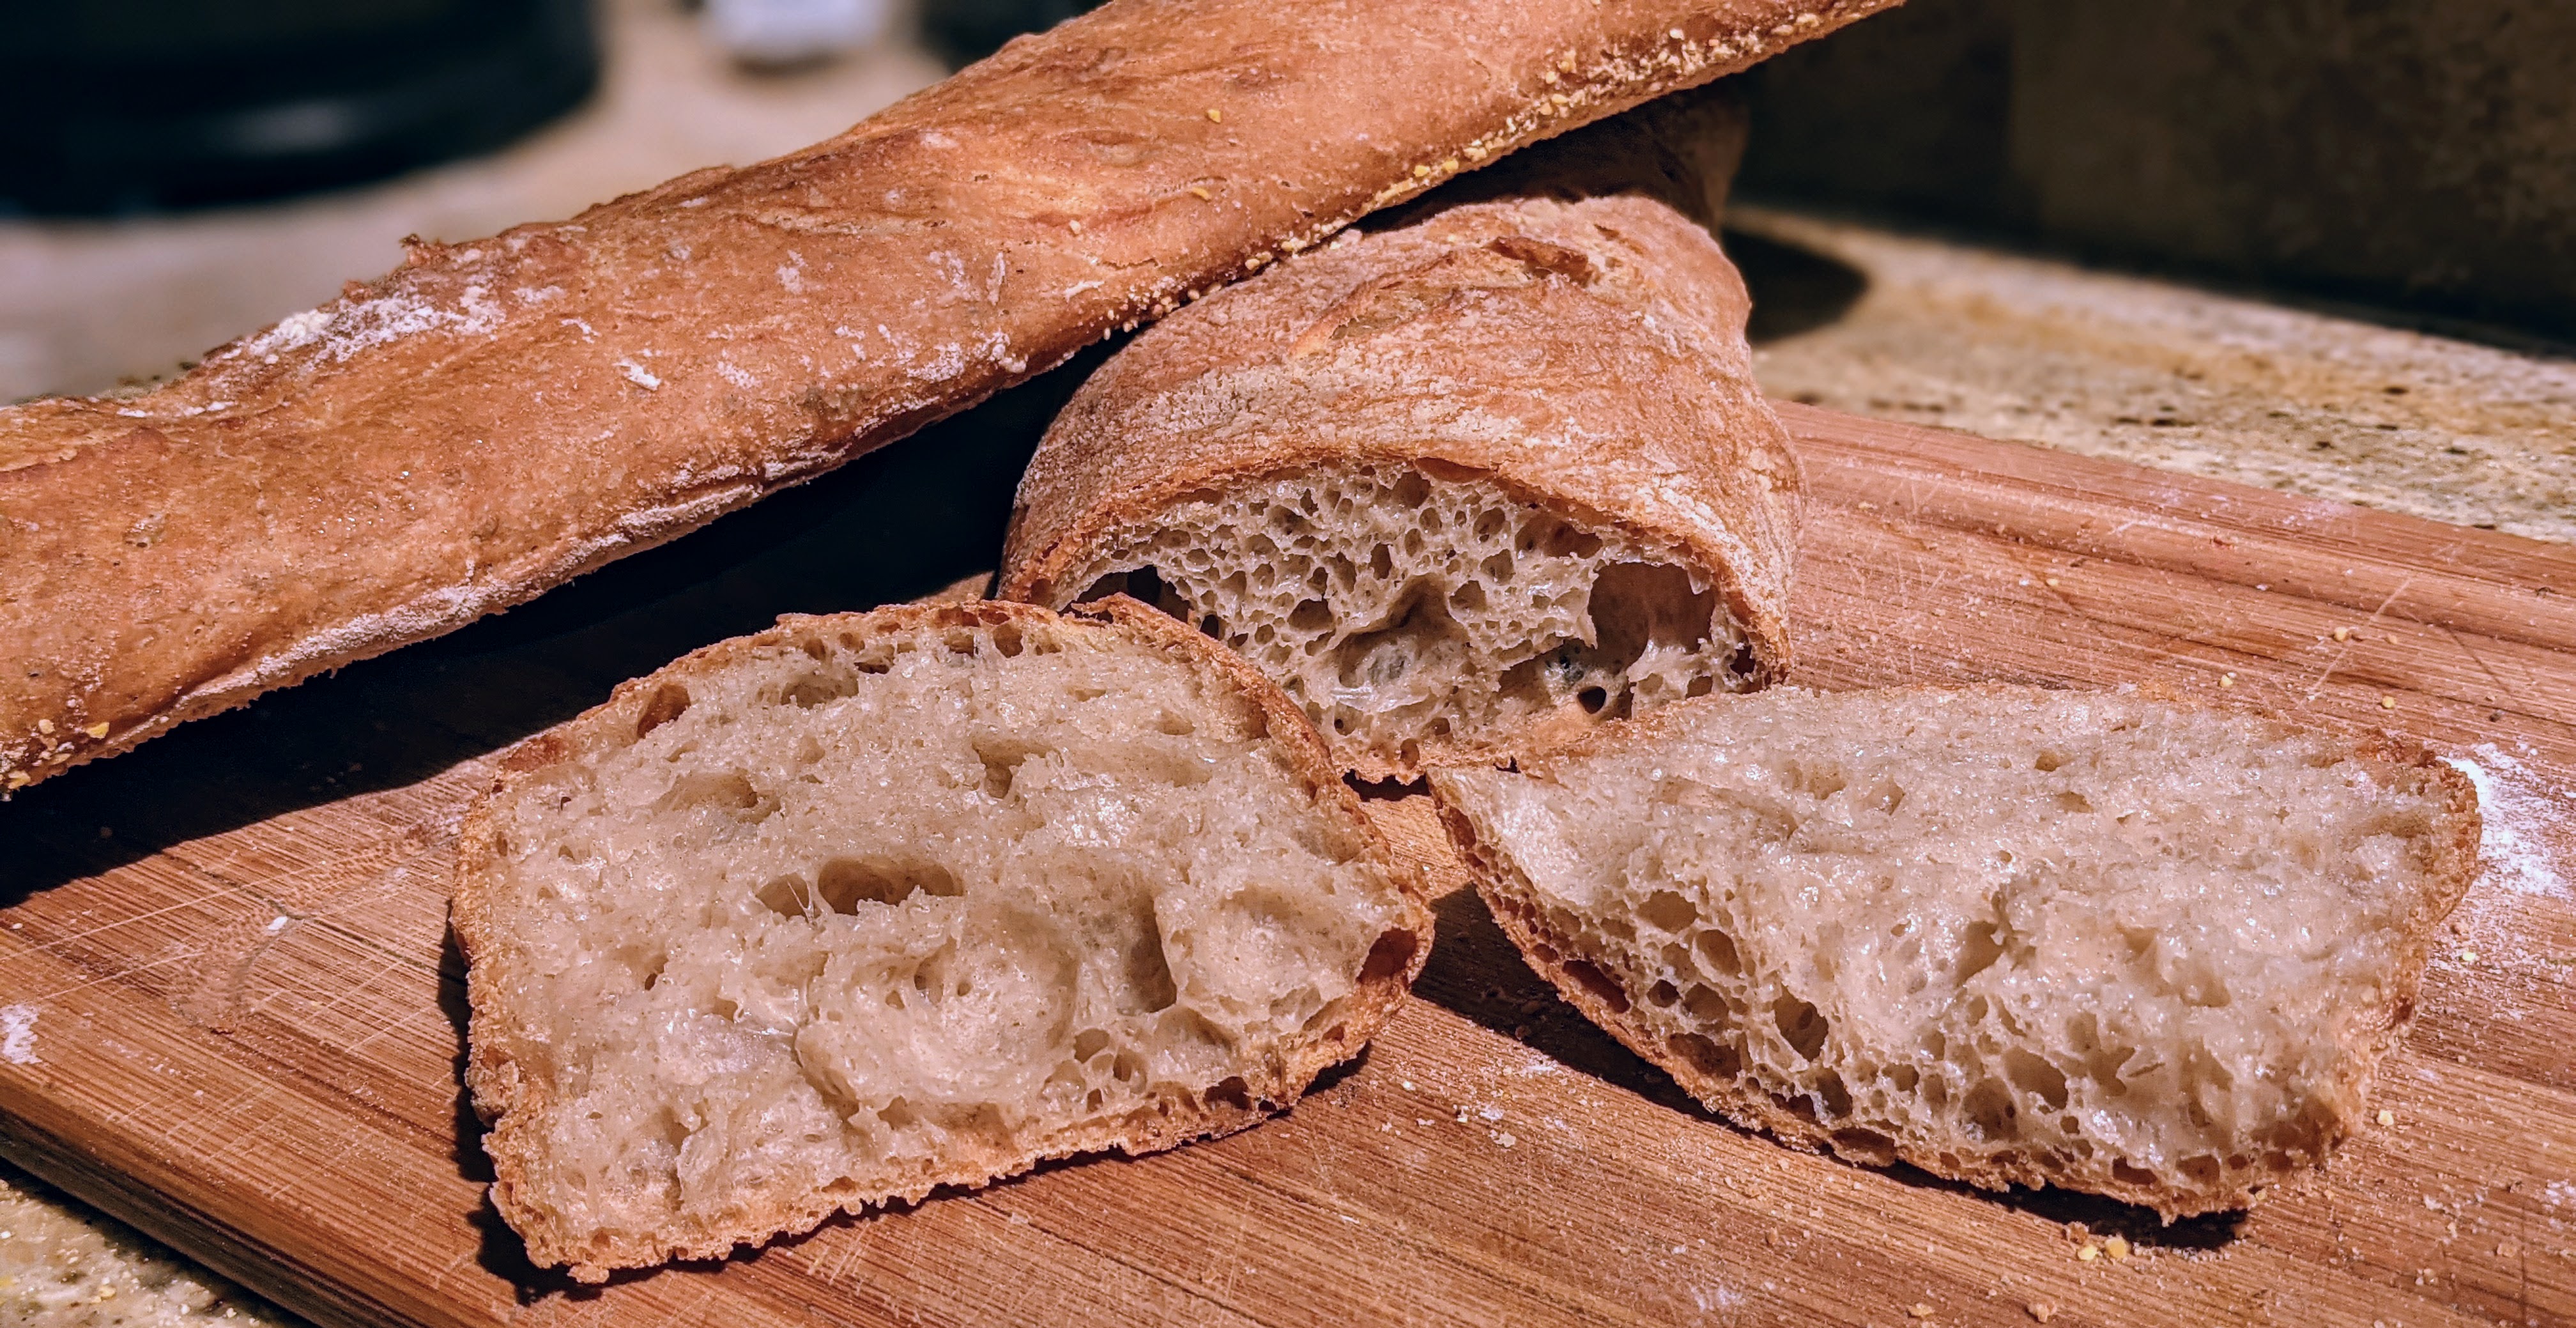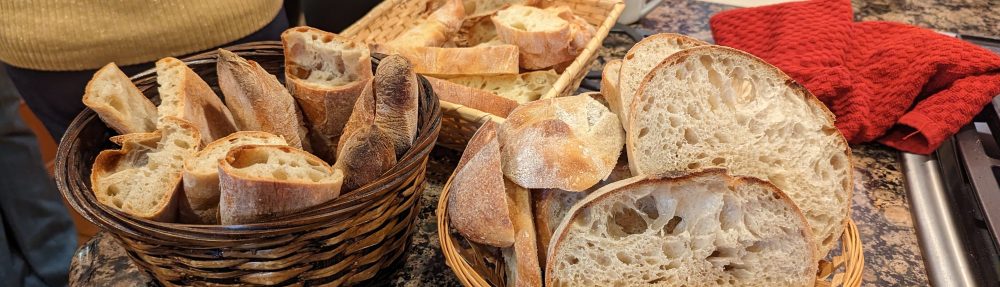


There’s something ethereal about biting into a slice of garlicky, herbacious bread. But add a sharp cheese like Asiago or Parmesano Reggiano, and the bread goes to another level! This is a bread that I don’t make too often simply because it’s an incredibly caloric bread. My family requests it quite a bit, but I usually end up making my Garlic-Rosemary sourdough bread and citing health reasons.
This bread, on the other hand, is made from a straight dough. I developed it more out of convenience and ease because it’s a same-day bake. However, I have made it with a levain made from 20% of the total flour.
No matter what you use to raise the bread, this is a great recipe for learning how to incorporate cheese into your bread. When I first made it, I used nothing but shredded cheese. Unfortunately, cheese melts, which means it liquifies! I’ve had a few collapsed loaves from only using shredded cheese. But I’ve learned to use a combination of shreds and predominantly chunks. Even with chunks, the cheese will melt, but it will melt in pockets rather than shreds that will melt into the dough.
A Note on Ingredients
For the cheese, I use a combination of Asiago and Parmesano Reggiano cheeses. The cubes are folded into the dough. Depending on my mood, I use different shredded, sharp white cheeses such as Gruyere or Grana Padano Parmesan or a four cheese Italian blend that I sprinkle on top of the loaves during the last 10 minutes of the bake.
I only use very good extra virgin olive oil. There is a lot of shit olive oil on the market. Most California olive oils from independent producers are pretty good. It’s a bit of a crap shoot with Italian olive oil which I love. For Italian olive oils, I use oils produced by the Frantoi Cutera brand; specifically, their Segreto and Primo types. These oils can be pricey, but they’re really robust. I always have a bottle of one of these on hand. For Italian oil, though it’s not a guarantee, look for the “DOP” or “PDO” badge on the bottle. Also, check the bottling date. It should be less than a year old.
For California olive oil, I absolutely adore anything made by Sciabica Family California OIive Oil. I was first introduced to their oil at the annual Dominican Sisters Christmas Fair. Sciabica harvests, crushes and produces the olive oil for the sisters, and they also sell their own oil at the fair, which I bought and absolutely love! But you can get it online! You can order a 1.5L “oil in a box” for $36.00. They use flat rate shipping. For me, it was $5.00. So it’s high-quality but very affordable olive oil!
Let’s make some bread!
Overall Formula
| Flour | 100.00% |
| Water | 65.00% |
| Olive Oil | 5.00% |
| Salt | 2.00% |
| Yeast | 1.00% |
| Garlic | 6.00% |
| Fresh Rosemary | 0.25% |
| Cheese (cubed) | 20.00% |
| Total Percentage | 199.25% |
Final Dough
Yield: 4 X 700g loaves
| Flour | 1,419.32 |
| Water | 922.56 |
| Olive Oil | 70.97 |
| Salt | 28.39 |
| Yeast | 14.19 |
| Garlic | 85.16 |
| Rosemary | 3.55 |
| Cheese | 283.86 |
| Total Dough Weight | ~2828g |
| Yield | 4 X 700g loaves |
| Optimal Dough Temp | 76°-78°F |
Prep the Garlic. Peel and measure out the garlic you’ll need (I buy peeled, fresh garlic from my local produce store). If you’re over a few grams, it’s not a big deal. Place the garlic on a piece of foil, and drizzle a little olive oil to coat the cloves. Wrap the garlic in the foil, then roast it for 35-40 minutes at 400°F. Set aside and let cool for at least a half hour before mixing the dough.
Prep the Rosemary. You can use dried rosemary, but there is nothing like the aroma and flavor of the oils from fresh rosemary. Though I listed 0.25%, you can use more or less. I actually use a little more than called for.
Prep the Cheese. For the chunks, I like to use a combination of Asiago and Parmesano Reggiano. Cut the cheese into 1/2″ – 3/4″ cubes.
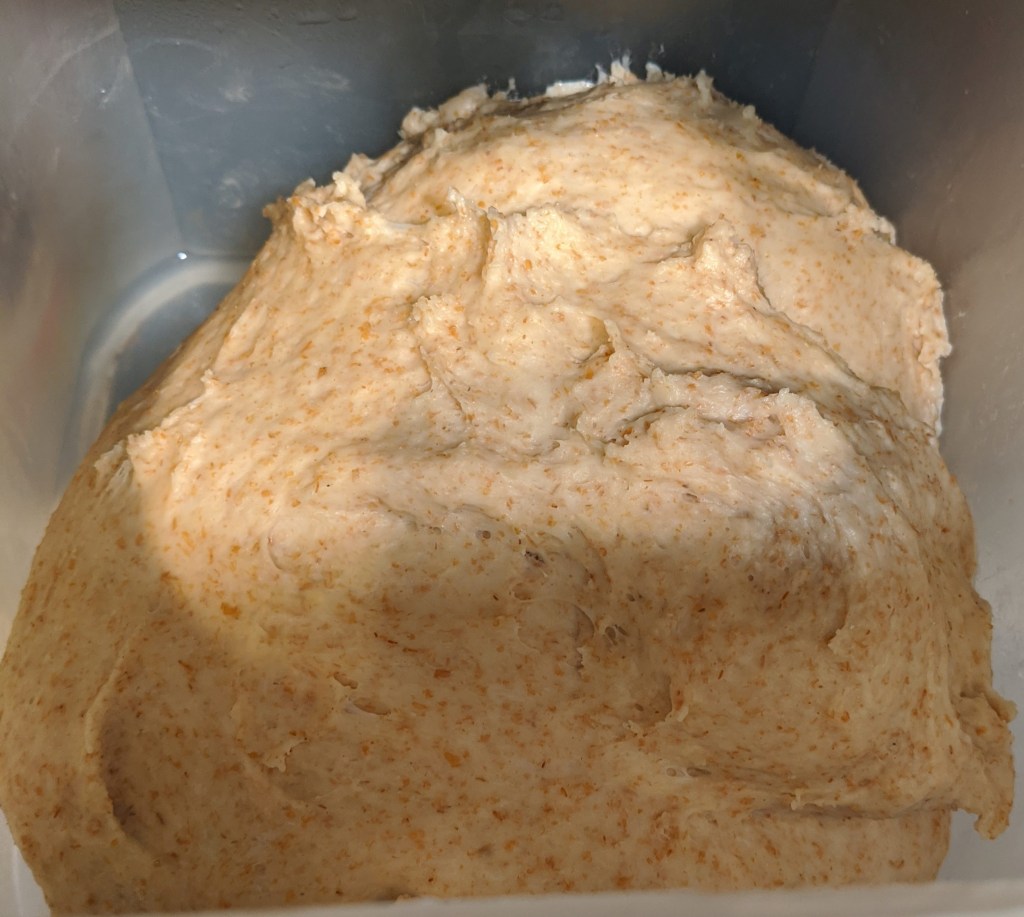
Mixing. Mix the flour, salt, and yeast together until fully combined. Gradually add the water. When the ingredients just start coming together, add the olive oil, garlic, and rosemary, then mix until all the ingredients are fully combined with moderate gluten development. You do not want to knead this dough!
If you use a mixer, mix only on low speed, just to bring the ingedients together. If you find a lot sticking to the sides, go to the second speed for a few seconds, then go back to the lowest speed.
Bulk Fermentation: 1 1/2 – 2 hours until almost doubled.

Incorporate the cheese and folds. After mixing, let the dough rest for 30 minutes to get fermentation started. Spread the cheese cubes evenly over the surface of the dough and press them into it. The dough will be a little puffy even after 30 minutes. Once you have all the cheese pressed into the dough, take the dough by the long end, stretch it up and fold it back about 2/3 over the dough. Turn your container around, then do the same on the other side. Turn the container 90° then repeat the letterfolding process. Make sure to give the dough a healthy stretch without tearing it! Roll the dough onto the seams. Rest another 30 minutes then repeat the process.
Lamination. After another 30 minutes, you’re going to laminate the dough on a board. It’s basically the same thing as the folds in the container, but stretching it a bit more as the dough should be more extensible by then. Lightly flour your board so the dough doesn’t stick, tug the dough into a rectangle, then stretch and letter fold the dough. Be VERY gentle with this to avoid tearing, but give it a good stretch. There will be a little tearing due to the cheese chunks, but don’t pull too quickly or violently. Once you’ve folded over all four sides, roll it over onto its seams then form it into a ball. You could try using your bench scraper, but it’s actually easier to do with your hands. Return the dough to your container seams-side-down then let the dough rise for another 30 minutes or until it has about doubled.
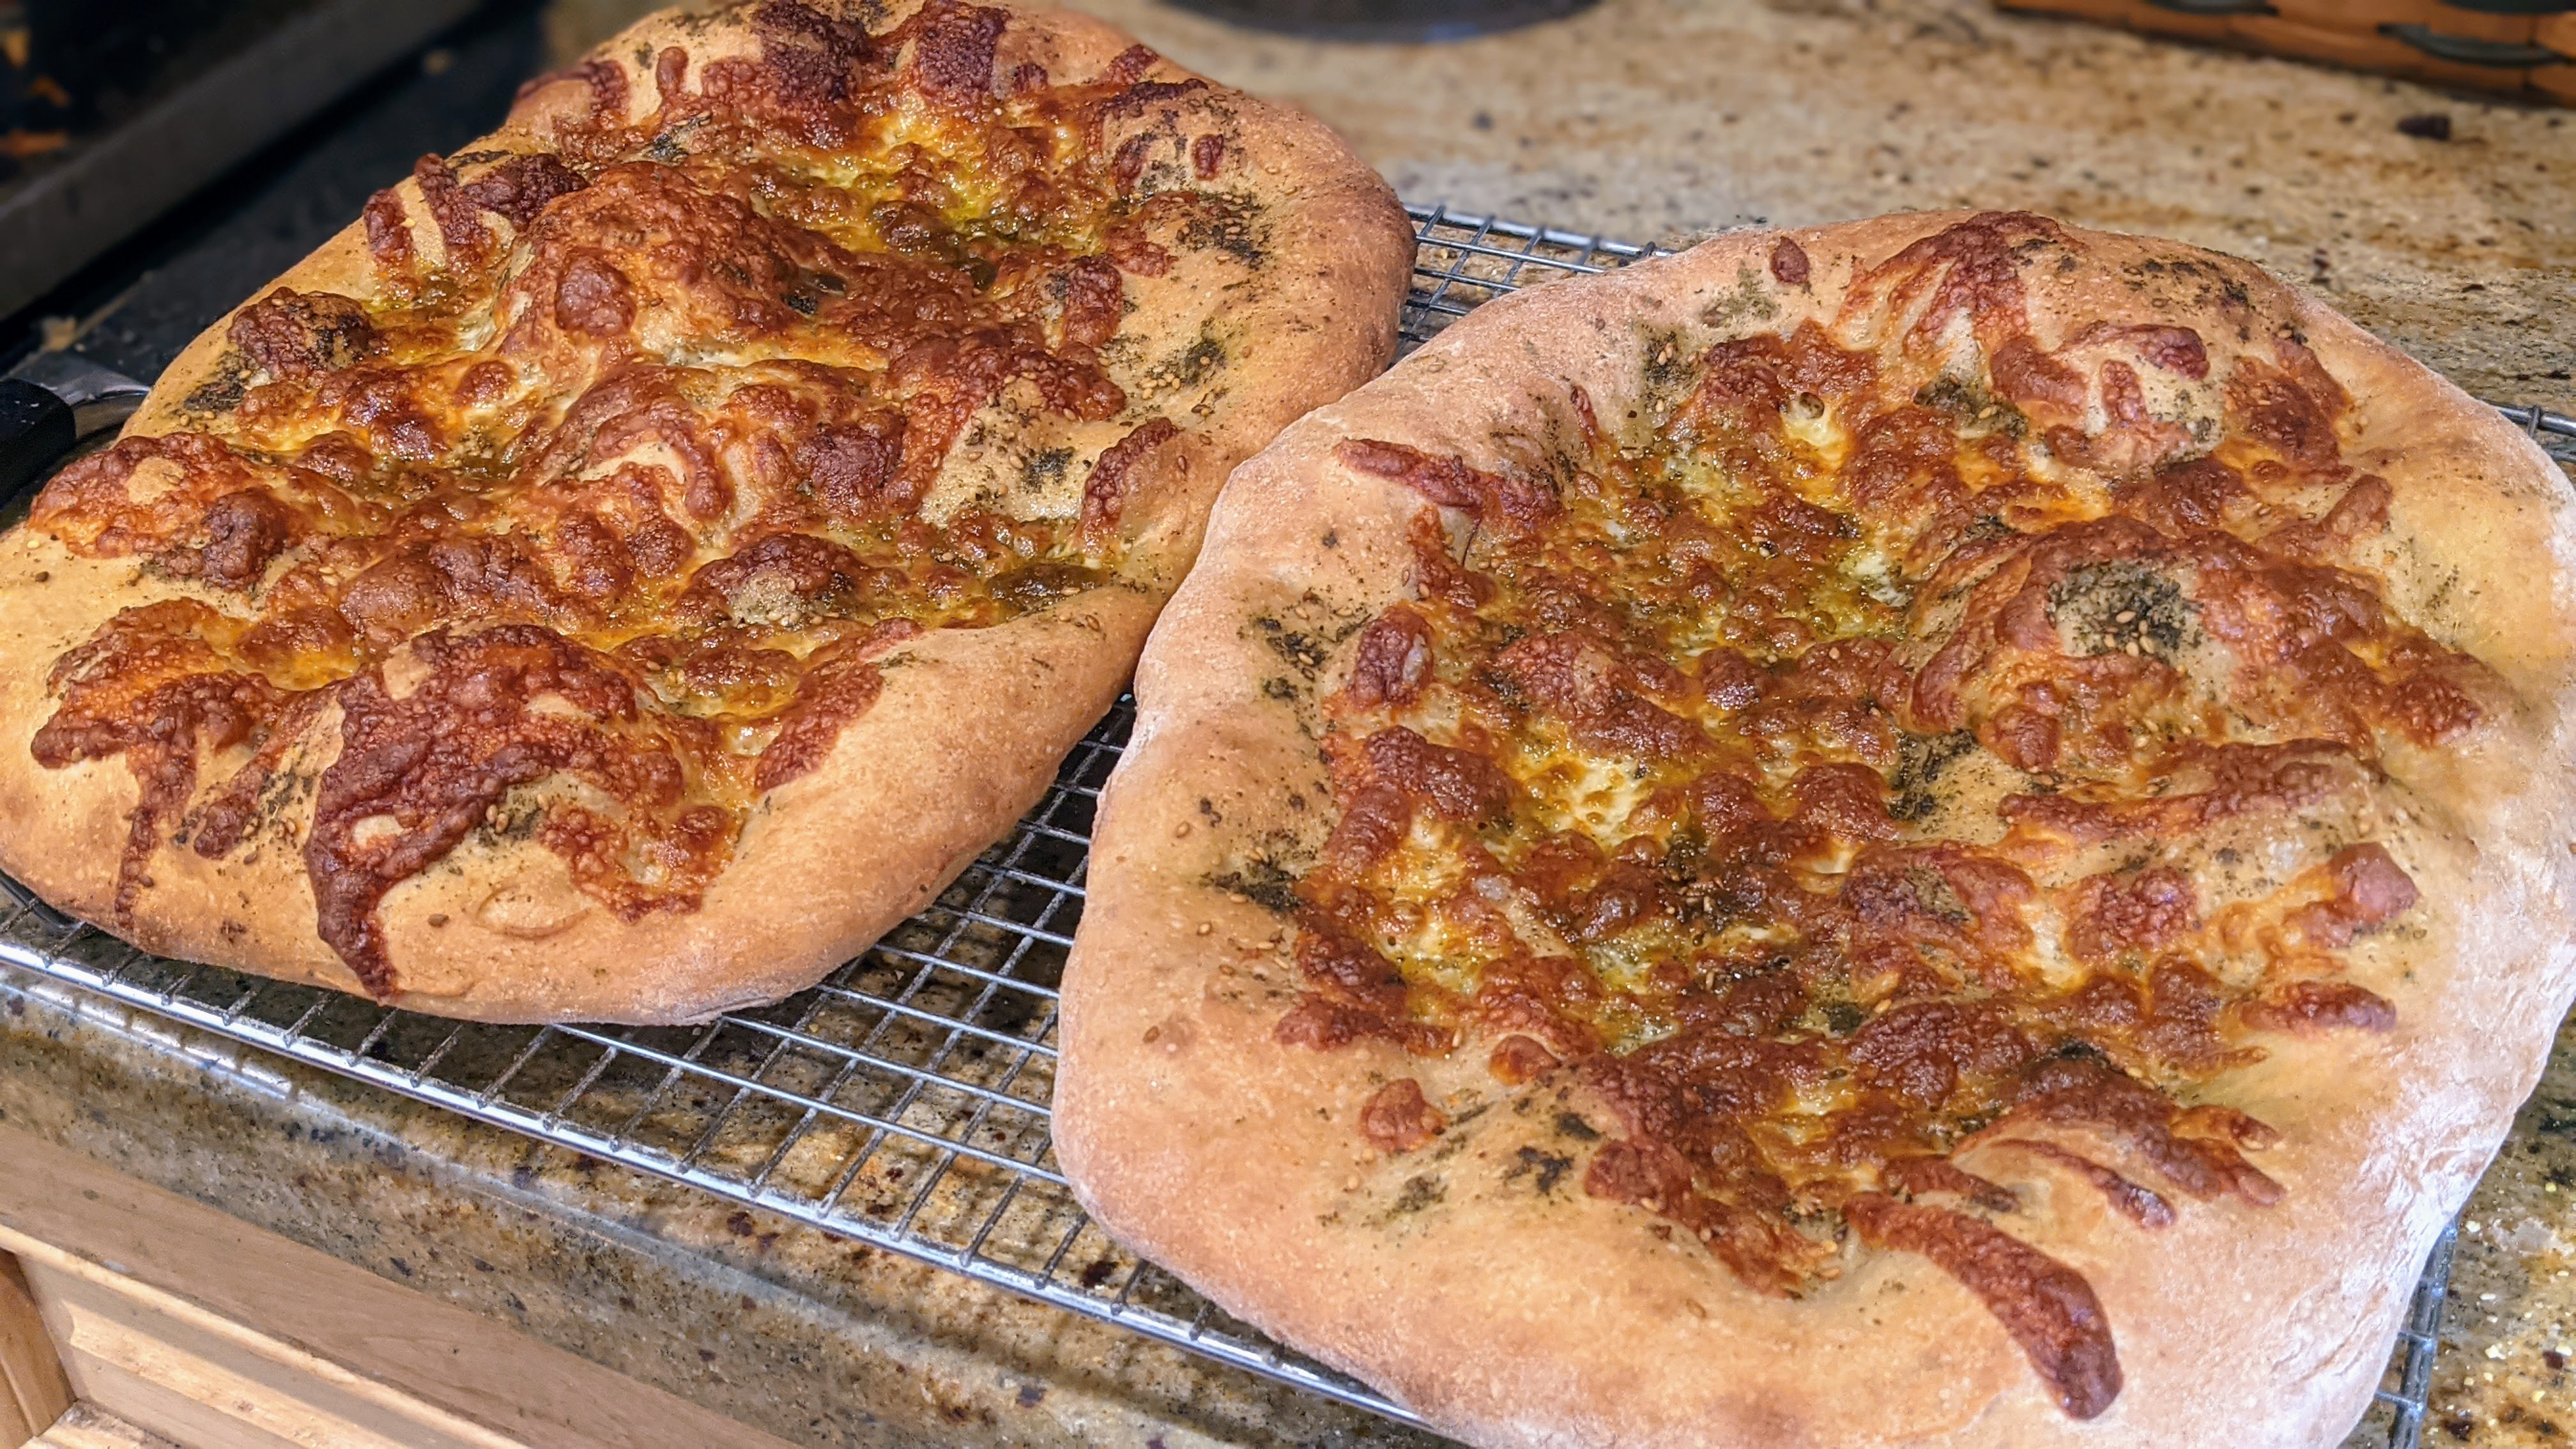
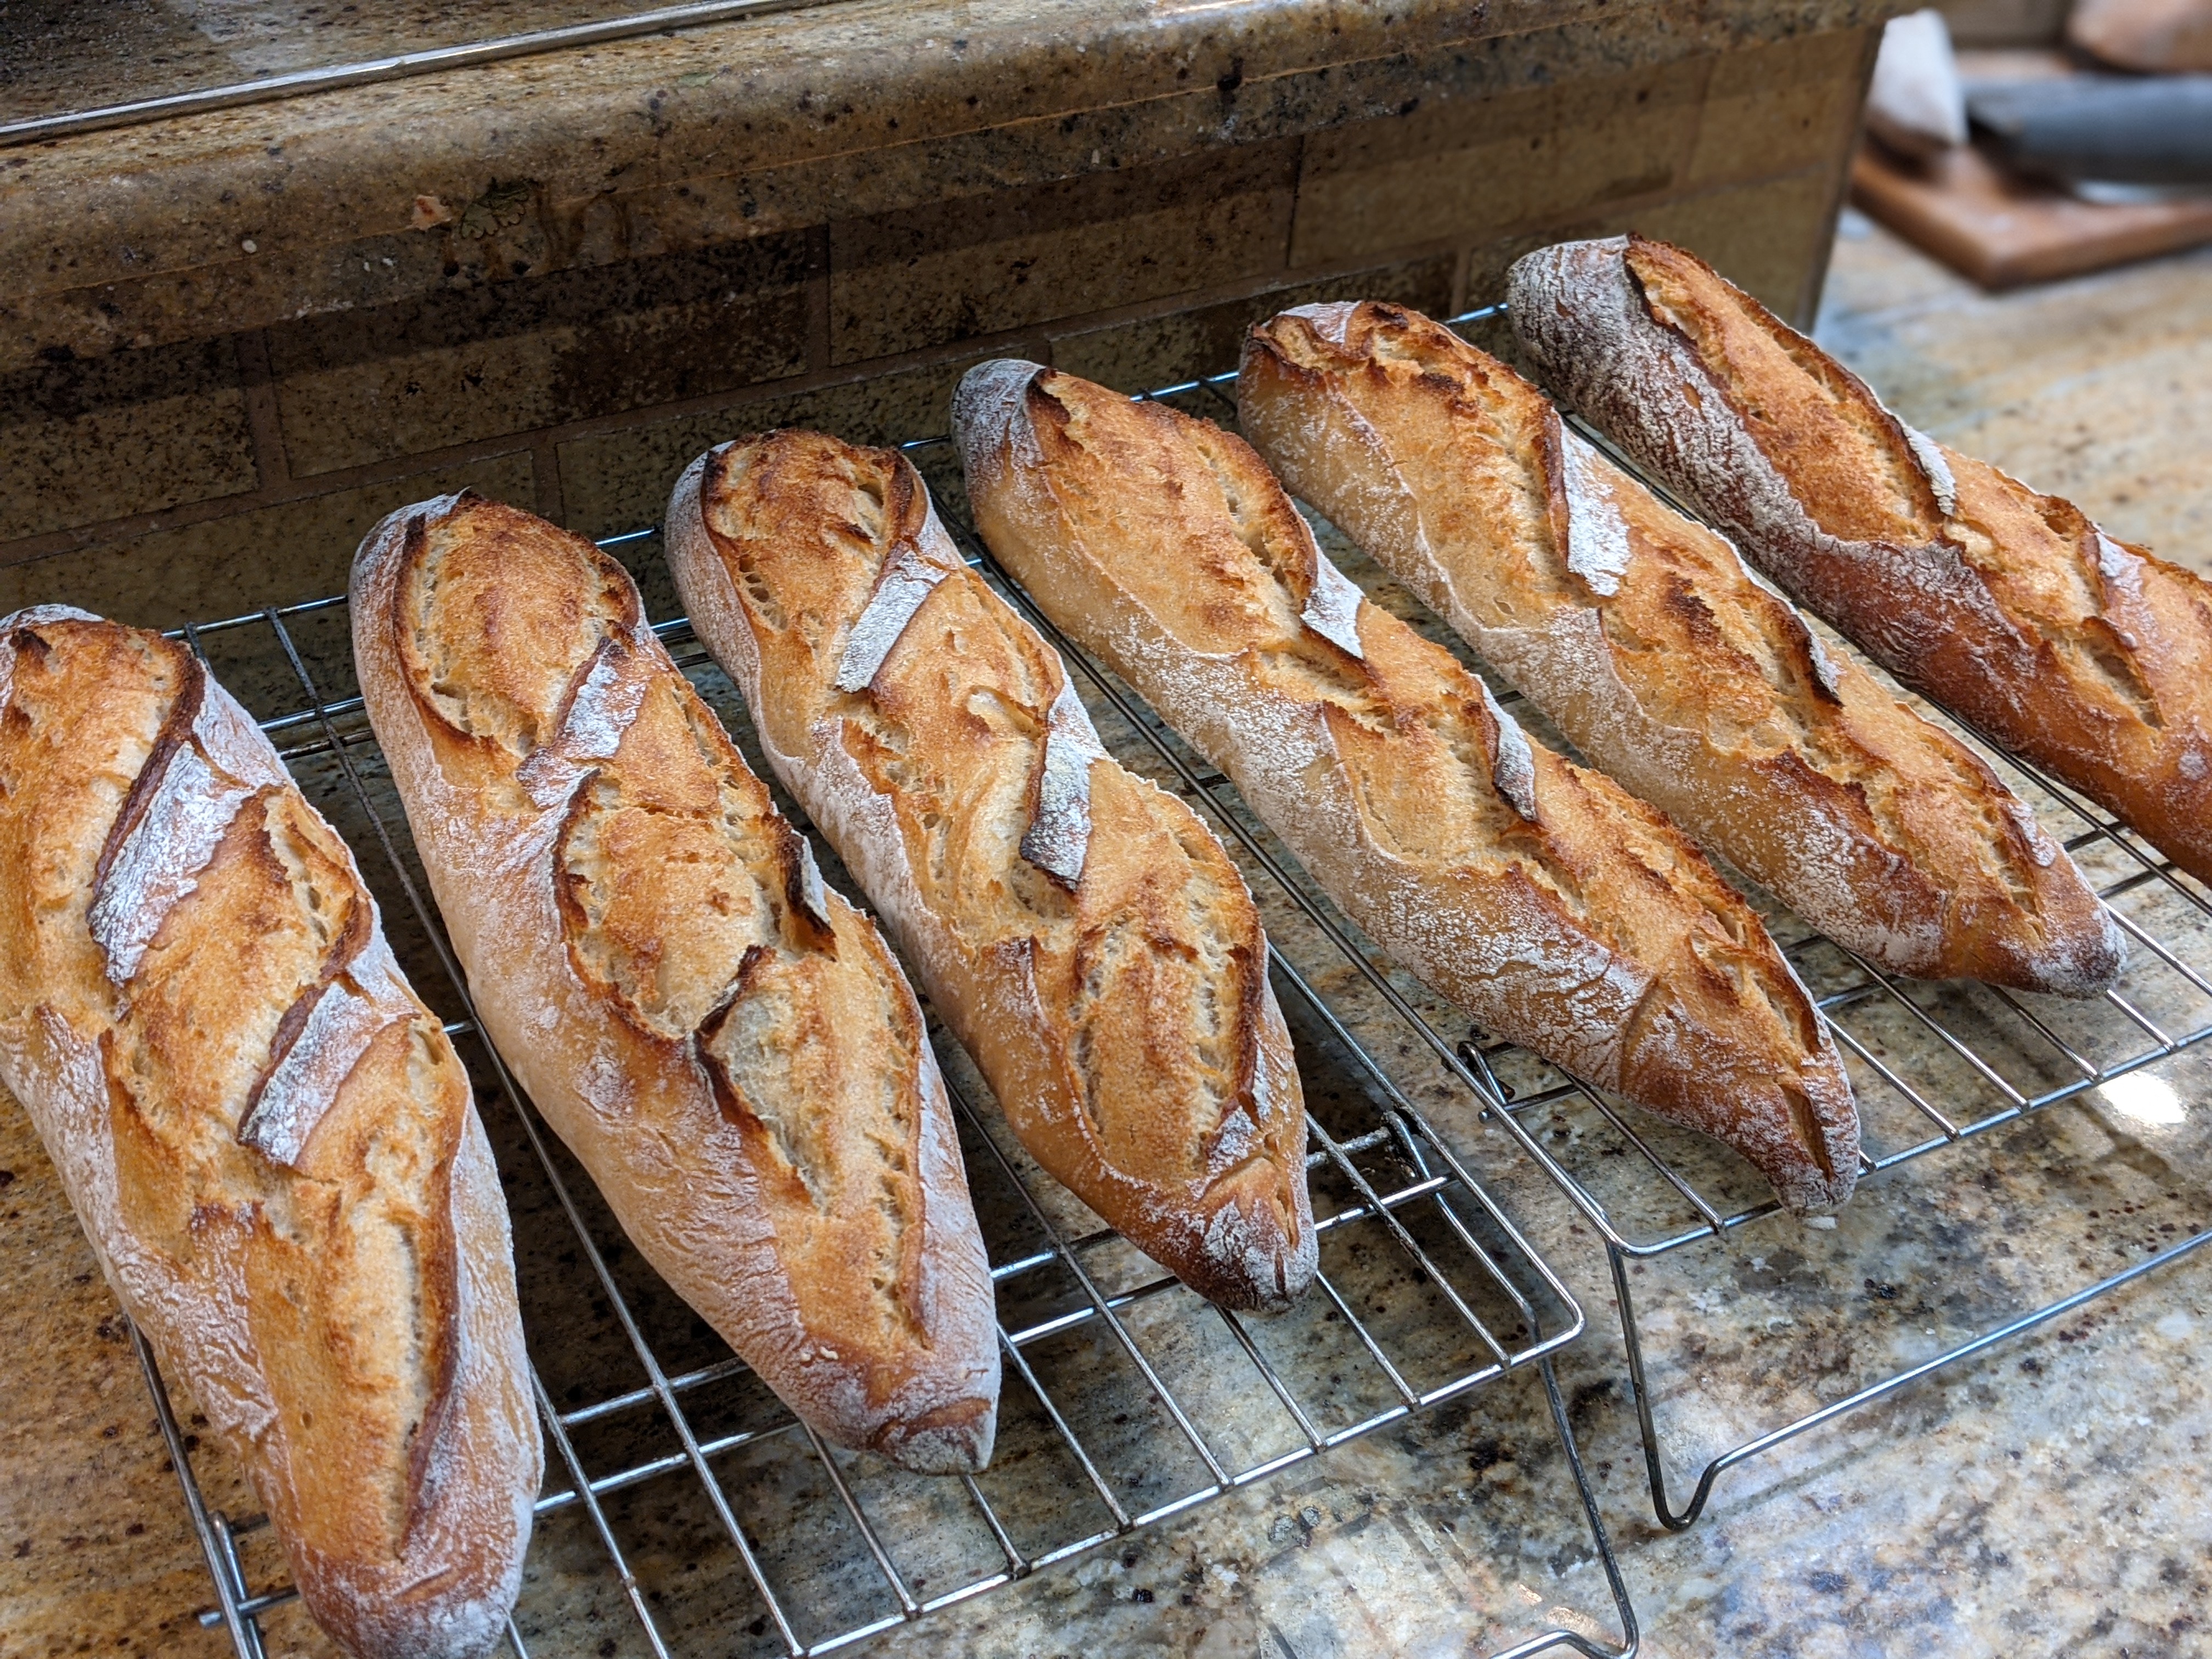
Divide and shape. Divide into four equal pieces. Ideally, based on the formula, the pieces would be 700g. But… sometimes I use a little more garlic or cheese, so I scale out to four equal pieces. Once scaled, pre-shape into rounds, being careful not to let the cheese tear the skin (lightly dust the tops with a little flour to help with this). Bench rest for 15-20 minutes, then shape into batards or rounds.
Final fermentation. 30-45 minutes. By now the yeast will have really propagated, so this final rise will be fairly quick. Just do a poke test to see how the loaves are doing.
Bake. Bake at 500°F for 15 minutes with steam, then 30 minutes at 435°F. 10 minutes before the bake is done, sprinkle a healthy amount of shredded cheese over the top of the loaves.
If you bake on a stone, I highly recommend lining it with parchment paper as the cheese will ooze out of the loaves – which is a good thing. It will prevent your board from staining.
If You Want to Use a Sourdough Starter
I’ve made this with sourdough starter as well. The only difference in the development is that things go quite a bit slower. The mixing and initial folding stays the same, but bulk fermentation will take longer to get the dough to double, and final ferment can take a couple of hours at room temp. You can also pop the loaves in the fridge overnight.
Overall Formula
| Flour | 100.00% |
| Water | 65.00% |
| Olive Oil | 5.00% |
| Salt | 2.00% |
| Yeast | 1.00% |
| Garlic | 6.00% |
| Rosemary | 0.25% |
| Cheese | 20.00% |
| Total Percentage | 199.25% |
Levain
| Preferment Flour %* | 20% |
| Hydration % | 100% |
| Flour | 283.86 |
| Water | 283.86 |
As I always state, build up a levain that’s more that what you need, so in this case, make a 600g 100% hydration starter.
Final Dough: Yield 4 X 700g loaves
| Flour | 1,135.46 |
| Water | 638.70 |
| Olive Oil | 70.97 |
| Salt | 28.39 |
| Yeast | 14.19 |
| Garlic | 85.16 |
| Rosemary | 3.55 |
| Cheese | 283.86 |
| Preferment | 567.73 |
| Total Dough Weight | 2,828.00 |
| Total Flour | 1,419.32 |
| Total Water | 922.56 |