What’s So Special about Kamut Flour and Why I Love to Bake with It So Much

Last week, I finally was able to procure a 25 lb. bag of KamutTM flour. For months, so many producers were out of it, and those that did have it, like Whole Foods, sold it in much smaller quantities than I needed and for a premium price. So, as soon as I saw that Azure Standard had it back in stock, I immediately put in an order!

Since I discovered it, KamutTM flour has been an integral component in most of my flour blends. I’ve mentioned using it several times since I started this blog, but when I baked my first loaves of it after many months of not having it, I sat down and asked myself, “Why do I love this flour so much?” I realized that there are lots of reasons, so I thought I’d share them here.

Before I go on, let me answer the obvious question for those who don’t know what it is: What is KamutTM? KamutTM isn’t a type of wheat but a trademark name for the Khorasan strain of wheat. It is an ancient grain that was discovered in an ancient Egyptian burial chamber after World War II and the grains ended up in the hands of a Montana wheat farmer who cultivated them. The trademark name is important because:

  1. It ensures that the grain comes from the original seed stock and is both unmodified and unhybridized and completely non-GMO.
  2. It is also 100% certified organic.

These are important distinctions as they provide a guarantee of origin, purity, and quality.

Nutritionally, unlike regular wheat, Kamut has a high intrinsic energy as it has a higher lipid content than regular wheat. But it is also high in both protein and fiber and contains several essential minerals and vitamins such as niacin and manganese that contribute to its overall high nutritional value.

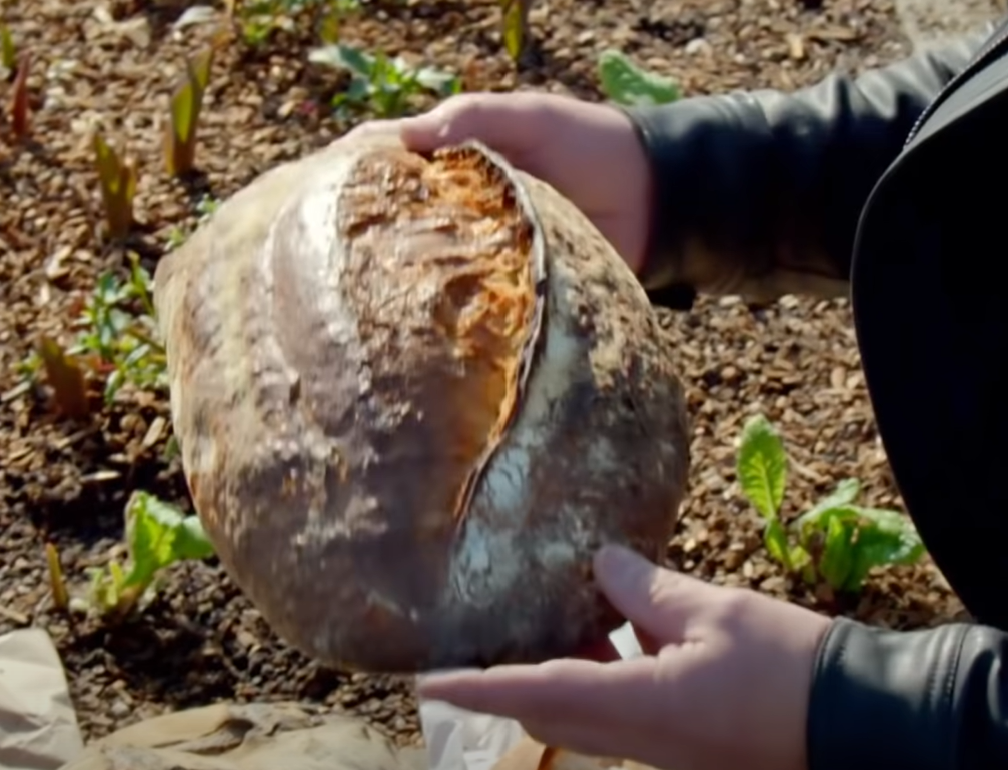
But the science-y stuff aside, another thing I love about this flour is the romance behind its history. As I mentioned above, the grain was found in an ancient burial chamber in Egypt after World War II, and though classified as Khorasan wheat, it has also been called “King Tut’s Wheat” or Pharoah’s Wheat” based on its origin.

And baking with flour that comes from wheat that has a provenance dating back thousands of years makes me think of what it was like baking back then. Sourdough was discovered in ancient Egypt around 3000 BC, and it’s cool to me to bake with grain whose origins date back that far. I admit it. I’m a hopeless romantic, dreaming of the “old days” and what it was like baking with those ancient hearth ovens with that original grain.

Plus, historians believe the discovery of sourdough was purely accidental. Accidental or not, it changed the world! Up to that point, bread was flat and dense. But the addition of yeast literally gave rise to a completely new form of bread that was then adopted by the Greeks and Romans, then spread to the rest of the world. Did it start with Khorasan wheat? Maybe. I have no idea. But who cares? It was used back then and that was all I needed to know to want bake with that ancient grain.

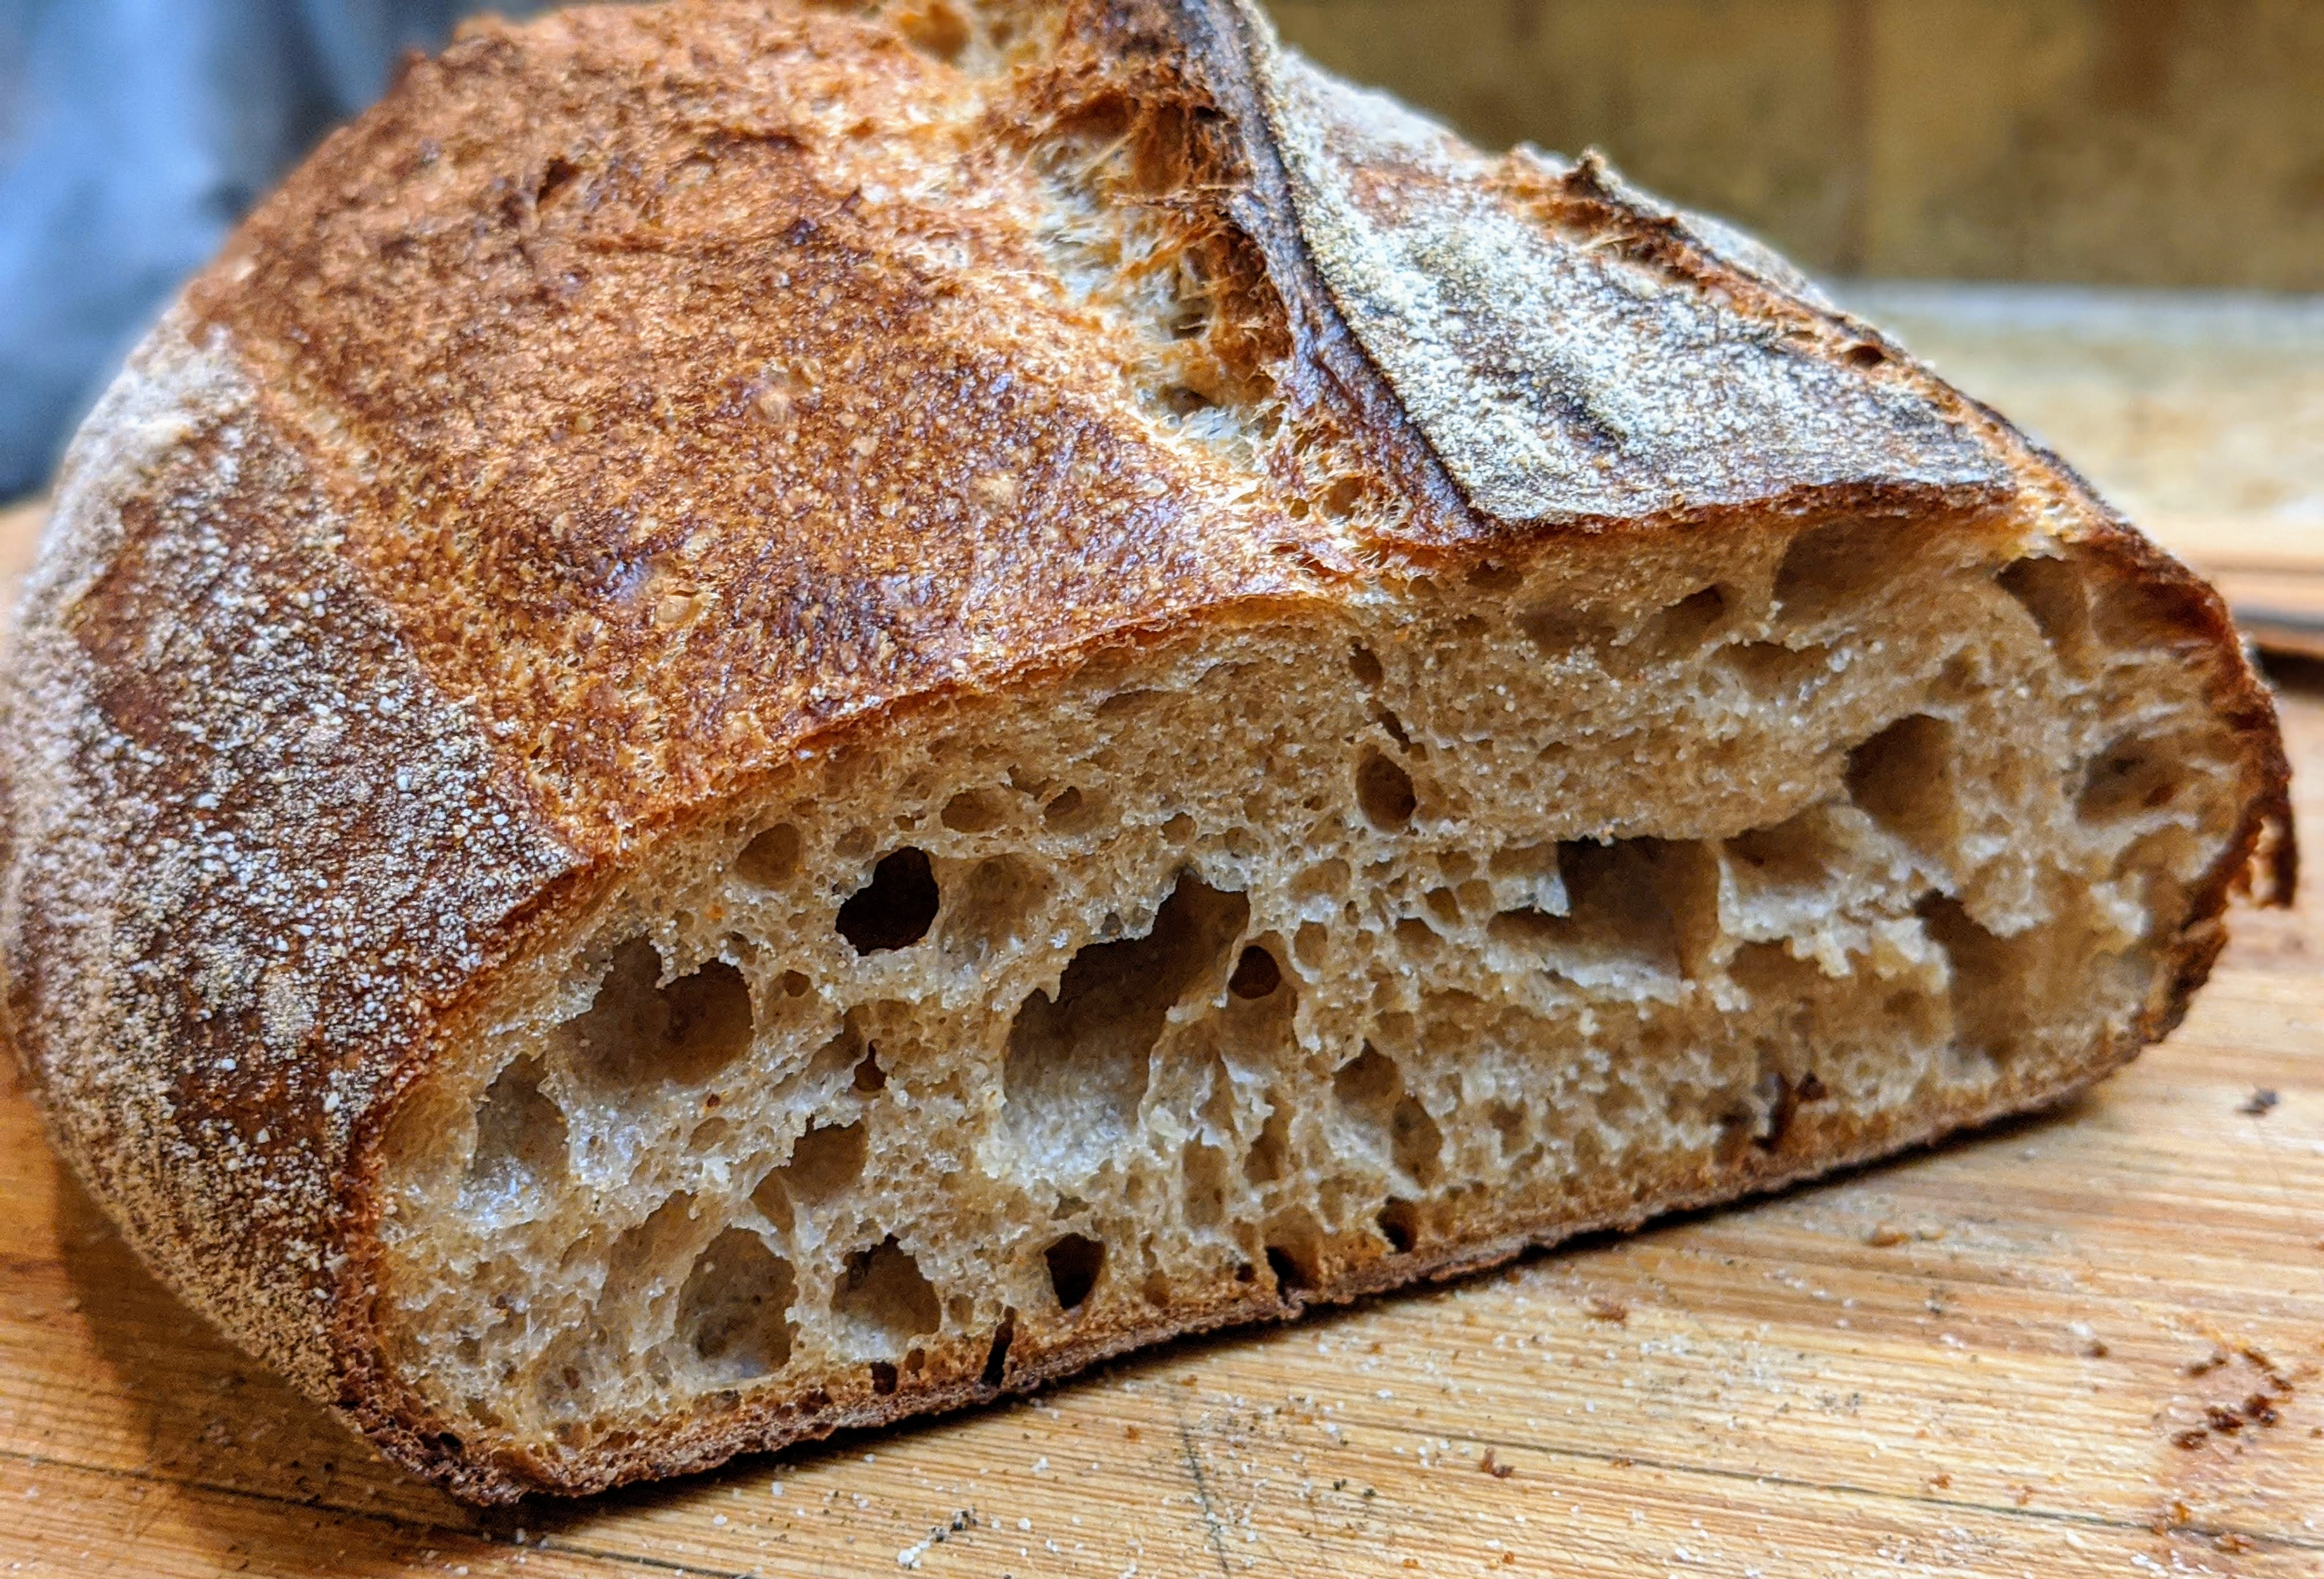
But other than the romantic history, I love KamutTM flour for what it brings to the loaves that I make with it. When combined with a high-extraction or whole-grain flour, it helps soften the crumb. This is because even though it forms gluten when mixed with water, its gluten is much more delicate than regular wheat.

And that delicateness was a challenge to work with at first as it introduced a trade-off with the soft crumb: The dough also became prone to tearing. It forced me to learn how to handle the dough more gently. Until then, I hadn’t realized how ham-handed I was with my dough. My stretch and fold sessions were relatively rough affairs compared to how I stretch and fold now; not that I’d completely rip the dough apart, but it certainly wasn’t with the deliberate care I take now. And that skill has carried over to other dough made with different flour blends.

Of course, as KamutTM is flour, and flour is food, what about its taste and texture? As I mentioned above, its gluten provides a smooth, almost velvety feel to the crumb. It also has a nutty flavor that contributes to the overall complexity of the flavor profile.

Working with KamutTM Flour

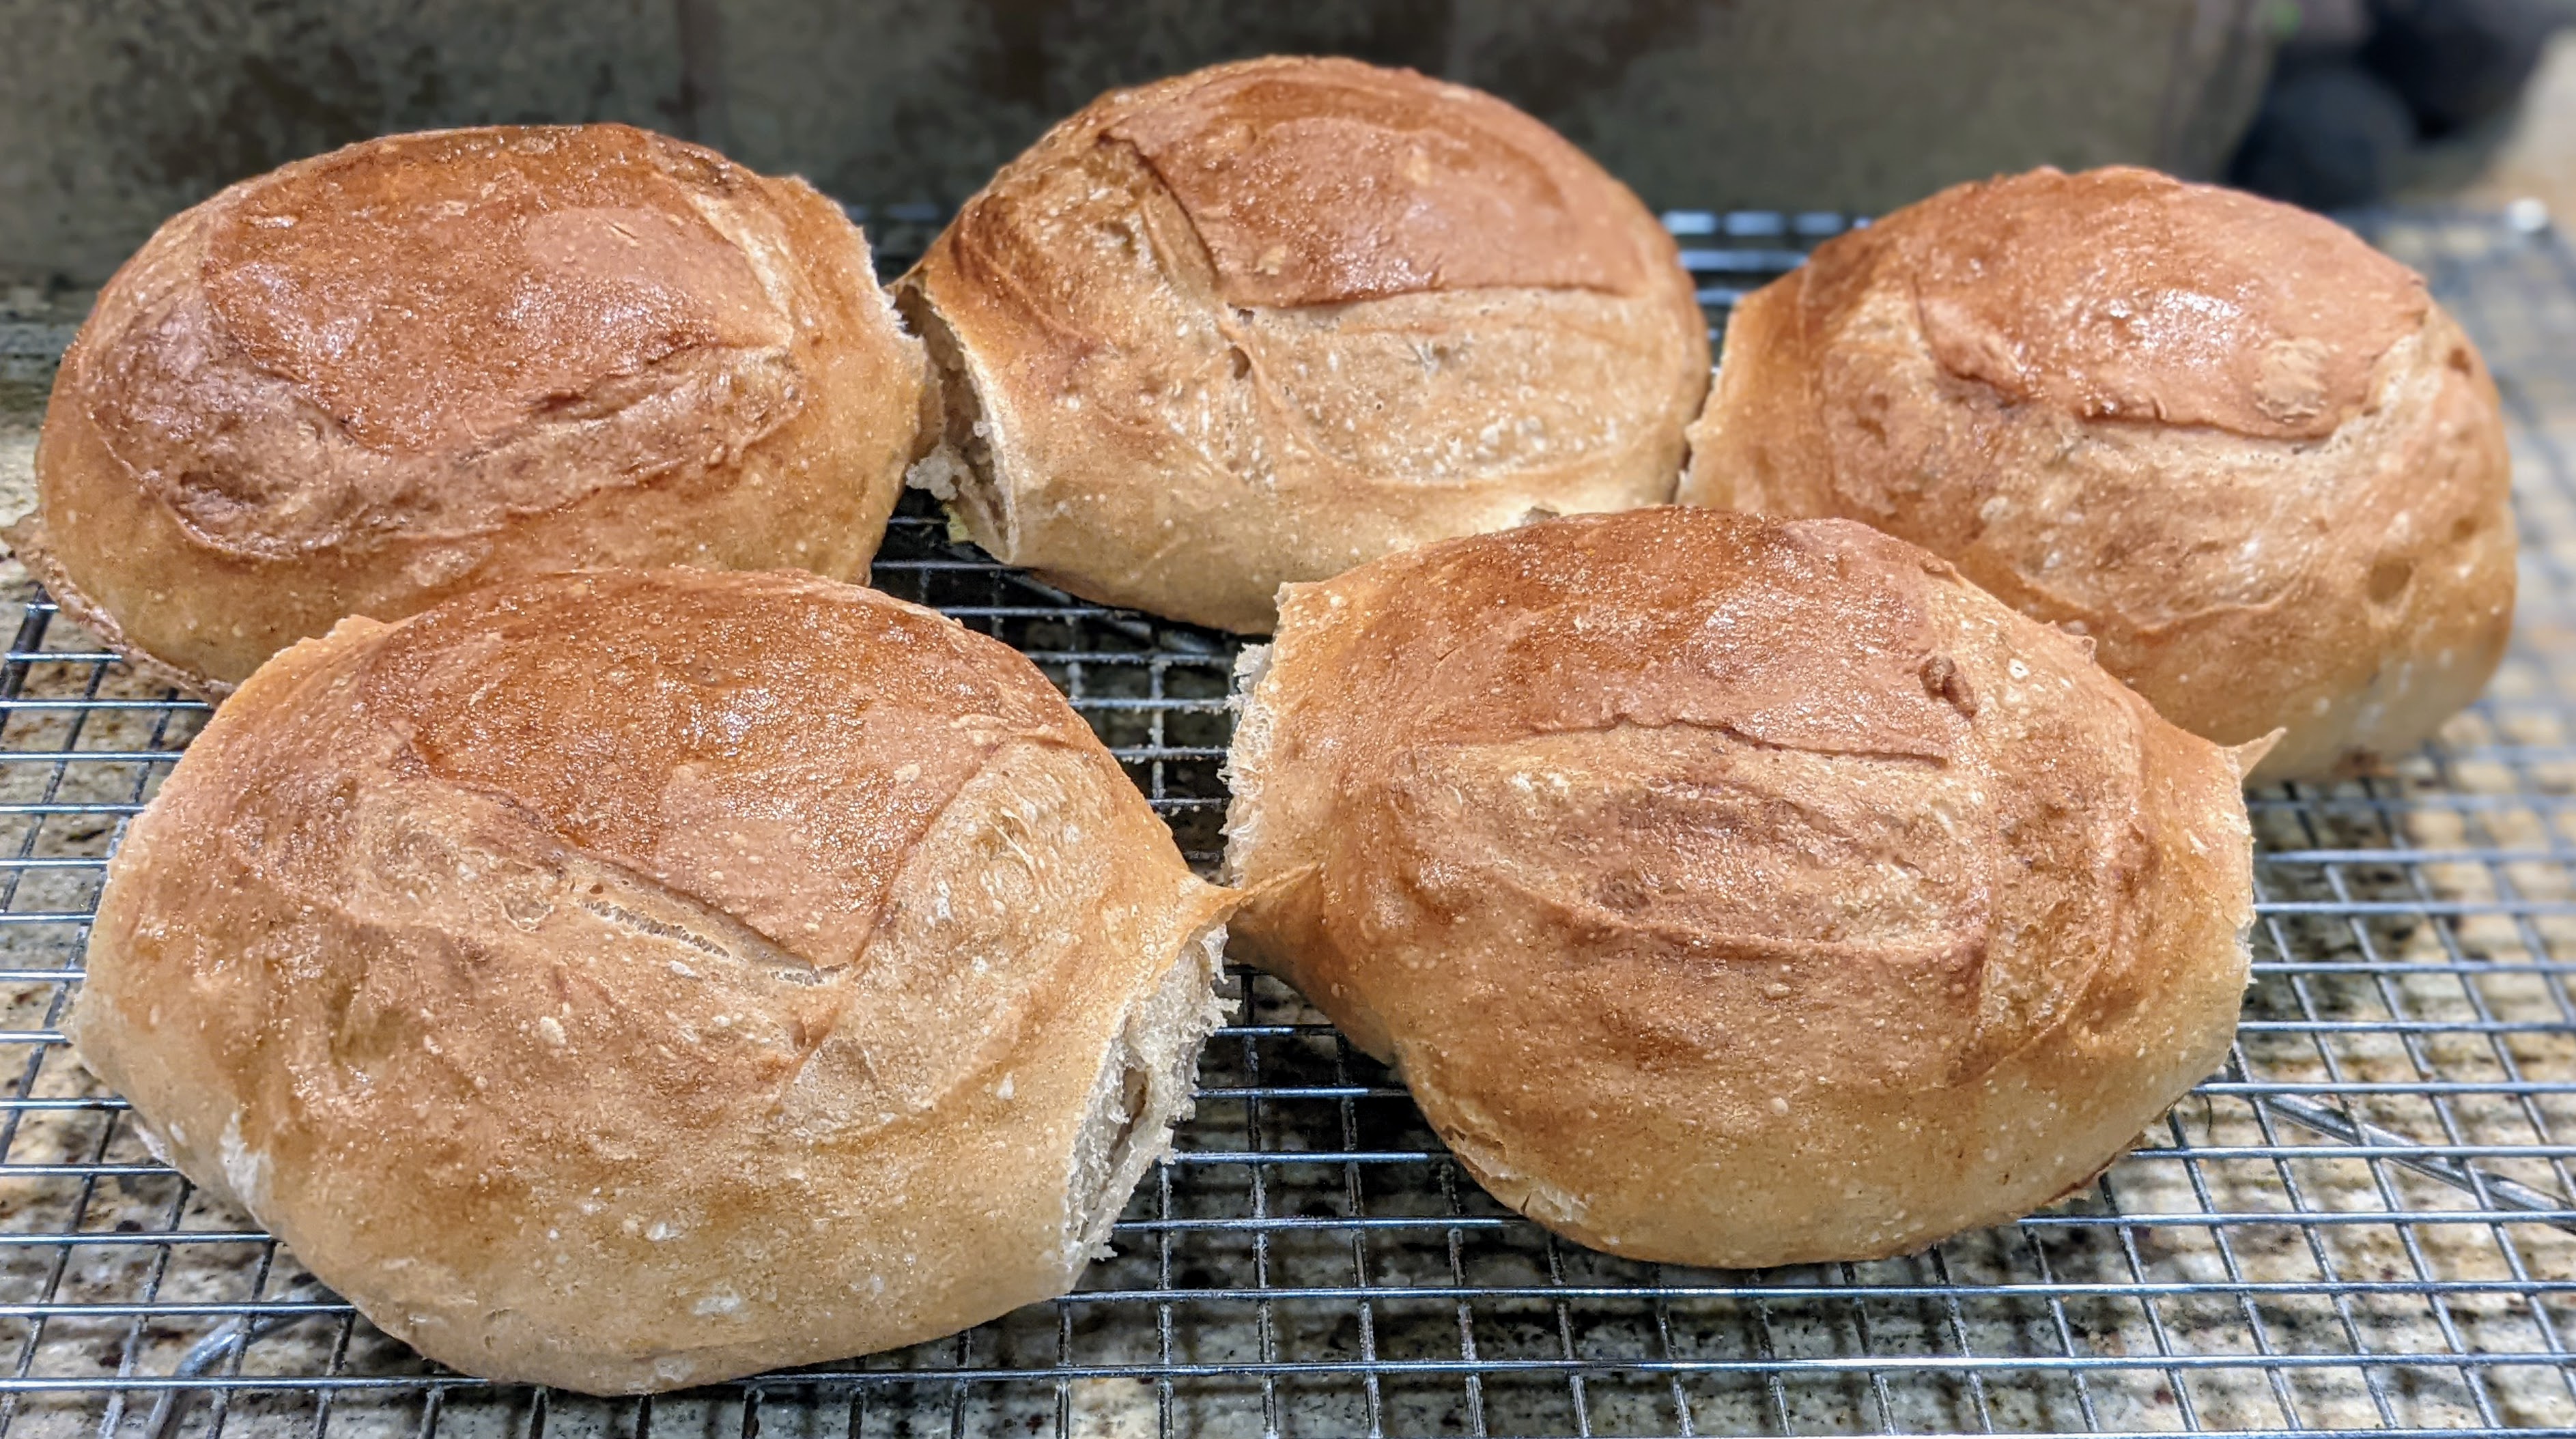
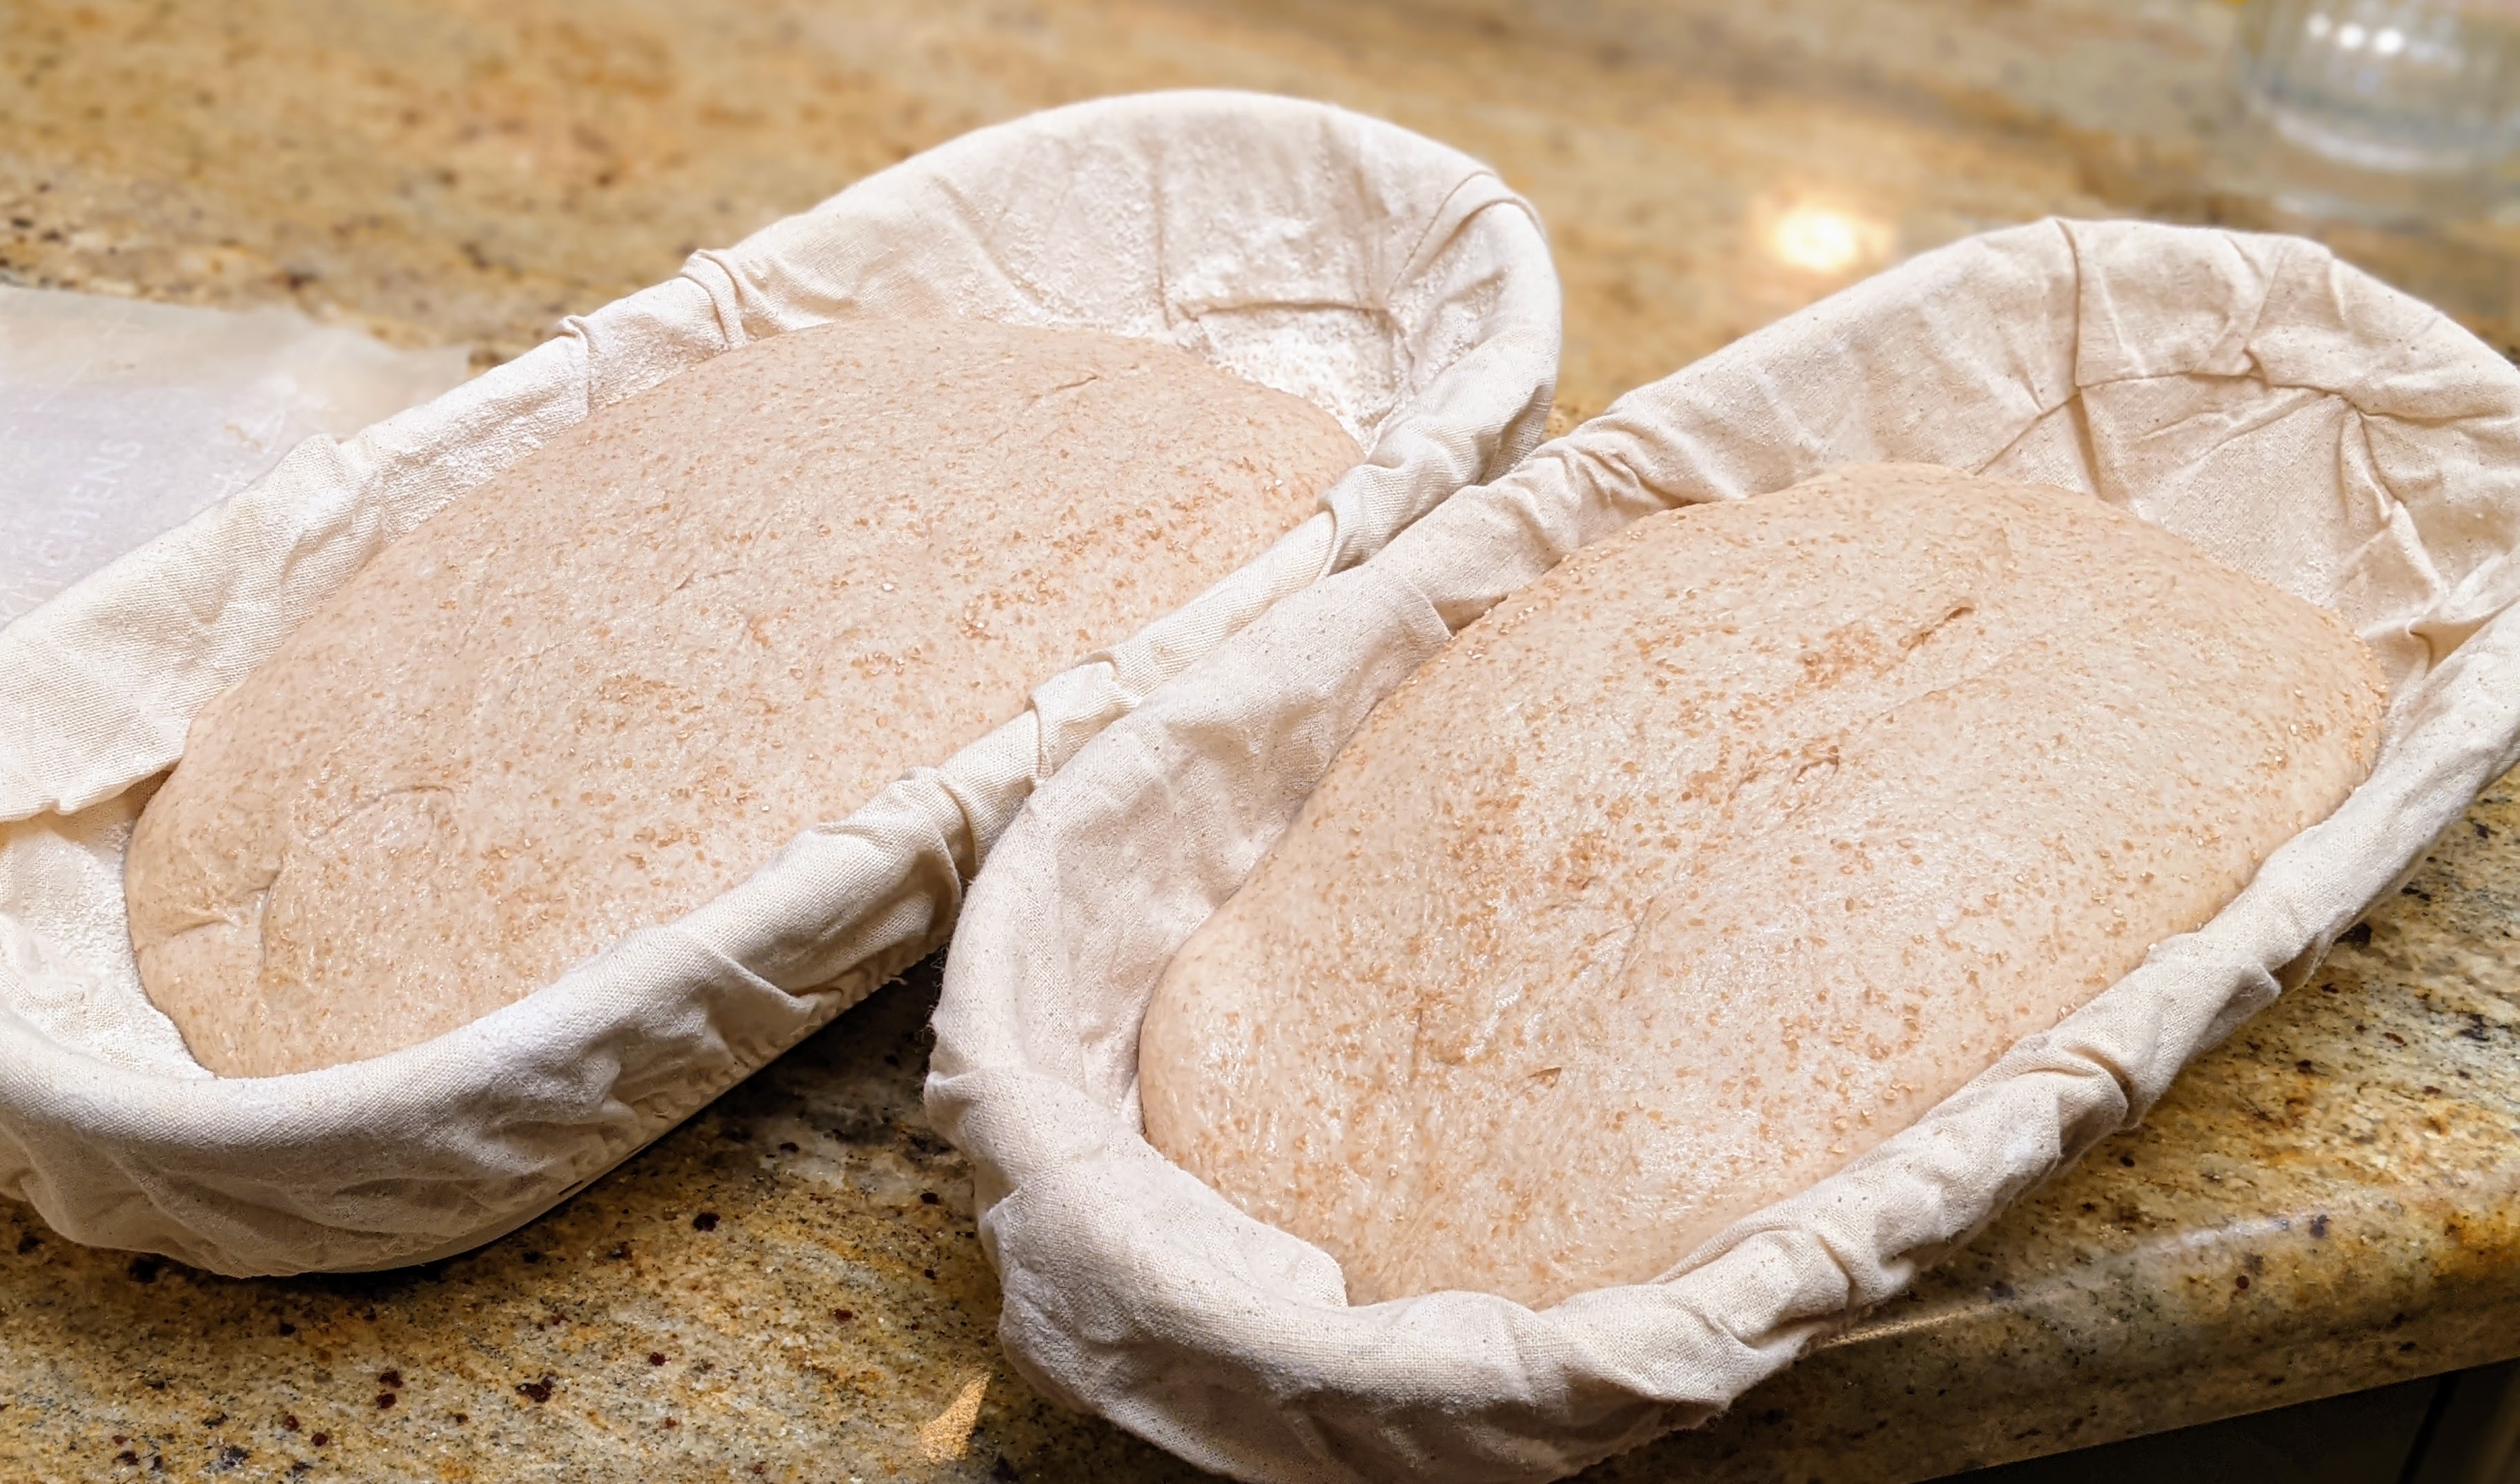
If you want to work with KamutTM, I recommend starting with a smaller quantity first to try it out. Whole Foods usually carries 1-pound bags from Bob’s Red Mill. That’s enough to make two 1-kg 60% Bread Flour/40% Kamut loaves @ about 85% hydration.

Other than that, here are a few things to keep in mind when working with Kamut:

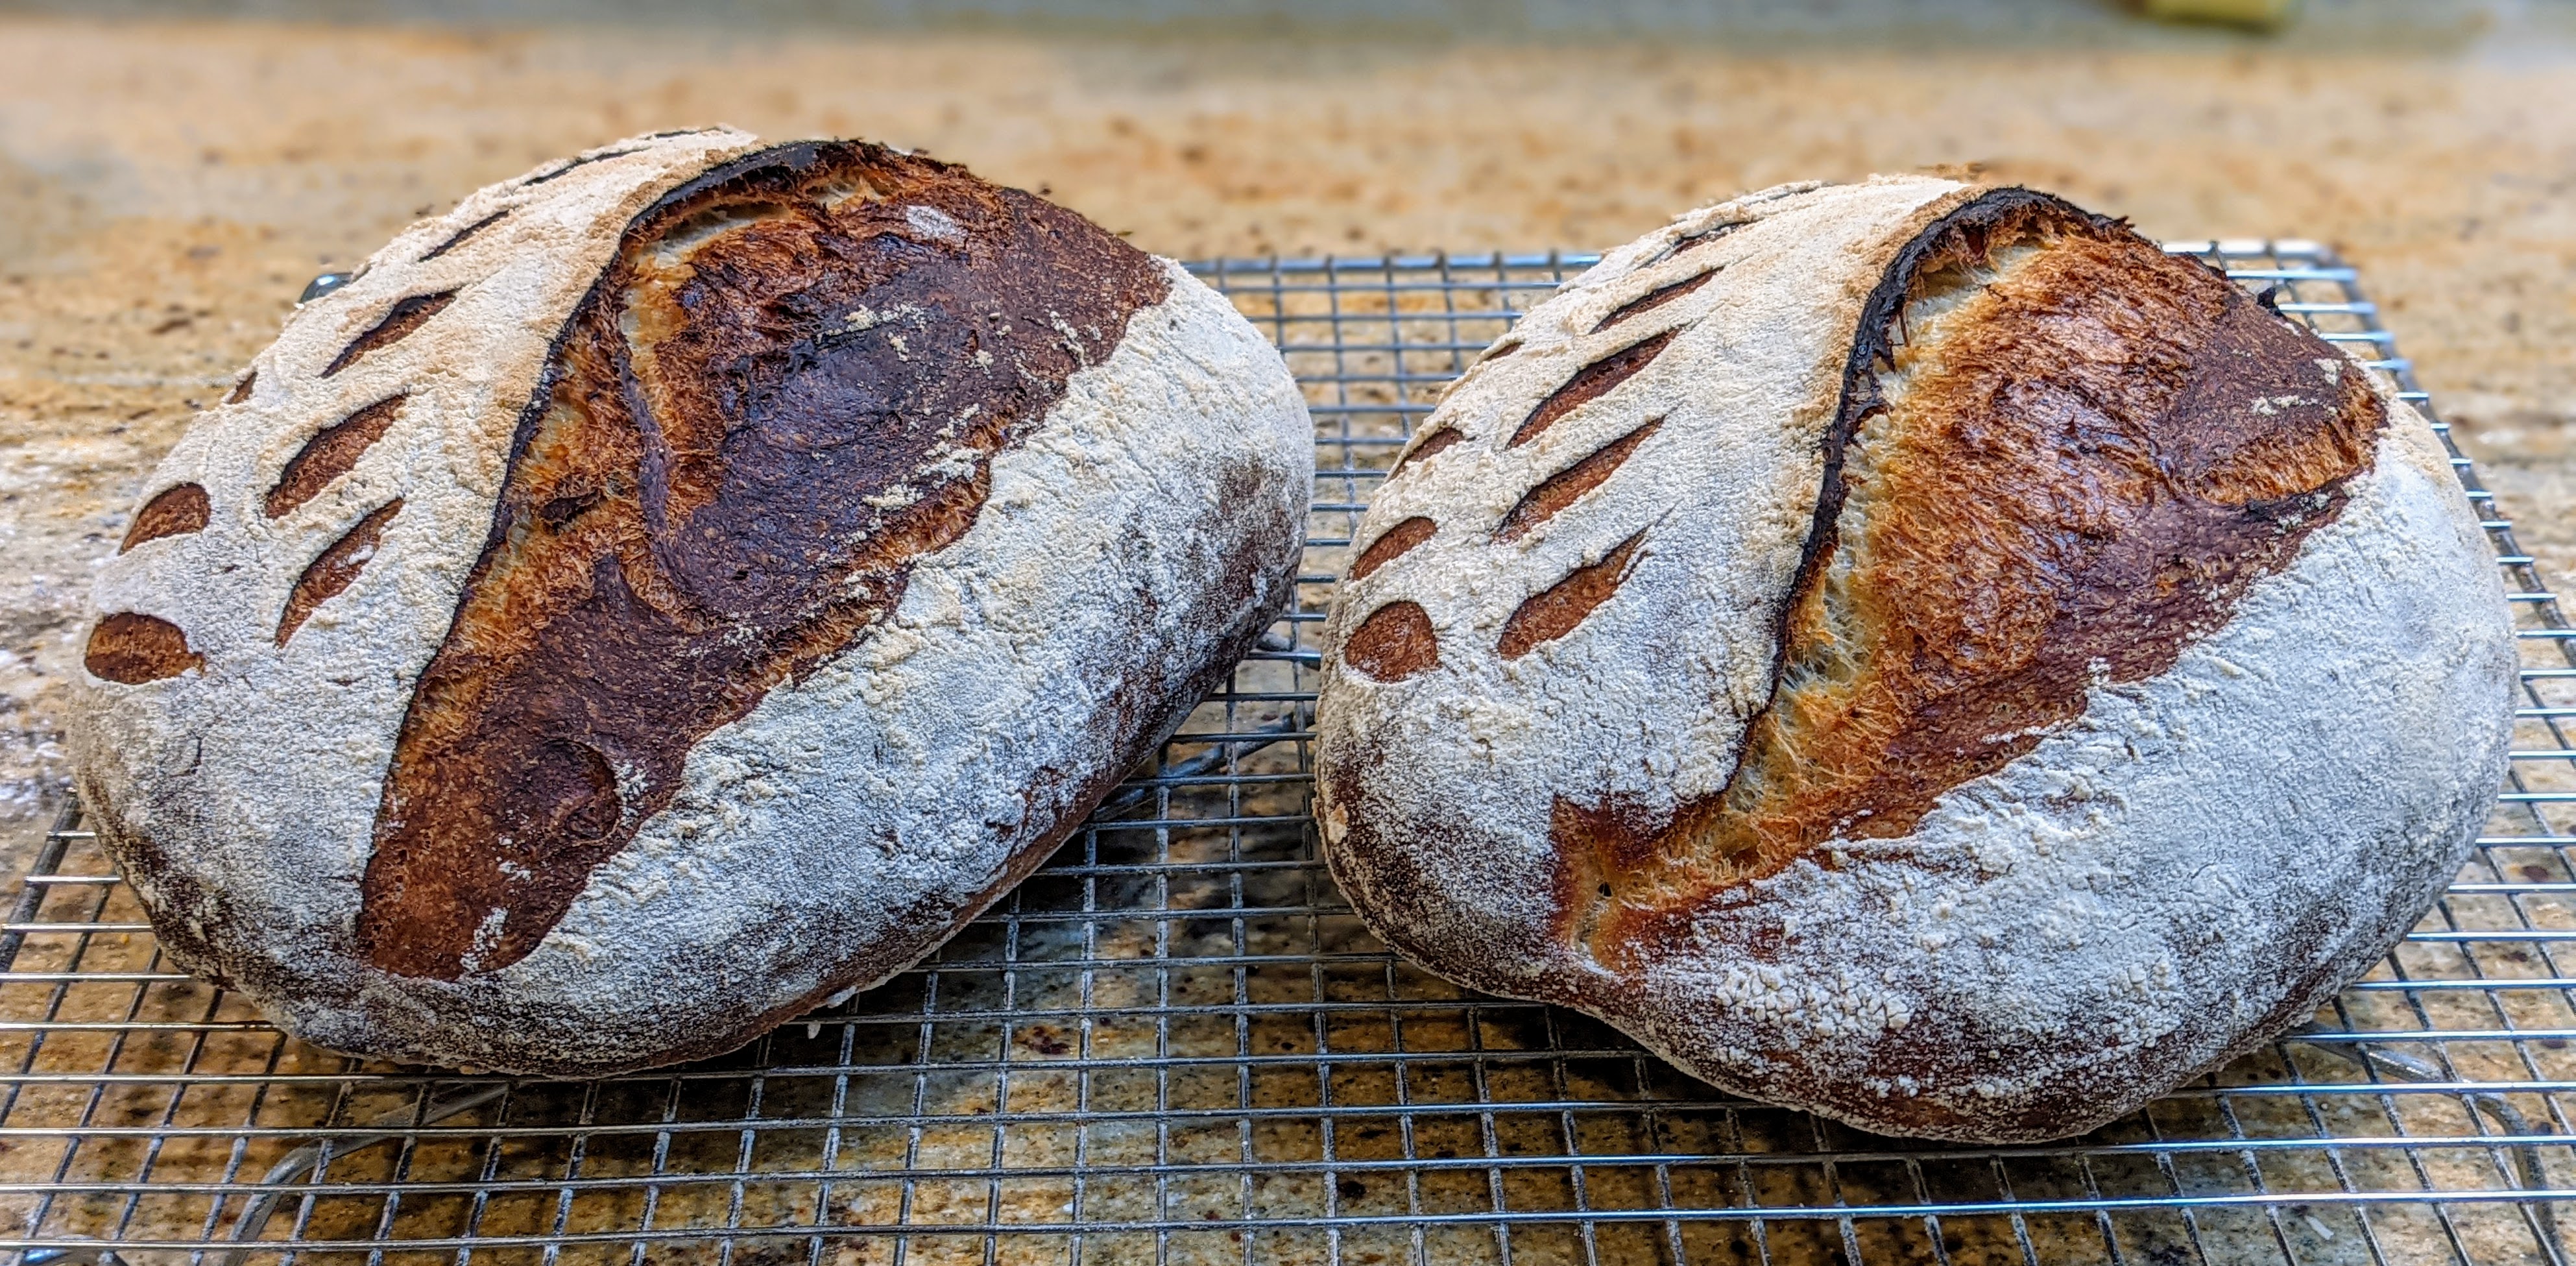
  1. I’ve found that Kamut’s starches break down pretty easily. So, if you use a rye-based starter, be extremely watchful of your bulk fermentation. The loaves I made above used a 25% rye starter inoculation and bulk fermentation happened a lot faster than with normal bread flour. That amount of starter is going to speed things up anyway, but it was about twice as fast as normal with the Kamut present. I had to turn down the temperature on the fridge I use for cold final fermentation to about 39℉, where I normally have it set around 42-44℉ to favor lacto-fermentation. Of course, an alternative is to use less starter, but I really wanted a more pronounced tang.
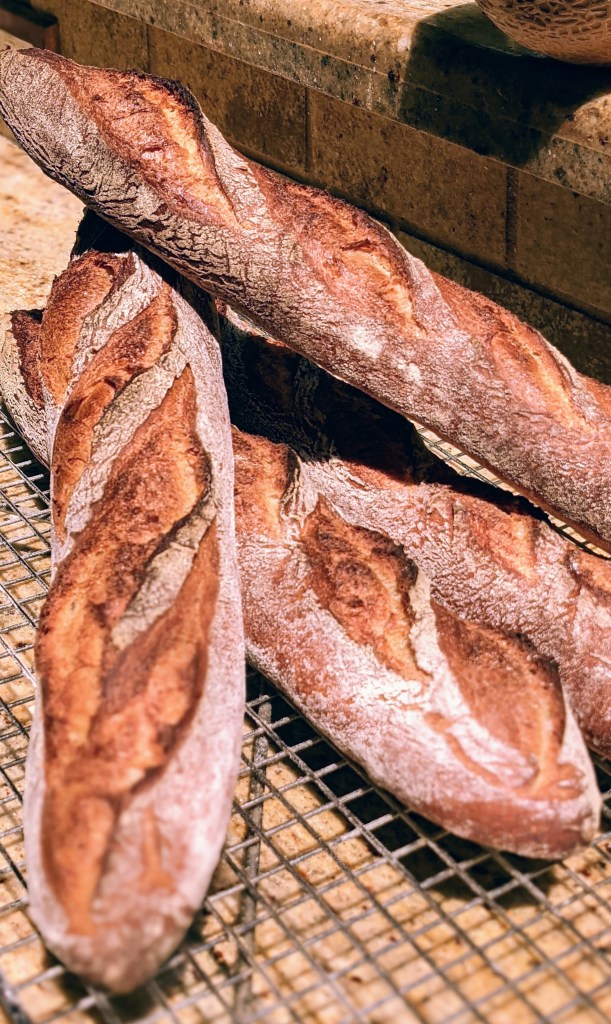
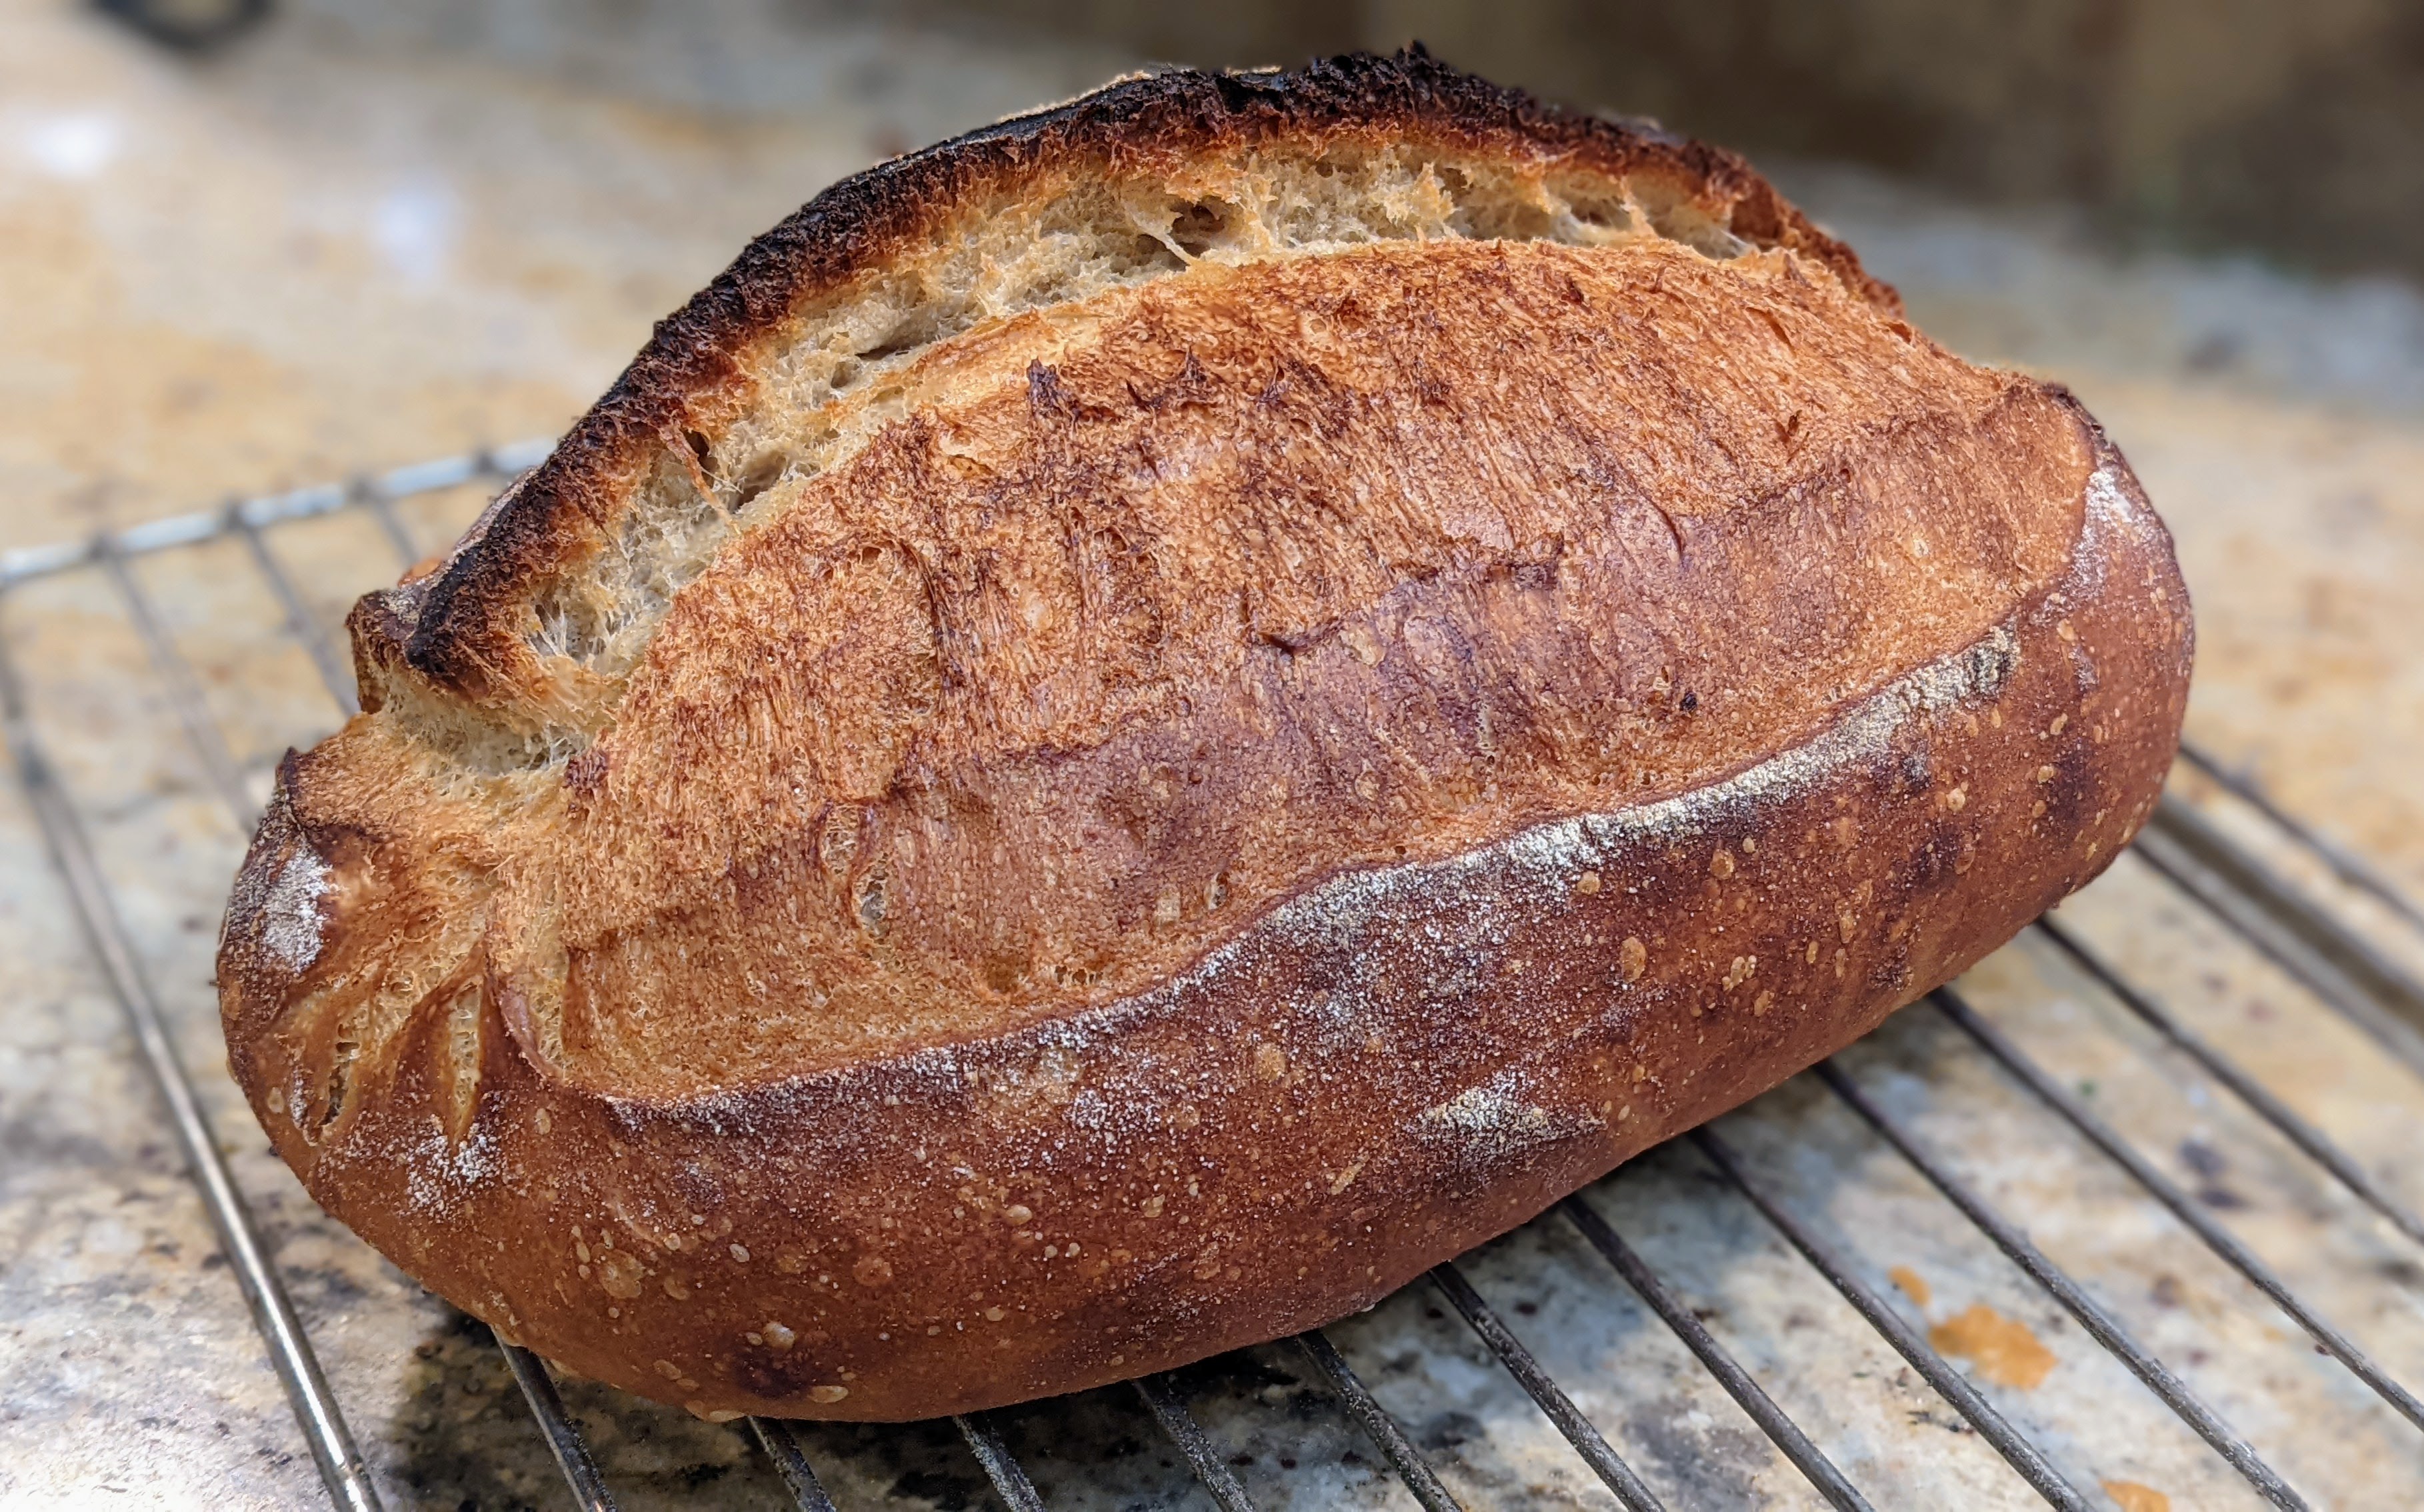
  2. And since Kamut’s starches break down pretty easily, I do not recommend using a real high temperature for baking. The loaves I baked above were baked at 460℉ for 20 minutes with steam, then 425℉ for another 22 minutes dry. Because of all the released sugars, that bread finished with a dark crust!
  3. As I mentioned above, the type of gluten that is formed with Kamut is a lot more delicate than with the hard red wheat that’s normally used in baking. When you’re folding your dough, be very mindful of the extent to which you pull the dough. My advice is to only pull to the point where you feel some resistance, then fold the dough over. You may have to fold more times than you normally would during a session to ensure you’re building structure, but you’ll also ensure that you’re not tearing your dough.
  4. Kamut is a “thirsty” flour, so I recommend a healthy autolyse or fermento-lyse of at least 45 minutes. This will ensure that your flour is well-hydrated.
  5. As far as hydration percentage is concerned, you’ll have to experiment. The bread flour I use is particularly high in protein at around 15%, and though the Kamut from Azure Standard is about 11.7% protein, I can still my hydration way past 80%, though I typically don’t exceed 85%. Even then, it still handles like a 72% hydration dough with regular bread flour.
  6. If you make bread with 100% Kamut, best treat it like rye and bake it in a pan or a Dutch oven to prevent it from spreading out. It won’t spread out nearly as much as rye, but its gluten is not very strong.
  7. And speaking of strength, bear in mind that most Kamut flour is whole-grain flour, so don’t expect to get big holes. You’ll get plenty of spring, but just not a lot of voids in your crumb.
  8. You might consider sifting the flour through a fine mesh to capture the germ and husk. These are like little knives that will cut the gluten strands. And with Kamut’s weaker protein bonds, removing that stuff will help with your rise. I usually sprinkle the germ on top of the loaves before I place them in the oven.

The Many Faces of Baguettes

Click on a picture to see its recipe. The baking method described in the recipes may differ from what I discuss here. That’s because those were the ways I baked them initially. But in the last 6 months, I’ve taken to standardizing my flour blend(s) and formulas. I vary the technique to achieve different results.

I’ve been very open that my favorite bread to make is the baguette. But as you can see, I bake several different types. But with just a few minor exceptions, I bake all my baguettes pretty much the same way: 12 minutes with steam @ 475°F, 15 minutes @ 425°F. The only difference is with sourdough baguettes that go both longer on steam (20 minutes) and a little longer – 25 minutes – at 400°F for curing. As for the other types, as you can see from the pictures of some of the batches I’ve baked just in the past few months, they show different crust colors, almost as if they were baked differently. I can guarantee you that they weren’t.

And to drive the point home further, except for the Tartine baguettes, the rest of them obeyed the same, basic formula:

Flour100.00%
Water76.00%
Salt2.00%

So what differs between all the different types of baguettes are the dough development and fermentation techniques employed for each different type. The most significant effect on crust color comes from fermentation. The darker crust baguettes are not the result of longer bake times, but rather the amount of sugar released into the dough due to the longer fermentation times of either the whole dough or preferment.

For instance, the Baguettes a l’Ancienne, Sourdough, Pointage en Bac baguettes all undergo very long and cold bulk fermentation times. This allows more sugar to be released into the dough than can be metabolized by the yeast. Those crusts caramelize nicely and hence have the darkest crusts. The Tartine-Style baguettes are a little lighter as less sugar is released as the combined preferments only account for 28% of the total flour. The Poolish baguettes are fairly close in color to the Tartine-style, but they’re just a bit lighter as the preferment accounts for only 25% of the total flour. And finally, the Baguettes de Tradition are the lightest as very little sugar is released into the dough. This stuff is SO very cool!

To be honest, seeing how dough can be affected by so many different variables never ceases to amaze me and keeps me completely obsessed with dough; pushing me to try different things to see their effect on the finished bread.

As far as baguettes are concerned, I used to think that a baguette was a baguette. And though intuitively and intellectually I knew there were differences, it wasn’t until I started baking different kinds that I really knew just how different they could be – even from the same formula! It’s stuff like this that keeps me baking!

Easy-Peasy Zatar-Flavored Yeast Loaf

I was at a retreat this past weekend and on Saturday afternoon, I happened to pass by the cafeteria kitchen to see a big 20-quart mixing bowl almost spilling over with proofing dough! It smelled absolutely wonderful! I was drawn to the bowl and chatted it up with one of the cooks, sharing with her that baking bread is one of my life’s passions. I never got the chance to speak with the head cook, but I’m going to be contacting them to see if I could volunteer in the kitchen to bake bread for retreat attendees in the future. So cool!

In any case, the loaves they produced were straight-forward yeasted loaves, probably about 1.5 kilo each. And though they didn’t have an open crumb, the crumb was still nice and airy. Much like a quickly risen, yeasted loaf. And that got me thinking: Sometimes it’s just nice to make an uncomplicated yeasted loaf. It’s so easy to get caught up in sourdough this and sourdough that that I miss the real point of making bread and that is to feed people! So, inspired by those simple loaves, I resolved to bake a loaf like that for my family when I got home.

But instead of making a simple loaf, I thought I’d give it a little pizzazz and add a bit of that wonderful Middle Eastern herb mixture, zatar. I only added just enough to add a real subtle flavor, but just that little bit has a HUGE impact on the taste. Let’s get to the recipe!

Overall Formula

First I started out with my basic baguette formula, but instead of my normal 0.38% yeast, I went to 1% yeast…

Flour100.00%
Water75.00%
Salt2.00%
Yeast1.00%
Total %178.00%

Final Dough

Flour851g
Water638g
Salt17g
Yeast9g
Zatar*1-2g
It doesn’t take much…
Yield1 X 1500g loaf
*I didn’t factor the Zatar into the overal formula because I just measured out a couple of grams (honestly 2 teaspoons) of the mixture and added it to the flour. As for the yield, if you add everything up, it’ll come to 1516g, but I always add a fudge factor to account for loss during processing.

To be completely transparent, I actually used three flours for my dough in this recipe: 50% High-extraction bread flour, 30% Kamut flour, and 20% AP Flour. They were measured as follows:

High-extraction bread flour426g
Kamut flour255g
AP flour170g

Mix. Combine all the dry ingredients and mix well. Add the water and mix thoroughly until there are no dry ingredients left. Work the dough until it starts forming a smooth consistency. If you’re using a mixer (that’s what I did), mix until the dough become smooth and starts climbing up the hook (about 3 minutes at medium-low speed). If you’re mixing by hand, knead the dough in the bowl until smooth and it starts coming off the sides of the bowl (about 5-7 minutes).

Bulk Fermentation. About 1 1/2 hr.

Fold. The dough only needs to be folded once after 1/2 hour. After that, let it rise in the container until nearly doubled in size.

Preshape. After the dough has finished bulk fermentation, transfer it to an unfloured work surface and work it into a round. Allow it to bench rest for 15-20 minutes or until it has relaxed.

Shape. This is a really versatile dough, so you shape it into a round or an oval or even a long loaf. For my loaf, I did a standard batard shape, but rolled it out a little to form a longish loaf that I let rise in a 14″ banneton.

Final Fermentation. 30-45 minutes. By this time, the yeast will be really active and if it’s warm, final fermentation will happen quickly. So watch it! Use the standard poke test to determine the springiness of the dough. Your indentation should pop back a bit after poking the dough, but never fully come back.

Bake. Bake for 45 minutes at 450°F (no fan, please). During the first 15 minutes use steam to help the loaf rise. It will really spring up with this much yeast!

It’s Lent. Time for Bread Bowls on Fridays!

I’m a cradle Catholic and though I don’t consider myself to be particularly devout, I still do my best to observe the traditions on which I grew up. One of those traditions is not eating meat or poultry on Fridays during the season of Lent. For my family, that has meant eating soup. Normally, we go to our church as they have Friday soup days, but this Lent, we’ve been staying in and either preparing our own soup (which actually means me doing the cooking), or we buy freshly prepared soup from our local Safeway (the tomato bisque is the BOMB!).

Last week, I made a batch of clam chowder. When my son came home from lacrosse practice he asked me what was for dinner, and I said, “Clam chowder.” He immediately asked, “In a bread bowl?” When I gave him a negatory, I could see his heart sink. I think he figured since Dad was a baker, I’d naturally make bread bowls. So… lesson learned, and this week, though I bought the soup, I decided to make bread bowls to make up for not having them last week.

These are not sourdough bread bowls. I could easily do those, but it being a fairly full-scheduled week, I didn’t have the time to get a levain going. So I decided to keep it simple and make a straight dough and make little boules from that. Now, not wanting to fuss with a recipe, the best I could come up with was a riff on my standard baguette recipe, but use a good amount of yeast. I also wanted to make the bread in less than three hours, so using plenty of yeast would get me there. Yeah, it’s a quick bread, but I wasn’t too concerned about making a particularly flavorful bread because it would get all its flavor from the soup.

Ahhhhh! The smell of yeasty bread! As much as I love sourdough, there’s nothing quite like a nice yeasty bread. It’s pretty amazing. Here’s the recipe!

Overall Formula

Flour100.00%
Water75.00%
Salt2.00%
Yeast1.50%
Total %178.50%

Flour Blend

AP Flour (King Arthur)60.00%
High-extraction Bread Flour (Azure Standard)40.00%

For flour, a specific brand isn’t that important. But for bread flour, I’d recommend using a fairly strong flour that has more than 12% protein content as this dough is pretty high in hydration at 75%.

Final Dough

AP Flour458g
High-extraction Bread Flour306g
Water ~90°-95°F573g
Salt15g
Yeast11g
Total Yield1364g
6 X 225g loaves

Mix. Sift the flour into a large bowl. Add all the salt and yeast, then mix all the dry ingredients until everything is evenly distributed. Make a crater in the middle of the dry ingredients, then pour all the water into the bowl. Using a Danish dough whisk or your hand, using a circular motion in the water, work the flour and water together, grabbing a little flour off the sides as you make circles. This is a lot like mixing pasta dough by hand. Once you’ve pulled all the flour off the sides of the bowl, use a rounded bowl scraper to scrape under the dough and turn the dry ingredients at the bottom into the dough mass. Once there are no dry ingredients left, cover your bowl with a cloth and place it in a warm place to rise.

Bulk Fermentation. 1.5 – 2 hours.

Fold. This dough only requires a single stretch and fold session after 45 minutes. There’s so much yeast, that after the first 45 minutes, the dough will be close to doubled. Using gentle motions, stretch and fold the dough until the entire mass lifts off the bottom of the bowl. Your dough will have developed all the strength it needs. After that, cover the bowl again with a towel, then let it sit in a warm place for another 45 minutes or until the mass is close to double in size.

Before dividing, preheat your oven to 475°F.

Divide and Preshape. Pour out the dough onto an unfloured work surface. Scale-out 225g pieces, then using your scraper, shape the pieces into rounds. No need to create a super-taut skin. Once preshaped, let the loaves bench rest uncovered for 15 minutes. The dough will spread out, but will still be nicely domed on top.

Shape. Lightly sprinkle the tops of the pieces with dusting flour (I use a 50/50 rice/AP flour mixture). Turn each piece onto the floured side then shape it into a boule. With dough at this hydration, I prefer to use a stitching technique similar to the Tartine shaping method to create a good internal structure, then use my bench scraper to form it into a round, making sure to tuck all the seams from stitching under the round.

Final Fermentation. Line a large baking sheet with parchment paper, then evenly space the rounds on the baking sheet. Once placed, you can optionally dust the tops with dusting flour, then cover the rounds with a towel and let rise for 30-45 minutes. But poke test after 30 minutes! Because it was warm in my kitchen today, I was bake-ready in just less than 30 minutes!

Bake. Bake with steam for 12 minutes at 475°F. After 12 minutes, remove the steaming container, then turn down your oven to 425°F. Bake for another 15-20 minutes until the loaves are nice, golden-brown.

Serve. Let the loaves cool for 15-20 minutes (they’ll still be nice and warm), then take a loaf and cut a large circle on the top. Using either a spoon or your fingers, gently hollow out the loaf. Fill it with your soup!

An “Easy” Dough Calculator

Here’s the link to the spreadsheet. You can’t edit it, but you can copy it to your own Google Sheets.

Being a software engineer by trade, I have a penchant for using technology to aid in automating manual tasks and baking is no exception. One thing I did early on was to create spreadsheets for calculating ingredient amounts based on my desired yield and a baker’s formula. I actually created a bunch over time, but there’s one dough calculator I created in particular that I seem to use the most. It’s displayed a the top. If you’re interested, click on the link above and copy it!

The calculator is split into 5 major sections:

  1. Loaf Calculation
  2. Formula
  3. Preferment
  4. Flour Blend
  5. Final Dough

One of the reasons I started building my dough calculators was that I wanted to bake bread to a certain, specific yield like 4 loaves at 335g apiece, then calculate the ingredients I’d need based on the target yield and the baker’s formula. This is in contrast to recipes you’d normally find in books and online where the ingredients are listed out and you have no idea about the yield other than, “Divide the dough into two equal pieces.”

That has always rubbed the more exacting side of my personality the wrong way. And especially when I started baking at higher volumes, I needed to know how much I was going to bake first. Then I’d figure out ingredient amounts based on that. Thus, I started creating dough calculators.

I use this calculator when I’m experimenting with different flour blends or different kinds of preferments. It takes all the guesswork out of figuring out what I need. Note that it is specifically meant for basic loaves that have no inclusions. This accounts for about 95% of what I bake such as sourdough boules and batards and baguettes.

Let’s step through the various sections:

The first two sections of the spreadsheet deal with the yield I’m after and the base baker’s formula. Just these two elements can drive all the ingredient amount calculations as the total flour can be obtained by simply dividing the target dough weight by the Total %. The Process Loss % field is a fudge factor for the total yield. There will always be some dough weight loss in processing, so adding a 1% or 2% fudge factor ensures that you can create all the loaves based on the dough weight.

Note that Yeast is included as an entry. If you’re making naturally leavened bread, this should be set to “0.”

The next section deals specifically with the preferment. You will provide the percentage of the total flour you’d like your starter to be, then set the hydration of your starter. A typical liquid starter is 100% hydration. A biga, on the other hand, will be around 75% to 80% hydration. Once you enter those things, the flour and water you’ll need to produce the starter, along with mature starter OR yeast will be calculated. Note that these calculations will produce more starter than you actually need for the recipe, but this is something that should be done anyway to account for process loss or starter sticking to the container.

The starter amount is meant to create a 1:5 ratio starter, the starter weight being 20% of the combined weight of the flour and water. But note that this is merely a guideline. If you’d rather do a 1:3:3 or whatever, that’s entirely up to you. You’ll just have to provide the amount of starter required in the ingredients list.

If you’re creating a poolish, the yeast you’d use is listed. I personally base the amount of instant yeast I’ll use for a poolish to 0.3%. You can change this in the cell formula if you use a different amount.

The last two sections of the calculator deal with the flour blend and the ingredients which really go hand-in-hand. This provides an easy way to figure out how much of a particular flour you want contributing the flour blend as a function of percentage. The grey line labeled “Preferment” is the percentage of the total flour that is already spoken for by the preferment. All the numbers should add up to 100%. The cell will be colored red if there is any variance.

Finally, we have the Final Dough ingredient list and the amounts required. The flour blend amounts are provided. The Total Yield is provided as an accounting measure to ensure everything adds up to what we expect. Though not shown, Total Flour and Total Water are displayed below the ingredient list and yet another check.

I invite you to copy the calculator. It has proven an invaluable tool for me!

The First Rule of 90%+ Hydration Dough: Don’t Mess With It! Part II of Working with Extreme Hydration

In “Tartine-Style 50% Whole Grain Sourdough: Experimenting with Extreme Hydration, First Stop 85%,” my goal was to push the limit of the flour I use to see just how far I could take it. I postulated that 85% hydration was the outer limit for my flour, but to be completely honest, I was wrong. The loaf shown in the pictures above was hydrated to just over 90% hydration. The flour blend I used was 10% Whole Wheat (from the starter), 54% Bread Flour (Bob’s Red Mill), 36% Whole-grain Kamut Flour.

I was amazed at how the loaf maintained its structure enough to get a really great oven spring! I was a little unsure when I poured the dough out onto my loading board. It really spread out. But the important thing I noted was that despite the dough spreading out, it was still domed which meant that there was a structure to the dough. And rise up it did!

I’m going to keep pushing to find the outer limit of the hydration my flour can take, but one thing that has occurred to me in my high-hydration experiments is that the success I’ve been experiencing with the loaves I’m producing probably has a lot more to do with my technique than the flour itself. And that brings me to the crux of this post.

An important thing I’ve learned working with super-high hydration dough is to only manipulate it to accomplish what I need for a particular step and after that, leave it alone! When I’m stretching and folding the dough, I only do it enough to where I can feel the tension in the dough. And I also have learned to stretch the dough a lot slower than I normally stretch a less hydrated dough lest I degas it too much. Oh I stretch it as far it will stretch, but I don’t tug on it hard – just a slow and smooth motion.

With this batch of bread (I actually baked a few loaves with this batch of dough), I didn’t stretch and fold the Tartine method of six folds over three hours. I felt enough strength had built up after three folds. So I let the dough sit for 3 hours until it was almost doubled (my starter was a little sluggish that day).

When preshaping, I only preshape until the skin has been pulled a little taut and smooth. I don’t try to develop tight skin on the ball. And then I let it rest until it has relaxed. Depending on the weather, this could be 30 minutes or it could take an hour for the dough to relax.

With shaping, I use a stitching technique I learned from watching several videos of Chad Robertson shaping his bread at Tartine. Though it isn’t Chad Robertson, this video demonstrates the technique really well. It’s a gentle technique that creates structure but doesn’t degas the dough much and uses gravity and the natural tackiness of the dough to seal the bottom seam. Another way to get a great look at the technique is to watch John Favreau’s “The Chef Show” when he visits Chad Robertson’s Manufactory in Los Angeles.

Then finally, a long, 12-24 hour rest in the fridge for final fermentation will allow the flavors to develop and dough to perform its expanse.

Again, I want to stress that I only touched the dough when I absolutely needed to. The dough is so wet and delicate that I didn’t want to pop too many bubbles. Messing with the dough too much would undo all the hard work the yeast had done to create those wonderful gas-filled pockets!

Calculating Dough Yield – You Have to Work BACKWARDS!

I’ve touched upon this before that I’ve always had issues with recipes because they always list out the ingredients like 1000g of flour, then say, “Divide the dough into two equal pieces.” I suppose that’s fine if you’re just baking for your family and you don’t really care about things being truly equal. But when I started baking a lot and especially when I started Dawg House Bakery, dough yields and loaf weights became VERY important to me.

With regular recipes, even though they might include the baker’s formula, oftentimes they simply say, “Use this much of this and this much of that, etc.” It makes it incredibly difficult to calculate yields based on that approach, especially if you’re baking a dozen or more loaves. So I’ve taken to working backward. And by that I mean I figure out what I want to bake first, like 8 loaves @ 800 grams apiece, then work backward from there. And THAT is where the baker’s formula comes into play.

Now, most people look at a formula and only look at it from the perspective of calculating the non-flour ingredients, for instance, salt is 2% of the total flour. But the real secret of a formula lies in the sum of all the percentages. Let’s look at a basic sourdough baguette formula that I use:

Flour100.00%
Water80.00%
Salt2.00%
Total %182.00%

When I first started using formulas, I didn’t understand that Total % figure. Like most, I just looked at the non-flour ingredients. But once I learned that if you divide the total dough weight by that Total %, you get the flour amount that you need, it was a total game-changer!

For instance, let’s say I want to make 4 baguettes at 335g apiece before baking. The total dough weight would be 1340g. Now, if divide that by the 182% total percentage, the total flour in my recipe would be:

1340 / 182% = 736g

From there, it’s easy to calculate the rest of the ingredients!

If we were doing a straight dough, the numbers would look like this:

Flour736g
Water589g
Salt15g

For this amount, I just know from experience to use about 6-7 grams of yeast, so I don’t really factor that into my calculations, but typically it’s around 1% or less depending on the weather (the warmer it is, the less yeast I use).

But What About Using a Preferment or Sourdough Starter?

This is where it gets a little tricky because the preferment is technically part of the total flour and water, not a separate component. You will hear some bakers say that a preferment is the early stage of the dough. You still calculate the total amount of the preferment based on the total flour, but you have to subtract the flour and water of the preferment from the total flour and water when figuring out what you’ll need in the final dough. Otherwise, you’ll throw off your total dough weight.

For my sourdough baguettes, I want my starter to be 25% of the total flour. As my starter is 100% hydration, here are the calculations:

Preferment % of Total Flour25%
Preferment Total Weight184g
Preferment Hydration100%
Preferment Flour92g
Preferment Water92g

Based on that, here’s what the final dough ingredients will look like:

Flour736g – 92g = 644g
Water589g – 92g = 497g
Salt736g * 2% = 15g
Preferment736g * 25% = 184g
Total Yield1340g

For your convenience, I’ve created a Google Spreadsheet that you can use to calculate your ingredients. You won’t be able to edit the document, but you can copy it to your own spreadsheet, then edit it as you see fit. BTW, the calculations in the spreadsheet that you will first see are for creating 2 X 1000g Tartine-style 40% Kamut loaves. If you’re new to baking, I don’t recommend this recipe! At 90% hydration, the dough is VERY tricky!

To be honest, I have about 30 different sheets for the different kinds of bread that I bake. When I’m developing a new recipe, I always use a spreadsheet like this. It takes the guesswork out

Tartine-Style 50% Whole Grain Sourdough: Experimenting with Extreme Hydration, First Stop 85%

After re-reading Tartine No. 3 recently, I got inspired to start experimenting again with super-high hydration sourdough production. My typical hydration for sourdough is 75%, but Tartine goes even past 90% hydration! My earlier forays into 90%+ hydration were a little discouraging. I produced pretty flat loaves that, though possessed of a really open crumb, didn’t have much vertical rise. Then I saw some pictures of full loaves of Tartine and realized they had similar results!

But for me, I wanted to find a balance between extreme hydration and maintaining some oven rise. So I decided to do some tests, of which this is the first. The loaves in the pictures above were made with 85% hydration dough. I have a feeling that that is probably the limit of the type of flour I’m using, but the next bake, I’m going to push it to 90%.

These turned out a lot better than my previous forays. And part of that – I think – is due to the baskets I used. I watched some videos of both Tartine and several other bakers that were making high-hydration oval loaves and they all used what appeared to be 14″ baskets. So I got a couple. I think it makes a difference as it allows the dough to expand. But I won’t be absolutely sure until I make loaves using a standard oval basket and a long basket at the same time.

Baker’s Formula

Flour100.00%
Water85.00%
Salt2.00%
Diastatic Malt Powder (optional)**2.00%
Total Percentage189%
*Levain percentage factors the flour from the levain into the total flour
**Depending on the flour bread flour I use, I’ll add malt if there’s none added by the miller.

Final Dough

Flour
50% Bread Flour (13.8% protein), 30% Whole Wheat, 20% Kamut
935g
Water775g
Salt21g
Levain*267g
Diastatic Malt Powder21g
Total Dough Yield2020g
2 X 1000g loaves + 20g wiggle room
*Levain is calculated as 25% of the total flour which can be arrived at by taking the target dough weight and dividing it by the total percentage, so 2020 / 189%.

The Process

Make the Levain. Like Tartine, I prefer to use a young levain because I like the nutty flavor characteristics of a young levain and prefer to develop sourness during final fermenation. Even if I end up fermenting the dough enough to make it sour, it won’t be overpowering. For this particular recipe, I take about 50g of mature starter (I maintain a separate mother) and combine it with 150g flour and 150g water (warm enough to get my dough to about 80°F). Levain is ready when it passes the float test (anywhere from 2 – 5 hours depending on weather).

Initial Mix/Autolyse. Reserve about 50g of water, then mix the rest with all of the flour (if you’re using diastatic malt powder, add it now so the enzymes have a chance to break down the starches in the flour). When I use whole grain flour, I will typically autolyse for 2-4 hours, in parallel with my levain maturing.

Final Mix. Add all the levain, salt, and reserved water to the dough. Mix thoroughly until all ingredients are fully incorporated.

Bulk Fermentation. 4-6 hours depending on ambient temp or rate of fermentation or until the dough has expanded about 30-35% of its original size. There are a lot of variances in the timing. With the loaves shown above, they took a long time to bulk ferment, even at 80°F.

Divide and Pre-Shape. Divide the loaves into 1-kilo pieces, then work into rounds, developing a little surface tension. Bench rest uncovered for 20-30 minutes until the balls have relaxed.

Shape. Shape into rounds or ovals, then place into baskets.

Final Fermentation. 12-24 hours at 39°-42°F. The longer you go, the sourer the bread. I’ve taken loaves out to 36 hours but by that time, the acids started breaking down the gluten and I didn’t get much oven spring.

Bake. Bake at 475°F for 20 minutes with steam (if using a Dutch oven, then 20 minutes with the lid on). Remove the steaming container, then bake for 25-35 minutes dry at 425°F or until the crust has baked to a deep, golden brown.

Baking Bread: It’s a Perpetual Balancing Act

Last night, I watched a video of Paul Hollywood touring bakeries in San Francisco on a quest for San Francisco sourdough. He got bread from different bakeries all over the city apparently to see if he could find the epitome of sourdough and once he identified it, he’d go visit that bakery. Of course, it was going to be Tartine. That he saved the Tartine loaf for last in his evaluation was a total giveaway, which made that particular segment seem a little contrived.

The inevitability of Paul going to Tartine aside, one thing caught my eye when Paul showed the entire loaf. I was able to capture a screenshot from the video. Look at how flat that loaf is! Though the crumb is a classic, open Tartine crumb, the vertical rise in the bread is actually minimal. And if you look at the lower end of the loaf in the picture, it’s clear that the dough spread out – a lot – in the oven.

Then looking at a top-down view of the loaf (right), there wasn’t much opening from the scoring mark, which is another indicator that the loaf sprung more outward than up.

The reason for this is likely because Tartine dough is incredibly high-hydration. In some cases, and especially with their whole-grain loaves, the hydration levels exceed 90% (their flatbreads are over 100% hydration). At that level of hydration, no matter how well the gluten structure is developed to trap gas, the water in the dough will not allow the gluten strands to coalesce nearly as much as a lower-hydration dough. So as the dough bakes, it tends to spread out rather than rising up.

Mind you, I don’t consider this to be bad in any way, shape, or form. In fact, based on what I’ve gathered from studying the Tartine method, I’d expect a loaf like this to have little vertical rise and tend to spread out. But it’s a great illustration of the balancing act of baking. In this case, in Tartine’s quest to produce a highly-open crumb, they increase hydration and sacrifice vertical rise. Other bakers may not want this.

For me, I prefer a tighter, softer crumb and more vertical rise similar to the picture below:

It’s by no means a dense structure as evidenced by the sheer number of small holes in the crumb. And I prefer this because this kind of crumb structure will hold spreads like mayonnaise and mustard and have far less leakage when used with a sandwich as compared to a crumb that has lots of big holes. In my case, I sacrificed that open crumb structure that so many people seem to obsess over in favor of vertical rise and the ability of the crumb to hold spreads more effectively.

The point of all this is that I’ve found that it’s necessary to weigh the different factors that go into producing a loaf of bread. If I’m after a particular outcome, I have to constantly balance that with what I might have to sacrifice in another area.

For instance, like many, when I first saw pictures of Tartine bread, I wondered what it would take to produce bread similar to that. And after lots of study and experimentation, I finally got the method down to produce loaves with a super-open crumb such as the ones shown below:

I must have baked at least 50 loaves before I could achieve this consistently. A friend of mine whom I had given a loaf messaged me and remarked how it was like Tartine bread. What a compliment!

But despite my success in achieving that, personally, I didn’t like the bread. It tasted great and the long, final proof really brought out its sour characteristics. But from a practical standpoint, it frustrated me. Though it looked and tasted great, I felt that bread like this wasn’t very versatile. So I had to do quite a bit of rethinking and balance the desire for an open crumb with its practical use. So after weighing all the different factors, I decided to drop the hydration rates of my boules and batards to around 78%-82% depending on the flour blend I use.

I realize that for beginning bakers I’m probably sounding like the teacher in Charlie Brown: “Mwa-ma-wah-wah-mwa…” But if once you start baking with regularity and gaining knowledge and skill, you’ll see what I mean about the balancing act of baking bread.

30% Kamut Flour Roasted Garlic-Rosemary-Parmesan Pure Levain Bread

Last week, my daughter called me from Portland, OR, and asked if I could make her favorite bread: Garlic-Rosemary-Parmesan sourdough that she could take back home with her after her upcoming visit home. As if I need a reason to bake… So of course, I told her that I would.

But this time, I wanted to do something a little different. When I’ve made this bread in the past, I’ve fortified the natural yeast with some commercial yeast. But this time I wanted to only use a starter and develop the dough using the Tartine method that employs a relatively small amount of a young, active levain and ferments at a fairly warm temperature: 80°-82°F.

I also wanted to challenge myself and bake larger loaves than I normally bake with this recipe. My standard loaves are 700g, but I wanted to make 900g loaves with this batch. That doesn’t seem as if it’s a big difference, but my experience in the past with using olive oil in the dough is that larger loaves tend to collapse a bit as oil is a gluten formation inhibitor so I stuck with making smaller loaves that wouldn’t collapse under their own weight.

Okay… I have to admit that after thinking about it, I was just being chicken-shit. I didn’t want to alter my original process. But as I wanted to add more flavor complexity by using 30% Kamut flour which – at least in the brand that I use – is notoriously weak, I knew I had to change my approach. Really, all this entailed was to delay the addition of the olive oil until after I had developed the gluten a bit. And by doing that, I got insanely good results! Combine that with bassinage, and the results were amazing.

Let’s dive into the formula/recipe:

Overall Formula

Bread Flour70.00%
Kamut Flour (If you don’t have Kamut, use whole-wheat flour)30.00%
Water70.00%
Olive Oil5.00%
Salt2.00%
Yeast0.00%
Garlic6.00%
Rosemary0.25%
Parmigiano Cheese*20.00%
Total Percentage203.25%
*I caution the use of Parmigiano Reggiano as it will liquify during the bake. I’ve instead learned to use Grana Padano or shredded American-style Parmesan (like Sargento). The only challenge with using this harder style of cheese is that it will really affect the structure of the dough, and you have to be extremely gentle with your stretch and folds!

Levain

Mature Starter50g
Flour50g
Water50g
Levain Required for Recipe134g*
I will detail the levain build below

Final Dough

Bread Flour579
Kamut Flour248
Water (85°-90°F)559
Olive Oil45
Salt18
Yeast0
Garlic54
Rosemary2
Cheese179
Levain134
Total Yield1,818
2 X 900g loaves
Optimal Dough Temp80°-82°F
Total Flour894
Total Water626

Build the Levain

Since I store my starter in the fridge, I invariably have to employ a two-stage levain build to ensure my levain is active. Typically, I’ll create 1:1:1 levain, usually about 30g mature starter, 30g water, then 30g AP flour. Once that peaks, I’ll feed it with more flour and water to get me to the levain weight I need. Then once it peaks again (and passes the float test), then I’ll proceed with the final dough development.

In both cases, I use very warm water – about 90°F – to ensure that the yeast is happy. And I ferment the starter in a warm environment to maintain the warmth. The idea at this stage is to emphasize yeast activity over bacterial activity.

Build the Final Dough

Roast the Garlic. Peel the garlic you need, then wrap in foil with a little olive oil, then roast at 375°F for 30-40 minutes. Or… I just cut the top off a whole garlic cluster, pour some oil over the top, then wrap it up in foil and roast it.

Initial Mix/Autolyse. Reserve 50g of the water. Add the rest to the levain and dissolve the levain completely. Add this liquid to all the flour and mix thoroughly until no dry ingredients remain. Rest for 45 minutes to 1 hour.

Second Mix/Bassinage. Dissolve the salt in the remaining water, then pour it over the dough. By now the garlic should be cool and soft. Squeeze out what you’ll need then dump it onto the top of the dough. Sprinkle the rosemary and cheese evenly over the dough. Using a squeezing action, work the ingredients into the dough until everything is fully incorporated and the ingredients are evenly distributed. Once the bassinage water is incorporated, add the olive oil.

Bulk Fermentation. 3 1/2 to 4 hours in a warm environment to maintain an 80ºF dough temperature. If you’re going to do an overnight final proof in the fridge, bulk fermentation will be done once the dough expands 25-30%. If doing a same-day bake, allow the dough to almost double.

Folding. Fold twice at 50-minute intervals. Since there is whole-grain flour in the dough along with bits of cheese and herbs, be gentle with your folding. It is absolutely crucial that you do not stretch to the point that you tear the dough!

Note that I used to instruct to fold the dough every 30 minutes ala Tartine. Because of all the cheese and rosemary in the dough, I now only recommend performing two stretch and fold sessions.

Divide and Pre-Shape. Divide the dough into two 900g pieces. Pre-shape into rounds and bench rest them for 15 minutes, or until the balls have sufficiently relaxed for shaping.

Shaping. Shape into rounds or ovals and place into appropriate baskets.

Final Fermentation. If you’re going to do a cold ferment, place your bannetons in the fridge for up to 24 hours (the longer the ferment, the more sour the dough). You could experiment with taking final fermentation out to 36 hours, but make sure to check the dough! For my fridge, 24 hours seems to work well and give me some nice sourness. If you’re doing a same-day bake, do the final proof in a warm environment for about an hour to an hour and a half. Poke test the loaves to make sure they are ready. That last time I baked these, it took almost two hours for the loaves to finish proofing.

Bake. Bake at 400ºF with steam for 20 minutes. Remove the steaming container, then bake for 30-35 minutes at 425º or until the crust becomes a deep, burnished brown. This is a gentle bake that will not burn the cheese or brown the garlic too much.