I know, I know, more philosophy. But I’ve shared almost all my recipes on here so I want to take some time to give back to the community and share my thoughts and whatever wisdom I’ve gained, especially for those who are new to making artisan bread. In particular, I want to discuss something that every experienced baker knows: There are no shortcuts in baking. If you want to bake great-looking and great-tasting bread, there are certain steps you have to follow. There’s no getting around them.
I’m bringing this up because I’ve gotten comments or been in discussions with people who don’t get this. They’d love to bake bread, but want things to be simplified. They want the process to be easier. And it’s not their fault. We live an a world where we have instantaneous information at our fingertips and readily available things. We’ve become accustomed to – and perhaps a little complacent in – being able to get many things done in our lives quickly. But arts and crafts; those things that we make from scratch require the development of skill and, let’s face it, lots of repetition.
Think about the words: Artisan bread. The operative word in that phrase is “artisan” which implies art or artistry. To do any kind of art requires development of skill. For instance, for a painter to get the right color and hue, they must understand how to mix paint colors to achieve it. “Blue” to a painter isn’t just a single color, even if the primary is a specific shade.
Likewise, in making bread, there are certain, specific ways a baker processes and works dough to create various kinds of bread. There’s no getting around those steps. Also, there’s no getting around the time it takes to execute those steps. Experienced bakers learn the processes and inherently know that they must follow those procedures if they are going to be successful. It’s like the painter mixing colors. There’s a prescribed way of doing things. Detract from that and the desired effect, or loaf in the case of bread, won’t turn out as expected.
So, especially for folks who are new to baking artisan bread, I realize that it can be a little overwhelming at first. There are usually lots of steps in making any kind of bread. But as I said, there are no shortcuts. Slow down. Put on your patience hat and as I’ve mentioned in previous posts, trust in the process. After a while, all those steps will become second nature. You won’t even think about them. You’ll just do them.
If you follow baking blogs or participate in online baking forums, you’ve probably heard this: The stiffer – lower hydration – the starter the sourer the taste. The thinking is that a stiffer starter promotes aerobic metabolism, thus creating more acetic acid, while a more liquid starter promotes anerobic metabolism which favors the creation of lactic acid. The difference is that acetic acid tastes more sour than lactic acid.
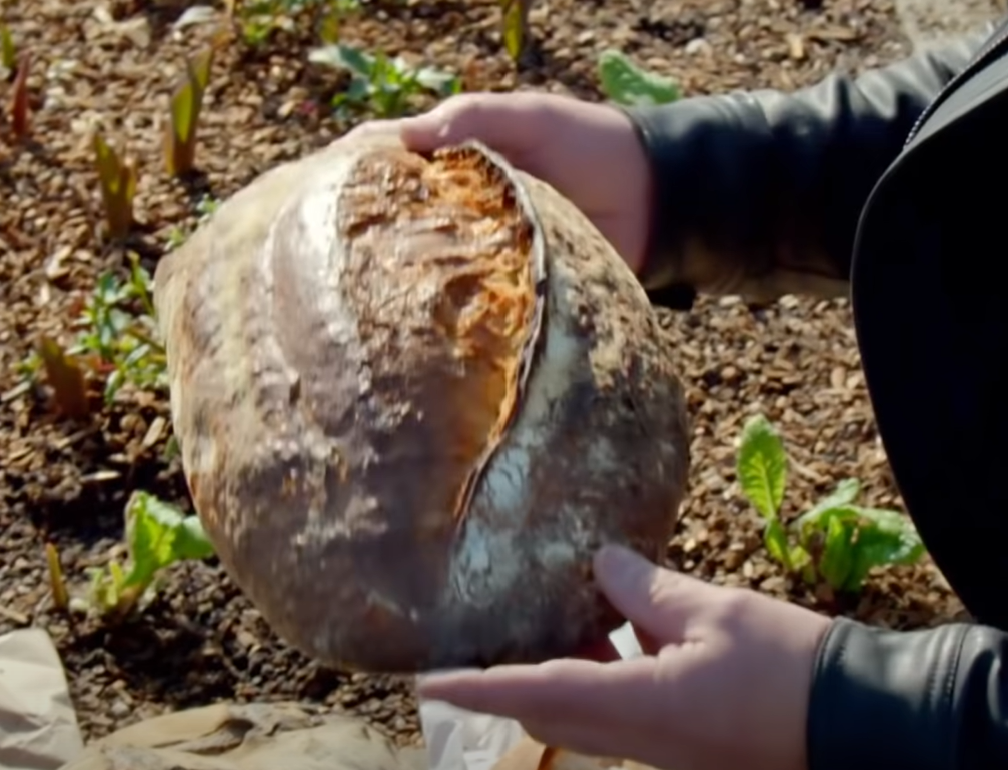
That’s all well and good. But as with so many things in making sourdough, there are several variables that can affect the sourness of your bread. For instance, with the loaf at the top, I used a 100% hydration starter to ferment the bread. It was 20% inoculation relative to the flour (BTW, I hate using that word with respect to bread because it has a specific scientific meaning). But at that hydration level, the yeast density was low, and it took 24 hours for final fermentation in my fridge. That loaf was nice and tart!
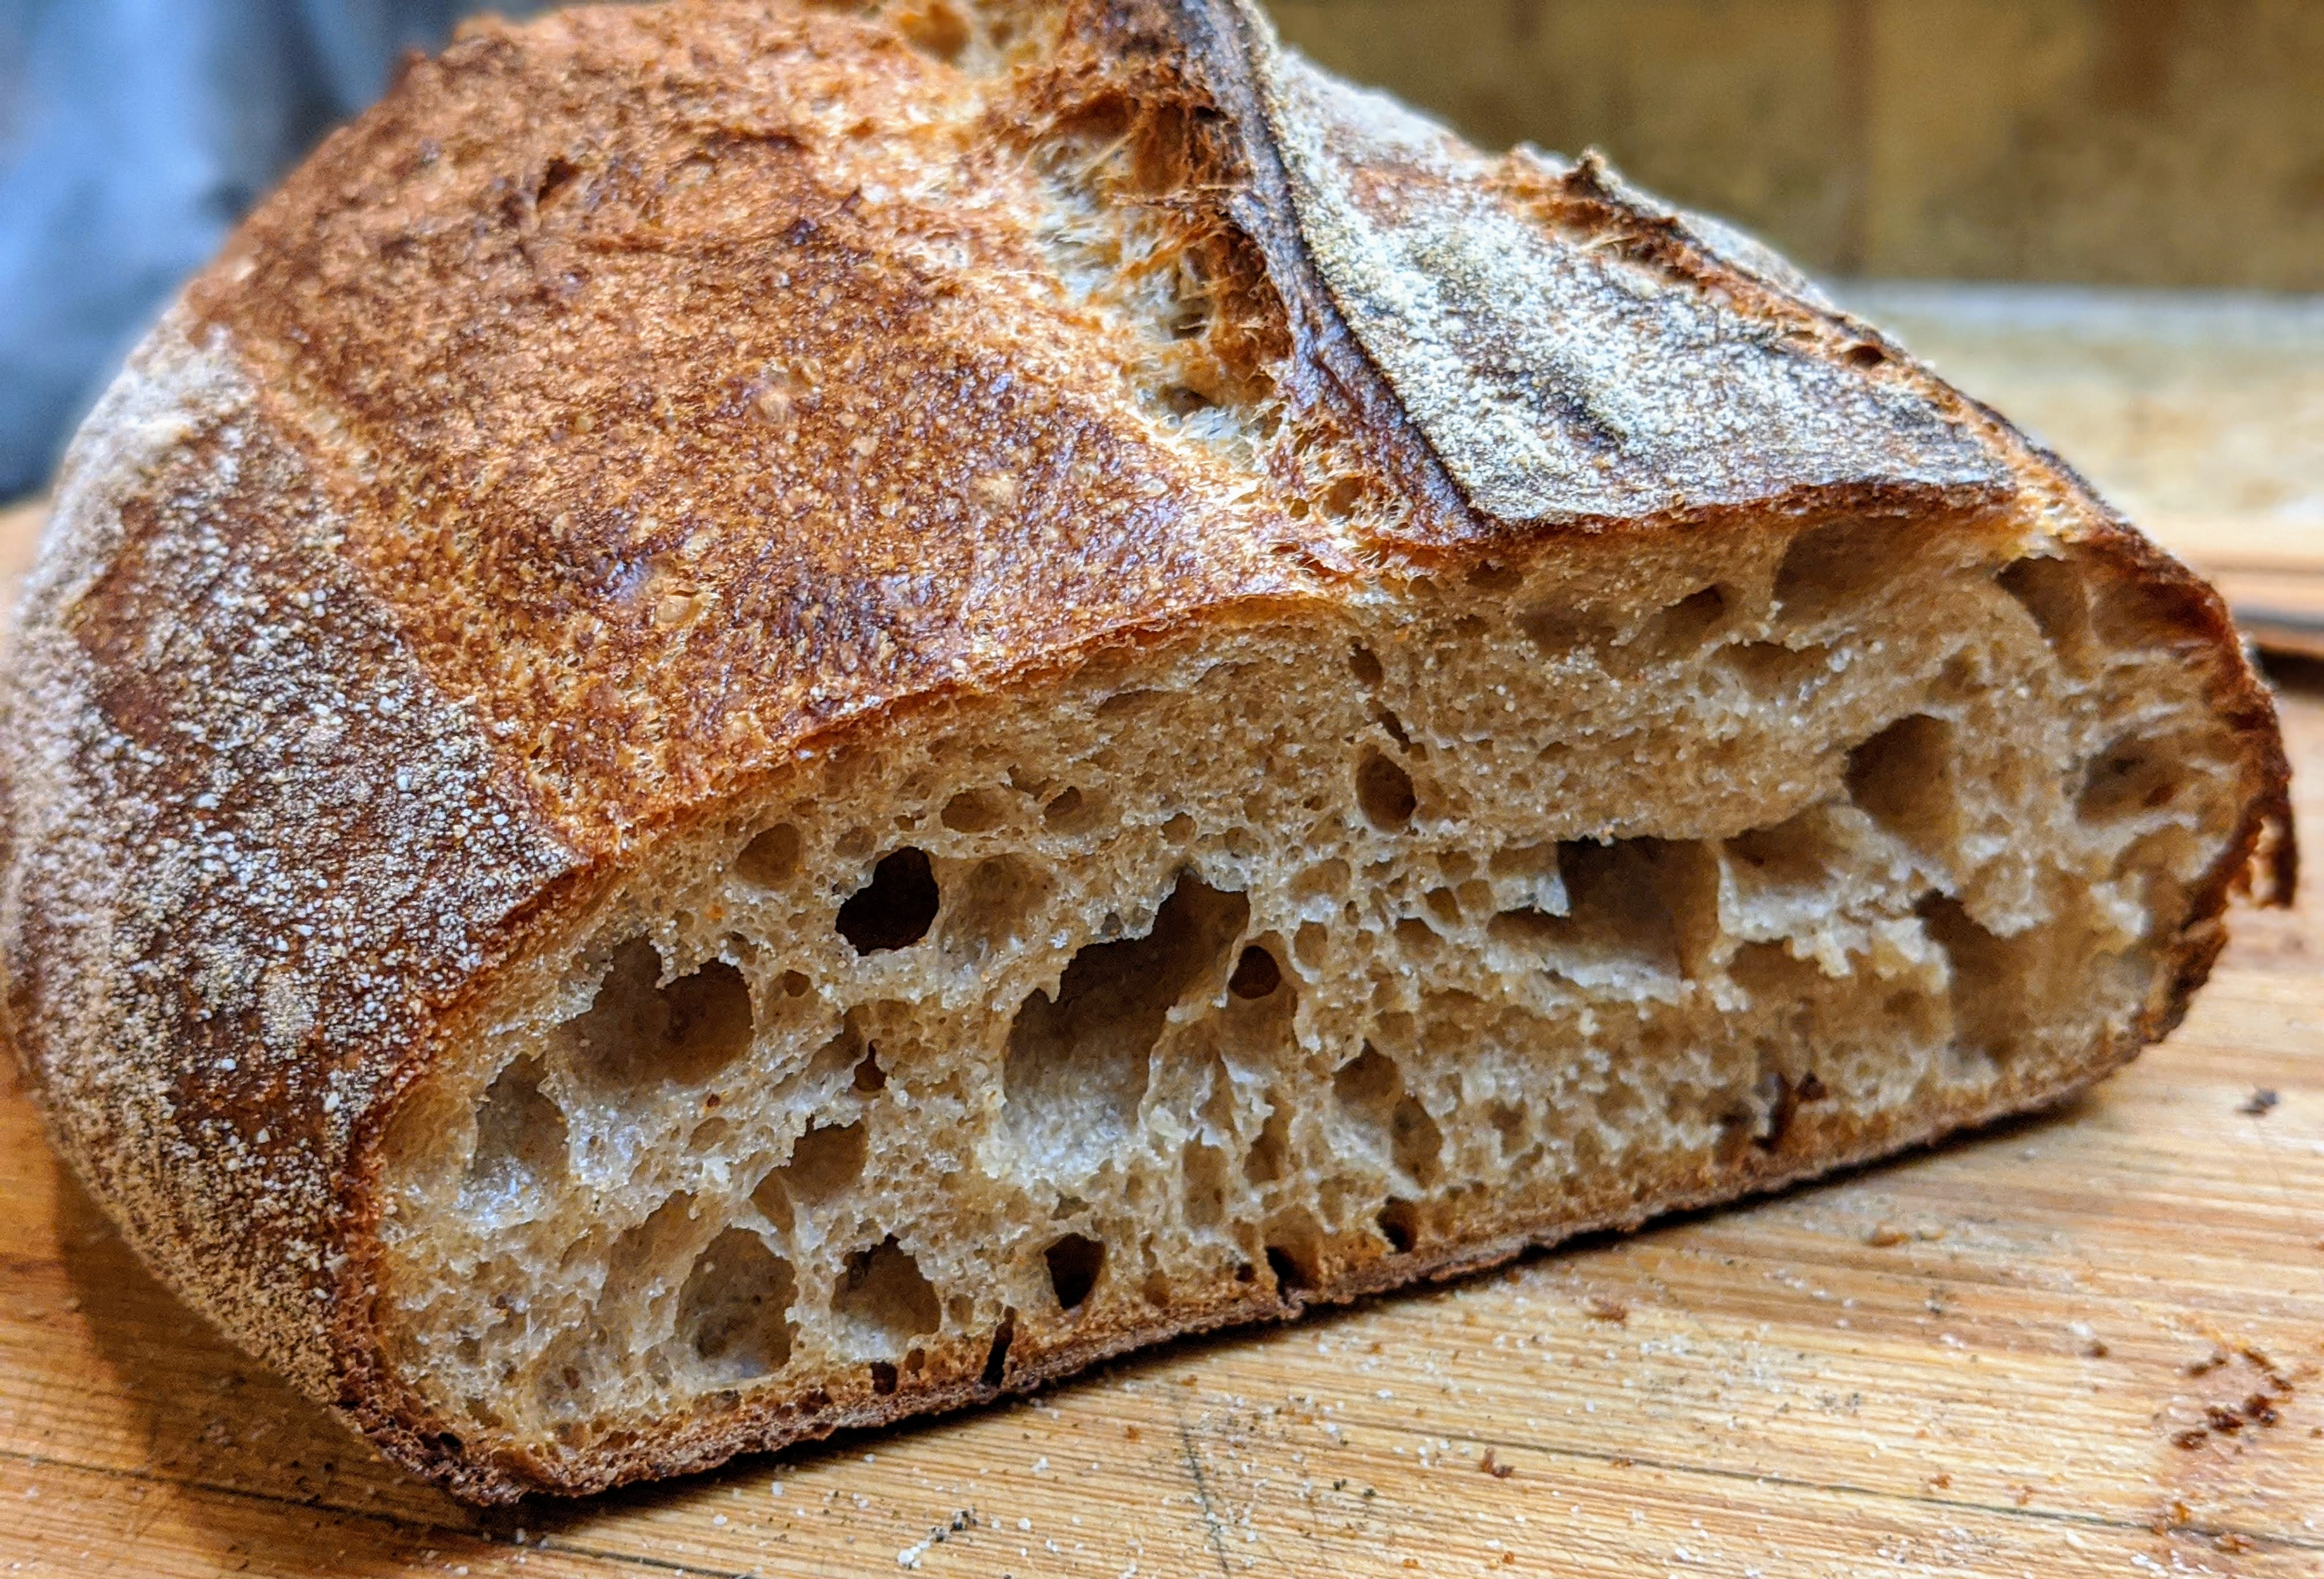
On the other hand, with the loaves immediately above, I used a 60% hydration starter, with the same inoculation level of 20%. But the yeast density was so much greater than the liquid starter, that final fermentation was barely 10 hours and I was pushing it, which accounts for the less open crumb. It hardly has any sour taste.
Myself, I’ve never bought into that rule of thumb that a stiffer starter will make a more a sour tasting loaf of bread. I’m quite familiar with the food science behind that and agree that aerobic metabolism promotes the production of acetic acid which will be perceived as more sour. But baking as long and as much I have, the best way I know that making a sour loaf involves a lot more than just the starter. The stiff starter gives you a head start as it favors the production of acetic acid. But other factors such as the environment, fermentation time, type of flour, and amount of starter also affect sourness.
As far as a long, cold fermentation is concerned, while yeast metabolizes, it creates inhibitors that block bacterial activity, effectively mitigating or eliminating competition. So, using a lower inoculation level will ensure a lower relative yeast density and will help mitigate fungal activity, and in turn, allow the bacteria to flourish during bulk fermentation. Then when bulk fermentation is complete, doing a cold fermentation of around 38℉ (and no higher than 40℉) will slow down yeast activity even further and let the bacteria continue do their thing. These principles apply to using all sorts of starters, from pure liquid fruit-based starters to high hydration starters, to super-stiff starters. So, at least for me, the type of starter isn’t as relevant as the dough fermentation techniques I employ.
That said, I could be completely full of it, and there are folks who will disagree with me vehemently. I get that. But for me, it’s time and technique that will dictate how sour my bread is, not my starter.
The other day, I got a shipment of my favorite flour, Azure Market Organics Unbleached Bread Flour. I’ve written about it several times, so I won’t go into detail about it. But if you’ve read this blog, you know I love this flour! It’s so flavorful and wonderful to work with, but until recently, it was out of stock at Azure. They finally got it back in stock and I immediately ordered it. I feel like a kid in a candy store!
I’m excited because this flour has been integral to my flour blends, and with it unavailable, I’ve had to use alternatives. That hasn’t been too much of an issue, but any time you change things up, you need to adjust to the change, and sometimes it takes a few times to get comparable results to what you’re used to, as you tweak hydration, preferment amount, fermentation times, etc. But baking with this flour? It’s like putting on a pair of broken-in shoes. It’s just comfortable, which in turn makes my dough development process comfortable and familiar.
And I’ve realized that a very large part of my progression as a baker has been getting familiar with my ingredients. When you’re used to working with different ingredients, you just know how they’ll react and you can execute your process without having to apply too much conscious thought. Things just become automatic.
I once got in a great conversation with a professional chef. He said that the fundamental difference between him and a home chef is that he knows his ingredients so well that he doesn’t have to think about what he’s cooking. He can just focus entirely on creating his dishes. But more importantly, he said he gets the reps in that build that familiarity. It’s the same way with baking. When you’ve put in the reps, you just know, and as they say, when you know, you know.
As soon as I got my flour, I made the dough for the loaf above. With that loaf, I used a 500% hydration starter (yes you read that right) to ferment a 75-25 Bread/AP flour blend. Final hydration was around 75%. That’s just a basic loaf. But this was a bit of a challenge because I couldn’t do as long a bulk fermentation as I normally do because of time constraints. But knowing this blend and recipe so well, I knew that I could make up for it by doing an extra-long final fermentation. So, this loaf spent about 18 hours in my fridge.
When I checked it baking through my oven’s window, I just smiled and gave a sigh of pure satisfaction. I just nodded and said, “Mm-mm-mm, how sweet it is!” Then when I removed it from the oven, I was giddy. I saw how much the loaf had expanded, and I knew it was going to turn out great. Yes, it has a nice, open crumb, but more importantly, the dough was fully fermented and in no place was dense. So satisfying…
Like many other bloggers, I often talk about experimenting with different ingredients. I think that’s part of the process of developing skill. And while experimentation is great, getting reps in and learning what ingredients work best for you is just as important.
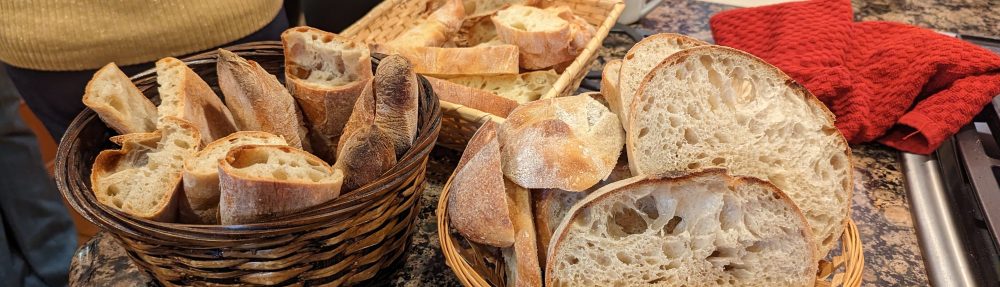
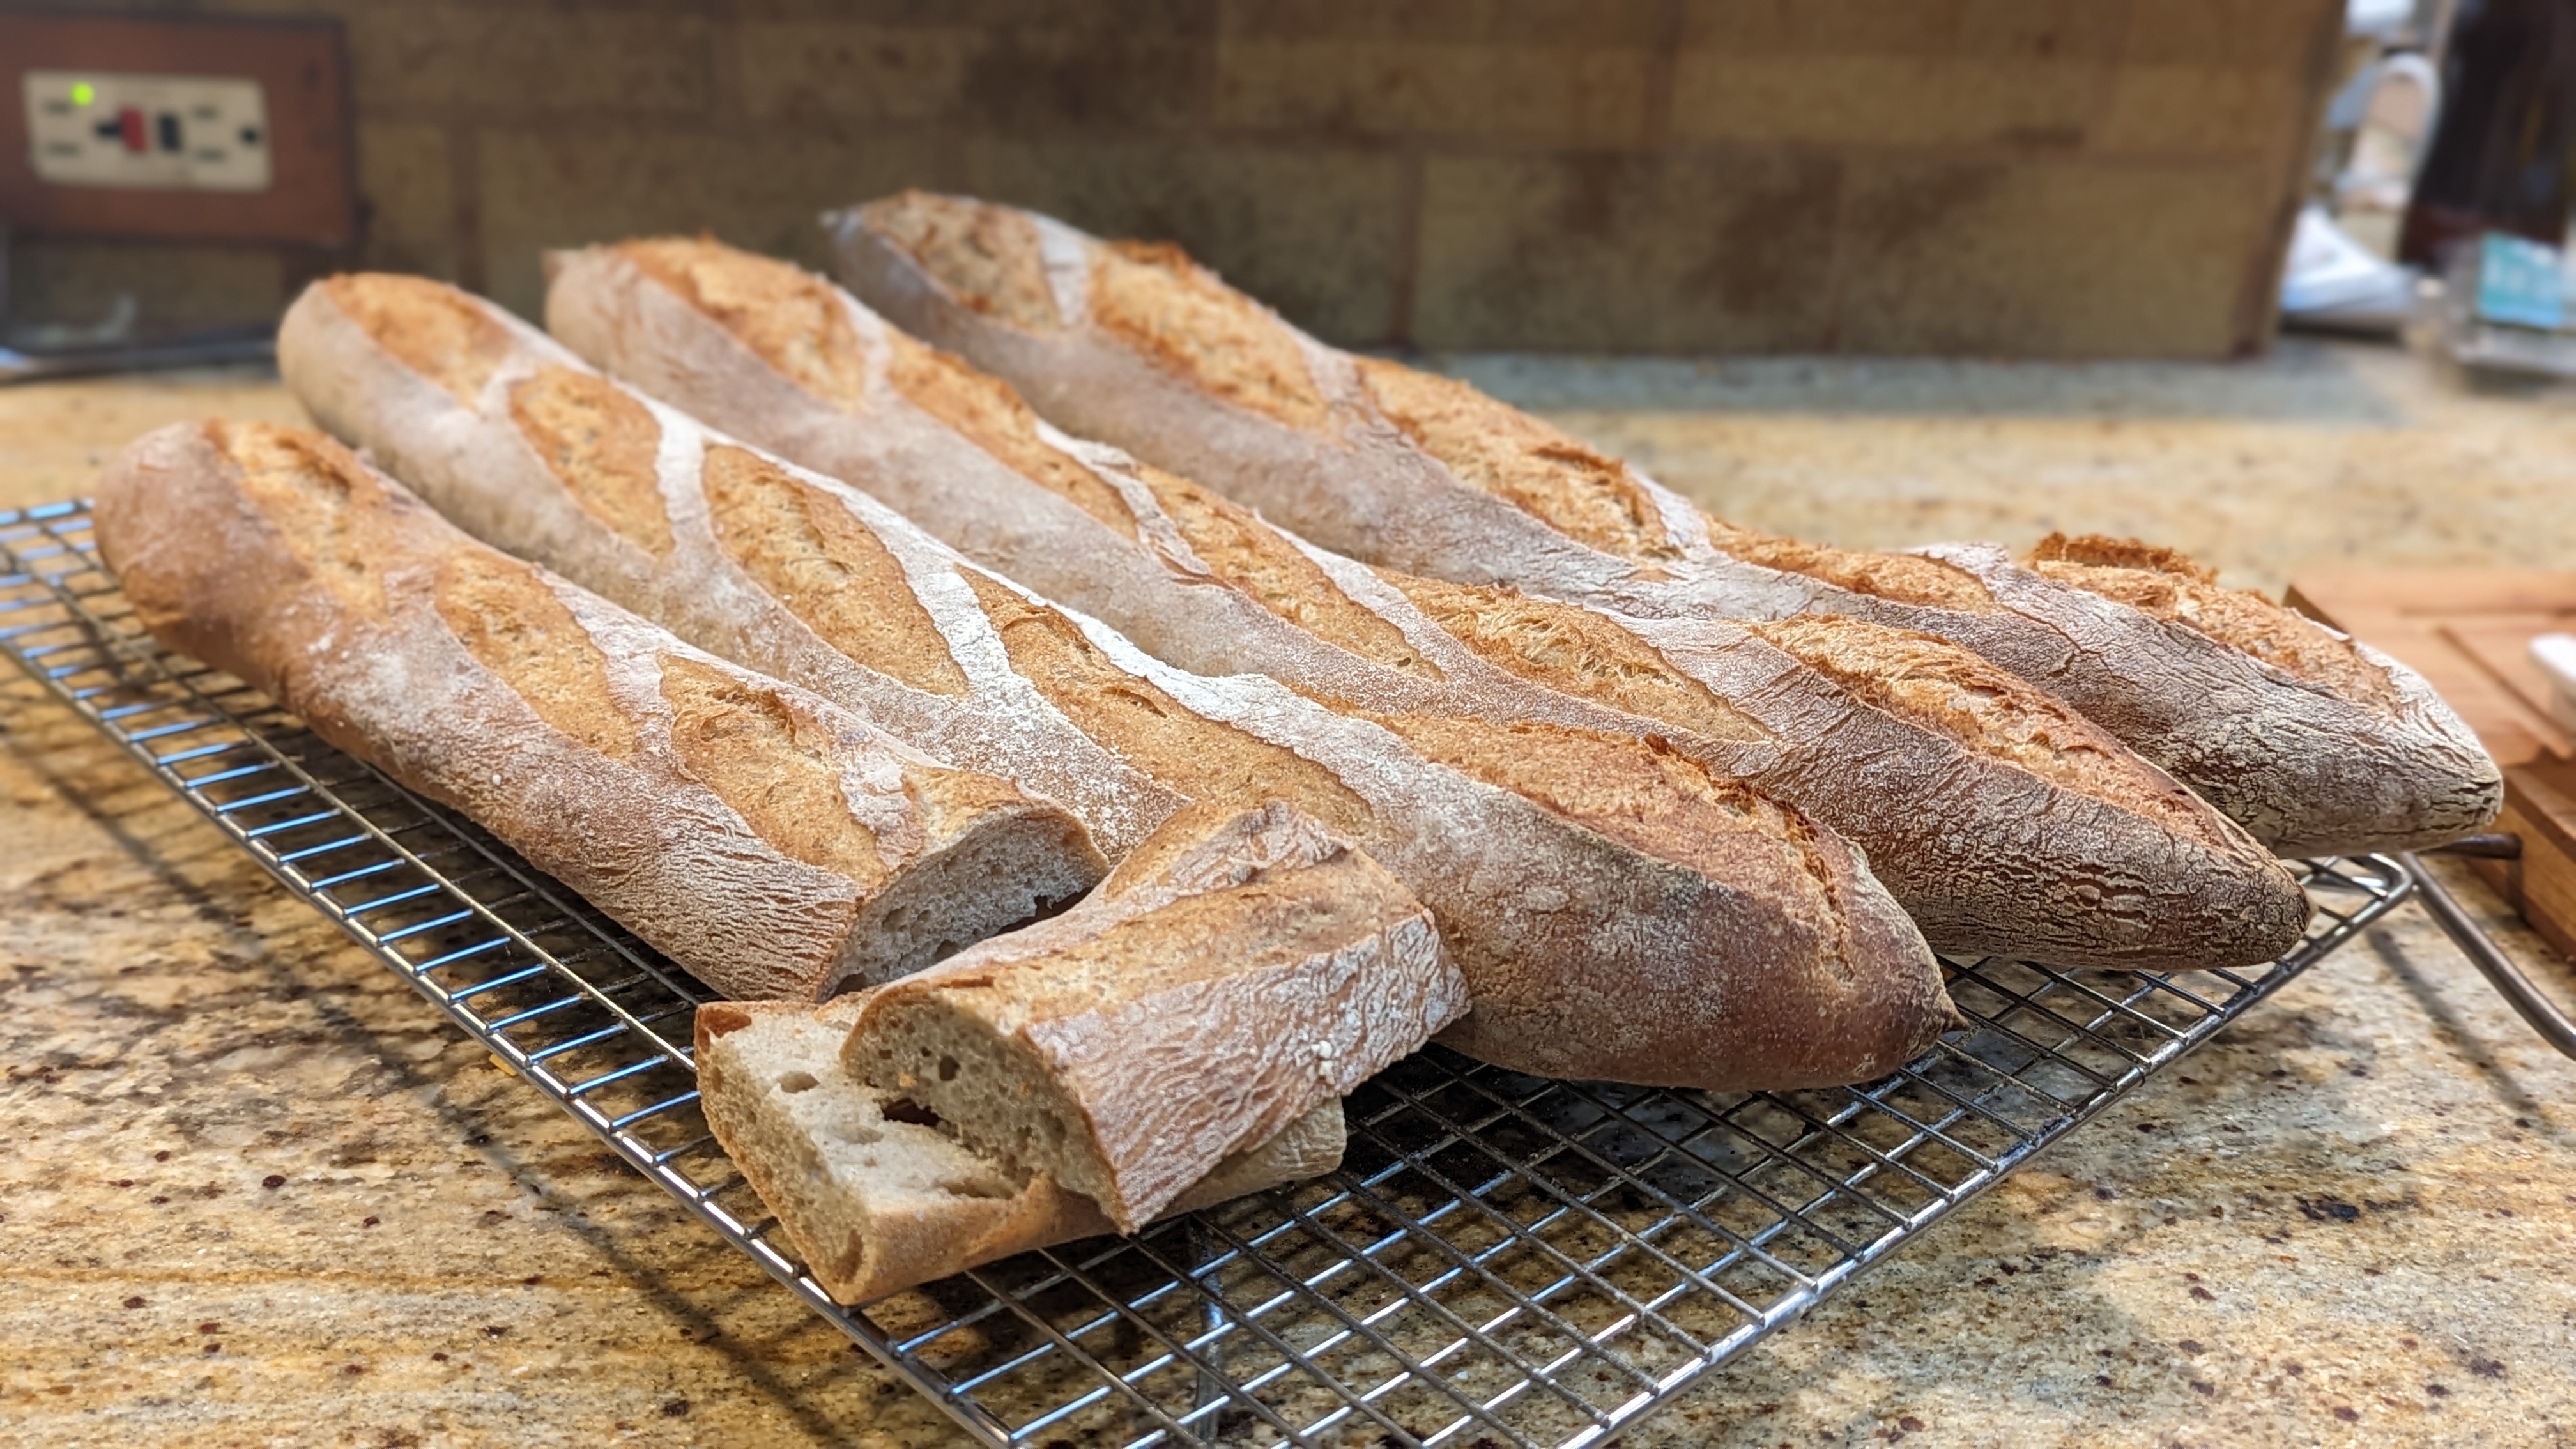
…than pulling baguettes out of the oven, picking one up, and immediately noticing that it weighs far less than how it looks. That goes for any bread, but for baguettes, it’s a crucial quality because it’s an indicator that the loaves had great oven spring which, in turn, means that the crumb will be light and airy.
I baked the loaves in the picture above yesterday. For those, I used a rye poolish, with the flour of the rye accounting for 25% of the total flour. I knew that even with 25%, the bran in the dark rye flour that I use can cut up gluten strands. But I handled the dough much more gently, making sure I didn’t tear it, and only folded it once as the bread flour I use has over 14% protein – gluten forms up fast.
I still took a hit on the overall openness of the crumb, but the crumb still came out light despite the lack of numerous large holes. I knew when I pulled them out just by looking at them, that they had sprung up quite a bit. And though I didn’t expect a super-open crumb due to the whole-grain rye, with that kind of volume expansion, I didn’t have to worry about the crumb being dense and chewy.
Then picking that first one up… I just smiled in satisfaction. It was a good bake.
Of course, if you don’t get those right then you’ll never be able to achieve an ear. But I don’t want to get ahead of myself…
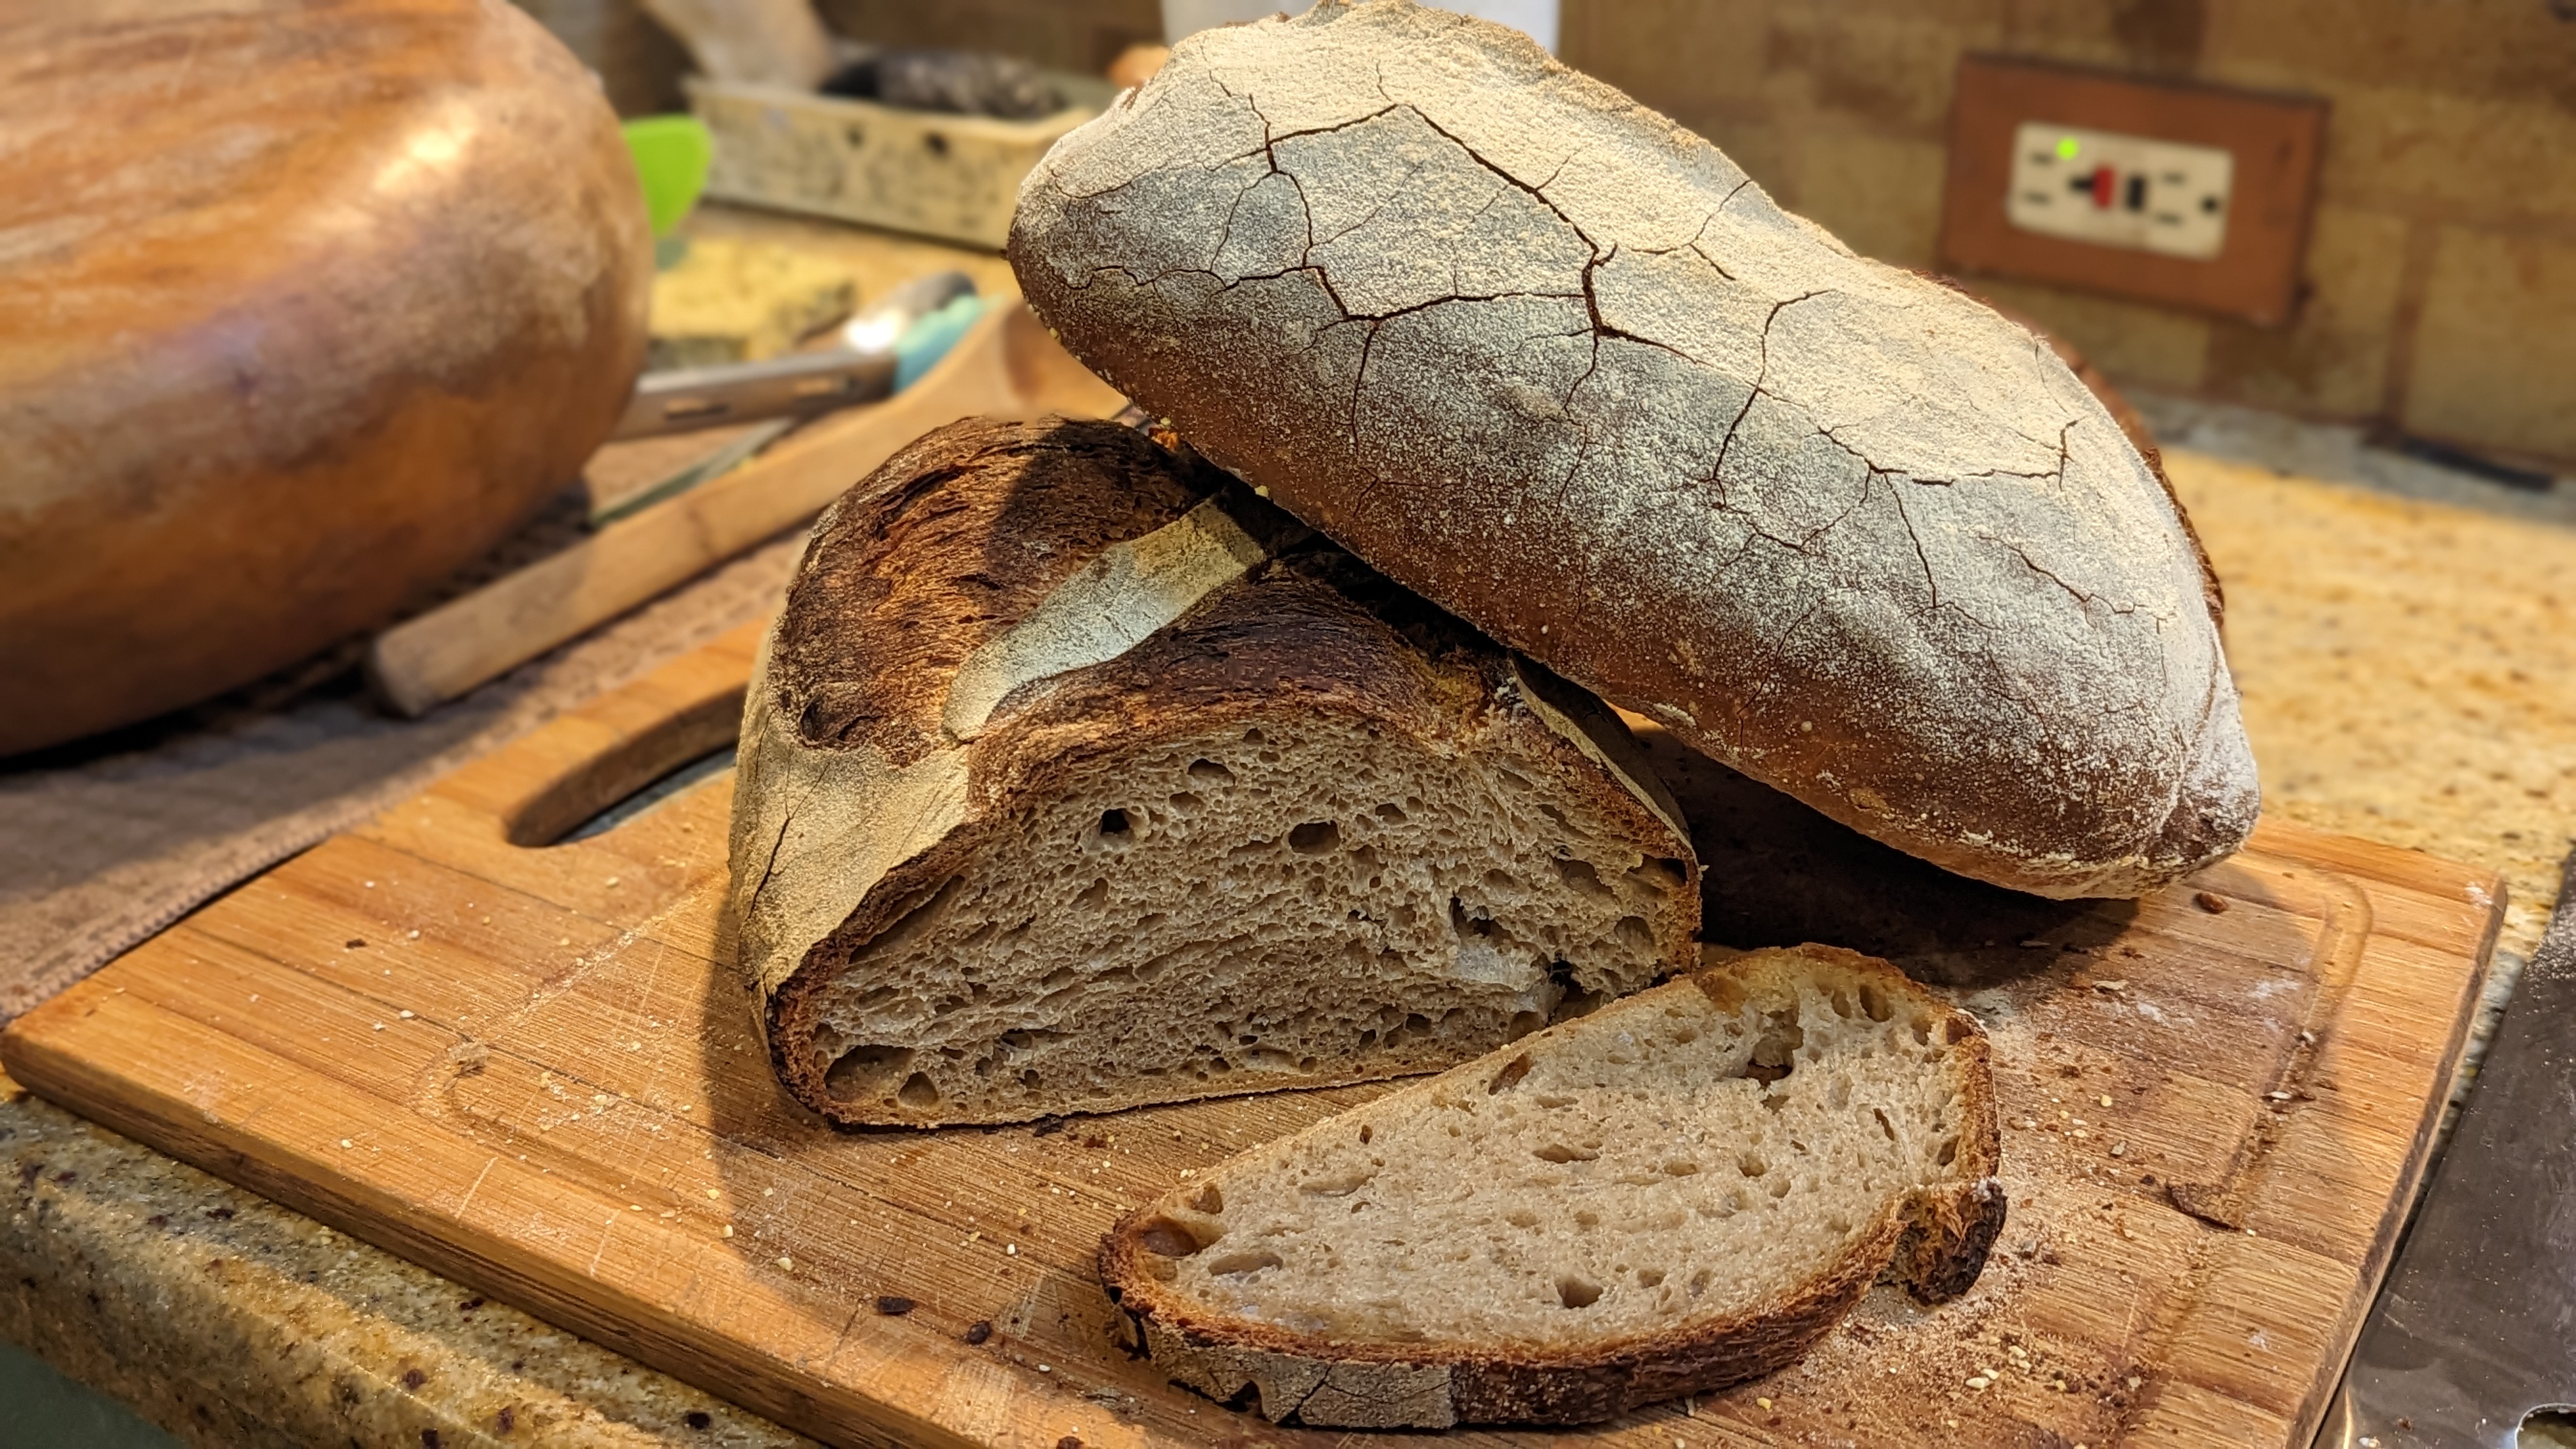
The pictures of the loaves above and the one below were made using the exact same formula (85%/15% Bread/Rye flour, 75% hydration, 2% salt), processed and fermented in the same way, and shaped using the exact same technique. They are all 1-kilo loaves. The crumb of the loaves in all three pictures looks similar to the picture below. They are all moderately open with a complete rise throughout the interior. They were also scored using the same lame and same scoring technique.
But as you can see in the top-right picture above, my loaves didn’t form ears. Most people would immediately say that I needed to create more skin tension. Sorry, that’s not it. Others would say I didn’t let the loaves ferment long enough. Sorry, that’s not it either. Still, others would say that I didn’t have enough steam, and the crust hardened before it could form an ear. Nope. So what’s the answer?
The loaves in the top picture were made from the same batch of dough, but the loaf on the left was part of a batch that was baked after the two on the right. What happened was that my stone had not come to temp, thus the ambient temperature was higher than that of my stone. As a result, the bottoms of the loaves did not expand as fast as the rest, and the exposed surfaces literally ballooned during baking, destroying any chance of forming an ear.
What also led me to this conclusion was that since the bottoms of the loaves were not as hot as the rest of the loaves, the yeast activity took longer to come to a close on the bottoms of the loaves. As a result, the exposed crusts set before the bottoms were done and one of the loaves literally sprung a leak as dough burst through a crack in the crust! Now THAT was funny!
When I removed the loaves from the oven, I laughed out loud because the loaves were HUGE and as I mentioned above, one of the loaves had leaked and a rather large protrusion was sticking out the back! On the other hand, the loaf at the top-left and the other in its batch came out as expected because my stone had come up to temp by then. Ugh! So I’ve learned my lesson and have an infrared thermometer on its way to me so I can ensure that my stone has come to temp.
The point of this is that as with other things I’ve written about in the past, there are several variables that will affect the outcome of a bake. Even in a commercial bakery, though conditions tend to be much more consistent than in a home kitchen, there’s variability in the environment. So you have to take the time to know your environment so you can achieve consistent results from bake to bake.
This is why I get a little irritated at some YouTubers who entitle their videos, “The Last _________ Recipe You’ll Ever Need,” or some nonsense like that. Though there are helpful tips in those videos, the vloggers invariably fail to mention their kitchen conditions and talk about how to deal with variances. For instance, baking bread on a hot day versus a cold day in a home kitchen, or failing to mention what their optimal dough temperature is!
Look, I realize that processing and shaping dough is challenging, and mastering just those things are probably the first things you need to accomplish to become proficient in bread baking. But as you get deeper and deeper into it, you realize things like temperature, or in my case, the stone equalizing with the oven affects the dough and the outcome of the bake.
As for developing an ear, I hate to break it to you, but that is NOT a sign of mastery. It is a sign that your loaf expanded, but don’t think that just because your loaf didn’t form an ear, you somehow failed. There are lots of gatekeepers in the home-baking world, especially in sourdough circles who believe that these things are important. They’re not.
But here are some rules of thumb that you can follow:
You don’t have to make a super-deep cut into your loaf when scoring. It’s more important that you maintain a shallow angle with your lame. For the loaves above, my cuts were about 1/2″ deep.
Also, understand that the purpose of scoring is NOT to make an ear. The purpose of scoring is to control where the loaf expands. Otherwise, your loaf will expand unevenly.
Make sure your dough is fully fermented. And no, it’s not just bulk fermentation. Yes, you want a thorough bulk fermentation, but you have to make sure there’s food left for the yeast for final fermentation. This is why Chad Robertson only takes his loaves out to about 30%-50% volume expansion in bulk fermentation. With his long, cold, final fermentation, he needs to make sure there’s food left for the little beasties.
Of course, shaping is absolutely critical. But you don’t have to get super-tight skin to get an ear. And though others may stress the importance of tight skin, the purpose of shaping is to orient the gluten strands.
Speaking of orienting the gluten strands, in order to orient them in the first place, you need to build strength in the dough but make no mistake, depending on the flour, the amount you stretch and fold will vary wildly. I use bread flour that is very high in gluten content (>13.5). Though I usually cut it with some other kind of flour, if I bake with it as the only flour, my dough only takes two stretches and folds before it has built up strength. On the other hand, if I use pastry flour that is made from soft red wheat, I have to do 4-6 stretch and fold sessions before it has built up strength. The point of this is that you should never overdo your folding. Fold until the dough can hold its shape for a while before it relaxes. Then leave it alone!
Finally, especially if you’re using a baking stone or steel, make sure your surface is equalized with the ambient temp of your oven. This is much less of an issue if you’re using a Dutch oven, but even when using a Dutch oven, you need to preheat it. That said, I saw a video where Chad Robertson was giving a master class and was using several Dutch ovens. He was popping them in the oven cold! But he was using a commercial convection oven to bake, so it’s likely the Dutch ovens came up to temp pretty fast.
The very first bread recipe I ever learned was a whole-wheat sourdough recipe made from an offshoot of an original San Francisco sourdough starter that I got from the TA of my freshman Microbiology class in college over 40 years ago. Along with the starter, he included a recipe. And while the recipe had times listed, he stressed to all of us who got the starter that the times he listed were only approximate and he gave us telltales as to when to move on to the next phase. That was the only bread recipe I used for many years and I got pretty good at recognizing and feeling what was happening with the dough.
You see – and I know this sounds a little strange – the dough will speak to you if you’ll only listen. Unfortunately, so many folks, especially newbies to baking bread, follow recipes literally. If a recipe says to fold the dough 6 times over three hours, they’ll do it. If it says bulk fermentation will two hours, they’ll start pre-shaping it at two hours. In either of these cases, under the right circumstances, they’ll produce nice loaves. But then they’ll scratch their heads wondering why their next batches didn’t turn out the same.
As Jonathan of Proof Bread said in one of his videos, “…the dough will let you know what’s going on with it.” And it’s true. The dough will indeed let you know, but in a way, you kind of have to know its language. Luckily, its language is limited to a few words. I’m going to put a humorous spin on it.
“Look, I’m strong enough already…”
Of course, we’re talking about dough strength and gluten development here. When you’re folding your dough, or even using a mixer, your dough will tell you when it has had enough. Even with high-hydration dough, you’ll start feeling a bit of resistance from the dough; where you no longer can stretch it to the extent that you were able to a couple of sessions ago. A good telltale is how long the dough takes to relax and hit the sides of your container. If it’s a fairly slow rate and the mass generally holds its shape – like minutes – chances are it’s strong enough. You’ve built enough strength into the dough so now let bulk fermentation finish.
But what about all those recipes like the Tartine Country Loaf and its various spin-offs that say to fold the dough six times over three hours? Well, just as with rising times, how much or how little you fold your dough to build strength is dependent on a lot of different factors. That said, probably the most important factor is the flour or flour blend you use as water absorption properties vary from flour to flour, which in turn affect both the rate and the quality of gluten formation. For instance, with the flour blends I use, I’ve never done the full six folds when following the Tartine process – even if I take hydration over 80%! My flour forms gluten pretty quickly and my folding builds strength quickly.
As I write this, I’m baking two 1-kilo loaves of 75% Bob’s Red Mill Artisan Bread Flour / 25% Azure Standard Dark Rye Flour hydrated at about 81%. The bread flour forms up gluten so efficiently that even at this high hydration, I only had to fold the dough twice last night! If I used my normal Azure Standard High Extraction flour, I’d have to fold it at least 4 times as it is not nearly as good at forming gluten due to the bran particulates in the flour even though it has almost 15% protein content. See what I’m getting at?
“Feed me! Feed me!”
Let’s make one thing really clear: Your starter is part of your dough. In fact, it’s the first part of your dough. Lots of books and articles have been written about feeding your sourdough starter, but I thought I’d take a different tack on the subject and demystify it a bit. No, I’m not going to suggest a different feeding method or schedule, but bear in mind that your starter will speak to you as well and if you’re listening, you may very well change your schedule.
One of the things I often hear people talk about is the lack of activity in their starter, and I see many comments similar to this: “I’m not sure what’s happening with my starter. It’s not very active and I’ve been feeding it every 12 hours!”
There are three main factors that affect activity in a starter (not in any particular order): 1) The density of the yeast in the starter matrix, 2) The amount of acidity in your starter, and 3) the ambient temperature. You can directly affect temperature. but you have to do a bit of finagling of the starter to affect items 1) and 2), and that is through feeding.
Generally, what you hear with regards to feeding your starter is you do it to get it active enough to use for baking. But as with dough strength, you can’t be a fundamentalist about the schedule. For instance, many starter instructions say to feed your starter every twelve hours, and people will do it religiously and then wonder why their starter never bubbles up much. The probable cause for this is that the starter’s not ready to be fed and instead of increasing the density of the yeast in the starter, they’re actually decreasing it.
The starter will tell you when it’s ready to be fed. Look for telltales such as doubling in volume (usually the peak), or if there is a noticeable “ring” around the top of the starter where the starter has peaked and then receded. Or if you’re using a fairly liquid starter, look for a proliferation of bubbles on the top surface. This is the starter telling you it’s ready to be fed.
On Discarding… A question that often gets asked is why we discard half the starter when feeding. Most people answer that we do this because if we kept on adding more and more flour and water, the sheer amount of starter we’d produce would be unmanageable. That is true, but there’s a bit more going on than just that simple explanation. In fact, two very important things are accomplished with feeding: 1) We reduce the acidity in the starter, as acid is a yeast inhibitor, and 2) We reduce competition from other microbes to allow the yeast to flourish.
Yeast exists to eat sugar and multiply. And its ability to do that requires fairly ideal conditions. Its environment can’t be too acidic, which is the other microbes’ way of keeping the yeast from taking over. And it has to have reliable and abundant access to fuel. By discarding, then adding fresh flour and water, we are providing fresh food, but also reducing the acidity in the starter and we’re creating a more favorable environment for the yeast to flourish. When yeast is able to operate optimally, it releases inhibitors of its own, thus becoming the dominant organism in the starter.
We want yeast to be the dominant organism for bulk fermentation. But for final fermentation, we want the other organisms, specifically the lactobacillus bacteria to be dominant. That is why pop our shaped loaves into the fridge to attenuate the yeast activity and allow the bacteria to hold sway. Cool stuff!
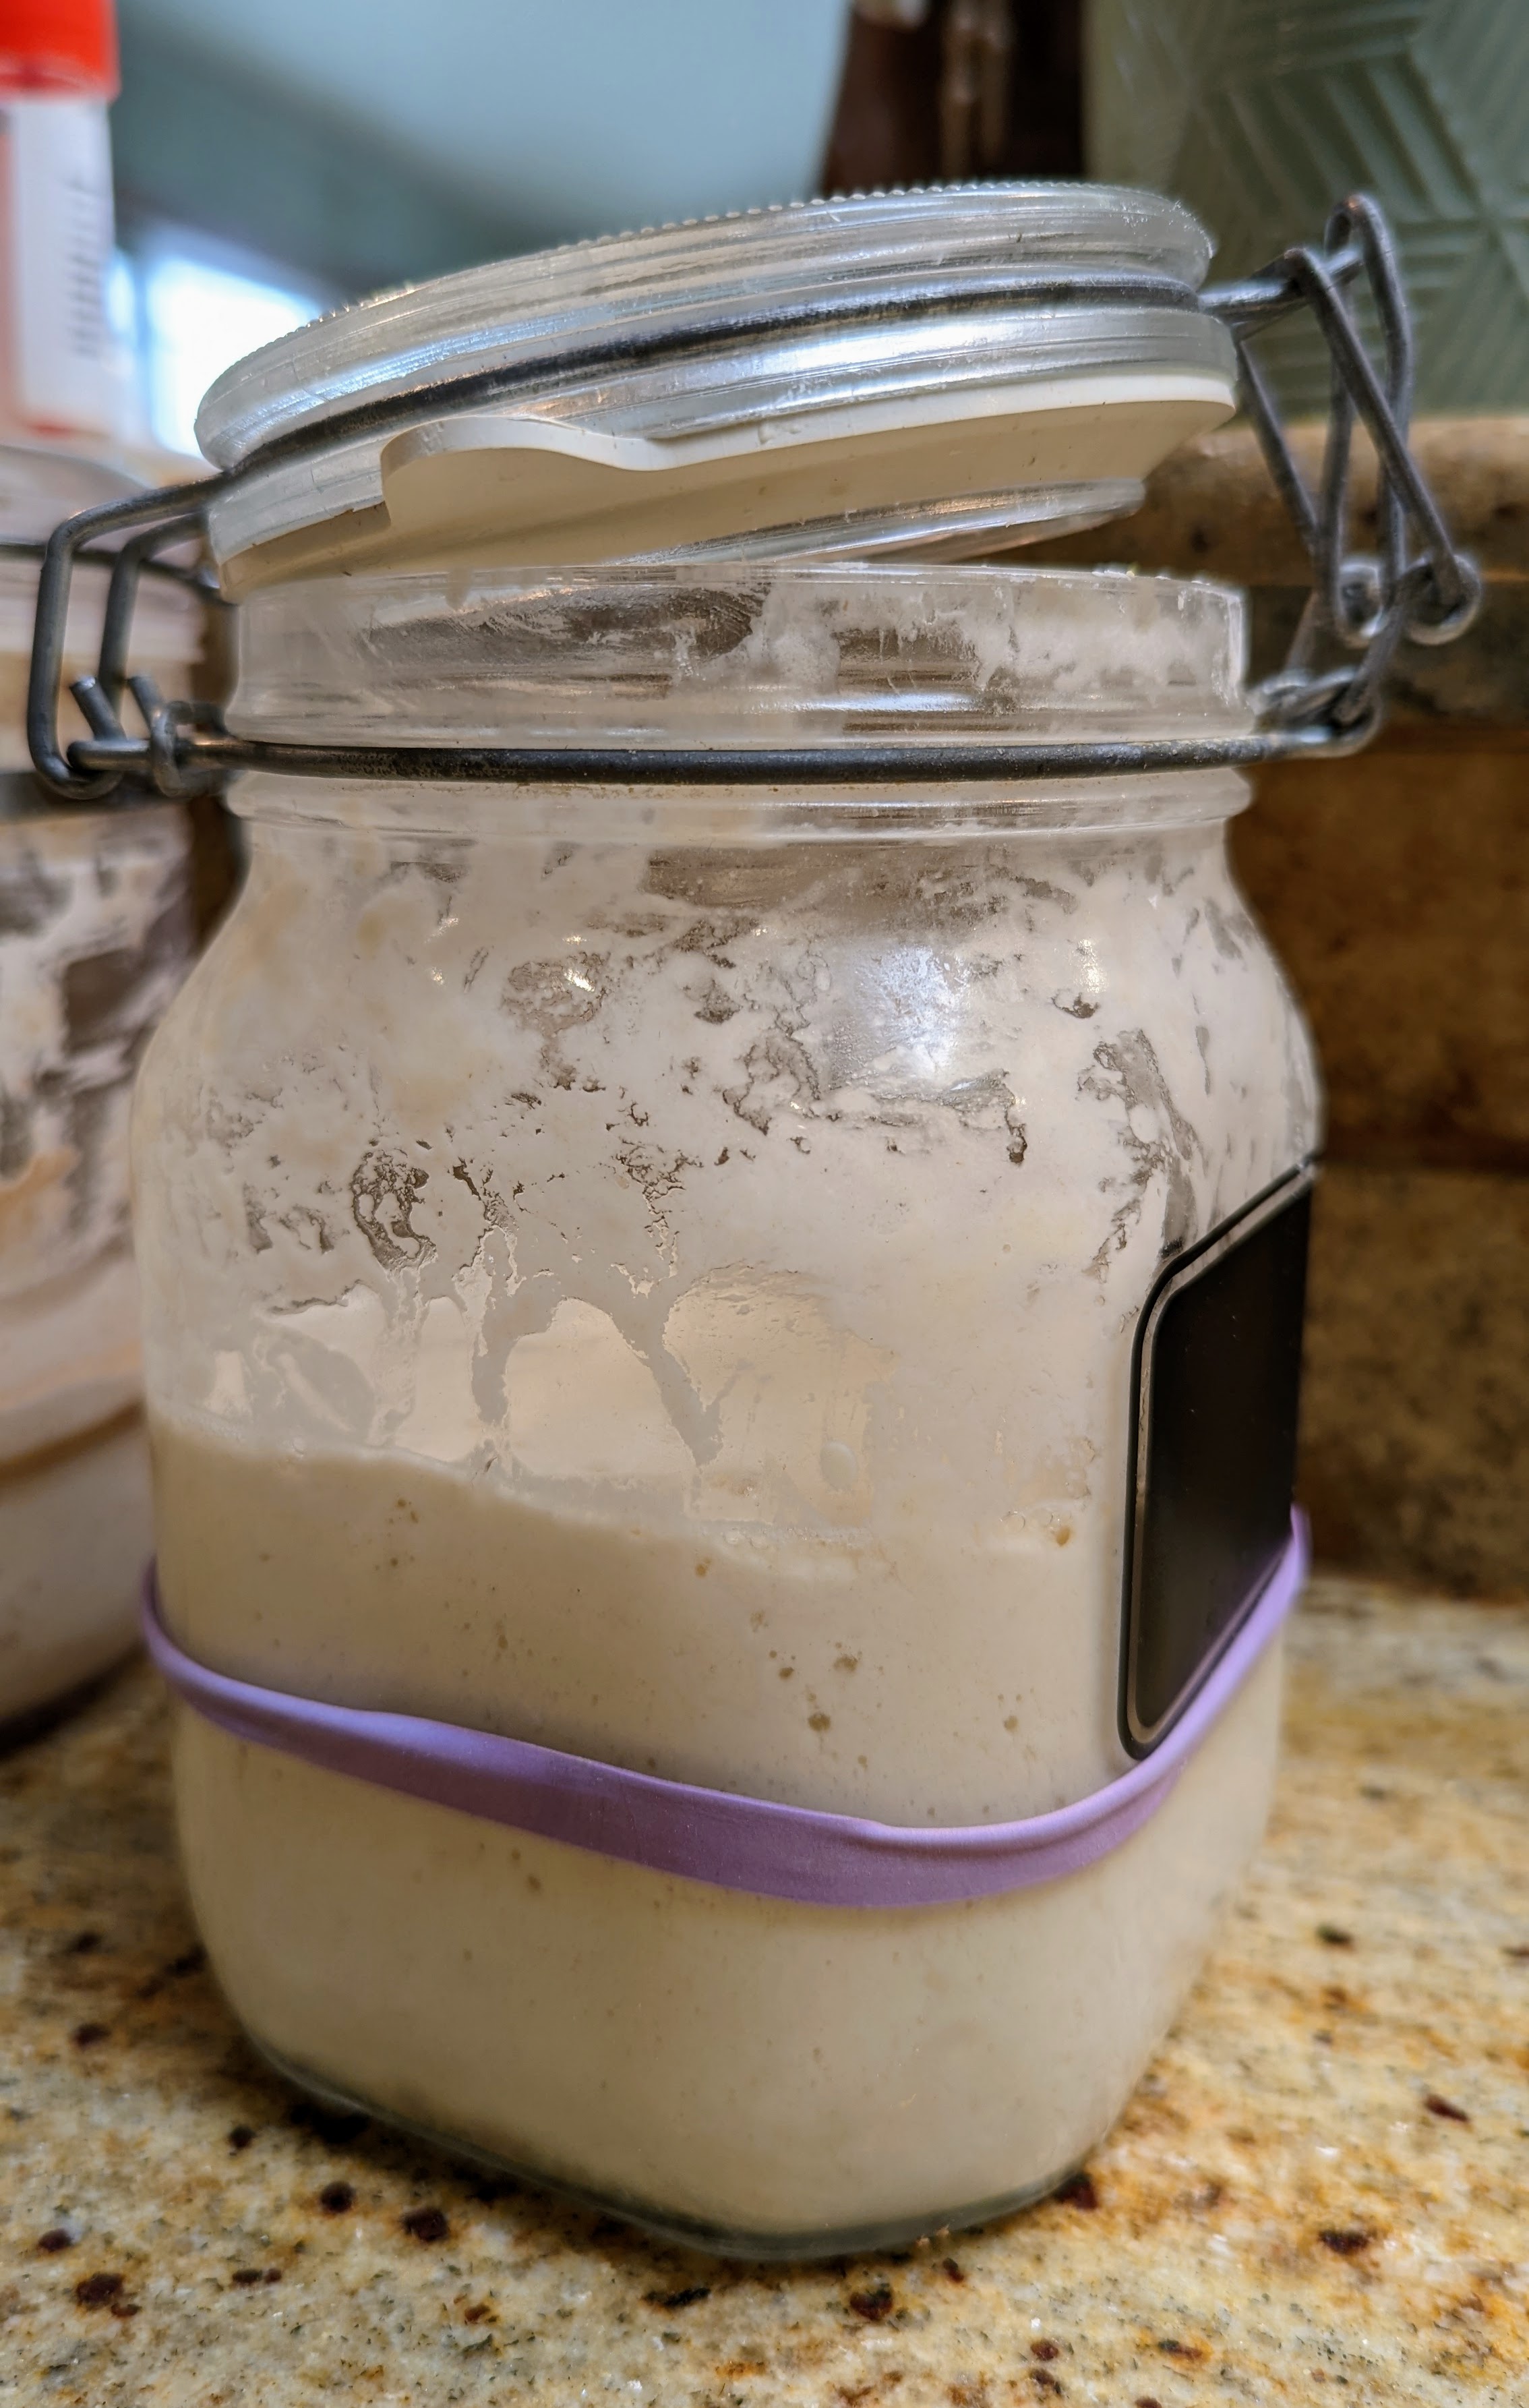
Activity 24 hours after activation of the Giza starter from Sourdoughs International.
Yeast: “You’re on MY time…”
I recently ordered a couple of different starters from Sourdoughs International and yesterday (9/17/2022), I finally got the time to activate their Giza starter that was propagated from yeast captured from an ancient bakery unearthed at the foot of the Great Pyramid. This was part of a National Geographic project. Check out the link to find out more about the starter.
Anyway, I activated it yesterday and went to feed it this morning after letting it sit in a warm environment for 24 hours. To my utter amazement, the starter was not just bubbly, but even a bit frothy! That was totally unexpected. Before I activated the starter, I made sure to completely sterilize my container to ensure that the microbes in the starter were the predominant organisms. Well apparently, they’re not only the dominant organisms, they’re incredibly active! Then about an hour after discarding and feeding the starter, I noticed how much it was expanding. At this rate, I think it will peak after just four hours!
The activation instructions mentioned that I shouldn’t expect much activity after 24 hours and the starter shouldn’t be ready for baking for 4 to 5 days. But at this rate, I’ll probably be ready to make some dough tomorrow!
The point of this is that yeast operates on its own schedule. We can read and follow instructions all we want. But if the yeast is ready, it’s ready. On the flip side, some yeast is slower on the uptake and takes longer to get going. For instance, my original starter that I have been nurturing for the last couple of years has always been a little lazy at the start of fermentation. I’ve tried rebuilding it and refreshing it, but it still just operates on its own schedule. It has actually been ideal for long fermentation periods, and as it is pretty sensitive to a cold environment when I retard the final fermentation, there’s lots of flavor development.
With this new Giza starter, I’m going to have to work out a new baking schedule since it is so active. I reached out to Sourdoughs International to inquire about the incredible activity of the culture, and they confirmed that it is very active. This is just SO cool!
As I’ve been sharing in the past few posts, I’ve been experimenting with super-high hydration dough to test the limits of my flour blend. It has been a real learning experience. One big thing is that really wet dough doesn’t respond like lower hydration dough. Whereas a lower hydration dough will come together and it’s easy to create a nice gluten network pretty much immediately, it’s not so with dough above the 85% hydration level. In fact, right after mixing, the dough is somewhat of a gloppy mess. It looks like pancake batter and even feels like it.
For instance, the loaf shown in the picture above was about 90% hydration. I was admittedly a little skeptical about the dough when I first mixed it. And after it had fully fermented, I didn’t even know if it would even shape! But I knew that the gluten strands were forming as I folded the dough. I could feel it. And damn if it didn’t spring up in the oven! VERY COOL!
Yesterday, I decided to push it even further and made a 95% dough out of the same flour blend. Because it was so wet, I decided to do the initial mix in my mixer. I’m so glad I did because after I got all the ingredients incorporated, the dough looked even more like pancake batter! Over the course of six folds over a 3-hour period, I definitely could feel the gluten forming as I folded.
But I have to be honest. Even though I could feel the gluten developing, the dough was still like a super-thick batter. When it came time to preshape and shape the dough, it was incredibly difficult to shape, and the resulting loaves were, let’s say, a little on the flat side. I got oven spring alright, but it was way more out than up. So I think exceeded the hydration limit with that particular flour blend.
But in spite of the difficulty in working with such a wet dough, I resisted the urge to tweak, though I could tell I probably wouldn’t get the most ideal results. And even though I’m fairly experienced as a baker, I had to see it through. I won’t lie. There were a couple of times while I was folding – if you could call it that – where I was tempted to add a bit more flour to the mix. But this was an experiment to test the hydration limits of that flour blend, so I let it go.
But despite the relative flatness of the loaves, I wouldn’t call the experiment a total disaster. The loaves rose up, which meant I could expect a reasonably open crumb, which I got. And quite frankly, the taste of the bread was magnificent. I used whole wheat levain this time around and this particular flour was packed with lactobacillus bacteria, giving the bread a gorgeous tang.
That “tang” means acid, and acid breaks down gluten, which may have been a contributor to the lack of gluten strength. So it’s one thing to consider for future bakes. I will either have to add vital wheat gluten to make sure there’s extra protein and perhaps still drop the hydration level just a smidgen.
As I think about this experiment, I look at all the time I’ve spent learning these past couple of years and it makes me smile. For me at least, the beauty of baking isn’t in the end product. The beauty is in the process and understanding all the variables that go into producing a loaf of bread. Though I’ve experienced failures or setbacks, they’ve all served to teach or reveal to me some subtle nuance. It’s like peeling back the layers of an onion.
I was watching an excellent video on making poolish baguettes by King Arthur Baking Ambassador, Martin Philip. Though I feel I’ve really gotten the hang of baguettes, there’s always something to learn, plus I wanted to get affirmation on the techniques I’ve learned and employed to this point. While not much was new to me, it was great to get some insights into when the dough was ready for final shaping and also learn a new way to shape!
But about three and a half minutes into the video, he said something so compelling that I had to write about it. Basically, he drew an analogy between music and baking. It was one of the aptest insights about bread making I’ve ever heard. Here’s the video (I’ve queued it to where he makes it):
I love the analogy he drew between a recipe and a sheet of music, especially when he said that “a recipe is like musical notation in that it’s notes on the page and the notes on the page will get you close to the song, but they’re not the song. It takes time. It takes practice before you can interpret things before you can become a good musician… or a good baker.”
Dammit! I’m going to be using this for all sorts of lessons, not just baking bread!
I just love the analogy! The recipe’s ingredients are the notes and the directions are the notation of the notes on the page. With a piece of music, you have to learn it and play it several times before it sounds like a song. At first, because you’re unfamiliar with it, you’ll flail and stop and start, or play sections over. But as you get used to the flow of the music, it starts sounding like a song.
Such is the case with a recipe; especially if it’s brand-new. I remember the first time I tried making baguettes. I was proficient with dough development and knew what to look for and I wasn’t at all intimidated by the 75% hydration. And I’ve since learned that dough development is the easy part! But when it came to shaping the dough into loaves – eek!
I had prepared by reading and watching videos about the technique. But having no experience with shaping baguettes, let’s just say it was a helluva lot harder than all the books, articles, and videos may have indicated. Oh, I was able to elongate the loaves all right, but they were a little… misshapen to say the least. It took me about 10 bakes to start getting comfortable with shaping and probably another 40 to 50 bakes and breaking my oven before I gained a level of proficiency and consistency.
And taken holistically, it took me all that time to understand the dough development and processing as well. Though I mentioned above that dough development is the easy part, dough behaves differently in different environmental conditions. For instance, in warmer weather, I tend to stick to the base hydration of 75%. But in colder weather where the dough can be a little stiffer, I’ll add a couple to a few percentage points of water so that the dough feels like I think it should.
Last night, I watched a video of Paul Hollywood touring bakeries in San Francisco on a quest for San Francisco sourdough. He got bread from different bakeries all over the city apparently to see if he could find the epitome of sourdough and once he identified it, he’d go visit that bakery. Of course, it was going to be Tartine. That he saved the Tartine loaf for last in his evaluation was a total giveaway, which made that particular segment seem a little contrived.
The inevitability of Paul going to Tartine aside, one thing caught my eye when Paul showed the entire loaf. I was able to capture a screenshot from the video. Look at how flat that loaf is! Though the crumb is a classic, open Tartine crumb, the vertical rise in the bread is actually minimal. And if you look at the lower end of the loaf in the picture, it’s clear that the dough spread out – a lot – in the oven.
Then looking at a top-down view of the loaf (right), there wasn’t much opening from the scoring mark, which is another indicator that the loaf sprung more outward than up.
The reason for this is likely because Tartine dough is incredibly high-hydration. In some cases, and especially with their whole-grain loaves, the hydration levels exceed 90% (their flatbreads are over 100% hydration). At that level of hydration, no matter how well the gluten structure is developed to trap gas, the water in the dough will not allow the gluten strands to coalesce nearly as much as a lower-hydration dough. So as the dough bakes, it tends to spread out rather than rising up.
Mind you, I don’t consider this to be bad in any way, shape, or form. In fact, based on what I’ve gathered from studying the Tartine method, I’d expect a loaf like this to have little vertical rise and tend to spread out. But it’s a great illustration of the balancing act of baking. In this case, in Tartine’s quest to produce a highly-open crumb, they increase hydration and sacrifice vertical rise. Other bakers may not want this.
For me, I prefer a tighter, softer crumb and more vertical rise similar to the picture below:
It’s by no means a dense structure as evidenced by the sheer number of small holes in the crumb. And I prefer this because this kind of crumb structure will hold spreads like mayonnaise and mustard and have far less leakage when used with a sandwich as compared to a crumb that has lots of big holes. In my case, I sacrificed that open crumb structure that so many people seem to obsess over in favor of vertical rise and the ability of the crumb to hold spreads more effectively.
The point of all this is that I’ve found that it’s necessary to weigh the different factors that go into producing a loaf of bread. If I’m after a particular outcome, I have to constantly balance that with what I might have to sacrifice in another area.
For instance, like many, when I first saw pictures of Tartine bread, I wondered what it would take to produce bread similar to that. And after lots of study and experimentation, I finally got the method down to produce loaves with a super-open crumb such as the ones shown below:
The crumb shot to the right is an extreme example of creating big holes. To be honest, that loaf probably could’ve stood to proof for a few more hours to develop both more sour flavor and let those tiny holes expand a little more.
I must have baked at least 50 loaves before I could achieve this consistently. A friend of mine whom I had given a loaf messaged me and remarked how it was like Tartine bread. What a compliment!
But despite my success in achieving that, personally, I didn’t like the bread. It tasted great and the long, final proof really brought out its sour characteristics. But from a practical standpoint, it frustrated me. Though it looked and tasted great, I felt that bread like this wasn’t very versatile. So I had to do quite a bit of rethinking and balance the desire for an open crumb with its practical use. So after weighing all the different factors, I decided to drop the hydration rates of my boules and batards to around 78%-82% depending on the flour blend I use.
I realize that for beginning bakers I’m probably sounding like the teacher in Charlie Brown: “Mwa-ma-wah-wah-mwa…” But if once you start baking with regularity and gaining knowledge and skill, you’ll see what I mean about the balancing act of baking bread.
As I’ve shared in the past, I’ve been baking bread for over 40 years, but it wasn’t until the pandemic lockdown that I had the time to devote to developing my artisan bread baking skills. And looking back over the last almost two years, it’s daunting to think that I’ve literally spent hundreds of hours mastering the craft; and I still consider myself a mere fledgling artisan bread baker.
Like many during the lockdown, my initial instruction came from Ken Forkish’ excellent book, Flour Water Salt Yeast. Though not very technical it helped me start getting a feel for the dough development process and for that, I’m ever grateful. I still refer to it for recipes.
On one such occasion recently, I revised the section where Ken wrote about making a dough you can call your own. I wrote about that a few months ago and while I still make lots of bread with my reference flour blend, soon after I wrote that article, I started making more and more use of Kamut flour.
Kamut is actually not a type of flour but a brand. The actual wheat type is known by its common name of Khorasan (Triticum polonicum) and is an ancient grain that can trace its roots to ancient Mesopotamia in an area known as the Golden Crescent. The kernel of this grain is roughly three times the size of most modern wheat varieties. And while it contains gluten, it’s of a type that is much more digestible than other wheat varieties and it is packed with B-vitamins.
Health benefits aside, Kamut has a wonderful flavor when incorporated in a flour blend. The bread that results has a slightly nutty flavor and when risen with a natural leaven presents a lovely fruity aroma. The crumb of bread made with Kamut is soft yet springy with a wonderful chewy texture. And as it is a rather thirsty flour even after a full bake (as shown above), the crumb retains a bit of moisture. Bread that I make using Kamut are among my most favorite.
But the main reason I love making bread with Kamut in the flour blend is that it is super-hard with which to work. The gluten that is formed with Kamut is incredibly delicate. And even though the Kamut flour I use has about 12% protein content, which you’d think could accommodate higher hydration, the delicate nature of Kamut’s gluten can a bit of an inhibitor to taking it above 75% hydration.
In light of that, Chad Robertson says in Tartine No. 3 that he takes his 60% Kamut dough past 90% hydration. But looking that the pictures, I believe he compensates by making smaller loaves though his recipe implies making 1-kilo loaves. Based on experience, medium-format loaves with that kind of hydration using that much Kamut will not have much vertical rise. You’ll get nice holes – which is what Tartine bread is known for – but not much vertical rise. For example, look at the pictures from Tartine No. 3 of the 60% Kamut bread below:
You’ll notice that there’s not much vertical rise in the cross-section. It’s a beautiful crumb that’s consistent with a highly hydrated dough. And though I don’t know how big those loaves are from the picture, I have made this recipe and experimented with 93% hydration for the 1-kilo loaves. Even though I built up lots of dough strength, they still spread out a lot. So I’m thinking that the loaves shown in the picture to the left above are significantly smaller than 1-kilo loaves so they retain some vertical rise.
As for me, I do a 40% Kamut, 30% Bread Flour, and 30% High-extraction Flour. The hydration is 75%. That blend and hydration offers the best balance of flavor and dough strength to give me great oven spring and a reasonably open crumb.
And given that Kamut’s gluten is so delicate, I’ve taken to final proofing at 39-40°F for up to 36 hours to allow plenty of time for the gases to expand in the dough. I’ve also learned to bake very gently during the first 20 minutes with steam at 400°F. Once I remove the steaming container, I up the temp to 425°F and bake for 35 minutes until I get a nice tri-color crust.
I mentioned above that I love working with Kamut because it’s a difficult flour with which to work, but I think another big reason is that it has taken me so long to master this blend and make consistently good loaves with it. And that in itself has been a revelation into the intricacies of bread baking. There are so many variables. And while it’s possible to establish methods that are common to many different kinds of bread, working with Kamut, I’ve had to make slight adjustments to my basic methodologies to accommodate the flour.
But I have to say that mastering this blend has given me an immense amount of satisfaction. And that satisfaction is what keeps me going and keeps me exploring!