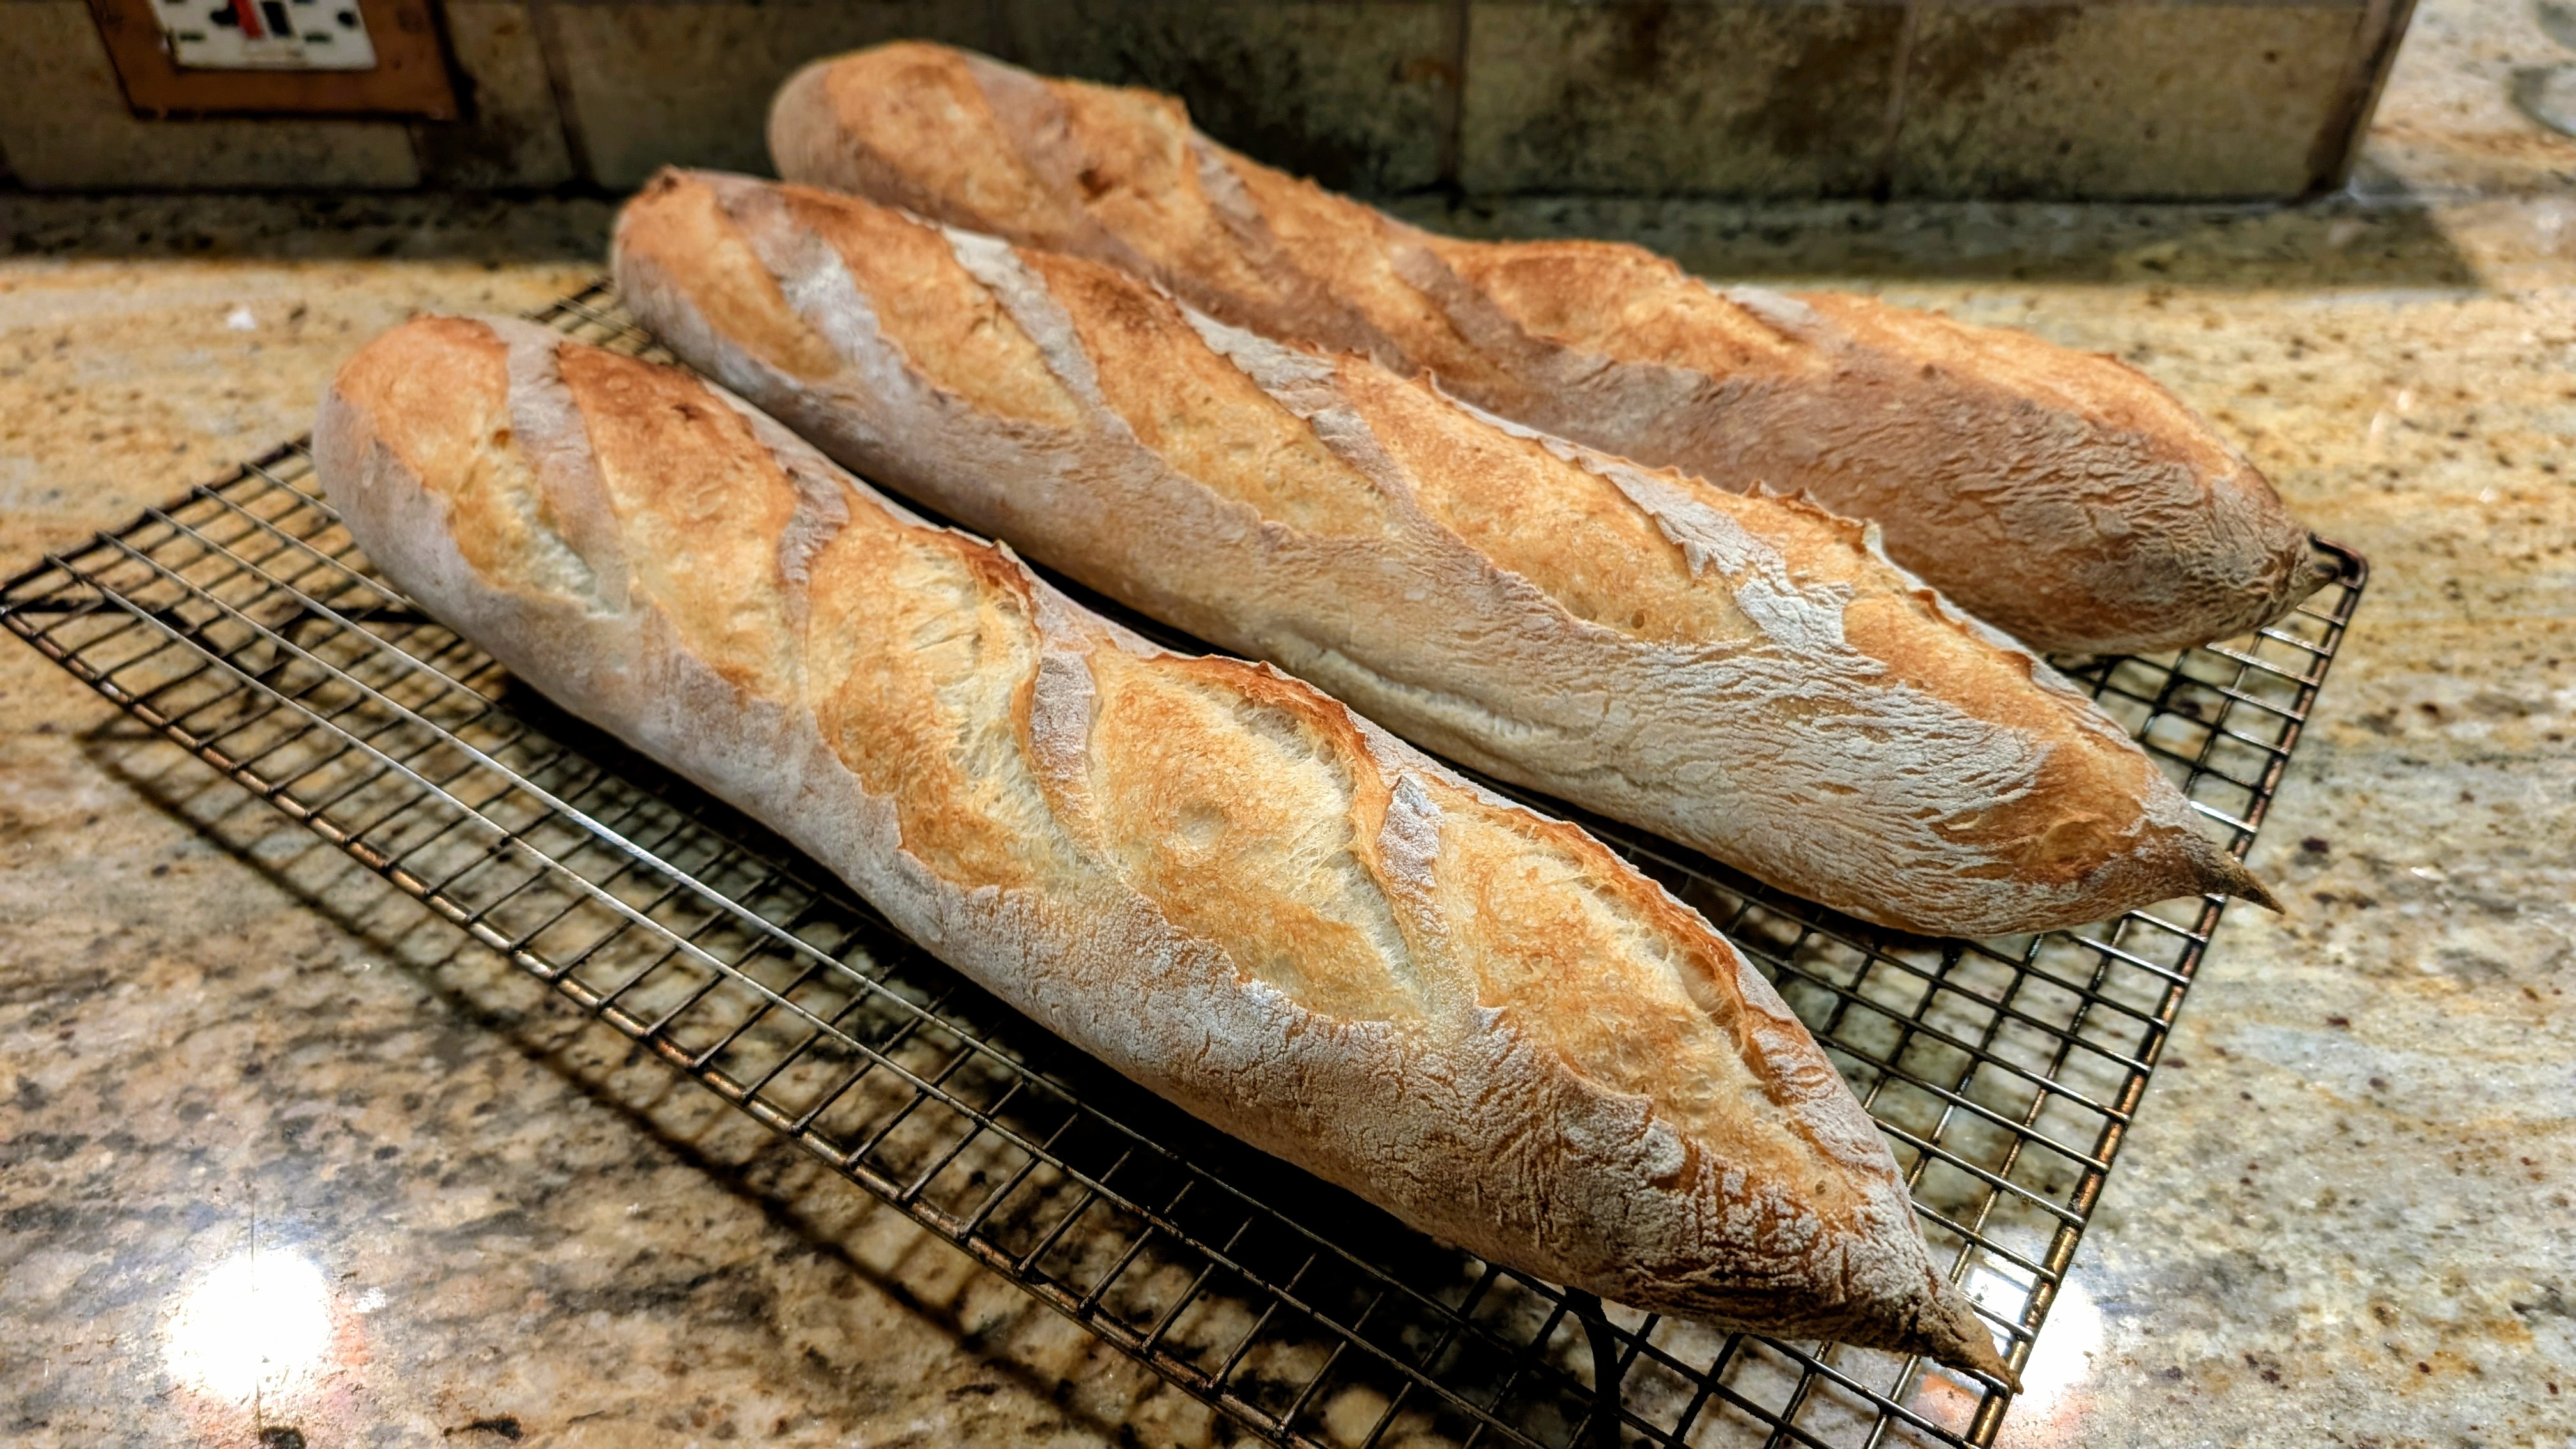

When I’m pinched for time and want baguettes, I turn to Baguettes de Tradition that are a same-day baguette that I learned how to make a few years ago from reading Jeffrey Hamelman’s book, “Bread.” This simple baguette recipe only requires a few hours from mix to bake and is perfect for when I want baguettes for dinner. My only complaint about these is that since they’re baked on the same day, they don’t have nearly the amount of flavor as when I use the Pointage en Bac method of slow rising the dough overnight. Still, they’re perfect for dipping or using as sandwhich loaves.
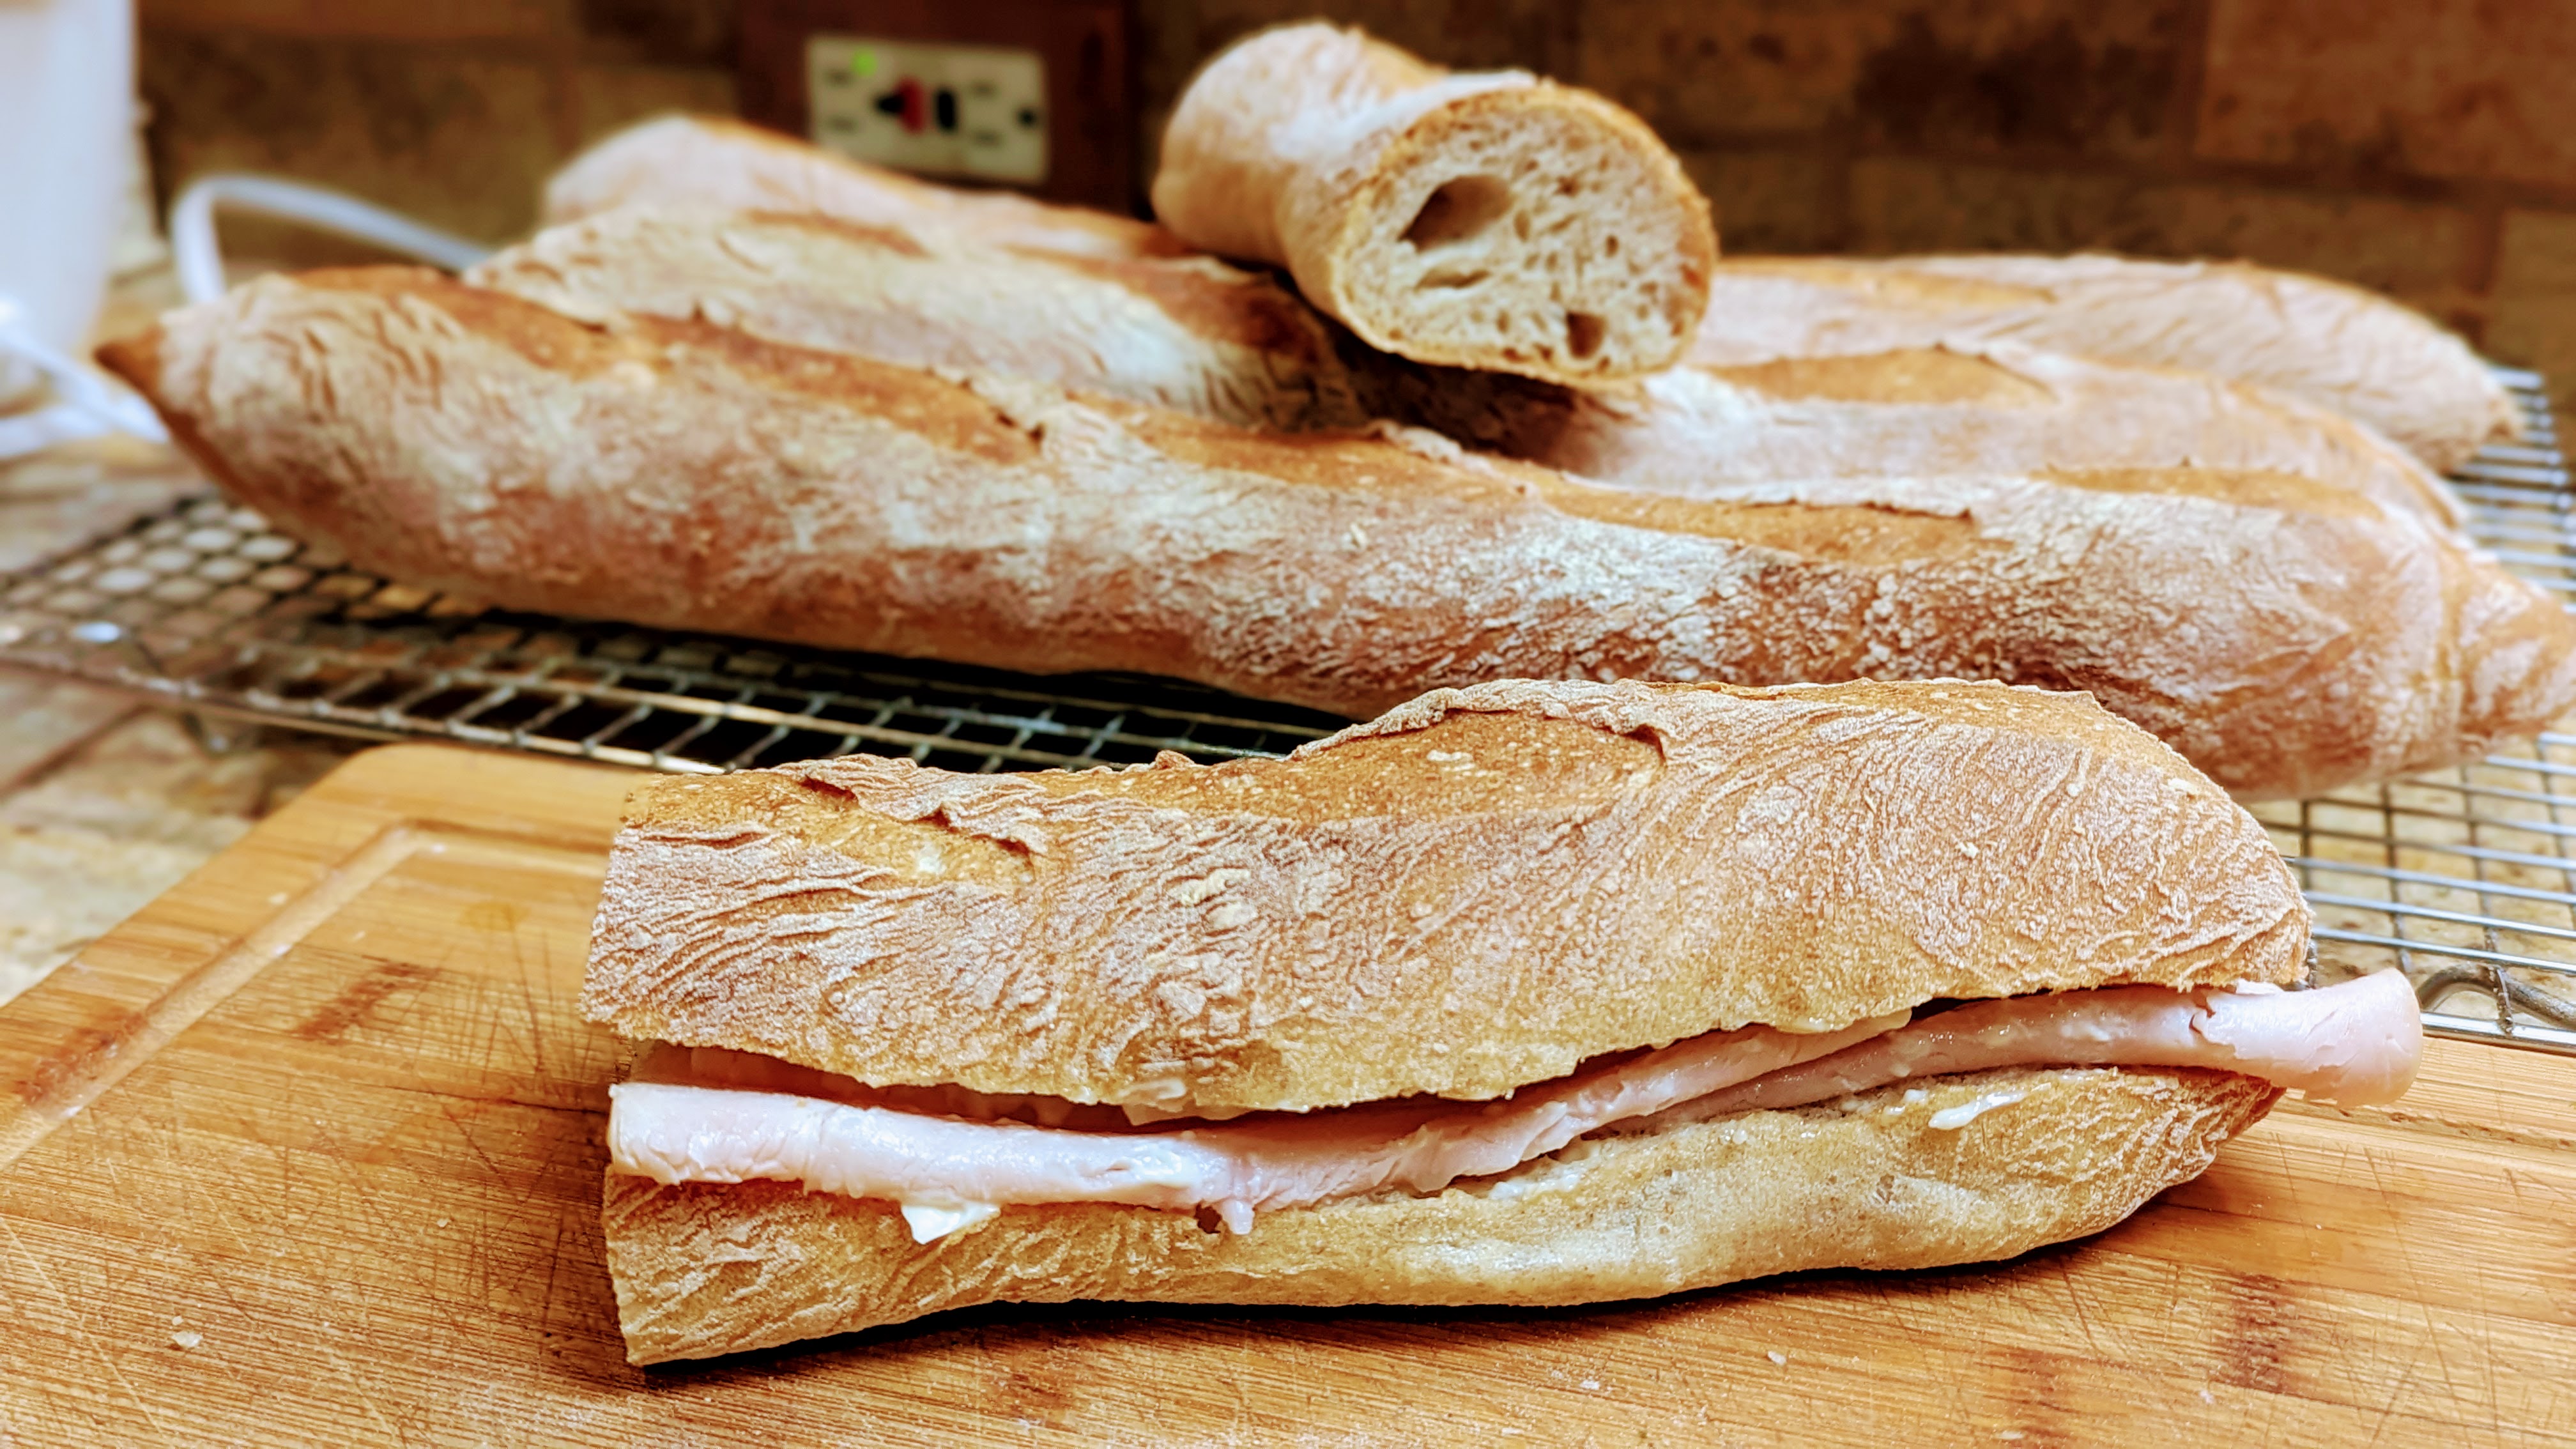
This afternoon I was trying to figure out what I wanted for dinner and remembered that I had some BBQ pulled pork in the freezer, then realized that I didn’t have any sandwich loaves. Not that I needed an excuse to bake some bread, I thought I’d make some baguettes.
At first, I was going to make Baguettes de Tradition, but then I also remembered the starter in my fridge and that I had just fed it a few days ago! So, I pulled it out and it looked like it had peaked, but only recently. What luck! I was excited because I knew that the starter would add tons of flavor to the dough! And yes, I used it right out of the fridge but dissolved it in 90°F to wake it up. Here’s the formula and recipe:
Formula
| Flour | 100.00% |
| Water | 76% |
| Salt | 2.00% |
| Yeast | 0.25% |
| Total % | 177.33% |
Final Dough
| Bread Flour | 154g |
| Kamut Flour | 205g |
| AP Flour | 564g |
| Water | 666g |
| Salt | 21g |
| Yeast | 2g |
| Unfed Starter (weight is 20% of the total flour) | 205g |
| Total Yield | 1818 6 X 300g Baguettes |
It can be a little dicey using unfed starter. My experience is that it should not be so old where it smells cheesy and sour. At that point, it’s very acidic and the bacteria have essentially taken over. A telltale is that’s it’s fine to use if the level of the starter in my container is still well above the original line and hasn’t subsided all the way back and the starter itself is still bubbly. That means there’s still plenty of yeast activity.
I used a flour blend that was as follows:
| Flour from the starter | 10.00% |
| Bread Flour | 15.00% |
| Kamut Flour | 20.00% |
| AP Flour | 55.00% |
| Total % | 100.00% |
I used a tiny bit of commercial yeast to boost the yeast activity as I want to favor rising. With the amount of starter I use, there’s going to be plenty of flavor. But you can certainly skip it.
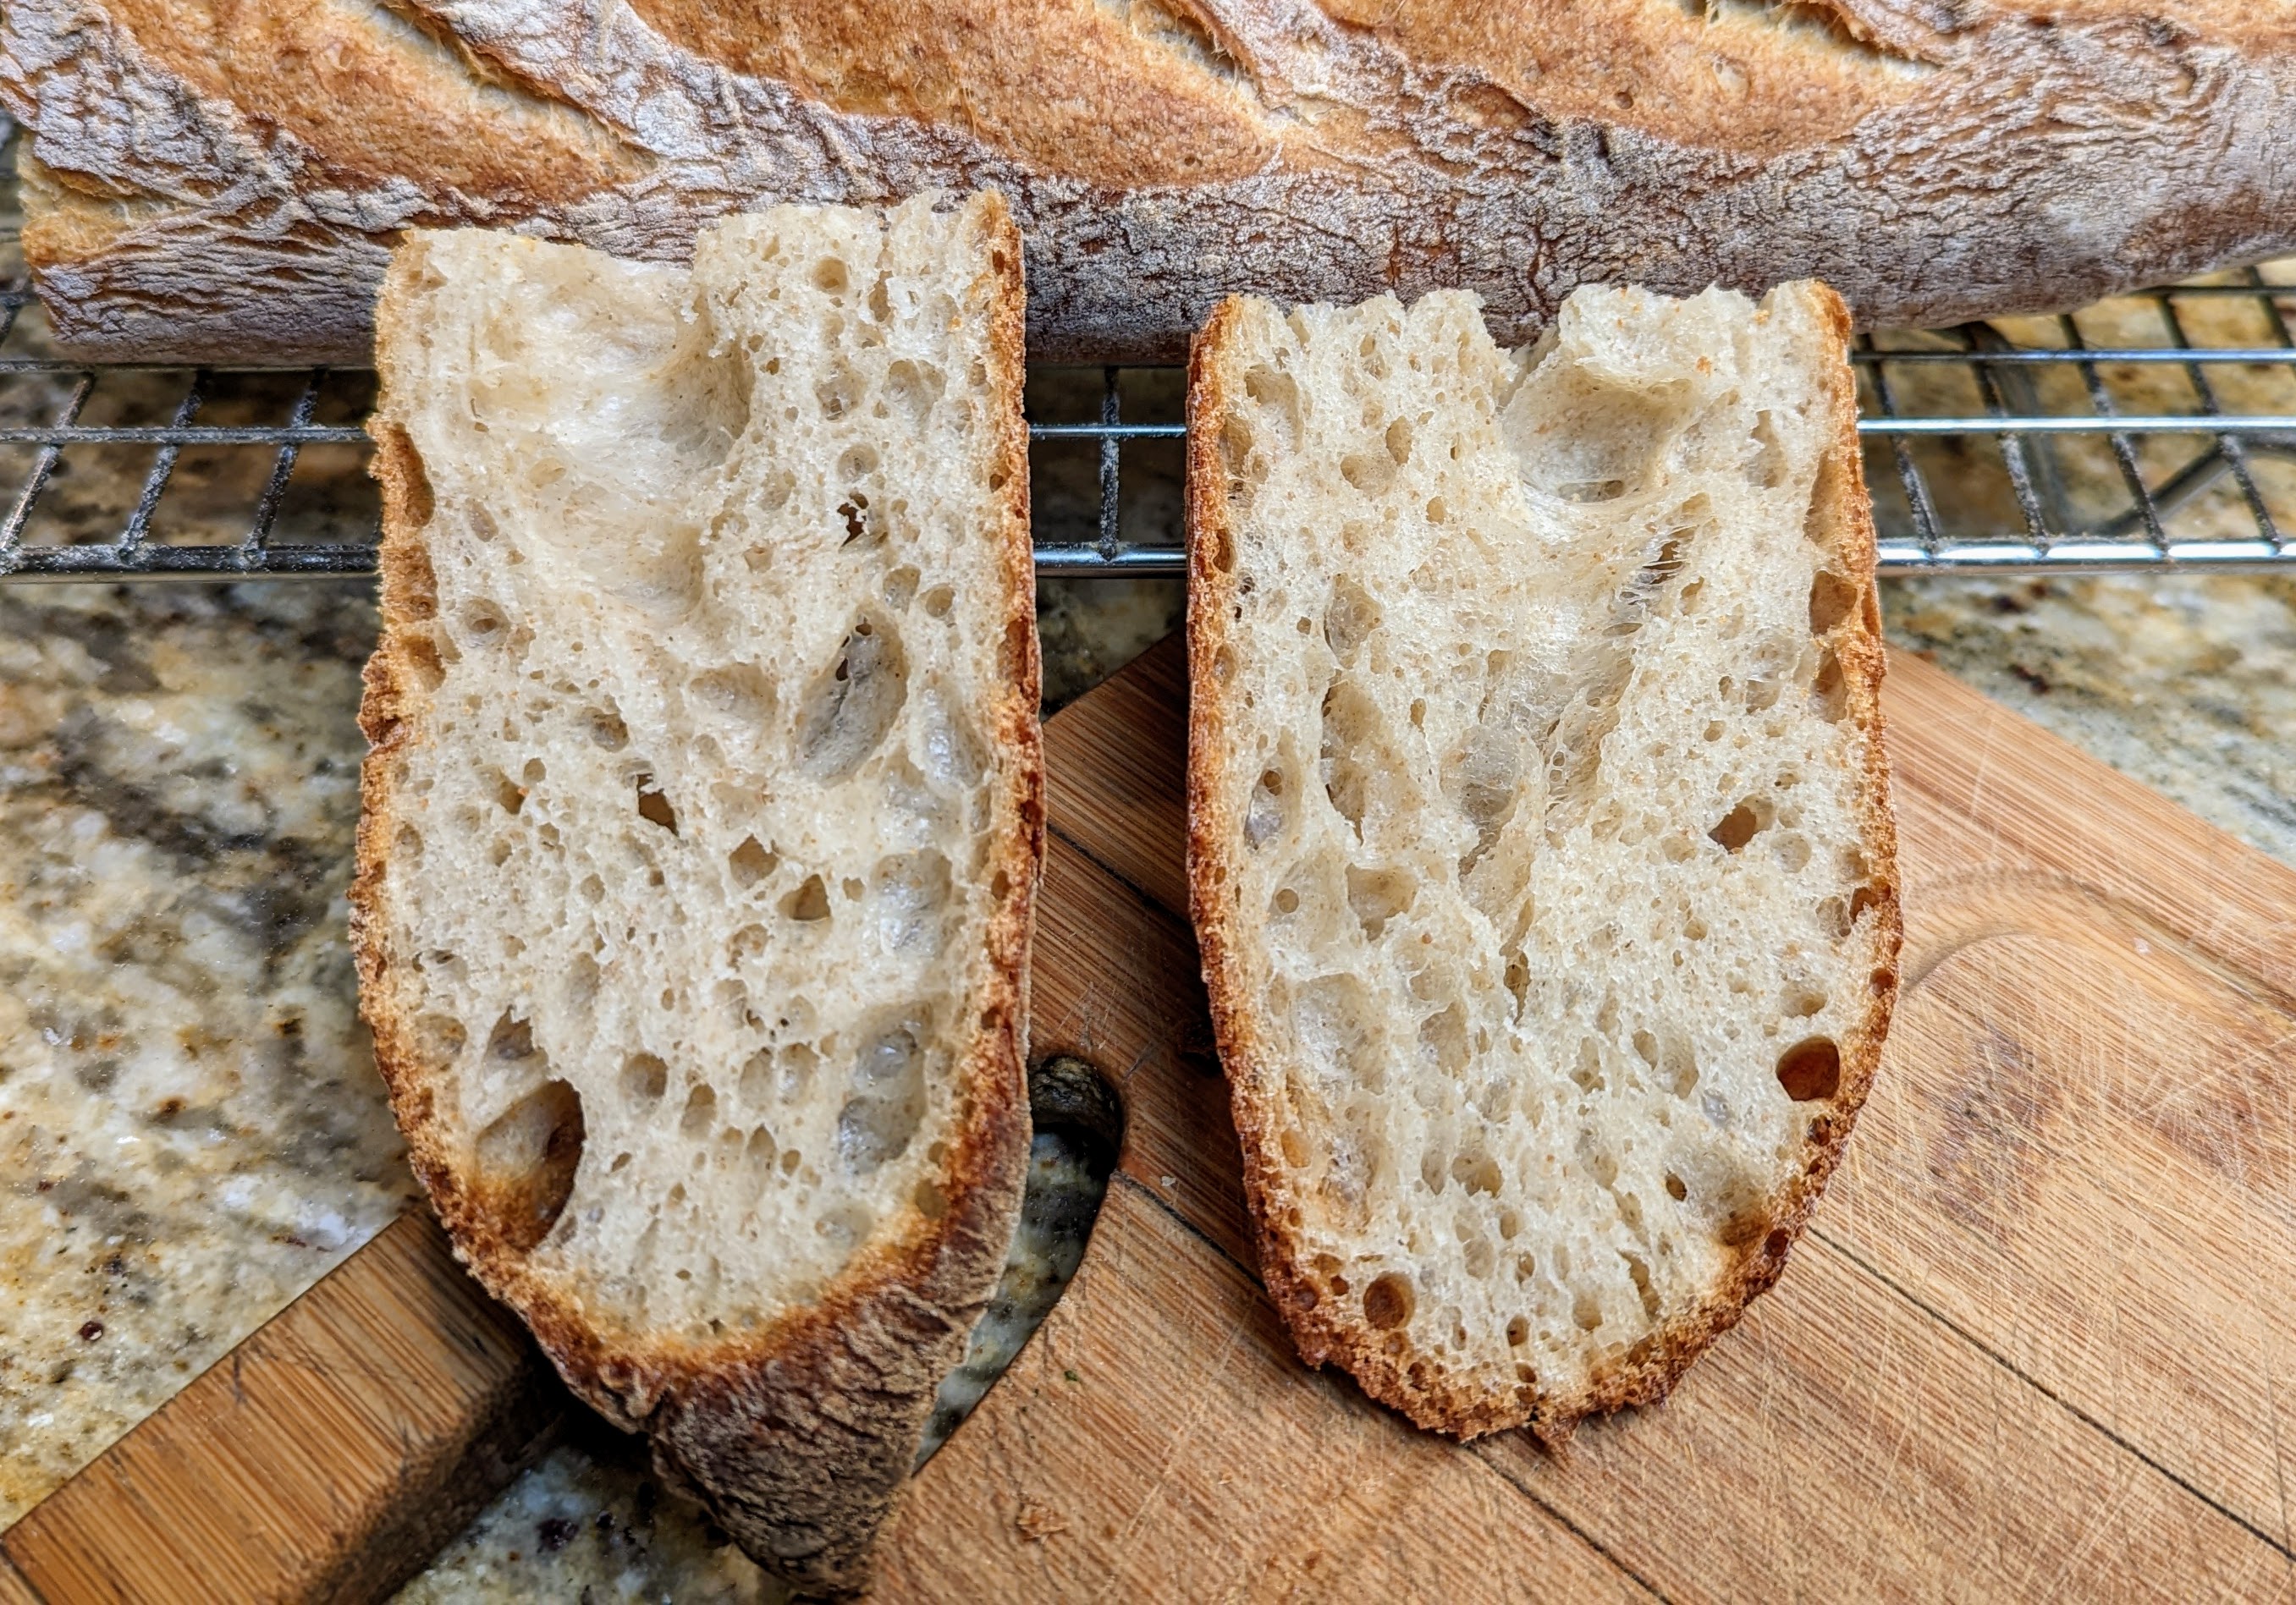
Using a sourdough starter alters my normal process for Baguette de Tradition because I follow the Tartine Basic Country Loaf process which includes a fermentolyse and a bassinage when I add the salt. Here’s the process:
Mix. Sift then thoroughly mix the flour in a large bowl and set aside. In another bowl, measure out the starter then add all but 50g of water and break up the starter till it’s completely dissolved. If you’re using starter fresh out of the fridge, make sure the water temperature is warm (85°F-90°F). Mix the flour and the liquid until everything is together and forms a shaggy mass.
Autolyse. Since we’ve included the starter, it’s colloquially called “fermentolyse.” Rest the mixture for 30 minutes to an hour.
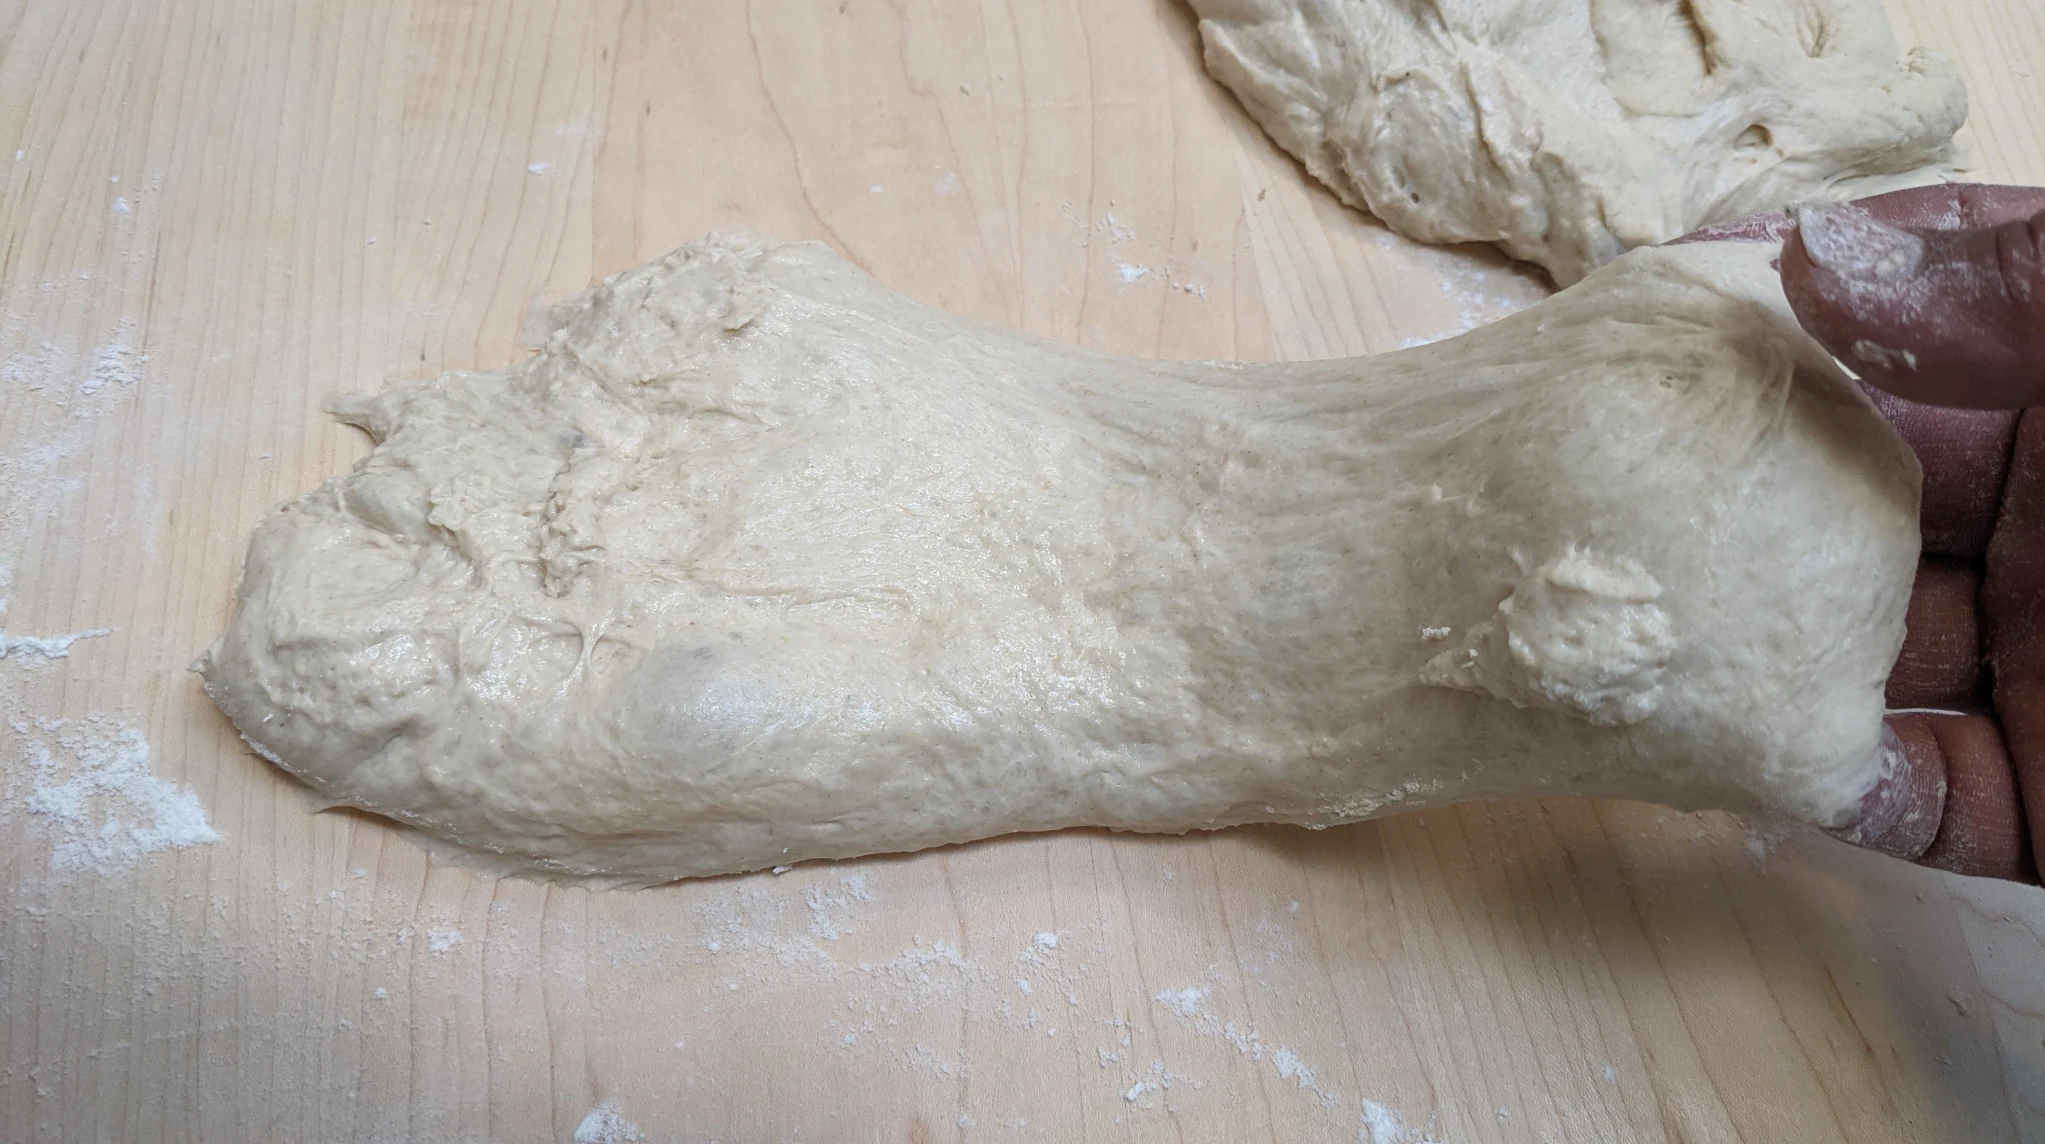
Yeast, and Salted Bassinage. Sprinkle the yeast all over the top of the mixture. Dissolve the salt in the reserved water, then pour it over the top of the dough (make sure you use a spatula to get all the salt). Using your hands or a mixer on low spead, fold the new ingredients into the dough until they are fully incorporated.
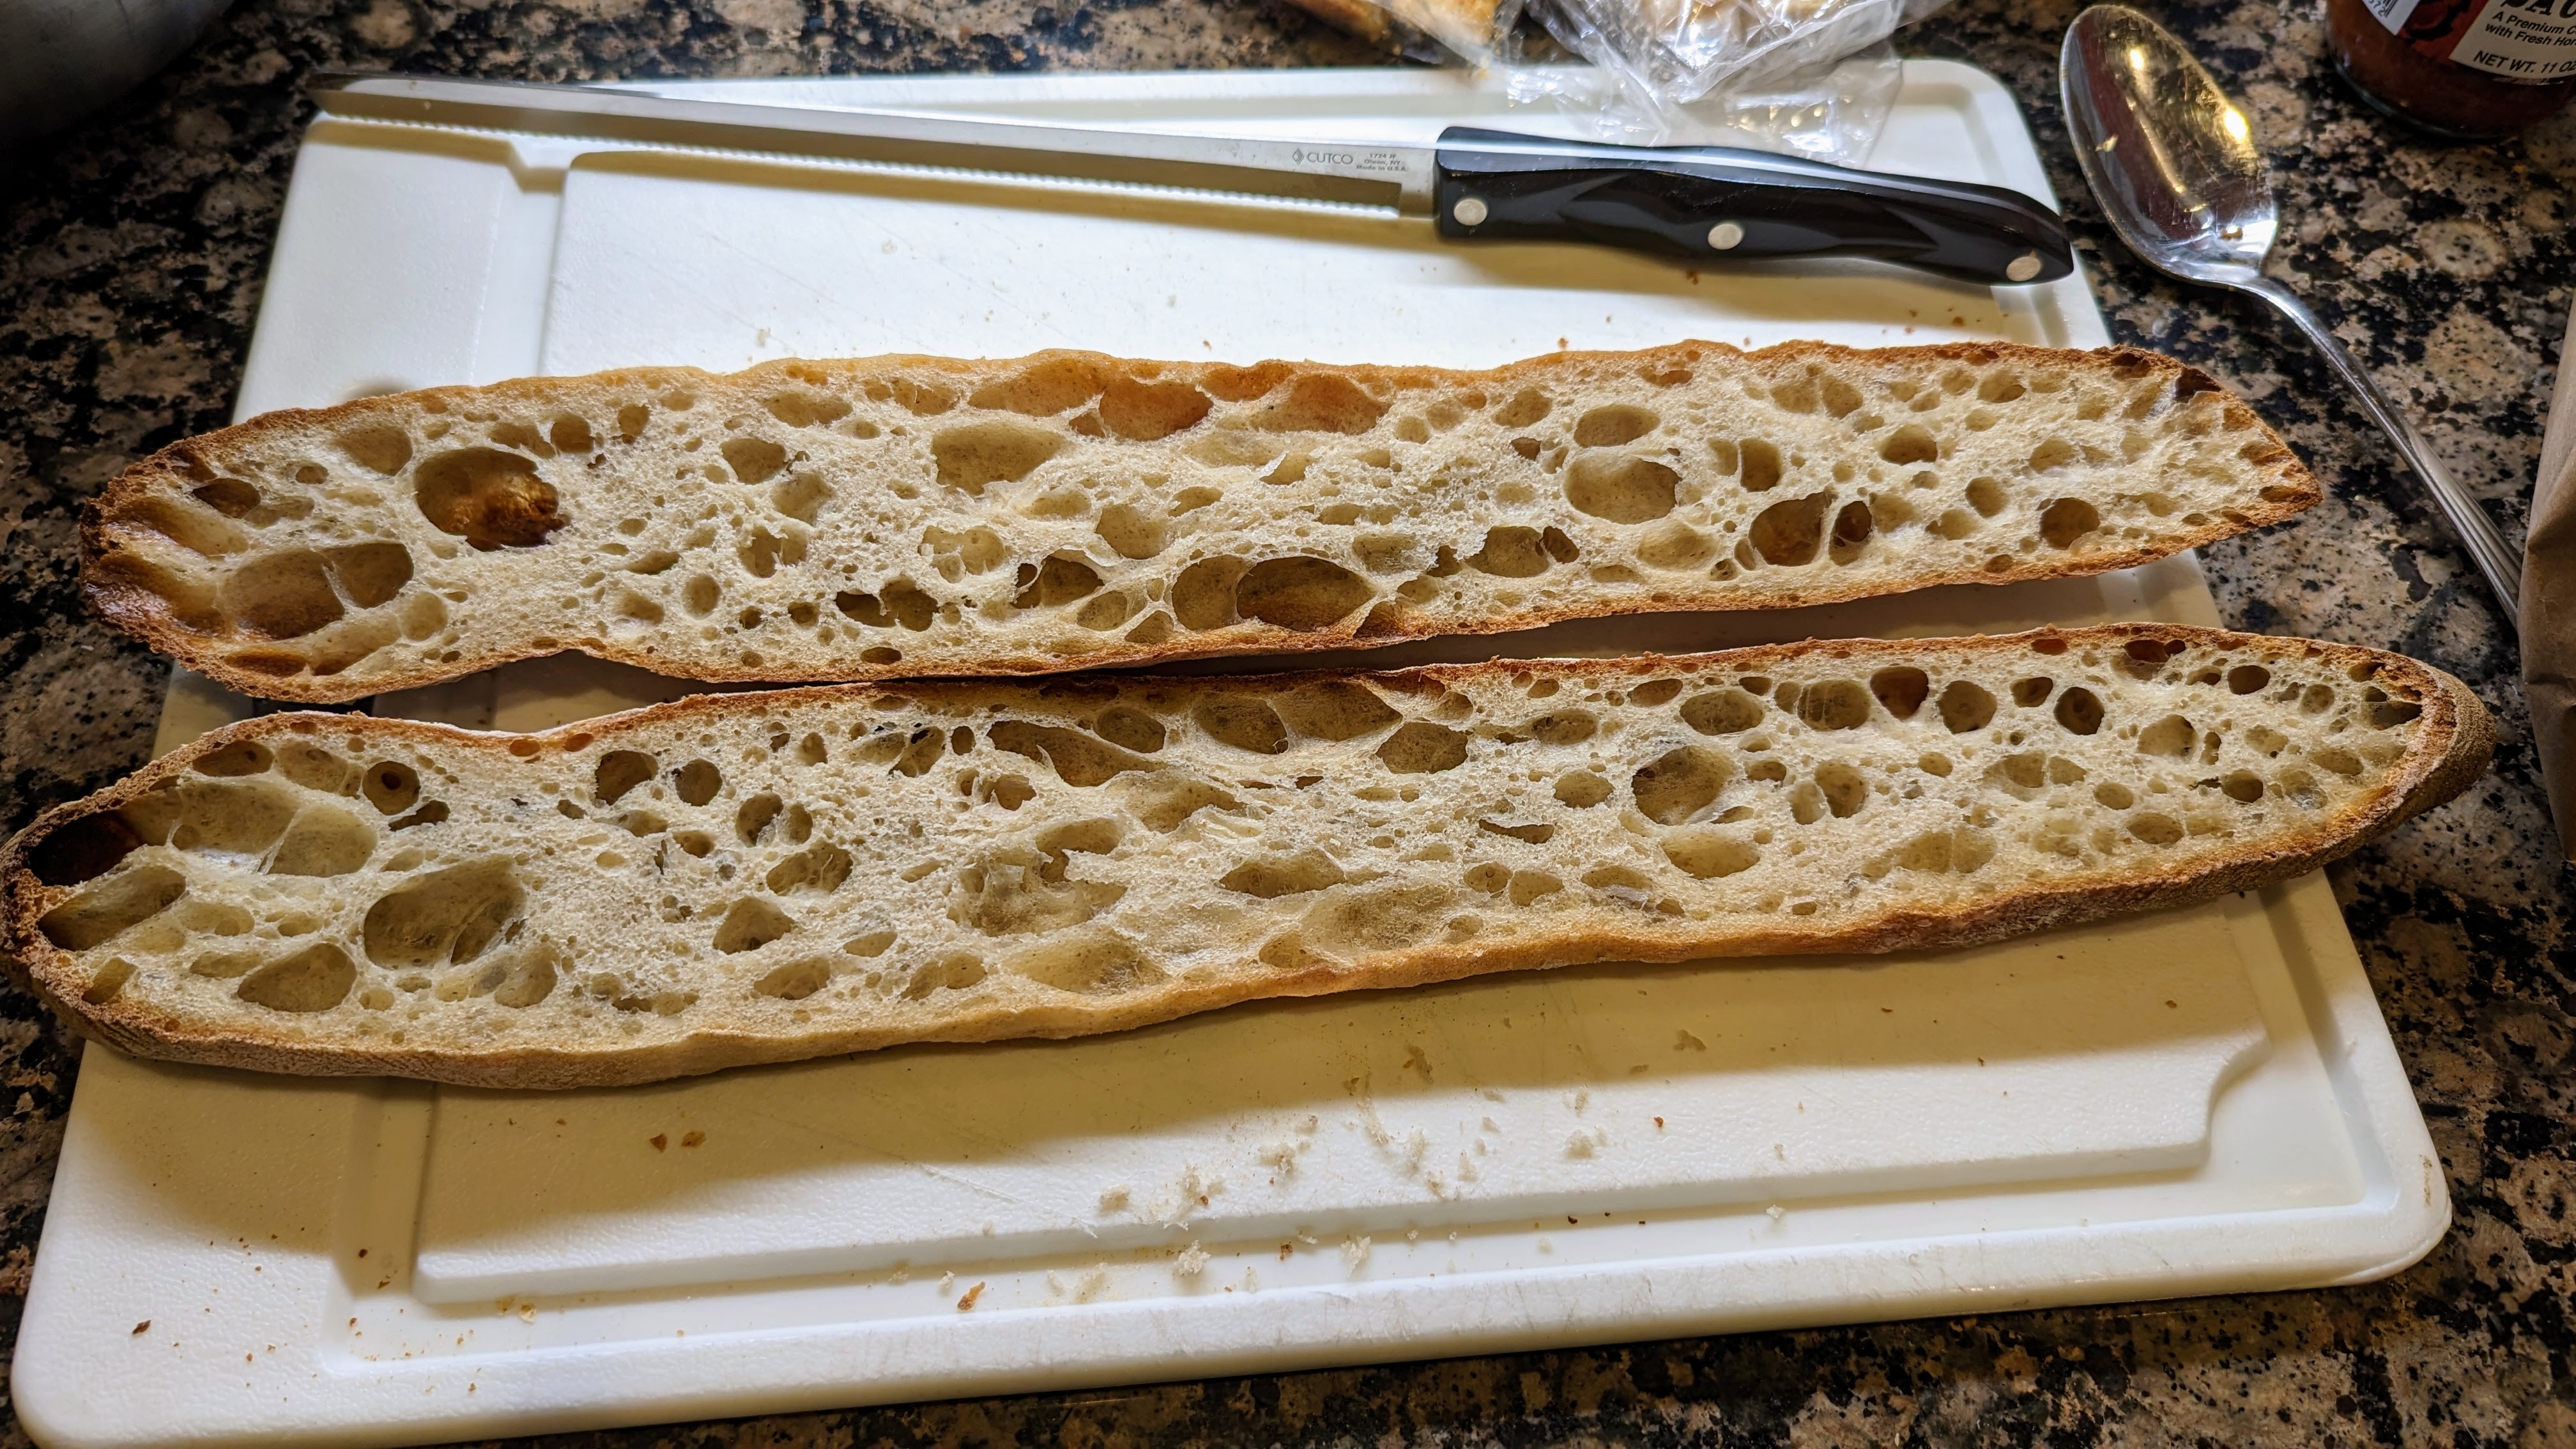
Bulk Fermentation. You can transfer the dough to another container for bulk fermentation or just let it sit in the mixing bowl. During the first hour, fold the dough three times, every 20 minutes, then let the dough bulk ferment to about 75% expansion. With baguettes, you don’t want to go to double and in fact, you want to bake them just a little short of fully fermented. I know it sounds a little bass-ackwards, but this was a technique I learned about from the baker who won the annual Best Baguette in Paris. He claimed the slightly under-fermented dough springs better in the oven.
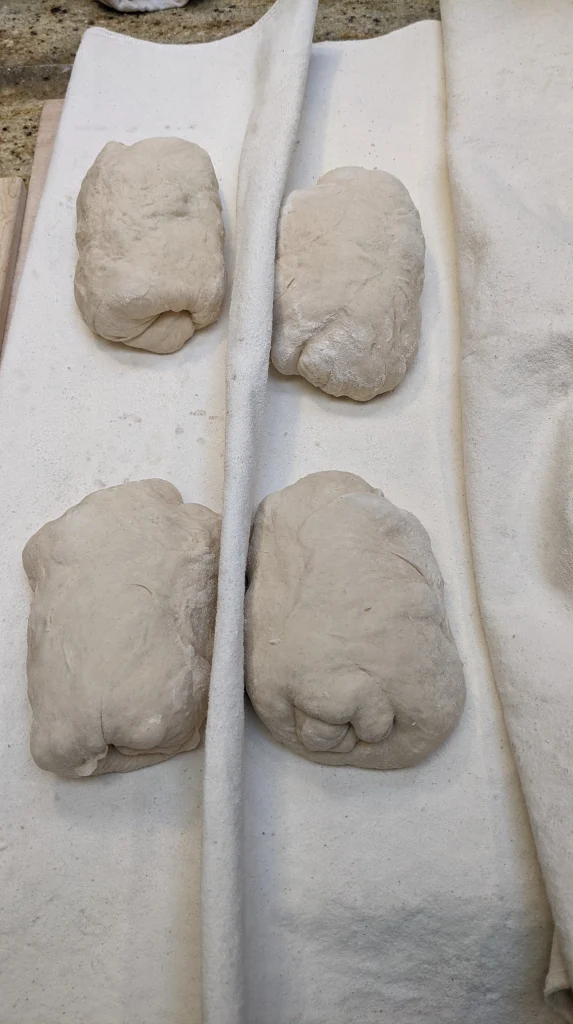
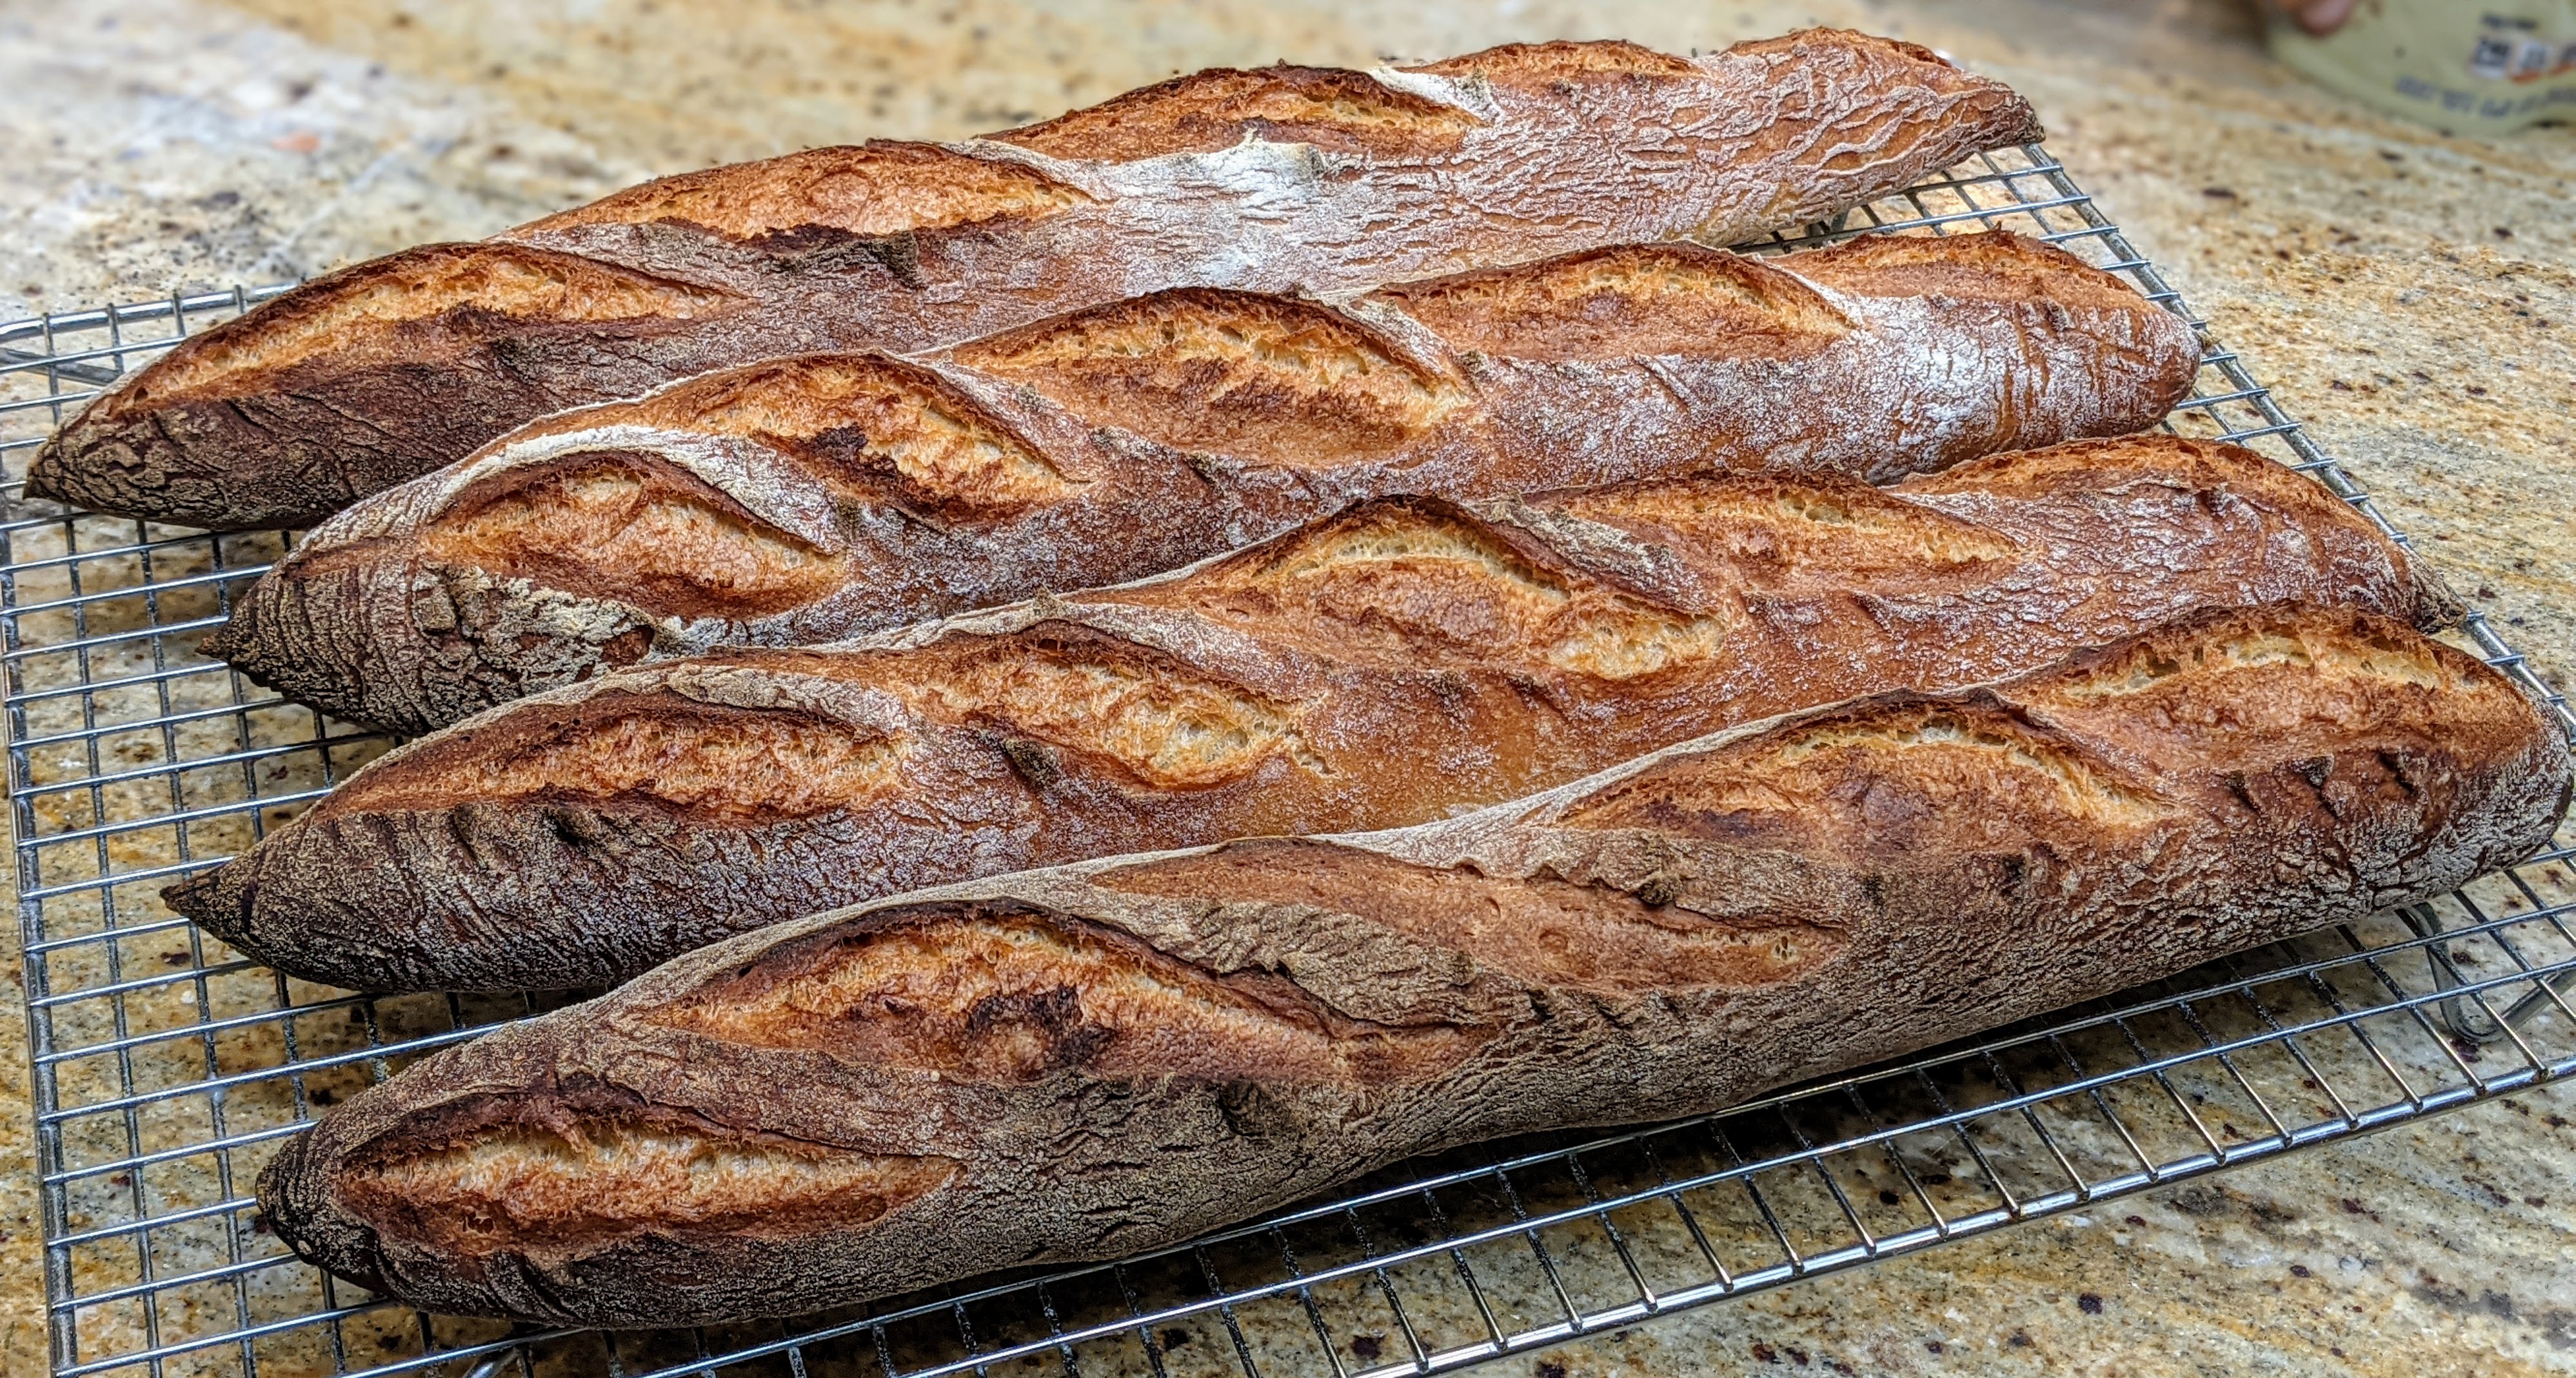
Divide and Pre-Shape. Once bulk fermentation is complete, pour out the dough onto a lightly flour workspace. Pull it into a rough rectangle, then divide the dough into six even pieces. The recipe here calls for the pieces to be 300g. Letter-fold the pieces and roll them up like a jelly roll. Bench rest for 15 minutes.
Shape and Final Fermentation. Shape the pieces into long logs, then transfer to a couch or baguette pan for final fermentation. Poke test the loaves and if the indent comes up and immediately, it’s too soon. If it comes up slowly, but a small indent remains, then they’re ready to bake.
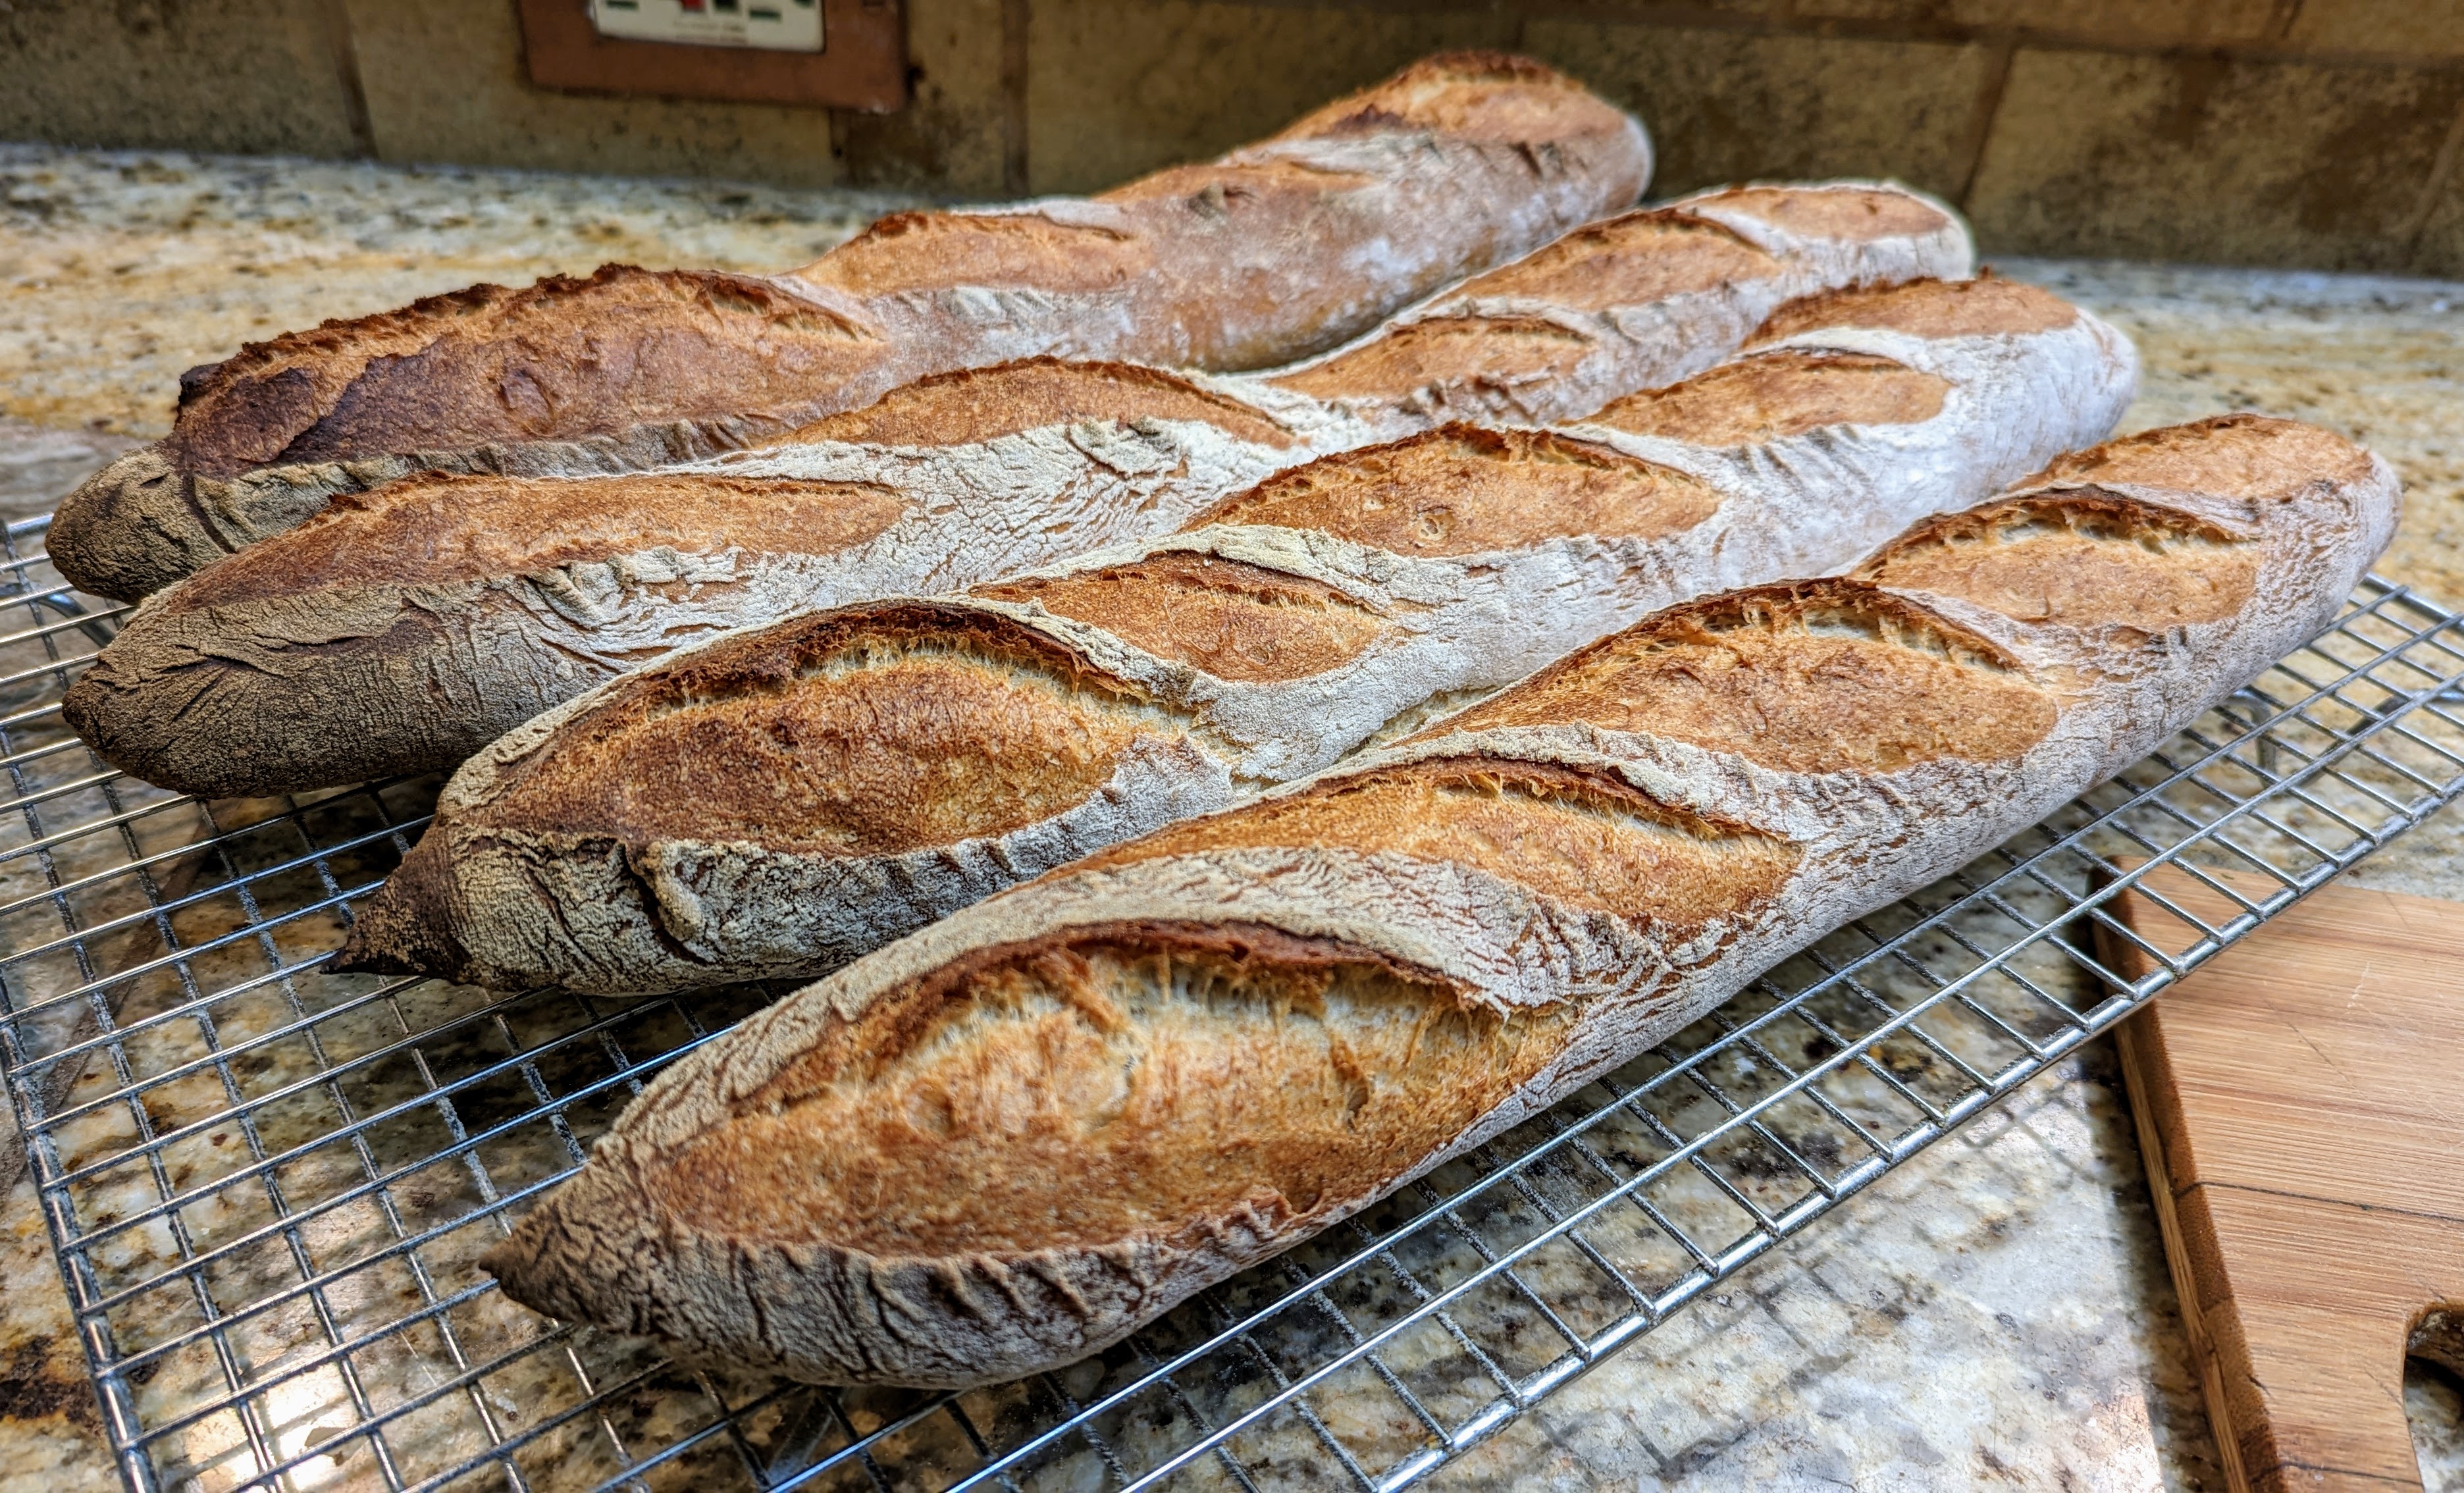
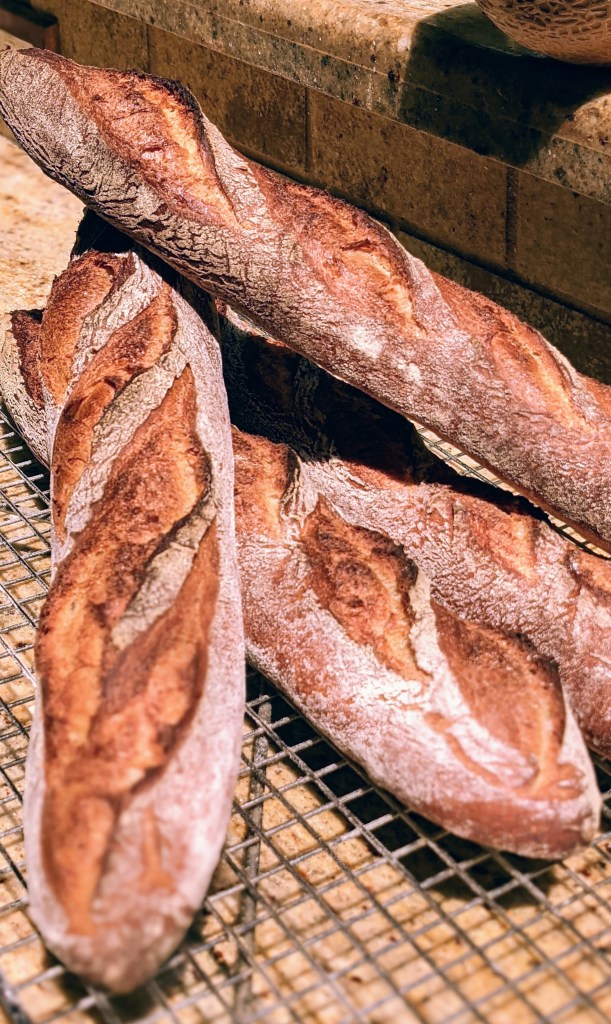
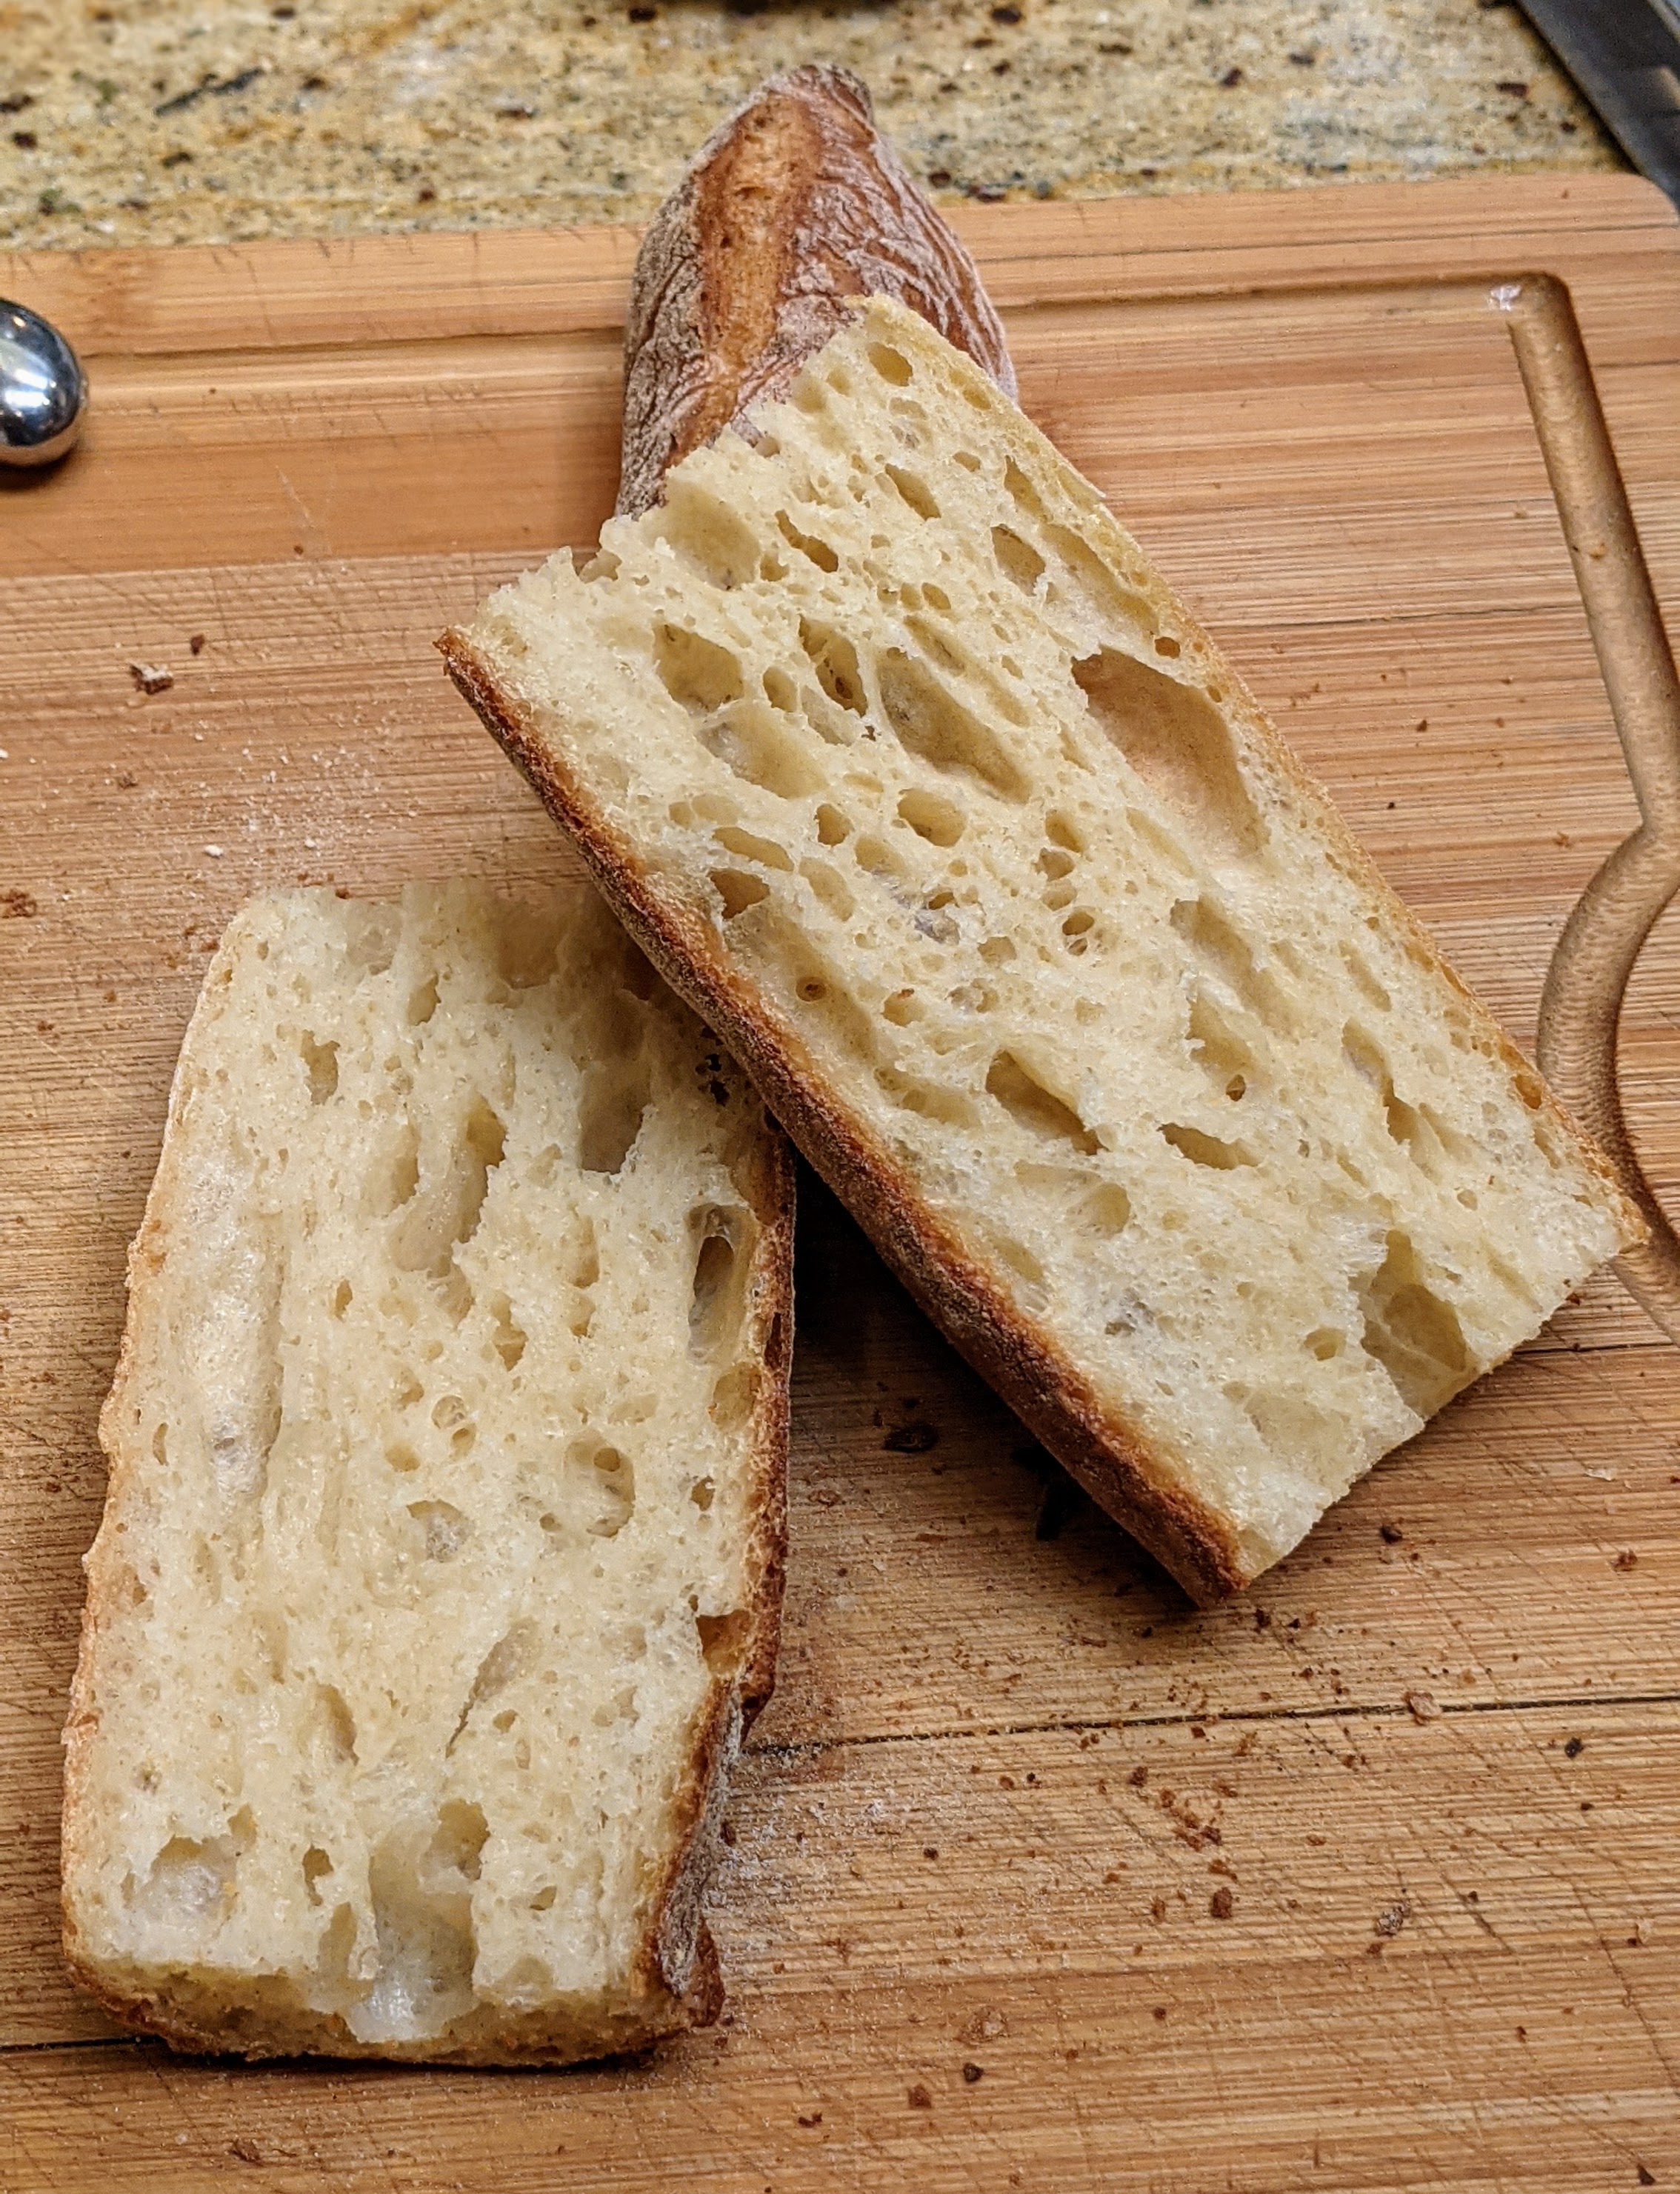
Bake. Score the baguettes then bake at 450°F. Bake with steam the first 10 minutes, then remove the steaming containers and bake until the crust is a deep golden brown. Mine took about 22 minutes to get to that point.
Cool for at least 30 minutes before cutting. Or you can do the Chad Robertson way and just cut it fresh out of the oven. 🙂