
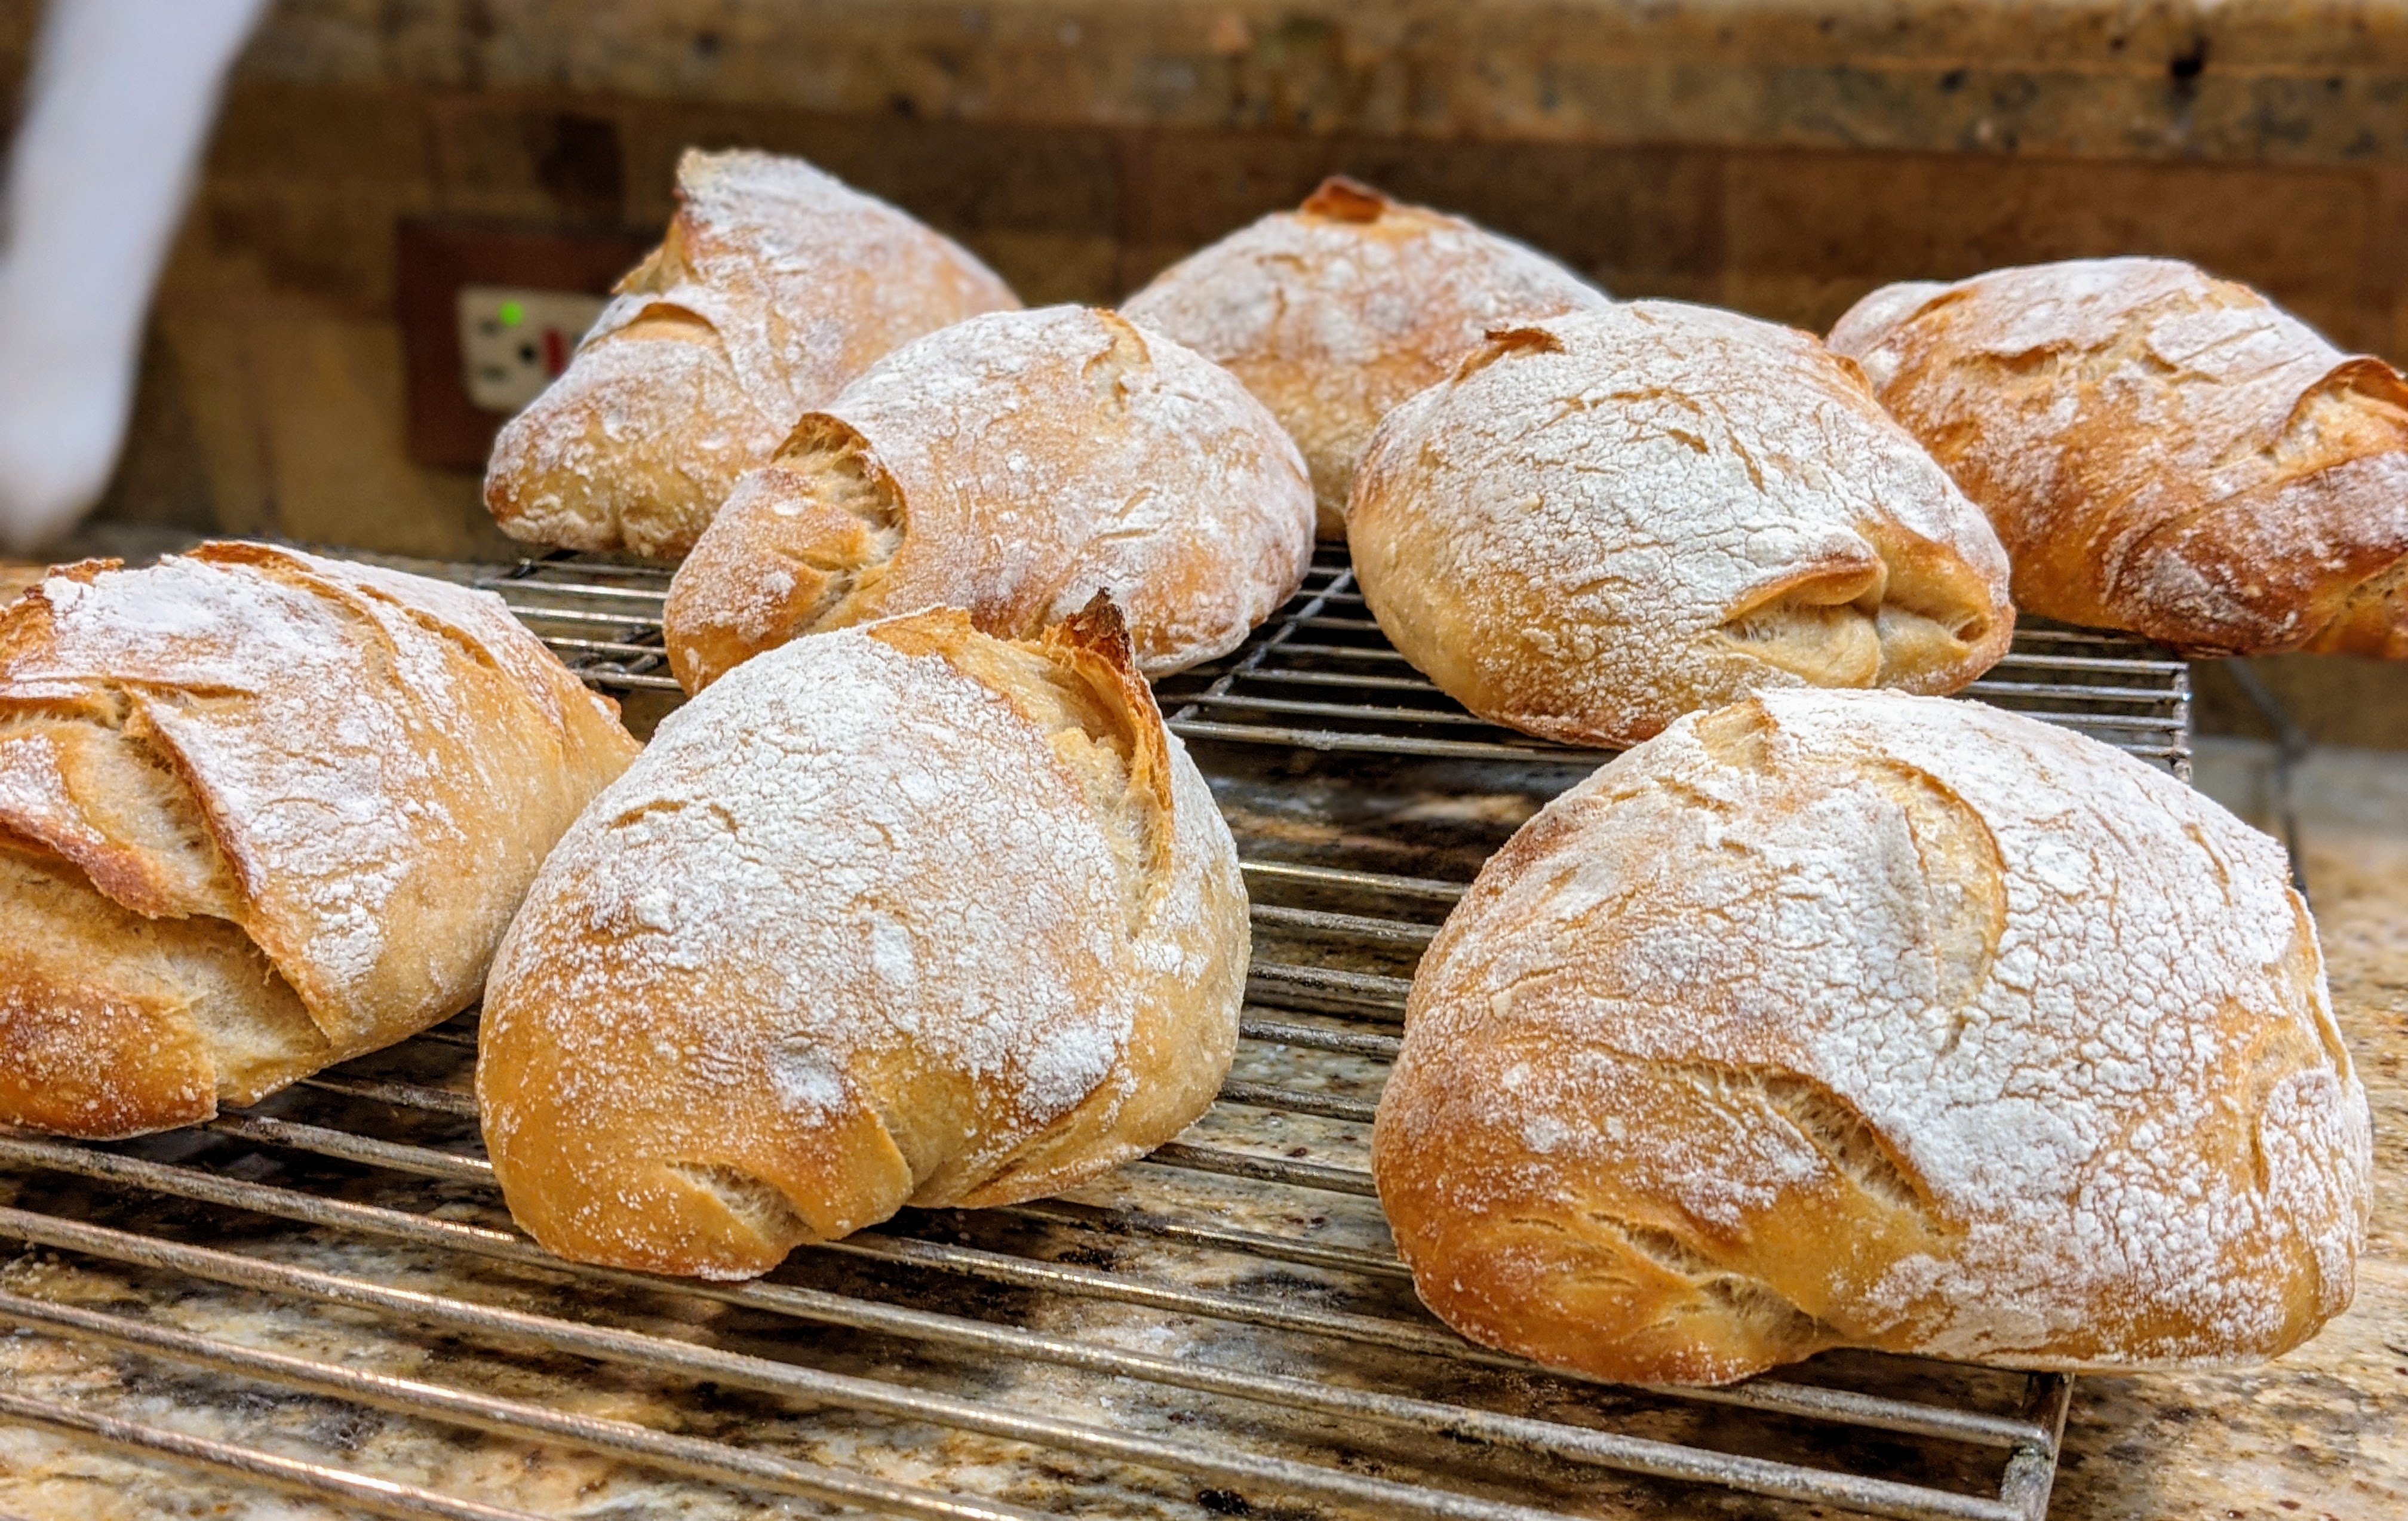


Besides baguettes, ciabattas are my other favorite loaves to make. Once I learned Master Chef Markus Farbinger’s recipe, I was hooked! Ciabattas are SO easy to make. Whether you use the standard recipe that I linked to above, or use a sourdough starter, it can be a same-day bake! Though if you go the sourdough route, I suggest doing an overnight bulk ferment, which I’ll explain below.
With this particular recipe, I’m going for a much lighter crumb and am using bread and AP flour. I know that I have eschewed using white flours, but the enzymes in the sourdough starter help break down the flour to make it more digestible, so while the flour may not be as nutritious as whole wheat and high-extraction flour, we’ll still get plenty of nutrition from the bread. That said, let’s get started!
Ingredients
Levain
| Starter | 200 grams |
| Unbleached Flour | 150 grams |
| Water (90°-95° F) | 150 grams |
Final Dough
| Levain | 500 grams |
| Unbleached Bread Flour | 250 grams |
| Unbleached AP Flour | 500 grams |
| Water* | 550-600 grams |
| Salt | 20 grams |
| Instant Yeast** (optional) | 2 grams |
**Using a bit of instant yeast is purely optional, but I’ve found that it is very helpful on cold days. I wouldn’t use it on hot days where I can rely on the ambient temperature of my kitchen to keep the microbes super-active.
Instead of using separate containers for the levain and the final dough, I just use a 6-quart Cambro tub. When my levain’s ready, I just add all the ingredients to the tub. It’s much more convenient. I’m going to provide some times as guides during the process. By no means are they hard and fast, especially with varying kitchen temps where the bulk and final fermentations can be shorter or longer depending on the ambient temperature of your kitchen.
Make the Levain
- Feed your starter so you can produce 200 grams of starter. When the starter’s ready, transfer 200 grams to a large mixing bowl or a large plastic tub. Note that the starter doesn’t have to be active and at its peak. My daily grape starter is maintained at 400 grams total, so I just use 200 grams from my mother culture, then feed her. Works like a charm!
- (4:00 pm) To the 200 grams of starter, add 150 grams of unbleached flour (here’s where I use my high-extraction flour, but you can use any unbleached flour that you want) and 150 grams of water. Mix thoroughly until smooth.
- (4:15 pm) Place the levain container in a warm place to ferment. It has been cold as of late, so I put my levain container in my oven with the door cracked to get a little heat from the oven light.
- (8:30 pm) If you have a fairly active starter, your levain should be actively bubbling by now. If it’s not, I suggest waiting until it’s really active.
Mix the Final Dough
- (8:40 pm) There’s no autolyse with a ciabatta, so just add all the final dough ingredients to the levain and mix thoroughly until you’ve incorporated all the dry ingredients and create a shaggy mass (about 5 minutes). Note: If you’re going to do a same-day bake, I suggest turning on your oven to 250° C or ~485° F now.
- It’s a bit messy, but I prefer to mix the dough by hand, alternating squeezing the dough through my open fingers, then using a stretch and fold motion to turn the dough. I’ll do this until I feel comfortable that the salt and yeast have been totally incorporated.
- Clean off your mixing hand and let the shaggy mass rest for 20 minutes.
- (9:05 pm) Using a wet hand, do a series of stretch and folds until you feel the tension in the dough building. When it kind of fights you, then let the dough rest for another 20 minutes.
- (9:25 pm) Dump the dough onto your well-floured work surface – it should be really well-floured – making sure you clean and scrape all the excess dough left in the container, then wipe the container with a paper towel.. Using quick motions, pull the dough into a rough rectangle, then do letter folds, front to back, and side to side at least three rounds. Make sure that when you fold, you also pull flap, then fold over. Once you feel that the dough strength has been built up (it will fight you a bit), roll the dough onto its seams, then using your bench scraper, form the dough into a ball.
- (9:30 pm) Spray the container with a light coat of olive oil (I use one of those PAM olive oil spritzers) then gently pick up the dough ball (you can form it up a bit more to make it easier), then drop it into the container.
- So here we have two alternatives:
- Let the dough rest for 5-10 minutes, then put the container in your fridge for an overnight bulk ferment.
- Let the dough rest for 20 minutes, and you’ll be ready for shaping.
Dividing and “Shaping”
Again, depending on how you do the bulk ferment there are two routes to take. The steps are similar, but different enough to warrant discussing them in separate sections.
Same-Day Bake
- After 20 minutes, again liberally sprinkle flour on your work surface, then slide the dough ball out of the mixing bowl.
- Using quick motions, gently tug the ball into a rough rectangle, then divide the dough into equal pieces. If I’m making loaves, I cut the rectangle in half.
- Technically, you’re not supposed shape the ciabatta dough. You pull it into a basic form. But I like to make my loaves into little rectangular pillows, so I gently letter fold the divided dough pieces, being extremely careful not to degas them.
- Once you’ve formed the loaves, gathering them from the long ends and cupping under the dough, transfer them to a well-floured couche, seam side up.
- Sprinkle the loaves with a bit of flour, then cover them and let proof for 10 minutes.
- After 10 minutes, check the loaves for springiness using the finger dent test. You want to have some spring. If there’s a bit too much; that is, the dough immediately springs back, let it rest another 10 minutes.
Overnight Ferment
If you did the overnight ferment, check your dough in your fridge. It should have at least doubled in size. If it hasn’t, you’ll have to wait. My retarder is set to 39° F and it takes 10-12 hours for my dough to double. So if you’re dough’s ready, turn on your oven now and set it to 250° C or about 485° F. Do not proceed until your oven is up to temp, then divide. If you’re using a baking stone, wait at least an hour before proceeding.
- Gently slide the fully fermented dough out of the bowl or container on a very well-floured surface. It should easily slide out since you oiled it down.
- As above, gently tug the ball into a rough rectangle then divide the dough into equal-sized pieces. Personally, the anal-retentive part of me, can’t resist scaling the pieces so they’re all roughly the same weight.
- (optional) As I mentioned above, you don’t have to shape the loaves, but I always do a simple letter fold, then place the loaves on seam side up on a well-floured couche.
- Sprinkle the loaves with flour, cover them, then let them rest for 20 minutes.
- At this point, I transfer the loaves, seam side down to my transfer board, covered with parchment paper. If you’re not going to use a baking stone, you can use a parchment-covered metal baking sheet.
- Sprinkle the tops with flour, cover them, then let the loaves rest for 20 minutes.
Bake
- Bake the loaves for 20 minutes (250° C/485 F) with steam (I now use a broiler pan on the bottom rack of my oven and pour a cup of scalding water into it).
- Remove your steaming tray after 20 min. Turn down the oven to 200° C/400° F) and continue baking for another 15 minutes, though check for doneness at 10 minutes.
- If you want a real crunchy crust, turn the oven off, then leave the loaves in the oven with a slightly cracked door for 10-15 minutes to cure the crusts.
As with my other recipes, I realize that I’ve been a bit long-winded. But I want to make sure I cover as much nuance as possible.

Pingback: Welcome! | The Dawg House!