Known as "Goofydawg" for decades, a few years ago, I reinvented myself from the geeky image I used to portray to that of a patrician whose life has been refined from experience. And I realized that I'm at the time of my life where I want to share that experience and hopefully pass on some of the knowledge and wisdom I've gained over the years.
Yeah, yeah, before any Texas chili purists chime in, I like my chili with beans, but with this recipe, beans are optional.
This is a recipe that took me years to develop. I don’t know – or care – if it’s competition-worthy, but it’s hearty and delicious. The batch above was made with venison hamburger and venison sausage. But pork or beef or any meat will do – even ground turkey and chicken!
This is a low-and-slow chili that takes about 3 hours to finish, but it’s simple to make, even though it may take some time to cook.
Ingredients
4 large, dried Guajillo chilis 1 yellow onion 6 cloves of garlic 1 1/2 lb lean ground meat (85-15 to 90-10) 1/2 lb sausage (preferably something with low sage like Texas breakfast sausage) 1 1/2 tbsp cumin 1 tbsp chili powder 1 tbsp cocoa powder 1 tsp black pepper 1 tsp MSG (optional) 1 tbsp paprika 1/2 tsp ground coriander 1/2 tsp black pepper 2 bay leaves 2 cans diced tomatoes (I like fire-roasted) 2 cans of beans, drained (optional – I like kidney and black beans) 2 tbsp corn starch slurry Salt to taste – about 1 tbsp for me, usually 8 oz. beer (I prefer Pilsner or a Lager. IPA are too bold)
Rehydrate the dried chilis in 2 cups of warm water
Cut the onion into quarters and place in a blender with the garlic
Once the chilis are rehydrated (about 1/2 hour to an hour), remove the stems and place in the blender with the onion and garlic.
Pour about a cup of the chili water into the blender and blend. You want the consistency to be thick, but not a paste. If it’s too thick, add a bit more chili water.
Add all the dry spices to the blender and mix thoroughly.
In a medium pot, add some olive oil, then fry up the onion blend over medium heat until aromatic.
Add the tomatoes and slurry and mix thoroughly.
Add the meat and break it up till there are no large chunks. Stir often.
Add the bay leaves.
At this point, you can add the beans.
Pour in the beer and fold it in thoroughly.
Allow the chili to come to a boil, cover, then reduce heat to simmer.
Let simmer for an hour and a half, stirring every 15-20 minutes.
Uncover, then let simmer without a cover to help thicken. Stir once halfway through.
Turn the heat off, cover, and let the chili rest for an hour.
Before serving, remove the bay leaves.
Serves 6.
Notes
This is just a basic recipe, but you can tweak it any way you want. I sometimes add a small can of chopped green chilis to give it an extra kick.
It’s even better the next day! I often make it the day before I serve it, let cool down, then pop it in the fridge overnight. All the flavors marry.
You can top with chopped onions, sour cream, and cheddar cheese.
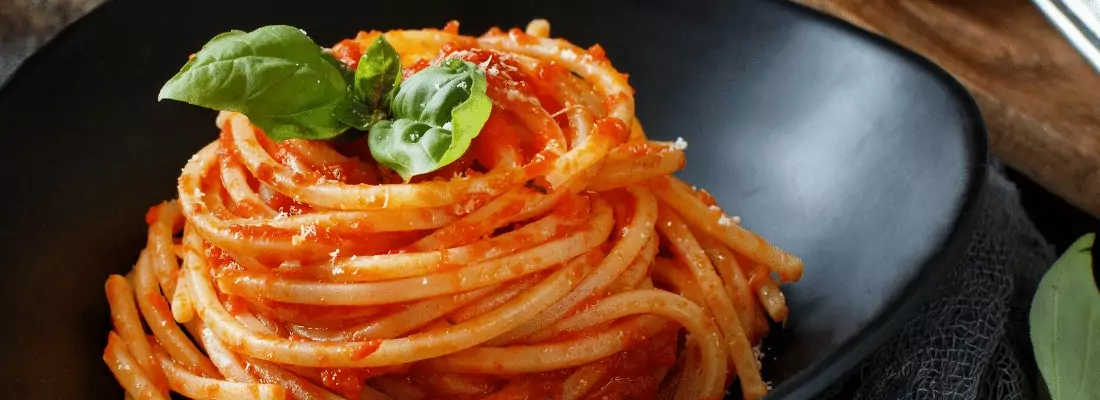
This sounds crazy, but this is great on spaghetti!
If you don’t add beans, you might let this simmer partially covered so more water evaporates from the chili.
Yeah, I know… I’ve been writing a lot about barbecue lately but it’s another passion of mine besides baking bread. And yesterday, I made what is essentially meat candy!
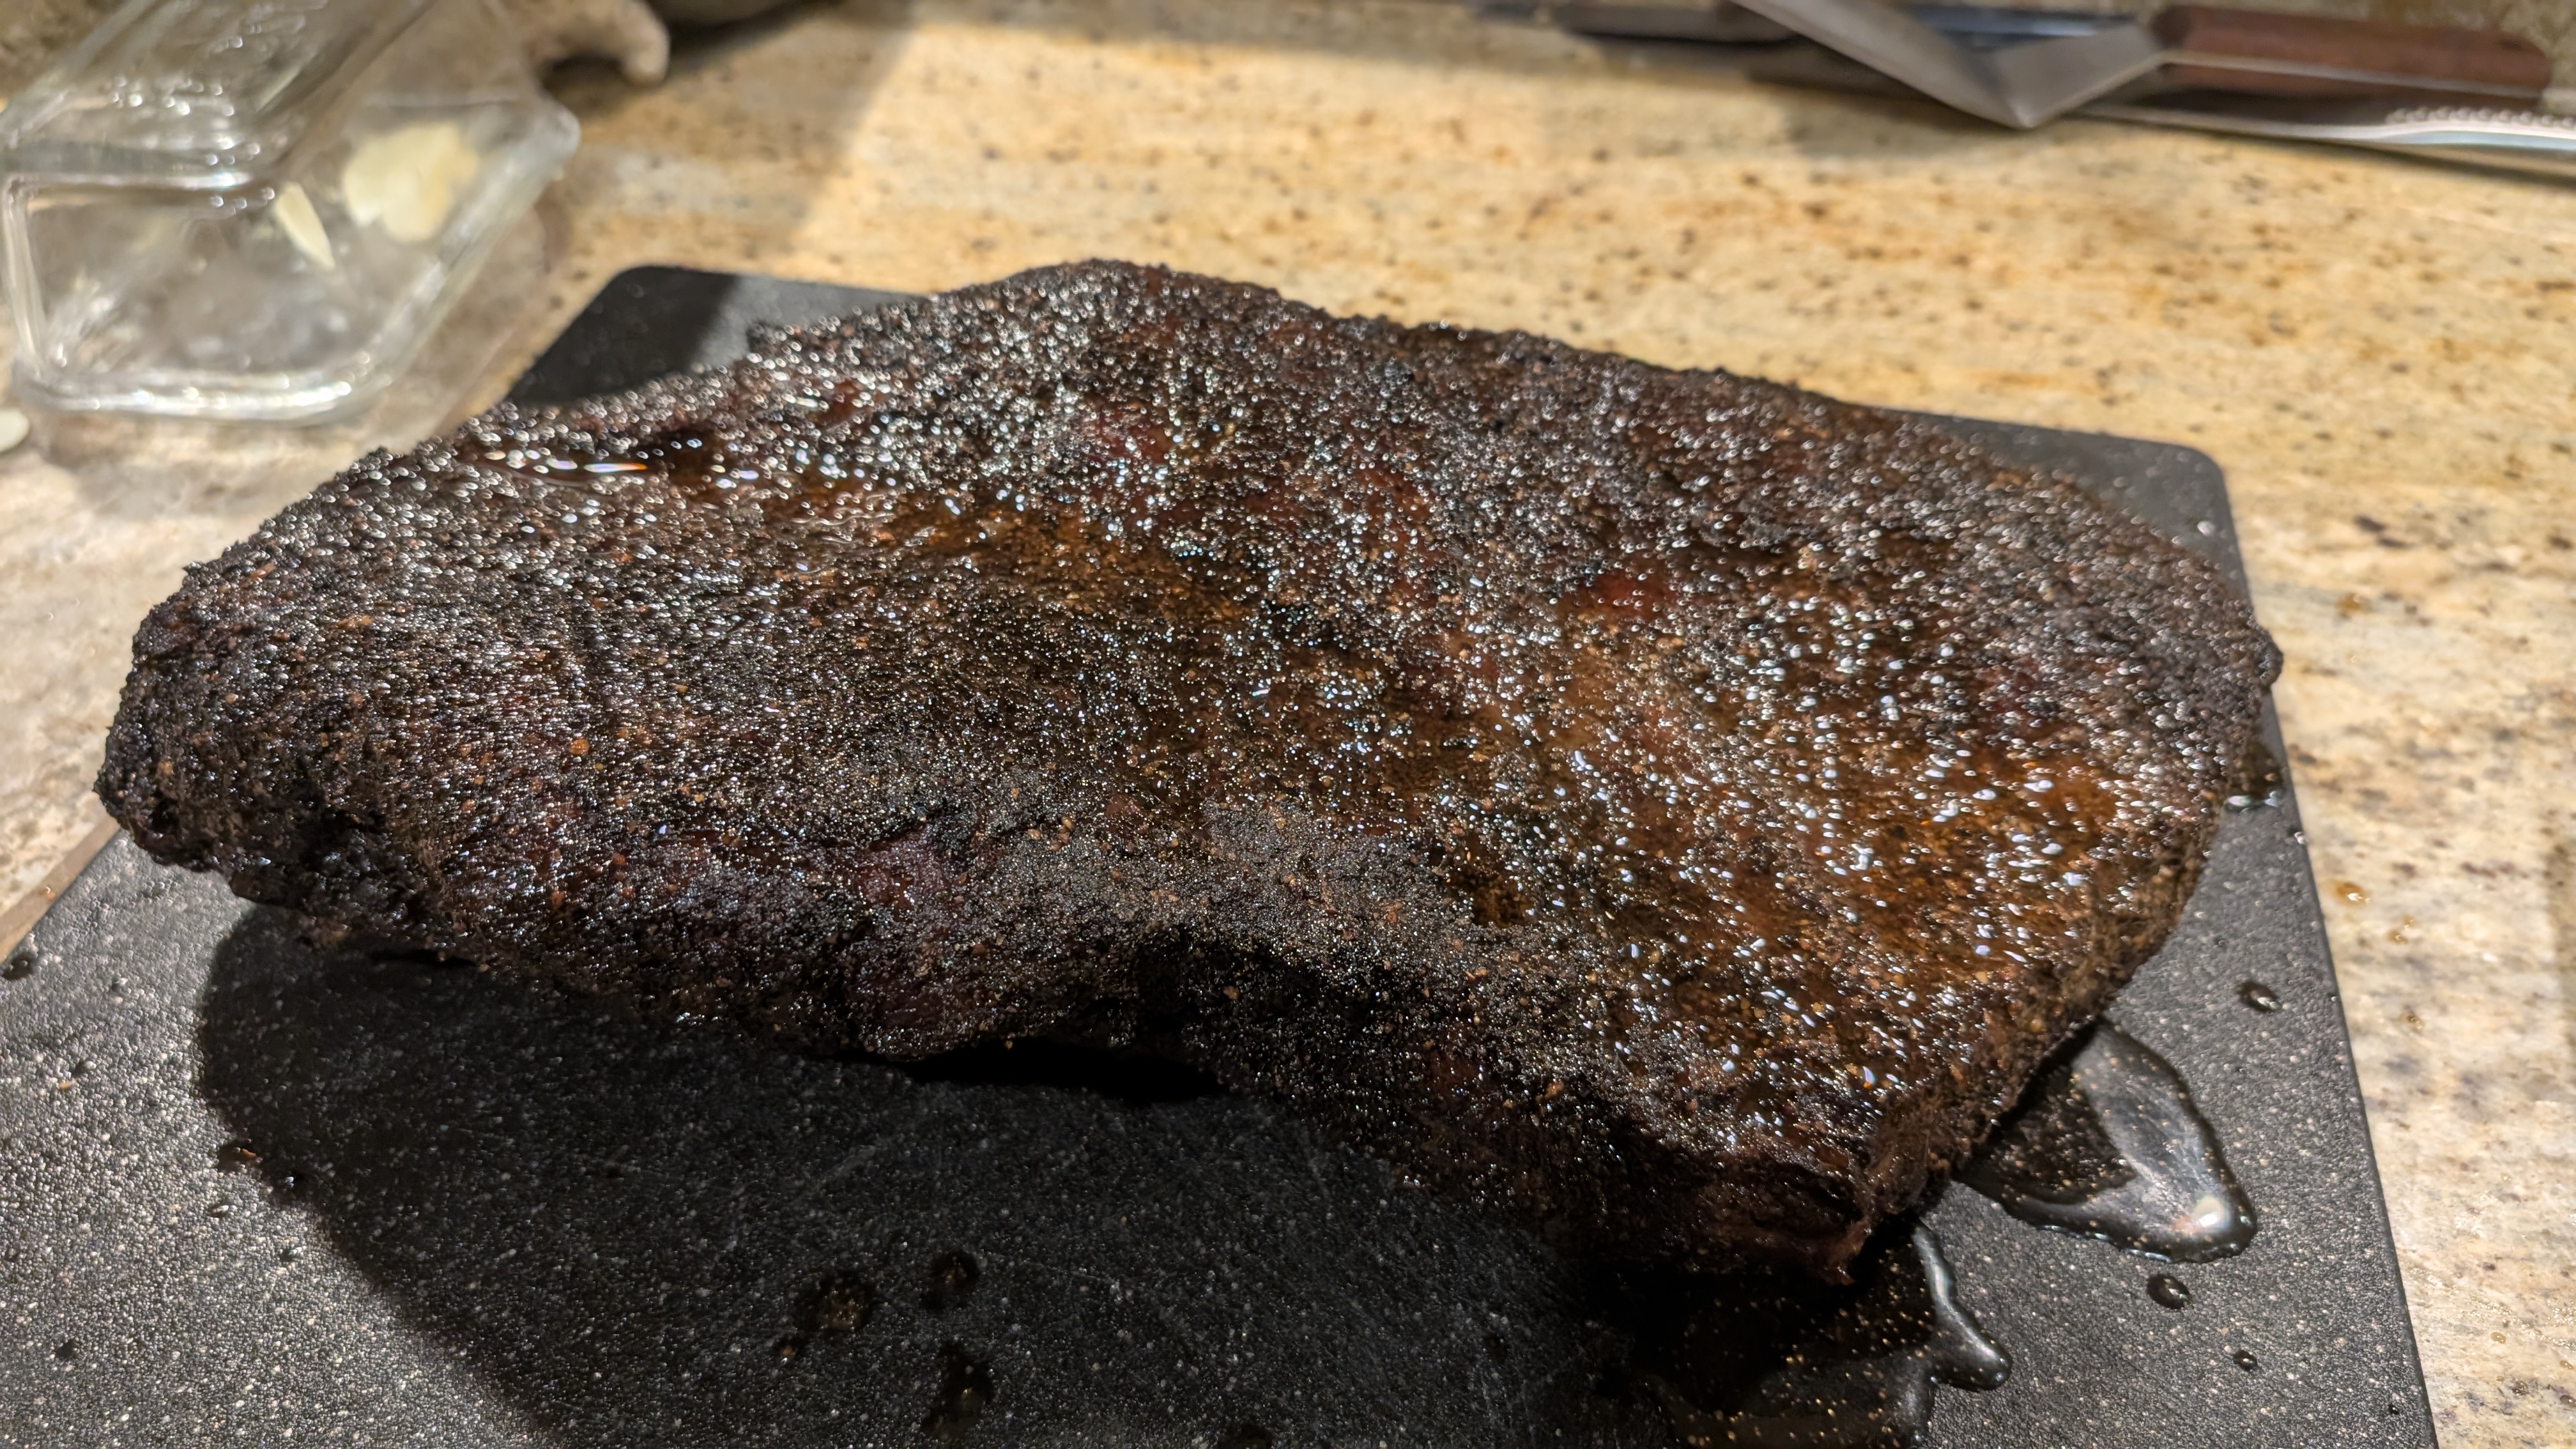
Last weekend, I made a gorgeous brisket. It was a huge cut of meat. I shared most of the flat (lean side) with a friend and kept the transition and point. Even after I split the transition from the point, I still had a bunch of point meat left. So, yesterday I cubed it up for burnt ends.
At least for me, burnt ends aren’t necessarily about the meat. They’re about the sauce. And because the meat was SO good, I didn’t want to use store-bought sauce, even though there are wonderful sauces out there. I wanted to make my own.
I must come clean about what inspired me to make the burnt ends and sauce. I happened to watch a video on bourbon burnt ends by Meat Church BBQ. And since I love bourbon, and have a few bottles, I thought that the sauce would be perfect for my burnt ends.
But when I looked at my shelf, I saw that I only had top-shelf bottles that are sippers. Bummer. I wasn’t going to use bourbon from $75+ bottles. But then I thought, what about using another spirit? I smiled because I had plenty of rum. So, I concocted a sauce recipe. I call it “Rum Fire.”
Jamaican Rum Fire BBQ Sauce
The idea behind this sauce was that I wanted to showcase the funkiness (aka “hogo”) of Jamaican Rum in a BBQ sauce and also give the sauce a more Caribbean feel as opposed to traditional southwest flavors. That covers the rum part. The “fire” comes from hot chili peppers like Habanero or Scotch Bonnet which also add to the Caribeean theme of this sauce.
Base
1 cup ketchup
½ cup tomato paste
½ cup apple cider vinegar
1 cup brown sugar
Rum and Aromatics
¾ cup Jamaican Rum
1 small onion, pureed
4 cloves garlic, pureed
¼ carrot, pureed
1 tbsp Worcestershire (I prefer Bear & Burton’s W Sauce)
1 tbsp Dijon mustard
1 tbsp beef tallow or butter
Spice Layer (Jamaican‑leaning)
1 tsp smoked paprika
½ tsp ground ginger
½ tsp cayenne
½ tsp black pepper
½ tsp allspice
Pinch of clove (tiny—Doctor Bird amplifies it fast)
1 tbsp Meat Church Holy Cow
1 tbsp Meat Church Holy Gospel (for dusting after the cook)
Optional: 1-2 Habanero or Scotch Bonnet chili peppers (seeds removed, finely chopped)
Process
Puree the onion, garlic, and carrot in a blender to create a smooth paste.
On medium-low heat, melt the tallow or butter, then pour the puree into a medium sauce pan. Sauté the puree until transluscent.
Add the Worcestershire and Dijon and completely incorporate
Add all the dry spices and incorporate them completely. Cook for 1-2 minutes or until the spices become fragrant.
Add all the base ingredients and the chili peppers to the pot and mix well.
Once everything’s together, add the rum. Mix until fully incorporated.
Allow to come to a slow boil, then reduce heat to low to burn off the alcohol.
Simmer uncovered for 30-45 minutes depending on how thick you want the sauce.
Once you’ve got your desired thickness, let it cook for 30 minutes.
If you don’t want that Caribbean heat kick, use less chili peppers or devein them before chopping them up.
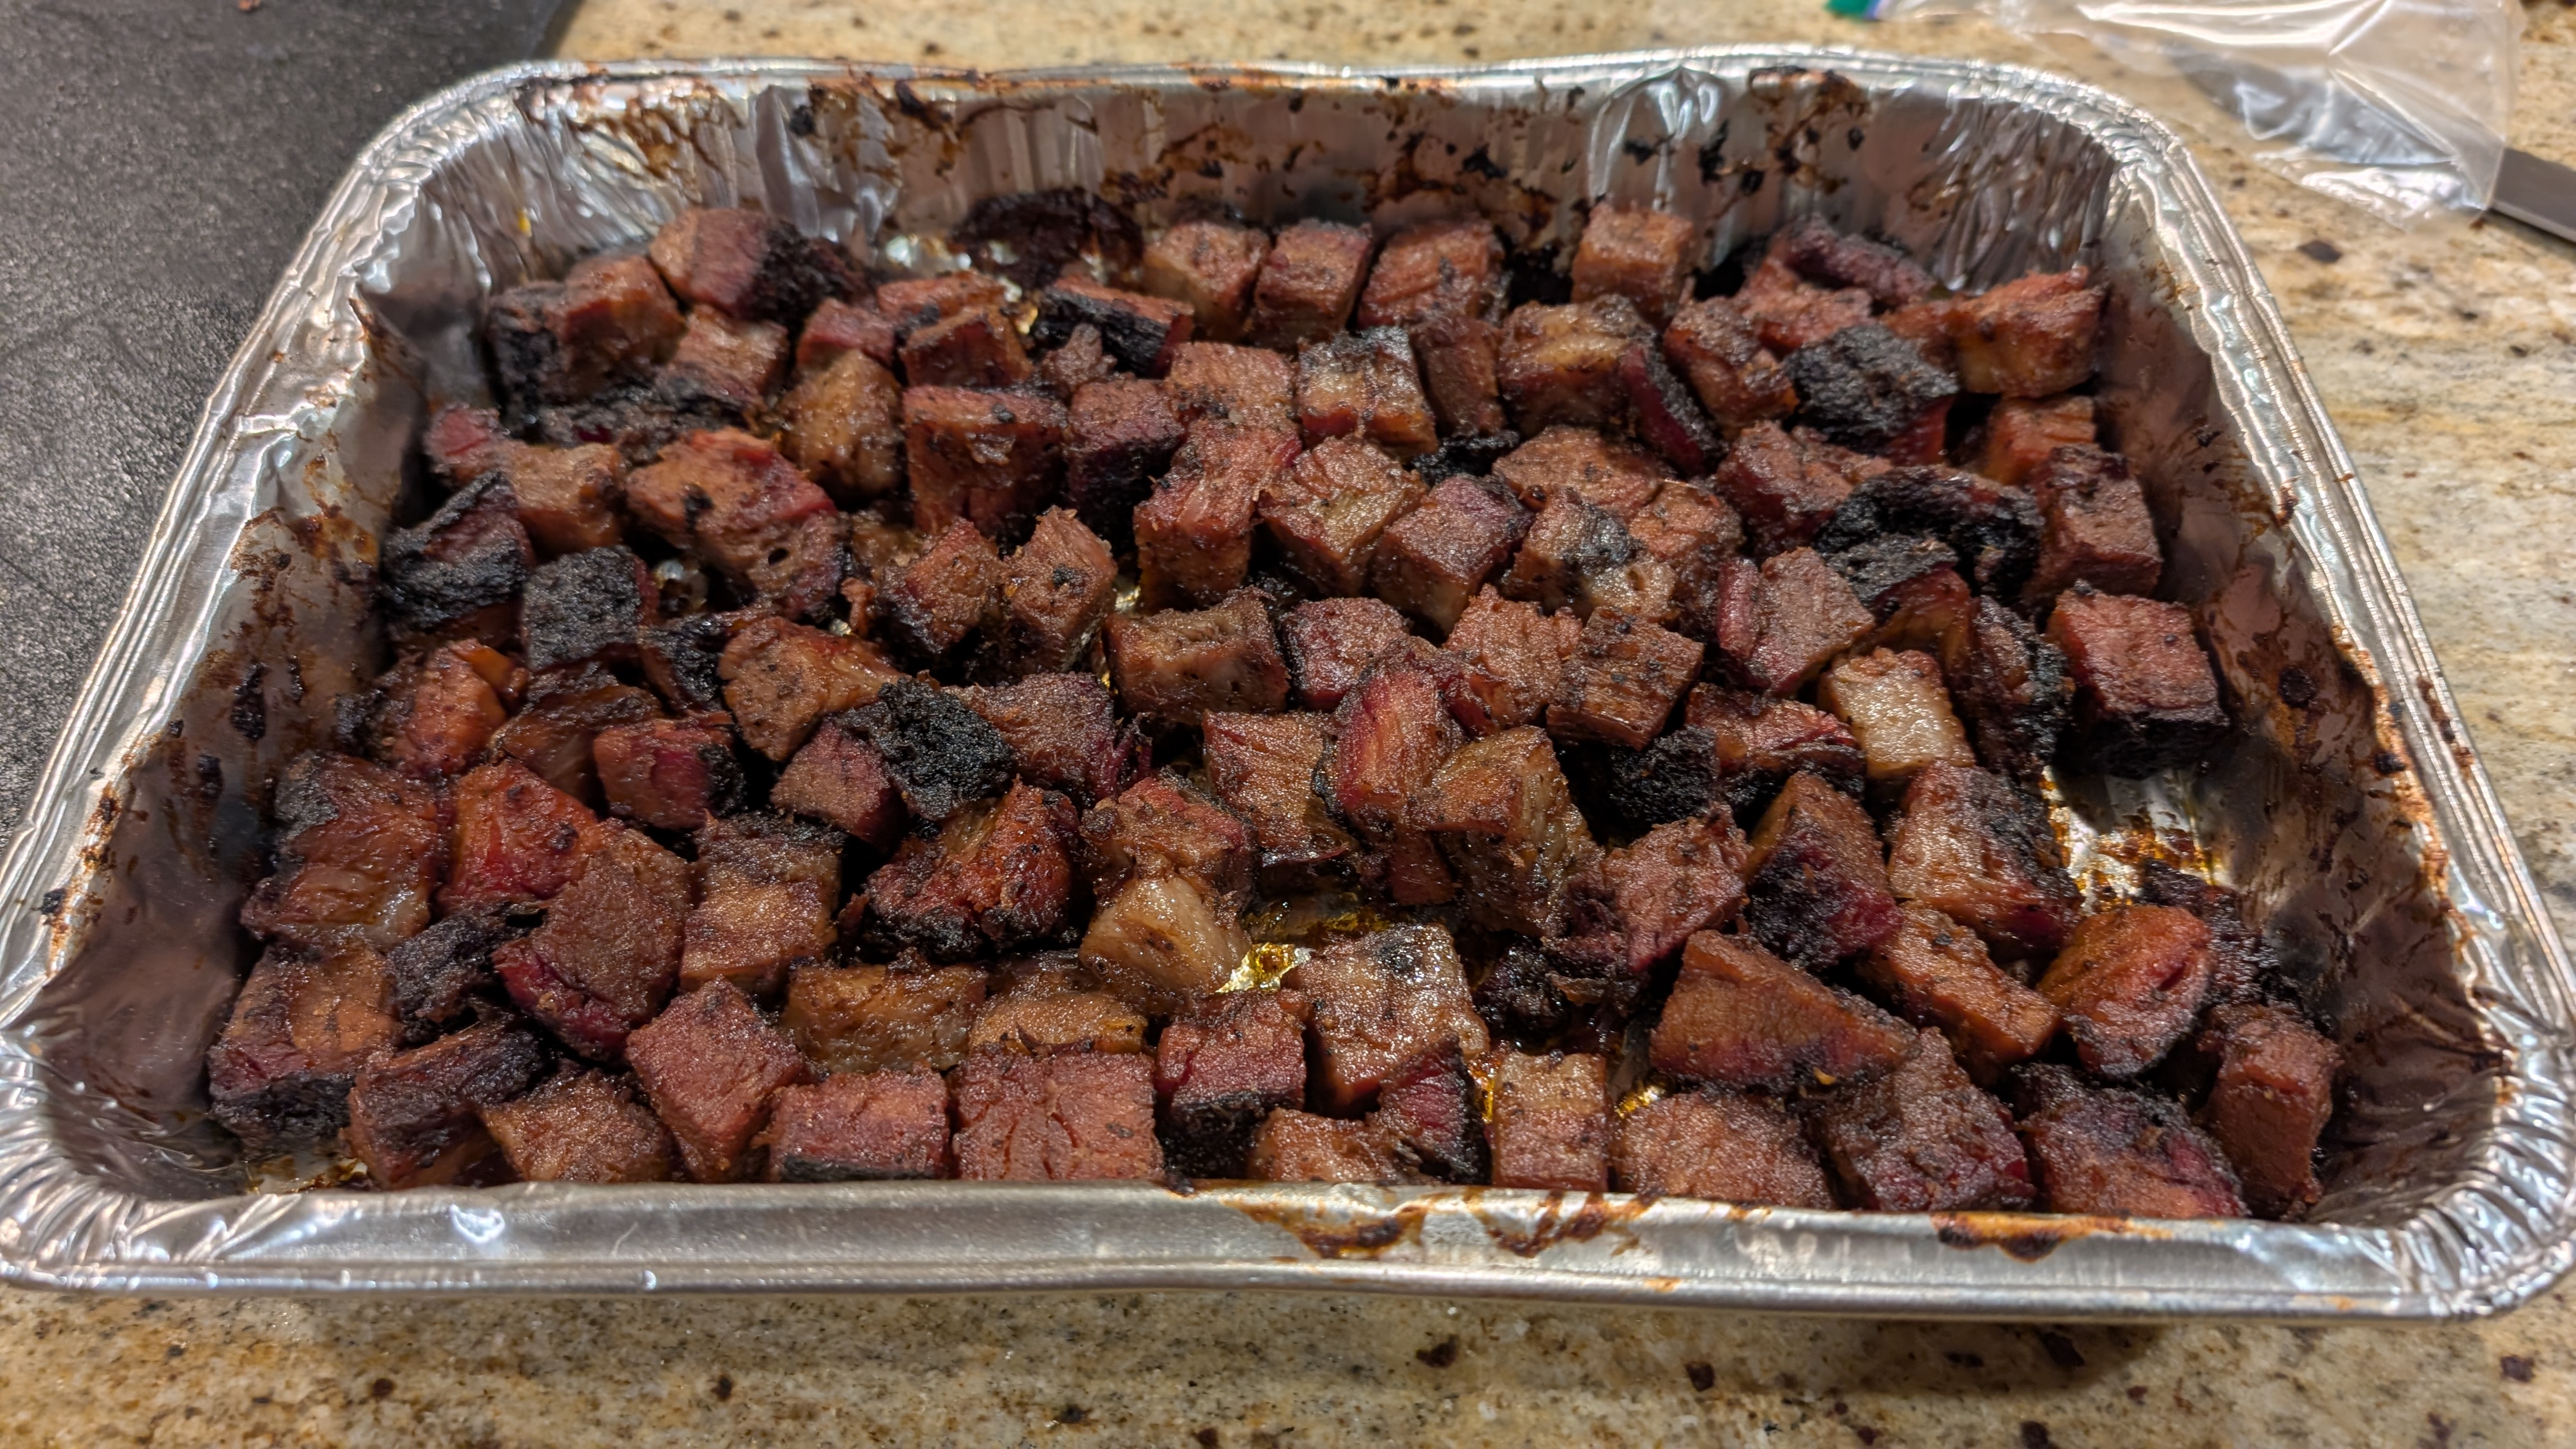
Making the Burnt Ends
When I’ve made burnt ends in the past, I don’t cook them right after I pull the brisket. The point meat is so soft and fatty that it’ll fall apart. So what I’ve learned to do is to refrigerate the meat. It makes cubing and saucing so much easier! Plus, it limits the amount – if any – the meat breaks up. If the meat was warm, it would tear apart and you’d have pulled brisket. That’s not a bad thing, but not what you’re after.
Cube refrigerated brisket point meat into 3/4″ cubes.
Sauce the meat just enough to coat. You don’t want the meat to be swimming in sauce, otherwise the sauce won’t caramelize, and that’s what makes a great burnt end.
Sprinkle the Meat Church Holy Cow (or a salt, pepper, garlic, smoked paprika mix) over the meat, then gently fold the meat to evenly distribute the sauce and seasoning.
Cook uncovered at 300°F for 30 minutes. That said, I like to cook them on my Traeger to give them a kiss of smoke.
Fold the meat again, then cook for 30-45 minutes to fully caramelize the sauce.
Remove from oven then immediately sprinkle Holy Gospel seasoning (or your favorite that has just a hint of sweetness to it).
Gently fold the seasoning into the hot meat.
Rest for 15 minutes, then serve, using the remaining BBQ sauce as a dip.
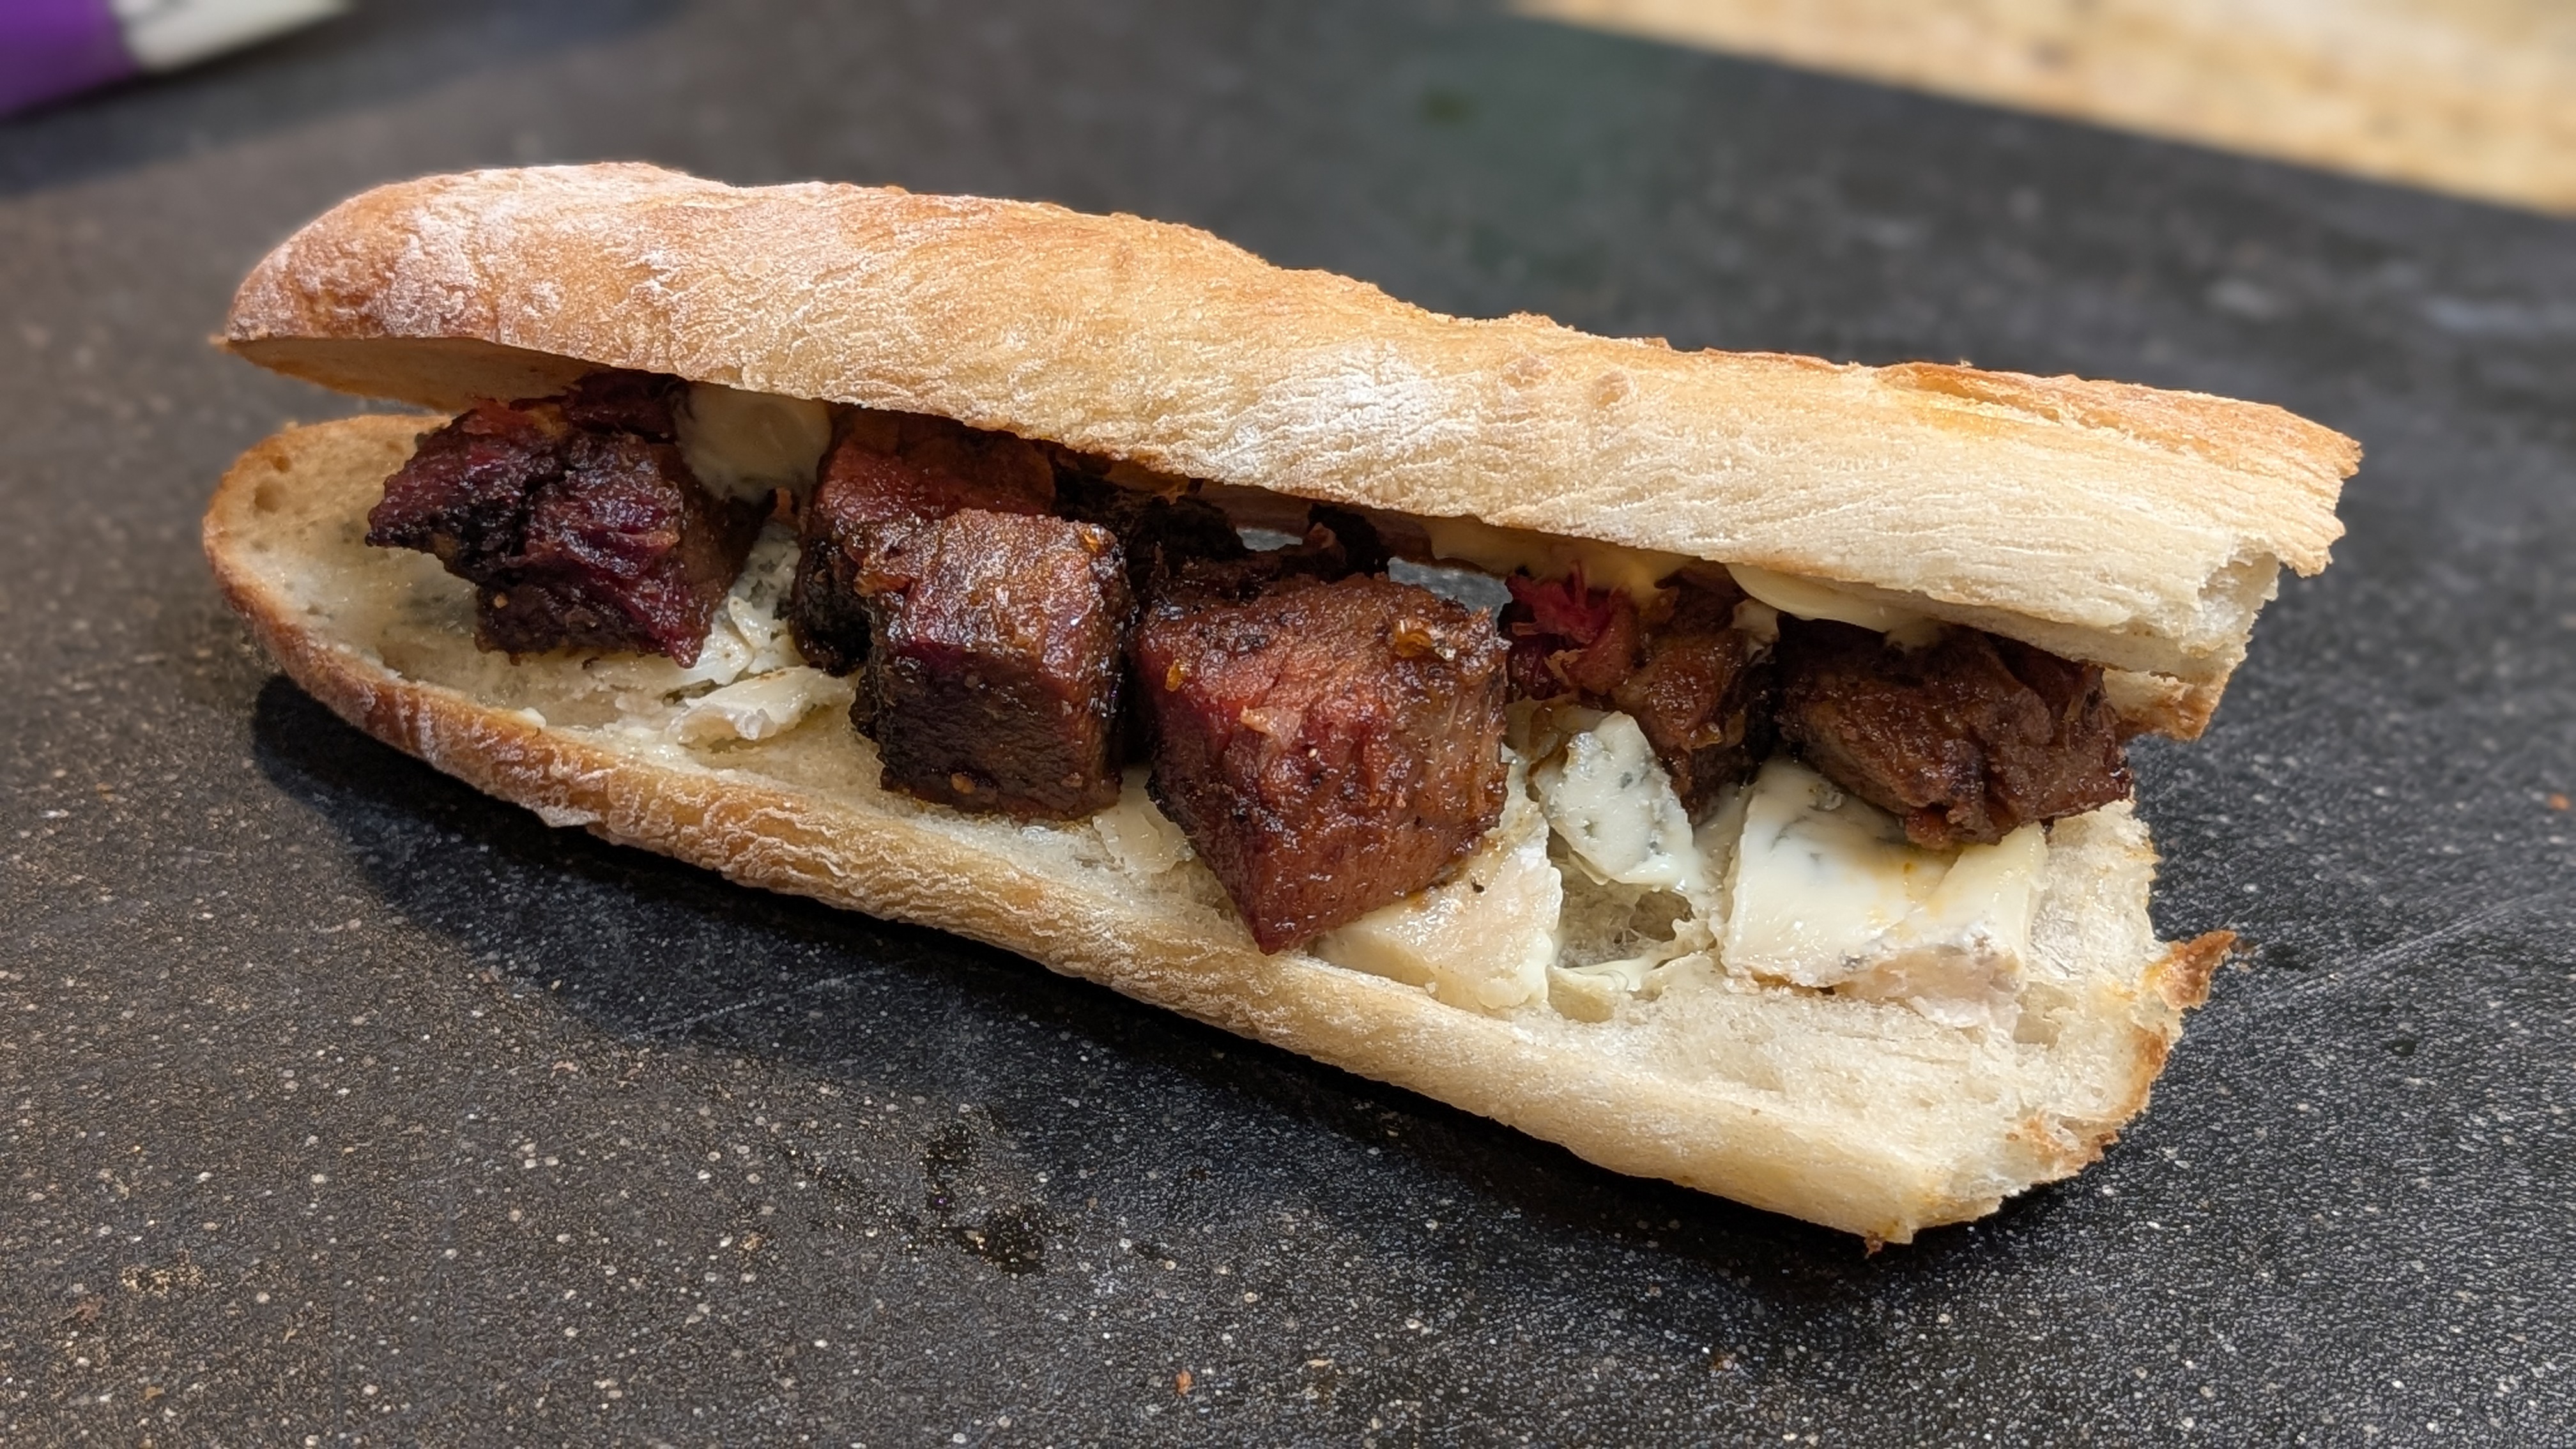
Brisket Burnt Ends Po’ Boy with Gorgonzola cheese!
One thing about the baking process is that it is sensitive to changes in many different parameters. Change just one thing and you may get wildly different results than what you expected. For me, the latest change I made was getting a new baking steel after baking for years on a Fibrament D stone.
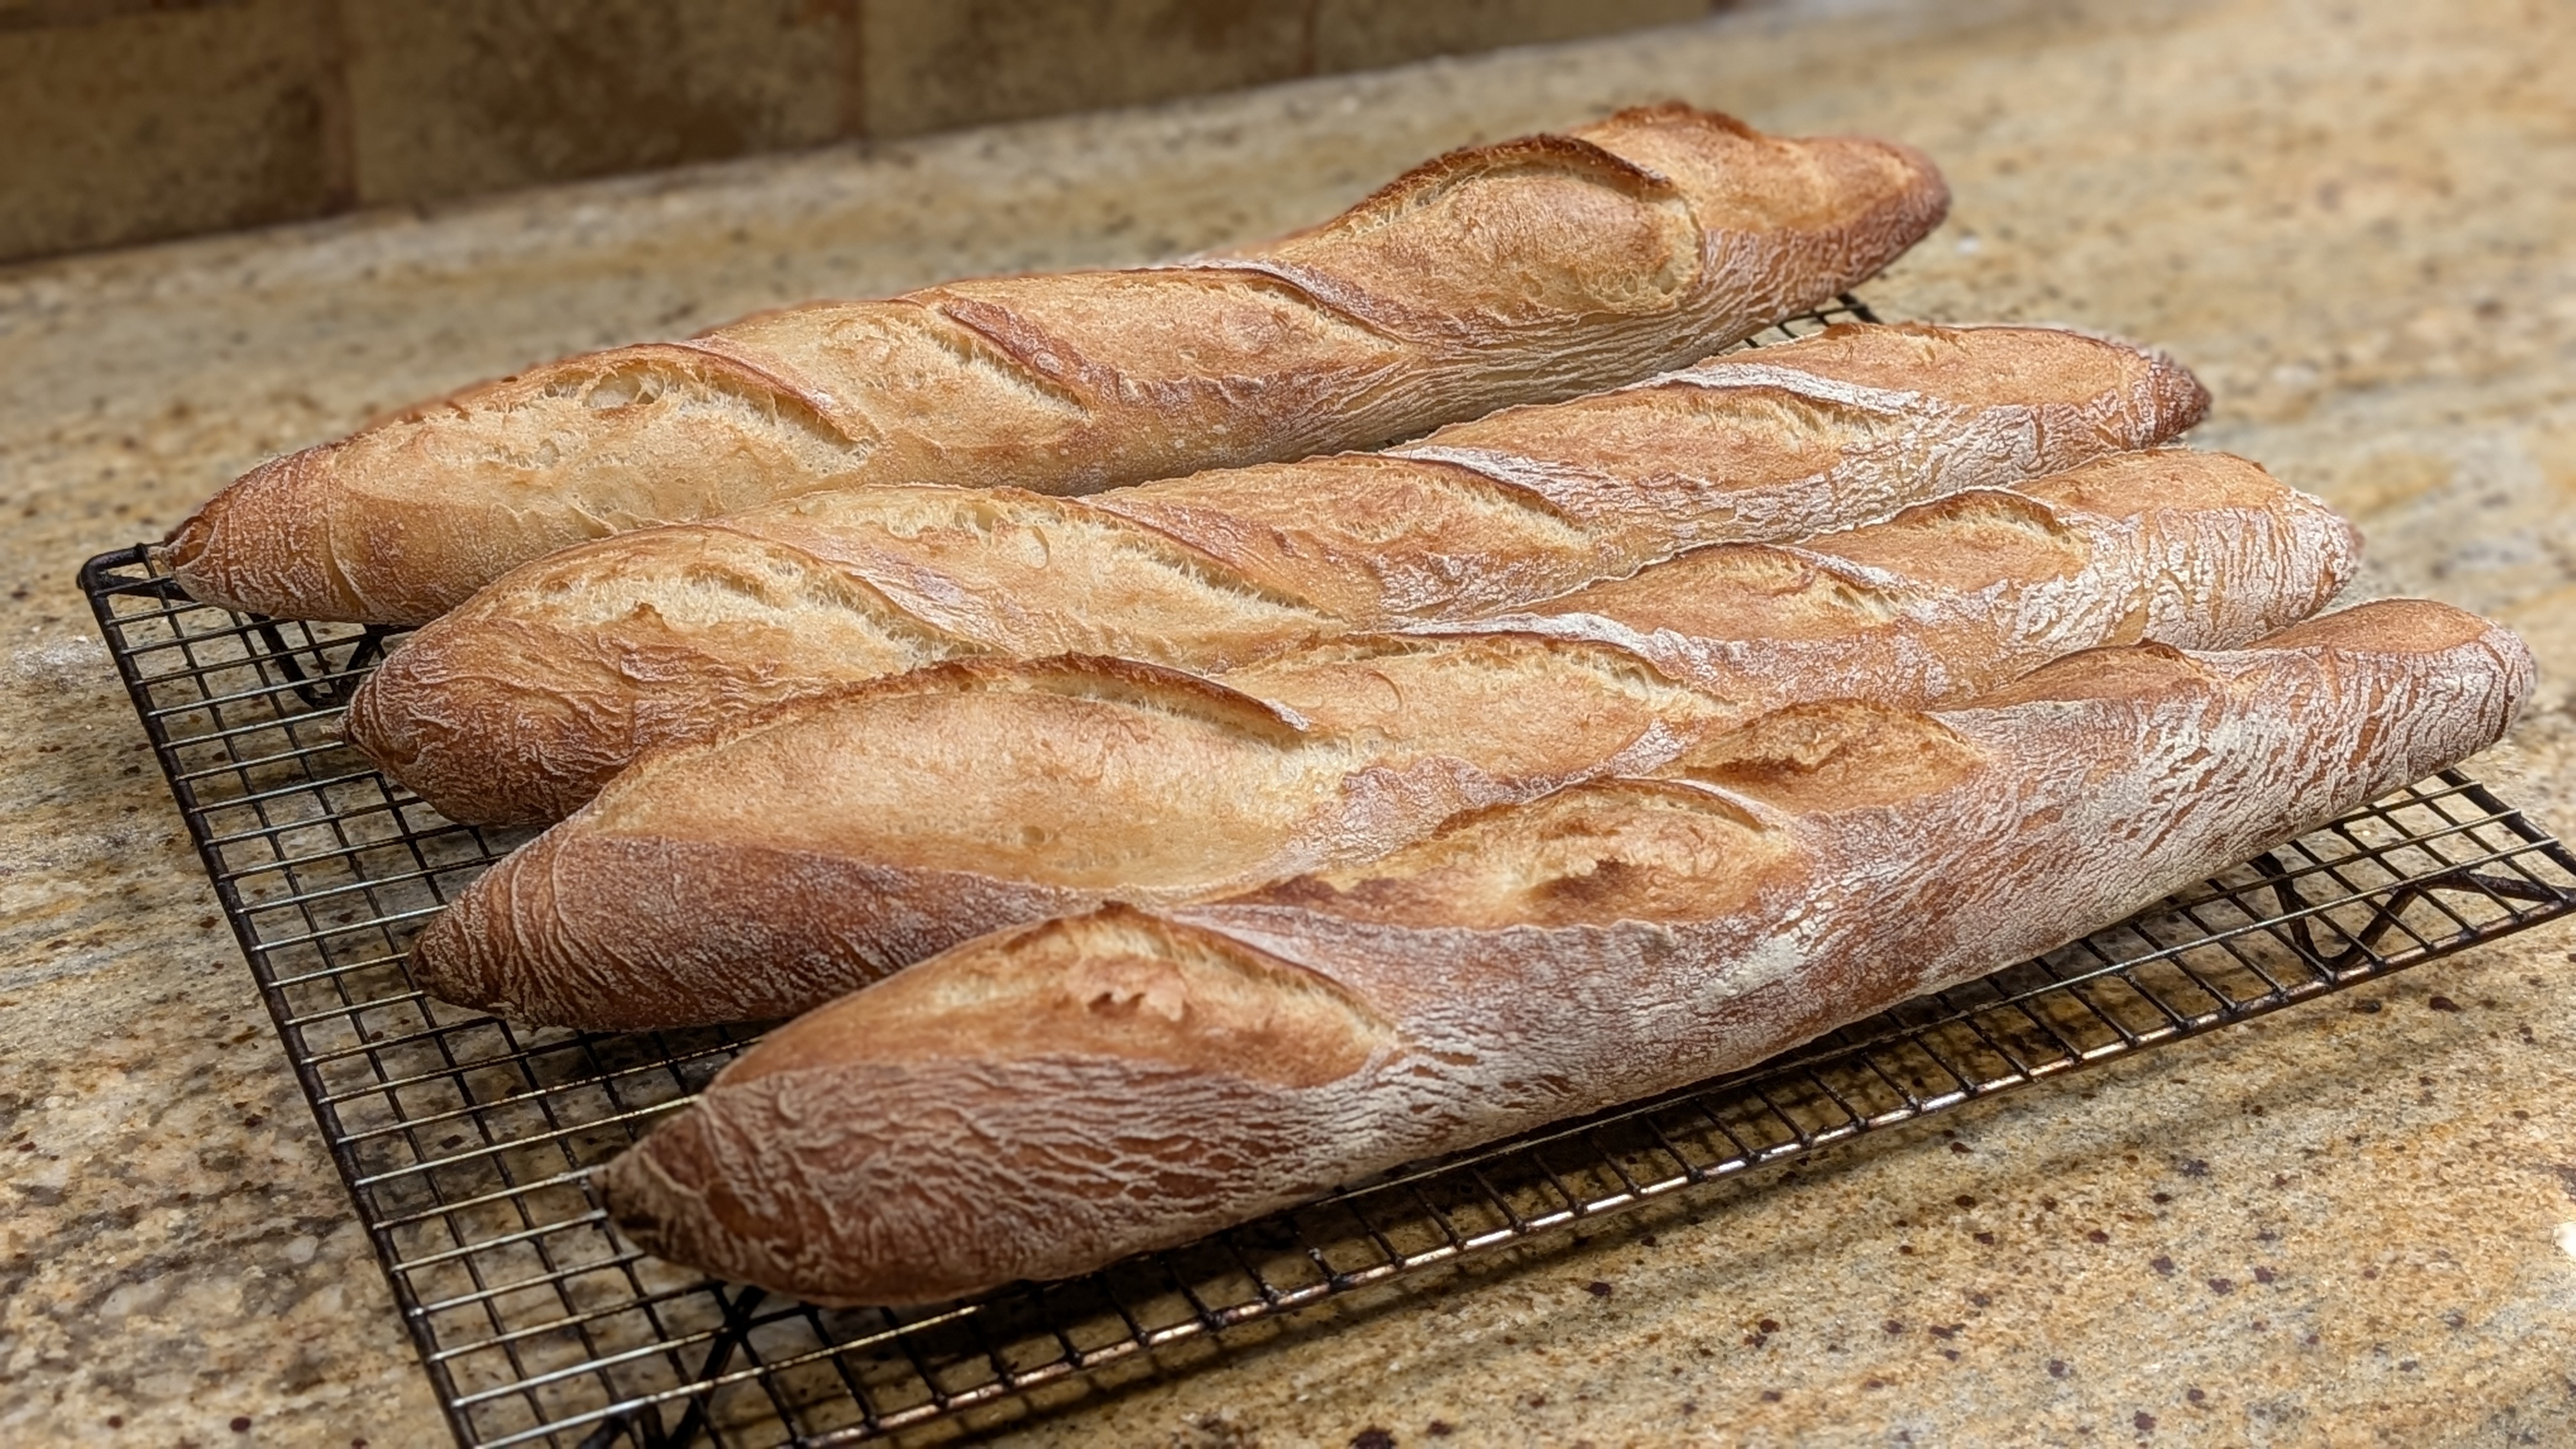
Take baguettes, for example. I was used to baking them on my stone, and my process revolved around it; mainly from a timing standpoint because my stone took so long to come to temp. But with my new steel, it comes to temp much quicker, and not only that, it retains heat much better than my old stone. Not only that, heat transfer to my dough is much more efficient than my stone.
What this means is that I’ve had to adjust my timings. For instance, I use to be able to bake my baguettes slightly underproofed with my stone because heat transfer wasn’t nearly as efficient and I could get a way with it. But with my steel, I have to take the final fermentation to fully fermented. Otherwise, my loaves would blow up and I’d get huge holes and the loaves would blow through my cuts and not form any ear. But this is a good thing.
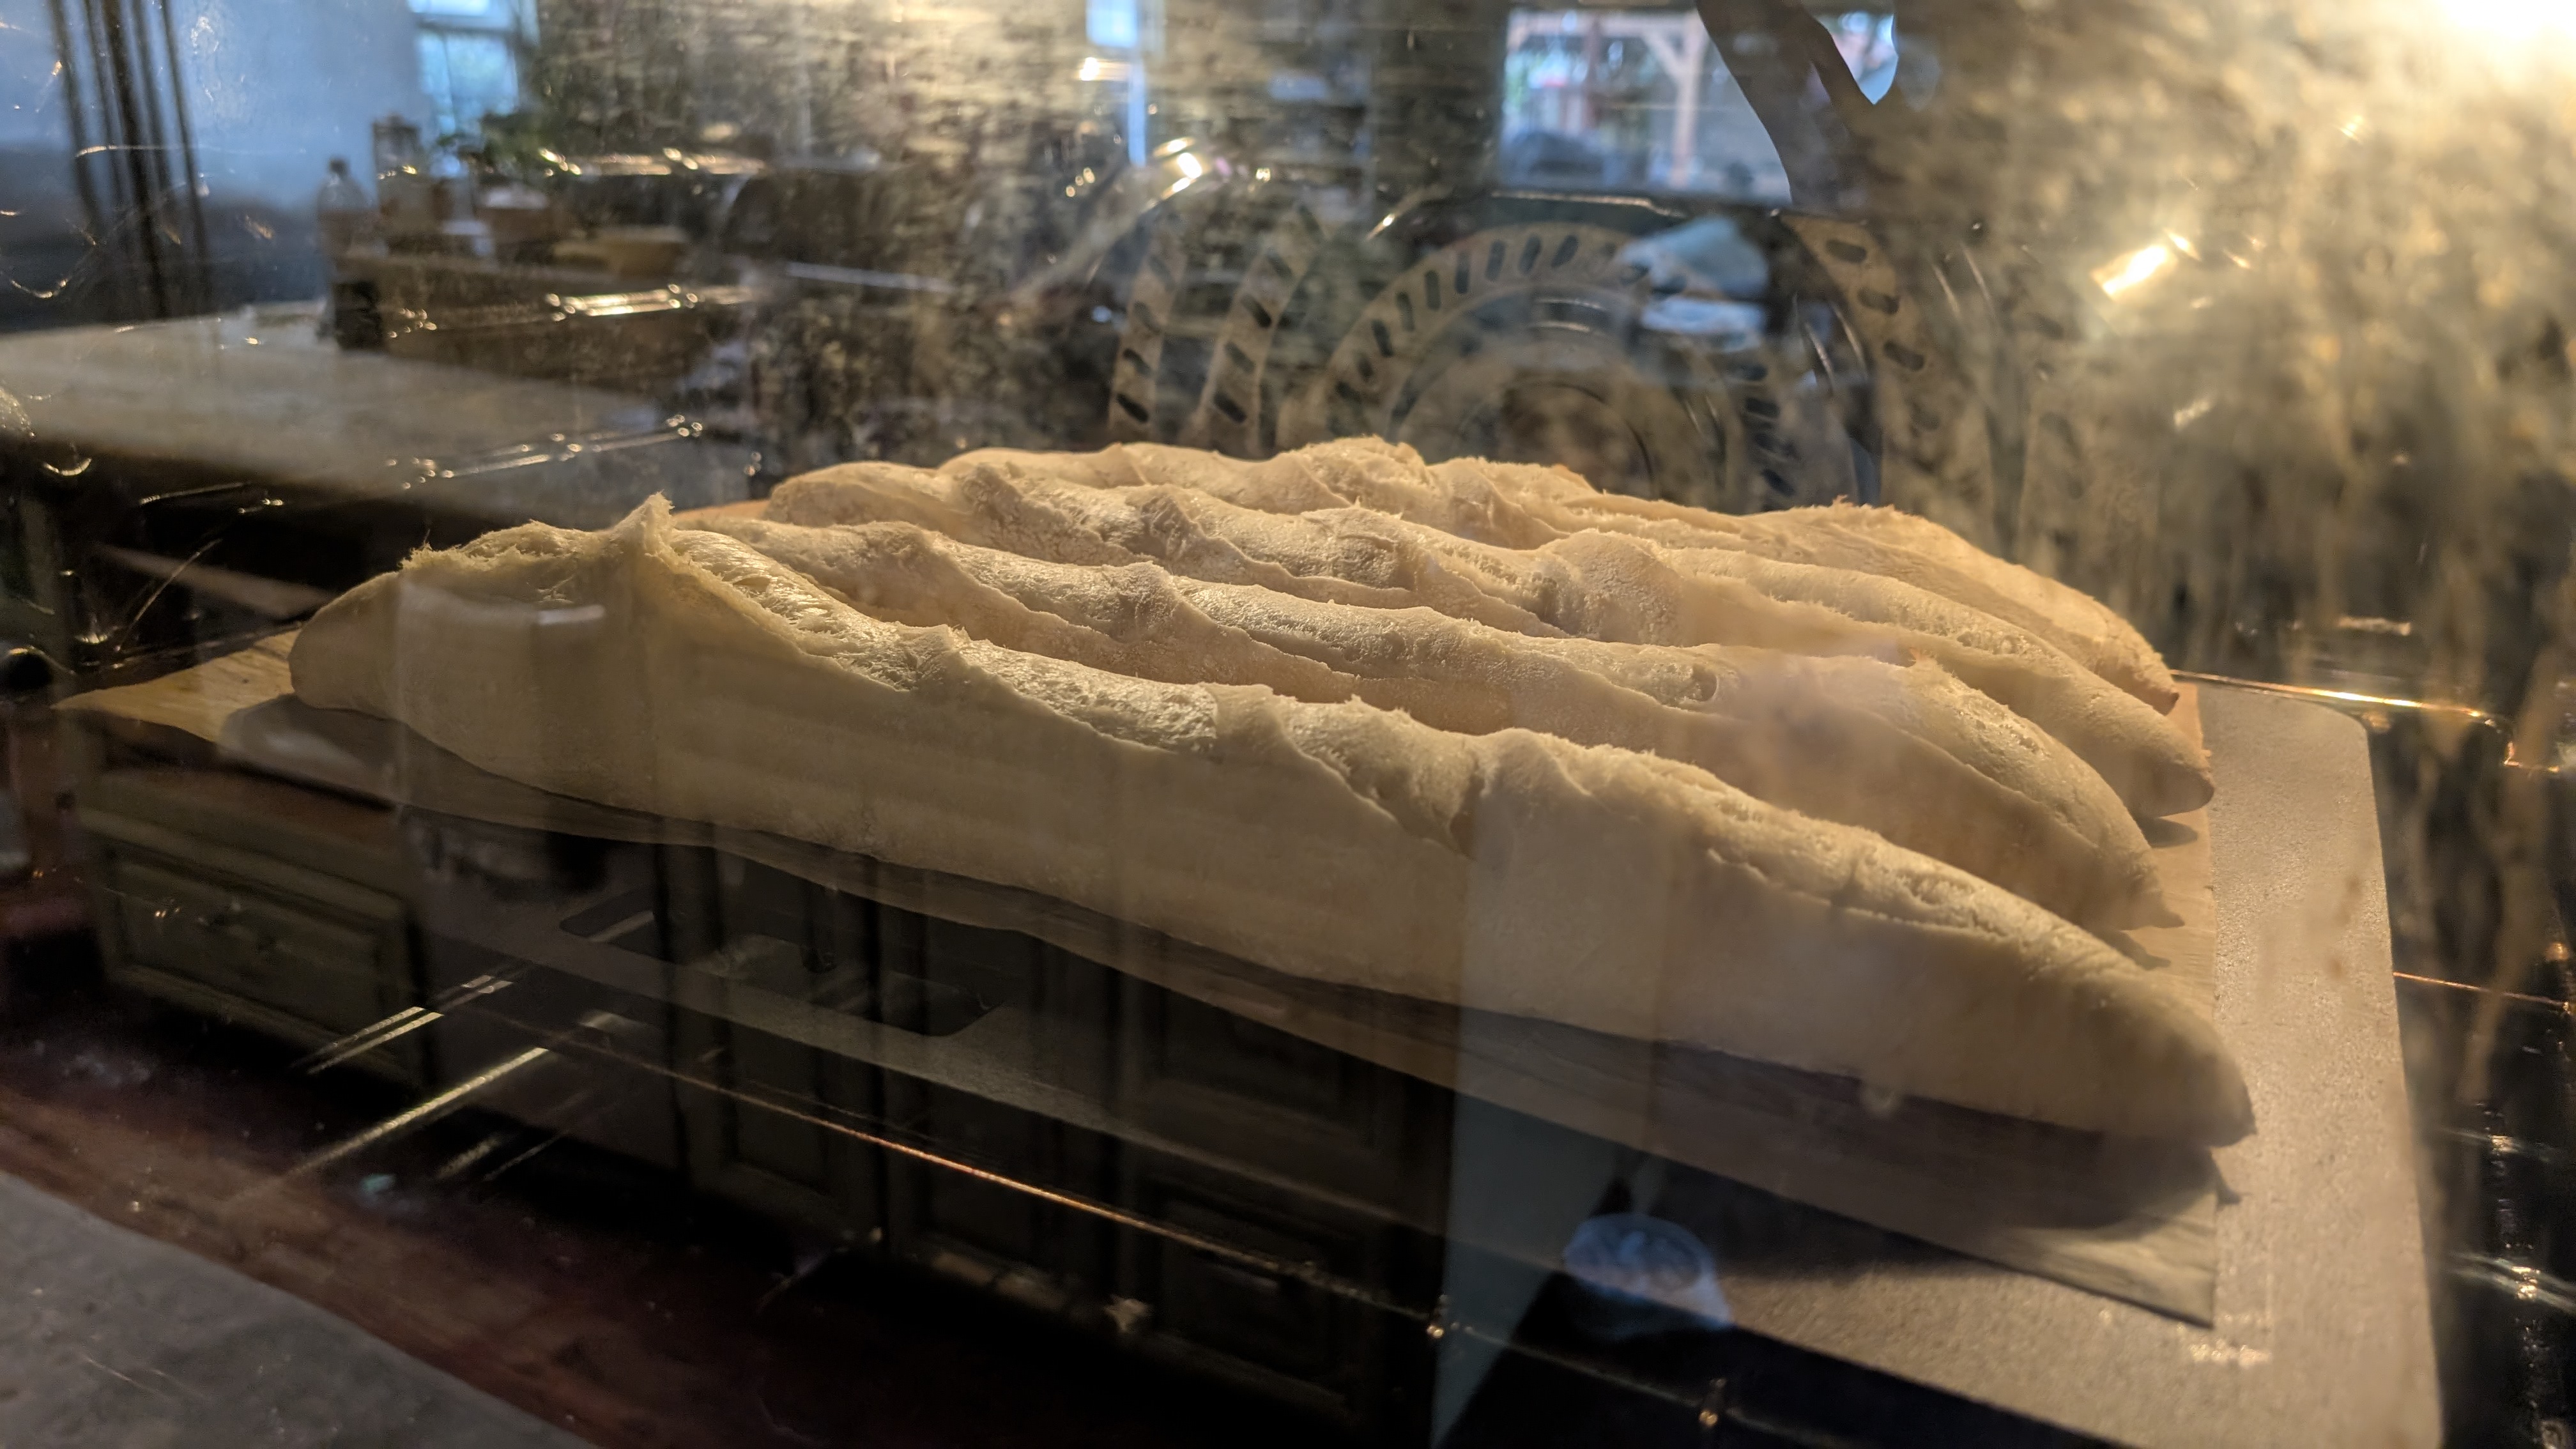
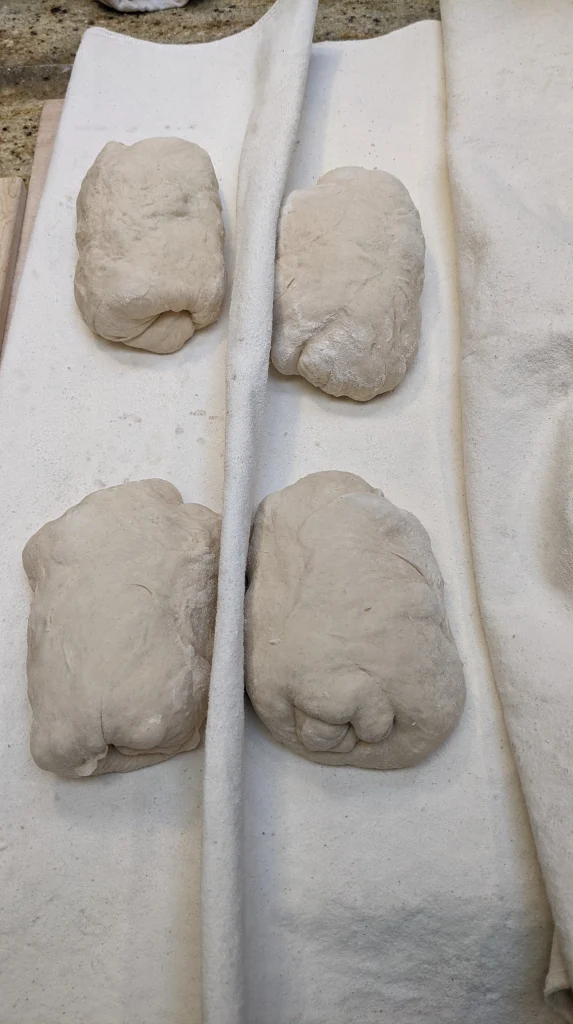
With the loaves pictured above, I went a little too far with the final fermentation. They puffed up nicely and the tasted damn good. But I could tell just by looking at them, that I need to make an adjustment to my final fermentation timing.
But one thing I can tell you is this: I’m never going back to a stone for home baking. That super-efficient heat transfer has produced loaves with a glorious open crumb (what you want with baguettes), and more importantly with large format loaves, great oven spring that I couldn’t rely on with my stone unless I heated it up to a very high temperature because it didn’t retain heat as well.
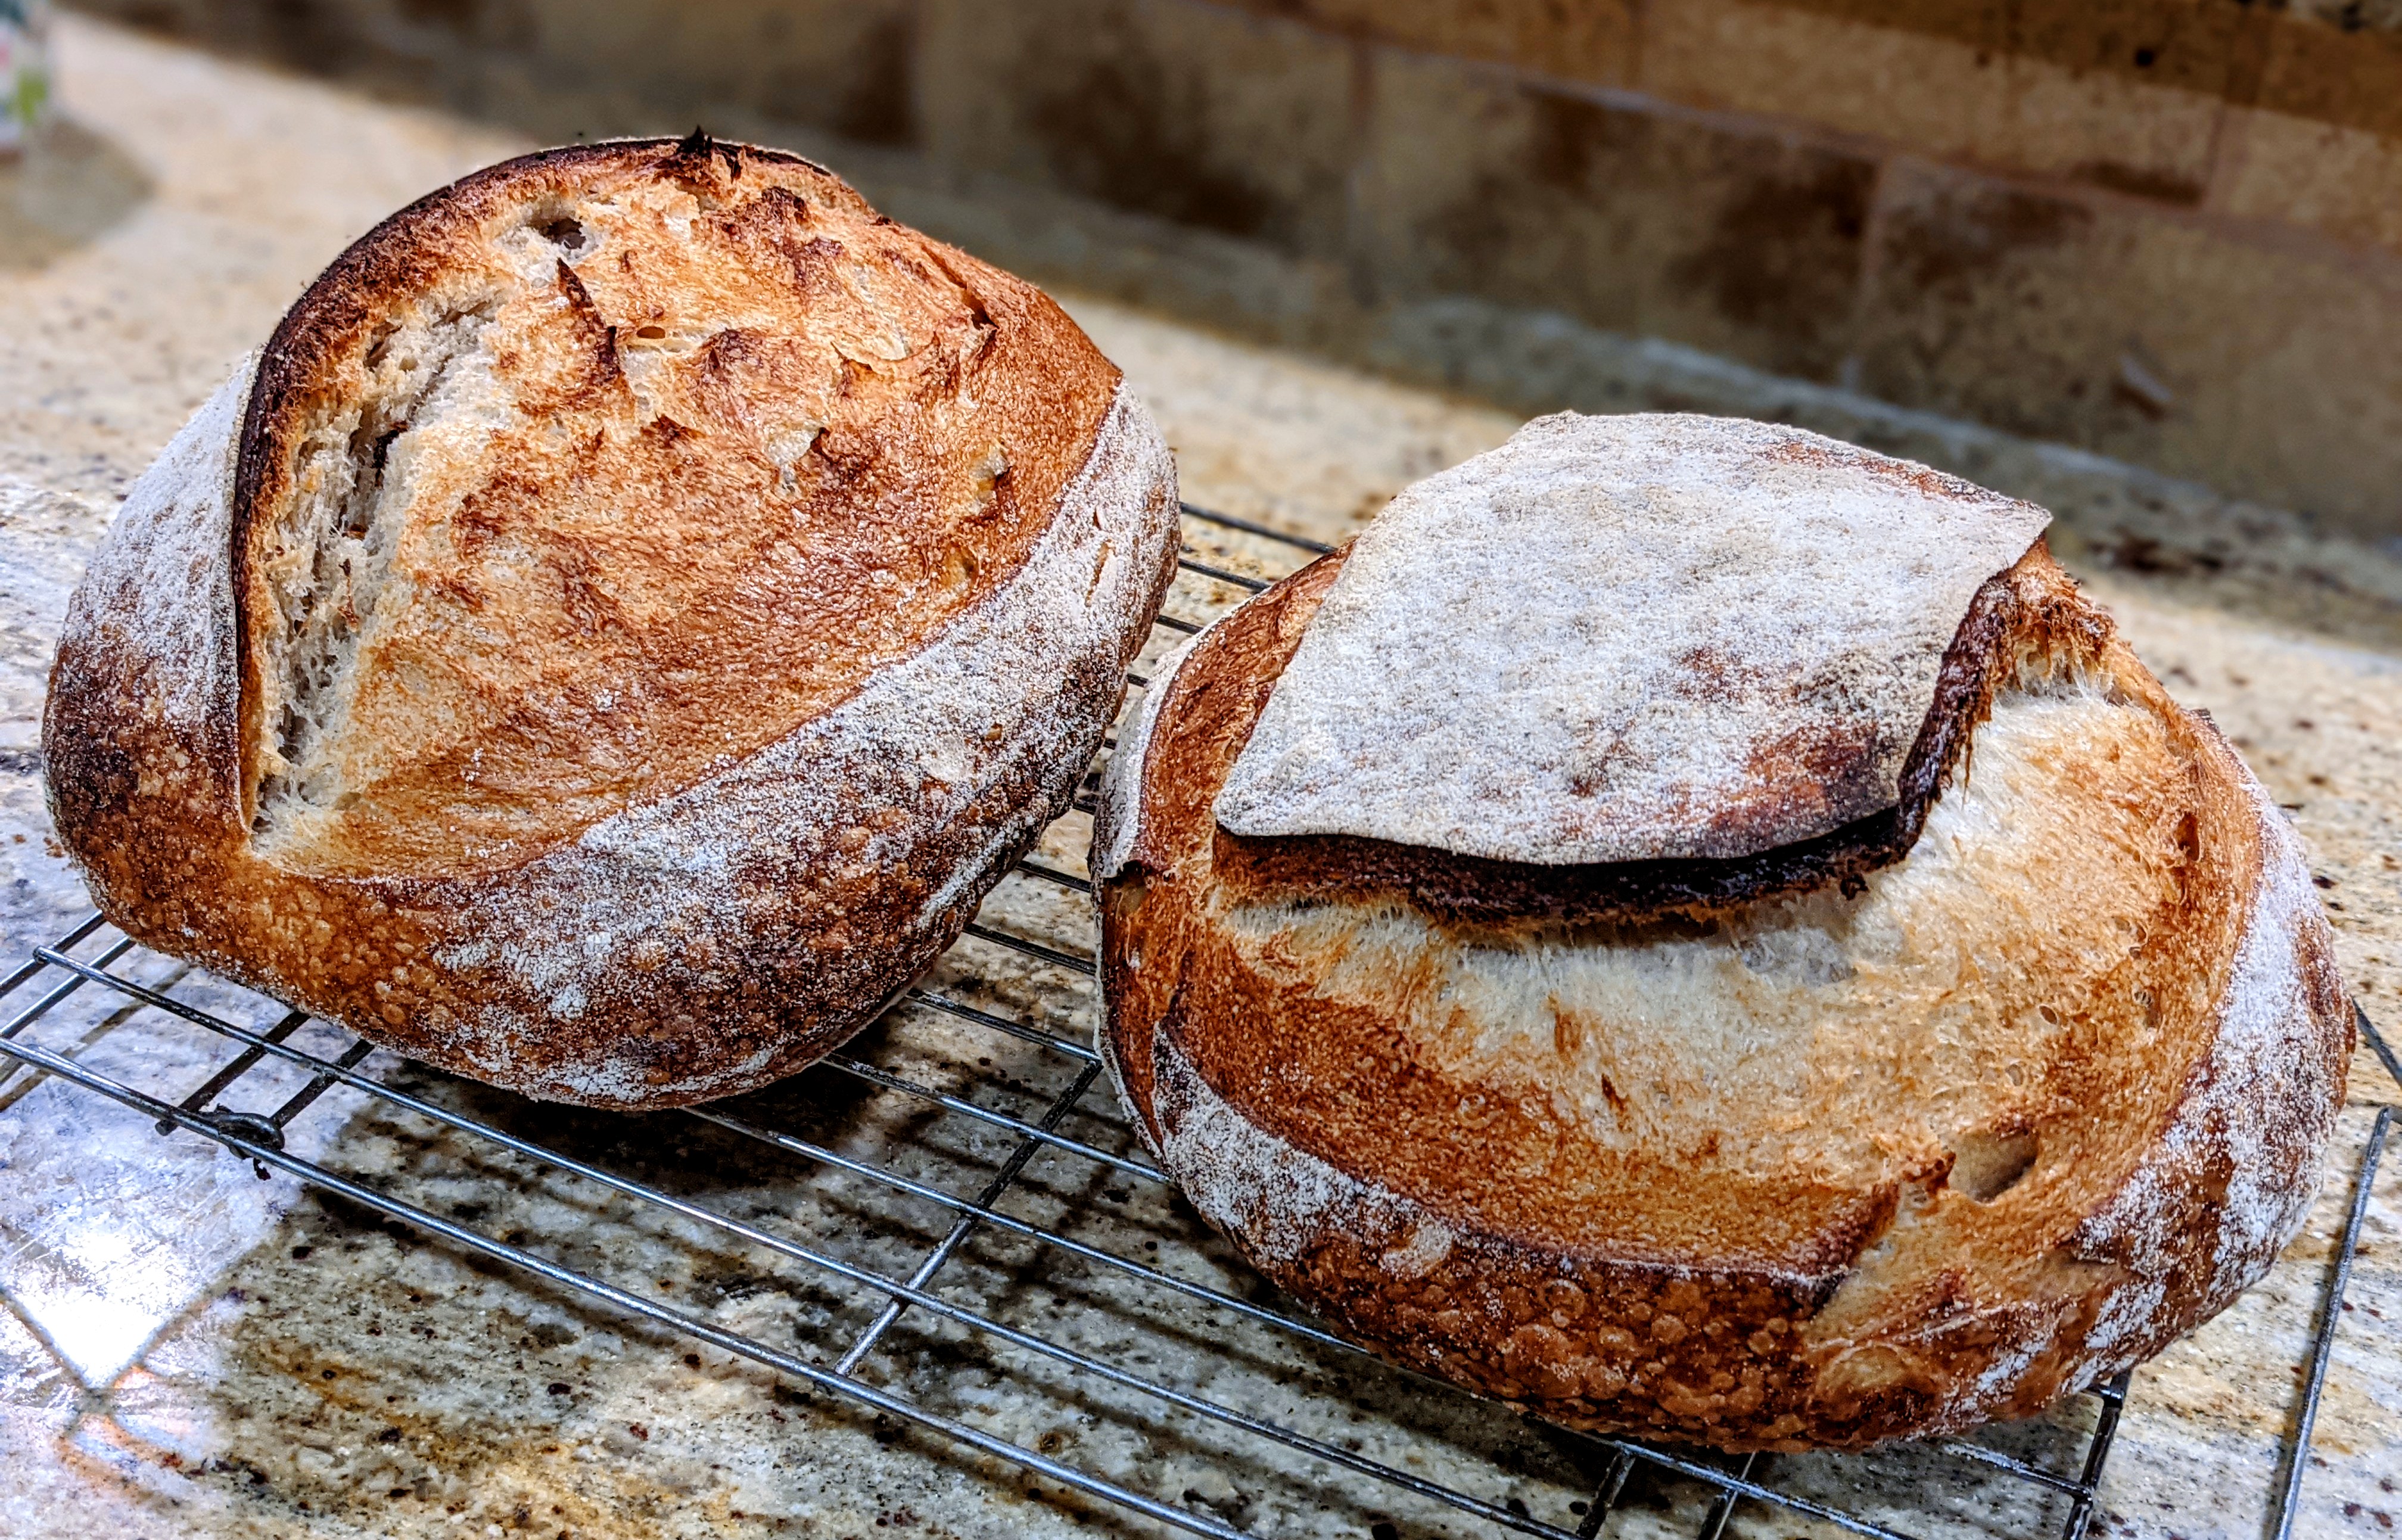
For years I used a Fibrament-D baking stone for baking all my bread. But a few months ago, for reasons I still don’t understand, it started taking forever to come to temperature and then wouldn’t hold it. It was a pisser, to say the least. I was embarrassed to share pictures of my bread because it had that classic look of bread that had been baked in an environment where the ambient temperature was greater than the baking surface. Ugh!
Here’s a rough idea of that effect:
What happens when the ambient temperature is higher than the surface is that the sides and the top bake faster than the bottom. The crust also sets too fast and what you get is an elliptical loaf that is also quite dense.
After a few bakes trying to do different things, I finally trashed my stone and started baking my boules and batards in a Dutch oven. That wasn’t necessarily a bad thing, but it did limit the size of the loaves I could bake. I really prefer baking on an open surface.
So, since Christmas was coming up, I did some research and asked Santa for a baking steel; specifically, the ThermiChef XL. After using it for the first time last week, I exclaimed, “Damn! I probably should’ve just used a baking steel from the get-go!” But looking back on my original decision to use a stone, I admit that I got caught up in the romance of baking on a stone surface. I had wanted to model my baking on baking in a hearth oven. And it worked great for a while, but I’m really at a loss as to why my stone stopped performing.
But it doesn’t matter now. The baking steel is so much more efficient. It comes to temperature much quicker, and as I got the 1/4″ thick steel, it retains heat much more efficiently. But most importantly, based on what I’ve seen thus far, heat transfer seems to be much better than my old stone, which would cool down at the spots where the dough would make contact. What I’m finding with the steel is that the bottoms of my loaves are much more solid compared to baking on the stone.
Another advantage with the steel is that it heats up a lot quicker than the stone. Even though the manufacturer recommends heating it for an hour before baking, I found that it comes to a stable temperature in half that time. My stone usually took well over an hour to come to temperature. Also, the steel comes back to temperature after a bake much quicker – like 10-15 minutes after a batch, so if I am doing more than a batch, my baking cycles are now much faster.
Finally, at 16″ X 22″, the steel provides much more surface area than my old stone. Furthermore, it has straight sides, whereas my stone had sloping sides. With this new steel, I could easily bake 3-4 800g batards at once.
Yeah, baking with a steel is definitely a game-changer. I may just get another to go into my other oven so I can do two batches at once.
Ever since I was a little boy, I have loved lamb. When my mom made lamb chops or roasted a leg of lamb, those were some of my favorite meals growing up. Nowadays I don’t eat it much and normally it’s at a restaurant. My wife doesn’t like lamb and since there aren’t many people in the house, I don’t get to cook it. But I know I can make it at least once a year and that’s on my birthday.
For all the years I’ve made it, I’ve roasted it in the oven, then served it as slices. But this time, I wanted to do something different and barbecue it to make pulled lamb. I got some further inspiration from Matt Pittman of Meat Church who makes pulled lamb for gyros! So that’s what we’ll be having for dinner tonight. My daughter is making her awesome homemade tzatziki sauce and dicing up Persian cucumbers and tomatoes. We’ll be serving all that on fresh-made pita bread from our local falafel shop. But enough of that, let’s get to making the lamb.
Preparation
There’s really not much to do to prepare a leg of lamb. But a little effort will go a long way to creating a great product in the end. First off, I remove the hard fat from the leg. All hard fat does is block heat from penetrating the meat, so I remove it. But I keep the soft fat on because it’ll melt away and make the meat much more succulent. I also don’t remove the silver skin. You can, but it’s just a lot of work and it’s usually so thin that it just cooks away.
Some legs of lamb have a big flap of meat at the end of the bone. Whether I’m smoking or roasting the leg, I always fold it over the joint and truss it with some butcher twine. That’ll ensure a nice, even cook.
As far as seasoning is concerned, you can go from basic to sophisticated. Some folks like to make an oil and fresh herb and garlic rub with fresh dill, rosemary, garlic, and olive oil. I prefer using dry rubs. For this cook, I used my new favorite rub from Meat Church called the Hail Mary Rub. This is Matt Pittman’s tailgating rub that he uses for Dallas Cowboys tailgating before games (he’s the Cowboys’ official tailgate pitmaster, BTW). This is a great blend of several different spices and it goes great with lamb. I also use a light sprinkling of Meat Church Honey Hog Hot to give it just a tiny bit of a bite. Finally, I finely chop fresh rosemary from my garden and sprinkle that all over the leg.
What about garlic? That’ll come later.
When I do a leg of lamb, I always crosshatch the fat cap through the fat to expose some meat. I then season it liberally with whatever rub I’m using. I’ve gotten the best results prepping the lamb the day before and putting it into the fridge to dry brine. Once I’m ready to cook it, I apply a bit more seasoning to the top of the leg (fat side for me), then into the smoker or oven it goes.
Smoking the Lamb
For this cook, I cooked the lamb at 225°F. It was cold and windy to I set my Traeger to 250°F. It fluctuated between 220° and 230° the entire cook. When the lamb reached 160°F (about 6 hours), I placed it in a half sheet foil pan and dropped in about dozen cloves of whole garlic and a sprig of fresh rosemary. I covered the pan with a sheet of heavy duty foil, then finished the cook in a 250°F oven until the internal temp reached 201°F (about an hour and a half) and the meat was probe tender. If it took a little effort to probe the meat, I would’ve let it go to 203°F to 205°F.
Pulling the Lamb
Meats like pork and lamb don’t need a rest like beef, so I pulled it by hand using insulated gloves. That meat practically dropped off the bone in a few places! I also have large pulling forks that normally use for pulled pork, but for the lamb, I chose to do it by hand to get a chunkier end product.
As for the garlic, the beautiful thing about adding the whole garlic cloves to the pan was that they roasted in the au jus. The rosemary sprig added tons of aroma and flavor.
At that point, the lamb was ready to serve, but dinner was still a couple of hours away, so I re-covered the pan and put it back in the oven at the “keep warm” setting after I let most of the heat out. This’ll allow the au jus and juices really penetrate the pulled meat.
In my previous post, I talked about trusting in the process and how it takes time to develop the skills to create great bread. And in that post I mentioned that it was difficult to describe what to feel for when working with dough. So, after I wrote that I asked myself how I could effectively describe the feel of dough to someone who has no clue.
When we’re making bread, there are three times we touch the dough: During mixing, when building dough strength, and final shaping. Mixing doesn’t really count because all we’re doing is bringing the ingredients together, even if we’re doing it by hand. Though it is important because this is where we start forming gluten. But it’s the latter two stages where we directly manipulate work dough with our hands. In this first part, we’re going to cover building strength in the dough.
Before we get into techniques and developing a feel for dough, it’s important to understand the concept behind what we’re doing. I’m not going to get all sciency and will keep the discussion at a fairly high level. Here we go!
“Dough strength” is actually a bit of a misnomer. What we’re doing when we’re building strength is more akin to creating structure in the dough. Even though dough looks like a smooth, contiguous mass, it is composed of gluten strands. When we first mix the dough and the gluten strands start to form, they’re randomly arranged much like a pile of spaghetti as shown below.
When we work the dough (through kneading and folding) to build strength and structure in our dough, what we’re doing is arranging and aligning the gluten strands so they come togther in a much more organized fashion. To be clear, in the early stages with our first couple of folds, gluten strands are still forming while we are aligning the ones that have already formed. This is why we do several folds. We want to make sure that all the strands that are going to form are formed and we want them to be aligned.
Taking the spaghetti example a little further, we want to produce something like the following:
You see how the spaghetti in the picture above stands neatly together compared to the pile above? This is what we’re doing when we’re building dough strength. We’re arranging the strands of gluten so we can achieve a nice, neat pile. The ultimate shape we form our dough into will be determined by shaping. But that’ll be discussed in Part 2. So, to be a bit more precise, when we’re doing our stretching and folding, we’re getting the gluten to align to be able to be shaped. Another effect of folding is ensuring that our yeast and bacteria are distributed evenly throughout the dough mass.
Now that we’ve had a high-level discussion behind the purpose of folding, let’s get into feeling the dough when you do your folds to ensure that you’re doing it to maximum effect.
Getting a Feel for Your Dough
We’ve all seen and have probably made loaves that look like this:
Or have created severely mishapen loaves like this:
I look at these and laugh! And even though the first loaf didn’t rise much and the second loaf kind of went haywire, they share one thing in common: They weren’t folded properly. The results may have been different, but these are classic examples of improperly worked dough. I made those loaves many years ago and took pictures for posterity to remind me of what NOT to do.
When we work our dough, whether we do coil folds or stretches and folds, it’s much like twisting a rubber band on a windup airplane. As you wind the rubber band more and more, it gets harder and harder to wind until you get to a point where it won’t wind anymore without breaking.
And it’s in the process of folding where so many folks new to baking bread get it wrong. Remember my discussion how videos don’t communicate everything one needs to know? Proper folding and what you need to feel for are often missed in those videos. You see a baker fold their dough. They’ll stretch it up, then flip it over the center. Looks simple and it is. But I can guarantee you that half the beautiful loaves you see on the Internet aren’t folded properly, especially the boules.
Why? Because they’re perfectly round and the bottom inch or so of those loaves are almost flat, which means the dough expanded all the way out to the edges of the Dutch oven and the only way for those loaves to expand is up. But if you take that same dough and put it on a stone, they won’t rise nearly as high, often resulting in a loaf similar to the flat loaf above.
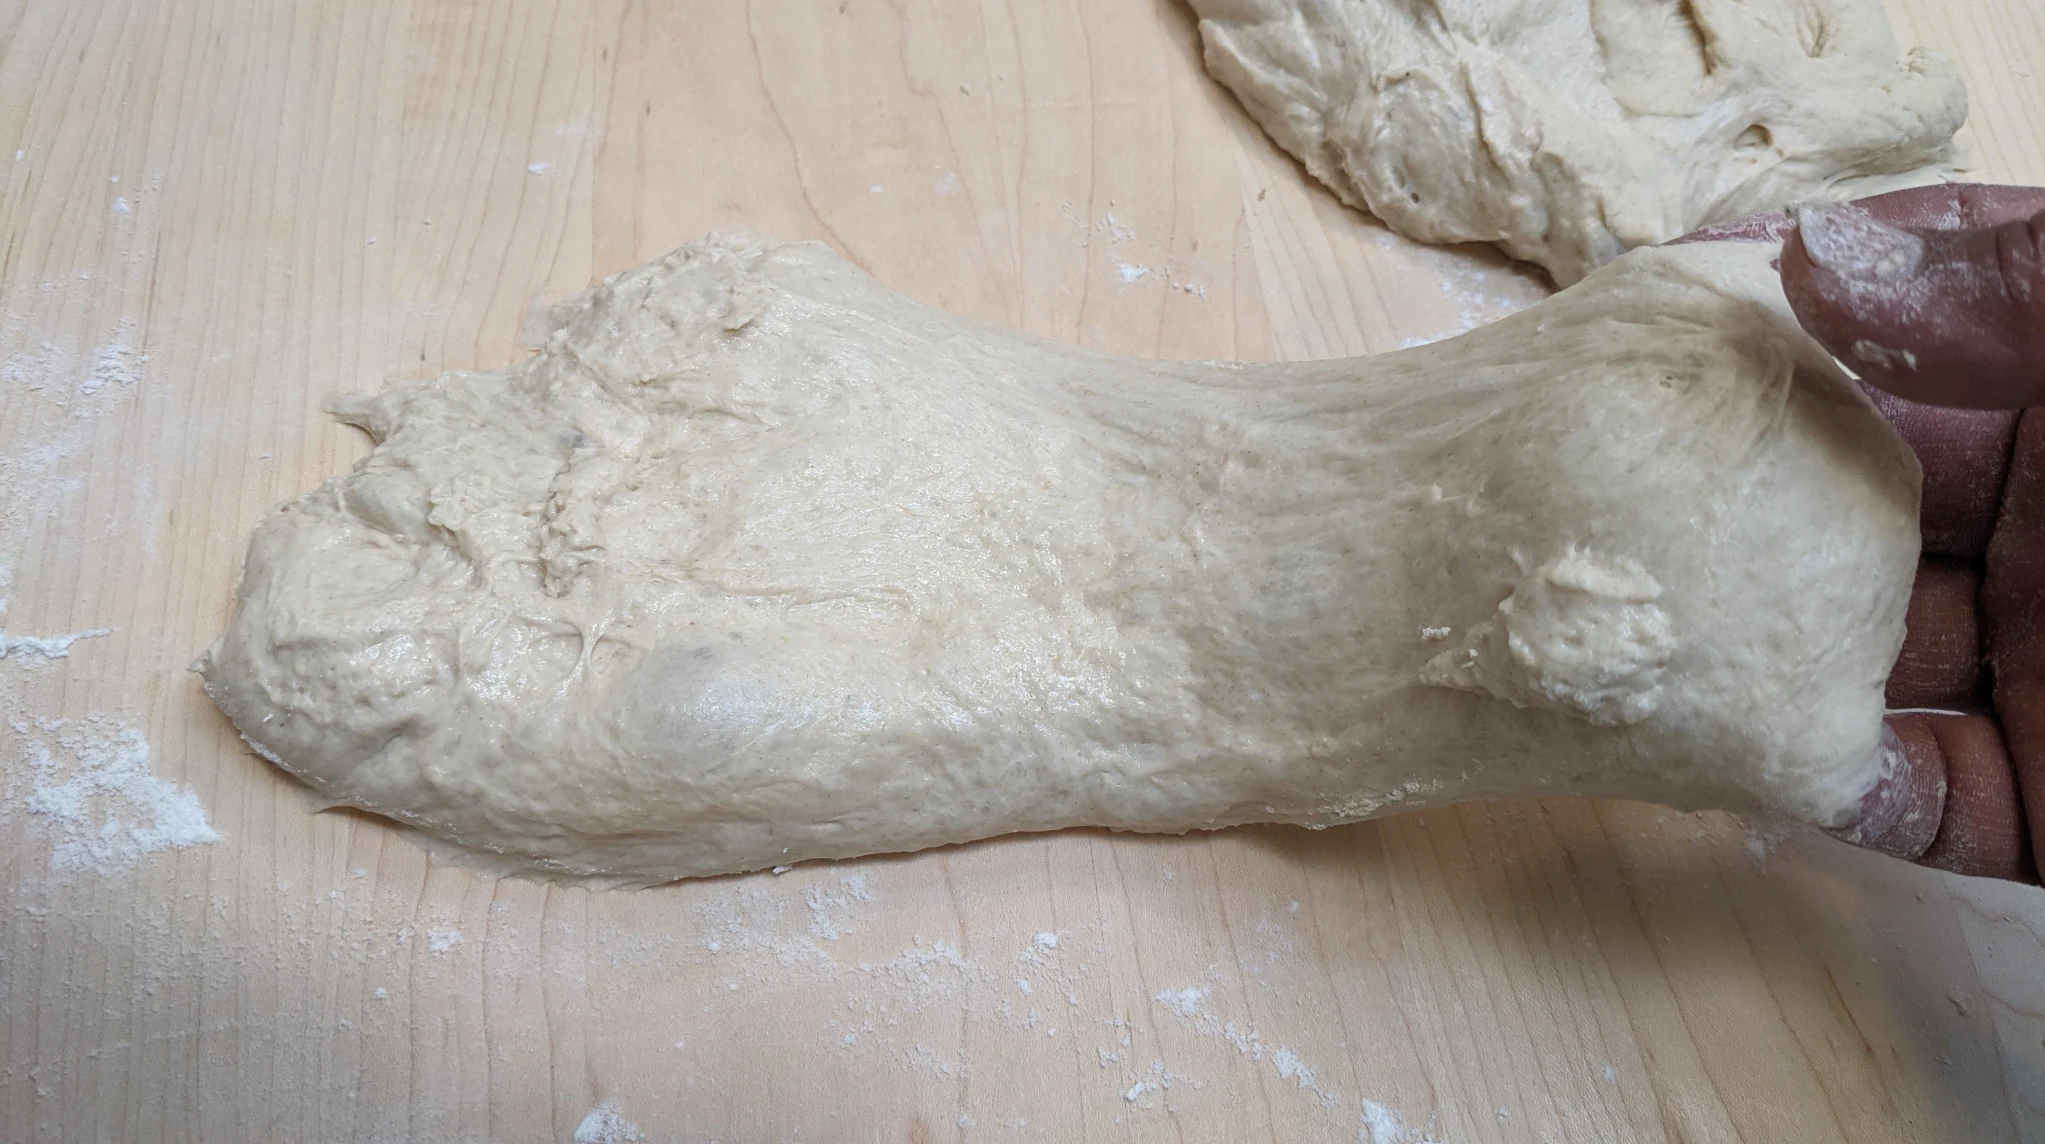
If you’ve read this blog you will know that I often mention that you should fold the dough until it no longer wants to be folded; that is, like the windup airplane example I used above, you want to work your dough until it resists. Most people never fold their dough enough, especially if they’re doing stretches and folds. Here are a couple of tips, not matter what folding technique you’re using:
Pick up the section of dough you’re stretching from the bottom of the dough mass, never from the top as you will only accomplish stretching the top portion of the dough.
When you stretch, make sure you stretch the dough to the point where you feel some resistance. And note that high-hydration dough requires you to stretch several times during a session. But never stretch to the point where the dough will tear. This takes some repetition to gain the intuition as to where the tearing point is in your stretch. But even if you tear the dough, don’t worry, just let it rest that the gluten strands will come back together.
Fold until the dough no longer wants to be stretched. A telltale is that when you pick up the dough from the bottom, most of the dough mass will come up. Most people see on videos that a baker may only do four folds in a session. What many don’t notice is just how far the baker stretches the dough. They may only require four total folds in one session.
The hints above apply mostly to standard artisan loaves like boules and batards. For bread made from super-slack dough like ciabatta or pan de cristal, you actually don’t want to work the dough too much because they’re so wet, plus you want to ensure that when you bake them you get a super-open crumb. But for other loaves, you need to make sure you’re stretching the dough sufficiently to get that rubber band effect.
Obviously, I’ve glossed over a lot of nuance in this discussion. But the point to this is that if you develop a feel for the dough especially in the strength and structure development phase, it’ll go a long way to improving the quality of your loaves.
Back in the late ’80s and early ’90s, my wife and I (we were dating at the time) jumped on the self-help movement. You know, stuff like Tony Robbins’ “Personal Power.” We took seminars from a company called “Phoenix Seminars.” It was great. We learned a lot about ourselves and each other even though the company turned out to be pretty shady with “leaders” who weren’t credentialed counselors or trainers. The company ultimately failed and the last I saw of the president of the former company was on late-night TV where she was hawking some product in an infomercial.
Did any of it work? Yes and no. Yes, from the standpoint that we learned several techniques of effective communication and self-motivation, and no, as the programs were purposely designed to keep you coming back for more; that is, paying more money to get to the next level. That said, it wasn’t a scam. I met some great folks that I keep in touch with and as I mentioned above, I learned some great things.
In particular, we learned some great trigger phrases that have helped us even to this day. One of those phrases was “trust in the processs.” When we’re learning new things, oftentimes we feel that things don’t make sense. In our confusion we get discouraged and frustrated, feeling as if we’re not making progress.
A good example of this is the following clip from the movie, “The Karate Kid” with Jackie Chan and Jaden Smith. In the scene, Jaden expresses his frustration at having to pick up his jacket, put it on, take it off, then hang it up day after day, thousands of times. His frustration grows to the point where he wants to quit. Then Jackie Chan demonstrates that the process had meaning after all.
The learning process takes time and that can be frustrating as well. And in the fast-paced, instant gratification world we live in today, many expect to get great results in a very short period of time. I don’t know how many times I’ve heard people say something like, “I followed everything step on this _________ (TikTok, InstaGram, etc.) video, and I just can’t get the same results.”
Speaking of videos, they’re great. I’ve learned lots from watching videos. But as instructive as they are, what they can’t teach you is feel. That is something that can only be learned through direct experience. Some video bakers like Martin Philip with King Arthur are excellent at describing what to feel for when you’re working with dough. But until you actually feel what it is being described, you won’t truly know it. That’s the challenge I have myself as a writer. I do my best to illustrate and describe how to work with dough, but there’s only so much I can do.
But despite that, don’t be discouraged. Remember, learning any skill is a process. Trust in it and you’ll eventually be successful!
In an online forum I have been a member of for several years, I’ve noticed certain trends in the questions asked. A few years ago, there were lots of questions about shaping techniques. And of course, there are the under- versus overproofed questions. But lately, I’ve noticed several questions regarding gummy crumbs and tough crust.
Lots of people jumped in and offered their opinions, and that’s great! But as with any hobby-based forum, there’s a lot of misinformation. For instance, in one thread, a person asked if the baker they used diastatic malt because they claimed that diastatic malt can cause a gummy crumb. I rolled my eyes when I saw that. I’ve used diastatic malt for years and have never gotten a gummy crumb. Softer, yes, but gummy? No way.
Others suggested lengthening bulk fermentation. Still others suggested shortening it. Some suggested doing more folds, while others suggested doing fewer folds. Holy shit!
For one post in particular, the picture the poster shared showed a nicely developed crumb. Upon inspection, it was ever so slightly underproofed as evidenced by the tighter bottom relative to the rest of the crumb. But it was close enough to be negligible. But indeed, the crumb seemed a little moist.
To be clear, the crumb was mostly airy, with a nice distribution of holes of diverse sizes, so gluten development wasn’t the issue (even though some suggested it was). In fact, in most of the posts I’ve seen on this subject, the crumbs of the loaves were mostly fine.
So, what might cause a gummy crumb? In all my years of baking, a gummy crumb is due to baking not being finished; specifically, not allowing enough time in the oven for the loaf to fully burn off the excess moisture from the dough.
Weather can have a lot to do with it. In summer months, when it tends to be drier, evaporation isn’t a problem. But when the weather turns and the temperature drops and the relative humidity increases, evaporation must be handled differently.
Irrespective of the weather, how does one fix a gummy crumb? Here are a couple of suggestions:
Bake at a lower temperature and a little longer. I know this seems unintuitive, but especially if you use a Dutch oven to bake your bread, sometimes the hot temperature (usu. around 475°F) doesn’t allow the crumb to get to a temperature that will evaporate the excess moisture. Then when you remove the lid and finally drop the oven temperature, the crust will brown, and the loaf will appear to be finished on the outside, but the crumb hasn’t had enough time to fully expel the moisture. By dropping the temperature of your oven to 450°F and lengthening the time with the lid on to 25-27 minutes as opposed to 20 minutes, you’ll slow the bake a bit but allow the insides to come up to temperature.
Remember, that first phase of baking with the lid on is where you’re trapping the evaporation of the water in the dough. You will still get a nice rise at the slightly lower temperature, and your crumb will have more time to get up to temperature. This also has the added advantage of slowing crust formation, allowing your loaf to really expand! It’s also why I’m a big proponent of adding a few ice chips underneath my parchment paper to keep the crust moist. The longer I can delay crust setting, the better chance my loaf has to expand from the inside (read: more open crumb).
After you remove the loaf from the Dutch oven, turn off your oven, then place the loaf right back on the rack for 15-20 minutes with the door slightly ajar. This is a process that Chad Robertson describes in his book “Tartine Bread” as curing, using the residual heat of the oven to help finish the bread. This does a final set of the crust but also serves to get that last bit of moisture out of the dough. I often do this with my sourdough loaves in the wintertime when the relative humidity is significantly higher than in the summer.
Finally, if you don’t have an instant read thermometer, do yourself a favor and get one. They’re less than $20. Why get one? Simply because to get a better feel for the doneness of a loaf, you need to take its internal temperature which should be no less than 195°F. You can’t simply rely on the color of the crust. It may look done on the outside, but until you take the internal temperature, you won’t know for certain.
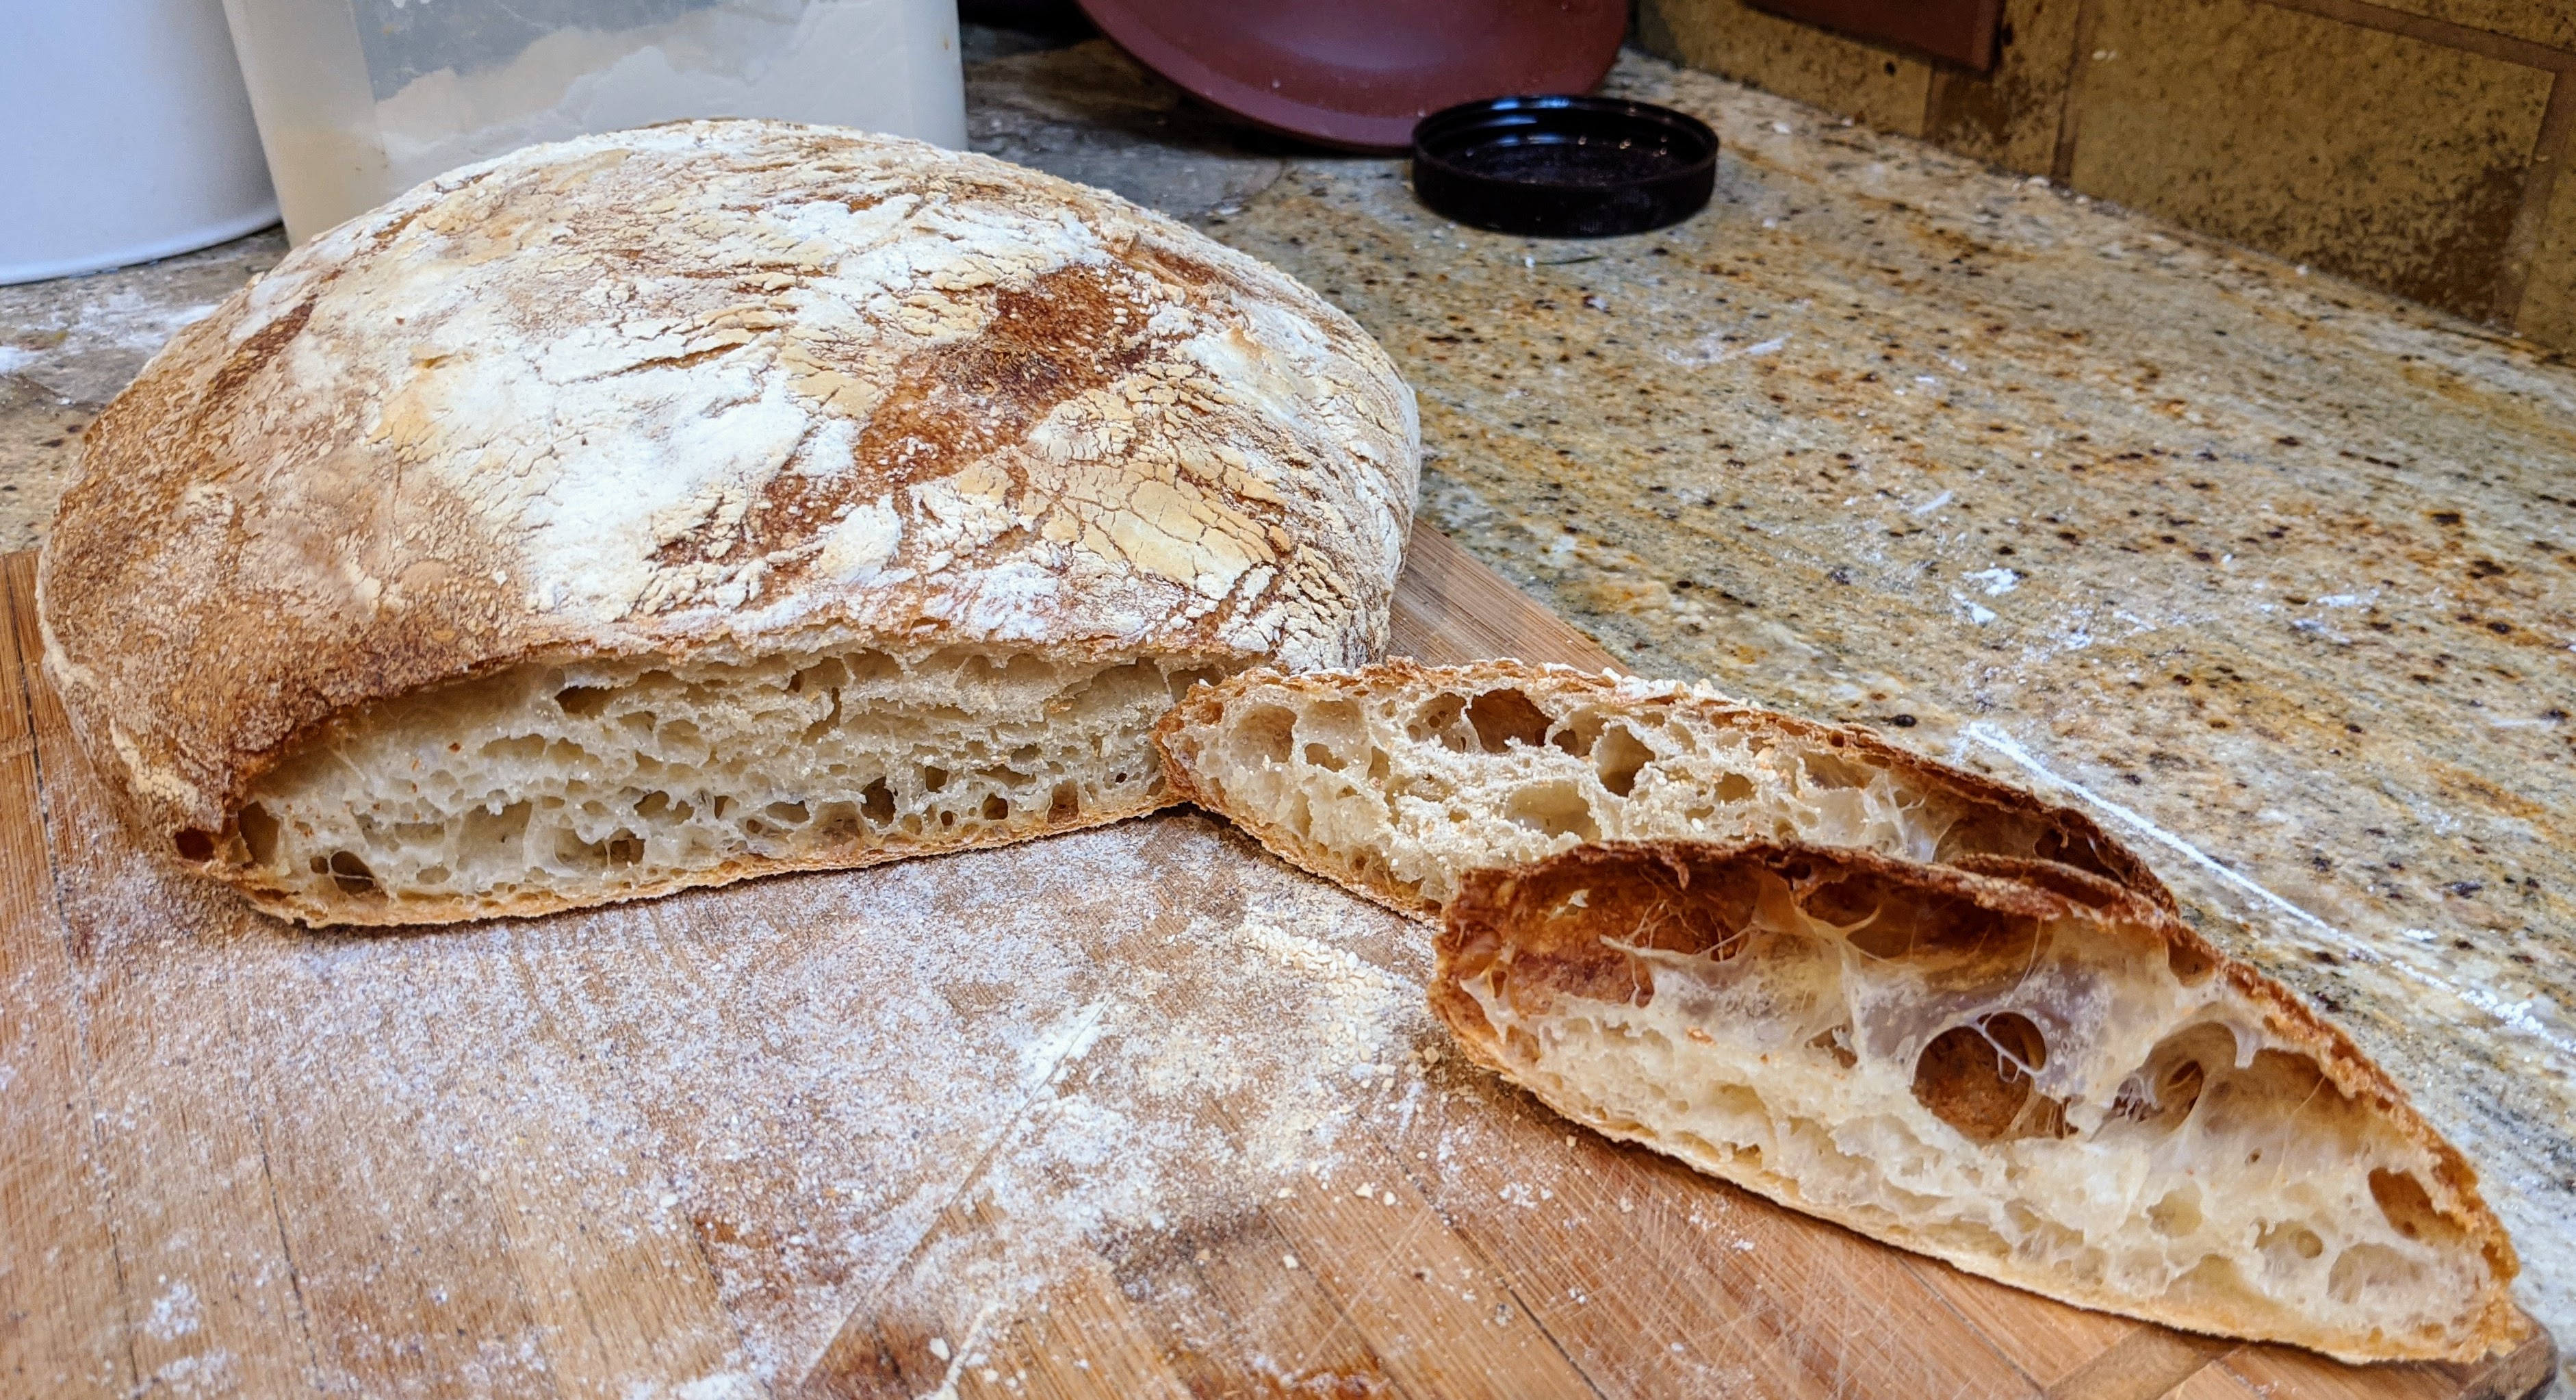
Pan de Cristal right out of the oven! OMG I’m excited!
Yesterday, I tried to make Pane di Altamura. I failed horribly. I’m still getting used to my new oven and I’m not sure what happened, but the crust set too early, and the crumb came out extremely dense. Plus, my Semolina flour is pretty old and the crumb was brown instead of yellow. Ugh! The bread tasted okay, but its density was just too much. I ended up throwing out the loaves (and no, they wouldn’t have made good croutons).
After I threw out the loaves I was understandably a bit distraught and disappointed. I hate wasting things, especially food. But these loaves were heavy hunks of cooked dough. I told myself right then and there that I needed a win.
So, this morning as I was brooding over yesterday’s fail and figuring out what I wanted to bake, I ran across a video on YouTube by Martin Philip of King Arthur and his demonstration on making Pan de Cristal. I had never made it before, but I had made plenty of high hydration ciabatta (>90% hydration) and knew how to handle that wet of a dough. I decided to make it.
I just pulled the loaves out of the oven, and I am a happy man! They turned out beautifully, with a gorgeous, thin, golden-brown almost chestnut crust. Each of the loaves are feather-light, which is how they’re supposed to be. And that means that they got plenty of rise. The smallest loaf in the top-left corner of the picture didn’t expand as much as I had to manipulate it on my baking sheet to reposition it. But its crust still came out nice and airy.
As for how they taste, in a word, they’re incredible. The olive oil that’s used to grease the casserole pan I used for coil folds infused into the dough, giving it a subtly sweet and nutty flavor. I just ate half of the smallest loaf with some butter. But this bread would go great for dipping into olive oil and balsamic vinegar.
Well, I got my win for the day. I needed it after my previous fiasco!
When I’m pinched for time and want baguettes, I turn to Baguettes de Tradition that are a same-day baguette that I learned how to make a few years ago from reading Jeffrey Hamelman’s book, “Bread.” This simple baguette recipe only requires a few hours from mix to bake and is perfect for when I want baguettes for dinner. My only complaint about these is that since they’re baked on the same day, they don’t have nearly the amount of flavor as when I use the Pointage en Bac method of slow rising the dough overnight. Still, they’re perfect for dipping or using as sandwhich loaves.
This afternoon I was trying to figure out what I wanted for dinner and remembered that I had some BBQ pulled pork in the freezer, then realized that I didn’t have any sandwich loaves. Not that I needed an excuse to bake some bread, I thought I’d make some baguettes.
At first, I was going to make Baguettes de Tradition, but then I also remembered the starter in my fridge and that I had just fed it a few days ago! So, I pulled it out and it looked like it had peaked, but only recently. What luck! I was excited because I knew that the starter would add tons of flavor to the dough! And yes, I used it right out of the fridge but dissolved it in 90°F to wake it up. Here’s the formula and recipe:
Formula
Flour
100.00%
Water
76%
Salt
2.00%
Yeast
0.25%
Total %
177.33%
Final Dough
Bread Flour
154g
Kamut Flour
205g
AP Flour
564g
Water
666g
Salt
21g
Yeast
2g
Unfed Starter (weight is 20% of the total flour)
205g
Total Yield
1818 6 X 300g Baguettes
It can be a little dicey using unfed starter. My experience is that it should not be so old where it smells cheesy and sour. At that point, it’s very acidic and the bacteria have essentially taken over. A telltale is that’s it’s fine to use if the level of the starter in my container is still well above the original line and hasn’t subsided all the way back and the starter itself is still bubbly. That means there’s still plenty of yeast activity.
I used a flour blend that was as follows:
Flour from the starter
10.00%
Bread Flour
15.00%
Kamut Flour
20.00%
AP Flour
55.00%
Total %
100.00%
I used a tiny bit of commercial yeast to boost the yeast activity as I want to favor rising. With the amount of starter I use, there’s going to be plenty of flavor. But you can certainly skip it.
Using a sourdough starter alters my normal process for Baguette de Tradition because I follow the Tartine Basic Country Loaf process which includes a fermentolyse and a bassinage when I add the salt. Here’s the process:
Mix. Sift then thoroughly mix the flour in a large bowl and set aside. In another bowl, measure out the starter then add all but 50g of water and break up the starter till it’s completely dissolved. If you’re using starter fresh out of the fridge, make sure the water temperature is warm (85°F-90°F). Mix the flour and the liquid until everything is together and forms a shaggy mass.
Autolyse. Since we’ve included the starter, it’s colloquially called “fermentolyse.” Rest the mixture for 30 minutes to an hour.
Yeast, and Salted Bassinage. Sprinkle the yeast all over the top of the mixture. Dissolve the salt in the reserved water, then pour it over the top of the dough (make sure you use a spatula to get all the salt). Using your hands or a mixer on low spead, fold the new ingredients into the dough until they are fully incorporated.
Bulk Fermentation. You can transfer the dough to another container for bulk fermentation or just let it sit in the mixing bowl. During the first hour, fold the dough three times, every 20 minutes, then let the dough bulk ferment to about 75% expansion. With baguettes, you don’t want to go to double and in fact, you want to bake them just a little short of fully fermented. I know it sounds a little bass-ackwards, but this was a technique I learned about from the baker who won the annual Best Baguette in Paris. He claimed the slightly under-fermented dough springs better in the oven.
To letter-fold, pull sides of the piece and
Divide and Pre-Shape. Once bulk fermentation is complete, pour out the dough onto a lightly flour workspace. Pull it into a rough rectangle, then divide the dough into six even pieces. The recipe here calls for the pieces to be 300g. Letter-fold the pieces and roll them up like a jelly roll. Bench rest for 15 minutes.
Shape and Final Fermentation. Shape the pieces into long logs, then transfer to a couch or baguette pan for final fermentation. Poke test the loaves and if the indent comes up and immediately, it’s too soon. If it comes up slowly, but a small indent remains, then they’re ready to bake.
Bake. Score the baguettes then bake at 450°F. Bake with steam the first 10 minutes, then remove the steaming containers and bake until the crust is a deep golden brown. Mine took about 22 minutes to get to that point.
Cool for at least 30 minutes before cutting. Or you can do the Chad Robertson way and just cut it fresh out of the oven. 🙂