

As I mentioned previously, my favorite bread to make is a baguette. And I think the primary reason is that I love to make sandwiches out of baguettes! To me, happiness is a great sandwich made with great bread. But I was SO excited because I think I finally found the perfect flour blend for my baguettes!
Yeah, yeah… I’m always tweaking. Well, not for my boules and batards any longer. I have the flour blend down for that. But with my baguettes, I’ve been trying to strike a good balance between texture, taste, and especially, nutritiousness. I didn’t want to do a pure white flour baguette, but I also didn’t want the bread to be as heavy as my 75-25 high-extraction/whole wheat blend. So I decided to lighten it up. But instead of using bread flour, I decided to use regular old AP flour, and the results were magnificent!
Before I get into the recipe, especially if you’re new to making baguettes, the formula and process may seem a bit daunting. But I wanted to include as much detailed information as possible because there’s a lot to know and frankly, baguettes are one of the hardest breads to make well. I’ve learned how to make baguettes through a lot of trial and error plus a variety of sources, both online and from books. What I’m presenting here is kind of a conglomeration of all the stuff I’ve learned.
Flour That I Use
In general, I use high-quality and if possible organic flour. For common AP flour, it’s almost always King Arthur or Bob’s Red Mill. Both offer consistent quality for baking (though I’ve recently taken to using Central Milling organic AP flour – it’s very nice).
For my baguettes, I use a blend of flour that is predominantly unbleached AP flour. By using a substantial amount of AP flour, I lower the protein content slightly. The one thing I found about baguettes is that you don’t want a real tight internal gluten structure. You want a nice, taut skin when shaping, but internally, you don’t want nearly as much dough strength as you would a boule or batard – just enough dough strength to hold the bubbles together.
- Azure Market Organics Unbleached Bread Flour, Ultra Unifine, Organic – In its place you can use a Type 85 flour or another high-extraction flour. And make sure that the flour is ground fine- to extra-fine. If you can’t find any high-extraction flour, no problem. Just use regular bread flour. However, one of the main reasons I suggest using high-extraction flour is that it retains most of the natural yeasts, oil, and microbes that are essentially removed from white flours; not as much as whole grain flour, but certainly much more than white flour. They will add more complexity to the overall flavor of the bread!
- As for 100% whole-wheat flour, you should sift it before mixing. Retain the bran, then sprinkle it over the shaped loaves right before baking. It’ll give the tops of the baguettes a rustic look.
- AP Flour – I struggle with this because technically you could use standard grocery store brands like Gold Medal or store label AP flour. King Arthur, Bob’s Red Mill, and Azure Standard are 11.5% to 11.7% protein. It’s really not that much difference in protein amount, but it makes a world of difference in oven spring and dough strength!
Bleached or Unbleached Flour?
My preference is to use unbleached flour which is aged naturally as opposed to bleached flour which uses chemical agents to speed up the aging process. From a taste perspective, you shouldn’t notice any differences. Texturally, it is said that unbleached flour has a denser grain and tougher texture, but I’ve only used unbleached flour, so I couldn’t tell you the difference.
Without further ado, here’s the formula.
Overall Formula
| Flour | 100% |
| Water | 75% |
| Salt | 2% |
| Yeast | 0.43% |
| Total Percentage | 177.43% |
Poolish*
| Flour | 100% | 200 |
| Water | 100% | 200 |
| Yeast | 0.16% | 0.3 |
*It’s a good idea to make more poolish than you actually need. There will always be some loss due to evaporation and dough sticking to your mixing utensil. So even though the dough technically calls for 190g of flour/water (380g poolish), I’d use at least 200g flour and water each.
Final Dough
| Flour | 572g AP flour (75%): 428g, High-extraction (25%): 143g |
| Water | 381g |
| Salt | 15g |
| Yeast | 5g Use half if bulk fermenting cold |
| Poolish | 380g |
| Yield | 1340g (+ 13g wiggle room) 4 X 335g (60cm) loaves 6 X 225g (40cm) loaves |
| Optimal Dough Temp | 76°- 80°F |
| Total Flour (incl. poolish) | 762g |
| Total Water (incl. poolish) | 572g |
Instructions
Day 1
Prepare the poolish 6-12 hours before you intend to mix the final dough. I usually make it the evening before my bake, but also, since I’m an early-riser, I’ll make the poolish at 5-6am, then mix the final dough in the afternoon.
Day 2
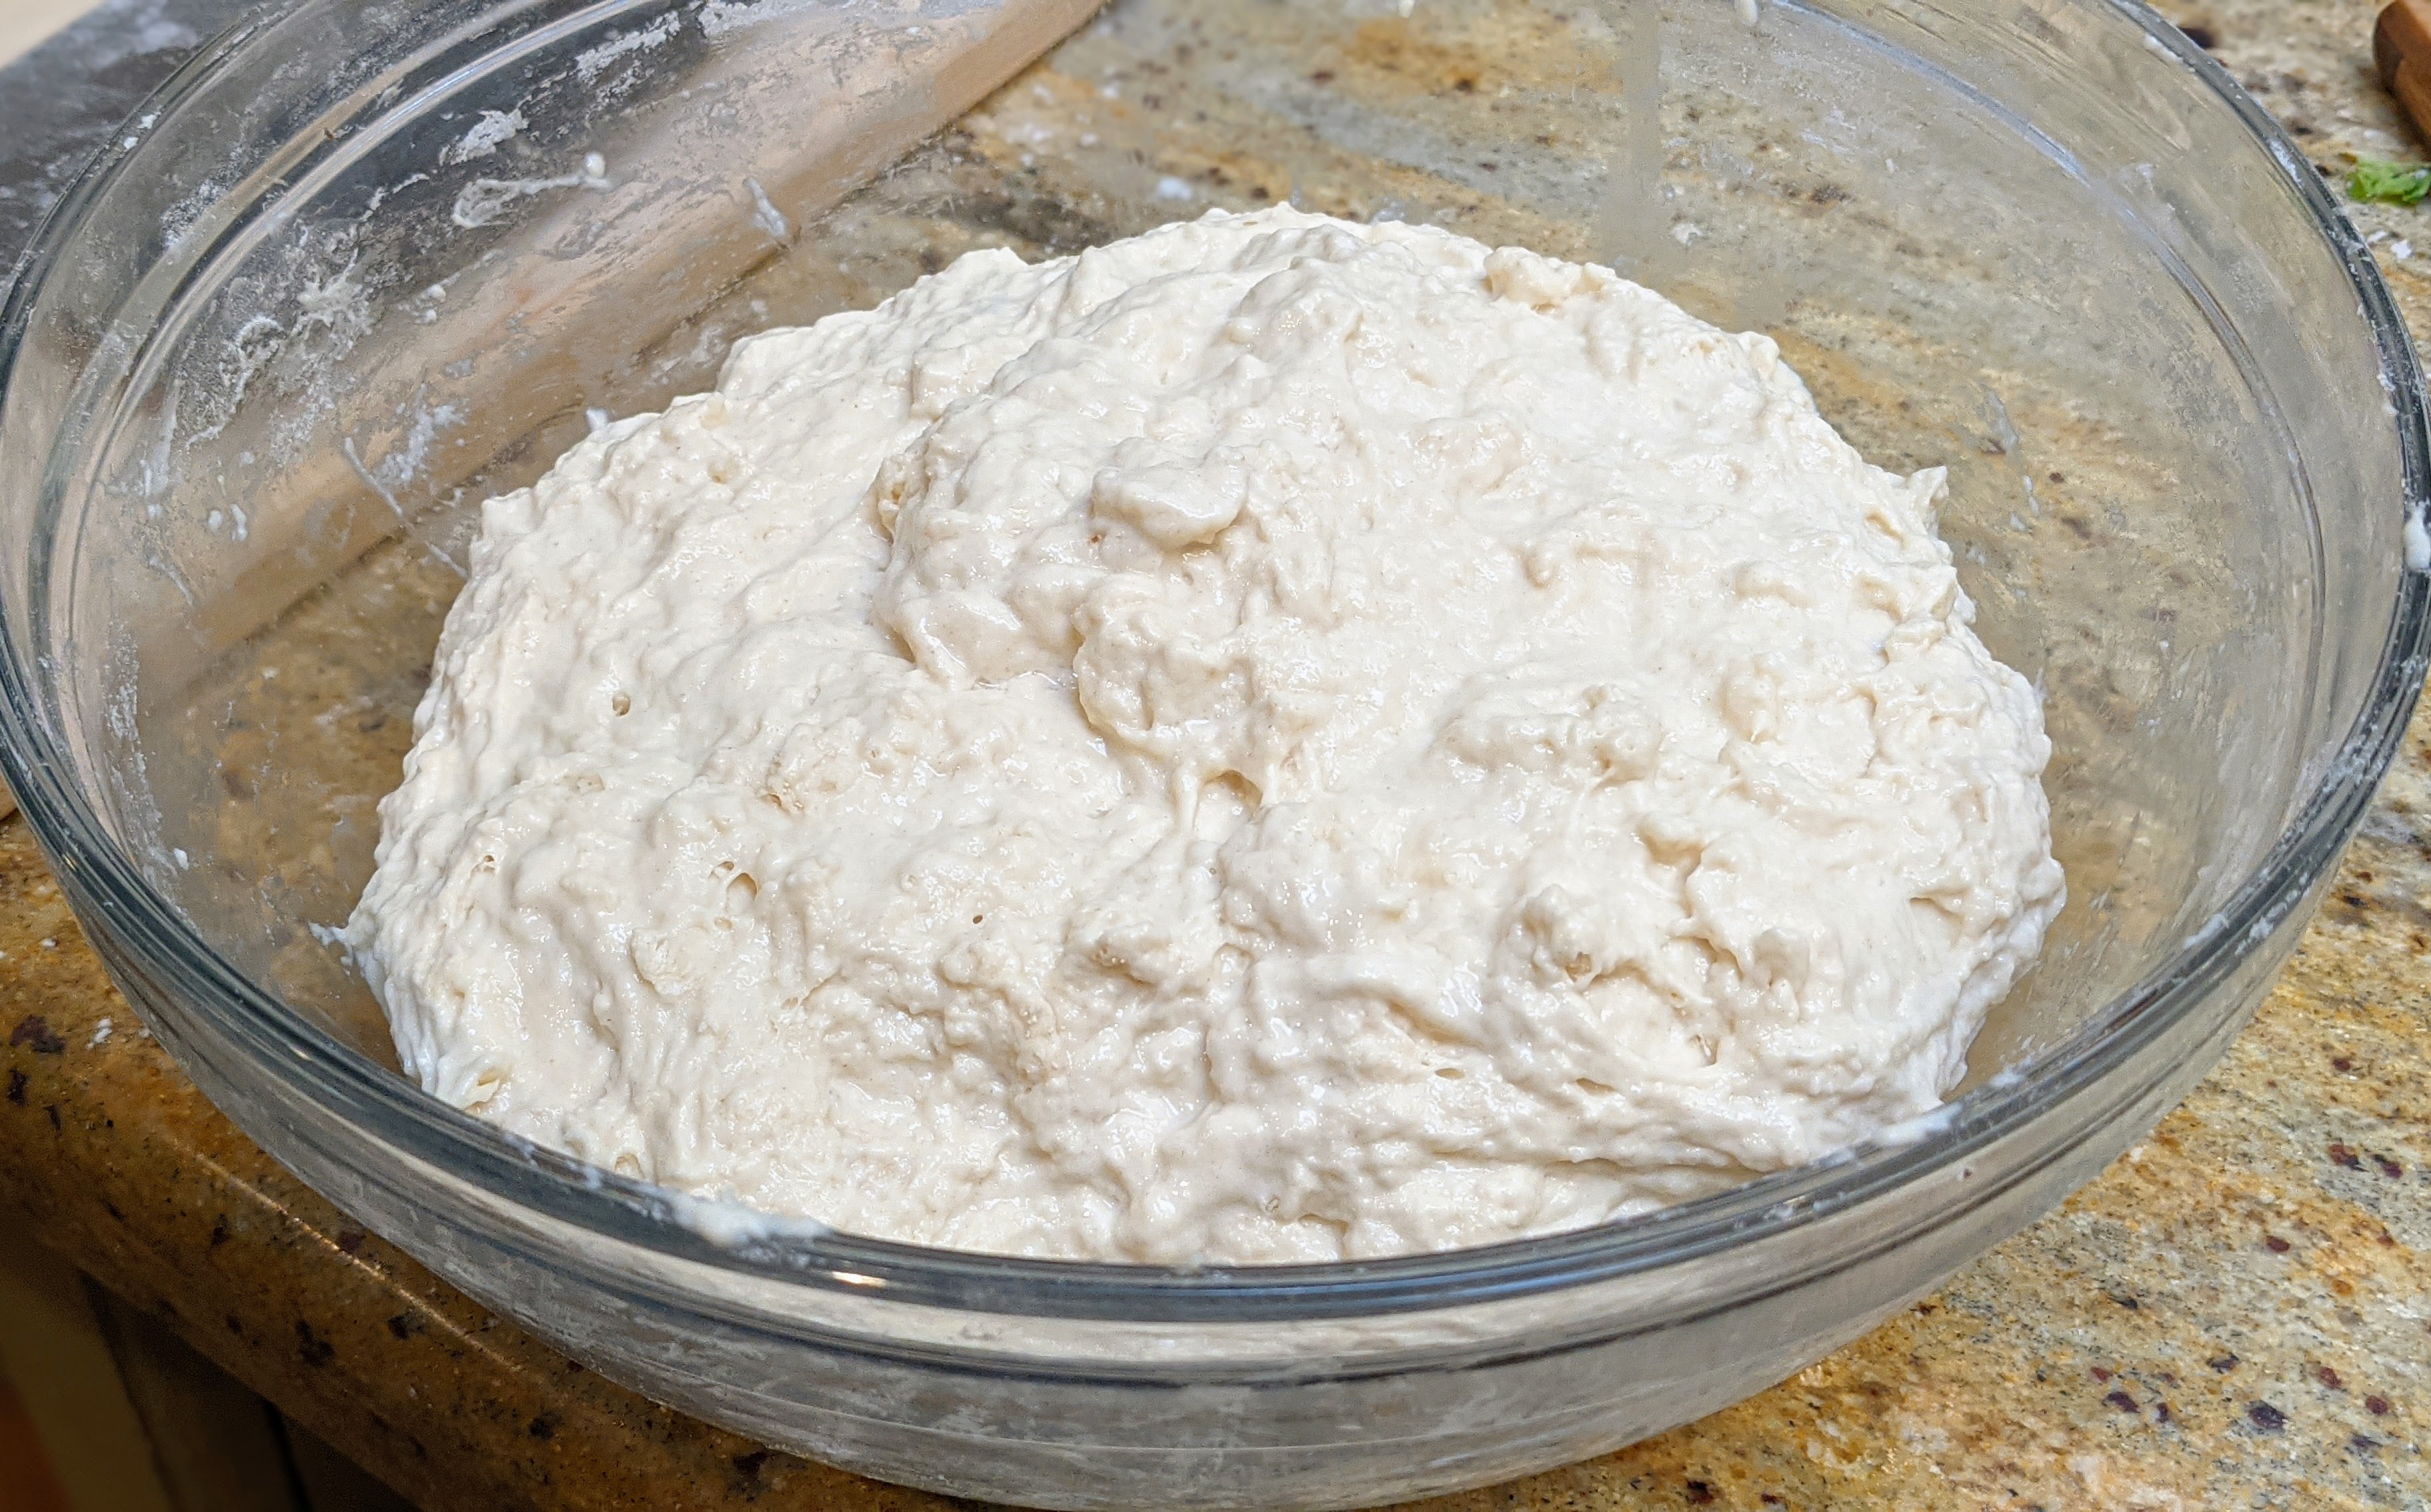
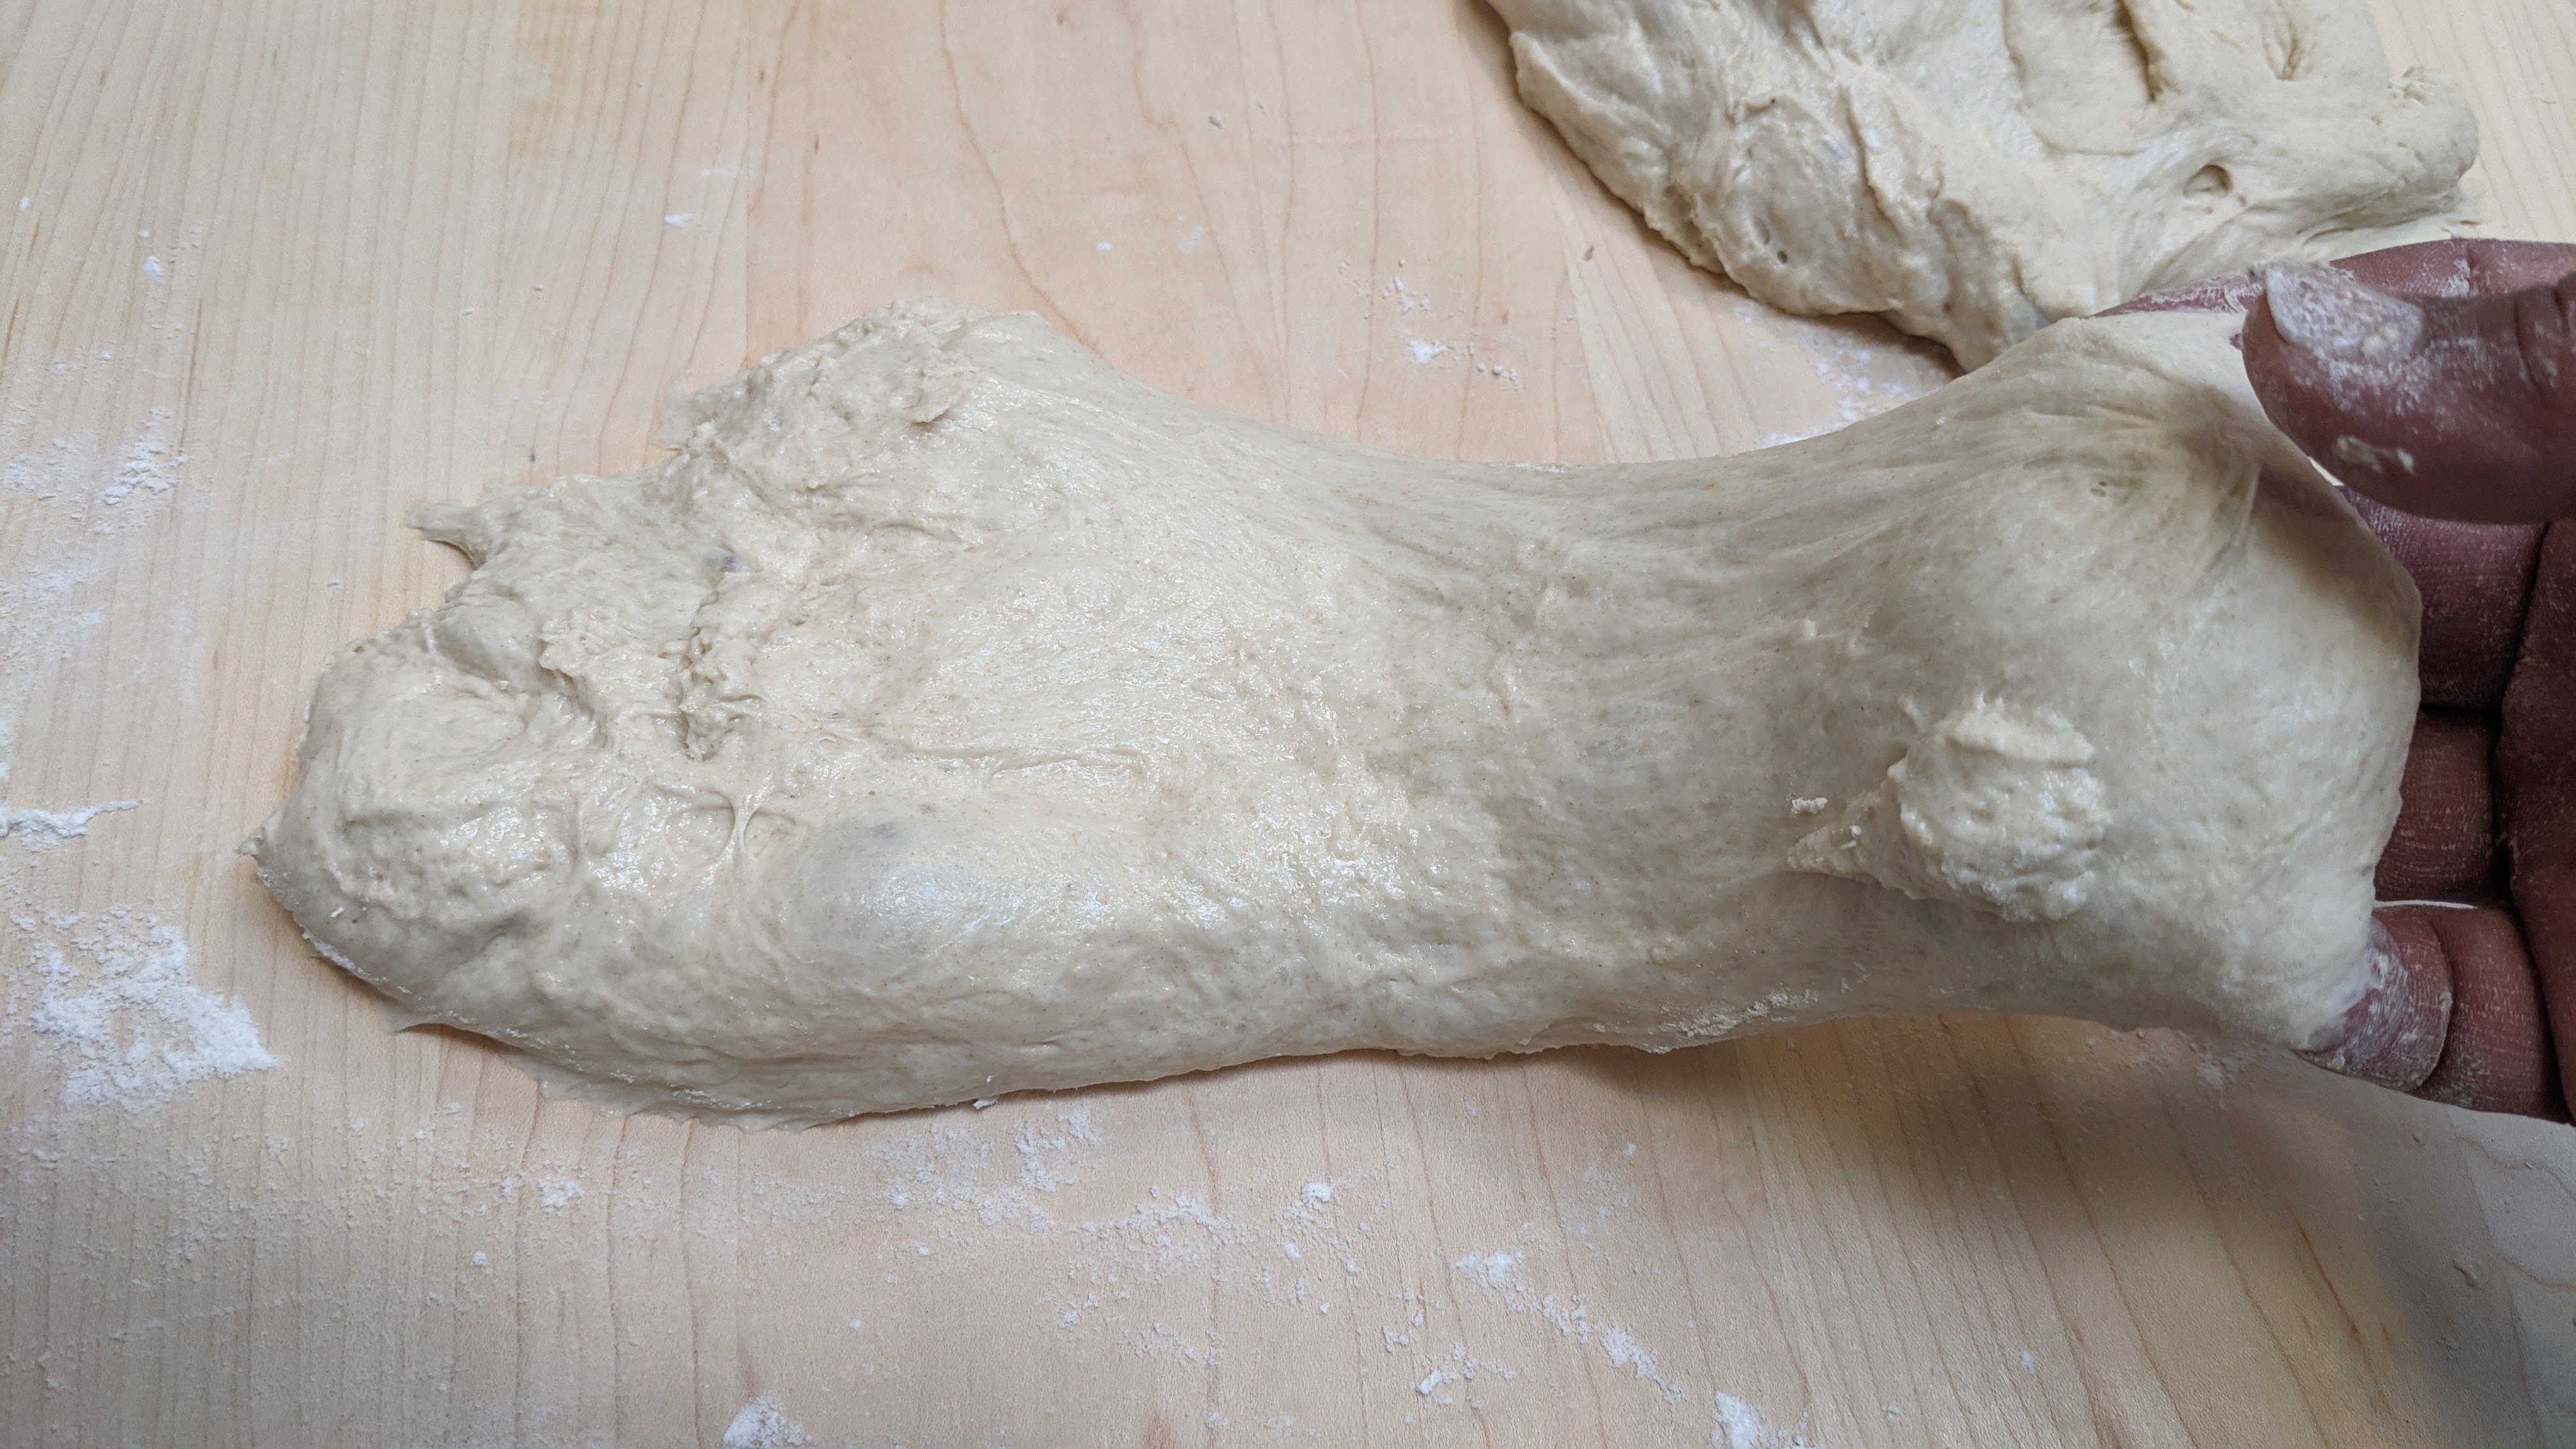
Mixing. Break up and completely dissolve the poolish into the water. In a separate bowl, thoroughly combine all the dry ingredients. Then mix the wet and dry ingredients together. Mix until all the ingredients are combined with no large lumps. If mixing by hand, a Danish dough whisk works great! If using a mixer, mix on the slowest speed and regularly scrape down the sides. Mix until you form a well-combined, but shaggy mass as shown to the left.
Bulk Fermentation. 2 – 2½ hours. Take the dough to no more than 50% of its original size. Though you can take it to double, you want some food for the final ferment, and doubling cuts it real close. Rolling out the baguettes will degas the dough, so you want to have enough yeast activity for the shaped dough to rise.

Folding. Fold three times (stretch and fold in the bowl), every 20 minutes in the first hour. I want to stress that you need to be very gentle with the folding. Definitely stretch the dough but be very careful to not tear it or degas it too much! Stretch and fold until the dough no longer wants to be stretched then stop. By the end of the third folding session, your dough will be smooth and luxurious, as in the picture to the right. You will see bubbles formed just beneath the surface of the dough.
(optional) Cold Bulk Fermentation. After the first hour, you can pop the dough into your fridge for some further flavor development. With this amount of commercial yeast though, I wouldn’t recommend doing this for more than 6-8 hours. You want to make sure the dough is still well-domed when you remove it from the fridge. The reason for this is commercial yeast – even at 36°F- 39°F – are pretty hardy little buggers. They’ll certainly slow down, but unlike indigenous yeast, they’re like little Energizer Bunnies! 🙂 That said, if you want to do an even longer cold bulk fermentation, cut the yeast in half or even down to a quarter of what I listed and you can cold bulk for a couple of days!
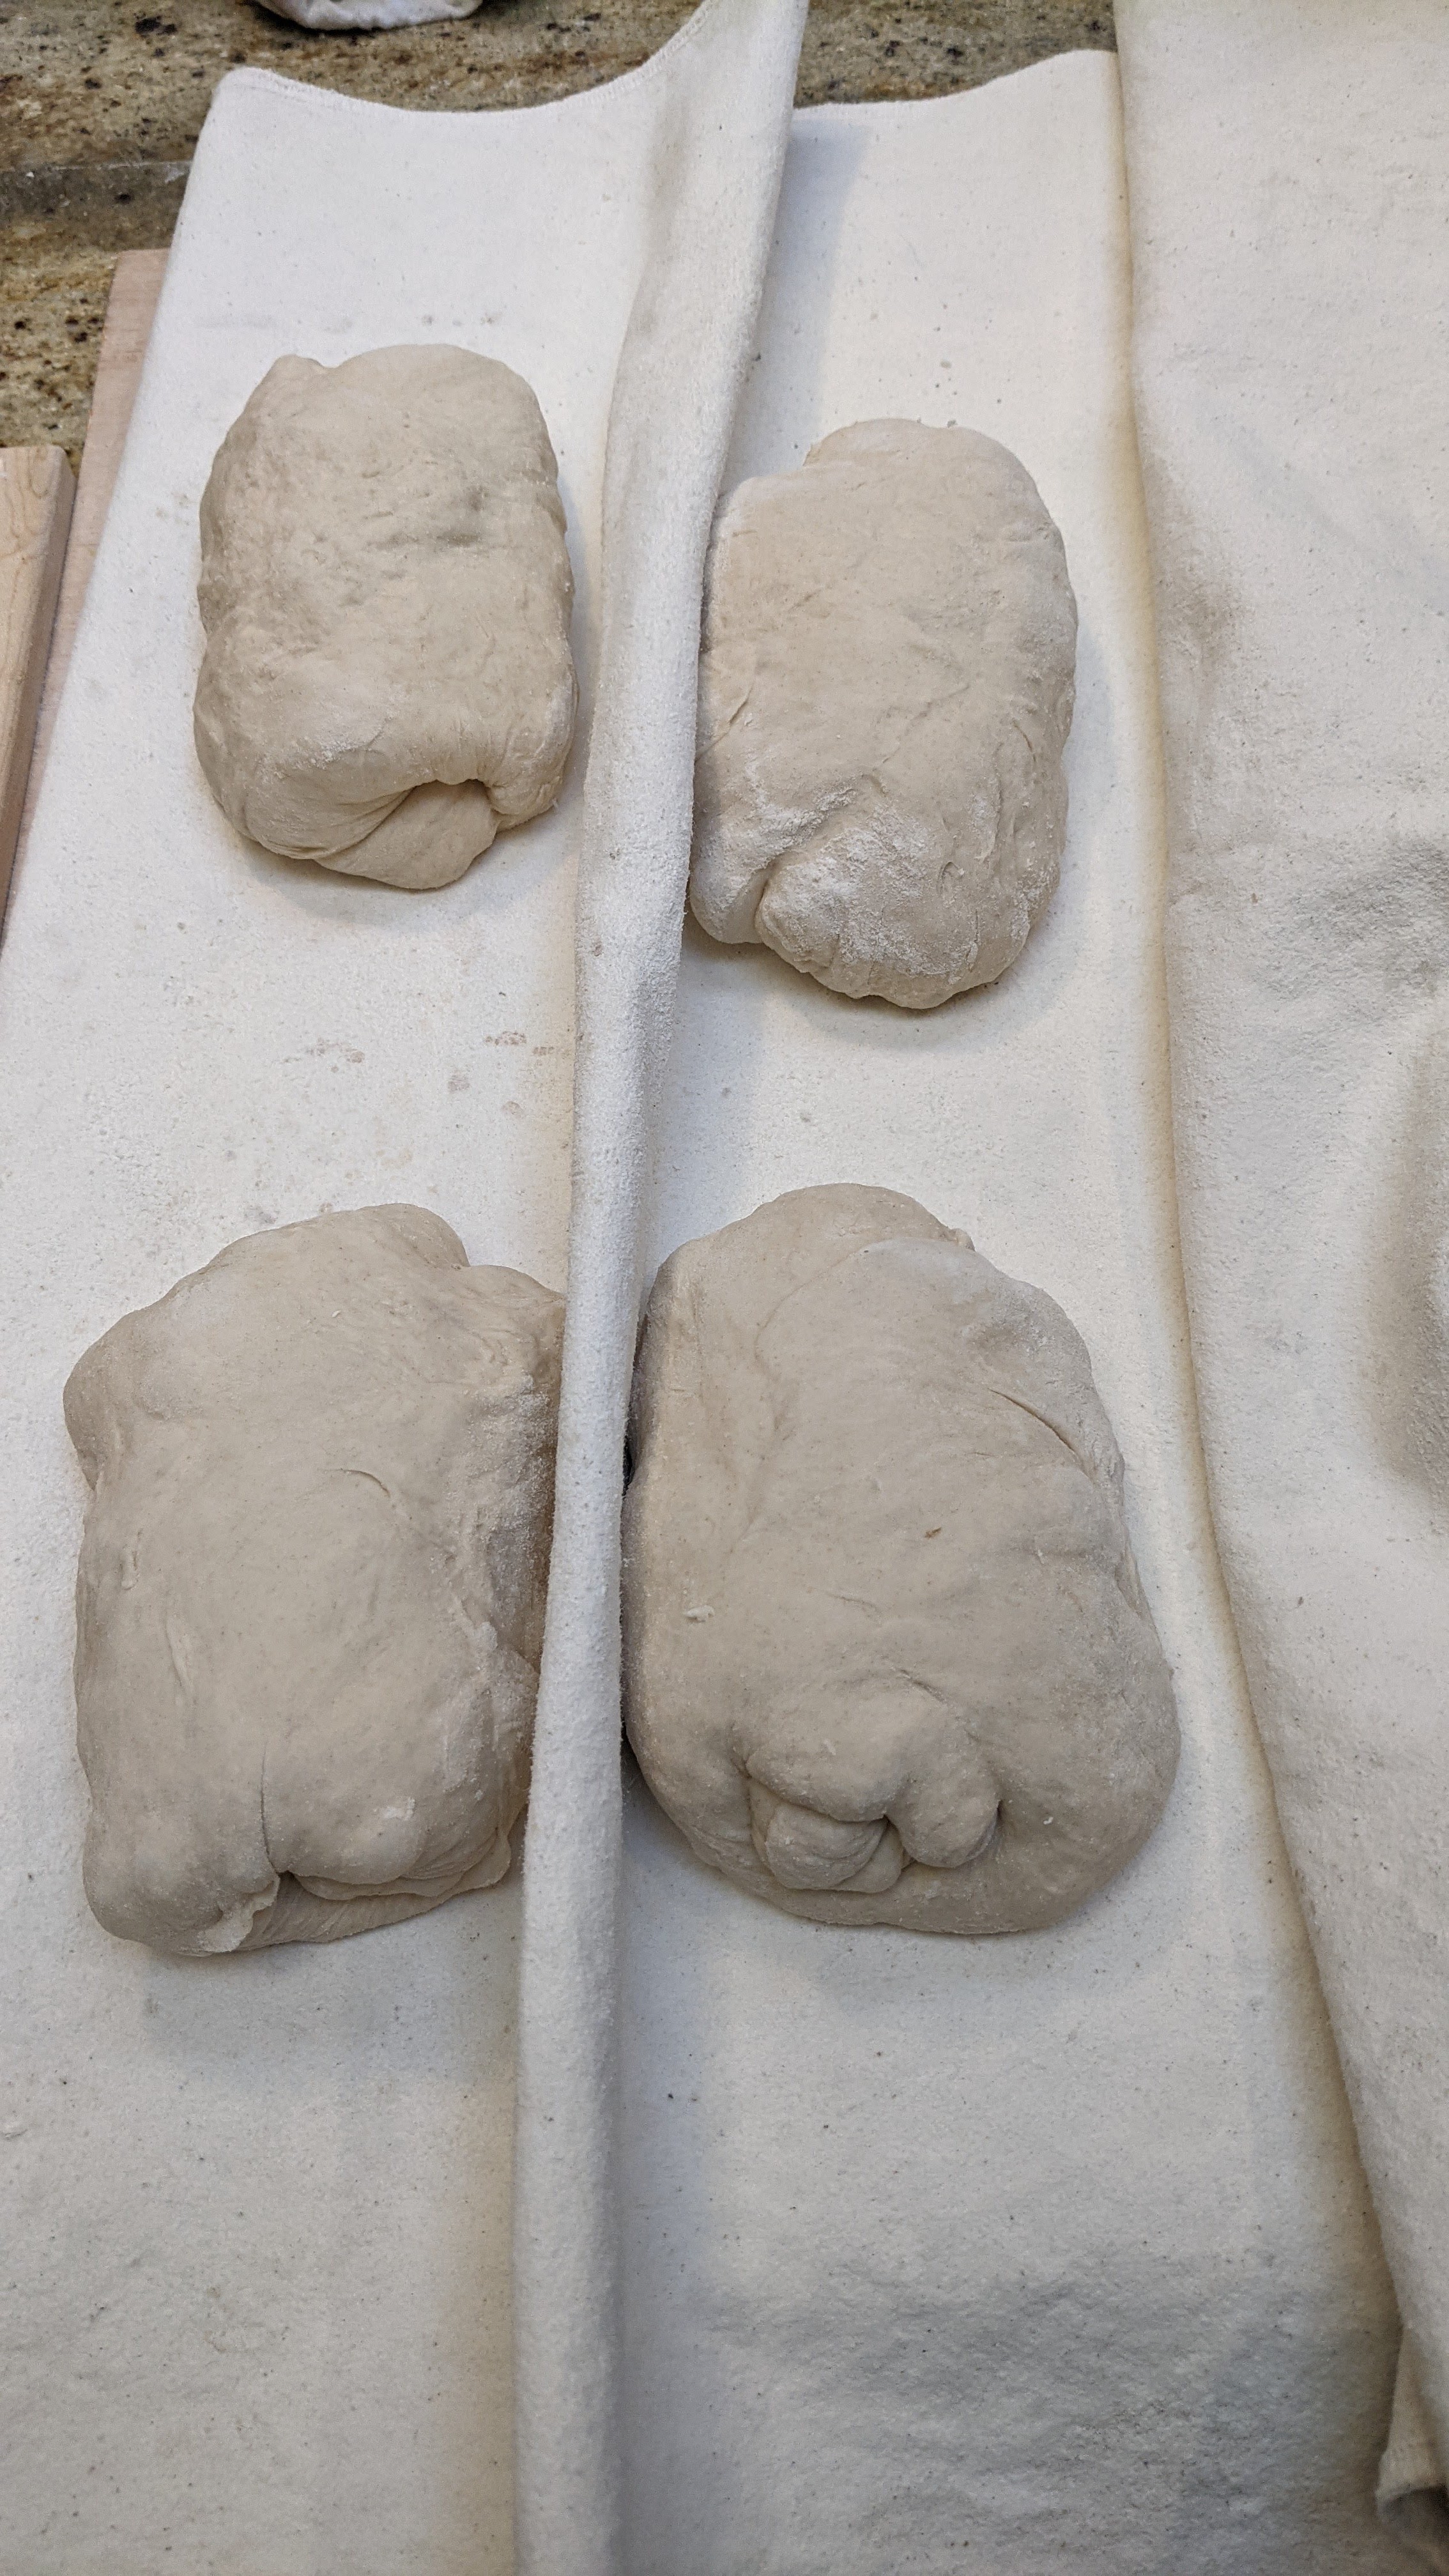
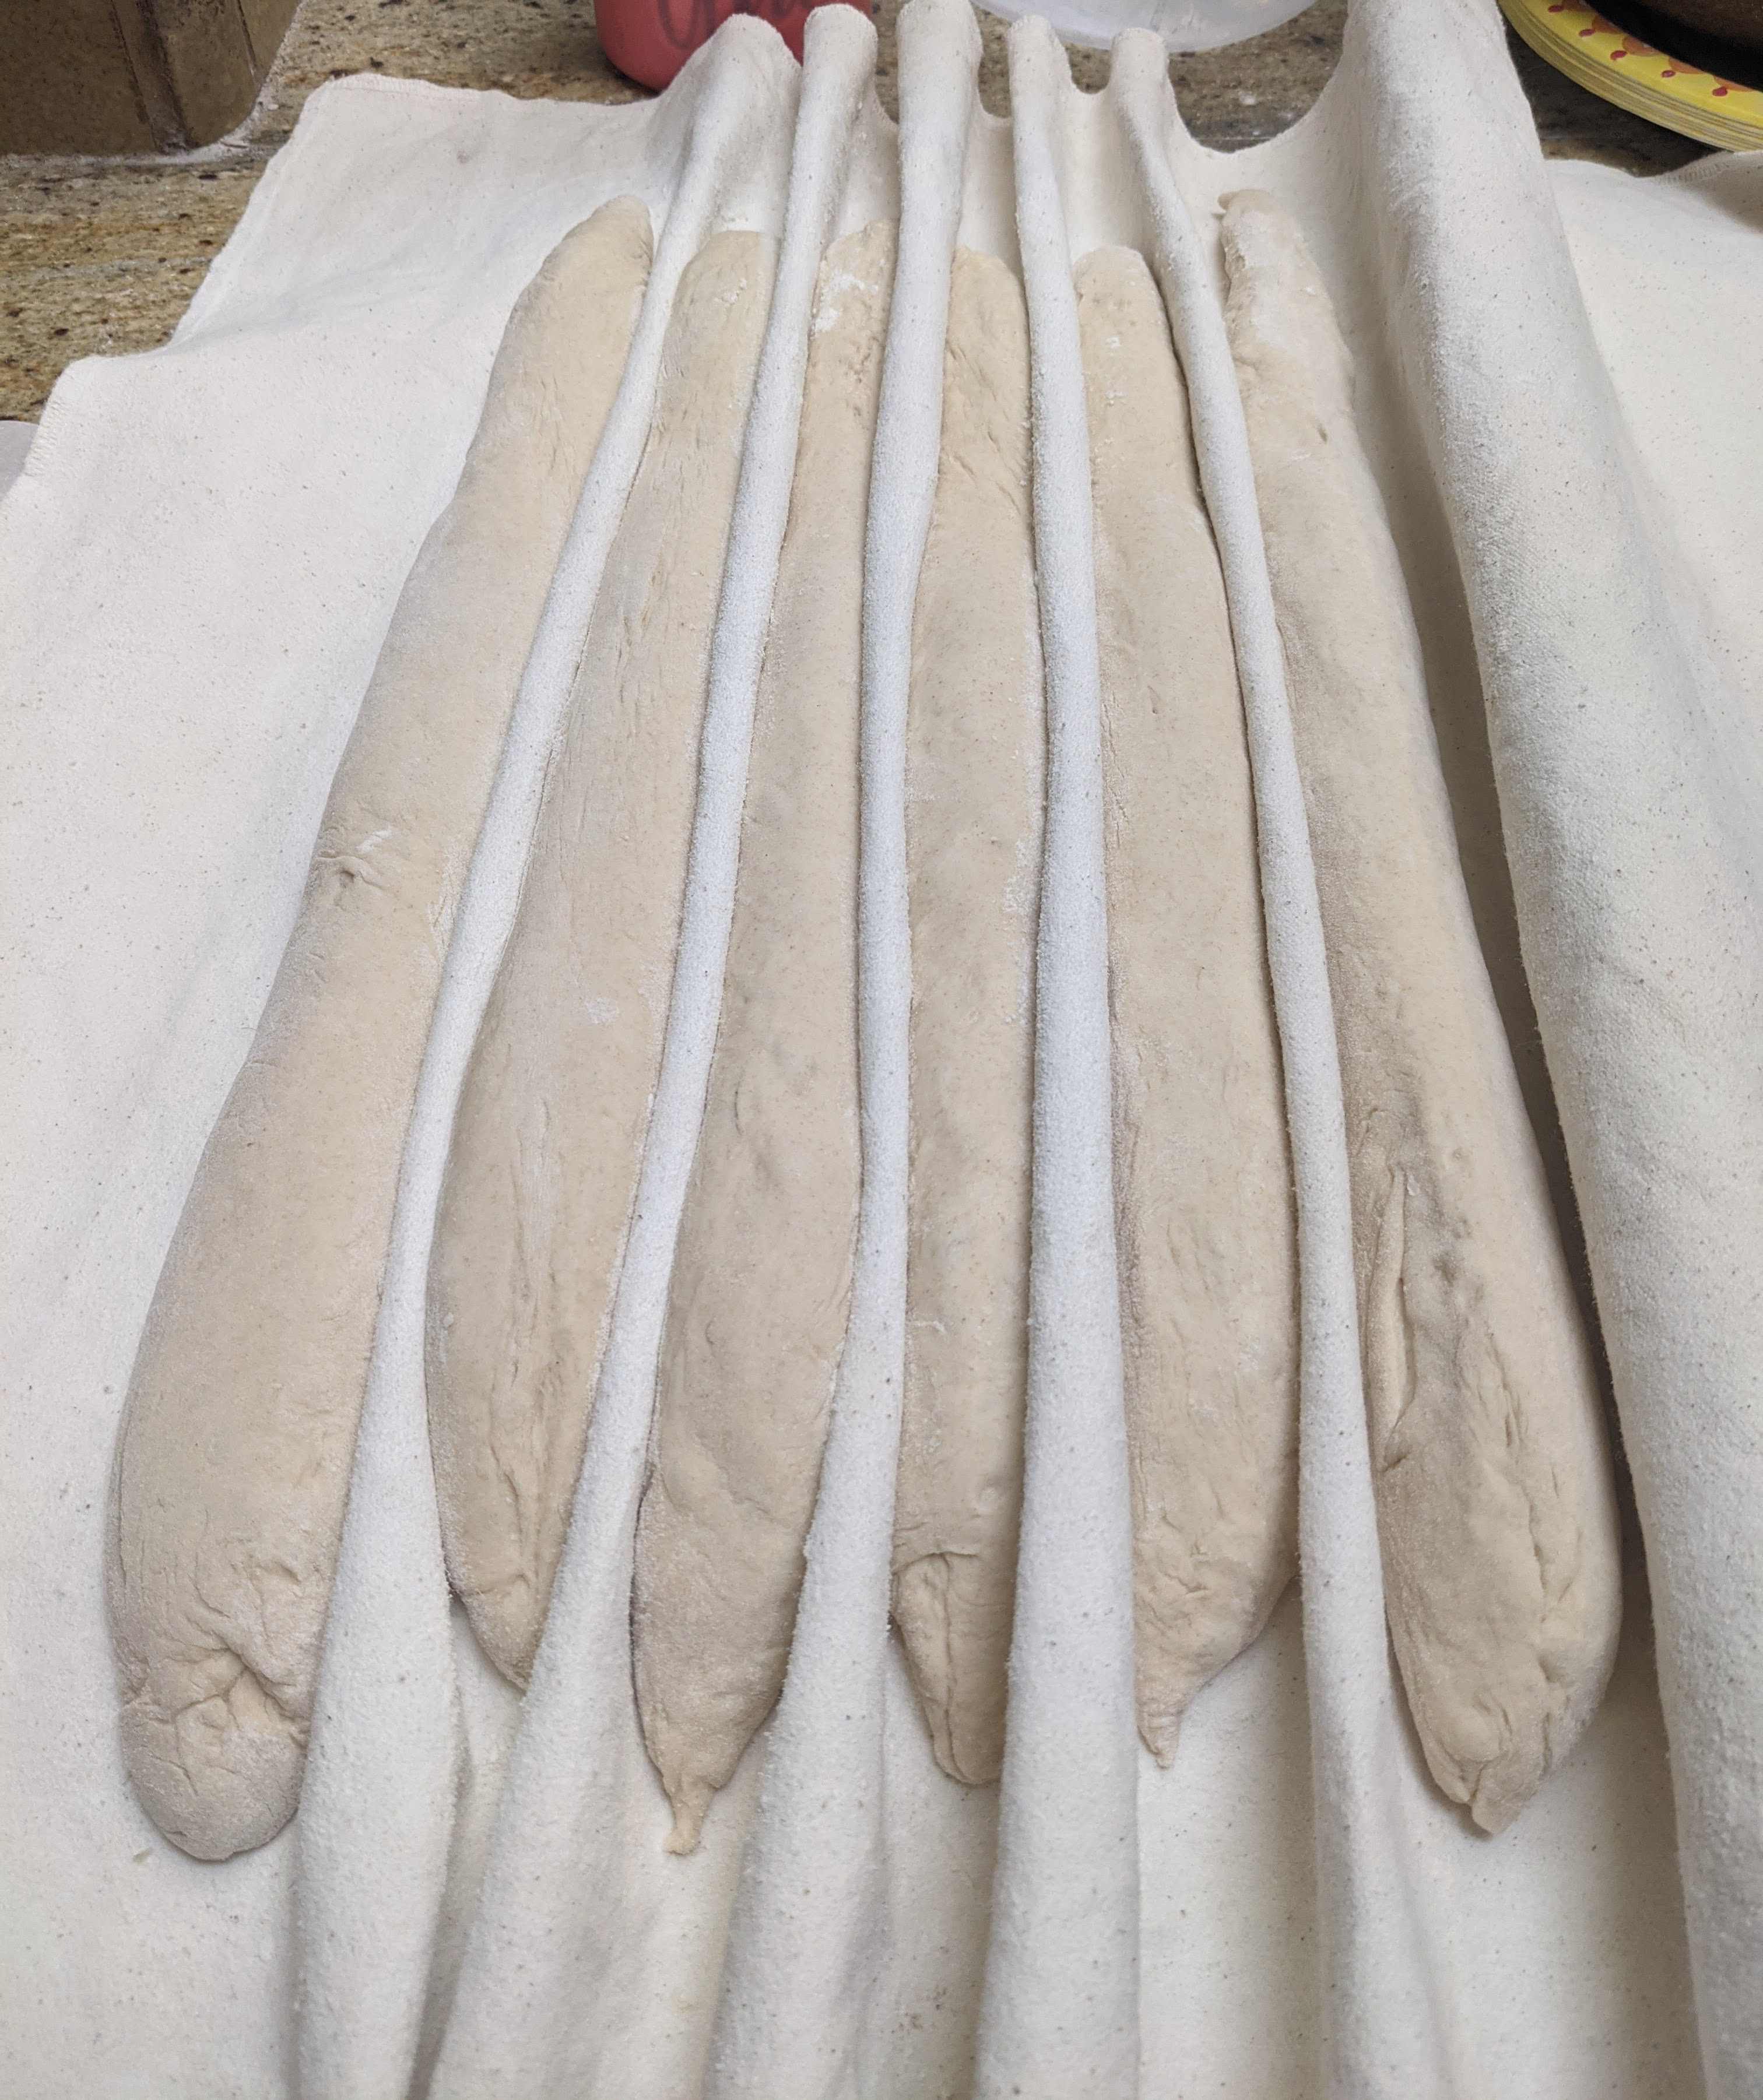
Divide and Pre-shape. Gently pour the dough out onto a lightly floured surface. Tug it into a rectangle, then divide it into 4 X 335g pieces for standard 60cm baguettes or 6 X 220g pieces for 40cm baguettes. Letter fold each piece by gently pulling out the sides and folding to the middle, then jelly-roll it perpendicular to the letter fold seam to form a rough, short log. Seal the seam, then place on a well-floured couche, seam-side-up (on the left). Allow the dough to relax for 10-30 minutes depending on how tightly you rolled the initial log. The dough should be very relaxed before you shape, otherwise, it will fight you!
Shaping. After the bench rest, shape the logs into baguettes about 15-20″ depending on the size of your oven (I have a baking stone, so I roll mine out to 24″). and return to the couche for final fermentation. Make sure to leave lots of room in between the pieces to prevent tearing during the final ferment. You’ll know the dough’s relaxed enough when you can stretch it and it doesn’t fight you. If you find the dough fighting you, let it sit for a few minutes then resume shaping.
Final Fermentation. 1 – 1½ hour. This could be shorter or longer depending on the weather! Use 1 hour as the baseline, but during warm weather, check the progress of the loaves at 30 minutes.
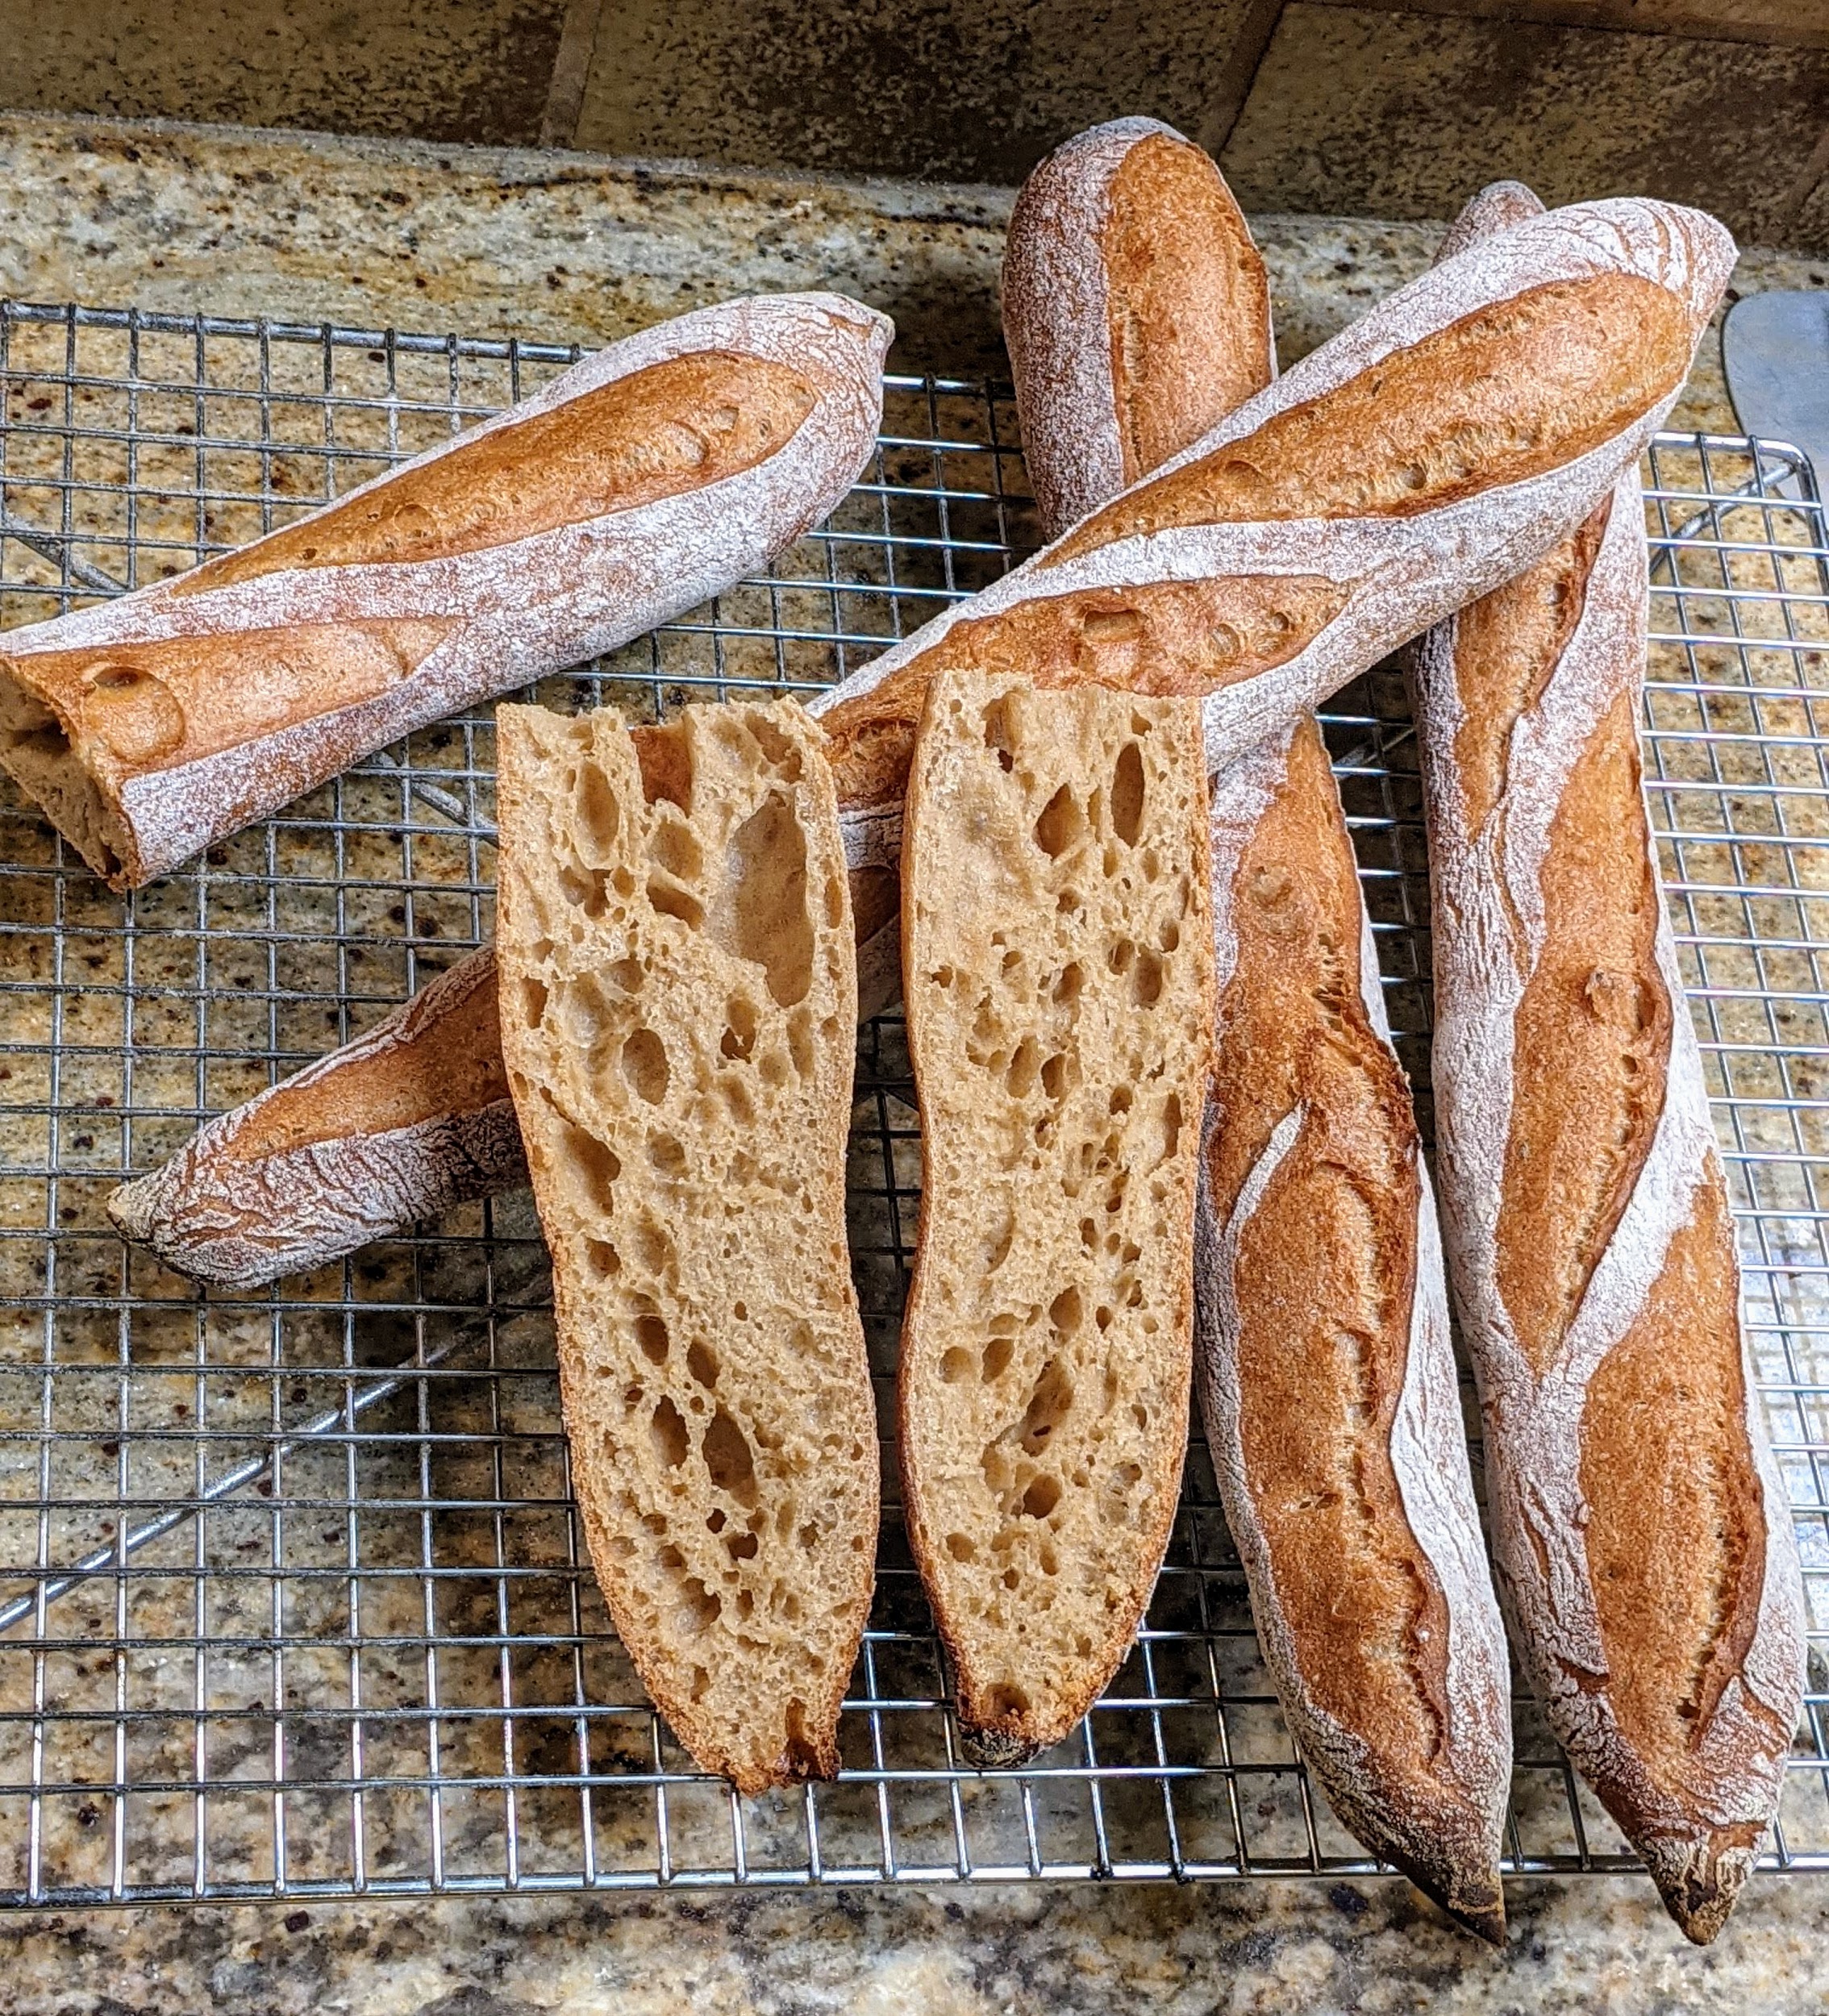
Bake. Transfer the loaves to a transfer board, score, then bake at 475°F for 12 minutes with steam. Release steam (remove your steaming container), turn down oven to 425°F and bake another 15-20 minutes until you achieve a rich, russet color. Personally, I’m not a fan of taking baguettes out to super-dark. The crust at that point becomes too hard to be enjoyable. But that’s just me.
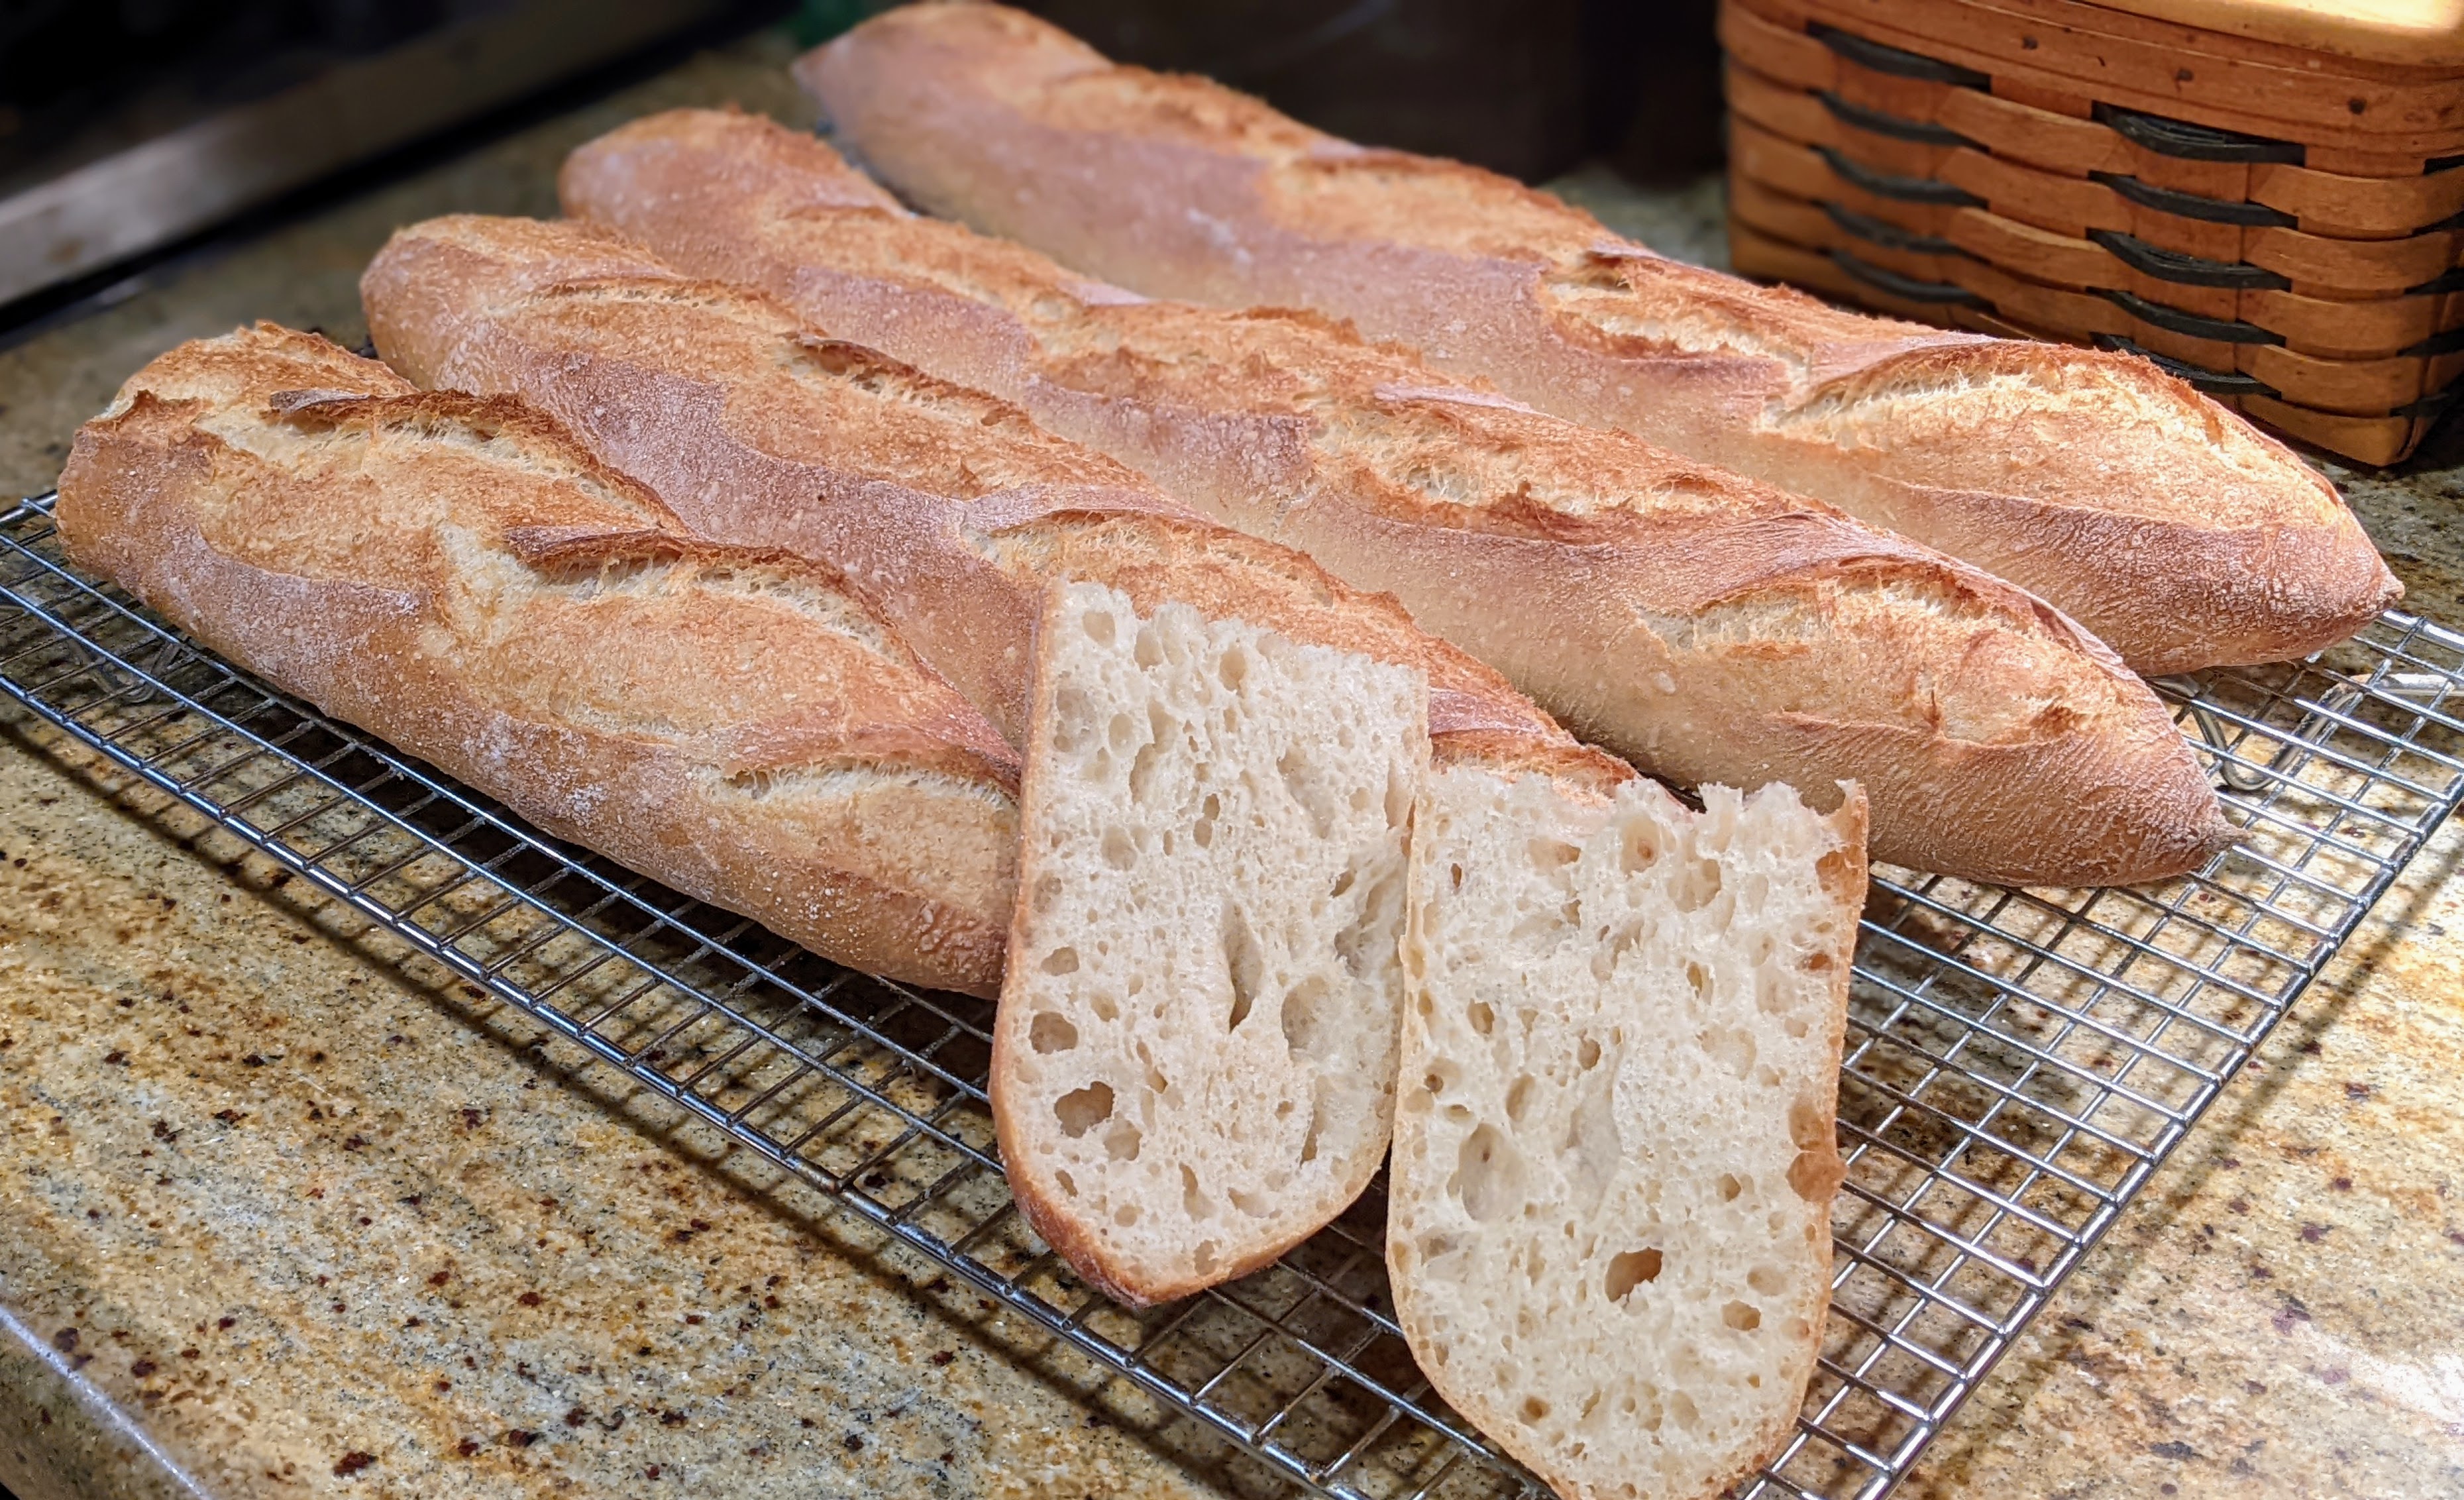
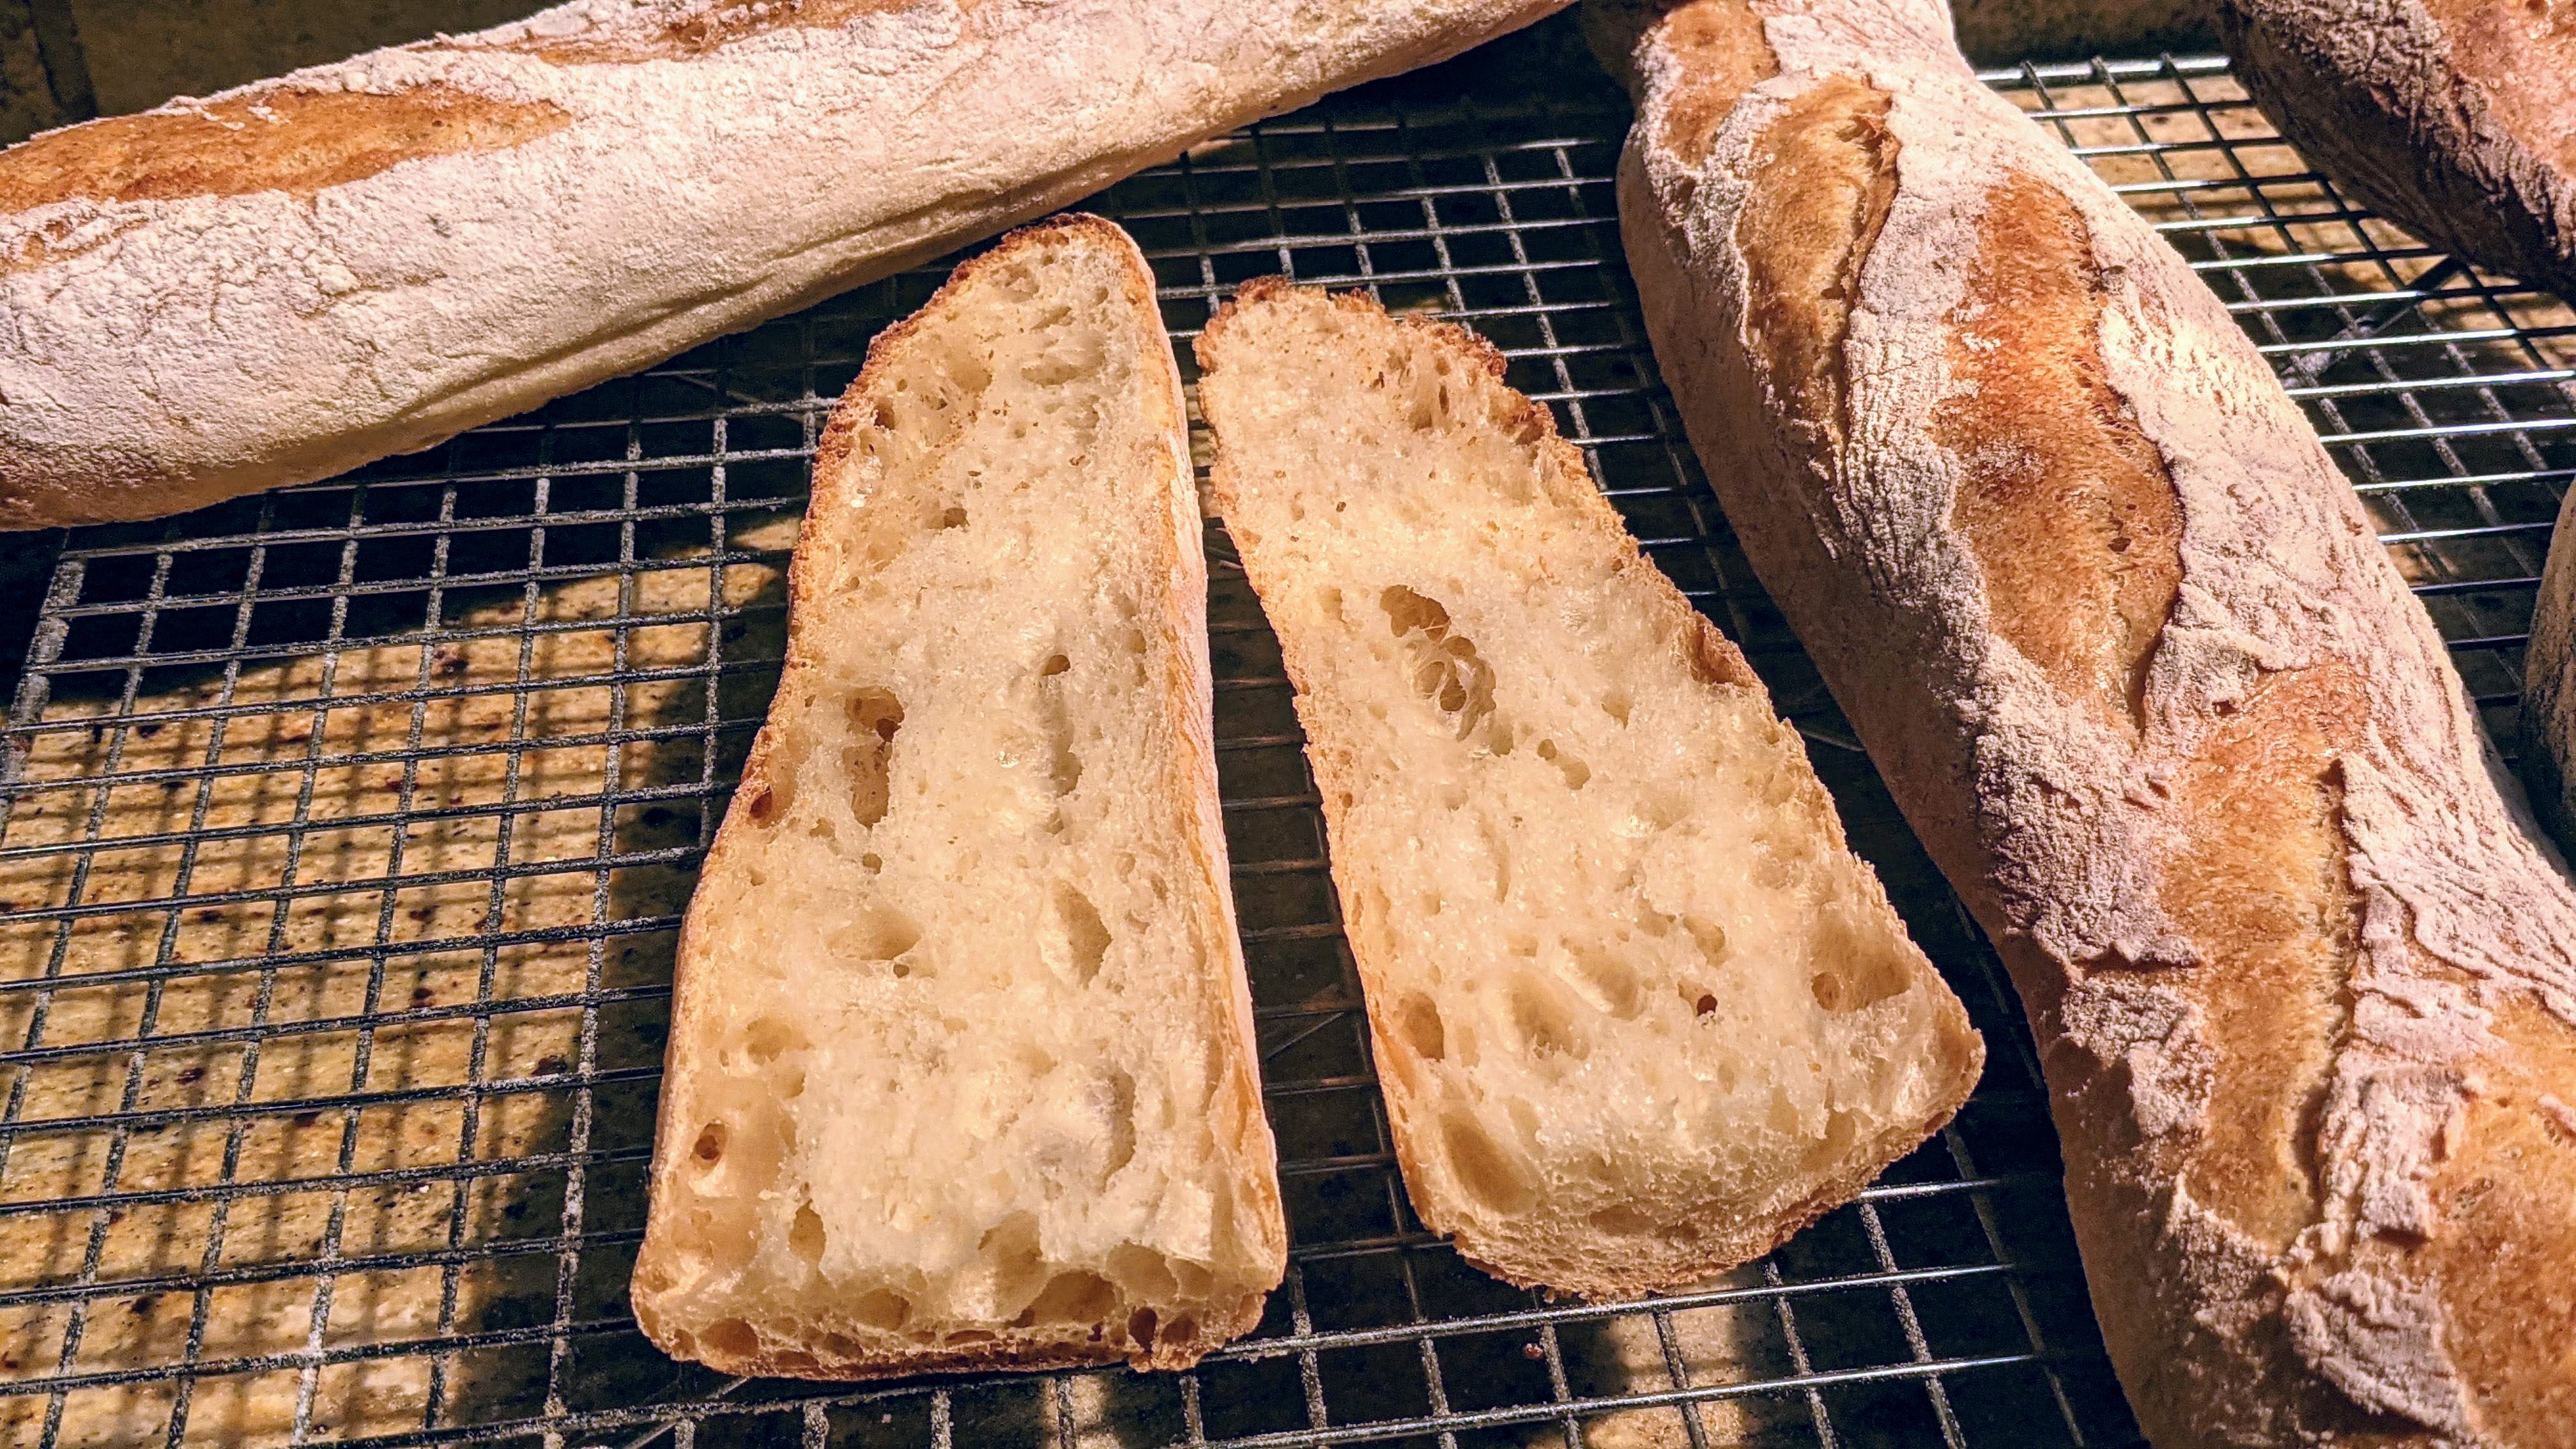
The ideal baguette will have various sized holes that dot the crumb.
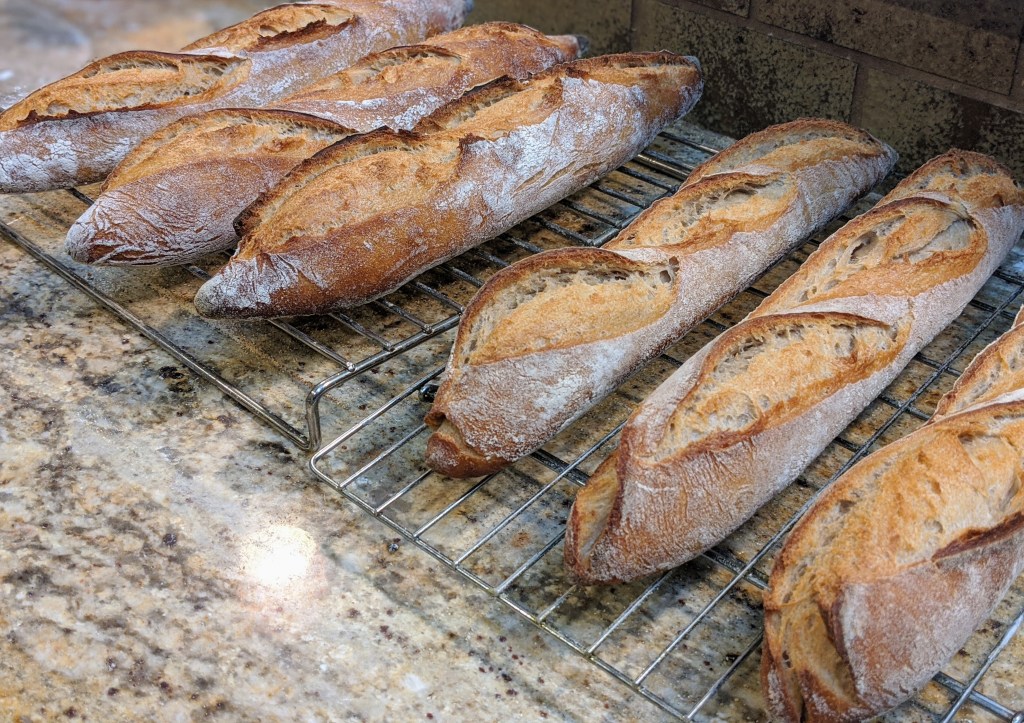
I allowed these demis to get a bit of a skin, thus they formed ears.
Notes
- You might be wondering where I got the 380g of poolish. That represents 50% of the total flour, including the poolish flour. To calculate total flour for any formula, take the the Total Dough Weight divided by the Total Formula %, so 1353 / 177.43% = 762. Technically, 50% of that is 381, but I like nice, round numbers.
- You can replace the poolish with sourdough starter. But make sure it’s at peak activity (passes the float test) and is nice and bubbly. The process will slow a bit because the yeast density of starter is not nearly as high as with commercial yeast.
- The pre-shape step is absolutely critical, not just in starting to orient the gluten strands but it also acts as an intermediate fermentation stage, however short.
- When shaping baguettes, make sure your hands are lightly floured lest the dough sticks to your palms and tears the skin. You need to avoid that! And remove any rings!
- Having made hundreds of baguettes, I’ve learned not to put too much importance on forming ears on the loaves as you can see with the loaves above. I actually cold-fermented the shaped loaves before I baked them because I had other loaves in the oven. They kind of formed a skin even though I had them covered. And though they were delicious, they were pretty crunchy. The aesthetic that I go for now is to get a moderately crunchy crust, but not to go overboard.
- It is ULTRA-important that you don’t take the final fermentation all the way to the finish. You actually want to get to about 85-90% fermentation, then bake. This’ll ensure that you get great oven spring. Otherwise, the loaves will be flat.
- As mentioned above, if you want to do a longer cold bulk fermentation, use less yeast. I’d start out by using half the yeast. But you could treat the bulk like pizza dough and use even less and take a couple of days for bulk fermentation. If you do that, use less than a gram of yeast.
What If I Can Only Bake Half the Shaped Loaves at a Time?
If you don’t have room to bake all the loaves at once, then pop the other loaves into your refrigerator while the other loaves bake. Once your oven comes back up to temp after the first batch, remove the extra loaves from the fridge and place them on your board.
You could also pop them in the freezer, but I don’t recommend doing that for more than 30 minutes.

Pingback: Next Stop… Ciabatta Town! | The Dawg House!
Pingback: Creating a “Mother” Dough | The Dawg House!
Would someone please post the recipe in layman’s (not a professional baker) terms?
I realize that the baker’s percentages can be a bit daunting at first glance, but I do provide weight measurements (in grams) for all the recipe ingredients. Do you have some specific questions? I’ll answer as best I can. I’m here to help!
Pingback: Welcome! | The Dawg House!
Pingback: Recipe: Sourdough Baguettes (Updated) | The Dawg House!