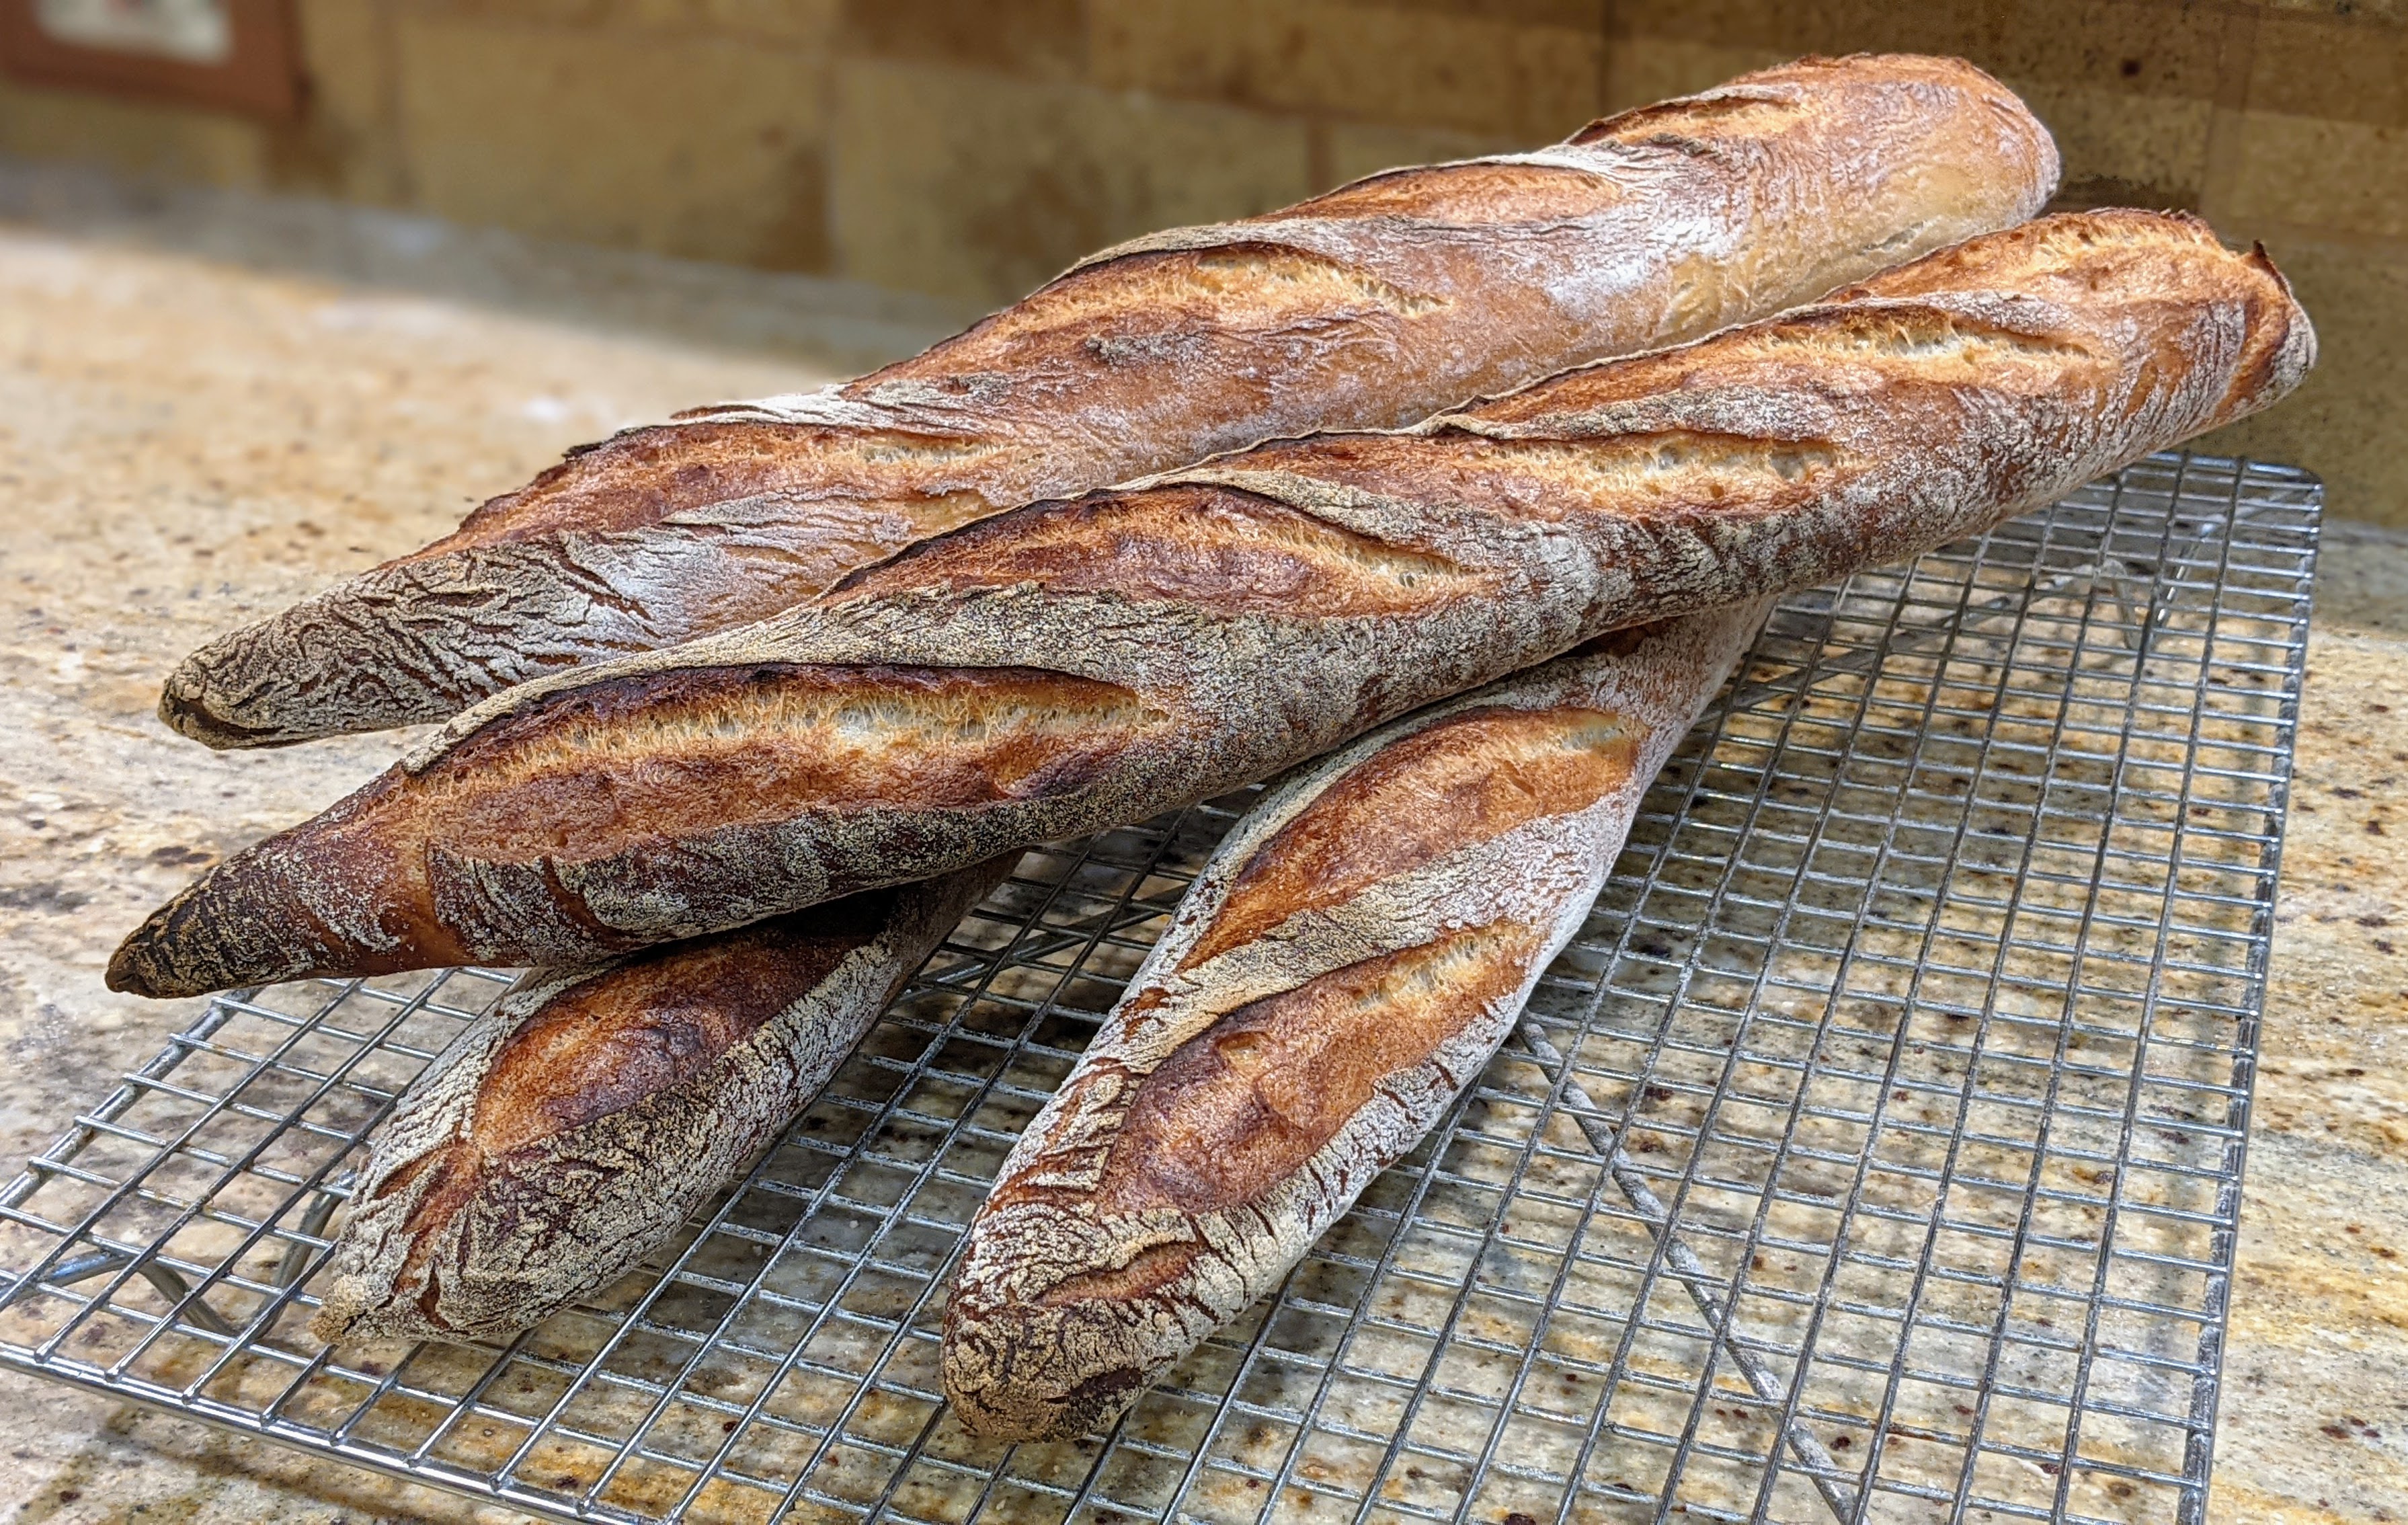
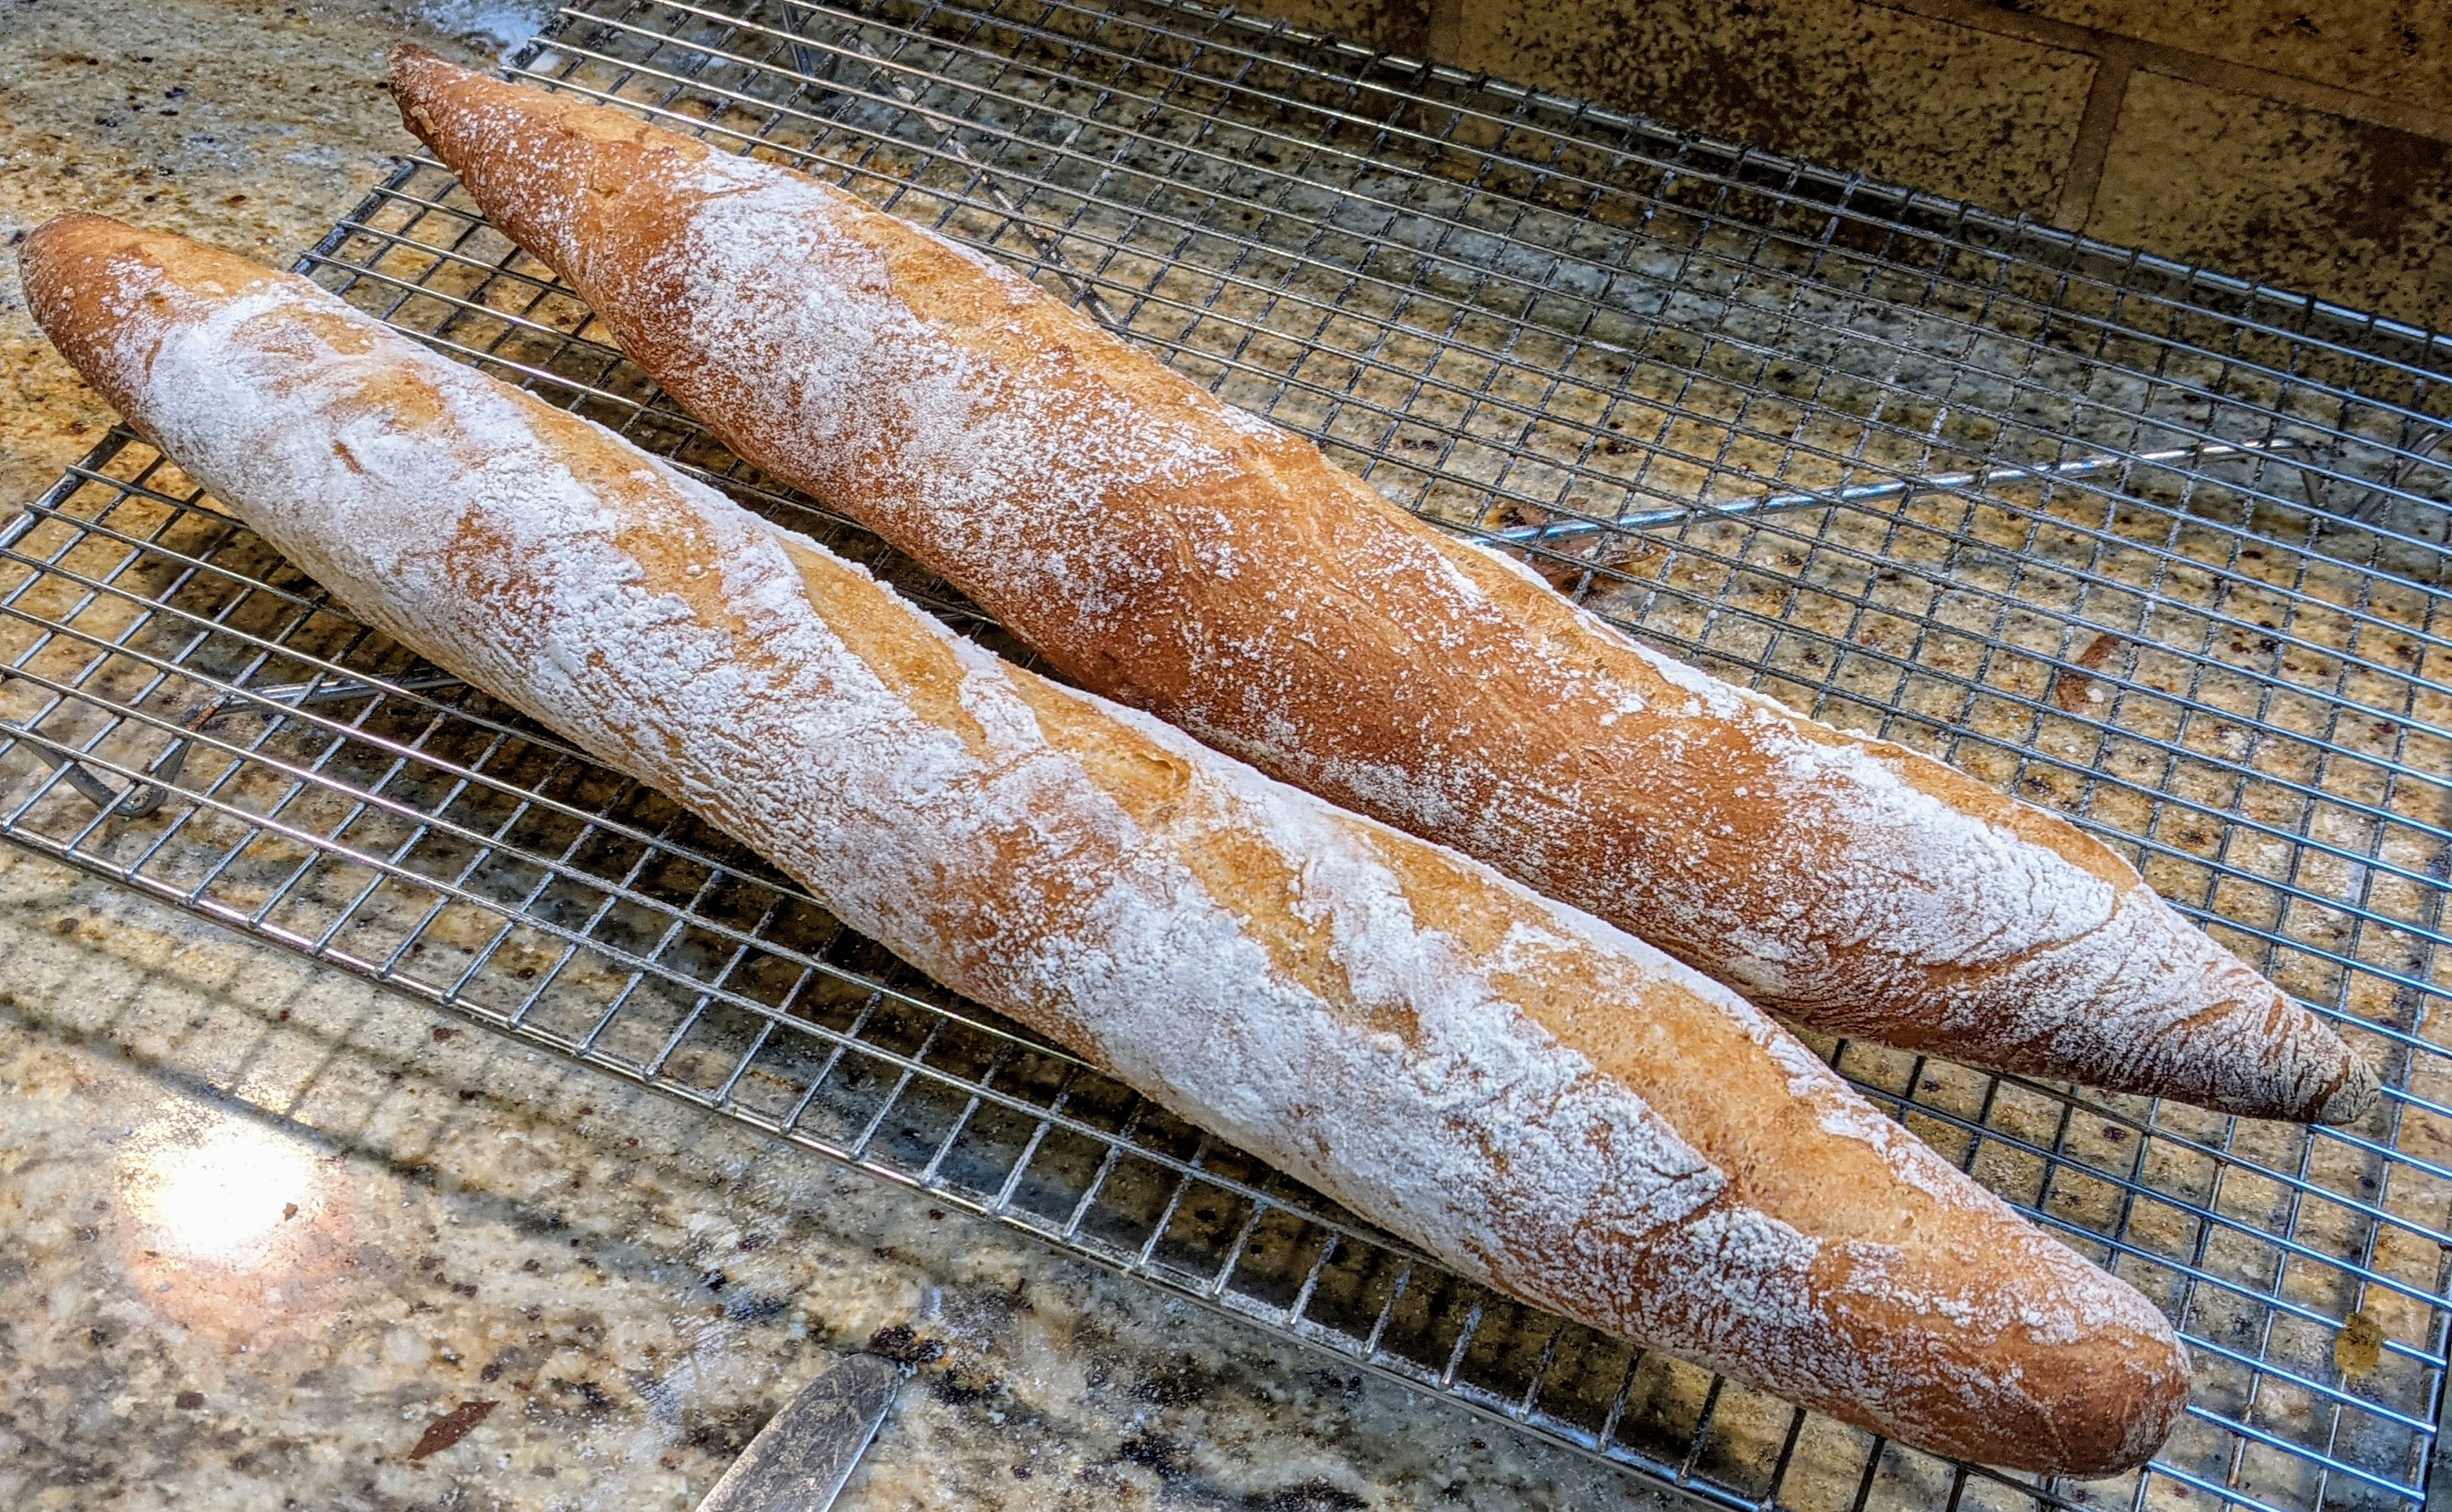
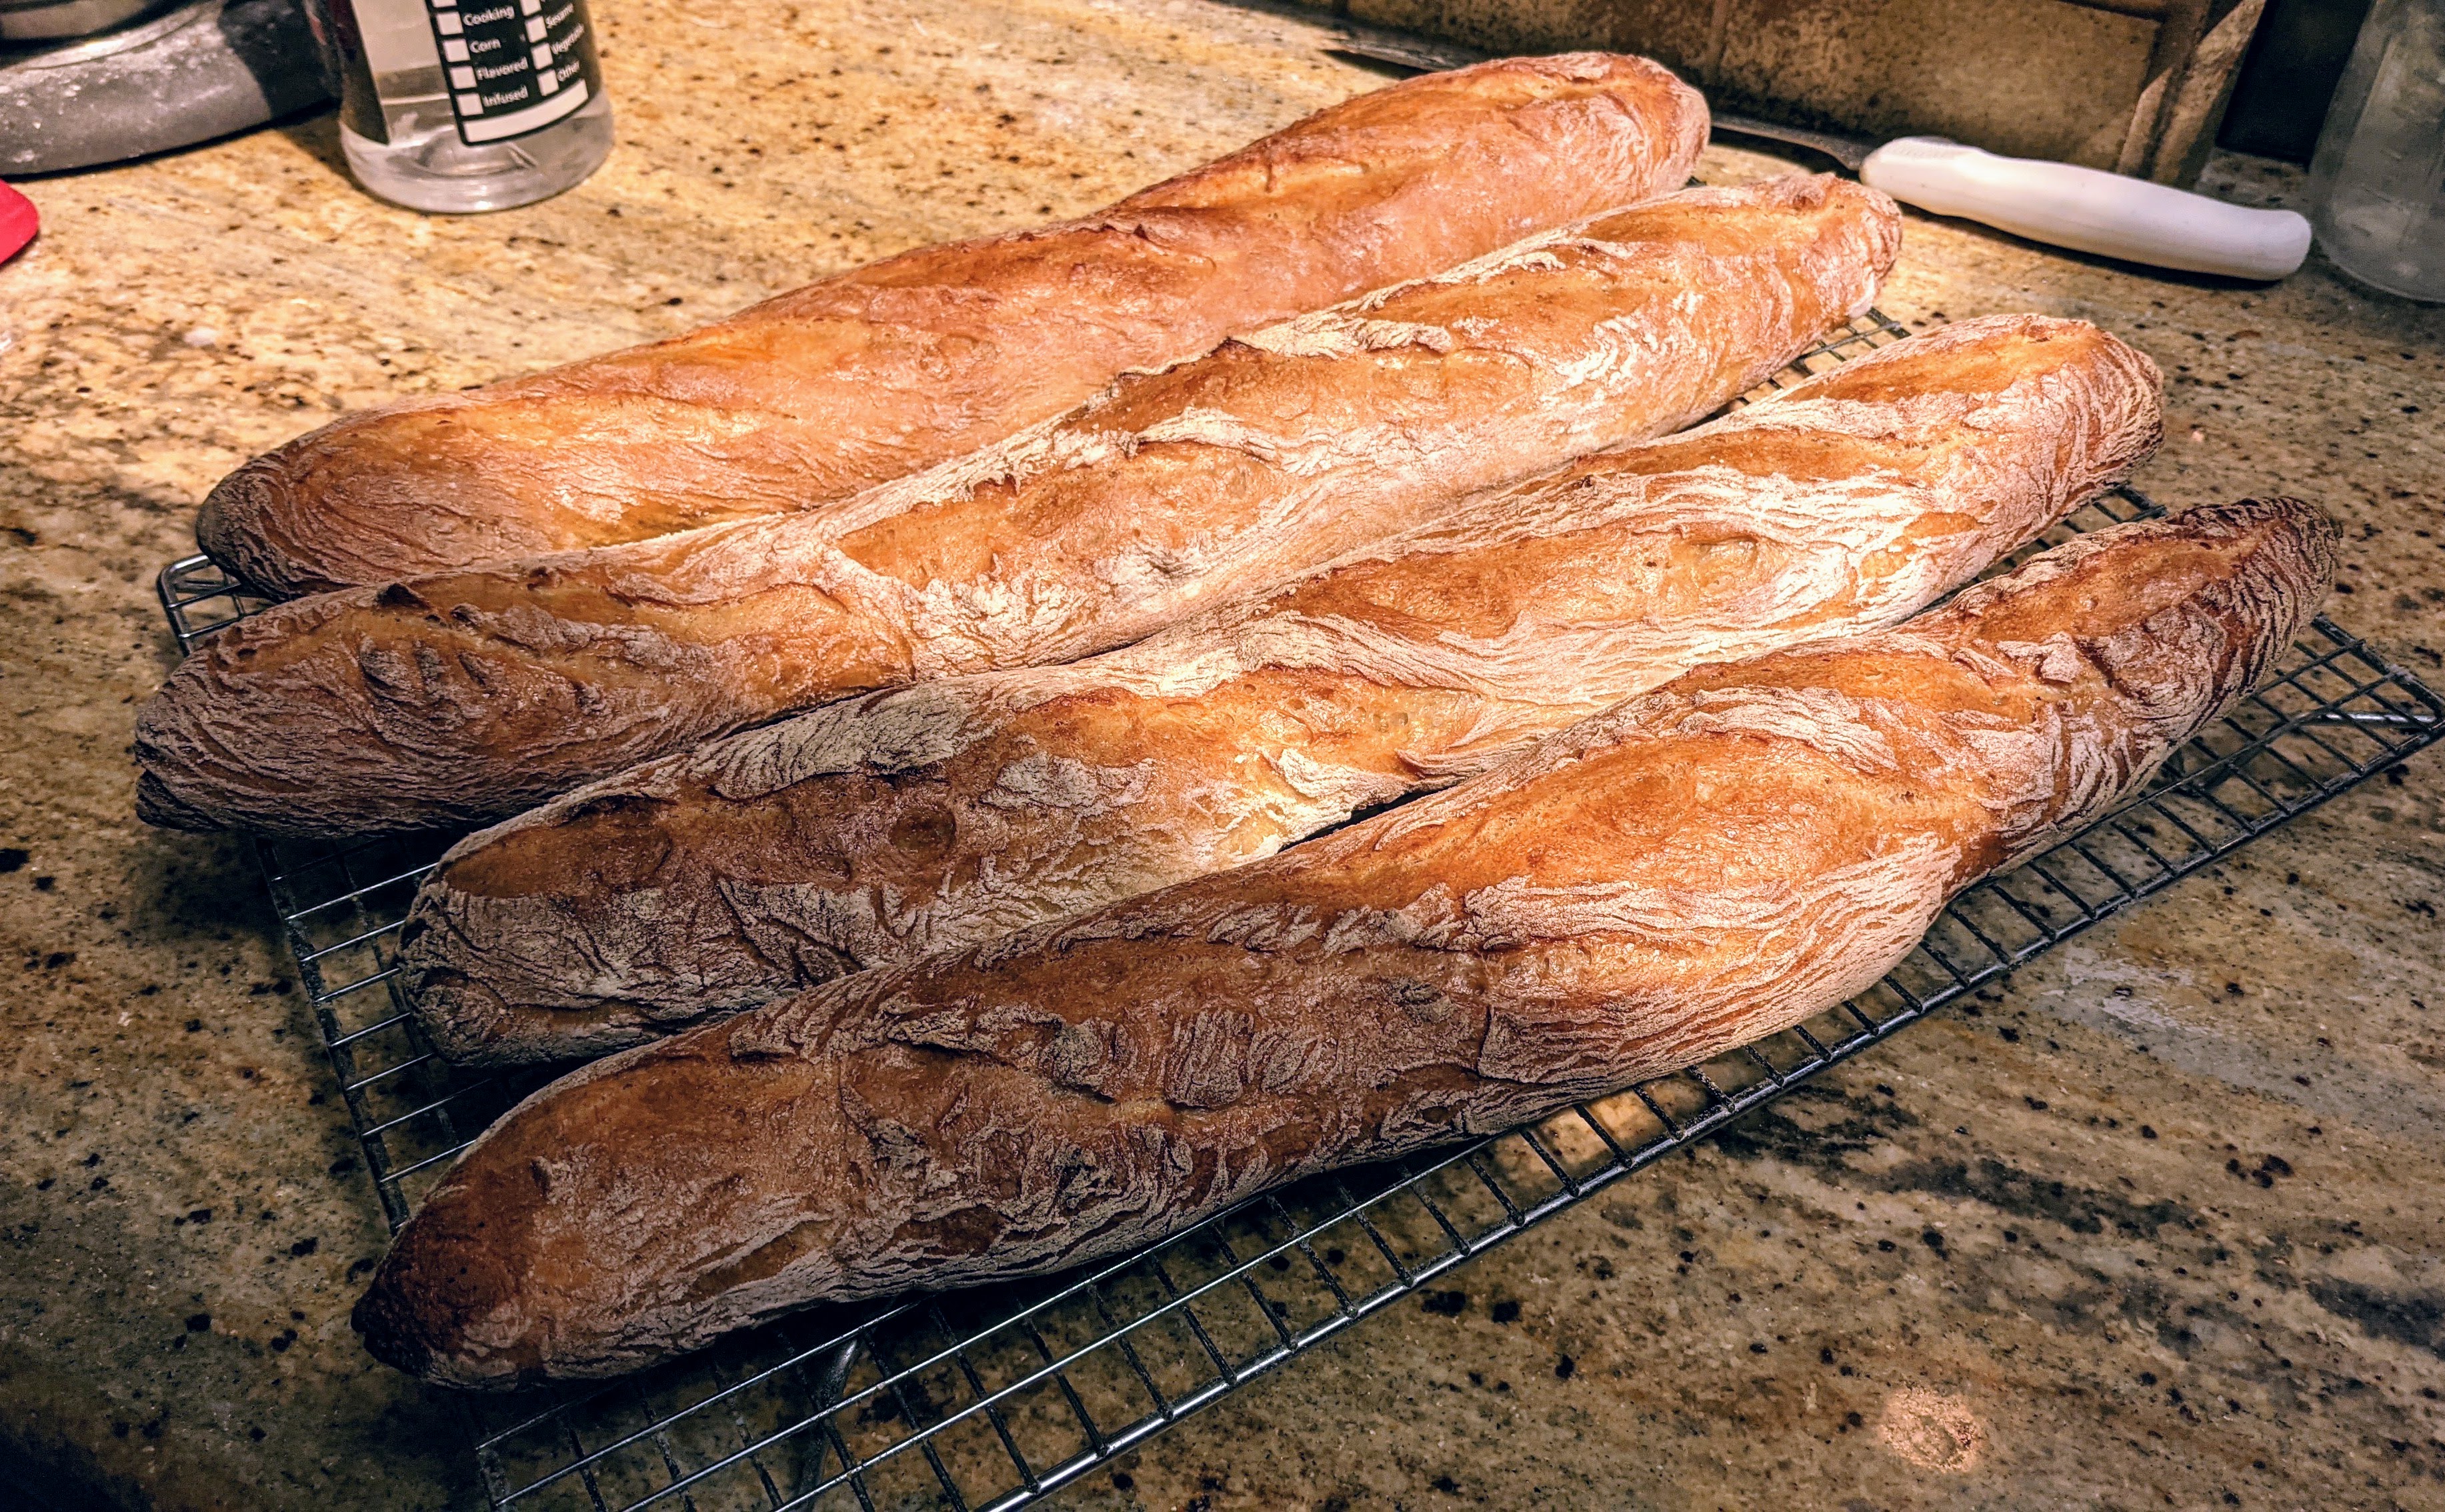
I’m surprised I haven’t posted a recipe for my poolish baguettes after all this time! I suppose I’ve been making pointage en bac baguettes for so long I completely forgot about these. But this evening after dinner I thought about what I’d like to bake and it occurred to me that I hadn’t made poolish baguettes in a long time. So I prepared a poolish for a nice 10-12 hour ferment. I can’t wait to bake them tomorrow morning!
What’s so special about using a poolish? The standard answer is that it adds flavor as the long fermentation time of 6-18 hours allows longer enzymatic activity adding to the complexity of the flavors of the dough. Plus, with the very small amount of yeast used, the bacteria have some time to do their thing and release organic acids into the dough. That adds flavor, but the acid also helps in making the dough more extensible. Cool stuff!
With these baguettes, the flour of the poolish represents 25% of the total flour of the recipe. Or put in simpler terms, the poolish weight is 50% of the total flour.
Overall Formula
Flour
100.00%
Water
75.00%
Salt
2.00%
Yeast
0.43%
Poolish
AP Flour
200g
Water
200g
Yeast
0.2g
Final Dough
Flour – You can use different flour blends. It doesn’t have to be only bread and AP flour.
571g
Water
381g
Salt
15g
Yeast
1g (cold ferment) 3g (room temp)
Preferment
381g
Total Yield
1353g 4 X 335g 55-60cm loaves 6 X 225g 40cm loaves
Optimal Dough Temp
78°-80°F
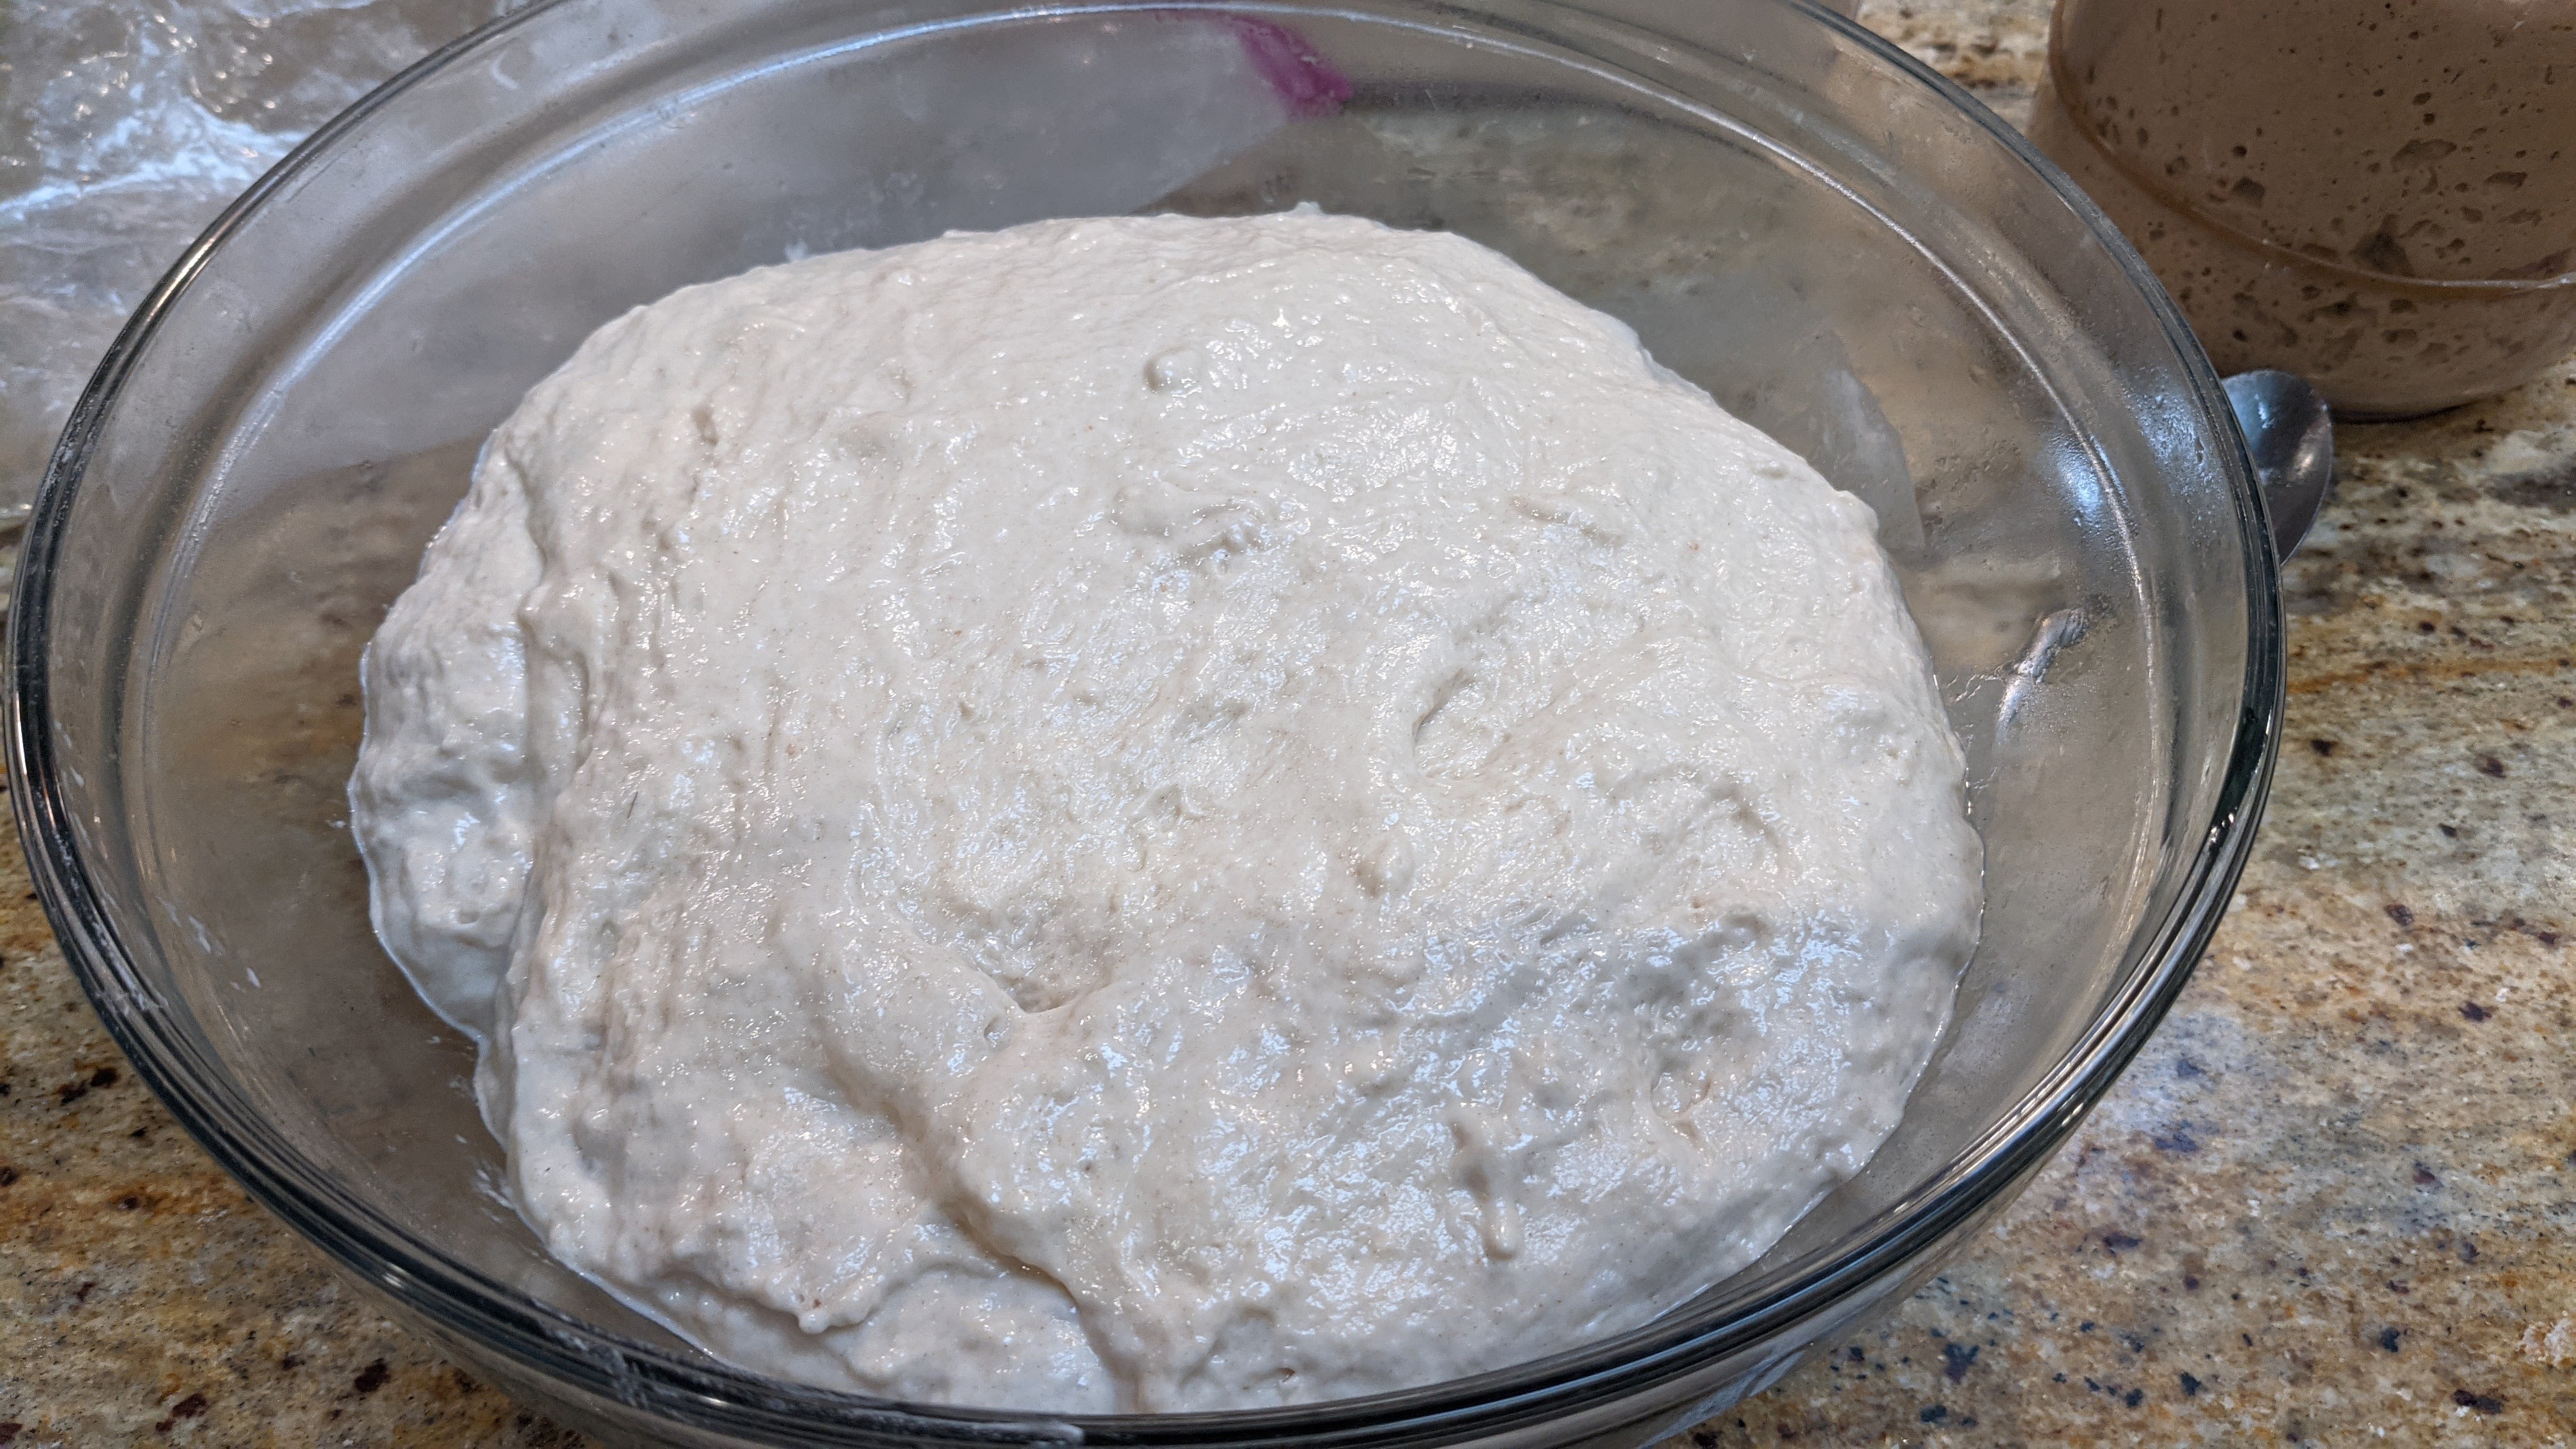
Make the Poolish. Though the recipe only calls for 381g of poolish, I recommend making 400g, as there will always be some loss in the process. Combine all ingredients in a bowl, cover with plastic and let sit overnight at least 6-8 hours. The poolish will be ready when it’s nicely bubbled on top and passes the float test (it could be doubled, but don’t necessarily rely on that). Note that in cooler weather, the poolish will take longer to mature, sometimes up to 18 hours.
Mix. Mix all the ingredients together to form a shaggy mass.
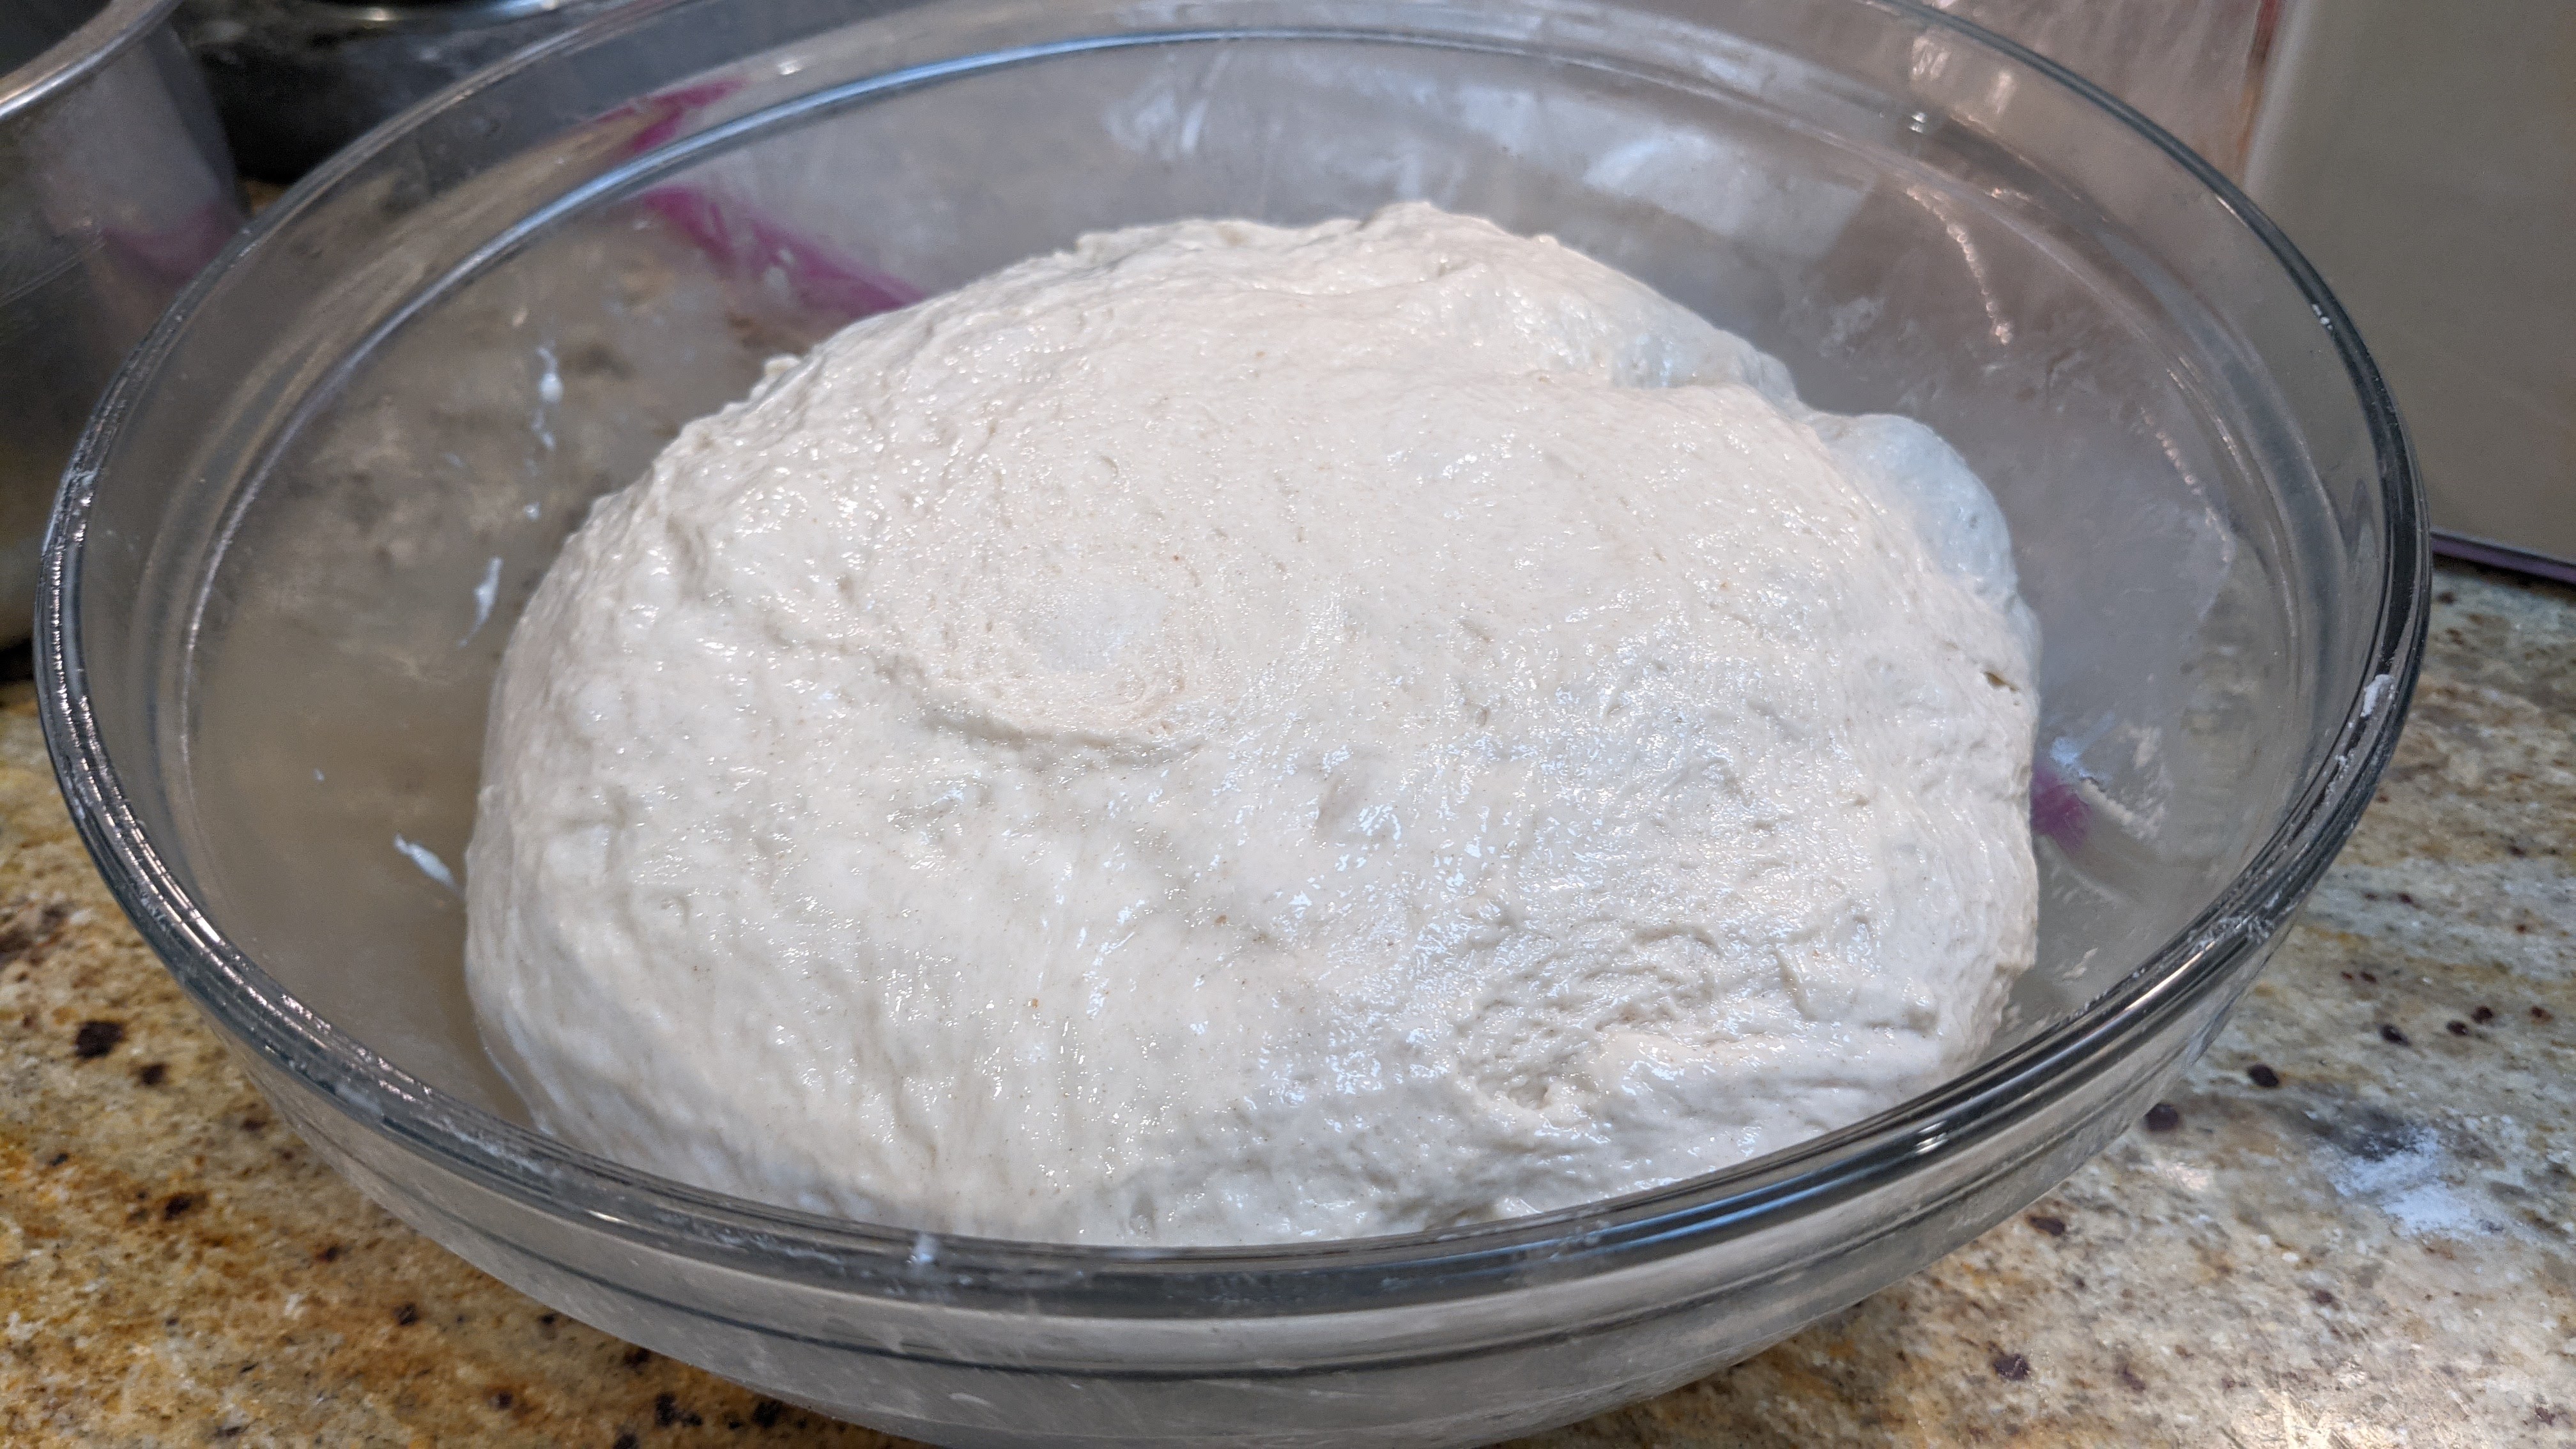
Bulk Fermentation. 1 1/2 to 2 hours or 6-18 hours in the fridge. Bulk fermentation is finished when the dough has expanded about 50%.
***If you want to do a long, cold bulk fermentation, I recommend using no more than 1 gram of yeast. Technically, you could forego the yeast altogether as the poolish will be full of yeast.***
Folding. Whether doing a cold bulk fermentation or not, stretch and fold the dough every 20 minutes in the first hour. By the third fold, the dough should be smooth and luxurious and will be highly extensible.
Divide and Pre-Shape. Divide the dough into 4 pieces at 335g or 6 pieces at 225g. Once divided, letter fold each piece by stretching one side, then folding it to the center, then stretching the other side and folding it over the body of the piece. Then roll the piece up like a jelly roll perpendicular to the folds, seal the seam, then place the piece seam-side-up on a well-floured couche.
At this point, it’s probably a good idea to preheat your oven to 475°F.
Final Fermentation: Depending on the ambient temp of your kitchen, final fermentation can take anywhere from 30 minutes to 2 hours. To determine when the loaves are ready for the oven, poke a floured or wet finger about a half to three-quarters of an inch into a loaf, then pull your finger back quickly. Observe the rate at which the indentation comes back. If it doesn’t come back at all, pop the loaves into the oven immediately – you’re extremely close to over-fermenting the dough. If it comes back quickly, and almost fills the indentation back up, give it a bit more time. If it comes back quickly, but immediately slows down, then you’re ready to bake!
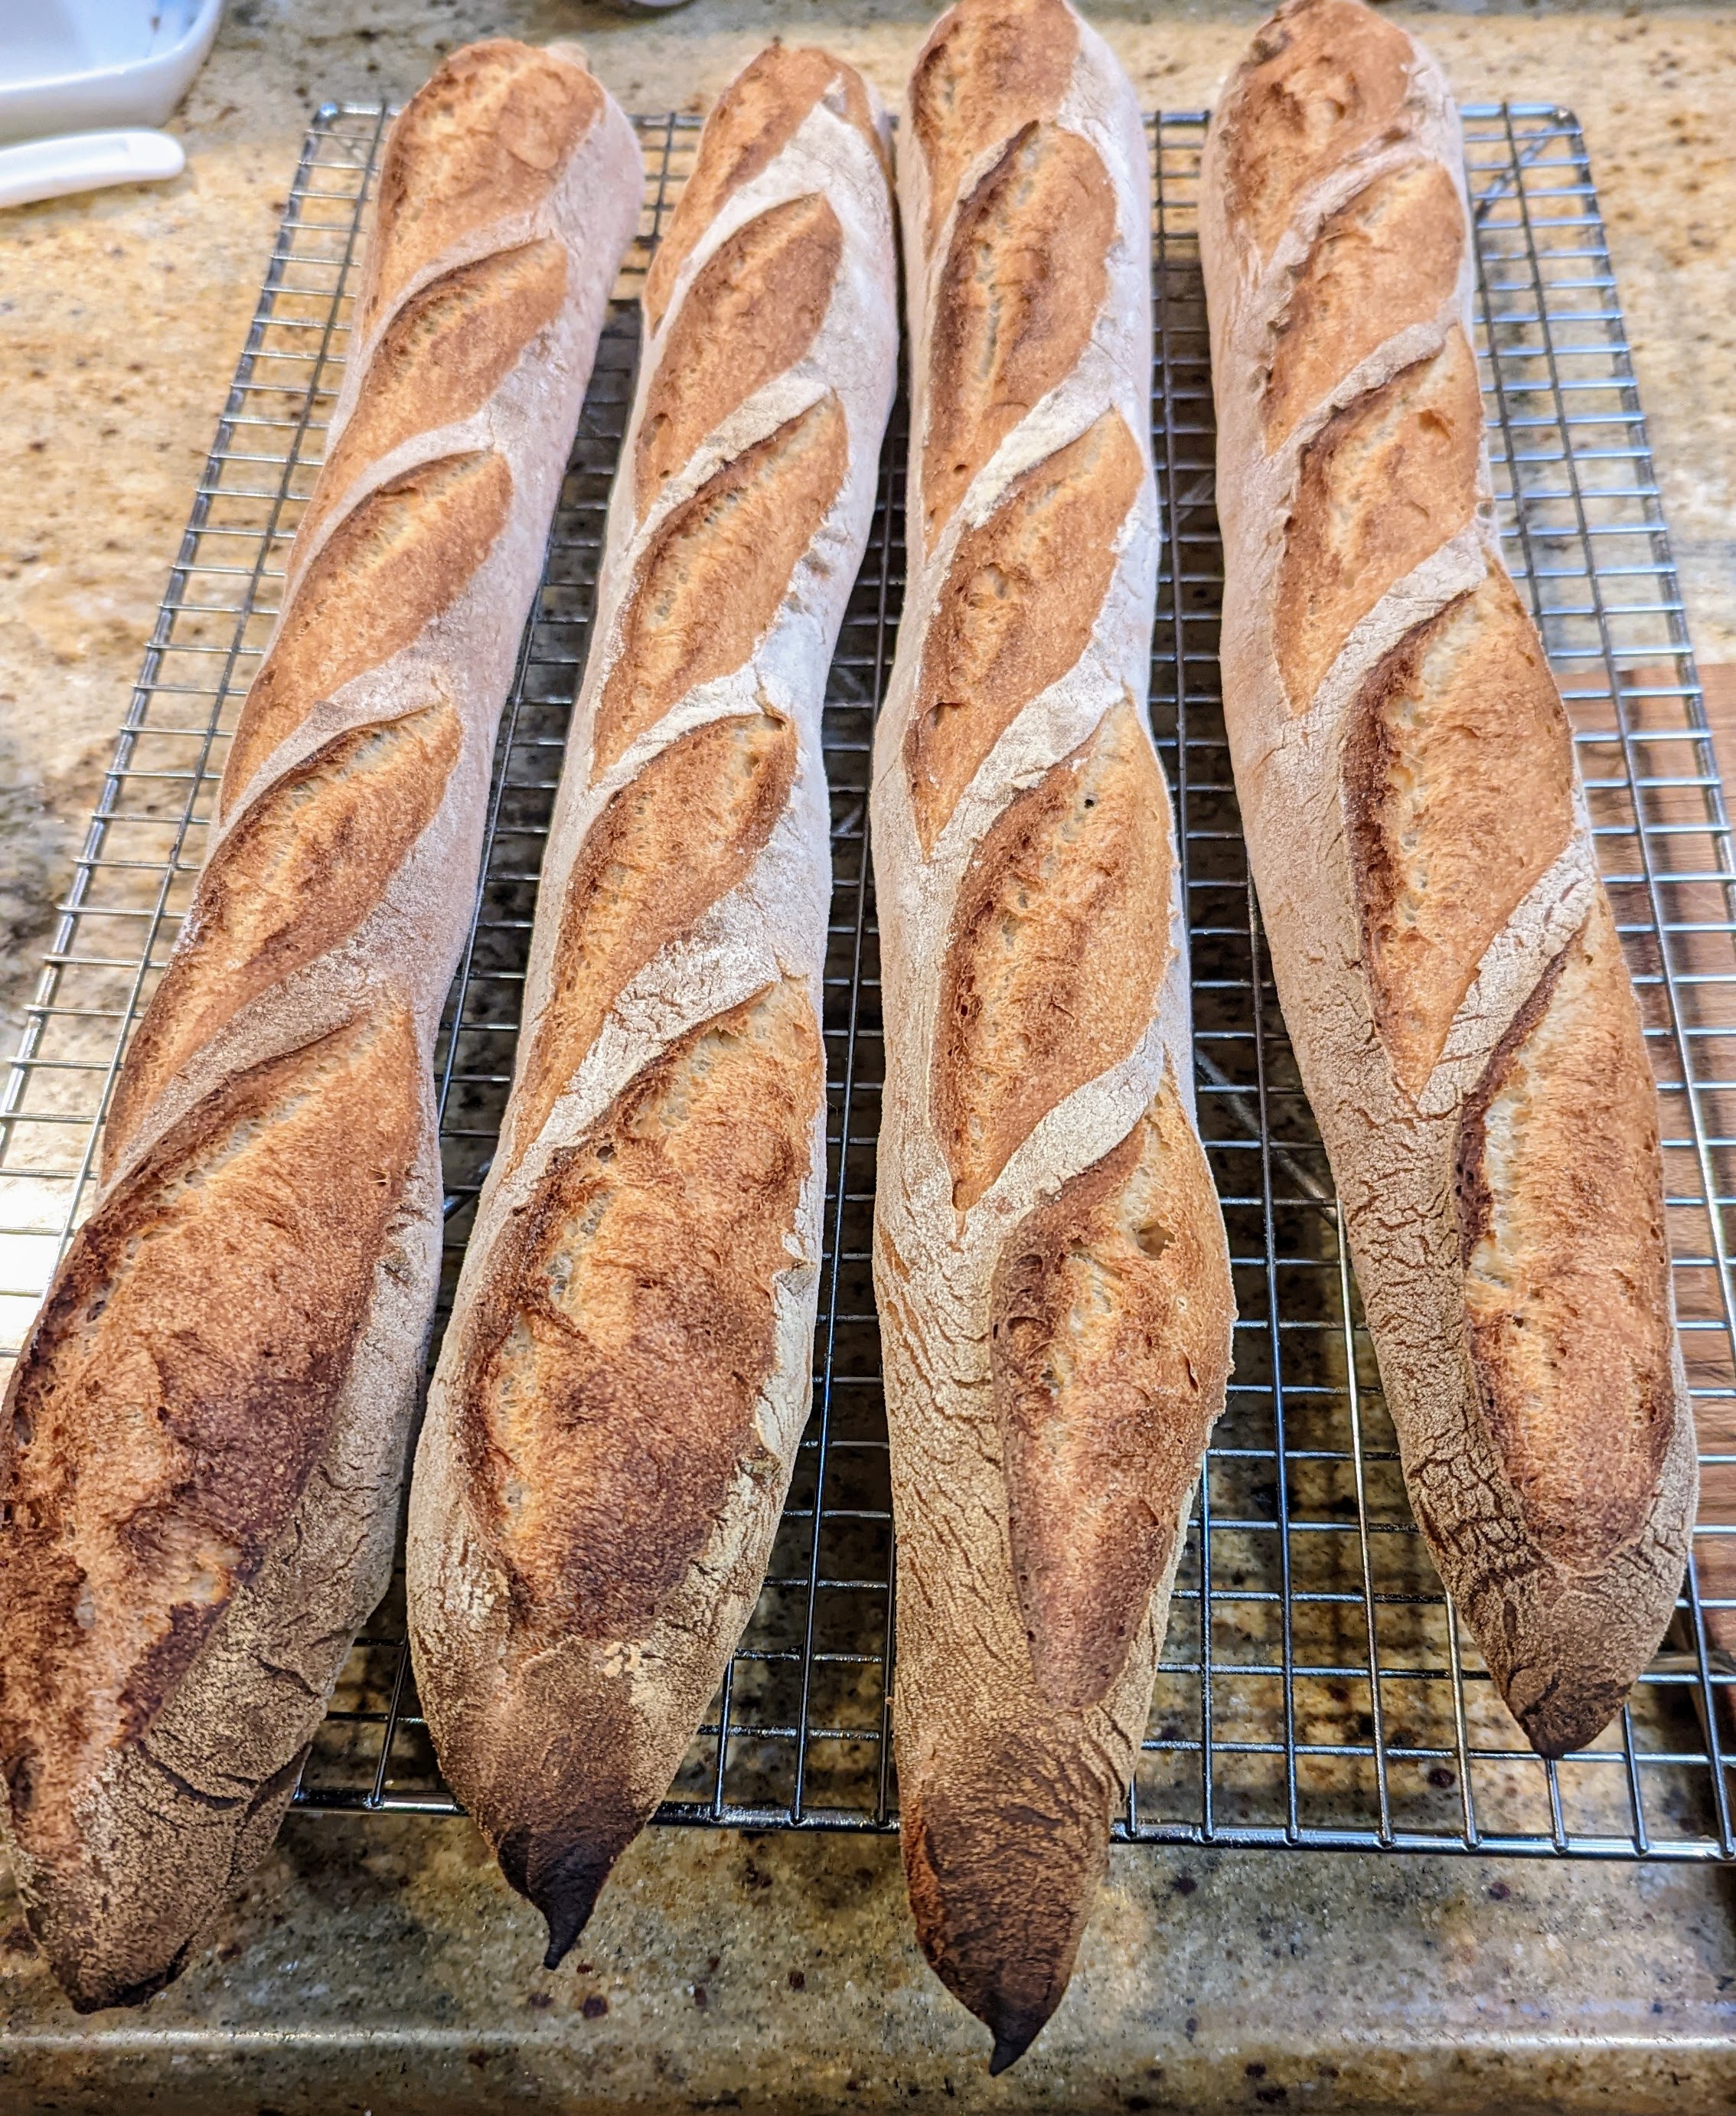
Score. See below…
Make sure your cuts overlap 1/3 of the previous cut!
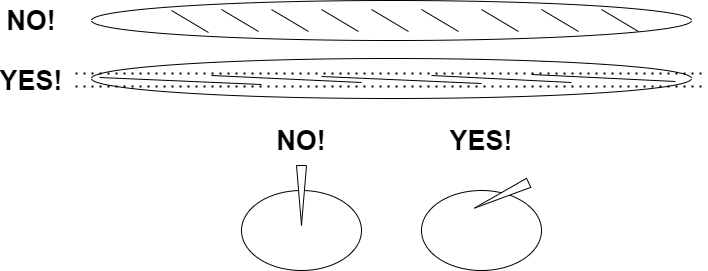
The important thing to note with scoring (and unfortunately Chef Markus doesn’t mention this) is that you have to make sure that the angle of your blade is extremely shallow (almost flat) because you want to create a flap. Also, your cut doesn’t have to be deep – no more than 1/2 inch. So, as the chef says, your cuts need to be as parallel as possible down the loaf, and your blade angle needs to be as shallow as possible to create a flap.
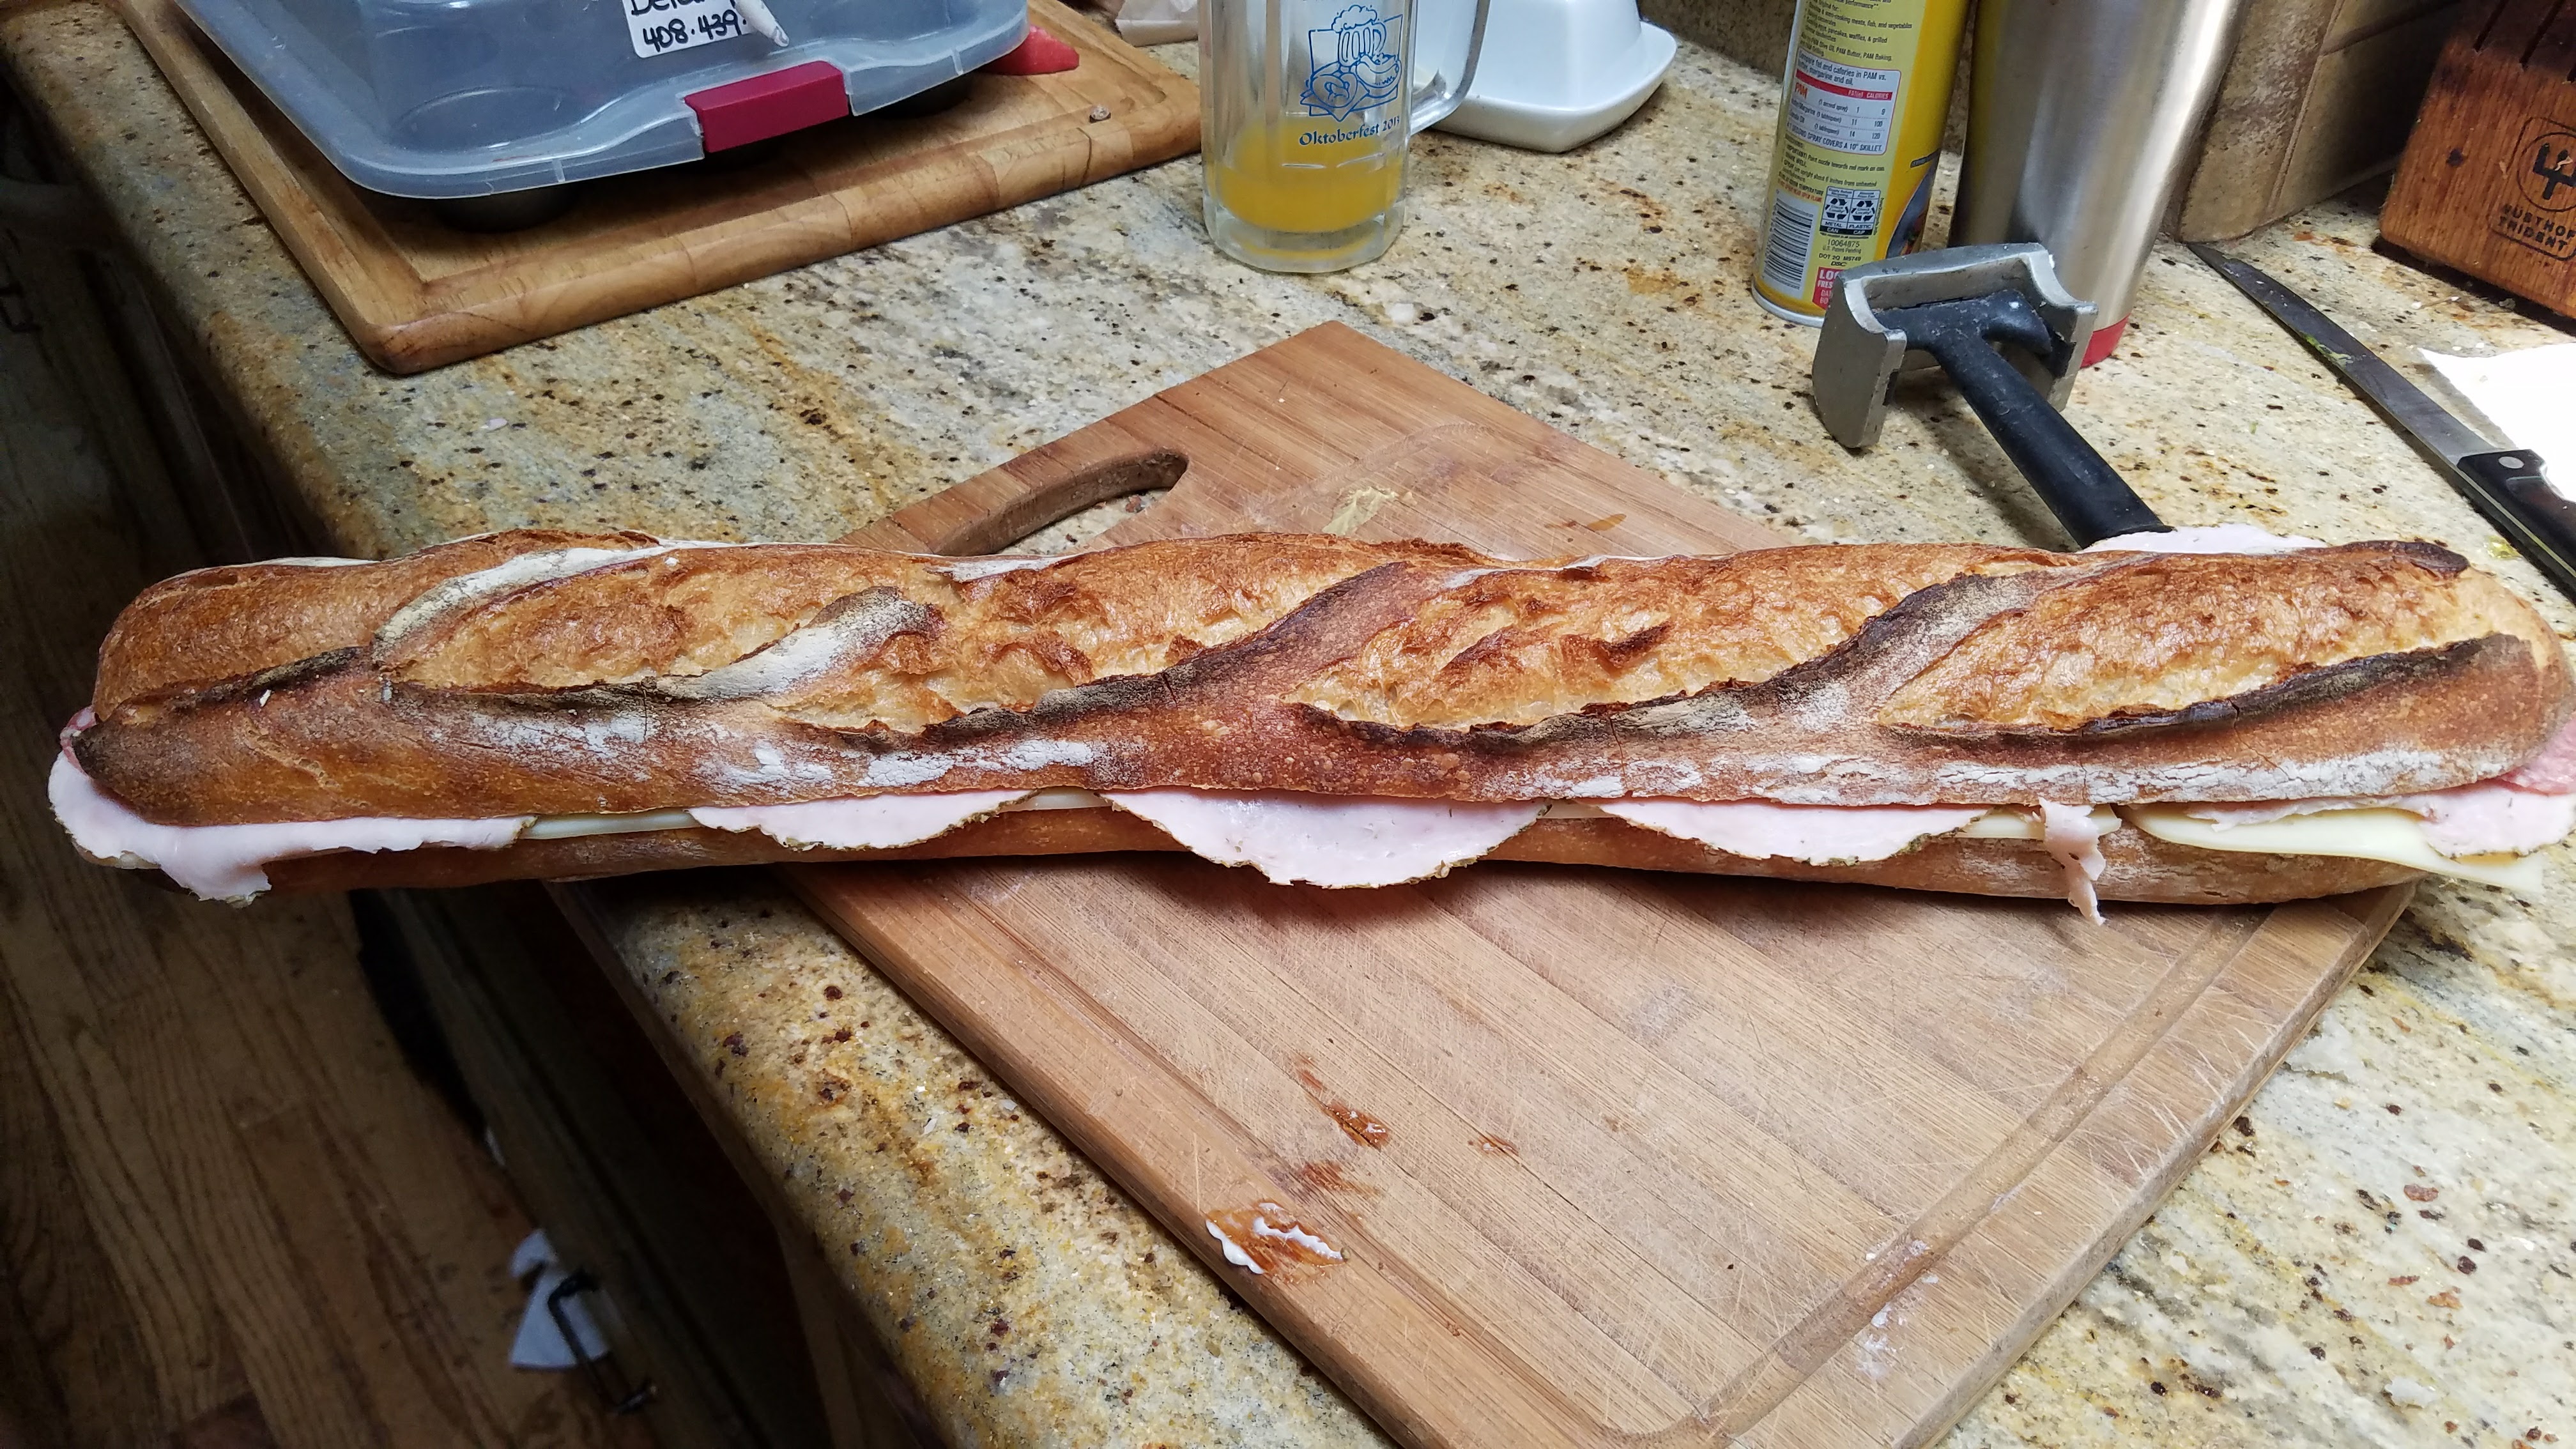
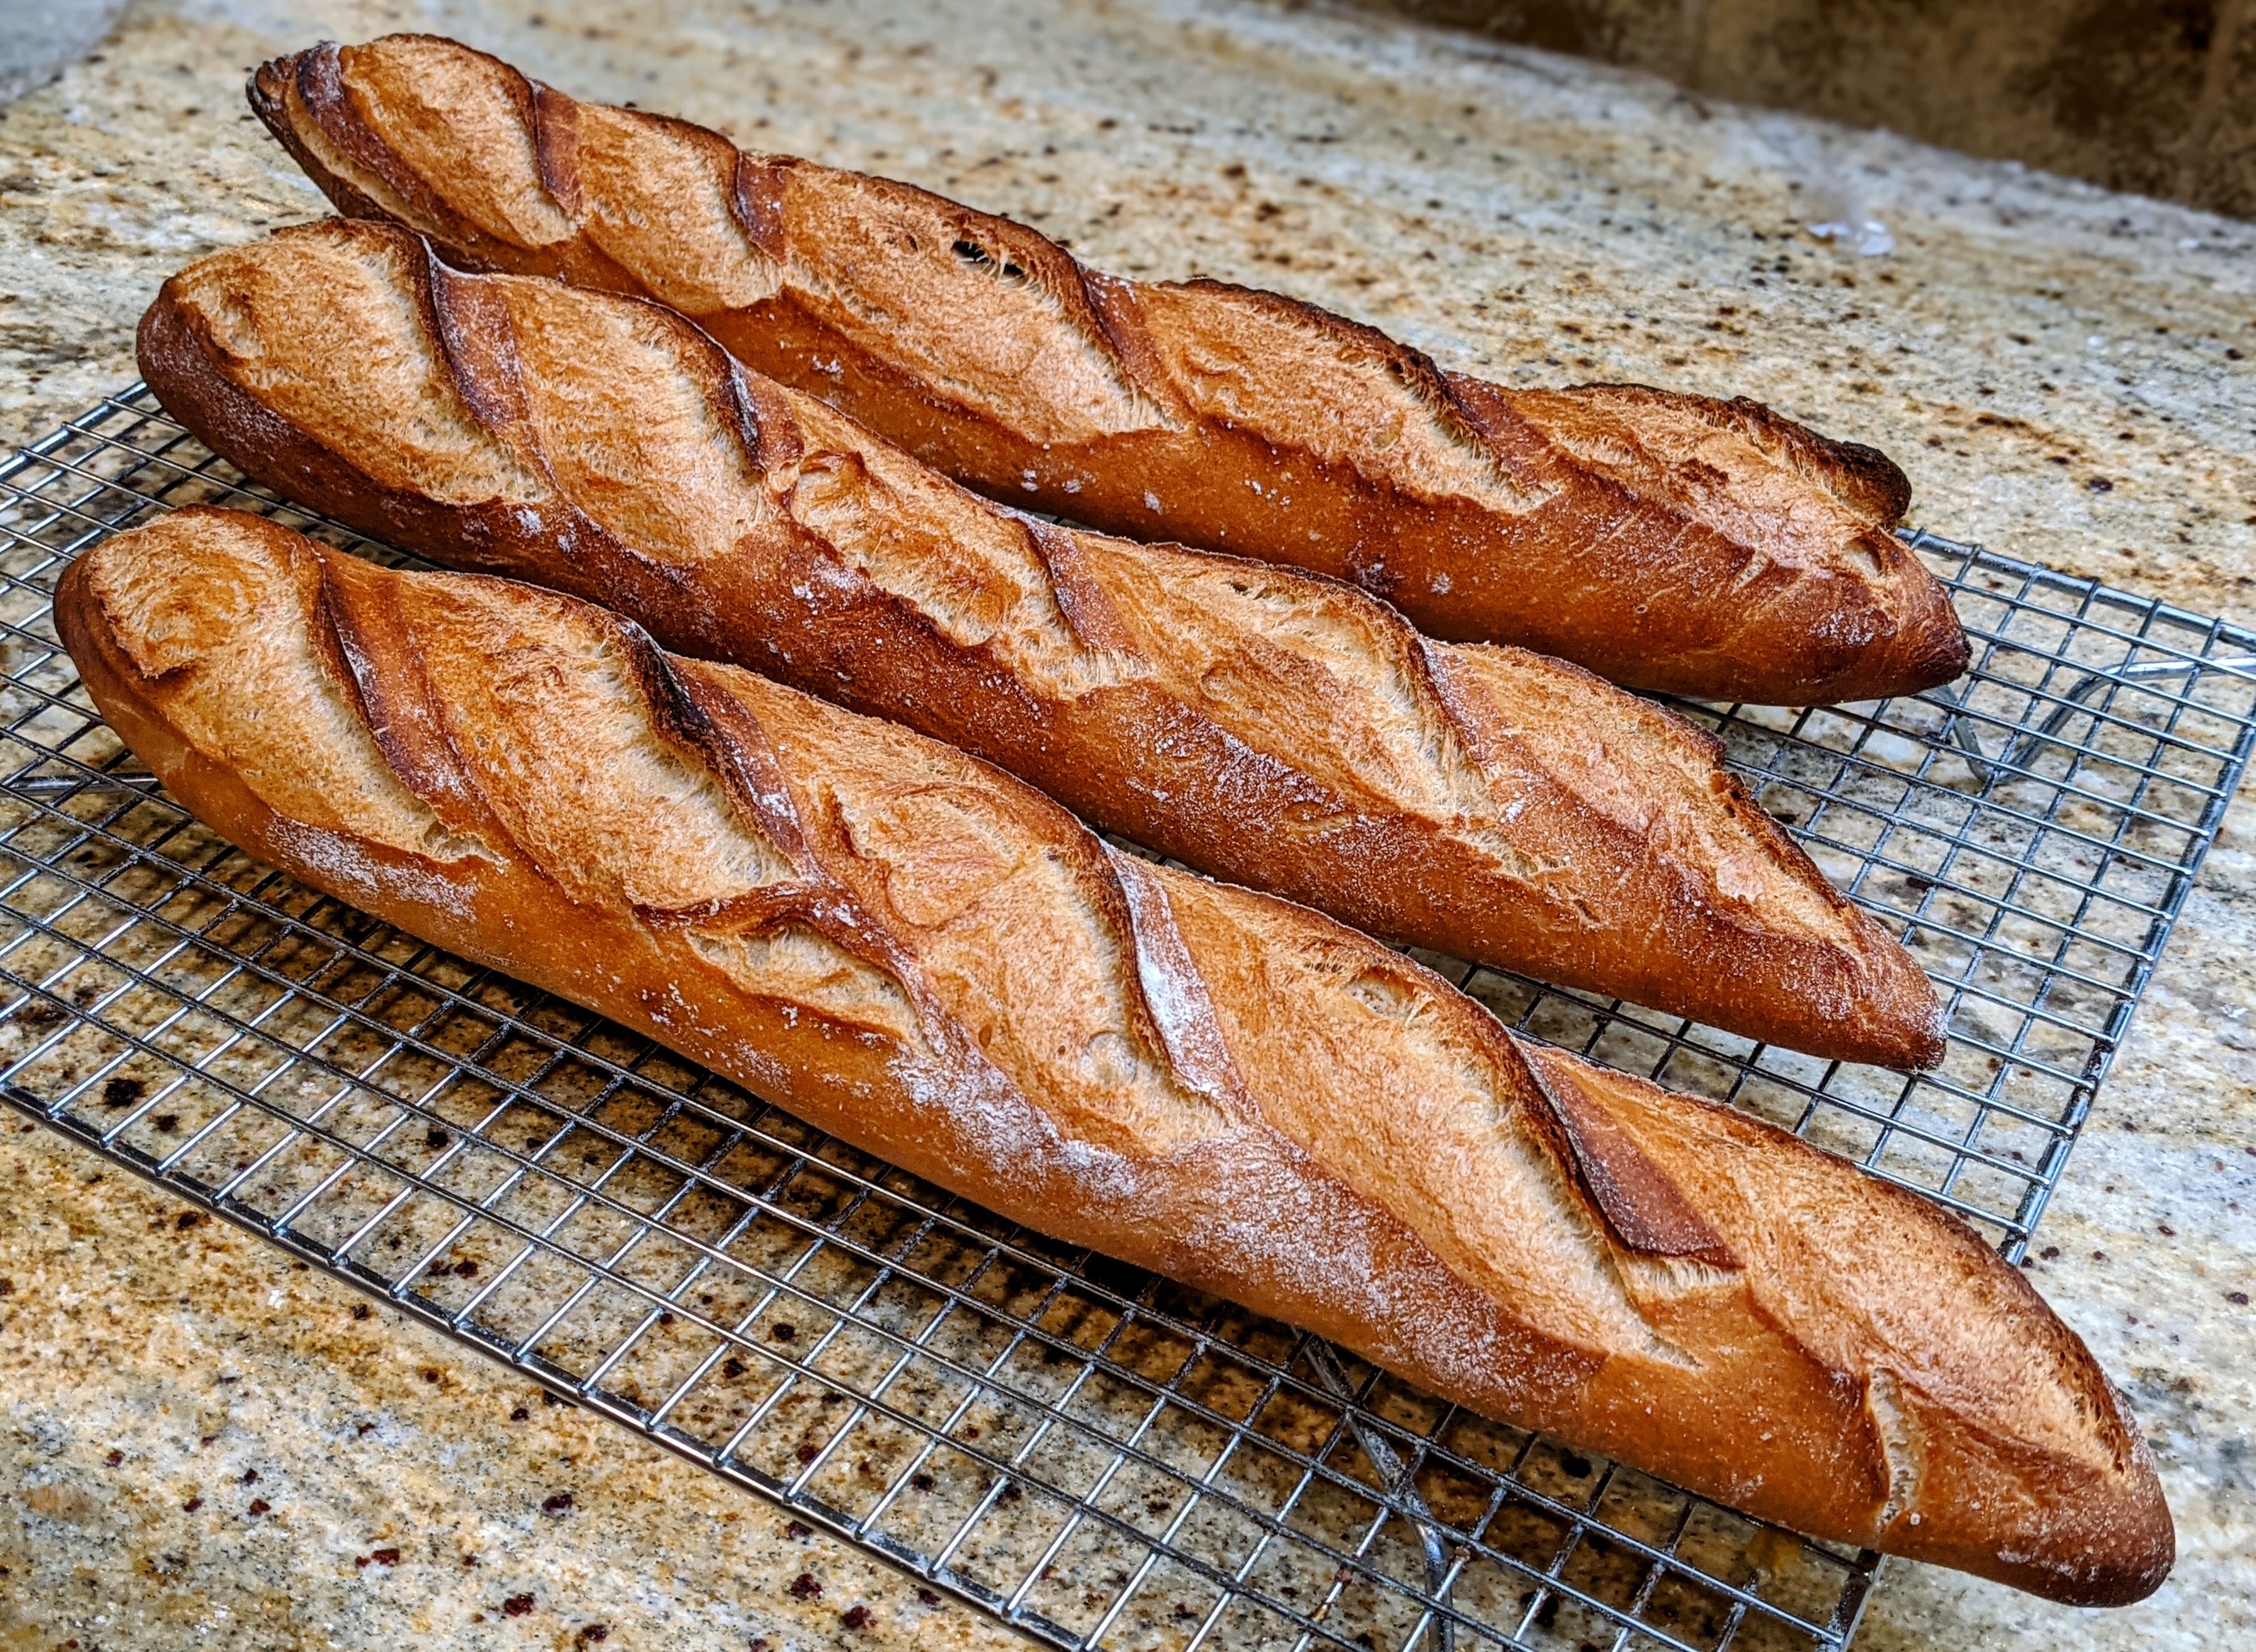
Bake. Transfer the loaves to a transfer board and score (see below). Bake at 475ºF with steam for 12-15 minutes or until the loaves start taking on color. Vent the steam and remove your steaming container, then bake for 12-15 minutes at 425ºF or until the loaves turn a nice, deep, golden brown.
NOTE: The bake times are approximate! The temperatures I listed work for my home oven. They may not work for yours. The important thing to note is that within the first 10-15 minutes while the loaves are on steam, the baguettes take on just a little bit of color. If they’re golden-brown to dark in that short period of time, your oven is too hot, or you need to lower your rack a little the next bake. It takes a few times to get the sweet spot.
Alternate Baking Technique. I just started experimenting with a gentler baking temp: 400ºF. 15 minutes with steam, 20 minutes dry. This will produce a slightly thick, crunchy crust and a light, airy and creamy crumb. It’s pretty awesome! And the oven spring is pretty amazing!
I’ve made no secret that much of what I bake is heavily inspired by traditional and ancient French and Italian bread. There’s a certain romance to it all and as a hopeless romantic, making these kinds of bread have a deep appeal.
But despite my love of ancient bread, my dough development techniques are all influenced and inspired by studying modern baking masters such as Markus Farbinger (Il de Pain, Knysna, South Africa), Jeffrey Hamelman (Director of Baking, King Arthur), Chad Robertson (Tartine Bakery, San Francisco), Carol Fields (Author of “The Italian Baker”), Nancy Silverton (Founder, La Brea Bakery, Chef & Restauranteur, L.A.), and Paul Barker (Cinnamon Square Bakery, UK)… which brings me to this particular recipe.
Asked to think about French bread and most people will immediately think of baguettes or the thicker long loaves labeled “French Bread” in the grocery. Long loaves made of white flour seem to have become synonymous with the country. But the baguette, while much loved (if you read this blog, you know how much I love to make baguettes), isn’t that old – at least relative to the traditional bread – having only been introduced in the early 20th century when bakers started using brewers yeast to leaven their bread. Before that, like hundreds of years before, naturally leavened bread ruled.
This particular bread really is a melding of the ancient and modern. While it’s a pure levain bread I use what Chad Robertson calls a young levain that provides a very light tartness as opposed to being strongly sour, which explains why I feed the levain twice in one a day prior to mixing (plus it’s highly active to give a good rise). The base of my starter uses employs a yeast-water culture I learned from Paul Barker’s Naturally Fermented Bread. And the recipe leans heavily on Hamelman’s Pain au Levain in Bread. Bread is so cool…
Overall Formula
Flour
100.00%
Water
65.00% (With 50ml optional bassinage 68%)
Salt
2.00%
Bassinage is optional. But I like to add a bit of water to the autolysed dough as it helps dissolve the salt.
Levain
Mature Starter
25g
Flour
150g
Preferment
150g
Required for Recipe
229g
Final Dough
Flour I use: 40% unbleached bread or high-extraction flour 30% whole grain flour (whole wheat, Kamut, red fife) 30% unbleached AP flour
949g
Water (warm)
617g
Salt
22g
Levain
229g
Yield
~1817g 2 X 900g loaves
Optimal Dough Temp
82ºF
Build the Levain
With this levain build, there’s no discard, save for what’s leftover from the build which you can pop into the fridge and use later. The thing about this levain is that it’s young and the way it’s prepared promotes yeast growth over bacterial growth. Traditional French sourdough has a tang but is not sour, so we focus on the yeast with this kind of levain.
Initial Levain Build. Add 25g mature starter (I just take it directly from the culture in my fridge) and add it to 50g flour and warm water, respectively. Allow doubling in volume with a slightly domed top and lots of bubbles. The build’s ready when it passes the float test – about 3-4 hours.
Second Levain Build. Add 75g of each flour and warm water to the levain. Mix thoroughly and let ferment. It should be ready in just a couple of hours – or even less. The levain is ready when it passes the float test.
If you’re working from home: Timing-wise, you could start the build early in the morning and mix before mid-afternoon.
If you have to go into the office: Do the first build immediately before leaving for work and leave it in a cool place. By the time you come home, the levain will have peaked and collapsed – that’s okay, but it’ll be pretty sour. You can discard a bit of if you don’t want the bread to be too sour. I myself just keep it all. But to help counteract the sourness, I use 100g of each flour and water. You’ll mix by early evening then shape right before bed. Then you can bake as soon as you get up!
Make the Dough
Initial Mix/Autolyse. If you’re using a flour blend, mix the flour until well-combined. In a separate bowl, measure out the levain you’ll need, and dump in all the water. Dissolve the levain until you have a thin slurry. Pour the slurry into the flour, then mix until no dry ingredients remain. Rest the mix for 30-45 minutes.
Final Mix/Bassinage. Sprinkle the salt over the dough, then add the 50ml of water. Work the salt and water into the dough until thoroughly combined.
Bulk Fermentation. About 2 1/2 – 3 hours, or until dough has risen to 50% of its original volume.
Folding. Fold twice at 50-minute intervals.
Shape. There’s no preshape with this bread! Gently turn the dough out onto a lightly floured surface, then divide into 900g pieces. Shape the pieces into tight rounds then place them into linen-lined baskets.
Final Fermentation. 1 1/2 – 2 hours @ room temp, or pop into the fridge for 6-12 hours.
Bake. Bake at 440ºF 45-50 minutes. Bake with steam for the first 20 minutes, then finish the bake with a dry oven.
Coming Clean…
Though I provided a recipe here, it’s really meant as a guide to enable you to freestyle later which sort of explains why I didn’t take much space with the more verbose explanations I usually provide. In fact, with the loaves at the top of the article, though I did measure out the ingredients so I could prove out the formula, I freestyled the process.
I had to because now that I’m going into the office three days a week, my baking time is limited. With the levain build, I actually did start the first build before I left for the office. And though I stored it in the coolest part of my house, by the time I got home, it had peaked and collapsed into a pleasingly sour mass. But I just fed it – and my instinct told me to use a higher ratio of flour and water and not just do a 1:1:1 so I probably used a 1:3:3 – and the microbe density was so high at that point that the second build was ready in just over two hours!
That’s the whole point of calling this a “Poilane-style” bread. At the famous Poilane Bakery in Paris, bakers make their famous miche relying purely on instinct. They go through a year and a half apprenticeship to learn the technique so well that they can pretty much eyeball the whole process. For me, baking by pure instinct is the ultimate expression of being a bread baker, but also the most pure form of historical expression, if you will.
Think about it. Back in ancient times, they didn’t have digital scales and temperature gauges. Bakers just relied on their senses. They took a little bit of this, a little bit of that and they just instinctively knew when to move on to the next step. So if and when you make this bread, pay attention to the look, feel and smell of the dough as you develop it. Then the succeeding times you bake, rely less and less on the recipe. You’ll actually be pleasantly surprised at how much you retain.
As is our habit after we dine in a particular town, my wife and I ended up perusing a book store where I, of course, sought out the bread books. I ran across this nice book called, “Boulangerie at Home,” and immediately thought to myself, There’s got to be a baguette recipe in there… I wasn’t wrong.
As for the book, it was beautifully laid out with lots of pictures, but though the title implied it was written for home bakers and perhaps even beginners, it’s a bit more advanced than that. I’ve been baking a long time, so I can look at a recipe and work out the baker’s math pretty much in my head. But these aren’t recipes that a newbie could do with ease.
But despite that, I found the baguette recipe and I snapped a picture of it. Then when I got home I started working through the baker’s percentages. The basic formula is below:
Overall Formula
AP Flour (King Arthur or Bob’s Red Mill) or T65* flour
100.00%
Water
71.43%
Salt
2.00%
Yeast – Instant**
0.25%
*T65 flour is flour with a protein content of 12%-13.5%. You could use King Arthur or Bob’s Red Mill bread flour for this, but I myself prefer King Arthur AP Flour at 11.7% protein content. The author calls for the use of high-gluten flour, but T65 is not THAT high. To me, high-gluten flour has protein over 15% (check out Janie’s Mill High-Protein flour – it’s expensive but wonderful). **The recipe from the book calls for fresh yeast, and if you have some, use 0.7%. For this recipe that would be about 6-7 grams of fresh yeast
Levain
The author called this “liquid starter,” but that just means it’s a 100%+ hydration starter. In this case, it’s a 100% hydration starter.
Preferment Flour % of Total Flour
4.80%
Hydration %
100%
Preferment Flour Weight
37g
Preferment Water
37g
Preferment Required for Recipe
75g
Final Dough
Flour
742g
Water (lukewarm)
519g
Salt
16g
Yeast
2g
Preferment
75g
Total Yield
4 X 335g loaves 6 X 222-225g loaves 1353g total
Optimal Dough Temp
78°-80°F
For dough development, I prefer my own method. The one in the book wasn’t bad, but I’ve been making baguettes for a long time, and the method I’ve developed works for me, so that’s what I’ll share here.
Note that this employs a hybrid rising method that uses both a levain and some yeast to rise the dough. The levain adds flavor and contributes a bit to the rising, whereas the yeast does the heavy lifting. You could use the levain exclusively, but then bulk fermentation will go on for much longer, and I suggest taking a Tartine approach and fold the dough every half-hour for 3 hours. Like any sourdough, depending on the ambient temp of your kitchen, bulk fermentation at room temp could take 6-8 hours.
Make the levain. If you have a mature starter already, take 20-30 grams of it then mix it with 100g of flour and 100g of water, essentially making a 1:5:5 (1-part starter, 5-parts flour, 5-parts water) ratio levain. The levain will be ready when it passes the float test. You’re not going to do several builds with this as you want to use a relatively young starter to limit the sourness of the bread.
Initial Mix/Autolyse. Reserve 50 grams of the water, then dissolve the starter in the remaining water. Add this mixture to all of the flour and mix until no dry ingredients are left. You’ll form a shaggy mass. Let this rest (autolyse) for 30-45 minutes. This will get the natural yeasts going.
Final Mix. Sprinkle the salt and the yeast over the dough, add the reserved water, then work them into the dough until thoroughly combined. The dough will still be a little shaggy, but considerably smoother than the initial mix.
Bulk Fermentation. 2-5 hours at room temp (depending on the ambient temp of your kitchen) or cold ferment (39°F to 42°F) for 6-12 hours following folding. If you decide to do a cold bulk fermentation, use half the yeast. Bulk fermentation is finished when the dough has risen about 50% (don’t let bulk fermentation go much further than this).
Folding. In the first hour of bulk fermentation, fold the dough 3 times at 20-minute intervals. After the third fold, let your dough rest and check its expansion. As I mentioned above, you only want the dough to expand about 50%.
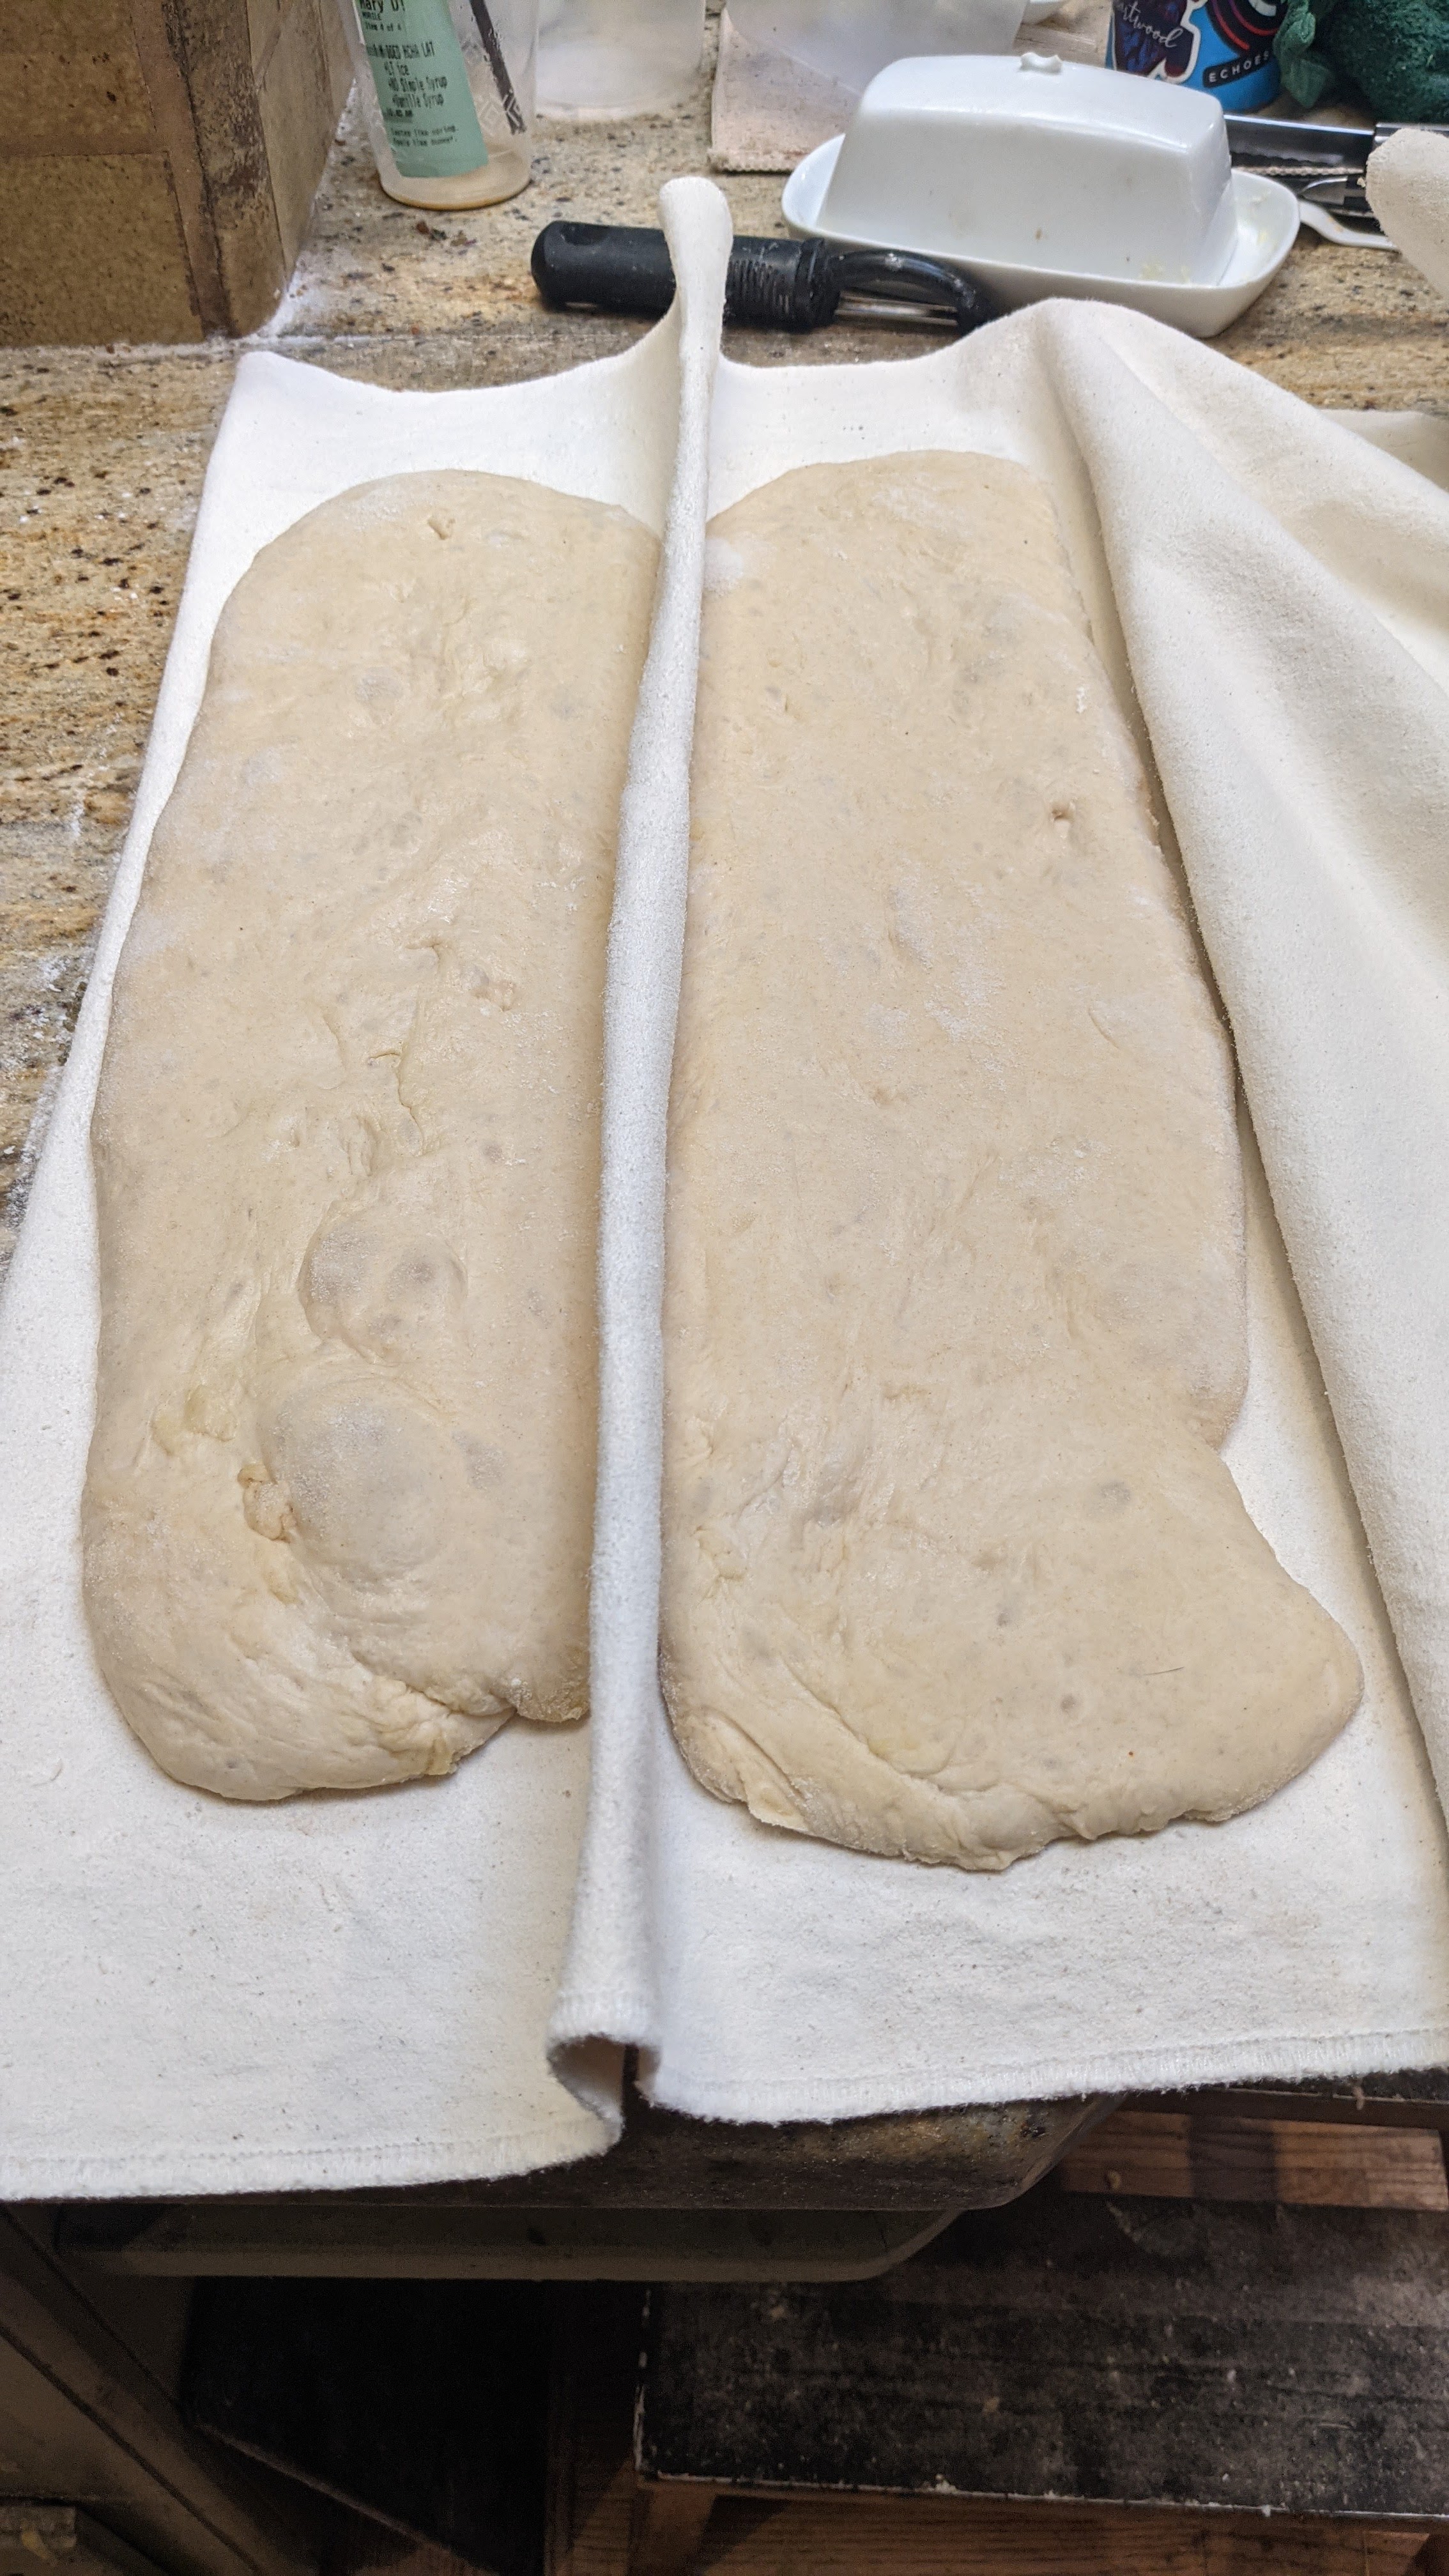
Divide and Preshape. Pour out your dough onto a lightly floured surface. Gently work it into a rectangle, then divide it into 4 X 335g pieces. With each piece, letter fold the left and right sides of the piece (stretch out a side then fold it over the body of the piece, then jelly-roll the piece over the seams. Place each piece seam-side-up on a well-floured couche, the let them rest for 20-30 minutes (or just a little more) depending on how tight you rolled each piece. You want the dough to be nice and relaxed. You may see a little rise out of the pieces during this time.
Shape. Shape the rested logs into baguettes, then place the shaped loaves on the couche for final fermentation.
Final Fermenation. 1-1 1/2 hour or until the loaves have puffed up to about 75-85% – just under doubled.
Bake. Transfer the loaves to a loading board, score them, then bake at 475°F for 12 minutes with steam. Remove the steaming container, turn the oven down to 425°F, then bake for another 12-15 minutes or until the crust is deep, golden-brown. This bread really benefits from a full bake.
I read some reviews of the book online and there were lots of people who wrinkled their noses at the use of commercial yeast in the recipe. The plain fact of the matter is that there are numerous ways to leaven bread. For me, as long as you’re not using chemical additives to leaven dough, you’re golden. But to eschew a technique just because it’s not sourdough, to me at least, lends itself to elitism. There’s more to bread than sourdough, folks…
The same goes for those who won’t bake bread that has a hydration rate of less than 75%. Even Jeffrey Hamelman shakes his head at that in his book Bread, calling it a shame that people cut themselves off from learning different techniques and methods because of this. I get it, though. The thinking is that higher hydration makes it easier to form holes in the dough. And for the most part, that’s true. But a lot ALSO has to do with how you handle the dough.
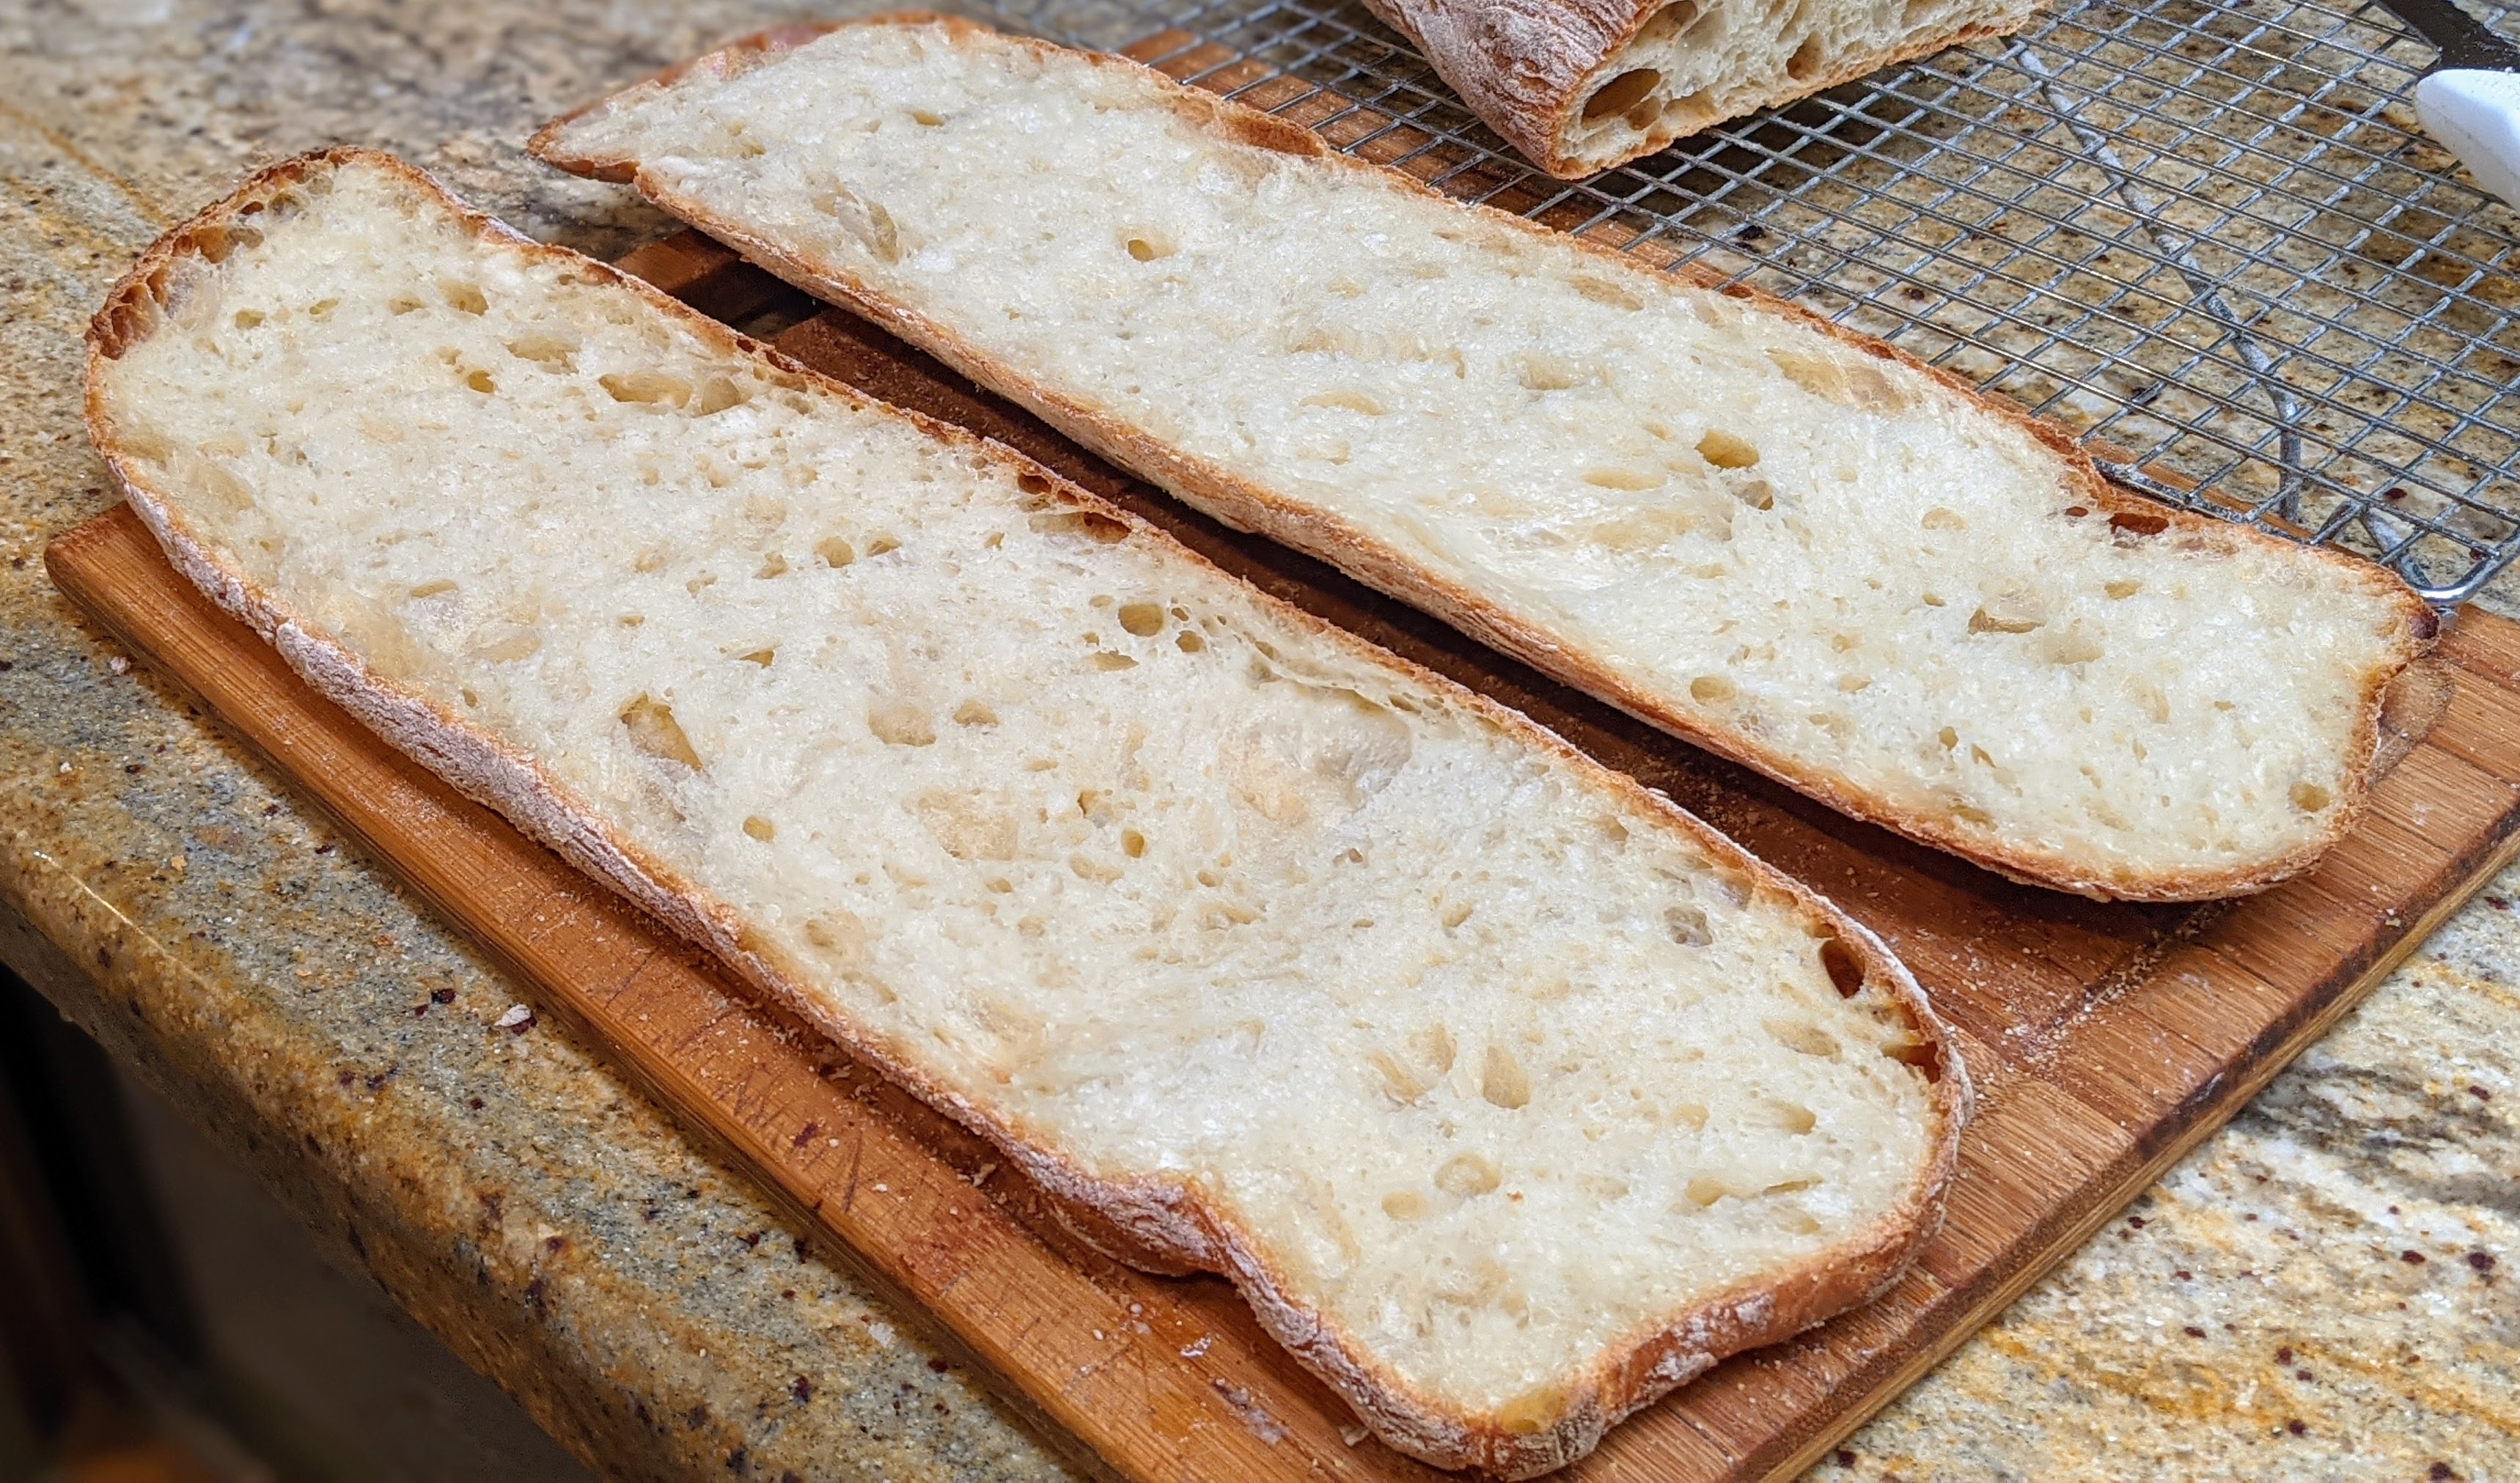
For instance, look at the picture to the left of the baguettes I made from the Tartine Bread book by Chad Robertson. What a crumb! Really open with lots of holes. Guess what? The dough that came from was 64% hydration! It was my gentle handling of the dough and its thorough development that allowed that to happen, not the hydration.
I have to admit that I was a little incredulous myself when I worked out the formula. But after having made these several times now, I love the technique!
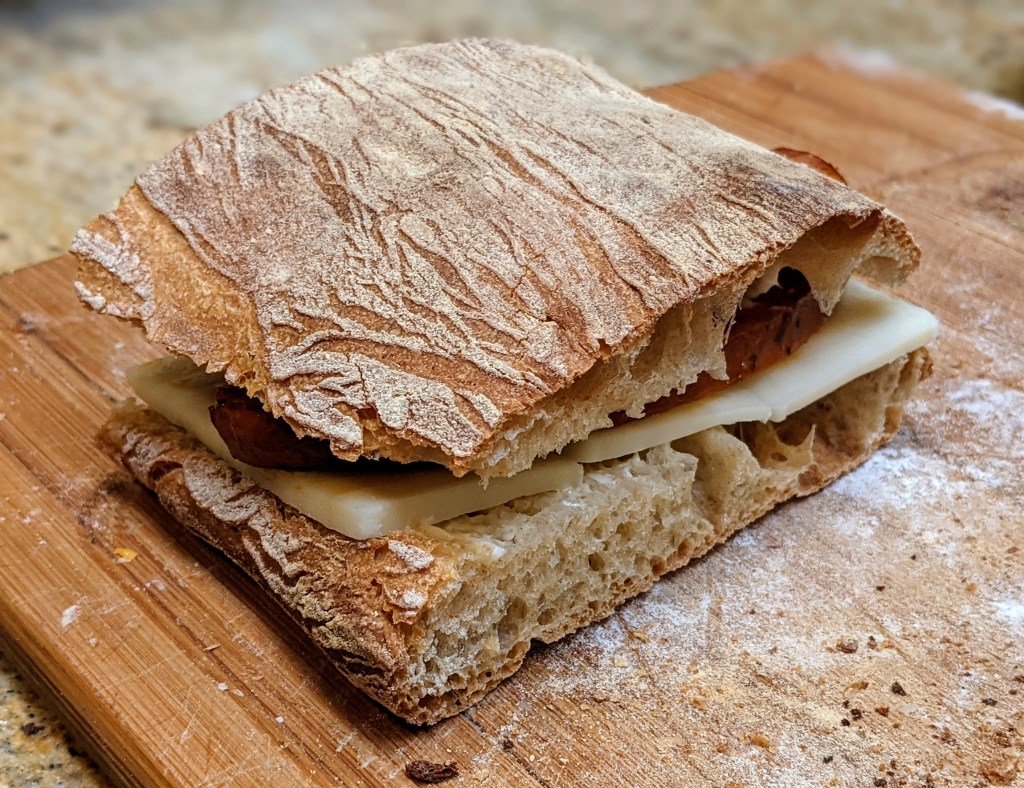
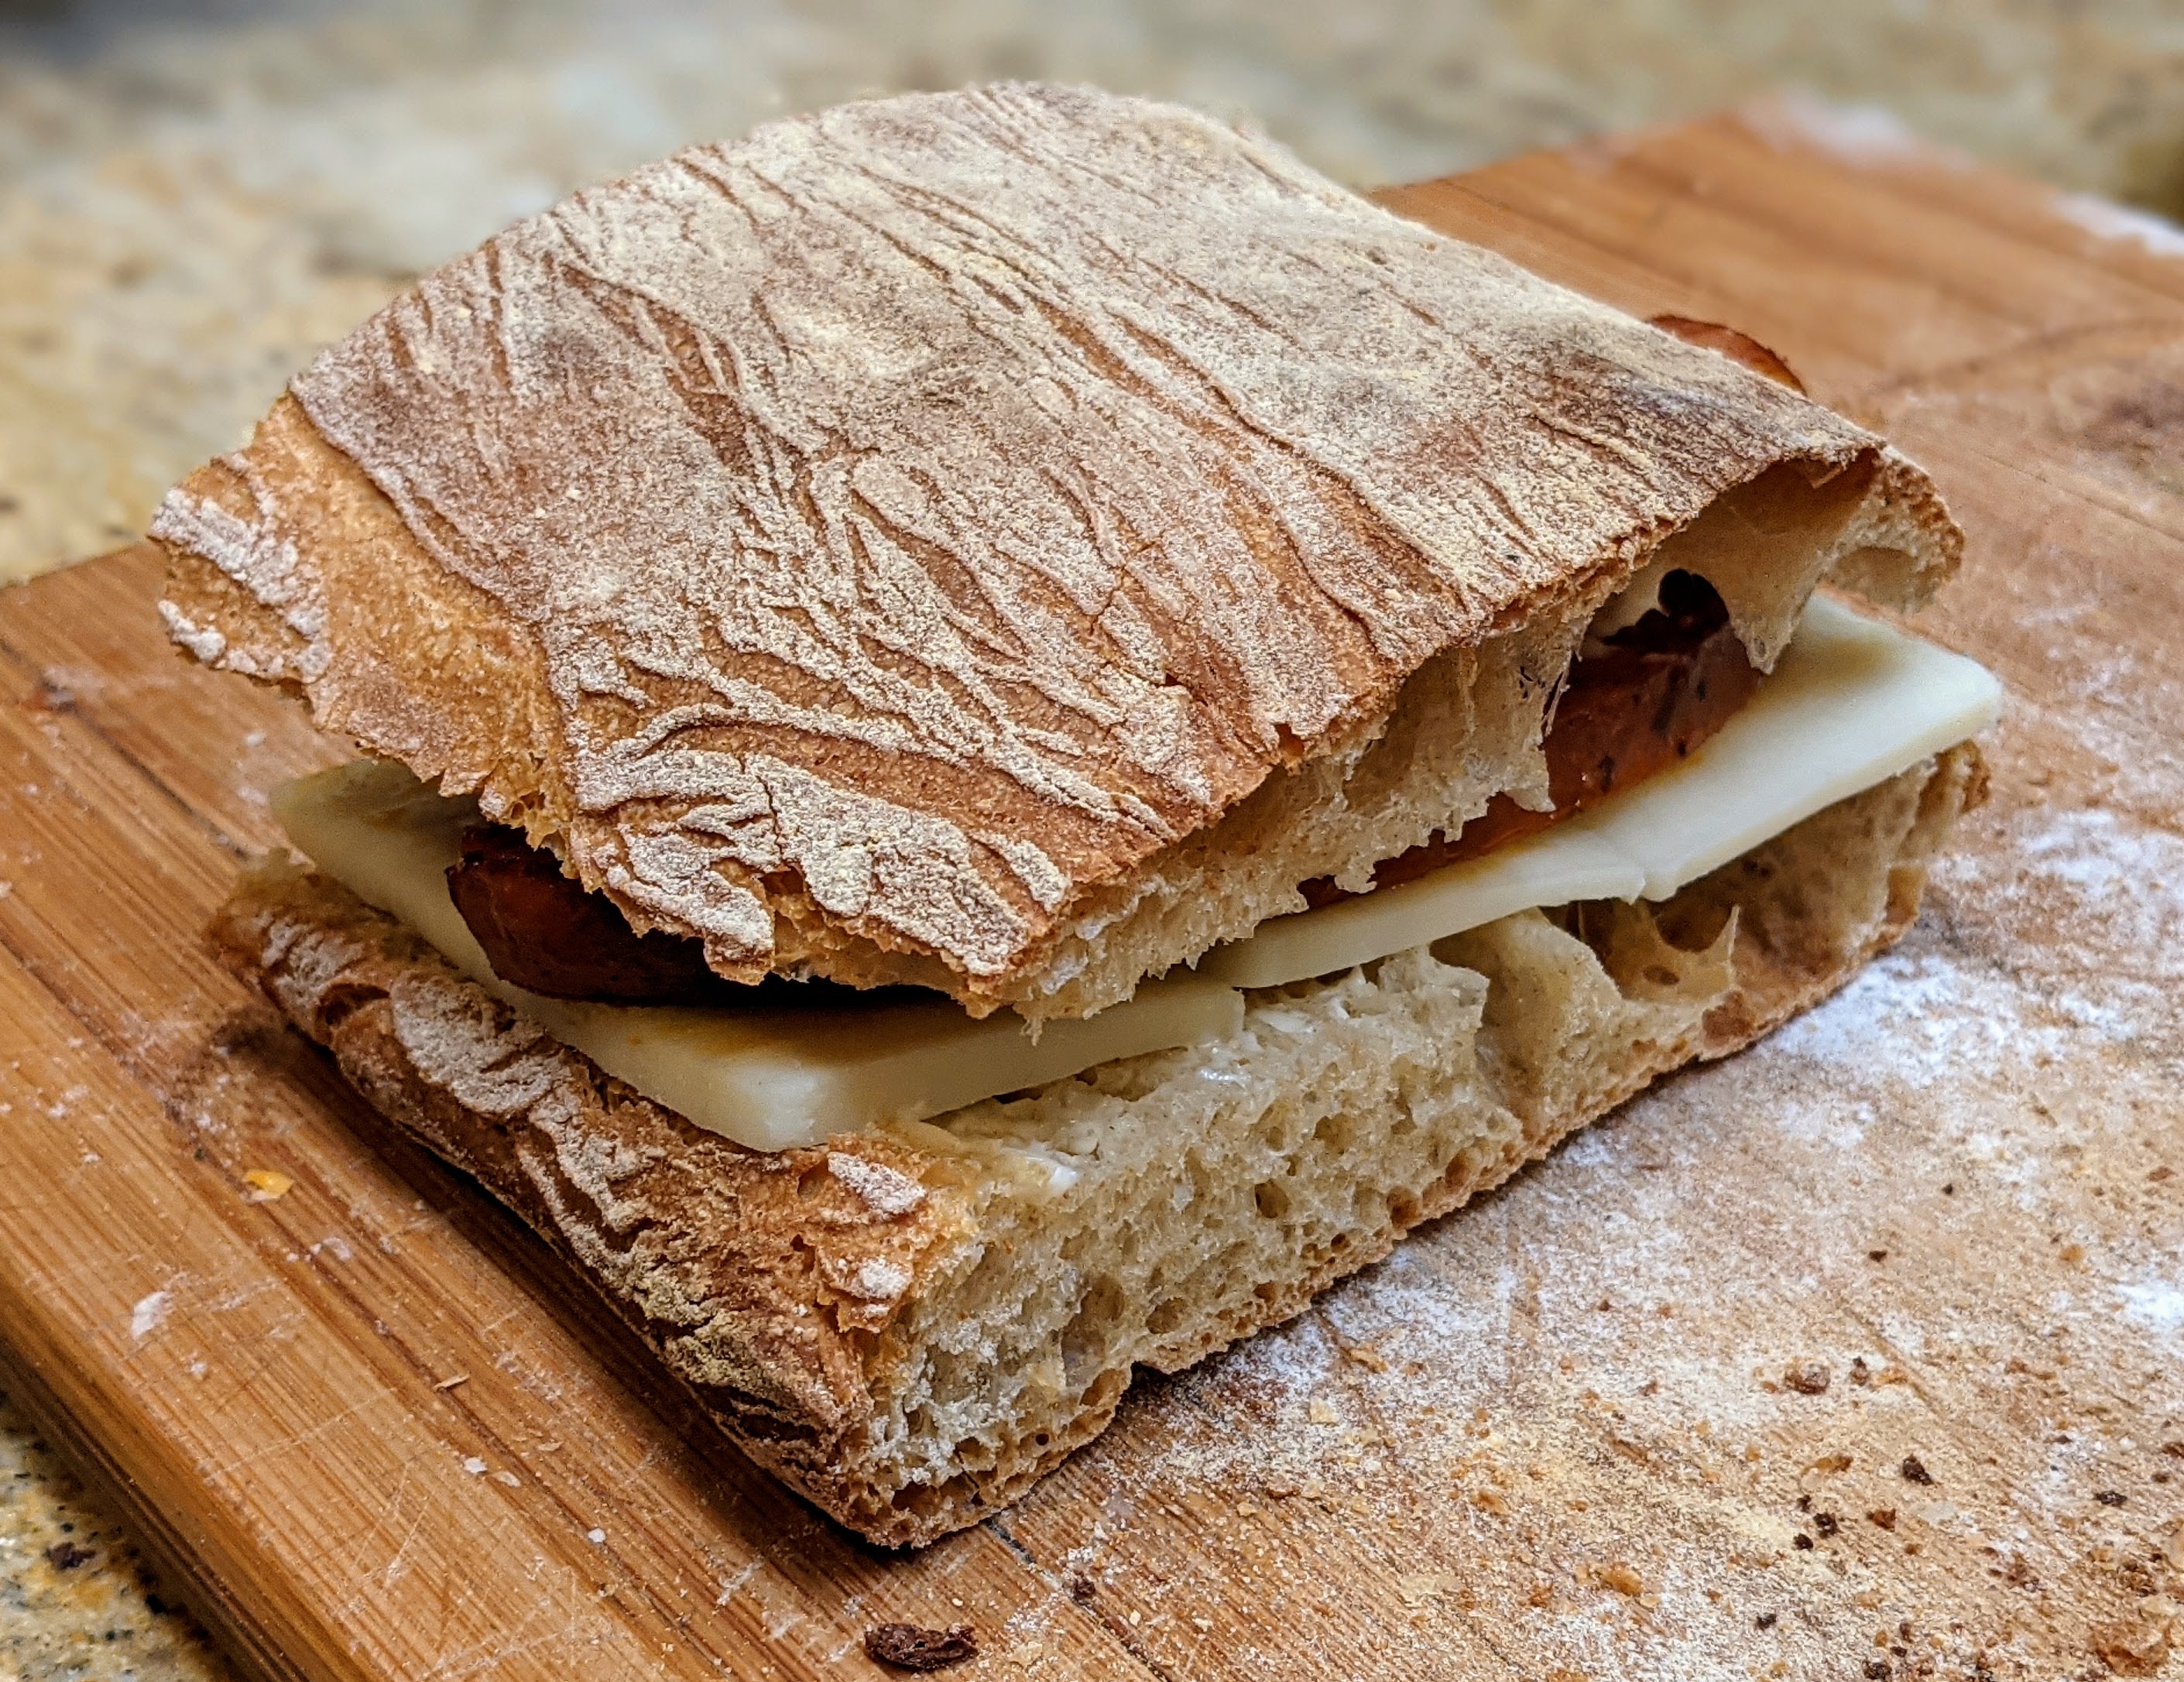
No way am I going to take credit for developing this recipe, though I have made my own tweaks to the flour. The recipe comes from master chef Markus Farbinger. I had no idea who he was until I happened to stumble on his baguette shaping video on YouTube. His technique was so incredible that I ended up buying his baguette and ciabatta video series on Vimeo. This ciabatta recipe is from that series.
To be honest, even though I’m documenting the recipe, I’m really only scratching the surface. I highly recommend renting or purchasing the series. Chef Markus the former Dean of Curriculum and Instruction for Baking and Pastry Arts at the Culinary Institute of America, and is co-owner of the Ile de Pain bakery in South Africa where he uses a wood-fired oven to bake his artisan bread. In other words, this dude is totally legit!
Overview
Like traditional baguettes, this ciabatta uses a poolish that you make the night before you bake, then in the morning, you mix the final dough. With this particular recipe, the process is quick! I mean, real quick. Things happen much faster than with your typical artisan loaf. Once you mix the final dough, your loaves are in the oven within an hour-and-a-half!
On top of that, you only manipulate the dough three times before baking and two of those times are devoted to creating structure. So you really only have two opportunities to create structure and strength in your dough before you bake. That third time is just pushing the dough into a loaf shape and transferring it to a couche. There’s no formal shaping and scoring with a ciabatta. So you have to get the structure-building steps down!
Now don’t go thinking that this is a beginner’s bread simply because of the short prep time or the use of commercial yeast. It isn’t. What makes it difficult is the hydration rate is a whopping 85%! At that level, it’s almost like working with a batter, and even for seasoned bread makers, that kind of hydration rate can be a little daunting. So like making baguettes, making a great ciabatta is less about the ingredients and so much more about the technique.
The Recipe
If you read the recipe table, you won’t see any olive oil. The only time it is used is to coat the mixing bowl after the second fold, just prior to the final fermentation. I’m not sure why this is, but the results are pretty marvelous just the same.
Like baguettes, the process occurs over two days. You create a poolish the night before, then mix the final dough and bake in the morning.
Overall Formula
I’m providing the overall formula because it is possible to do this as a straight dough.
Flour
Water
Salt
Yeast
100% (10% Whole Wheat) (90% Bread Flour)
85%
2%
0.64%
Poolish – Day 1
I love that the flour of the poolish represents 50% of the total flour. The influence of flavor from this amount of poolish is immense!
Flour
Water
Yeast
100 g Whole Wheat Flour 400 g Bread Flour
500 ml
0.4 g
Mix all the dry ingredients together, then add water in batches until you form a smooth, thick batter. Set aside at room temperature for 12-16 hours. I shoot for 14 hours. As an early-riser, I make the poolish at about 4pm then mix the final dough at 6am the next day.
If you’re using yeast packets, simply take a healthy pinch from a packet to use for the poolish, then use the rest for the final dough.
Final Dough – Day 2
Flour
Water
Salt
Yeast
Poolish
500 g Bread Flour
350 ml
20 g
6 g
1000 g
– If you’re wondering if the amount of yeast listed seems to be a bit much, bear in mind that Chef Markus uses 15 grams fresh yeast. The instant/active yeast equivalents are 30-40% of fresh yeast.
Dough Temp: 475F/24C
Before you start, I recommend using a round-bottom mixing bowl for the fermentation steps. The dough is so wet that it will be difficult to do stretch & folds if you use a vertical-sided container. Also, a couche is very helpful to have, especially for the final proof.
Note that the times listed are approximate! I just baked a batch yesterday and because it was early in the morning and very cool, I had to extend the times to 30 minutes, and I let the final proof go for 20 minutes.
Mixing. Sift the flour into a mixing bowl, then add the salt and yeast. Use a whisk to combine and thoroughly incorporate all the dry ingredients together. In a separate bowl, combine the poolish and water and completely dissolve the poolish. Once it’s liquified, pour the liquid into the mixing bowl and mix until no dry ingredients are left. Mix into a shaggy mass, then let the mixture rest for 20 minutes.
You can use a stand mixer for this step, but with this small amount of dough, I just mix by hand and use a Danish dough whisk. It’s pretty fast with this kind of hydration.
Bulk Fermentation First Fold. After the dough has rested, do a series of stretches and folds in the bowl. The trick to folding a super-wet dough like this is to make your hand like a wooden spoon, with your fingers pressed together. Scoop from the side and slip your fingers under the mass, then lift. At first, most of the dough will kind of pour out of your hand, but as you stretch the dough more and more, you’ll feel the tension building and the dough won’t pour out nearly as much. Wet your hand regularly! Once you feel as if you can pick up about a third of the dough mass when you scoop, you’ve built up enough strength for that session. Cover the dough and rest for another 20 minutes.
At this point, it’s a good idea to start preheating your oven (to 475°F/250°C), especially if you use a baking stone like I do.
Bulk Fermentation: Lamination. Generously flour your work surface, and I mean generously, then pour out your dough onto your work surface. Check to see if you can lift up the edges of the dough, and use your bench scraper to push flour under areas that are sticking. Gently tug the dough into a square, then starting at the bottom edge, quickly work your fingers under the dough (your fingers should be pressed together, give that side a stretch toward you, then fold the edge about 2/3 over the dough. Do the same with the top edge. Once you’ve folded the top edge over, gently pat the dough down to even out its thickness, then fold the left and right sides. Gently pat down the folded dough, then repeat the process.
Chef Farbinger laminates his dough 3 times. But with the King Arthur AP flour I use, by the time I’m finished with the 2nd lamination, the dough is nice and strong. Not matter what, once you’ve finished lamination, Roll the dough onto its seams then form it into a round. Place the dough into a well-oiled bowl (I just rinse out my mixing bowl then spray oil in it). Let the dough rest for 20 minutes.
Divide and “Shape“: Flour your work surface again, but not nearly with as much flour as with lamination. Slide the dough ball into the surface. Then using your bench scraper, gently tug the dough into a rectangle with fairly even thickness. Cut the dough down the center along the long edge to form two “slippers.” Then work each piece into long rectangles. Picking the loaves up from the ends and scooping towards the middle, transfer the loaves to a well-floured couche or tea towel. Lightly flour then dimple the tops to even out the thickness.
Final Fermentation: 10 minutes
Bake. If you’re baking on a stone, transfer the loaves to a loading board generously sprinkled with cornmeal. If you don’t have a board, cover a baking sheet with parchment paper, then sprinkle cornmeal on the parchment paper. Bake the loaves at 475°-480°F (~250°C) with steam for 15 minutes. Remove steaming container(s), then turn down the oven to 400°F (200°C) for another 15-20 minutesor until the crust turns a deep golden brown. If you want to follow tradition, don’t bake your loaves past this as the standard crust thickness should be 3mm on average according to Italian law. But that said, bake the loaves to whatever doneness you want!
I put “tradition” in italics above because technically ciabatta didn’t exist until the early 1980s. However, the technique is steeped in thousands of years of tradition.
After the success I had with the baguettes based on the Tartine Bread recipe, I thought I’d apply a similar principle to making ciabatta. But this time around, roughly 30% of the flour would come solely from a young sourdough starter as opposed to the half levain/half poolish of the baguettes.
Notice that I mentioned employing a young sourdough starter. This is important in that I wanted lots of yeast activity and also to mitigate the sourness from the bacteria. This is along the lines of Chad Robertson’s approach in Tartine Bread.
Like all ciabatta, this is an extremely wet dough. When you fold this dough the first time, it’ll feel a little icky. But don’t worry. The results are fabulous! Let’s get into the formula.
Overall Formula
Flour
100.00%
Water (warm – 85°F)
80.00%
Salt
2.00%
Olive Oil
5.00%
Total Percentages
187%
Levain
Preferment Flour %*
30%
Hydration %
100%
AP Flour
194.44
Water
194.44
Mature Starter
~30
Preferment Required
389
Note that the weights listed here are what is needed for the recipe. I’ll get into building the levain below.
Final Dough
Flour
454
Water
324
Salt
13
Olive Oil
32
Levain
389
Total Yield
1212 2 X ~600g loaves
Optimal Dough Temp
80°F-82°F
Weights are in grams
Please TRUST YOUR EYES AND YOUR HANDS with this. I list out times like 30-60 minutes, but things can happen faster or slower. As with any baking process, times are only guidelines!
Make the Levain. I do a double feeding to really crank up the yeast activity before I mix the dough. So I first take a good spoonful of mature starter and add that to 100g of AP flour and 100ml of water and mix it up well. I place my container in a fairly warm place (80°F+) and let it more than double. When it’s ready, the top is bubbly – very bubbly – and you can see the activity of the yeast. Once it gets to that point which, at least for my starter, takes about 2-3 hours, I feed it with 100g flour and water, then let that double. The activity is pretty strong at this point, so the levain is ready in under 2 hours (yesterday, my levain was ready in an hour!). The levain will be fairly bubbly and as with the initial feeding, you should see activity at the top of the mass.
Initial Mix. In a large bowl, mix the levain and all of the water and completely liquify the levain. Place the flour in another large bowl, then gradually add the water and mix until there are no dry ingredients. Rest for 30 minutes.
Final Mix. Sprinkle the salt over the dough mass, then once lightly incorporated into the dough, add the olive oil. It’s best to just squeeze it into the dough to work it in. Once all the olive oil is incorporated, do a series of light stretches and folds to fully incorporate the salt and oil. Note that this isn’t meant to build strength in the dough. Rest for 30 minutes.
Bulk Fermentation. Up to 2 hours depending on ambient temp. Ideally, your dough should ferment in an environment that’s no lower than 78°F.
Folding. After 30 minutes, stretch and fold the dough. It will be wet and will feel like a batter. Continue stretching and folding until you start feeling some tension build in the dough. You may have to do 10-12 stretches and folds. Four will not do the job. This is a critical step in building up some dough strength and gas retention properties in the dough. I love this part because I can literally feel it transform from a very liquid mass into a dough. After folding, rest for 30 minutes.
You may not see much apparent fermentation activity at this point,but that’s okay. The yeasts are working!
Lamination. This is the last step in building structure in the dough, so it’s pretty important. Liberally flour your work area. Don’t be stingy with the flour here because you do not want it to stick and tear the dough. Using your bowl scraper pour your dough out onto your work surface. Then to ensure that there’s flour underneath your dough, use your bench scraper to push flour underneath any areas that could potentially stick. To make sure your dough’s not sticking, move the whole mass around. It should move easily. Then once you know it’s not going to stick, with quick, definitive motions, slide your fingers under the sides of the dough and lightly stretch it into a square till the dough is about 3/4″ thick.
Take the top of the dough and stretch it away from you a bit and bring it to the center. Take the bottom half, pull it toward you, then completely overlap the top fold. Gently pat the rectangle down to even out the thickness, then do the same stretch on the left and right sides. Pat the dough down, then repeat the process two more times if you can. If the dough fights you, that’s a good thing. It means you’ve built some strength into the dough. Once you can no longer laminate the dough, gently roll it onto the seams and with cupped hands, work it into a round. Transfer the round seam-side-down into a lightly oiled bowl. Let the dough rest in the bowl for another 30 minutes or until you see about a 25% increase in volume. Note that this could take a little longer.
At this point, preheat your oven to 500°Fand make sure you have steaming container handy – a cast iron pan or a loaf pan with water-soaked towels.
Divide and Shape. Slide the dough out of the bowl onto a well-floured surface. As with the lamination step, gently pull the dough into a square with roughly even thickness, then cut it into two equal halves. Gently tug each half into long rectangles (forming the slippers). Then holding a rectangle at each end, bring your hands together to scoop the rectangle and place it onto a well-floured couche or towel. Once it’s on the couche, gently tug it back into shape. Once both loaves are on the couche or towel, gently dimple the tops of each piece to promote even rising.
Final Fermentation. This can take anywhere from 30 minutes to 2 hours. What you want to watch for is that the loaves are nice and puffy with obvious bubble formation on the skin. Exercise some patience here because with natural yeast, things happen A LOT slower than with commercial yeast, and if you bake the dough too early, you will not get very good bubble formation!
Bake. Get some hot water into your steaming container to get the steam going in your oven about 10-15 minutes before baking.
You’ll really need a flip board for this so as not to degas the loaves. If you don’t have one, you’ll have to basically do the same motion as putting the loaves onto the couche to transfer the loaves to either a baking sheet covered lightly with cornmeal (if you don’t have a baking stone) or flipped onto a transfer board sprinkled with cornmeal or semolina.
Quickly place the loaves into your oven and immediately turn the heat down to 475°F. About five minutes into the bake, check to make sure there’s still water in your steaming container. If not, replenish it (see notes). Bake with steam for 12 minutes then remove your steaming container(s) (I use multiple to ensure steam is produced faster than it can be vented) and reduce your oven temp to 425°F. At this point, the loaves will have started to take on color. Bake for another 12-15 minutes or until the crust is a deep golden brown. You can let these cool if you want, but there’s nothing like slathering a hot slice of ciabatta with butter and honey!
Notes
Some bakers I’ve encountered talk about not being able to keep steam in their ovens. I can’t either. Like almost all domestic ovens, my oven is designed to vent moisture. But if you produce more steam than the rate that the oven can vent it (I use multiple containers), you’ll be able to maintain a steamy environment. Furthermore, when you bake with steam, you need to check to see if your water has burned off during the time you need to be steaming! I always check my steaming containers 5 minutes into each bake to make sure they’ve got plenty of water to do the job.
Once you add the olive oil, the dough will really feel liquidy. Don’t worry and please don’t add flour. Olive oil is like a gluten lube. It increases a dough’s extensibility immensely and in addition to adding great flavor, contributes to the production of large bubbles.
Speaking of olive oil, do yourself a favor and use nothing but real extra virgin olive oil, not the cheap grocery store stuff.
I wrote a post saying that I had some issues with the Tartine Bread baguette recipe, especially with the yield, which was much more than the two or three baguettes that the recipe said it would produce. It was more like seven or eight baguettes. Not a bad thing, but the inconsistency kind of bugged me. I was also a little dubious about the hydration being only 64% and that the poolish used a seemingly large amount of yeast for such a small poolish amount.
But despite my issues, these baguettes totally intrigued me because Chad Robertson employed both a levain AND a poolish. And unlike most poolish baguette recipes that add a little yeast to the final dough, the rising potential with both types of preferments completely eliminates the need to use any extra commercial yeast other than what goes into the poolish!
Using two preferments was all I needed to know to want to make these baguettes. Chad’s reasoning was that they’d contribute tons of flavor to the bread – they do – but also give the dough lots of extensibility and a longer shelf-life (and I could attest to that because my pure sourdough baguettes will last a week).
But I didn’t want to make as much dough as the recipe in the book yields, so I had to scale it down. To scale it down I had to get the overall formula, then figure out my ingredient weights from that. I shared all this in my previous post, but I’ll put it down here now:
Overall Formula
Flour
100.00%
Water
64.00%
Salt
1.70%
Levain
In Tartine Bread, Chad Robertson says to use a tablespoon of mature starter – it’ll be somewhere around 30-40g of mature starter. The important thing is to make near a 300g levain.
Mature Starter
30-40g
AP Flour
150g ~14.25% of total flour
Water
150g
Optimal Fermentation Temp.
78°-82°F
Poolish
The book says to use 3 grams of yeast for 200 grams of flour and water each. Even if he meant fresh yeast, that’s an awful lot for such a small amount of flour (instant yeast weight would be 1.2g – that’s an insane amount). It’s not necessarily wrong, but the poolish will mature much faster than 3 hours with that amount of yeast and the aim is to get both preferments to peak near the same time.
AP Flour
150g ~14.25% of total flour
Water
150g
Instant Yeast
0.4g
Optimal Fermentation Temp.
78°-80°F
Poolish should develop in a warm environment to make the 3-hour schedule.
Final Dough
Bread Flour
170g
AP Flour
402g
Water
286g
Salt
14g
Poolish
229g
Levain
229g
Total yield
1330g 4 X 330g 60cm loaves 6 X 220g 40 cm loaves
Optimal dough temp
78°-82°F
Yield is just a little more than 1300g which is the target to account for loss due to evaporation or processing (dough sticking to stuff).
Note the relatively high dough temperature of 78°-82°F. This is consistent with Chad Robertson’s method of a warm bulk ferment. You can achieve this by placing your bulk fermentation container in a cold oven with the light on. The light bulb will provide enough heat to maintain that temperature range. But keep an eye on the temp. You don’t want it to get too warm. Propping the door open with a dish towel or oven mitt will help control the temperature.
This is a fairly straightforward formula. BTW, in case you’re interested, both the Poolish and Levain flour contribute 14.25% each to the total flour. So if you want to scale this up, you can use that percentage to determine how much flour you’ll need for both. Without further ado, let’s get into the dough development!
Make the Preferments
One thing to note is that both preferments should be made from predominantly AP flour. The reason for this is that whole grain flours will have much more fermentation activity.
Build the Levain
For the levain, take about 30-40 grams of mature starter and mix it with 150g each of flour and water. Your starter should have enough activity where the levain will be ready in three to four hours. Or if you have a regular schedule, try to coincide the peak of the levain with the peak of the poolish.
Poolish
With the poolish, thoroughly mix all ingredients together. Set aside in a warm place to promote yeast activity. Poolish will be ready when it is heavily bubbled on the top.
Both preferments should pass the float test to ensure optimum activity.
Initial Mix/Fermentolyse. Set aside 50 grams of water. Measure out what you need from both preferments and place in a mixing bowl. Liquify the preferments with the rest of the water, then sift all the flour and add to the liquid. Mix well until there are no dry ingredients and no large lumps in the mix. It’ll be shaggy. Cover and rest for 30-60 minutes.
If you’ve made baguettes previously, you will notice how stiff the dough is. Don’t be alarmed and add more water! The fermentation action of the starters will soften and aerate the dough. Also, note that this is not a true autolyse as the preferments are included. But it does help to hydrate the flour!
Final Mix/Bassinage. Sprinkle the salt all over the dough mass, then add the remaining 50 grams of water. Note that for this small amount of dough, I just mix it by hand, squeezing the salt and water into the dough. Mix until all the water has been incorporated and you don’t feel any salt crystals when you squeeze the dough.
You could use a stand mixer for all the mixing. But if you do, mix only on the lowest setting! I’ve found that with baguettes, you actually don’t want to develop the gluten too much in the mixing stage. You’ll do all that through the folds.
Bassinage Explained
Bassinage is a term you’ll occasionally hear from bakers from time to time. The literal translation of the word is “bathe.” From the perspective of dough development bassinage is the process of folding reserved water into an already mixed dough; basically bathing the mixed dough. You hold back some water (typically 5%-10%), then mix the dough with the remaining water to start the gluten formation. At a later time, you add in the reserved water.
The idea behind it is actually kind of ingenious. The thinking is that the initial mix will get gluten formation started. Then when the reserved water is added, though some water will obviously combine with the remaining flour, other water molecules will get trapped in the gluten matrix, thus forming little pockets of water, which in turn will help in the formation of a more open crumb.
Given that, especially with a moderately stiff dough like the Tartine baguettes, bassinage conceivably will help with creating an open crumb as the trapped water molecules will form steam bubbles during baking.
Bulk Fermentation. 3-4 hours. As with Chad’s basic country loaf, you’re looking for about 25-30% dough expansion. I let the bulk fermentation go for about 4 hours to get to that kind of expansion.
Folding. Fold every 30 minutes within the first three hours up to a total of six folds. Truth be told, I got to the fourth fold and the dough had plenty of strength, forming a nice windowpane. As with any kind of bread, you should never be too parochial about the folding suggested in a recipe. Once you’ve developed enough strength, stop folding. Continuing will just degas the dough.
To be honest, having made these a few times now, I’m not convinced the dough needs this many folds. The hydration is so low that the gluten bonds form quickly. I’ve never gone past four folds. The bulk fermentation does take four to five hours though. With that in mind, I’d suggest doing four folds every 45 minutes instead of six every 30 as is written in the book. But this also depends on your flour. When I use my Azure Standard Bread Flour, two folds is all I need.
Divide and Preshape. Gently turn the dough onto a lightly floured surface and tug it into a rough rectangle, then scale out four 330g pieces for 60cm baguettes, or six 220g pieces for 40cm baguettes. With each piece, letter-fold the dough in an east-west direction, then roll it up like a jelly roll and seal the seam and ends. Take care not to roll too tightly. Add just a little tension! Place seam-side-up on a well-floured couche. Rest for 30-45 minutes depending on how tightly you rolled the pieces. With this low-hydration dough, you need the dough to be well-relaxed.
Shape. I always use Master Chef Markus Farbinger’s baguette shaping technique. But if you have a shaping method already, feel free to use it. One thing that Chef Farbinger doesn’t mention in shaping is that while rolling, your fingertips and the heels of your hands should have contact with your board as you roll the dough out, forming a natural cup. To lengthen the log, you simply flatten your hands a bit – not completely – and the dough will push out to the sides.
Final Fermentation. Up to 3 hours. Yes, you read that correctly. Remember, this is a stiff dough, and after shaping, you want to give it plenty of time to relax. With my last batch, my dough was ready in about an hour and a half. It was a warm afternoon when I baked, and I didn’t want to run the risk of over-fermenting the loaves. In hindsight, I could’ve let it go out for about two hours. To tell if the loaves are ready to bake, if you do the poke test, the surface should give easily. And once you press a little deeper, the interior should have a little more tension, but it should give as well. Once you remove your finger, observe how the dough springs back. It should spring back slowly.
I can’t stress enough how important this last fermentation step is! This step will make or break the bake – even more so than the bulk fermentation because that rest period will allow the bubbles to re-form, which is crucial to achieving an open crumb. Remember, this is a stiff dough at 64% hydration compared to the standard hydration of 75%. And though the acid in the preferments will aid in the extensibility of the dough, it still needs time to develop the bubbles. So, once you’ve shaped, give this dough time to expand.
Bake. During the last hour of final fermentation, warm up your oven to 500°F. I use a stone to bake, but you can bake on a sheet or even a dedicated baguette pan. Use lots of steam! When I bake baguettes, I use both a broiler pan that I put hot water into, plus two loaf pans that have well-soaked terry-cloth towels in them to provide a steamy environment (NOTE: Your oven should be steamy when you place the baguettes in it). These are in the oven for about 10-15 minutes before I pop the loaves in (allowing my oven to come back to temperature). Quickly place your loaves in the oven, then immediately turn it down to 475°F. Bake for 12-15 minutes on steam or until the crust just starts getting color. Remove the steaming containers, turn down the oven to 425°F, then bake for another 12-15 minutes until the loaves turn a deep golden brown.
Cool on rack. You can eat these warm!
Notes
The trick to this recipe is getting the preferment timing close. You might expect the poolish to ferment more quickly than the levain, but having made these a lot, it’s hard to predict timing. But do not worry if one is ready before the other! It just means the yeast ran out of food. Once you mix everything together, the yeast will have a new food source.
The crumb, while open, is very much like a sourdough crumb. It’s tender, but a lot chewier than the baguettes I normally make. I realize that that could be a function of the flour I used. The next time I make these, I will use all AP flour – most probably Central Milling flour as it is only 10.7% protein. This should lend itself to a much lighter crumb texture.
While I appreciate the romanticism of baking on a stone, I always use parchment paper on my transfer board to get my loaves into the oven. Especially with baguettes, since I load them into the oven along their long sides, I’ve had too many mishaps where the loaves roll off my board! So, I use parchment paper. When I remove the steaming containers, I also remove the parchment paper from underneath the loaves.
The loaves could’ve benefited from a longer final fermentation. As you can see in the pictures, they turned out fine, but I think I could’ve had them even puffier had I let the final fermentation go longer. That said, I will have to monitor their progress carefully if I use low-protein flour.
Once the final fermentation is complete, I cannot stress enough that you handle the shaped loaves as gently as possible.
I must admit that I’m still a little bugged by the yield in the original recipe and the recommendation to break up the dough into 2 or 3 pieces. But despite that, I will relegate that to copy-editing oversight.
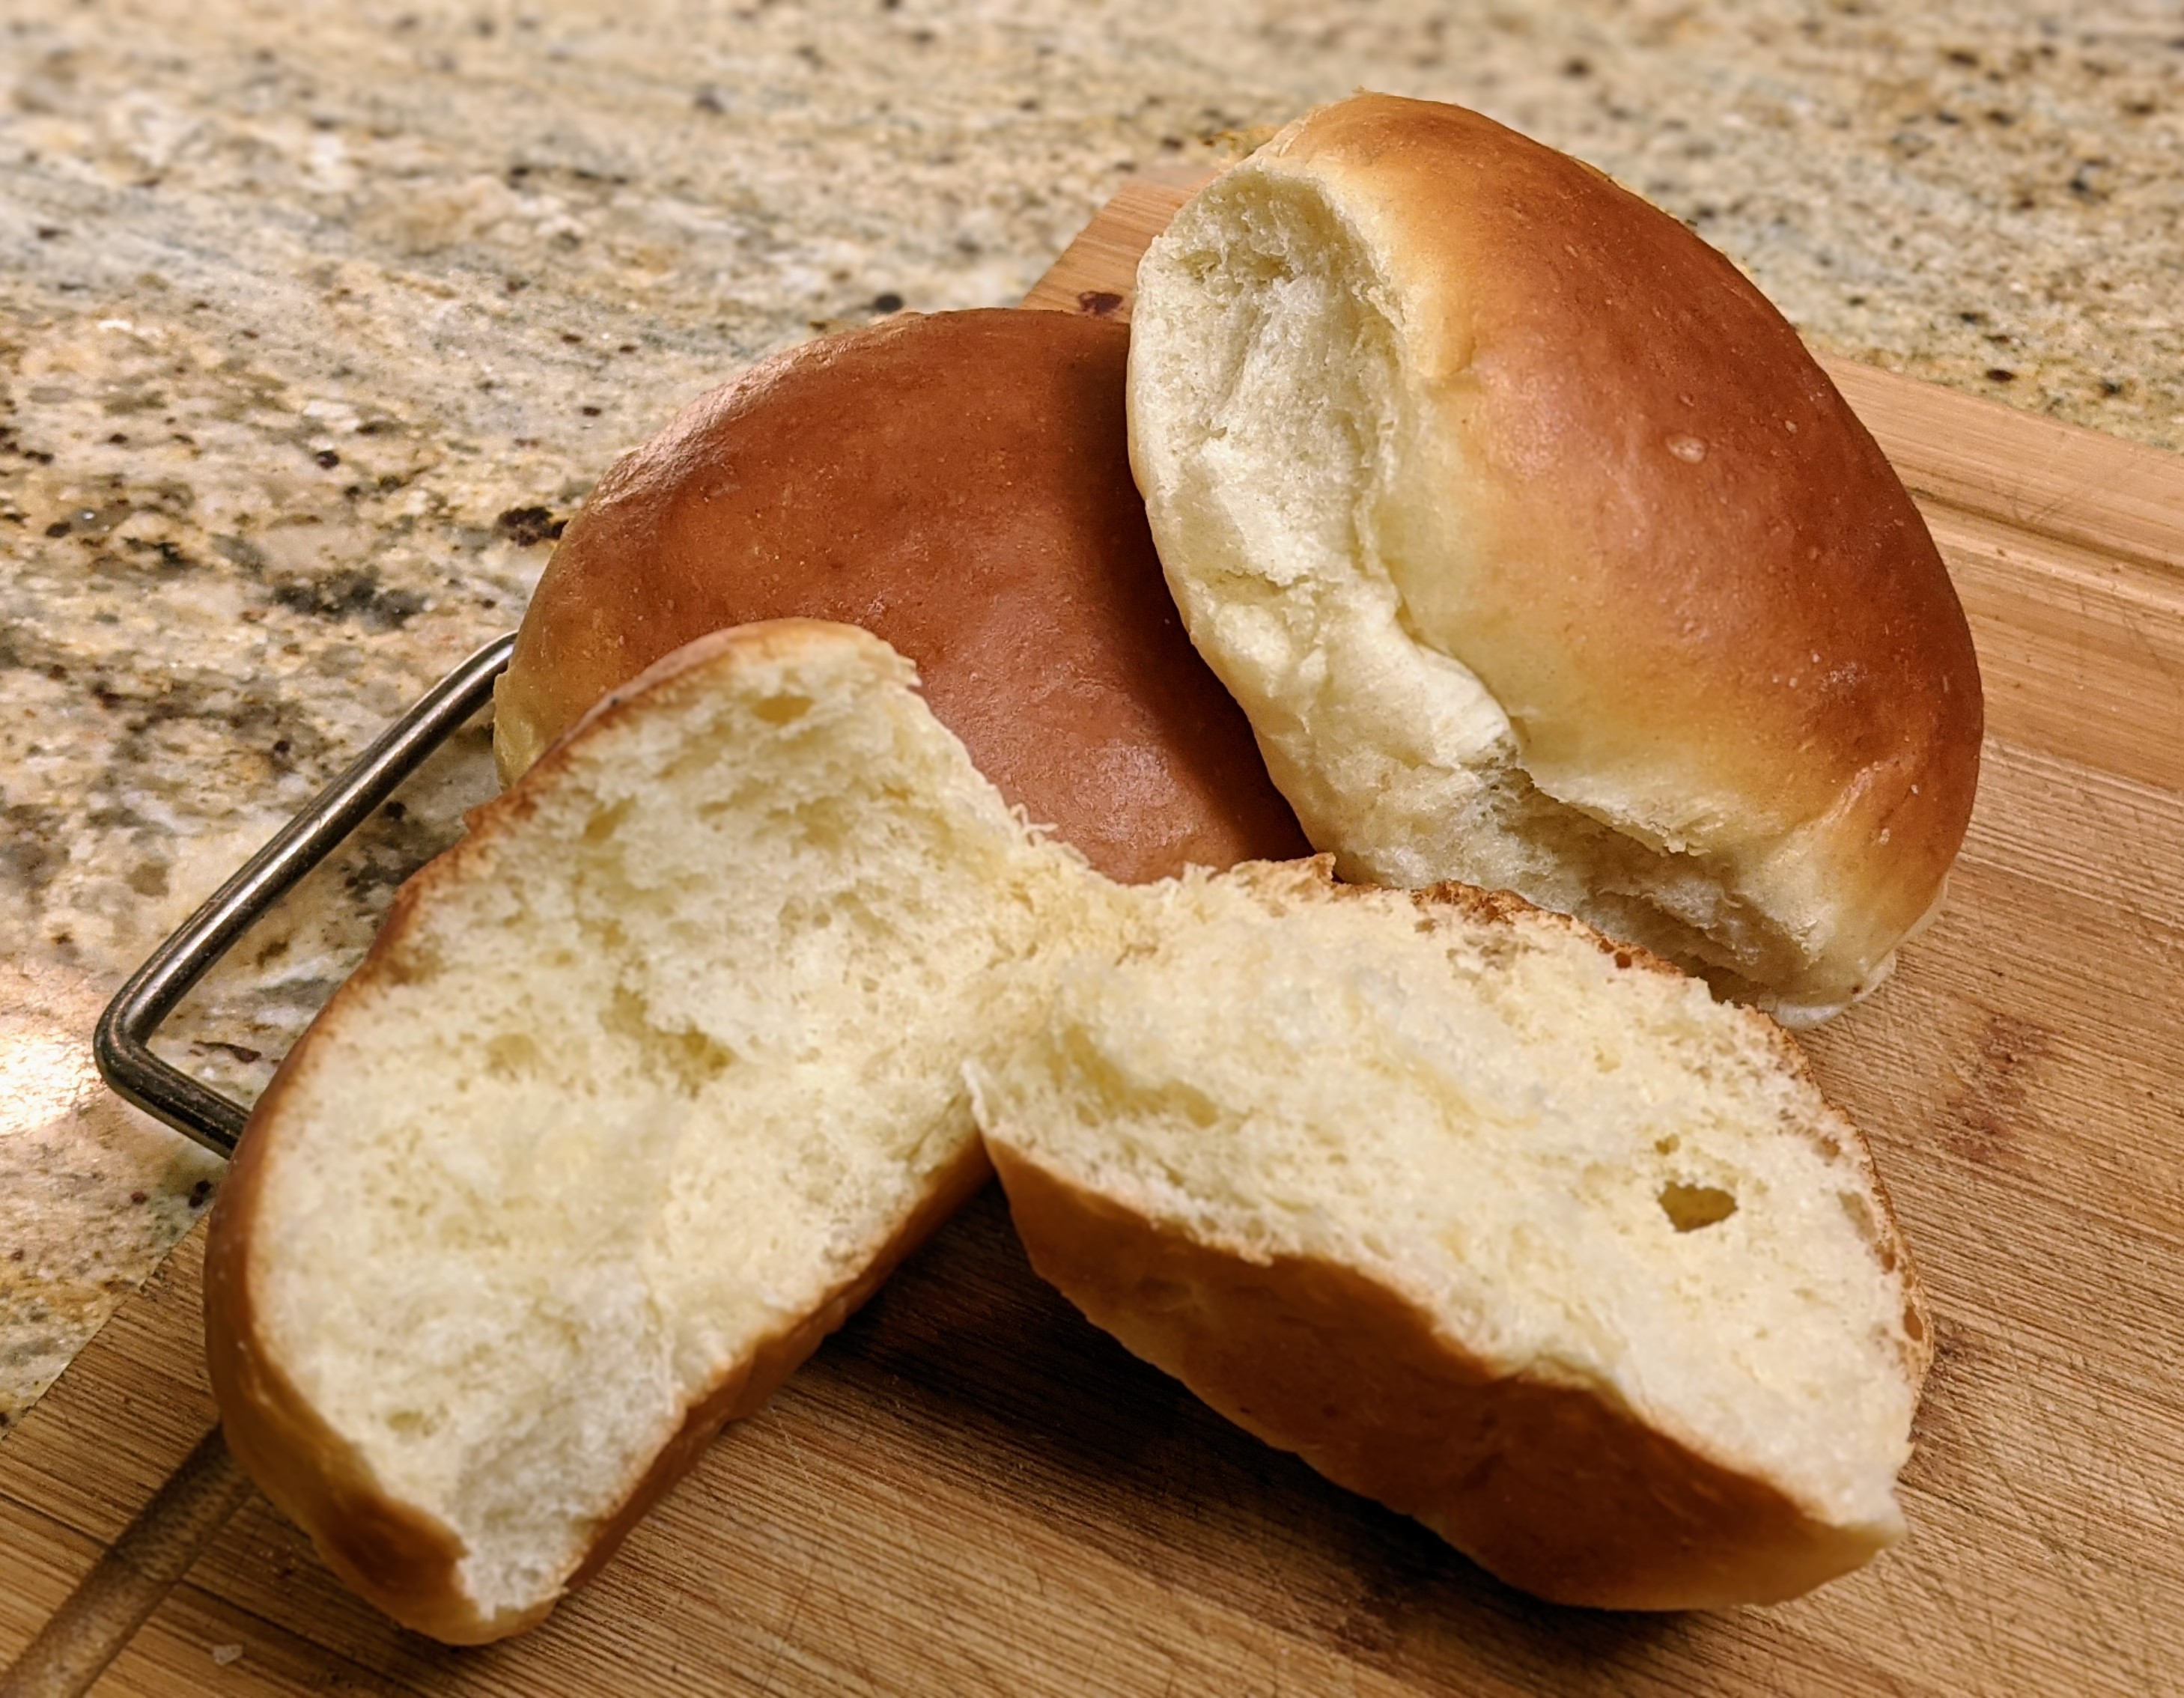
Update 9/4/2025 – To be honest, I never liked the low hydration of the dough because the texture of the crumb was more like traditional sourdough in that it was chewy. Baguette crumb should be chewy to some extent, but not nearly as toothsome as sourdough. So, I used the same technique but changed the hydration to the standard 75%. They’re much lighter with a nice, open crumb. Plus, I add a bit of diastatic malt powder (0.5%) to help soften both the crumb and crust.
When you see the Real Bread loaf mark, it indicates that this recipe produces bread with no artificial additives and is leavened either by a natural starter or commercial yeast.
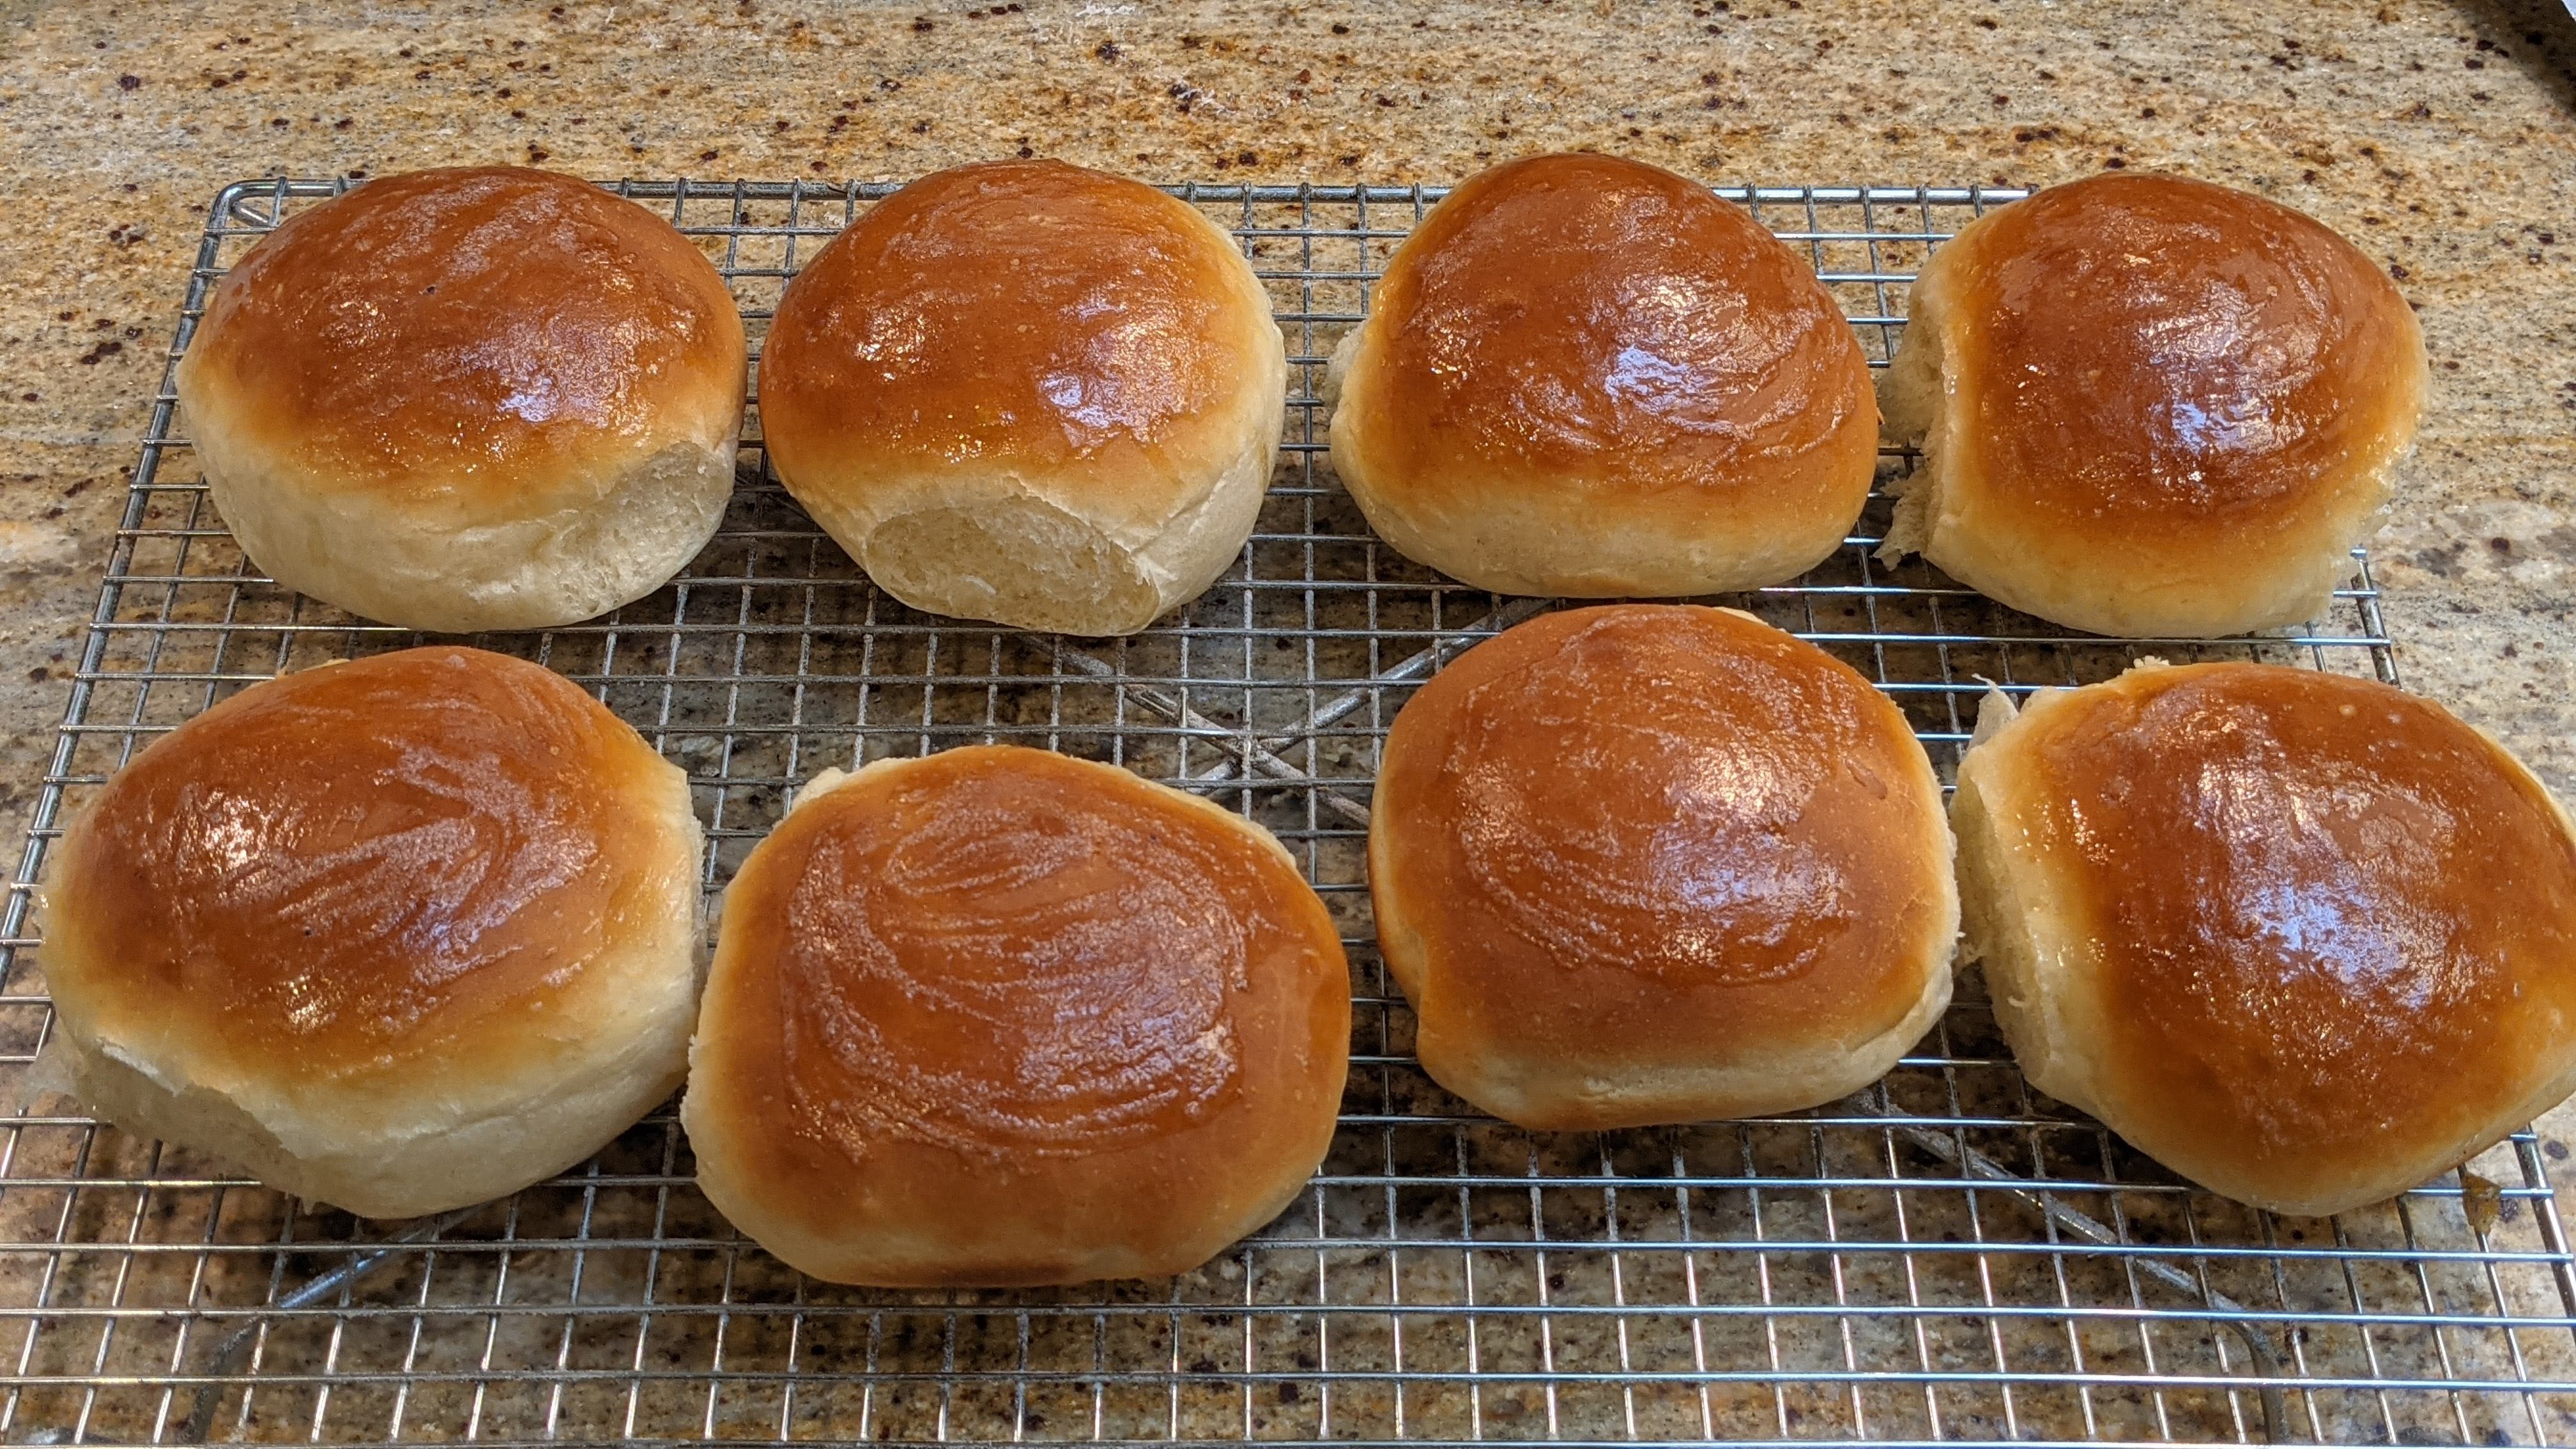
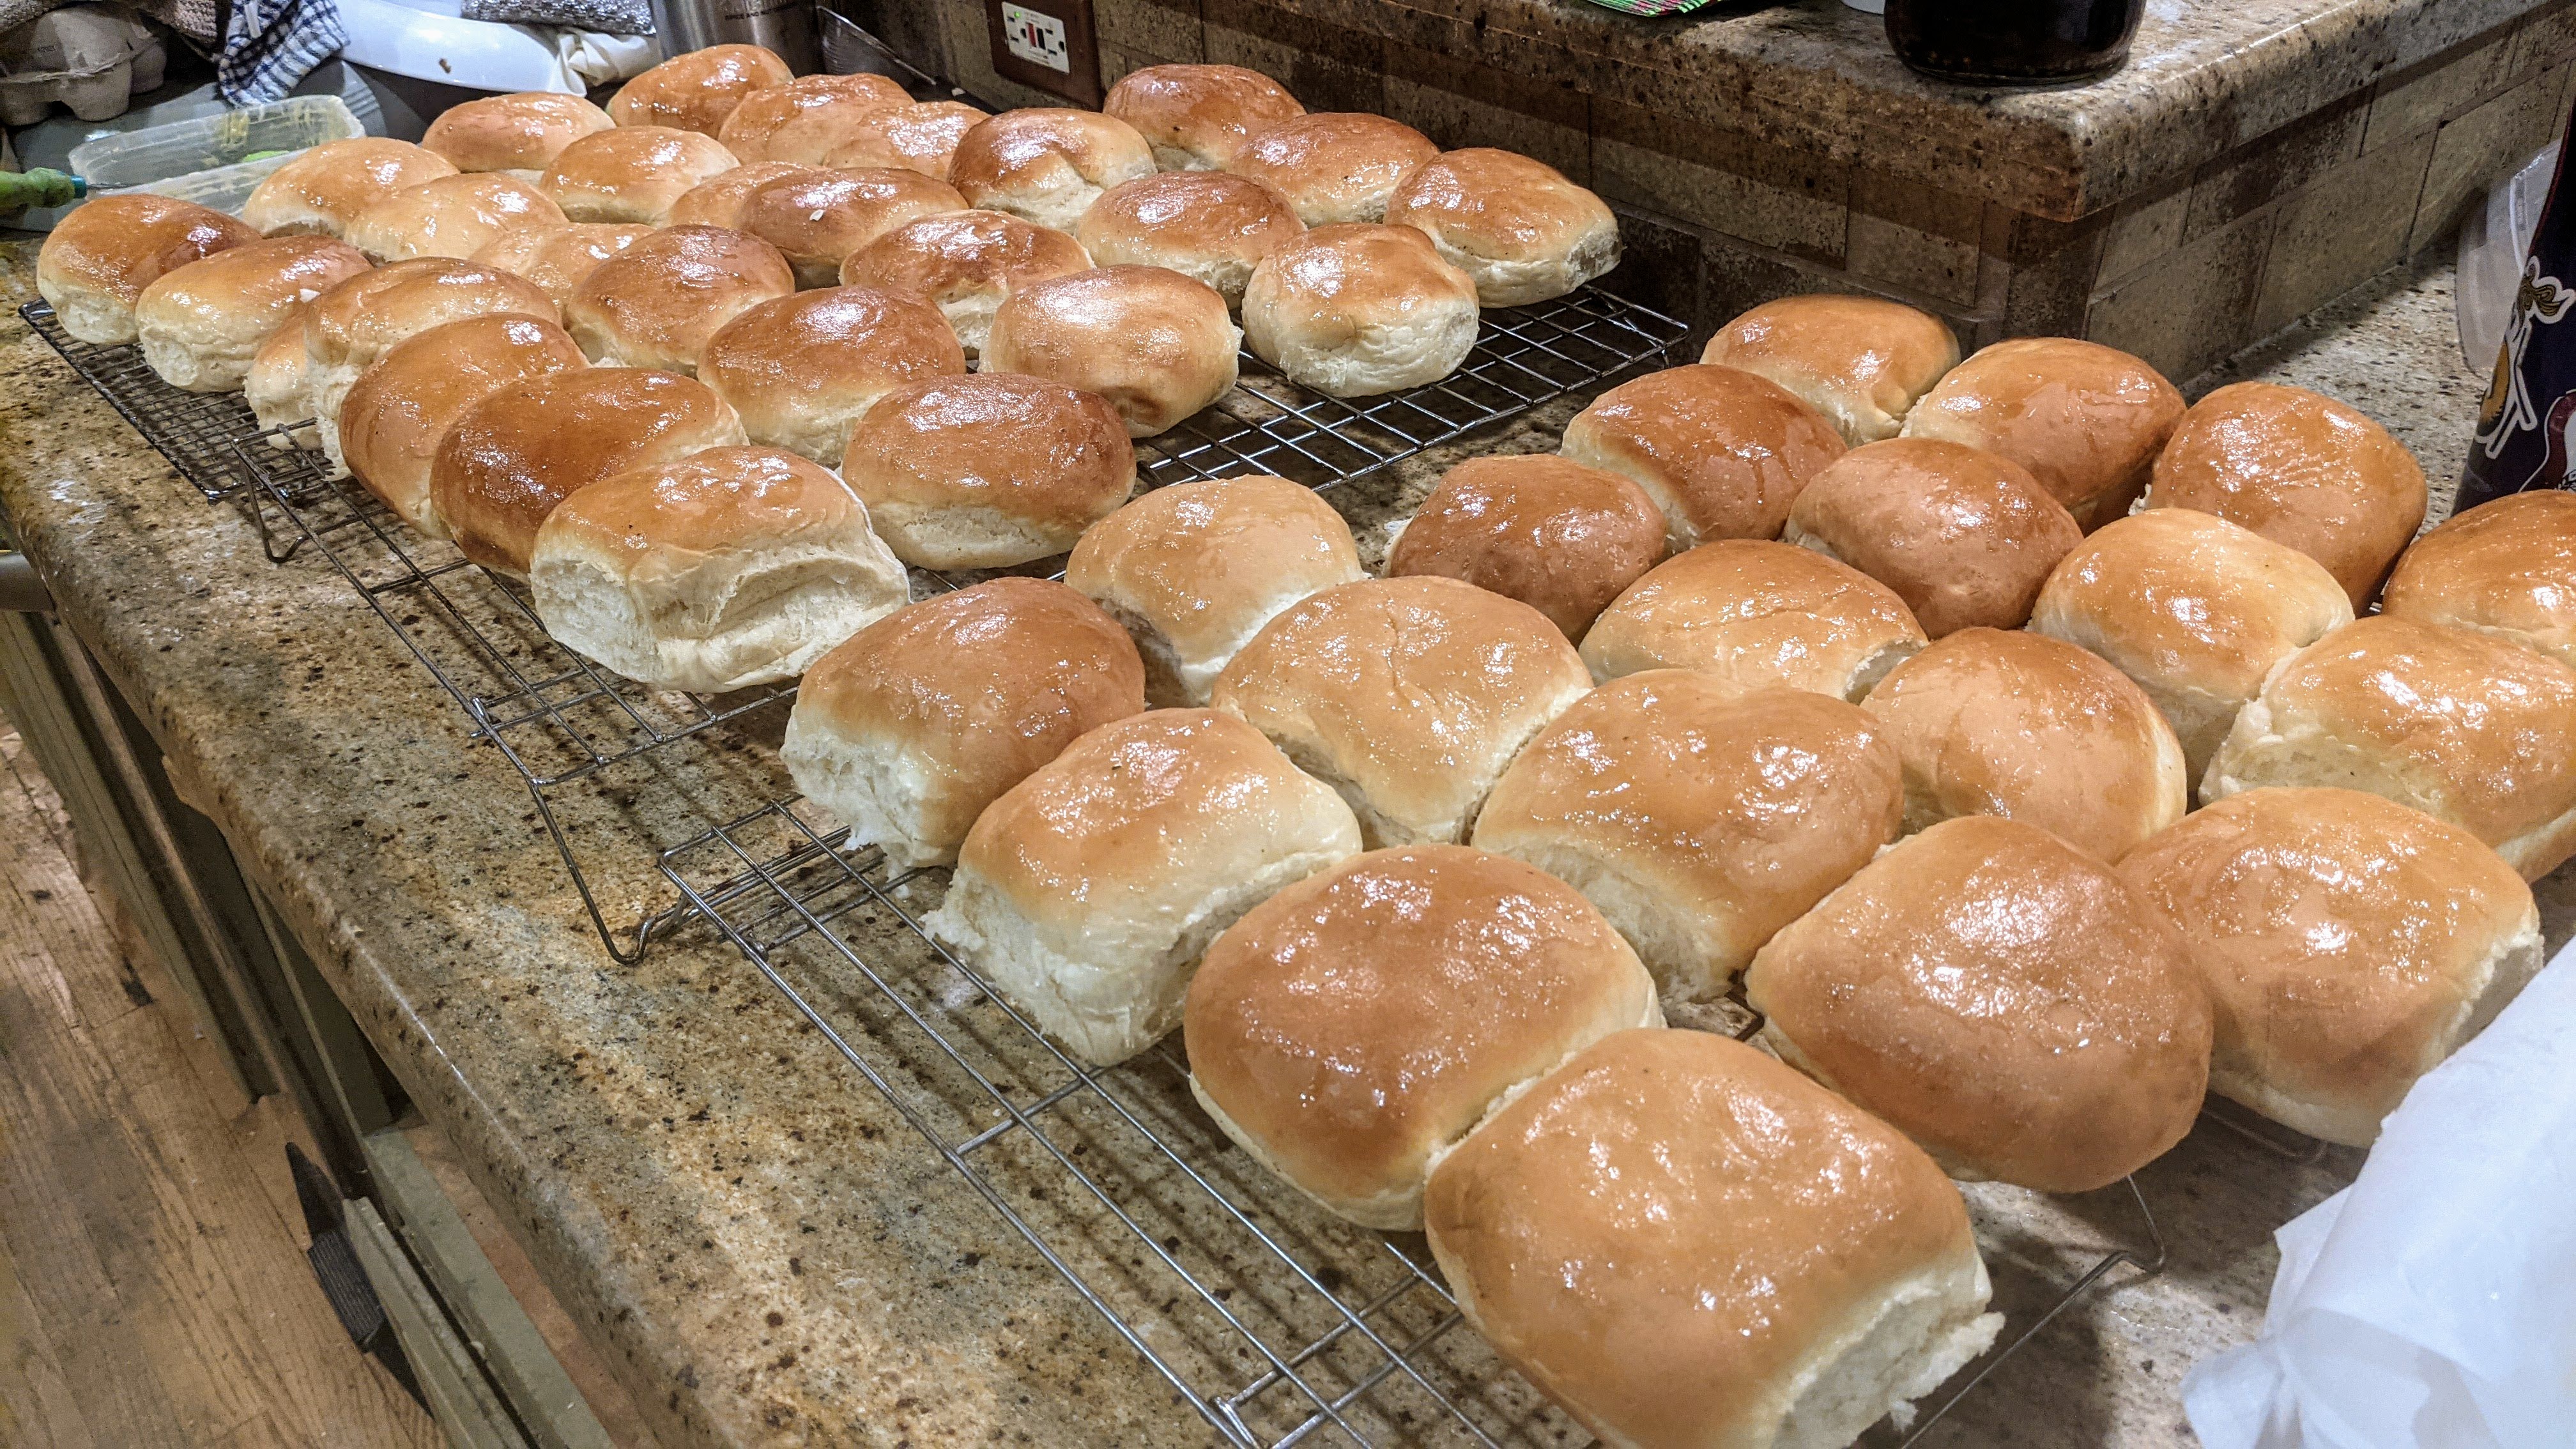
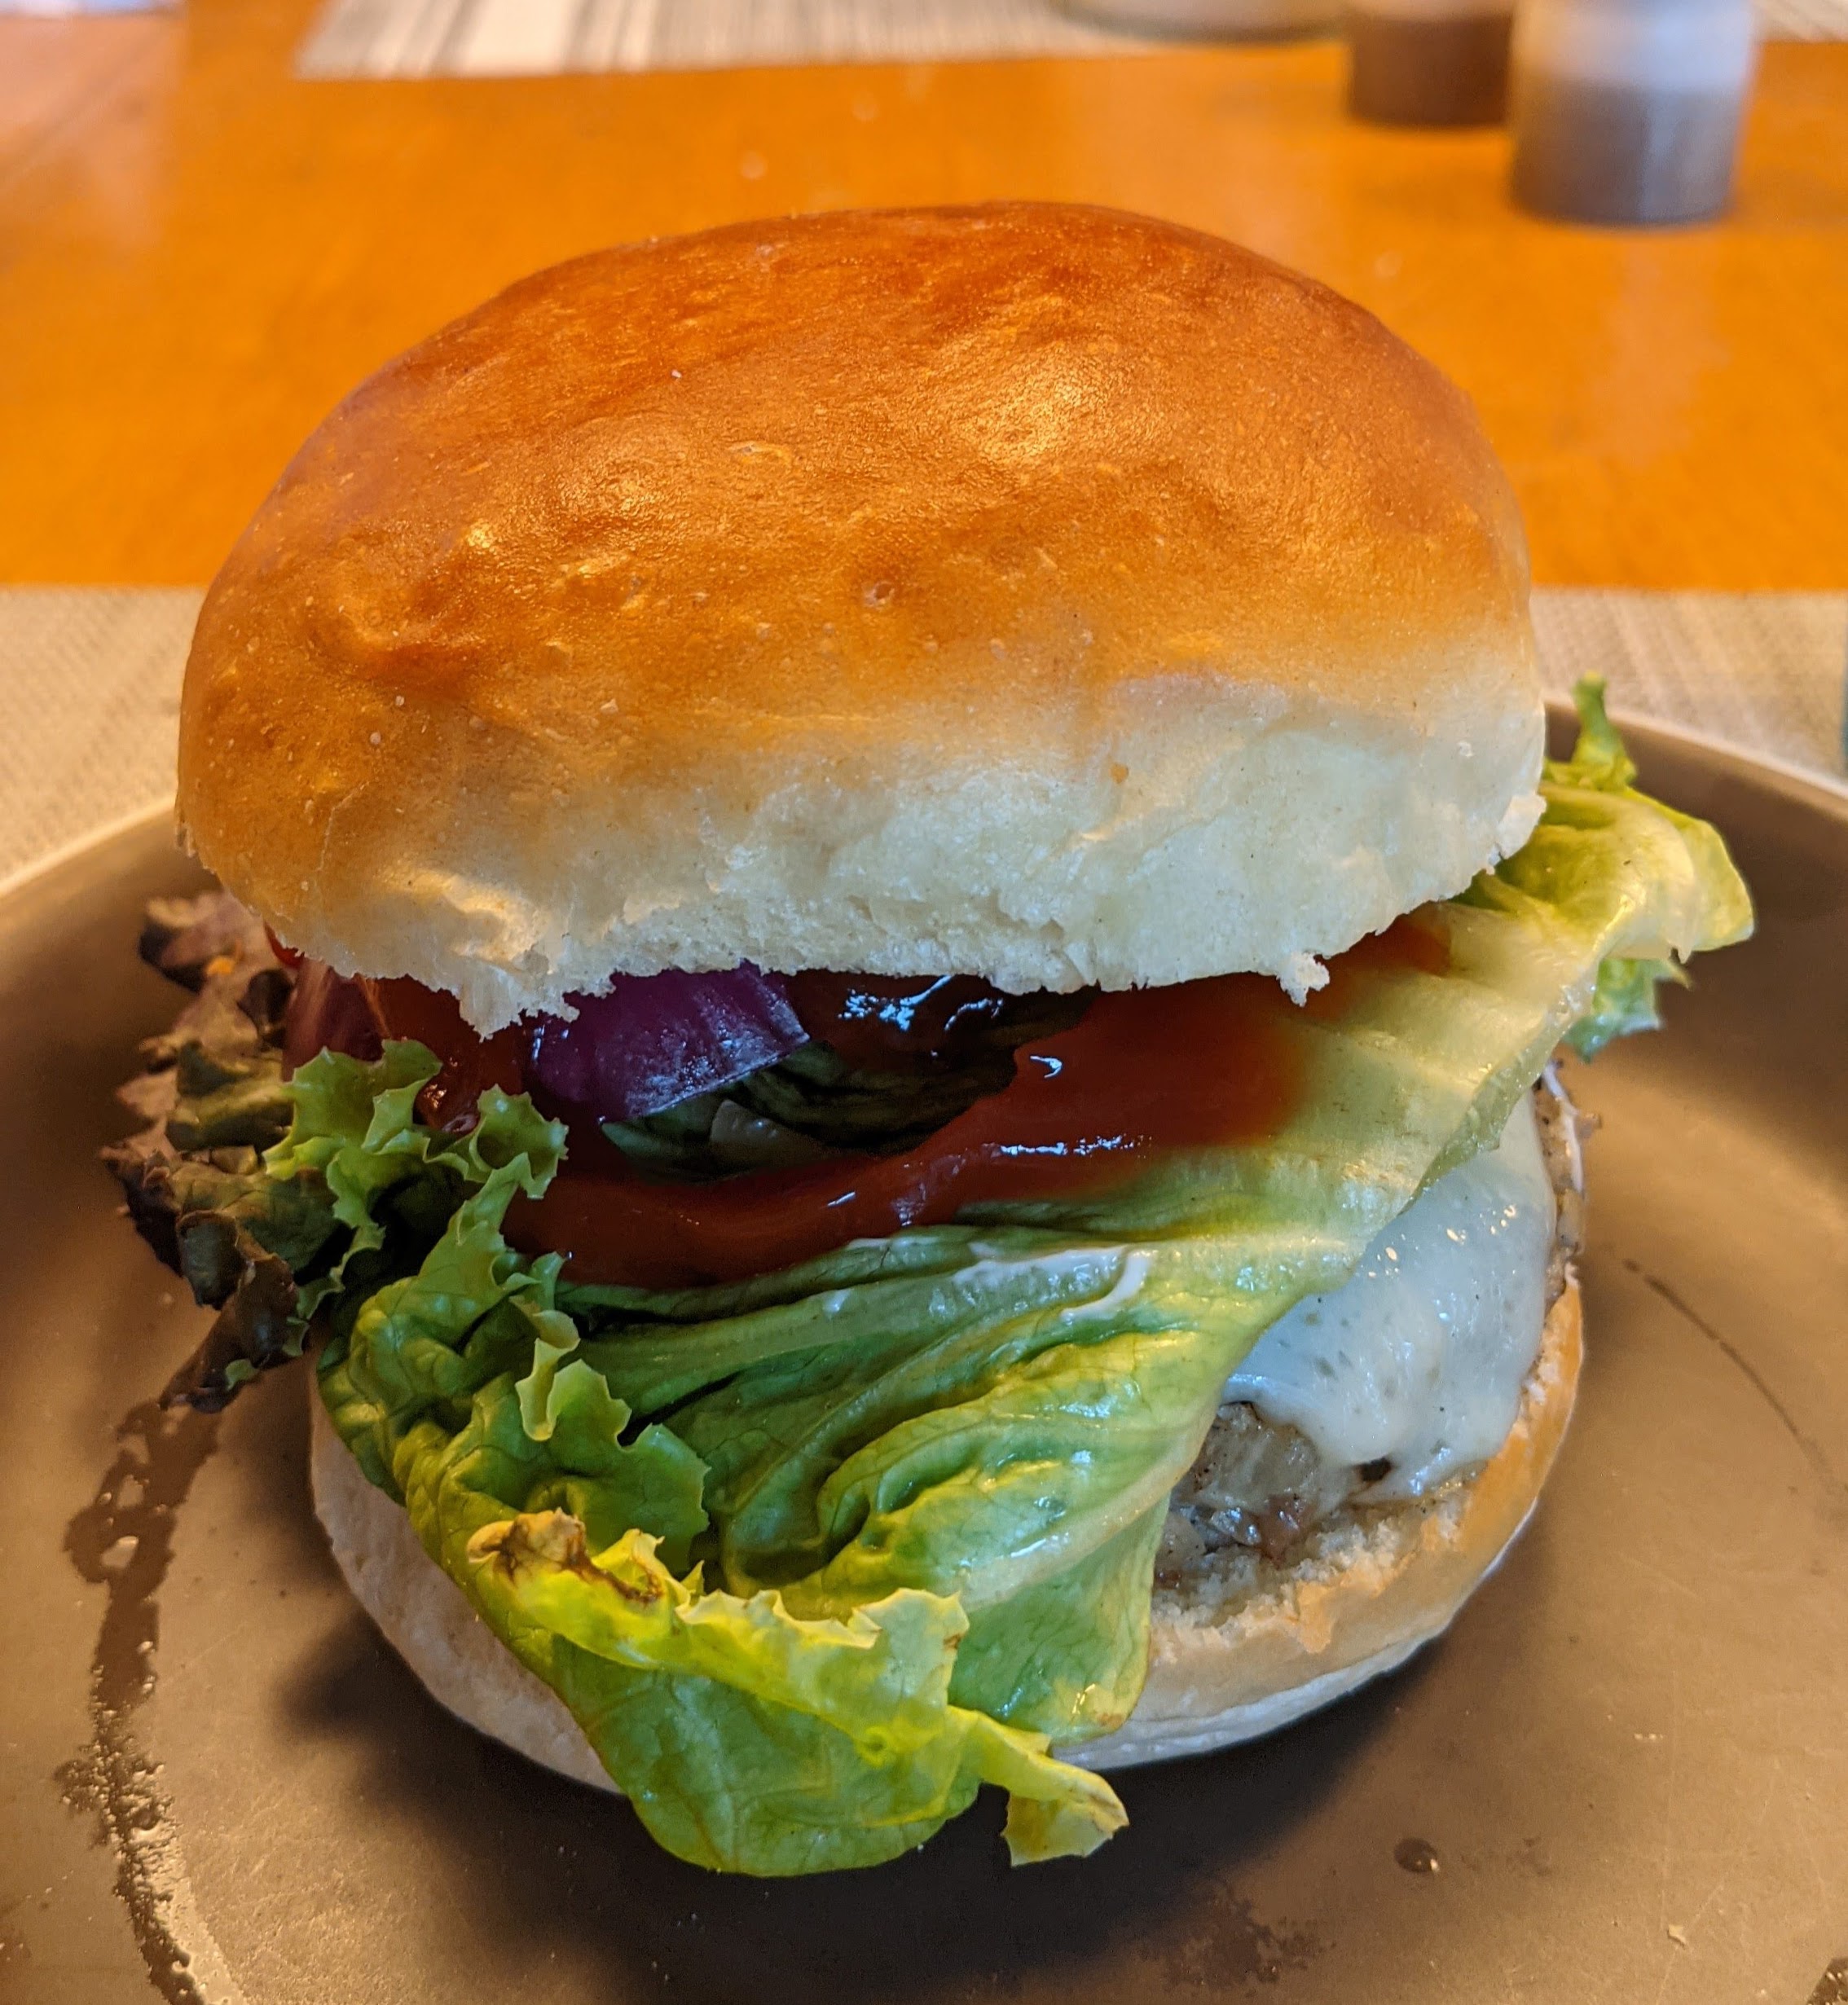
Yesterday before she left for work, my wife prepared one of the family’s favorite dishes: The meat for Turkey-Mushroom and Swiss Burgers. As she was walking out the door, she asked if I could make burger buns – specifically buns I’ve made a few times that are light, airy, chewy, and packed with yeasty goodness. With the butter and sugar in them, they’re very similar to brioche, but not as sweet and not as buttery – but they’re close, which is why I call them butter buns.
But I have to be honest: This is NOT my original recipe, though I’ve refined it over the last year. This is a riff on King Arthur’s “Beautiful Burger Buns” recipe. And these burger buns really are beautiful. But not only that, they’re super easy to make!
When I first made these buns, I was surprised to see that there was no milk or powdered milk used in the recipe. I was also surprised at how low the hydration was (46-48%). But the egg and butter make up for the lack of hydration. Plus, the butter combined with the egg gives the crumb a slightly yellowish hue.
And though there’s sugar in the formula, these buns are not sweet overly sweet. The sweetness is much more subtle considering the amount of sugar used.
I’ve made these buns several times and to be honest, I recommend using a mixer, especially if you’re pressed for time. I made the buns entirely by hand yesterday and hand-kneaded the dough. But I had a bit of time, and hadn’t kneaded by hand for a long time (gotta keep my chops up). In any case, let’s get into the formula:
Overall Formula
Baker’s %
Final Dough
AP Flour (pref. unbleached, unbromated)
100%
473
Water (lukewarm)
46%-50%
207-225
Egg (1 lg. egg – room temp)
8%
36
Sugar
12%
57
Butter (room temp)
7%
33
Salt
2%
9
Yeast
3%
14
Totals
179%
808
Optimal Dough Temp
80ºF
This will yield 8 100g buns and provides 1% of loss during processing. Note that this is a warm bulk fermentation!
Dough Development
Note that the hydration is 46%-50%. On cooler days, I recommend using the lower number. On warm days, use the higher number. That said, I always start with the lower number, then as I’m mixing will add a bit of water to get to that smooth consistency. Also, make sure your water is nice and warm! It helps incorporate the butter much easier.
Preparation. Before you start mixing the dough, mix the water, sugar, and yeast together in a mixing bowl to dissolve the sugar and activate the yeast; yes, even if you’re using instant yeast. Beat the egg so the yolk and white are well-combined. Note that I don’t bother measuring out the weight of the egg if I’m making a single batch and just drop a large egg into the mix. But if I scale up, I will beat a few eggs together and weigh according to the formula.
Mixing. Combine the flour, butter, and salt in a mixing bowl. Add the egg and water mixture and mix until all the ingredients come together there are no dry ingredients present. If you’re using a mixer, combine the ingredients at low speed, then once mixed go to the second speed to knead the dough for 2-3 minutes (dough should be smooth and pulling off the walls of the bowl). If mixing by hand, turn the dough out onto your board and knead until the dough is smooth (about 8-10 minutes).
Bulk Fermenation: 1-2 hours @ 80ºF or until the dough has almost doubled. In warm weather, this will happen FAST! With this amount of yeast, bulk fermentation will happen pretty quickly so you need to keep an eye on it.
Divide and Shape. Turn the dough out onto your board, then scale out 100g pieces. Roll the pieces into tight balls (you can do two at a time), then let them bench rest for 10 minutes. Place each ball on a baking sheet lined with parchment paper and press them out into 3″ disks. Gently dimple the tops as you would a ciabatta (believe it or not, this promotes even rising). If you’re using a standard-size baking sheet, you might want to stagger the pieces so they fit better. Don’t worry if they touch when you press them out. They’ll expand even further during final fermentation and baking.
Final Fermentation. Allow the shaped disks to rise for up to another hour or until they’ve clearly expanded and are puffy. On warm days, my dough’s ready in about 30 minutes. In any case, check them after about 30 minutes. Preheat your oven to 375°F.
Baking. Right before you bake, lightly brush the tops of the buns with melted butter. Bake them for 15-18 minutes until the tops are a light, gorgeous, golden-brown. Remove from the oven, then brush them again with butter. Cool for at least an hour before cutting.
Some Alternatives
I love this formula because you can use it for a couple of different kinds of bread besides burger buns!
Dinner Rolls. Instead of flattening out the rolls, place them in a round or a 13X9 pan to make dinner rolls.
Hawaiian Rolls. Half the sugar, up the butter to 10%, and replace 70%-75% of the water with pineapple juice and you’ll get a VERY close approximation to Hawaiian bread! Load the rolls into a pan as with the dinner rolls! You could also replace the remaining water with milk for an even fluffier texture!
As I mentioned in my previous entry, I love baking with Kamut flour! It’s such a dream to work with and most importantly, it just produces damn good tasting bread! In light of that, I thought I’d share my formula for making sourdough with 40% Kamut flour. With that in mind, here is the overall formula:
Overall Formula
Flour (40% Kamut, 10% Whole Wheat or Rye [from starter], 50% Any other combination of flour)
100%
Water
78%
Salt
1.8%
Notice in the formula, there is no entry for the starter. This is because the starter’s flour and water are always figured into the overall hydration. It is NOT a separate ingredient.
Final Dough
Flour
809
Water
611
Salt
16
Levain
180
Total Yield
1616g 2 X 800g loaves with some extra for process loss
Optimal Dough Temp
76°F
Total flour is about 900g
Make the Levain. Make a 100% hydration levain. I use a hybrid scrapings method of leftover mature starter from my fridge and botanical starter and whole grain flour (for me it’s usually white whole wheat but I will use kamut at times).
Mix. Reserve about 50g of the water and dissolve the salt into it. Mix the flour and remaining water and autolyse for at least 30 minutes (you can autolyse longer if you want). Once autolyse is finished, fold the starter into the dough, then add the salt water and thoroughly mix until everything is well incorporated.
Folding. 2-4 folds at half-hour intervals. You want to be gentle with the folding since you’re using a whole grain flour. Windowpane test after each fold to determine dough strength. If at any point it’s sufficient, stop folding and let bulk fermentation complete.
Divide and Pre-Shape. This recipe yields 2 X 800 gram loaves, so scale the pieces out then shape into rounds. Once shaped, bench rest for 20-30 minutes until the dough has relaxed.
Shape and Final Fermentation. Shape into rounds or ovals (I love to free-form batards). Once shaped, you can let the loaves proof for 1-2 hours at room temp, or pop them into the fridge for 8-16 hours. Note that if your fridge is particularly cold or your yeast really slows down in the cold, it may take longer.
Bake. Bake at 485°F/250°C for 15 minutes with steam. Remove steaming container or purge steam, then bake at 425°F/220°C on convection if you have it; otherwise, 435°F/225°C for 25-30 minutes. Bake until the bottom half of the loaves is a nice mahogany.
One would think that with the bread craze that has swept the world during the pandemic lockdown, that sourdough is the only bread being made and that the only bread that qualifies as artisan can only be made with a starter. That’s bullshit of course because doing something in an artisan way has less to do with the ingredients or materials and much more to do with craftsmanship.
When I make ciabatta, I typically use a biga or a poolish. But sometimes, I just want some bread. So as I do with Baguettes de Tradition, I’ll just whip up a batch of dough in early in the morning, and have fresh, hot bread for breakfast. No, it doesn’t keep, but at the small quantities I make, it’s gone in less than a day.
One might think that a straight dough can be bland and boring. But done right, a bread made from straight dough can be absolutely wondrous. And I will submit that while a same-day straight dough bread may not have the depth of flavor of one made with a preferment or employing a slow-rise, cold bulk ferment, employing great technique will go a long way toward making up for that.
That said, one way to add a little flavor complexity is to use a flour blend. Though I list using unbleached AP flour in the formula, my flour is actually a blend of 30% high-extraction flour and 70% AP flour. The high-extraction flour lends a nuttiness to the overall flavor of the bread, plus an ever-so-slight grainy texture to it making it seem much more substantial than it actually is.
Especially with ciabatta, the crisp, crackly, and crunchy crust combined with the light and airy crumb, redolent with large holes can create a magical bread. A full bake that activates the Meillard reaction (but not taking it to super-dark) can add flavors that would otherwise not be present on lightly baked loaves.
Overall Formula
Unbleached All-Purpose Flour
100.00%
Water
75.00%
Salt
2.00%
Yeast
1.50%
Milk (optional – see below)
10%
Olive Oil
4.00%
MILK?!!! No, I’m not kidding. It actually makes the dough fluffy and soft. This is perfect for sandwiches. You can dispense with the milk though and replace it with water. Definitely do the bassinage stage described below, so mix to an initial 75% hydration, then take it up to 85% with the reserved water.
Final Dough
Unbleached All-Purpose Flour*
525
Water
394
Salt
10
Yeast
8
Milk**
52
Olive Oil
21
Yield
2 X 500g loaves 4 X 250g loaves
Optimal Dough Temp
76°F
*Preferably organic and definitely > 11% protein. You can use Bob’s Red Mill or King Arthur. I use Azure Market AP Flour. **If you don’t want to use milk, that’s okay, just use all water, but milk will help with the fluffiness of the bread.
If you use a baking stone, preheat your oven to 485°F / 250°C to ensure your stone’s hot by the time you’re ready to bake. Things happen pretty quick with this bread, and you don’t want to get to final fermentation and have to wait for your oven to warm up.
Mixing. I recommend using a stand mixer if you have one, but this can be done by hand as well – it just takes longer. Sift the dry ingredients together then add the water. If using a mixer, mix on slow speed to incorporate all the ingredients then go to the second speed until mixture is smooth and the dough climbs to the top of the dough hook as the gluten is starting to form at this point. Rest for 20 minutes.
Bassinage. Once the dough has rested (you may also notice bubbles forming), fold the milk (or water if you decide not to use milk) into the dough until it is fully incorporated. This will get it to 85% hydration. But since the gluten started developing with the thorough mixing, there’s already strength in the dough and it will not feel like a soupy mess. You can actually feel the gluten strands! Once the liquid has been fully incorporated, drizzle the olive oil over the dough, and mix it in well.
Again, I use a stand mixer for this because it’s much more effective at getting the milk and olive oil incorporated.
You want to be gentle with folding and lamination steps. What we’re trying to do is build the gas retention properties of the dough in these steps.
Folding. Once the milk and olive oil have been incorporated, rest the dough for 20 minutes then do a set of stretch and folds. Don’t just do the standard four-fold North-South-East-West. Stretch and fold until you feel the tenacity of the dough building. Rest for 20 minutes.
Laminate. Liberally flour your work surface then gently pour the dough onto it. Gently tug it into a rectangular shape that is about 1/2″ to 3/4″ thick. Letter fold the dough in an NSEW pattern 3 times, gently pressing and flattening the dough between folds. After the last letter fold, roll the dough onto the seam (no need to seal) and shape it into a round. The dough ball should hold together and not collapse too much (don’t worry, it will collapse a bit because of the hydration). Place the dough into a well-oiled bowl seam-side-down (I just wipe down my bowl then spray it with olive oil). Rest for 20-30 minutes (or more) until the dough ball has almost doubled in size.
After laminating, you can go directly to dividing or shaping after the 20-30 rest, or retard the dough in your fridge for a few hours. With this much commercial yeast though, I recommend that your fridge temp is between 36°-40°F. You really want to slow the yeast and promote the lacto- and acetobacillus activity. That said, alternatively, you could use a bit less yeast, say 4 grams and retard the dough for an even longer period of time.
Divide and “Shape.” Again, liberally flour your work surface then pour your dough onto it. Gently tug it into a rectangle, then divide it into two equal pieces (or four if you want to make sub-sized buns). I’m kind of anal about things being even, so I actually scale out my pieces to 500 grams apiece. Gently tug each piece into long rectangles, then transfer to a well-floured couche (as shown to the right). Once you transfer them to the couche, flour your fingertips and gently dimple the loaves to promote even rising – and prevent over-rising, believe it or not – for the final ferment.
Final Fermentation. Cover the loaves and allow them to ferment for 30 minutes or until the dough is nice and relaxed and puffy.
Bake. Liberally sprinkle semolina or rice flour over the loaves while they’re on the couche, then flip them onto your transfer board. Bake the loaves with steam at 485°F for 12 minutes. Remove your steaming container, turn your oven down to 435°F, then bake for 20-25 minutes or until the crusts are a deep golden brown. You don’t want to go out to dark brown/black with these as the dough doesn’t have enough complexity in flavor to compensate for a super-dark crust. That’ll be the predominant flavor and the bread will taste like burnt toast. Not good. However, a deep golden-brown crust will also be relatively thicker lending a nice, textural quality. I realize that this veers from the traditional thin crust of ciabatta, but I love the textural contrast between the crunchy crust and the soft, pillowy crumb.
These are best eaten warm, so let cool for 30 minutes, then enjoy!
I don’t really think about it because I’ve made it so much, but ciabatta’s a challenging dough with which to work because of its hydration level. You have to make quick, precise movements with a dough like this. But the handling of the dough is mitigated by the bassinage. I just can’t stress enough how important that step is!
When first mixing the dough, it’s at a workable 75%. This allows us to work it and develop the gluten and thus dough strength early on in the process. Once the milk and olive oil are added, even though dough may appear to be a smooth batter, if you pull on it, you’ll see that it actually transforms into a highly extensible dough with all the wonderful gas-retention properties we expect! (Read: big holes)
And let me re-emphasize that the craftsmanship put into making bread like this is tantamount to its quality. But be that as it may, as a straight dough, it doesn’t really have a lot of complexity in flavor. That said, done right, it becomes a canvas on which you can build wonderful dishes.
I love using this bread for dipping into a fine olive oil (my preferred brand is Segreto from Italy that I have my daughter bring from New York City) mixed with a well-aged balsamic vinegar. I’ve used this bread for bruschetta as well. And let’s not forget that its very shape lends itself for wonderful sandwiches! Gawd! I’m getting hungry just thinking about these things! 🙂
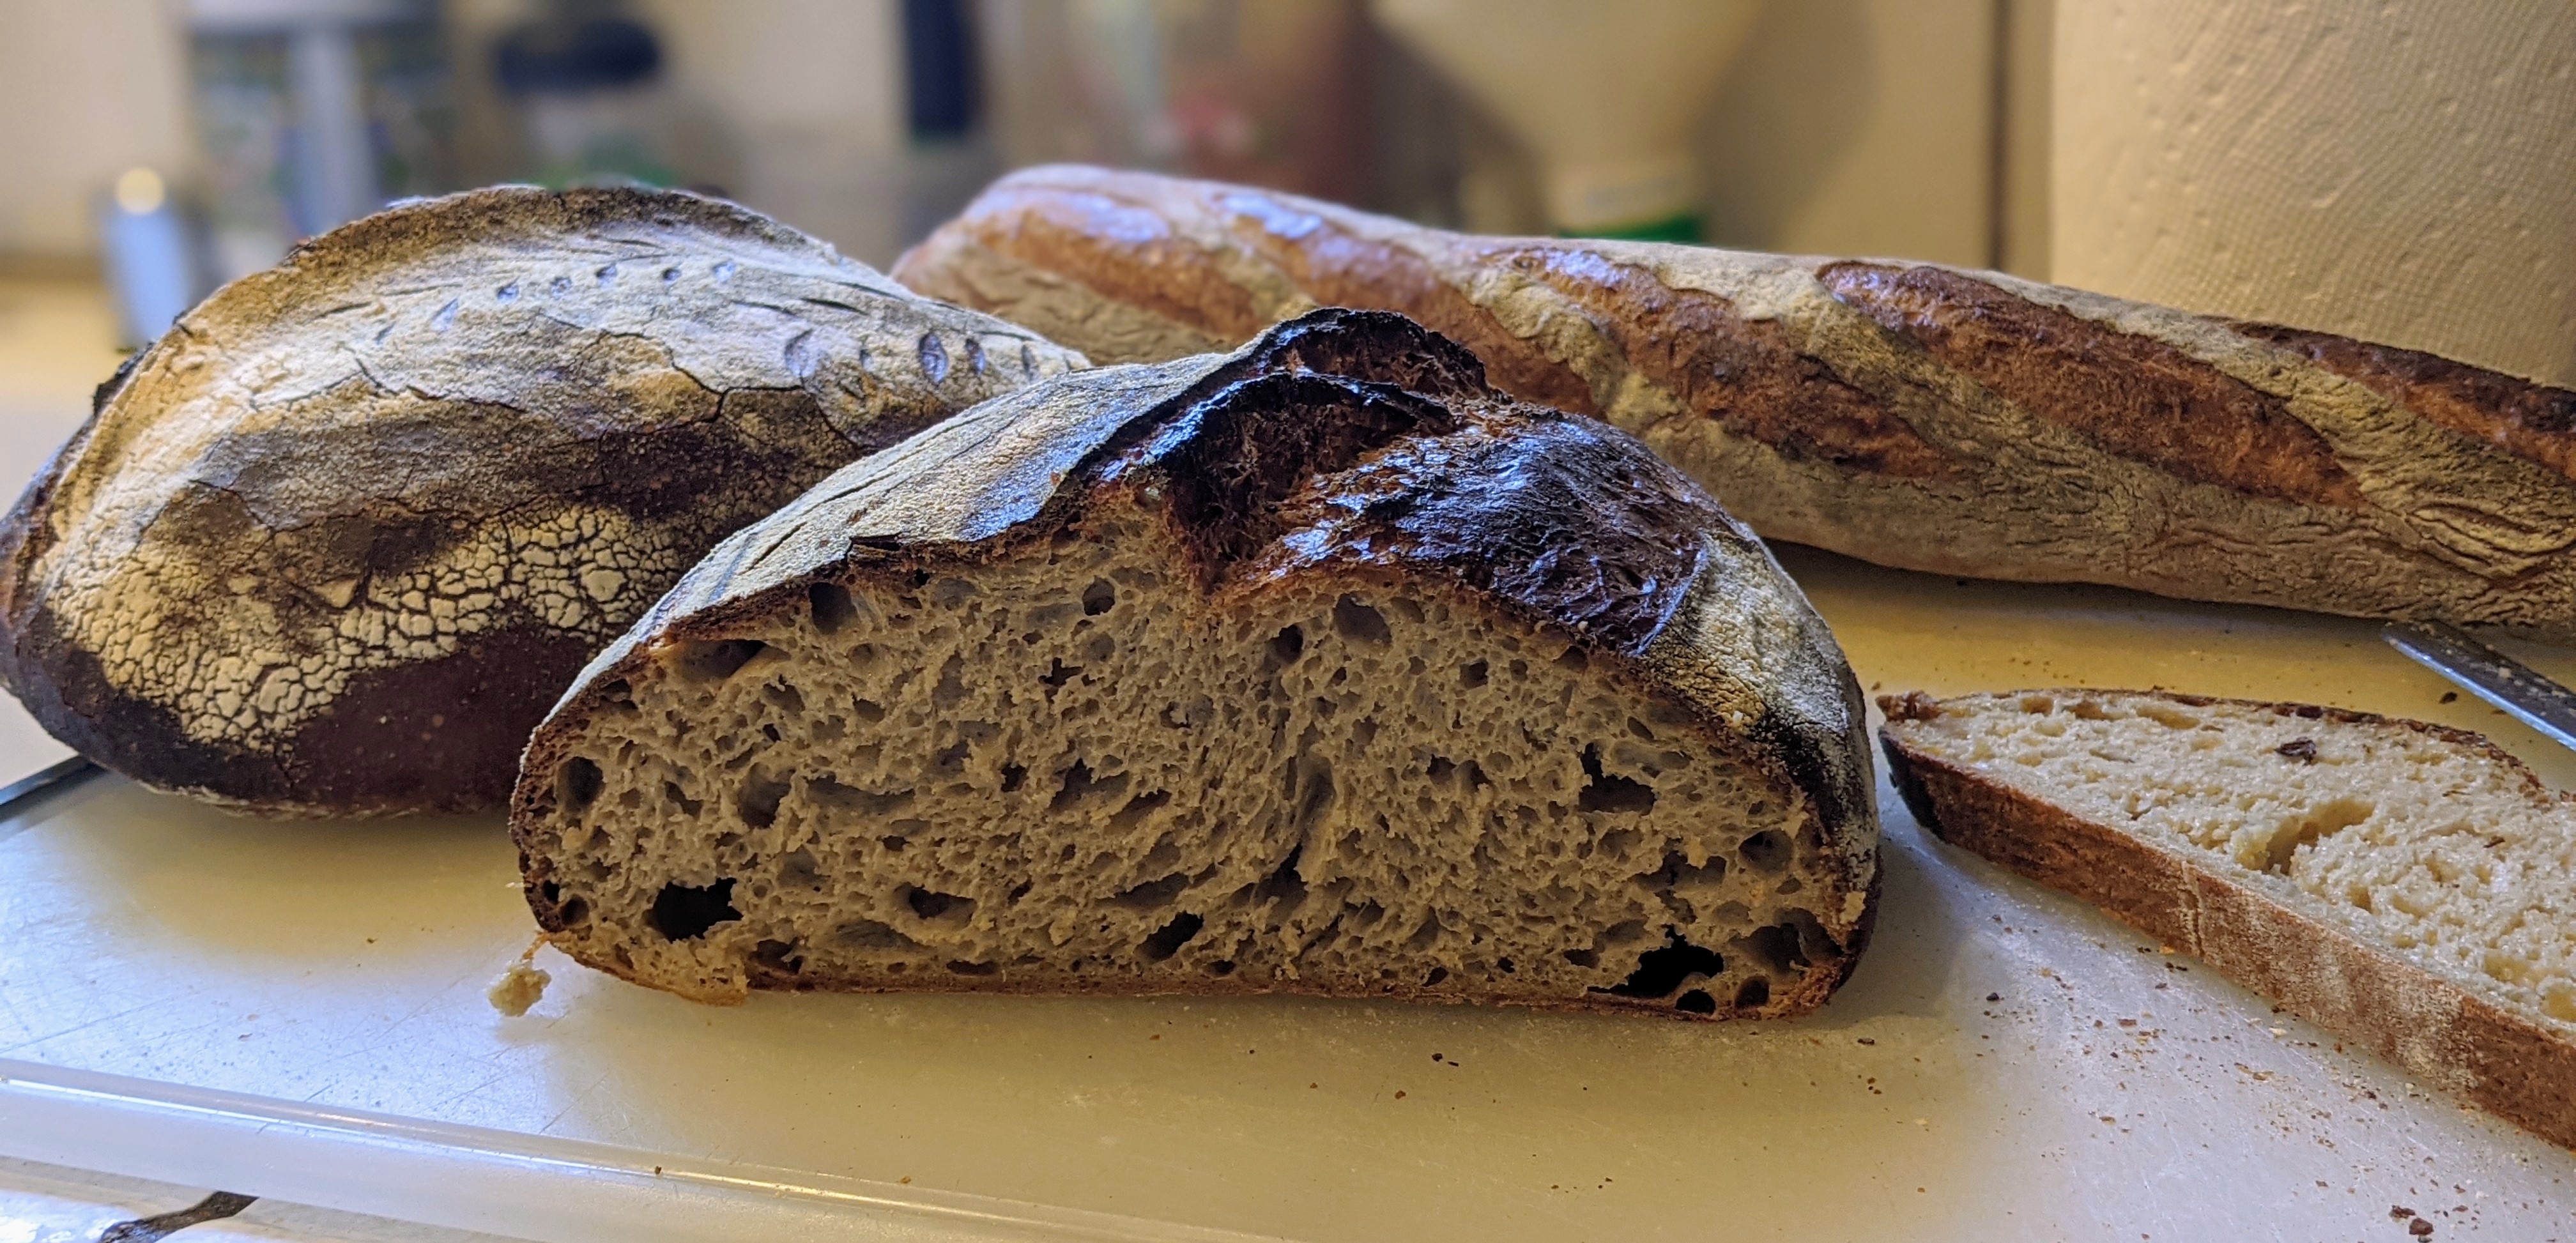
The way I learned to make baguettes was from Master Chef Markus Farbinger, who uses a slow rise or pointage en bac method. It is a straight dough, but bulk fermented and retarded overnight. This allows the amino acids and lacto- and acetobacillus bacteria to develop, while retarding the activity of the yeast. The results, as shown in the picture to the left, are pretty magnificent.
But I learned another technique called Baguettes de Tradition from Jeffery Hamelman’s book, “Bread” that he learned from Japanese bakers. This is a straight dough that differs rather significantly from slow-rise baguettes. First of all, these baguettes are baked in just a few hours from the final mix, so you’re working with room-temperature dough. Second, where I would normally use an 11.7% protein AP flour mixed with about a third high-extraction flour, this recipe calls for 100% bread (strong) flour. And finally, this is a wetter dough than what I’m used to using at 76% hydration.
As Hamelman puts it: “…a baker could be excused for concluding that the dumpster and not the belly is the destination for the bread.” This is because mixing is done gently, so after mixing – even using a stand mixer – there’s virtually no gluten development! The dough just comes apart. But with the folding schedule, the gluten develops quickly, and by the last fold, the dough is luxuriously smooth and supple – and strong.
Chef Hamelman warns that this is a challenging bread and certainly not one for beginners. I can attest to this as the dough at this hydration using pure bread flour is tacky and will easily stick – especially since you’re handling a room temperature dough. So keep your hands floured when shaping and use quick motions!
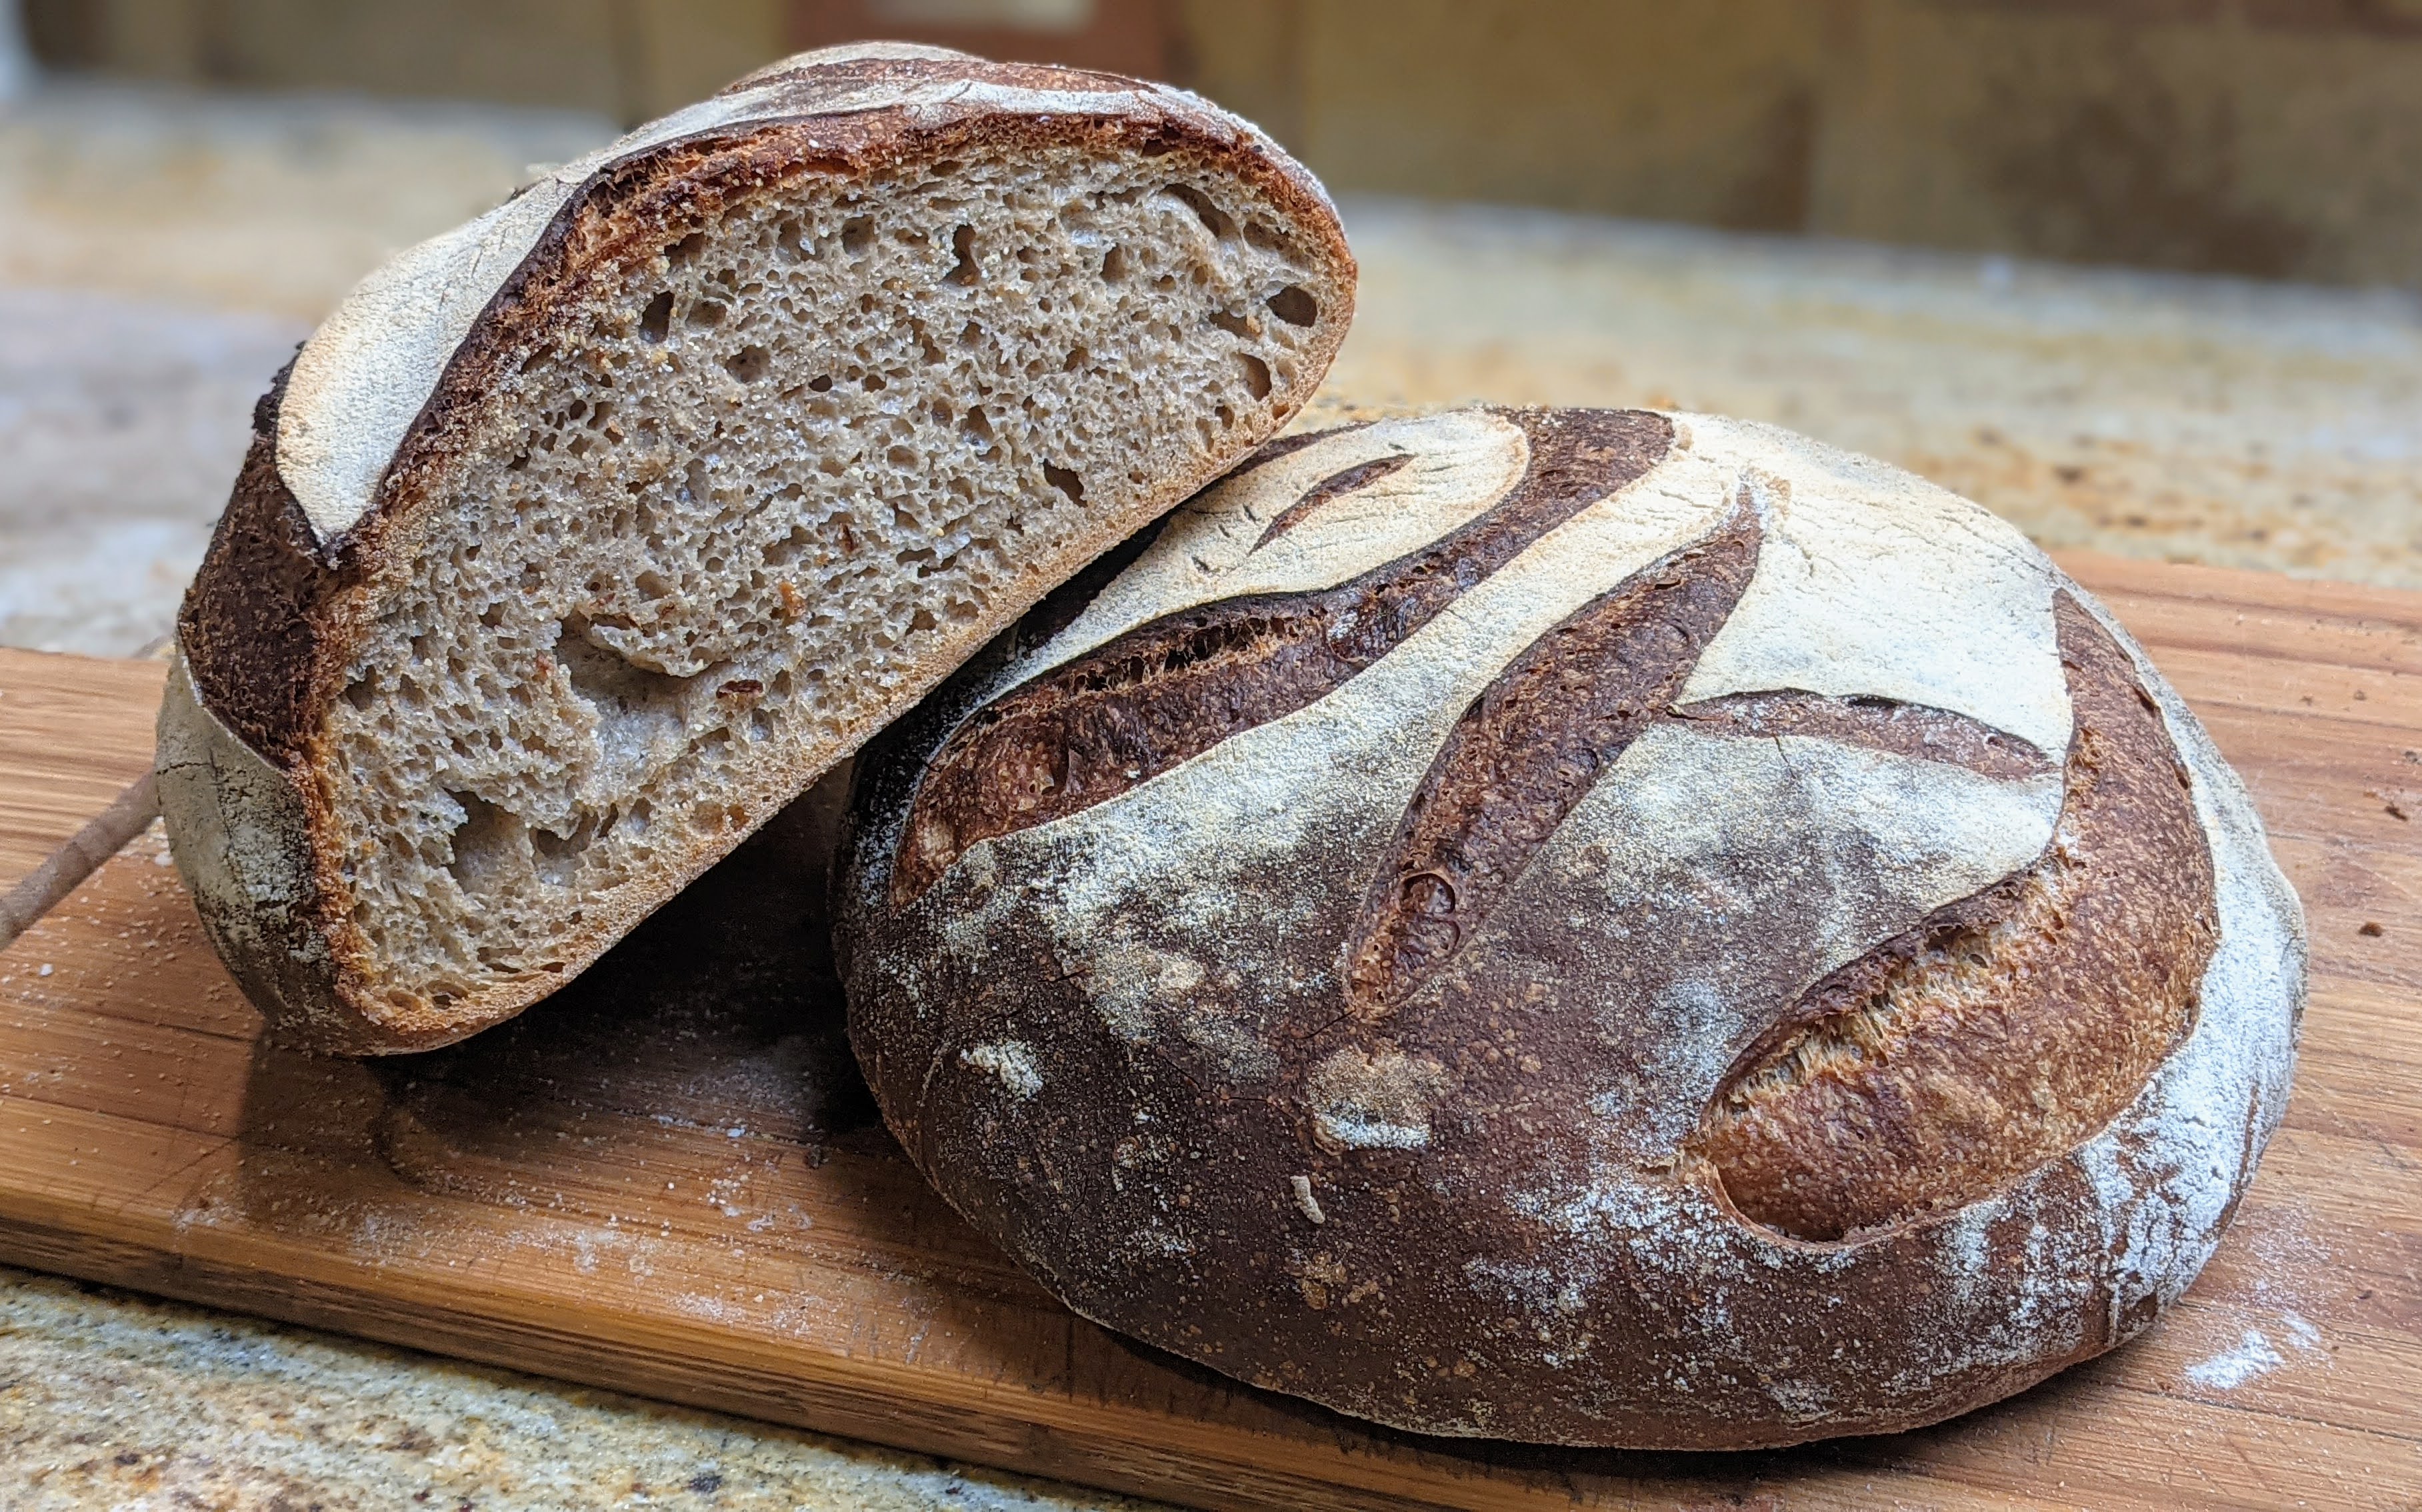
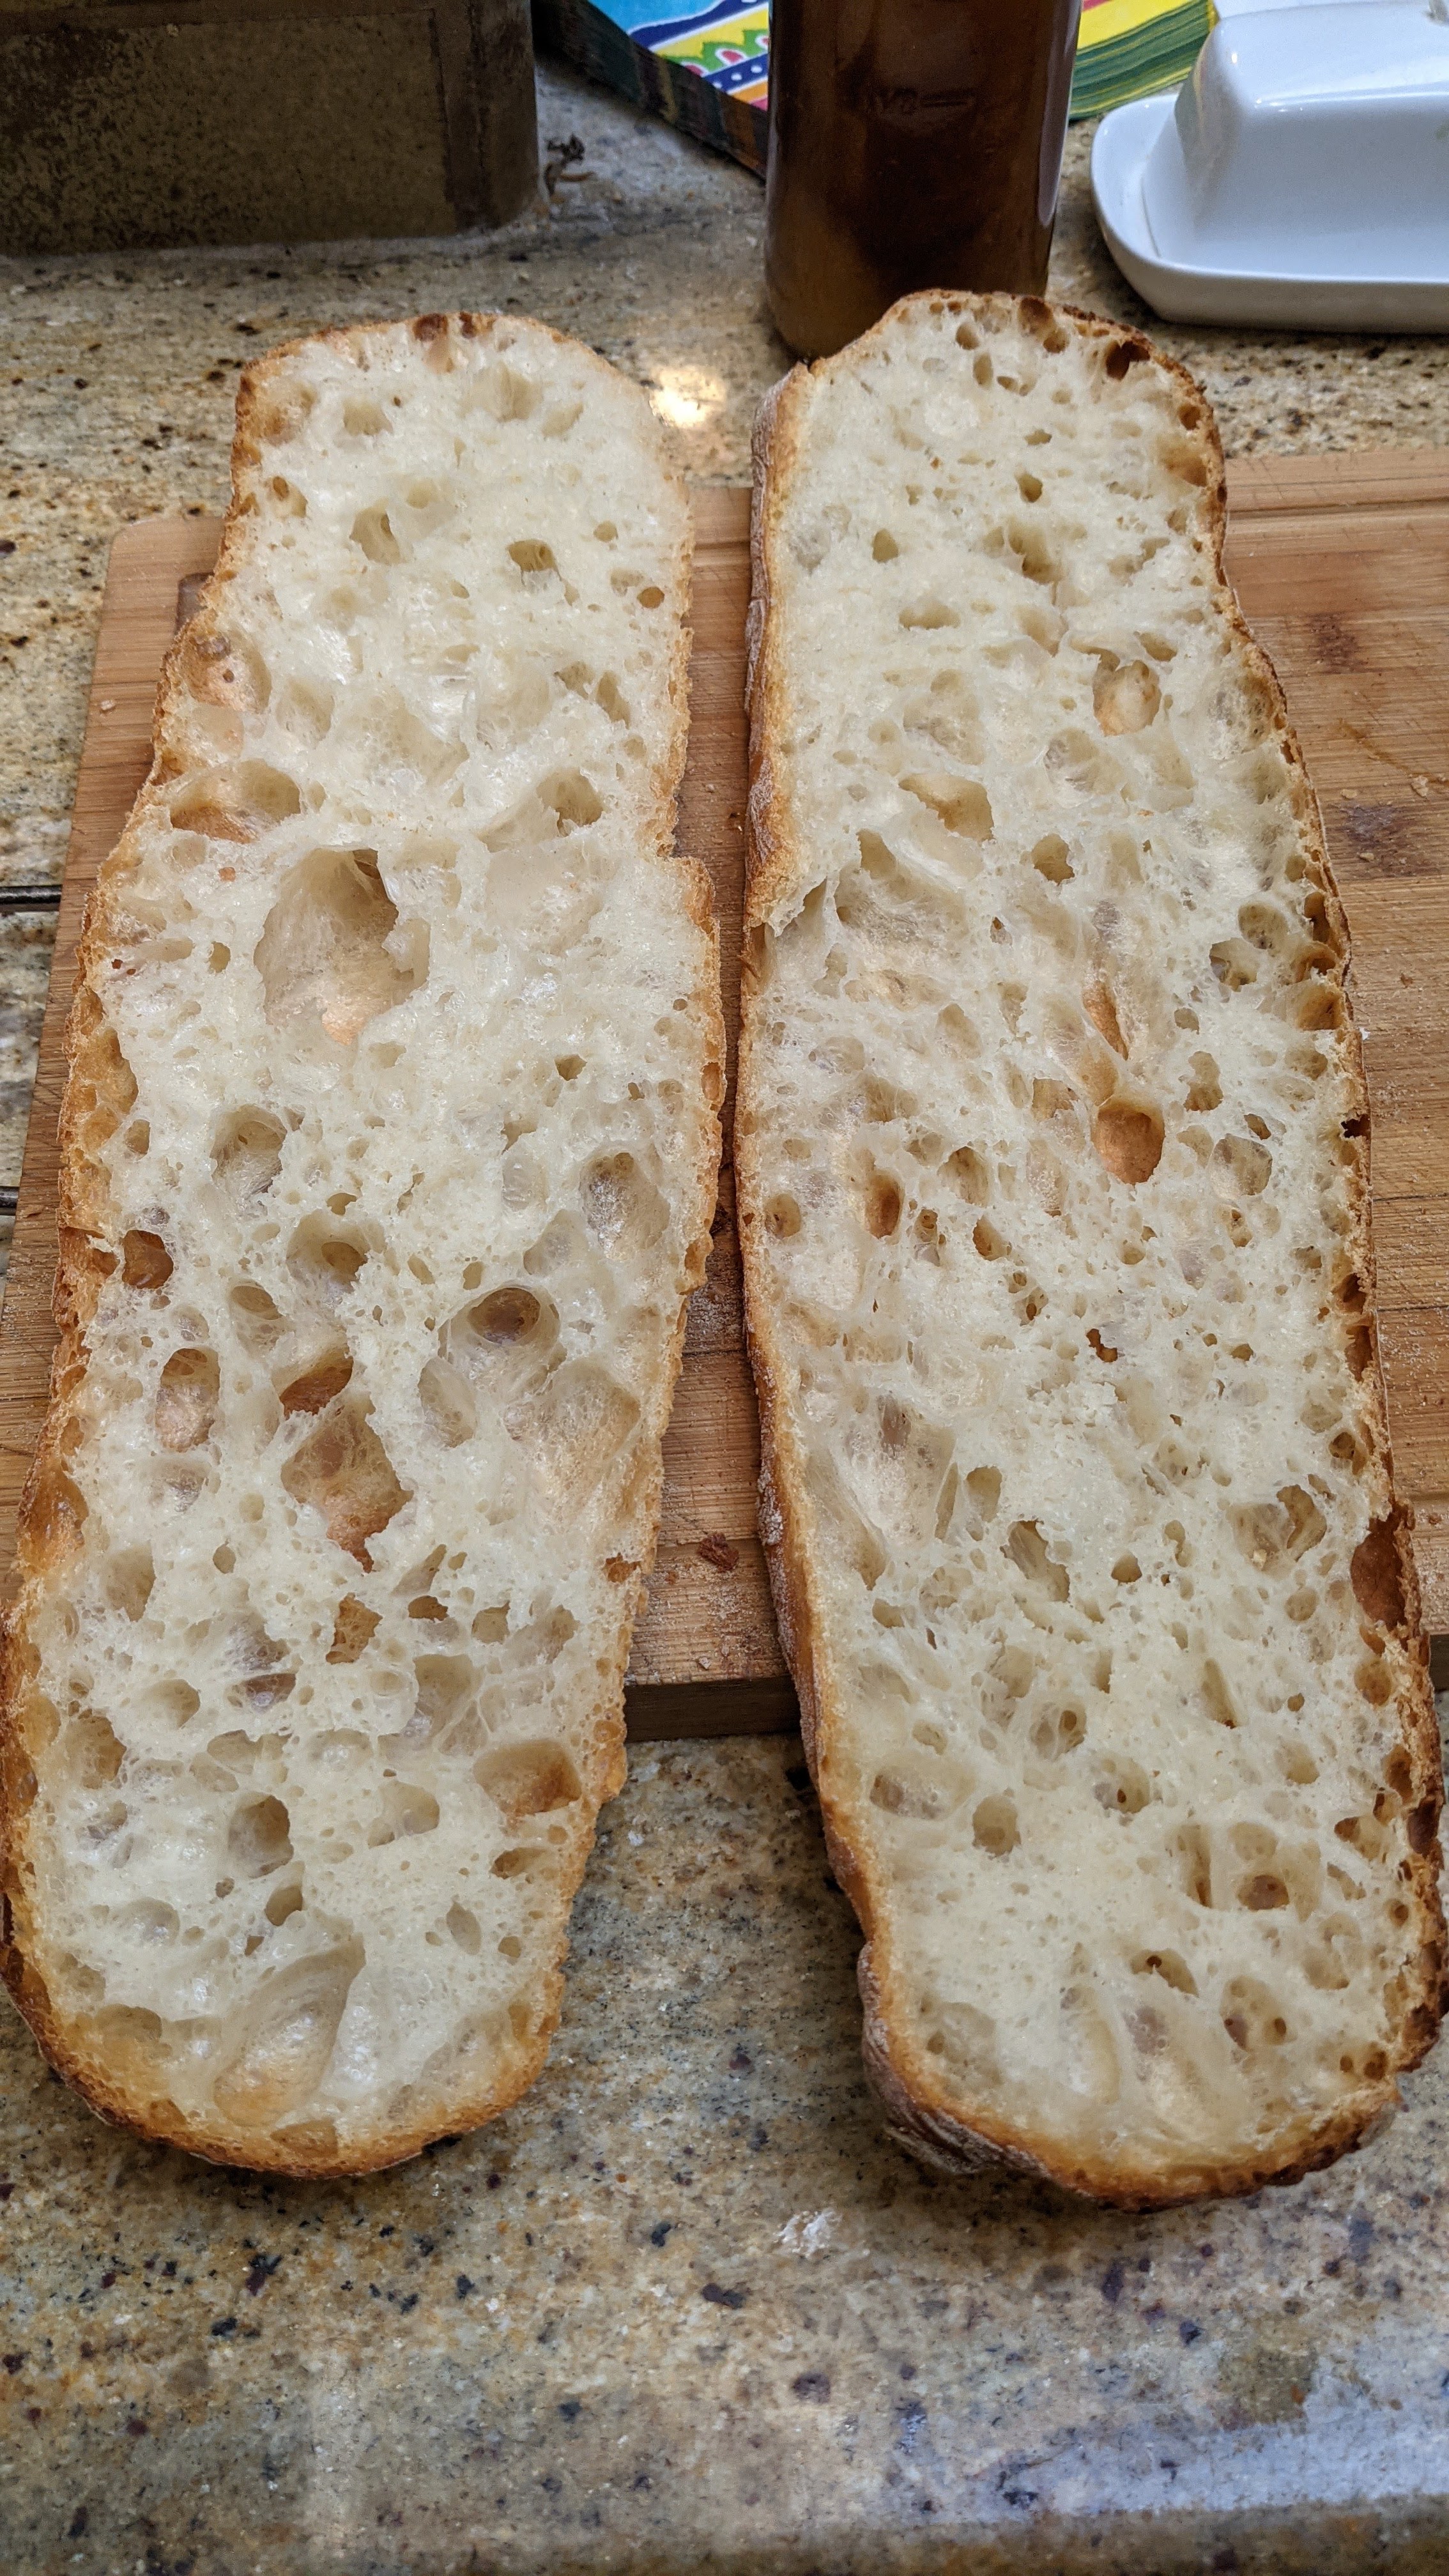
But the end result is pretty fabulous. You will notice right away when the loaves come out of the oven, that you will not get pronounced ears. This is because with these particular baguettes, you minimize the creation of a skin during shaping. The crumb is significantly different from my other baguettes in that there were not many huge voids. But that could be more of a function of how I handled them during shaping. But in spite of that, the texture of the crumb is magnificent, redolent with numerous pockets.
Overall Formula
Ingredient
Bakers %
Bread Flour
100%
Water
76%
Salt
1.8%
Yeast
.75%
Total
178.55%
Final Dough
Flour
769
Water
585
Salt
14
Yeast
6
Total Yield
4 X 340g pieces
Optimal Dough Temp
76°F
Especially with this recipe, before you get started, I highly recommend sifting your flour to avoid creating lumps which are a pain to get out, especially if you’re mixing by hand.
Mix. Combine flour, salt, yeast in a mixing bowl and mix thoroughly until all the dry ingredients are well incorporated. Whether or not you use a stand mixer, gradually add the water until you form a shaggy mass, then stop. I know that it might not make any sense, but believe me, the end result will be pretty amazing!
The dough is a shaggy mass after the initial mix
Bulk Fermentation. 1.5 to 2.5 hours (could be shorter) depending on the ambient temp of your kitchen. I know it’s a wide margin, but on hot days, things will happen quickly! Do not take bulk fermentation out too far, otherwise, you will shorten the final fermentation, and a lot of the final magic of creating nice holes happens there. I recommend 50%-75% volume expansion.
Right before the second fold. The dough has already started puffing up and is well-domed at the top!
Folding. During the first hour, gently stretch and fold the dough at 20, 40, and 60 minutes, being careful not to degas the dough too much. For each folding session, make sure to stretch the dough to its extent without tearing it and feel the tension and tenacity build up in the dough – eventually, it will fight you and not want to be stretched. When you’ve finished folding, turn the dough onto the seams. By the end of the third fold, you will have a very luxurious and supple dough! I never cease to be amazed by the transformation, plus the gentle, but frequent folding in the first hour really helps build the gas-retention properties of the dough. As such, I use this folding technique for all the baguettes I make!
Pro Tip: Wet your folding hand often!
By the end of the third fold, the dough is super-strong and smooth, with proonounced bubbles inside. This picture was taken about a minute after I turned it over on its folds to show how well it holds together.
Divide and Shape. Divide the dough into 4 equal pieces (for this recipe, they’ll be 340g). Gently letter fold each piece, pulling one side over two-thirds of the dough, then repeating that on the other side. Roll against the seam like a jelly roll, seal the seam, then place seam-side-up on a well-floured couche. Let rest for 15-30 minutes ensuring the dough has sufficiently relaxed before shaping. Shape into baguettes then transfer back to the couch for final fermentation.
Final Fermentation. 30-90 minutes depending on ambient temp. No matter how gentle you are, shaping a baguette is a bit of a violent affair on the dough. This is why you want to leave as much room for final fermentation to let the dough recover from the shaping process. Use the poke test at about 30 minutes to see how fast the dough pops back up. If it’s real quick and leaves no mark, then it’s not ready. Check it after 15 minutes to see how things are progressing. It’s a real feel thing with baguettes!
After final fermentation, baguette loaves should be puffy. Note that the skin on these is very delicate so scoring must be quick and decisive. You cannot pause the blade.
Bake. Bake at 475°F with steam for 15 minutes. Remove the steaming container, then bake at 425°F with convection (if you have it) for 15-20 minutes. If you don’t have a convection setting, finish the bake at 435°F. When you remove the loaves from the oven, check how they weigh in your hands. They should feel lighter than they look and the crust should not be soft. It will soften a bit later but fresh out of the oven, it should be firm and a bit crackly. If you feel they still have a little mass or if the crust is soft, pop them back into the oven for a few minutes.
Finished product. I kind of messed up on the shaping of these, but they generally turned out fine. The crust should have a slight sheen and the crumb should be riddled with holes of various sizes.
Notes
Though I provided specific ingredient amounts in the table above, I always work backwards in figuring out how much of the ingredients I need. For instance, for my oven, my standard batch is 4 baguettes scaled out to 335g apiece. So I know I’ll need 1340g of dough. I always add a fudge factor of about 1% due to loss during processing, so I’ll up that to 1350g. Given that, I can easily calculate the flour I’ll need by dividing the total yield of 1310g by the total of the percentages – in our case here it’s 178.55%. So 1310 / 178.55% = 734g of flour. From there, I can just use the ingredient percentages to figure out the amounts for the rest of the ingredients.
As far as scaling out the pieces is concerned, officially, a baguette should be 60 cm in length and weigh 250 grams. I’ve found through experimentation that I can get there if I scale the baguettes to 335 grams. However, I myself prefer a little bit wider baguette, so I scale my dough out to 340 grams. But as a rule of thumb, I use a factor of 5.5 or 5.6 and multiply that by the length of the baguette I want to make. This factor is basically dough weight/centimeter. 40cm demi baguettes typically scale out to 220g.
As with any high-hydration white flour dough, this dough is tacky! I can’t stress enough the quick, definitive movements I had to make to work with this dough. I also had to make sure that during shaping I was dipping my hands in my pile of flour to prevent sticking.