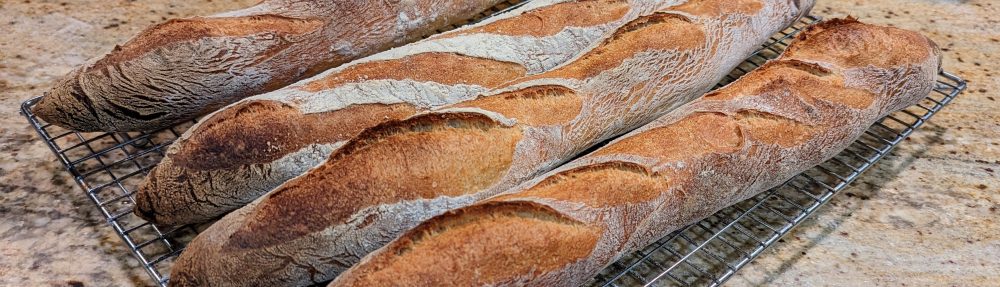
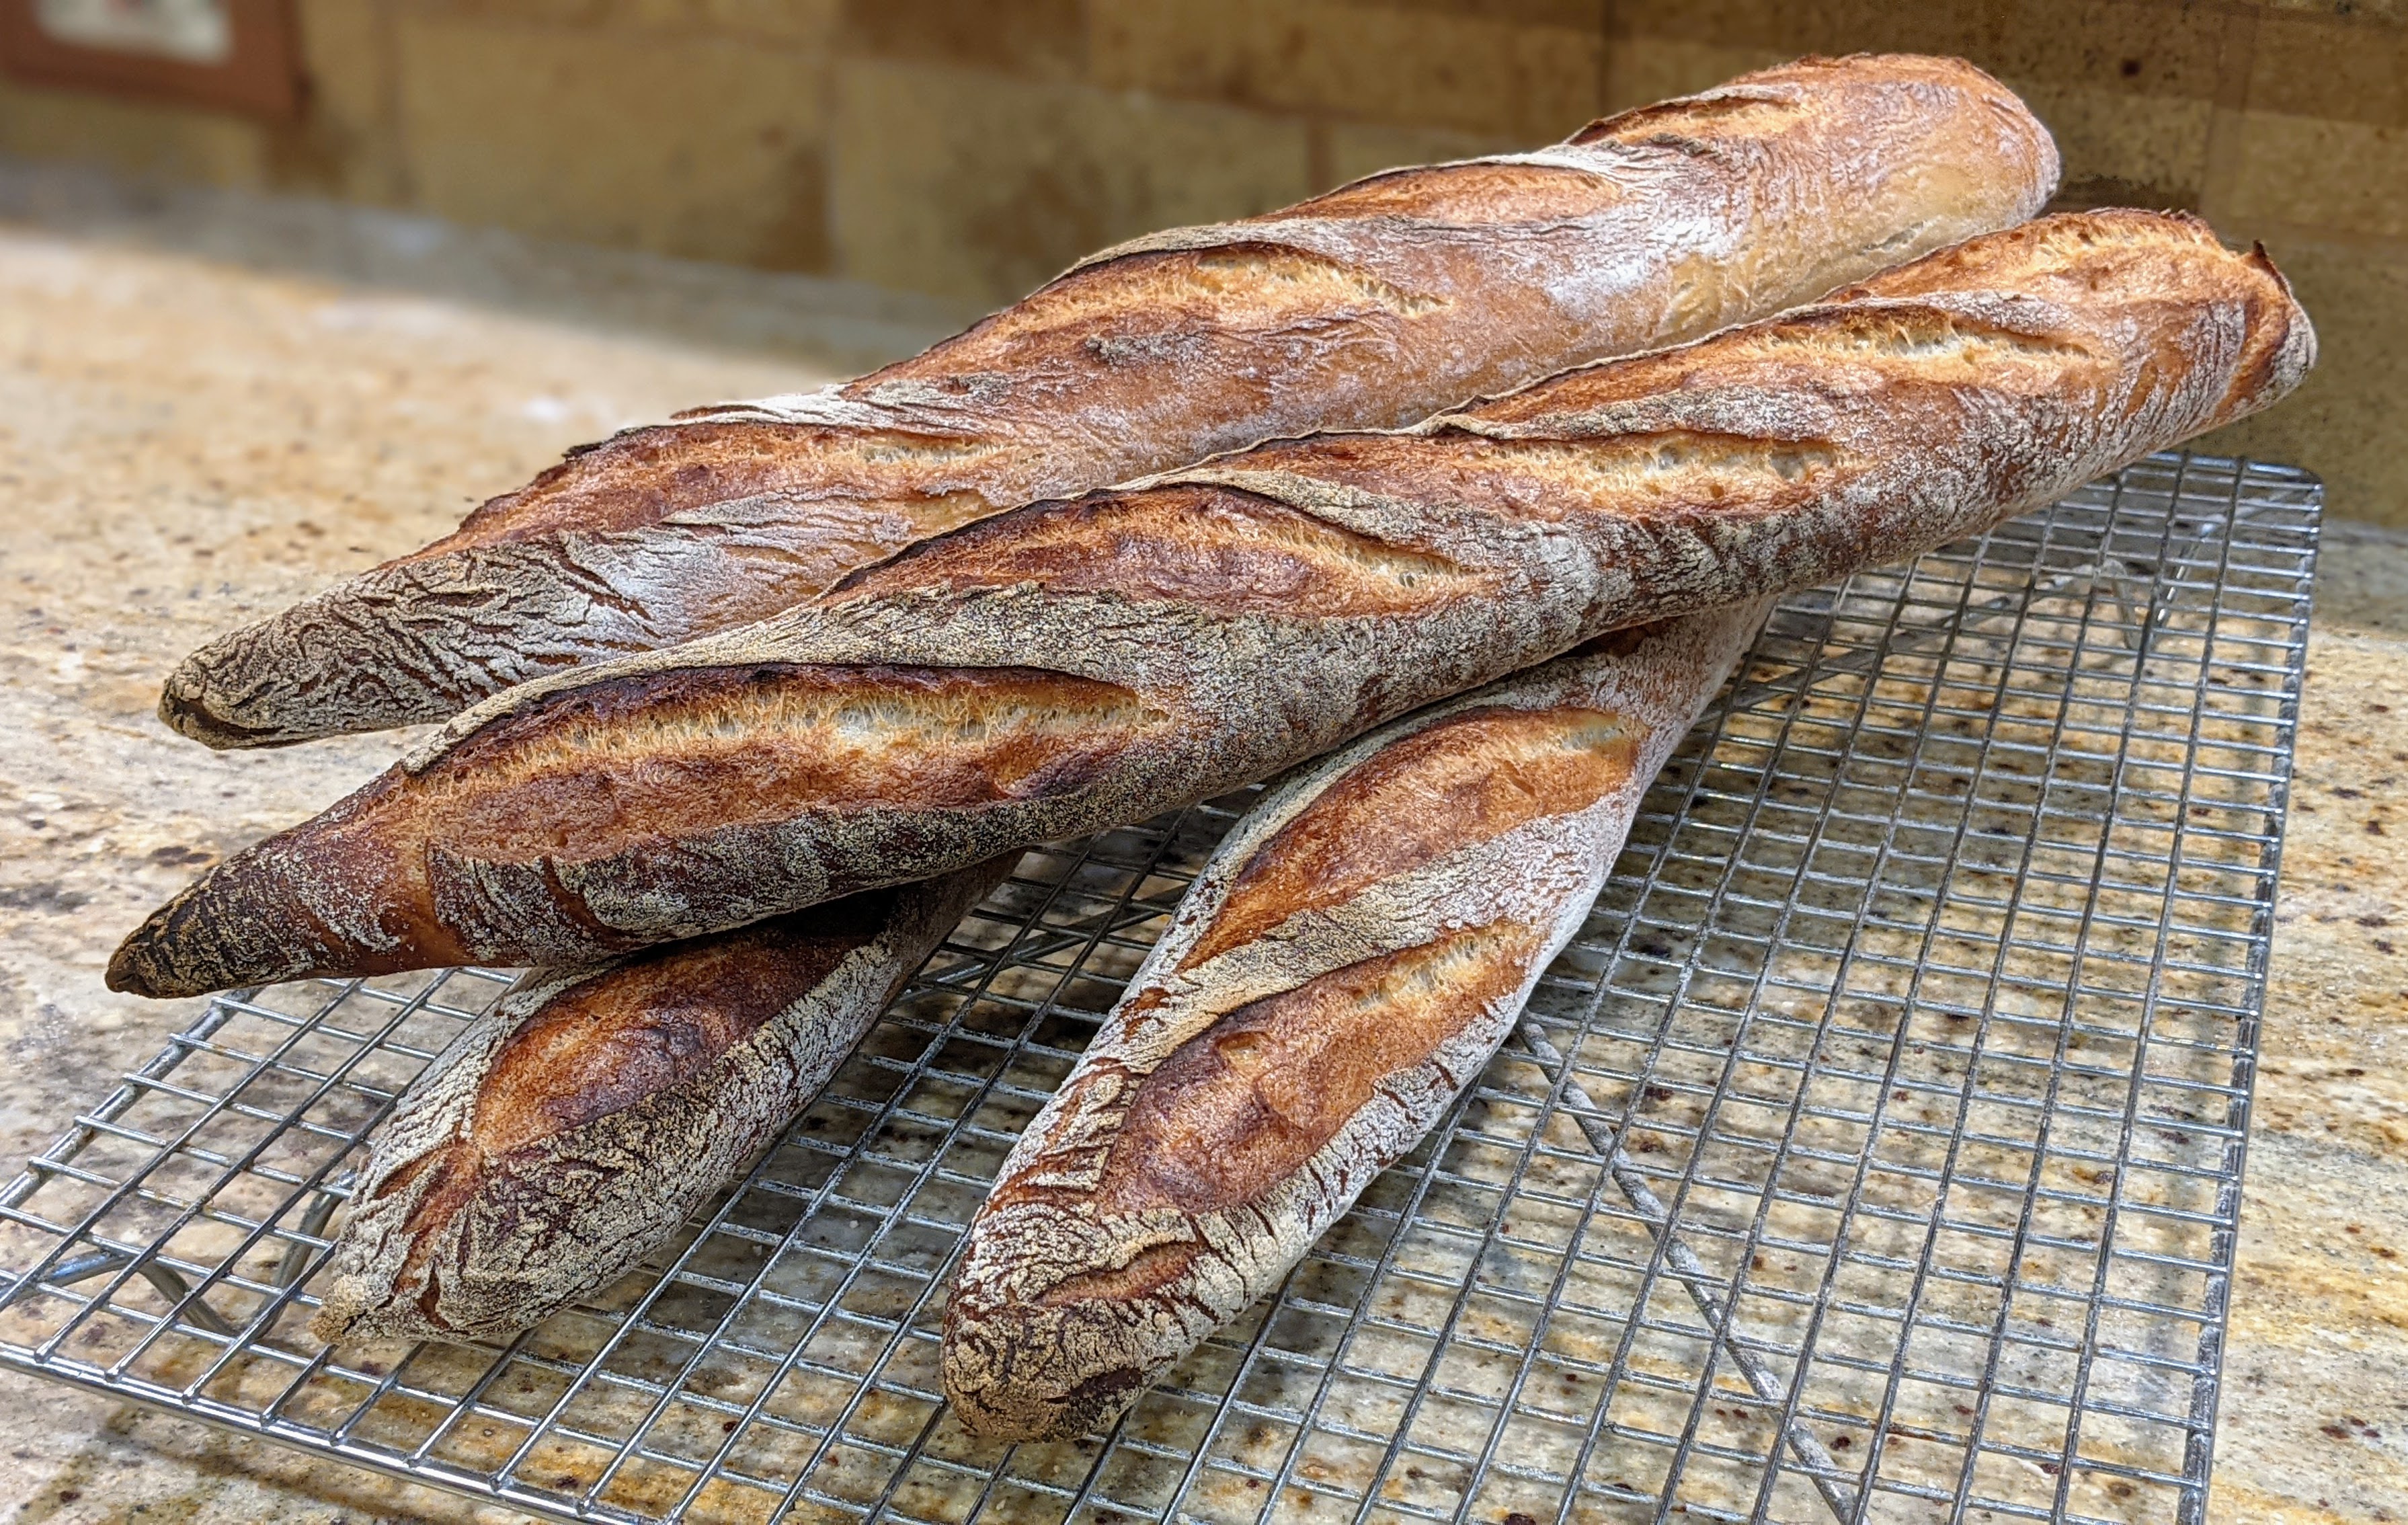
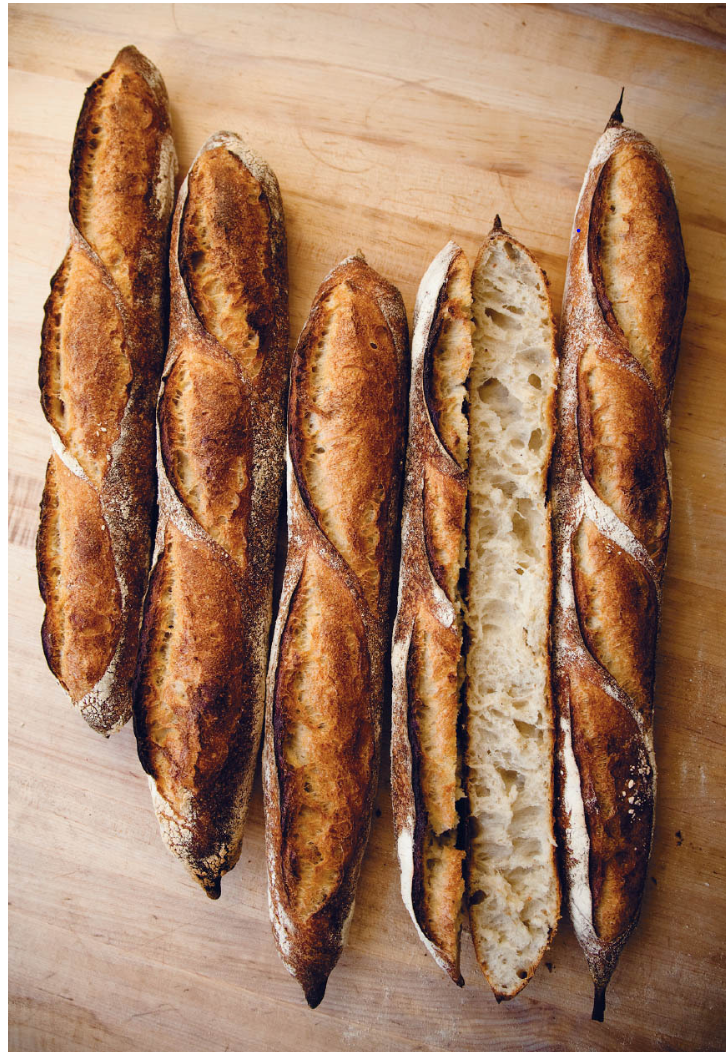
I’m surprised I haven’t posted a recipe for my poolish baguettes after all this time! I suppose I’ve been making pointage en bac baguettes for so long I completely forgot about these. But this evening after dinner I thought about what I’d like to bake and it occurred to me that I hadn’t made poolish baguettes in a long time. So I prepared a poolish for a nice 10-12 hour ferment. I can’t wait to bake them tomorrow morning!
What’s so special about using a poolish? The standard answer is that it adds flavor as the long fermentation time of 6-18 hours allows longer enzymatic activity adding to the complexity of the flavors of the dough. Plus, with the very small amount of yeast used, the bacteria have some time to do their thing and release organic acids into the dough. That adds flavor, but the acid also helps in making the dough more extensible. Cool stuff!
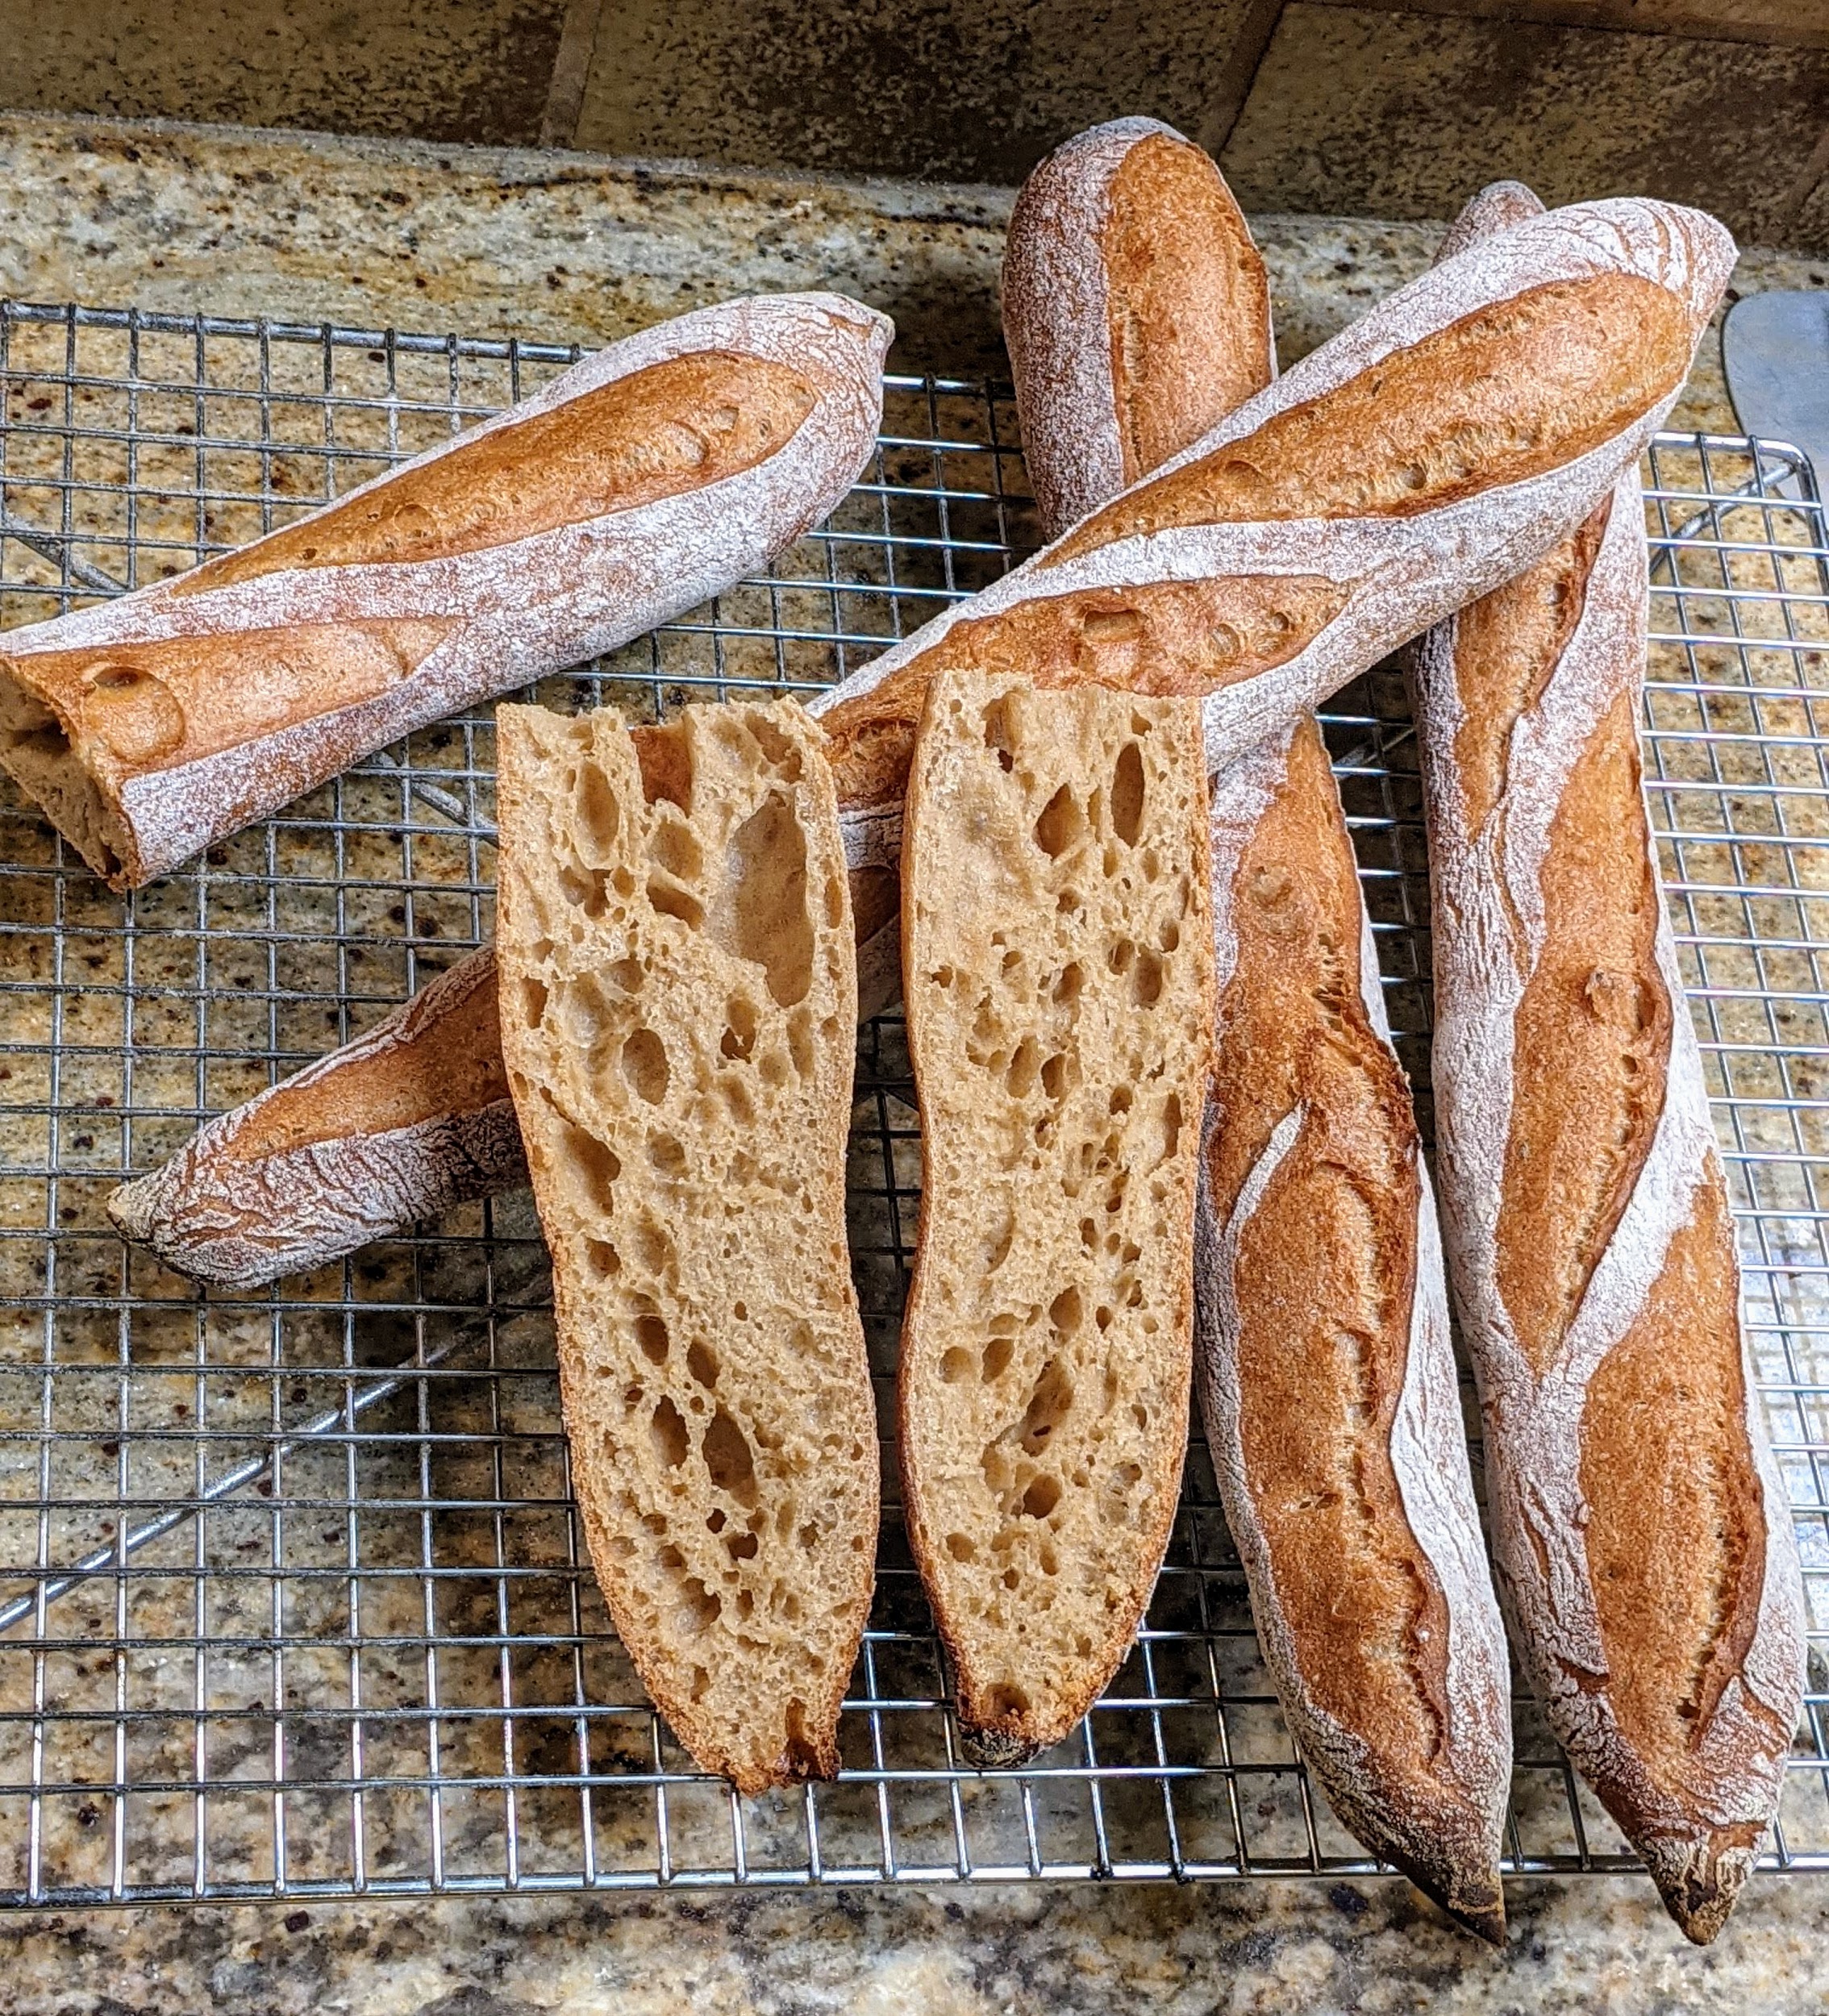
With these baguettes, the flour of the poolish represents 25% of the total flour of the recipe. Or put in simpler terms, the poolish weight is 50% of the total flour.
Overall Formula
Flour
100.00%
Water
75.00%
Salt
2.00%
Yeast
0.43%
Poolish
AP Flour
200g
Water
200g
Yeast
0.2g
Final Dough
Flour – You can use different flour blends. It doesn’t have to be only bread and AP flour.
571g
Water
381g
Salt
15g
Yeast
1g (cold ferment) 3g (room temp)
Preferment
381g
Total Yield
1353g 4 X 335g 55-60cm loaves 6 X 225g 40cm loaves
Optimal Dough Temp
78°-80°F
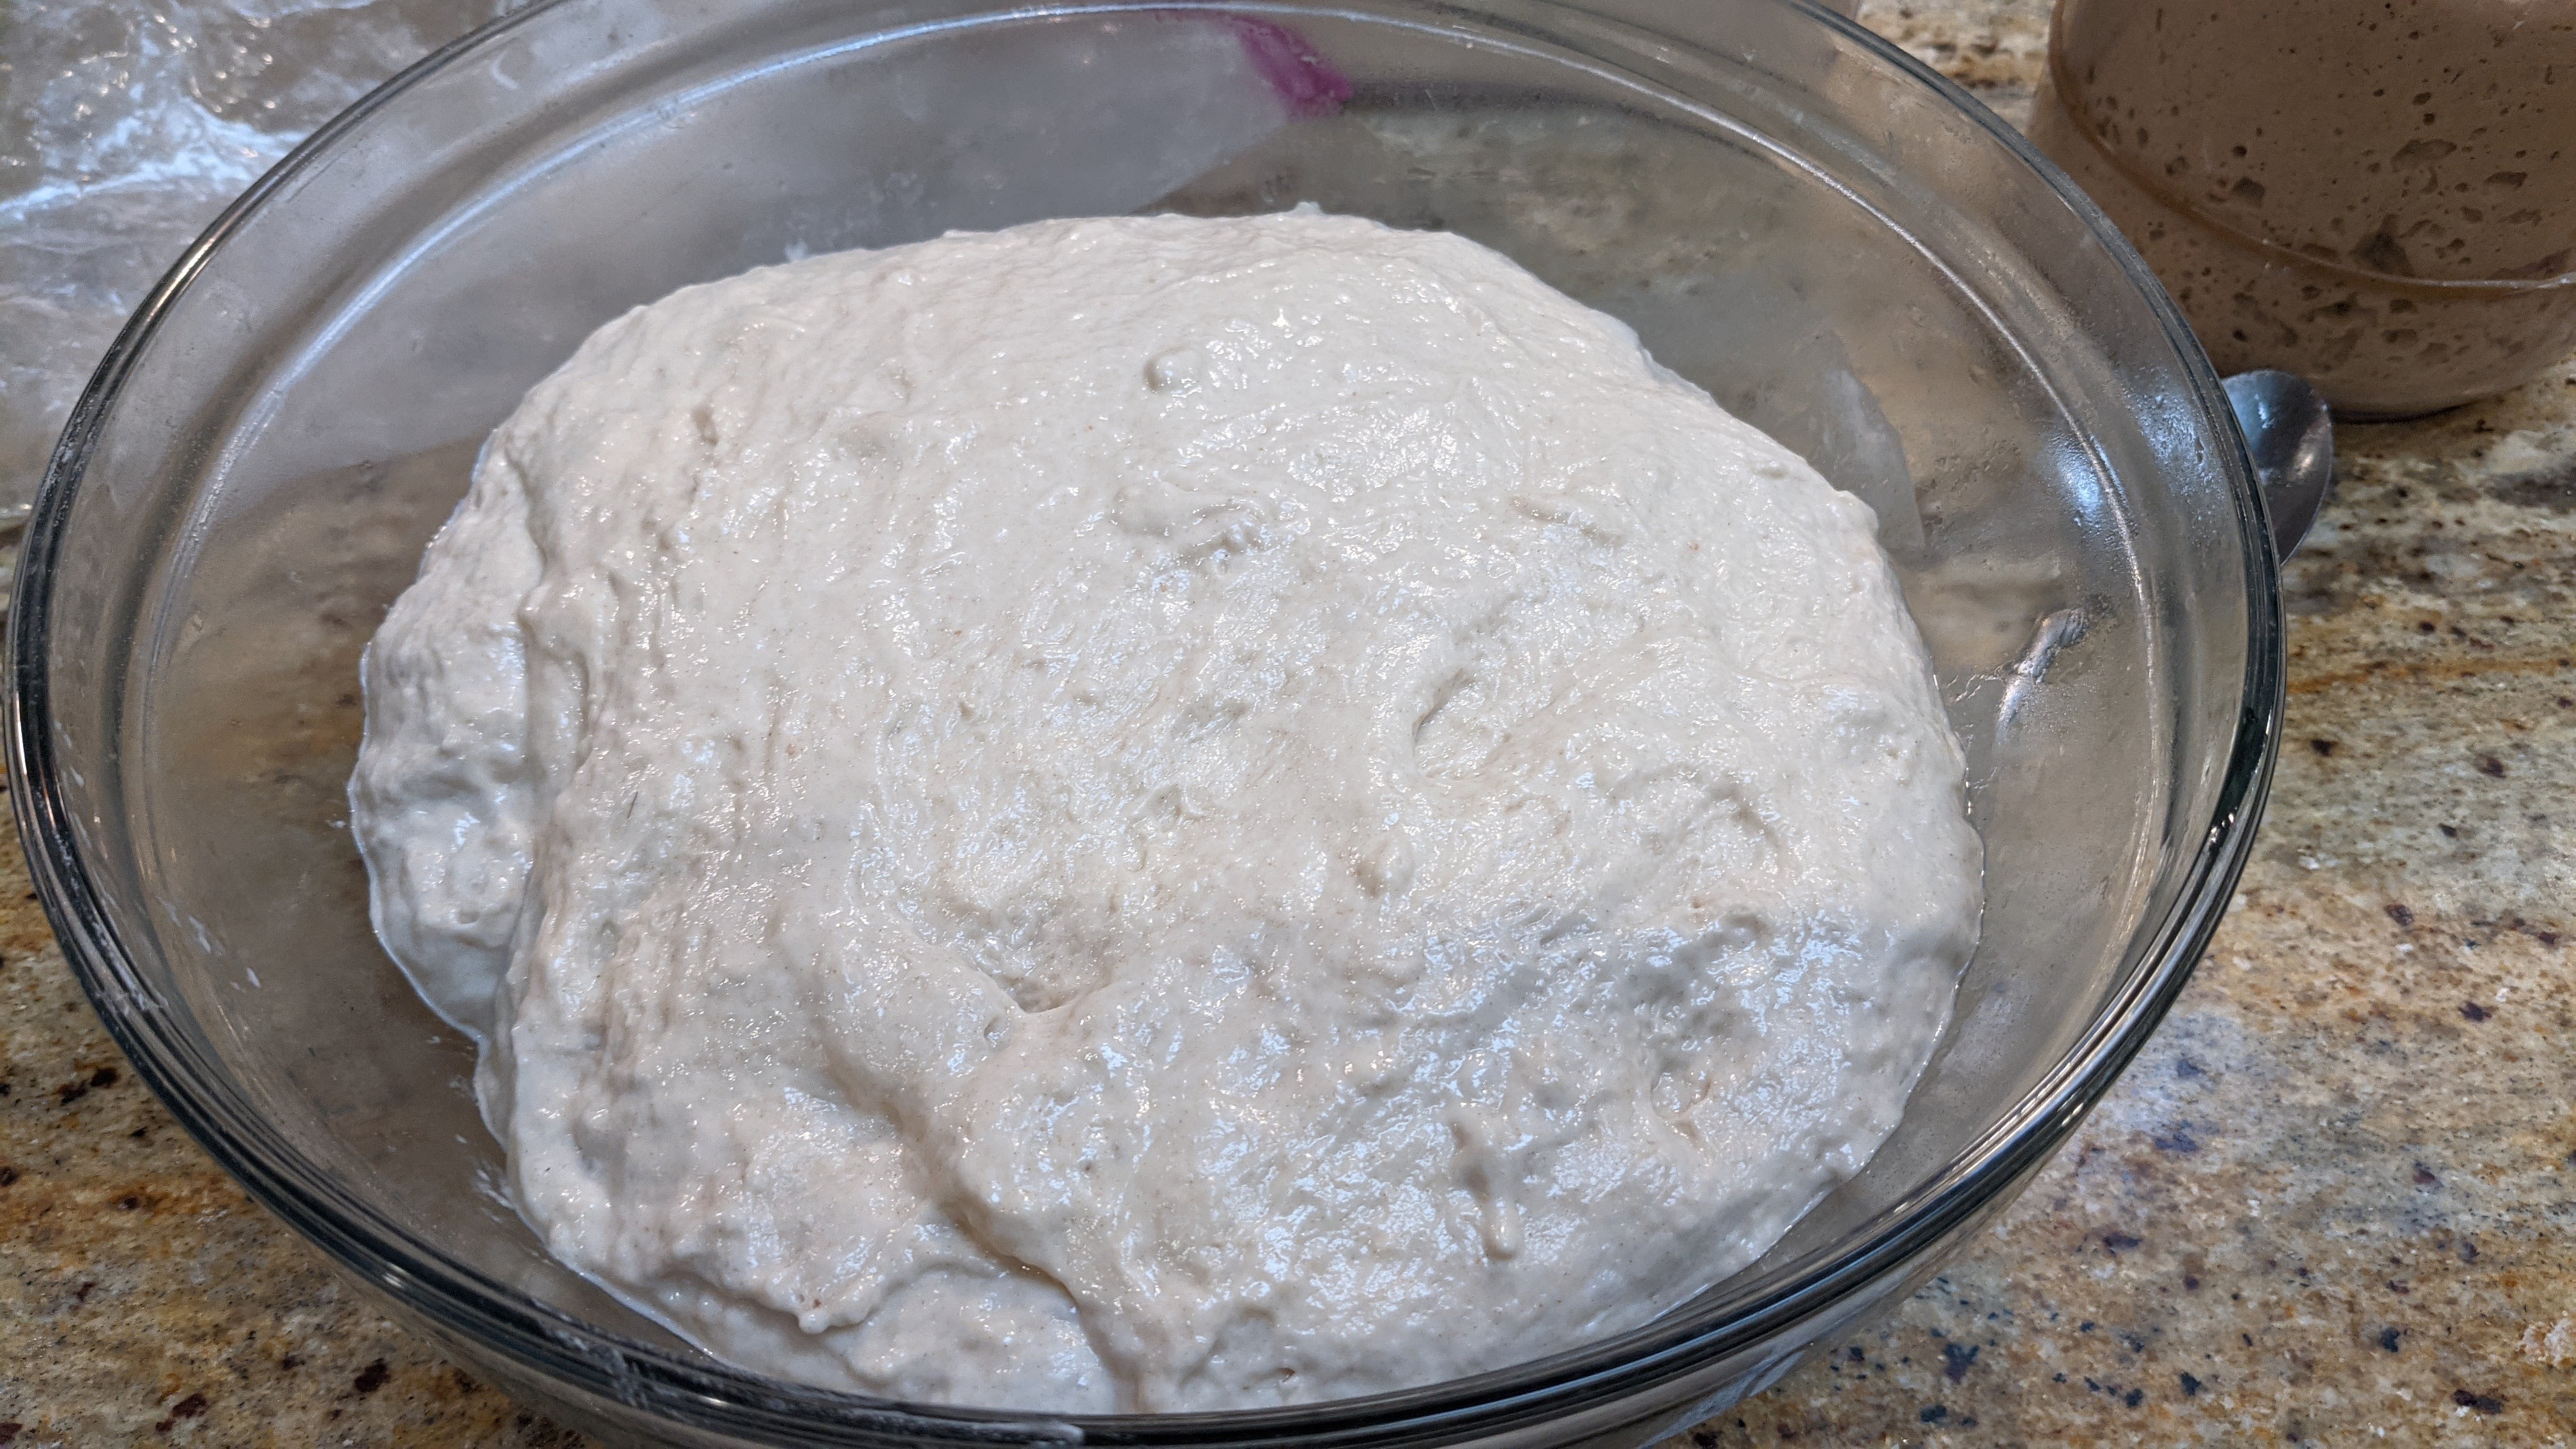
Make the Poolish. Though the recipe only calls for 381g of poolish, I recommend making 400g, as there will always be some loss in the process. Combine all ingredients in a bowl, cover with plastic and let sit overnight at least 6-8 hours. The poolish will be ready when it’s nicely bubbled on top and passes the float test (it could be doubled, but don’t necessarily rely on that). Note that in cooler weather, the poolish will take longer to mature, sometimes up to 18 hours.
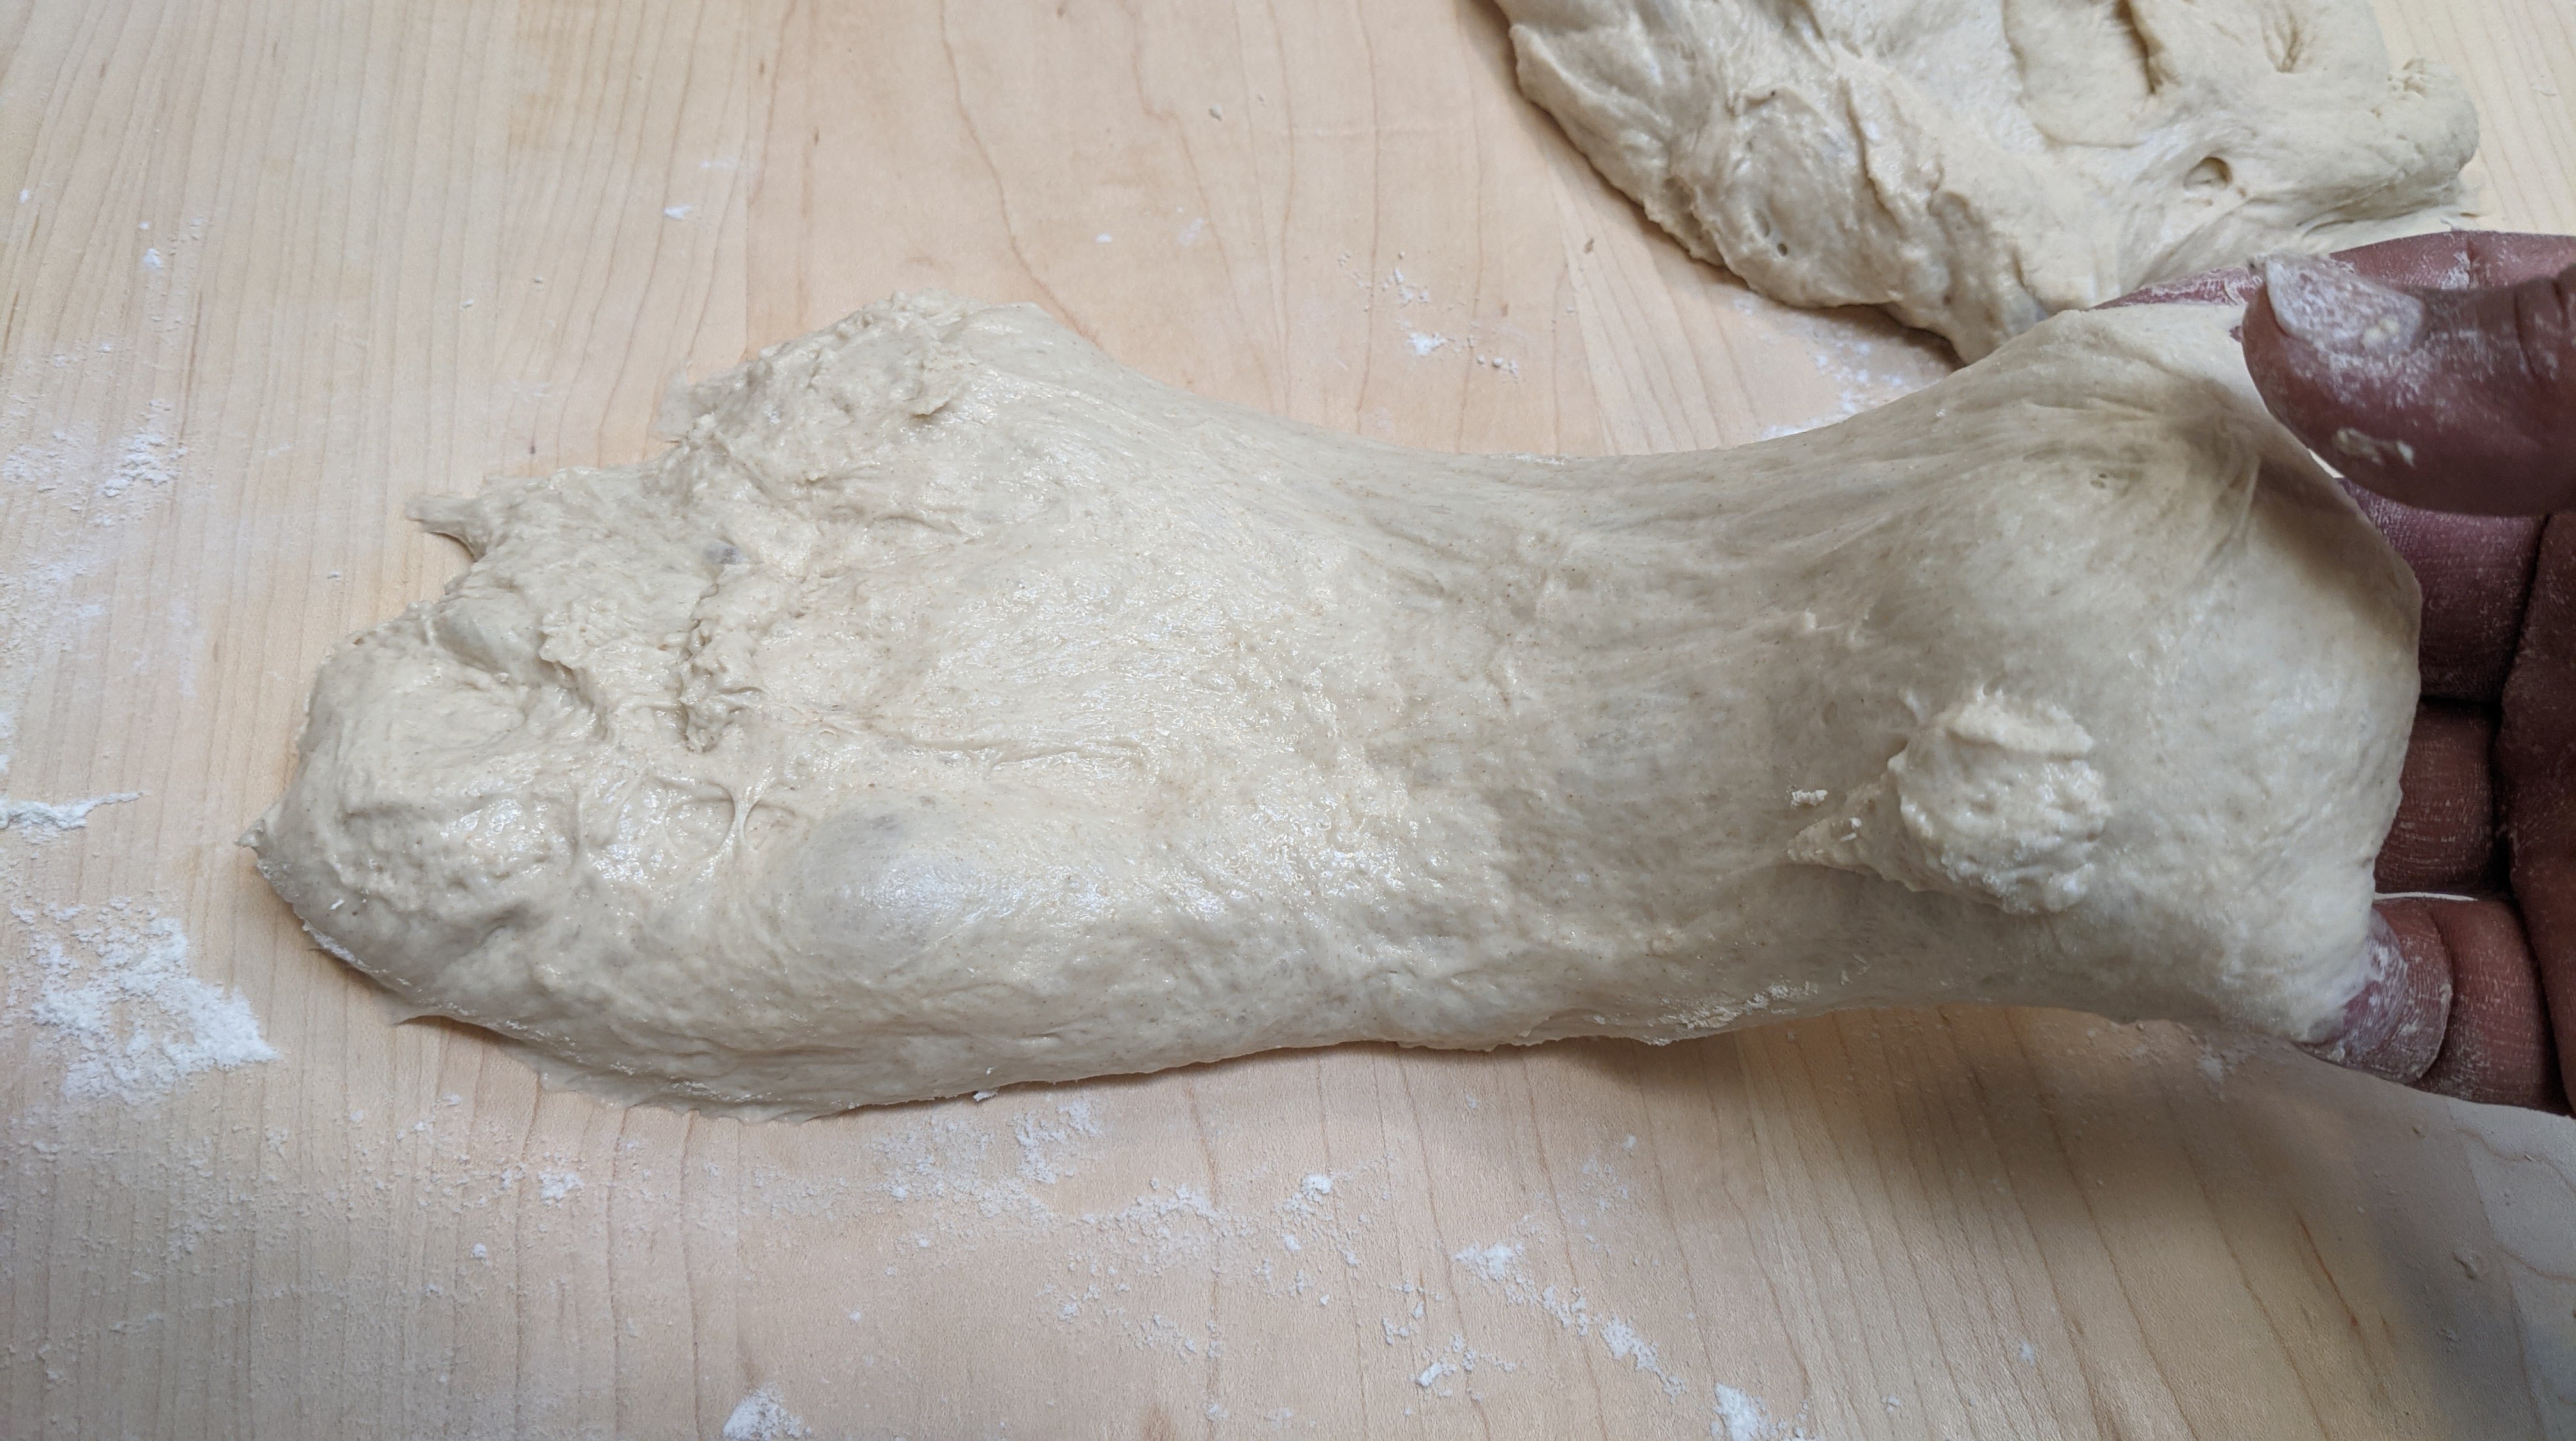
Mix. Mix all the ingredients together to form a shaggy mass.
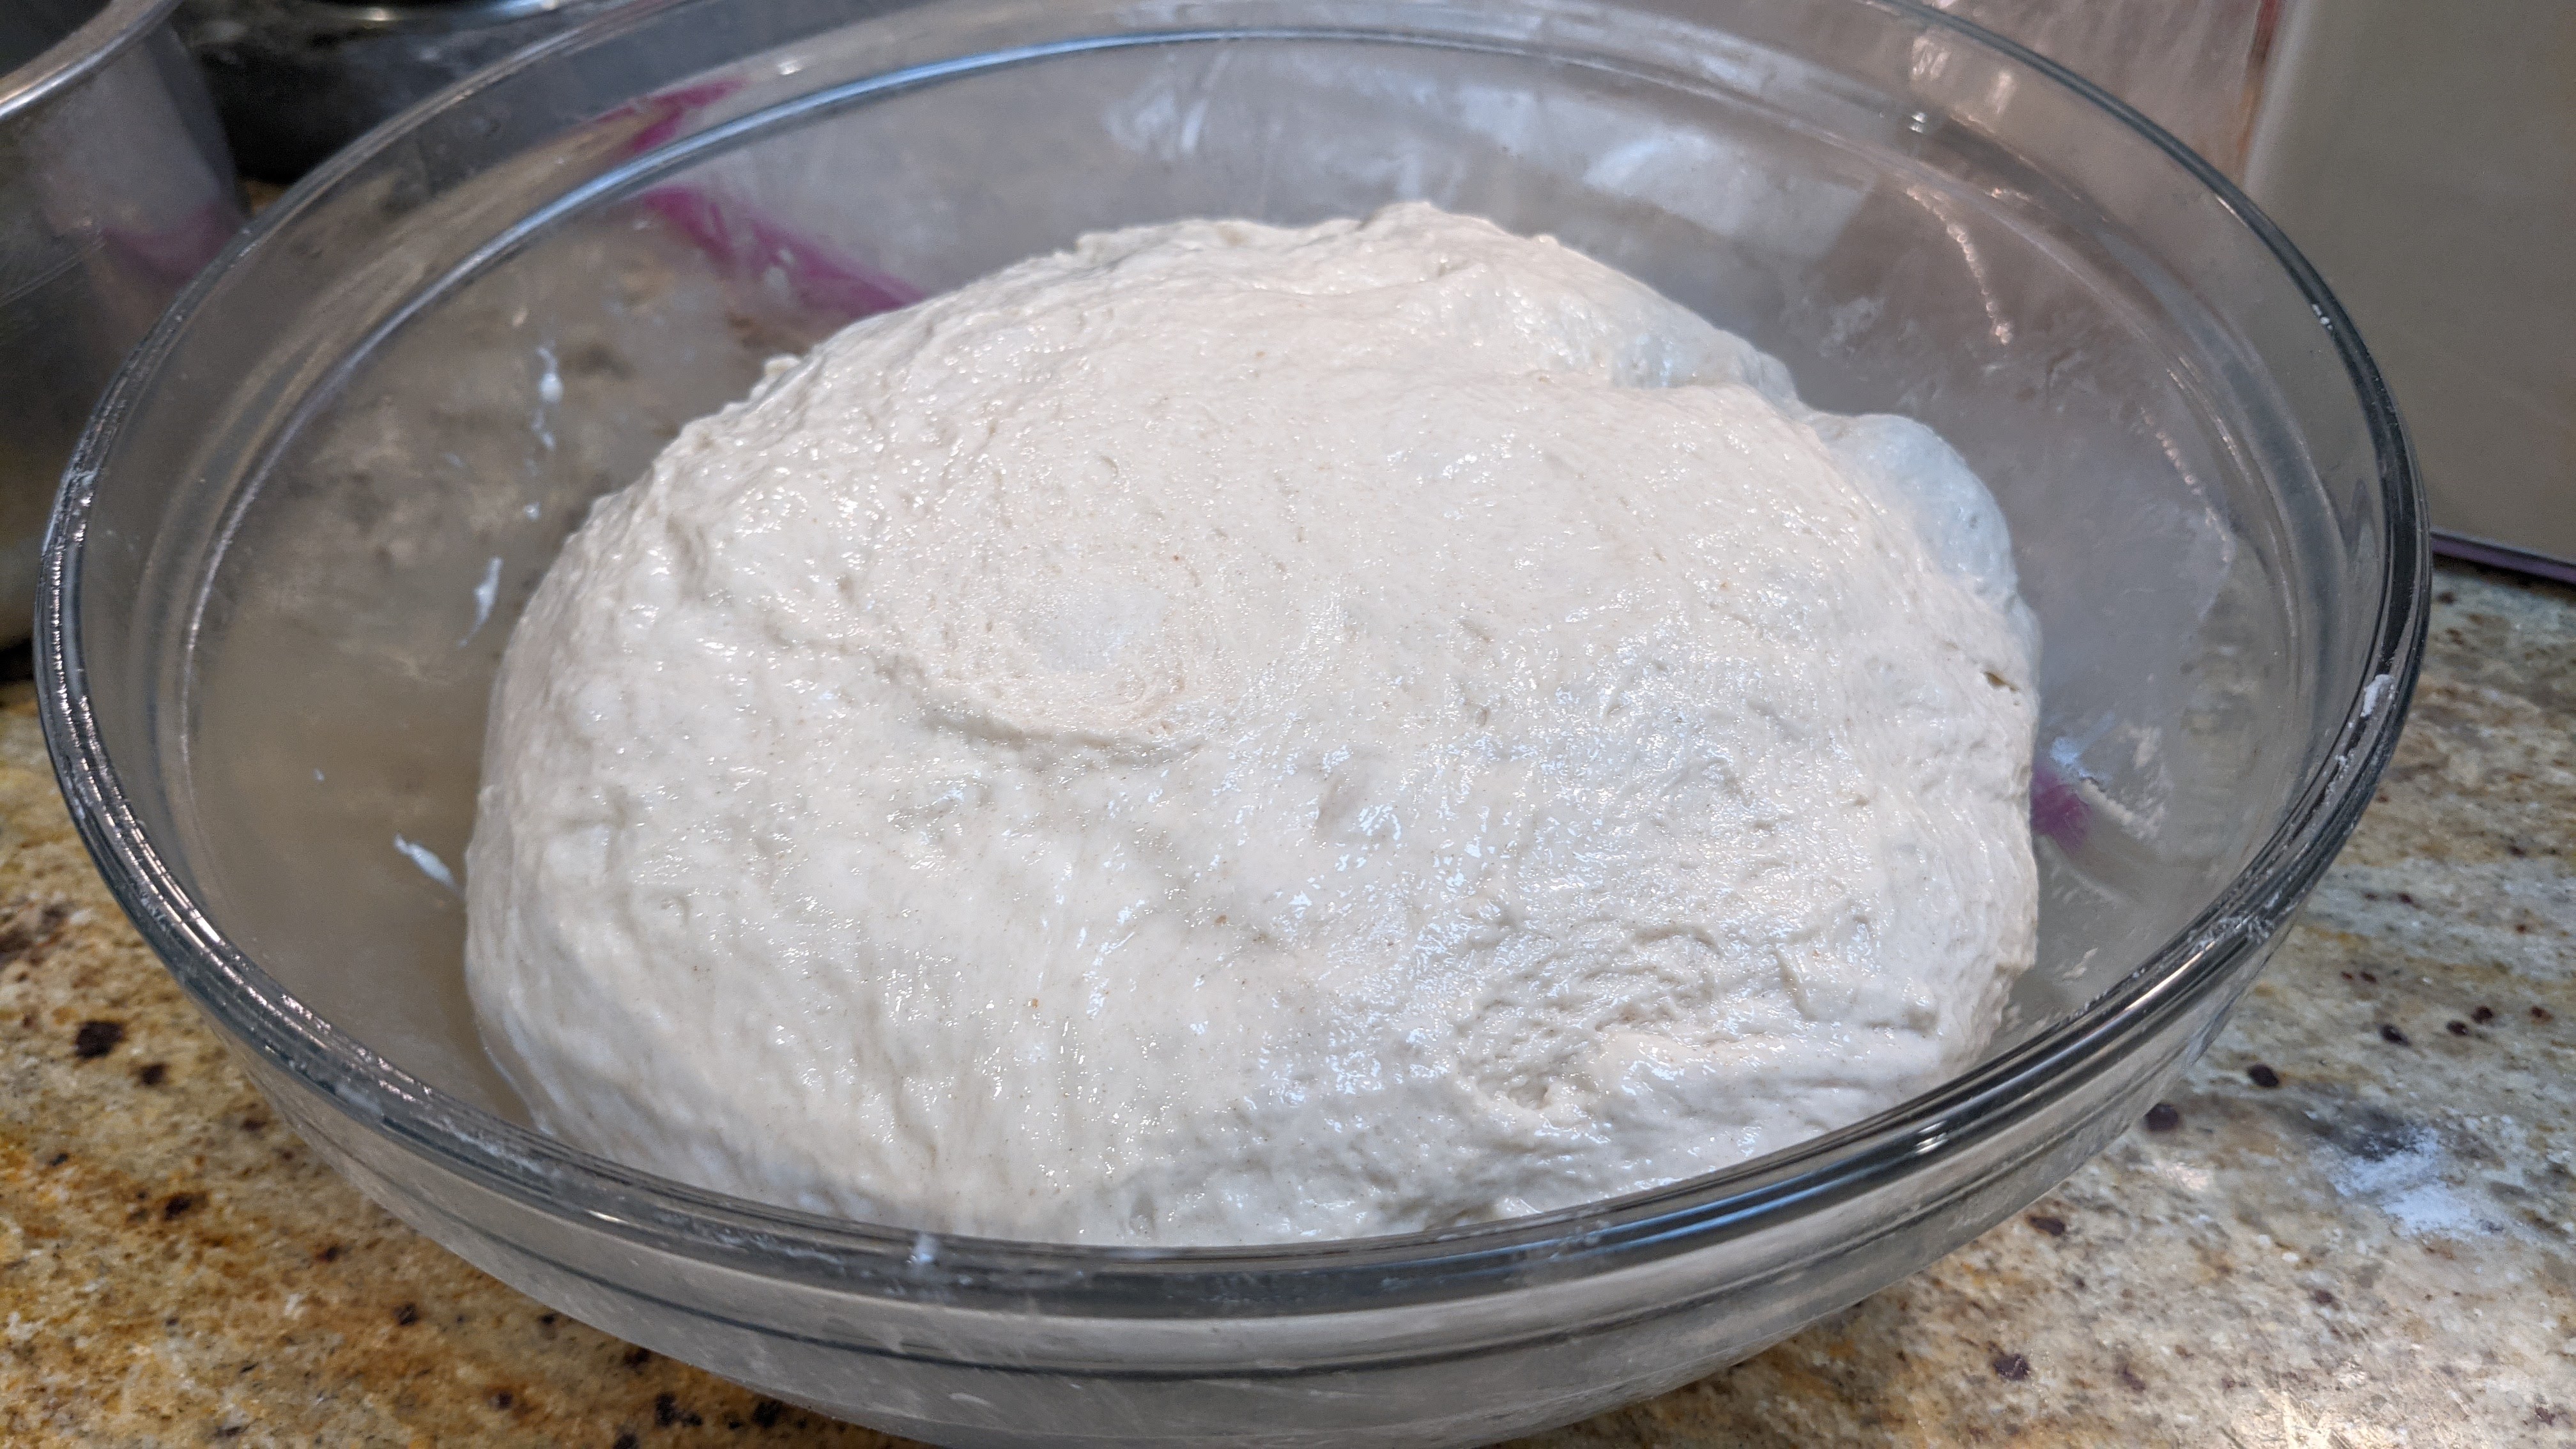
Bulk Fermentation. 1 1/2 to 2 hours or 6-18 hours in the fridge. Bulk fermentation is finished when the dough has expanded about 50%.
***If you want to do a long, cold bulk fermentation, I recommend using no more than 1 gram of yeast. Technically, you could forego the yeast altogether as the poolish will be full of yeast.***
Folding. Whether doing a cold bulk fermentation or not, stretch and fold the dough every 20 minutes in the first hour. By the third fold, the dough should be smooth and luxurious and will be highly extensible.
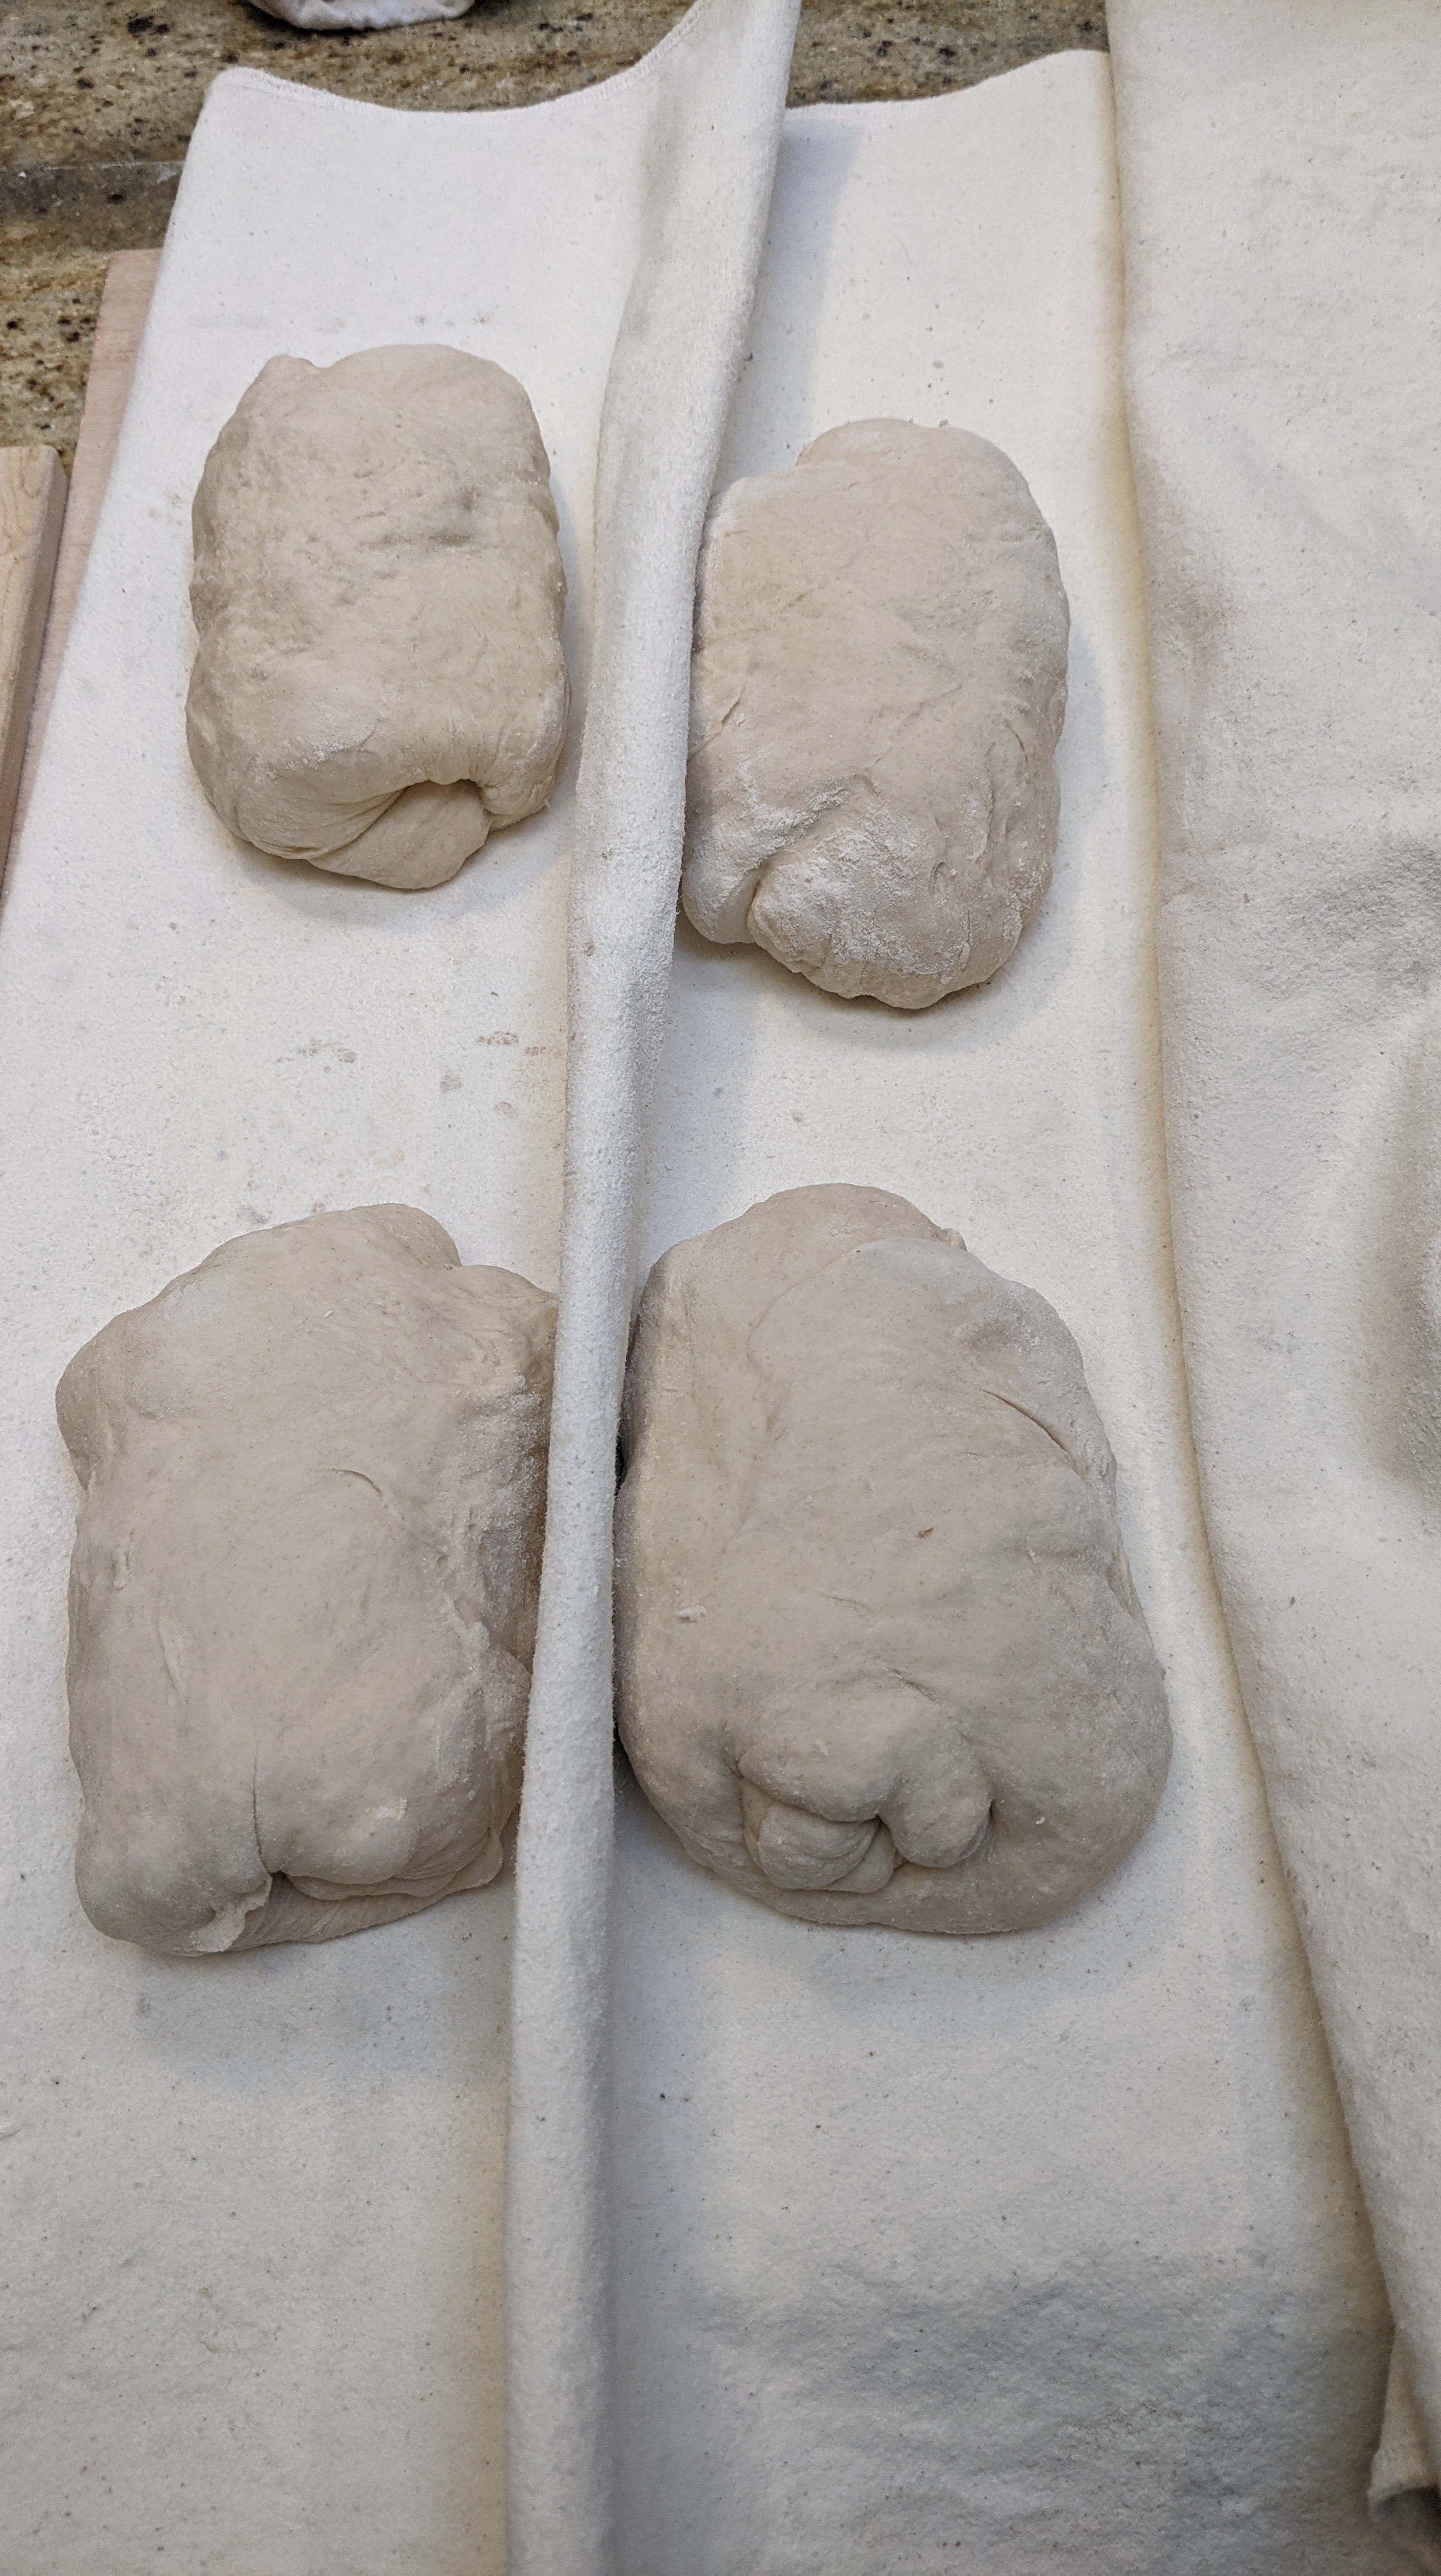
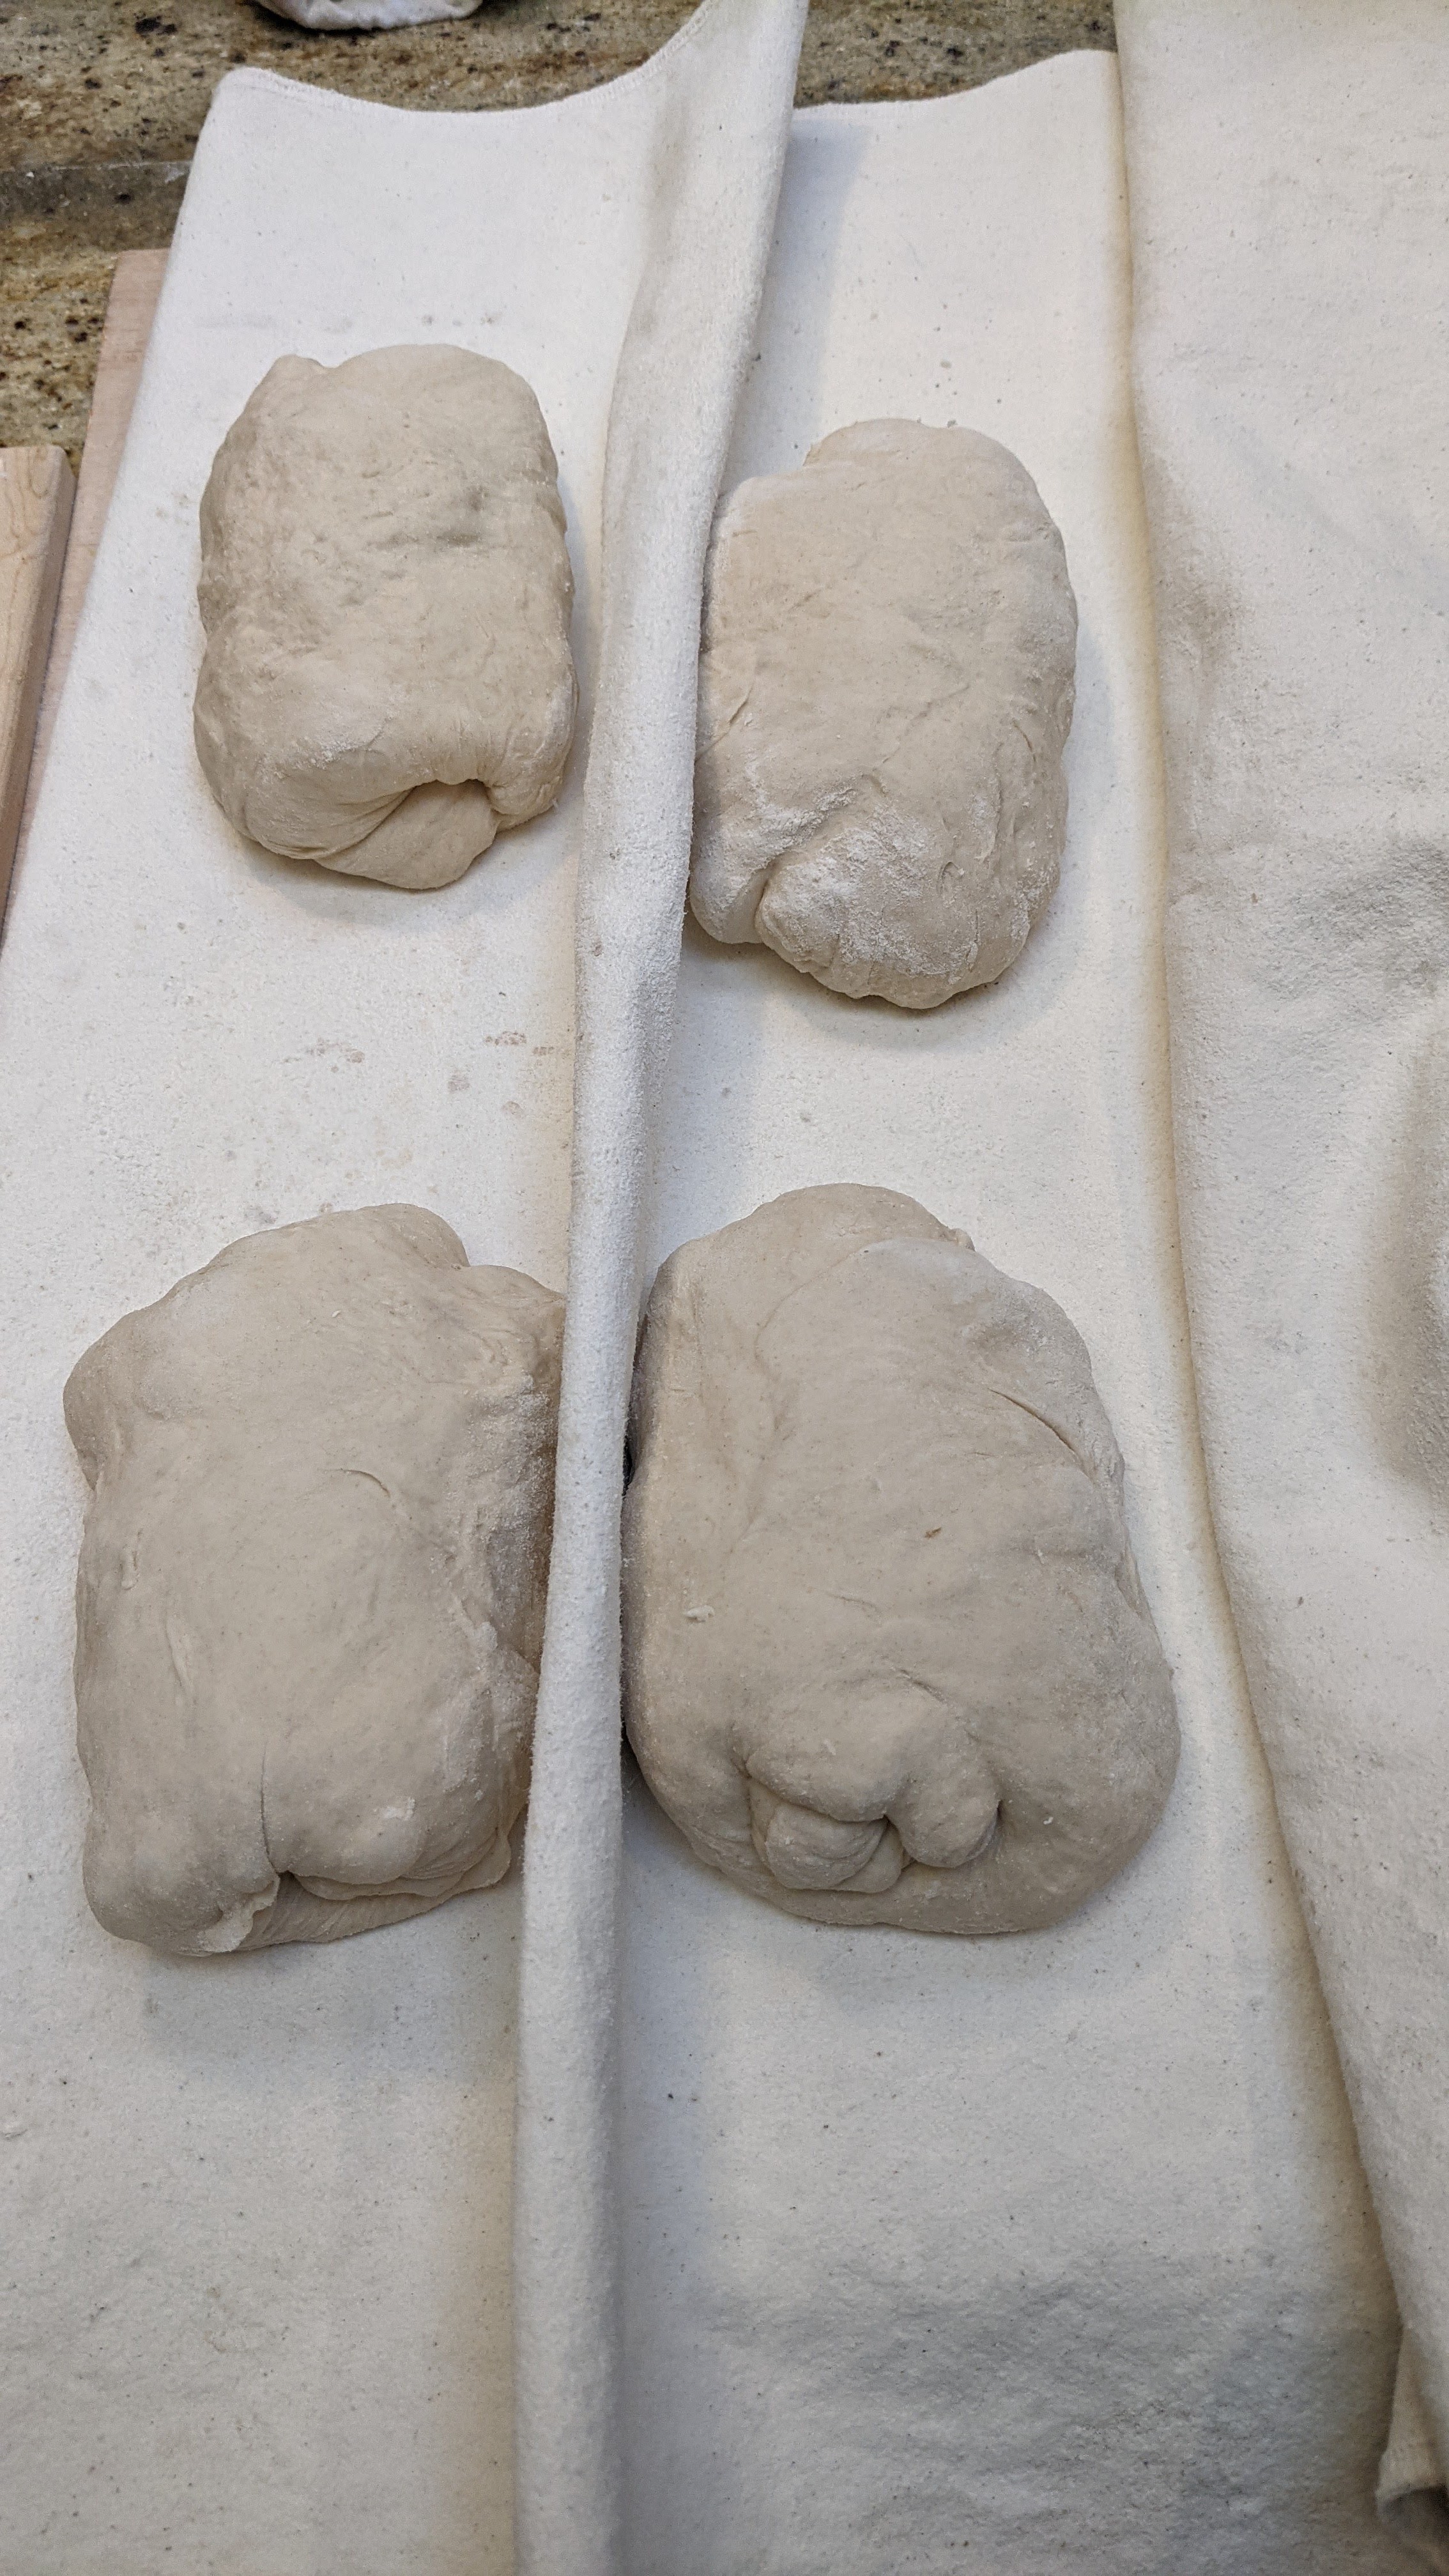
Divide and Pre-Shape. Divide the dough into 4 pieces at 335g or 6 pieces at 225g. Once divided, letter fold each piece by stretching one side, then folding it to the center, then stretching the other side and folding it over the body of the piece. Then roll the piece up like a jelly roll perpendicular to the folds, seal the seam, then place the piece seam-side-up on a well-floured couche.
At this point, it’s probably a good idea to preheat your oven to 475°F.
Final Fermentation: Depending on the ambient temp of your kitchen, final fermentation can take anywhere from 30 minutes to 2 hours. To determine when the loaves are ready for the oven, poke a floured or wet finger about a half to three-quarters of an inch into a loaf, then pull your finger back quickly. Observe the rate at which the indentation comes back. If it doesn’t come back at all, pop the loaves into the oven immediately – you’re extremely close to over-fermenting the dough. If it comes back quickly, and almost fills the indentation back up, give it a bit more time. If it comes back quickly, but immediately slows down, then you’re ready to bake!
Score. See below…
Make sure your cuts overlap 1/3 of the previous cut!
The important thing to note with scoring (and unfortunately Chef Markus doesn’t mention this) is that you have to make sure that the angle of your blade is extremely shallow (almost flat) because you want to create a flap. Also, your cut doesn’t have to be deep – no more than 1/2 inch. So, as the chef says, your cuts need to be as parallel as possible down the loaf, and your blade angle needs to be as shallow as possible to create a flap.
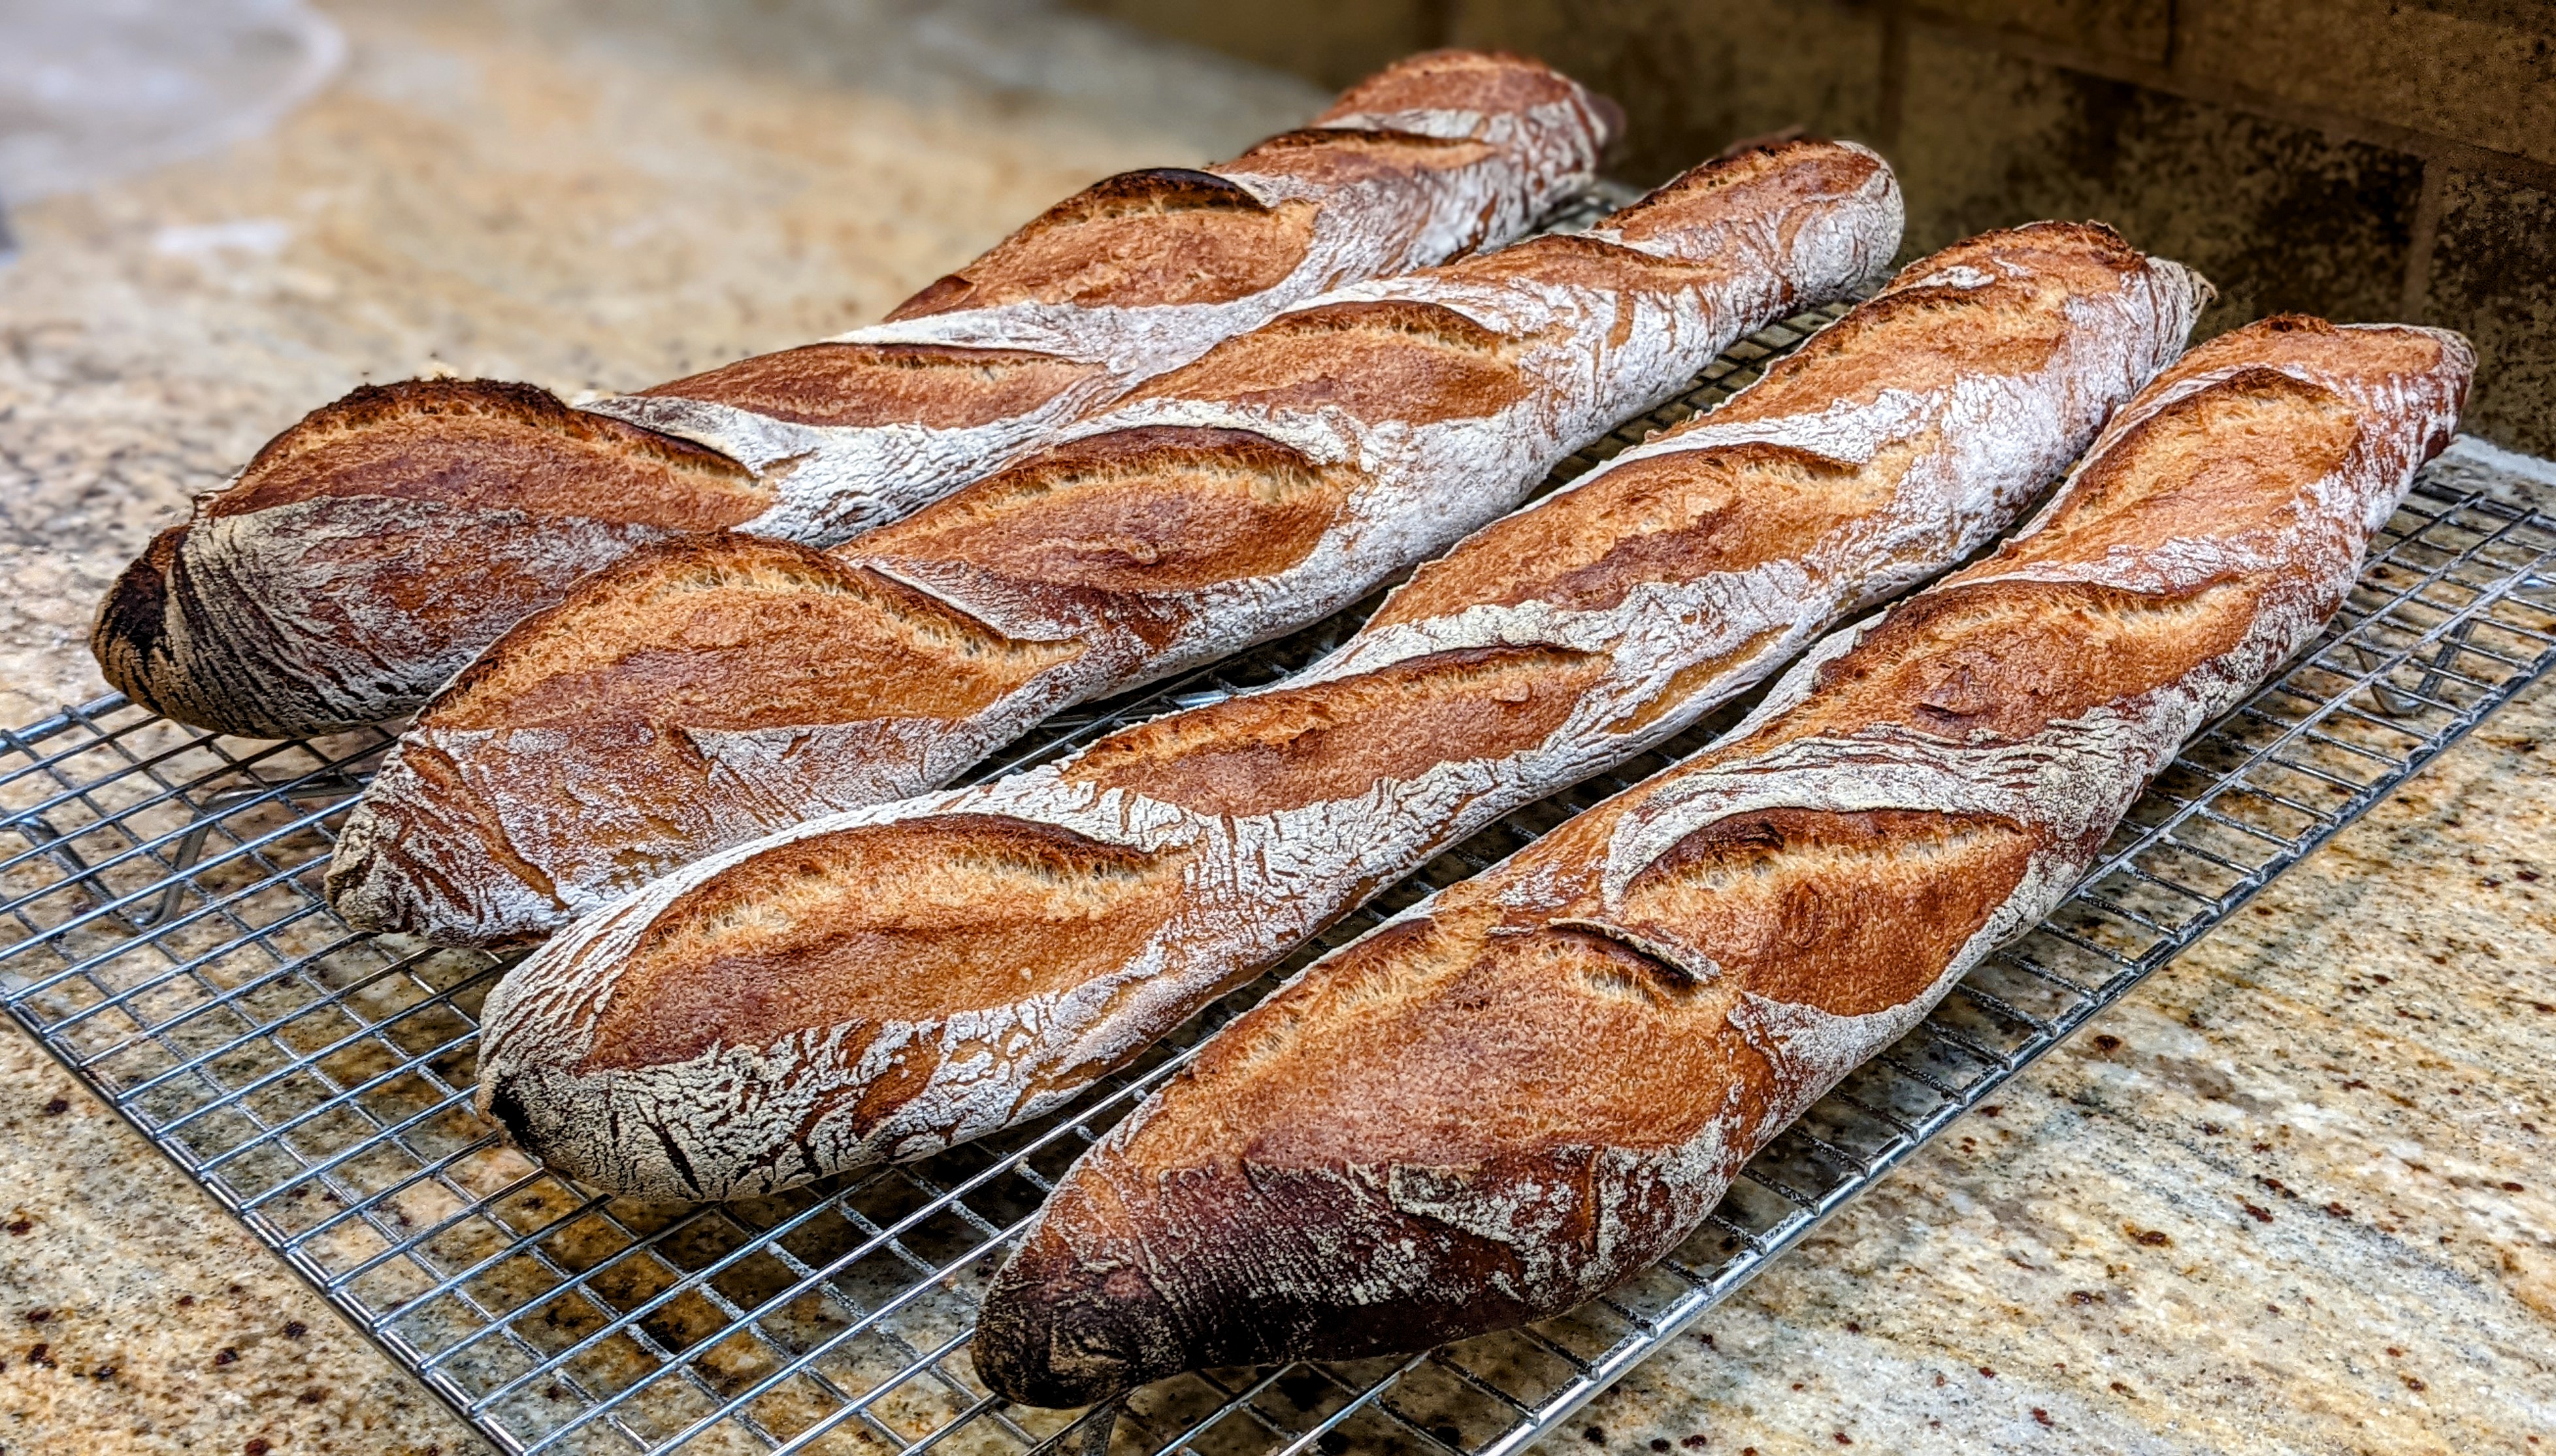
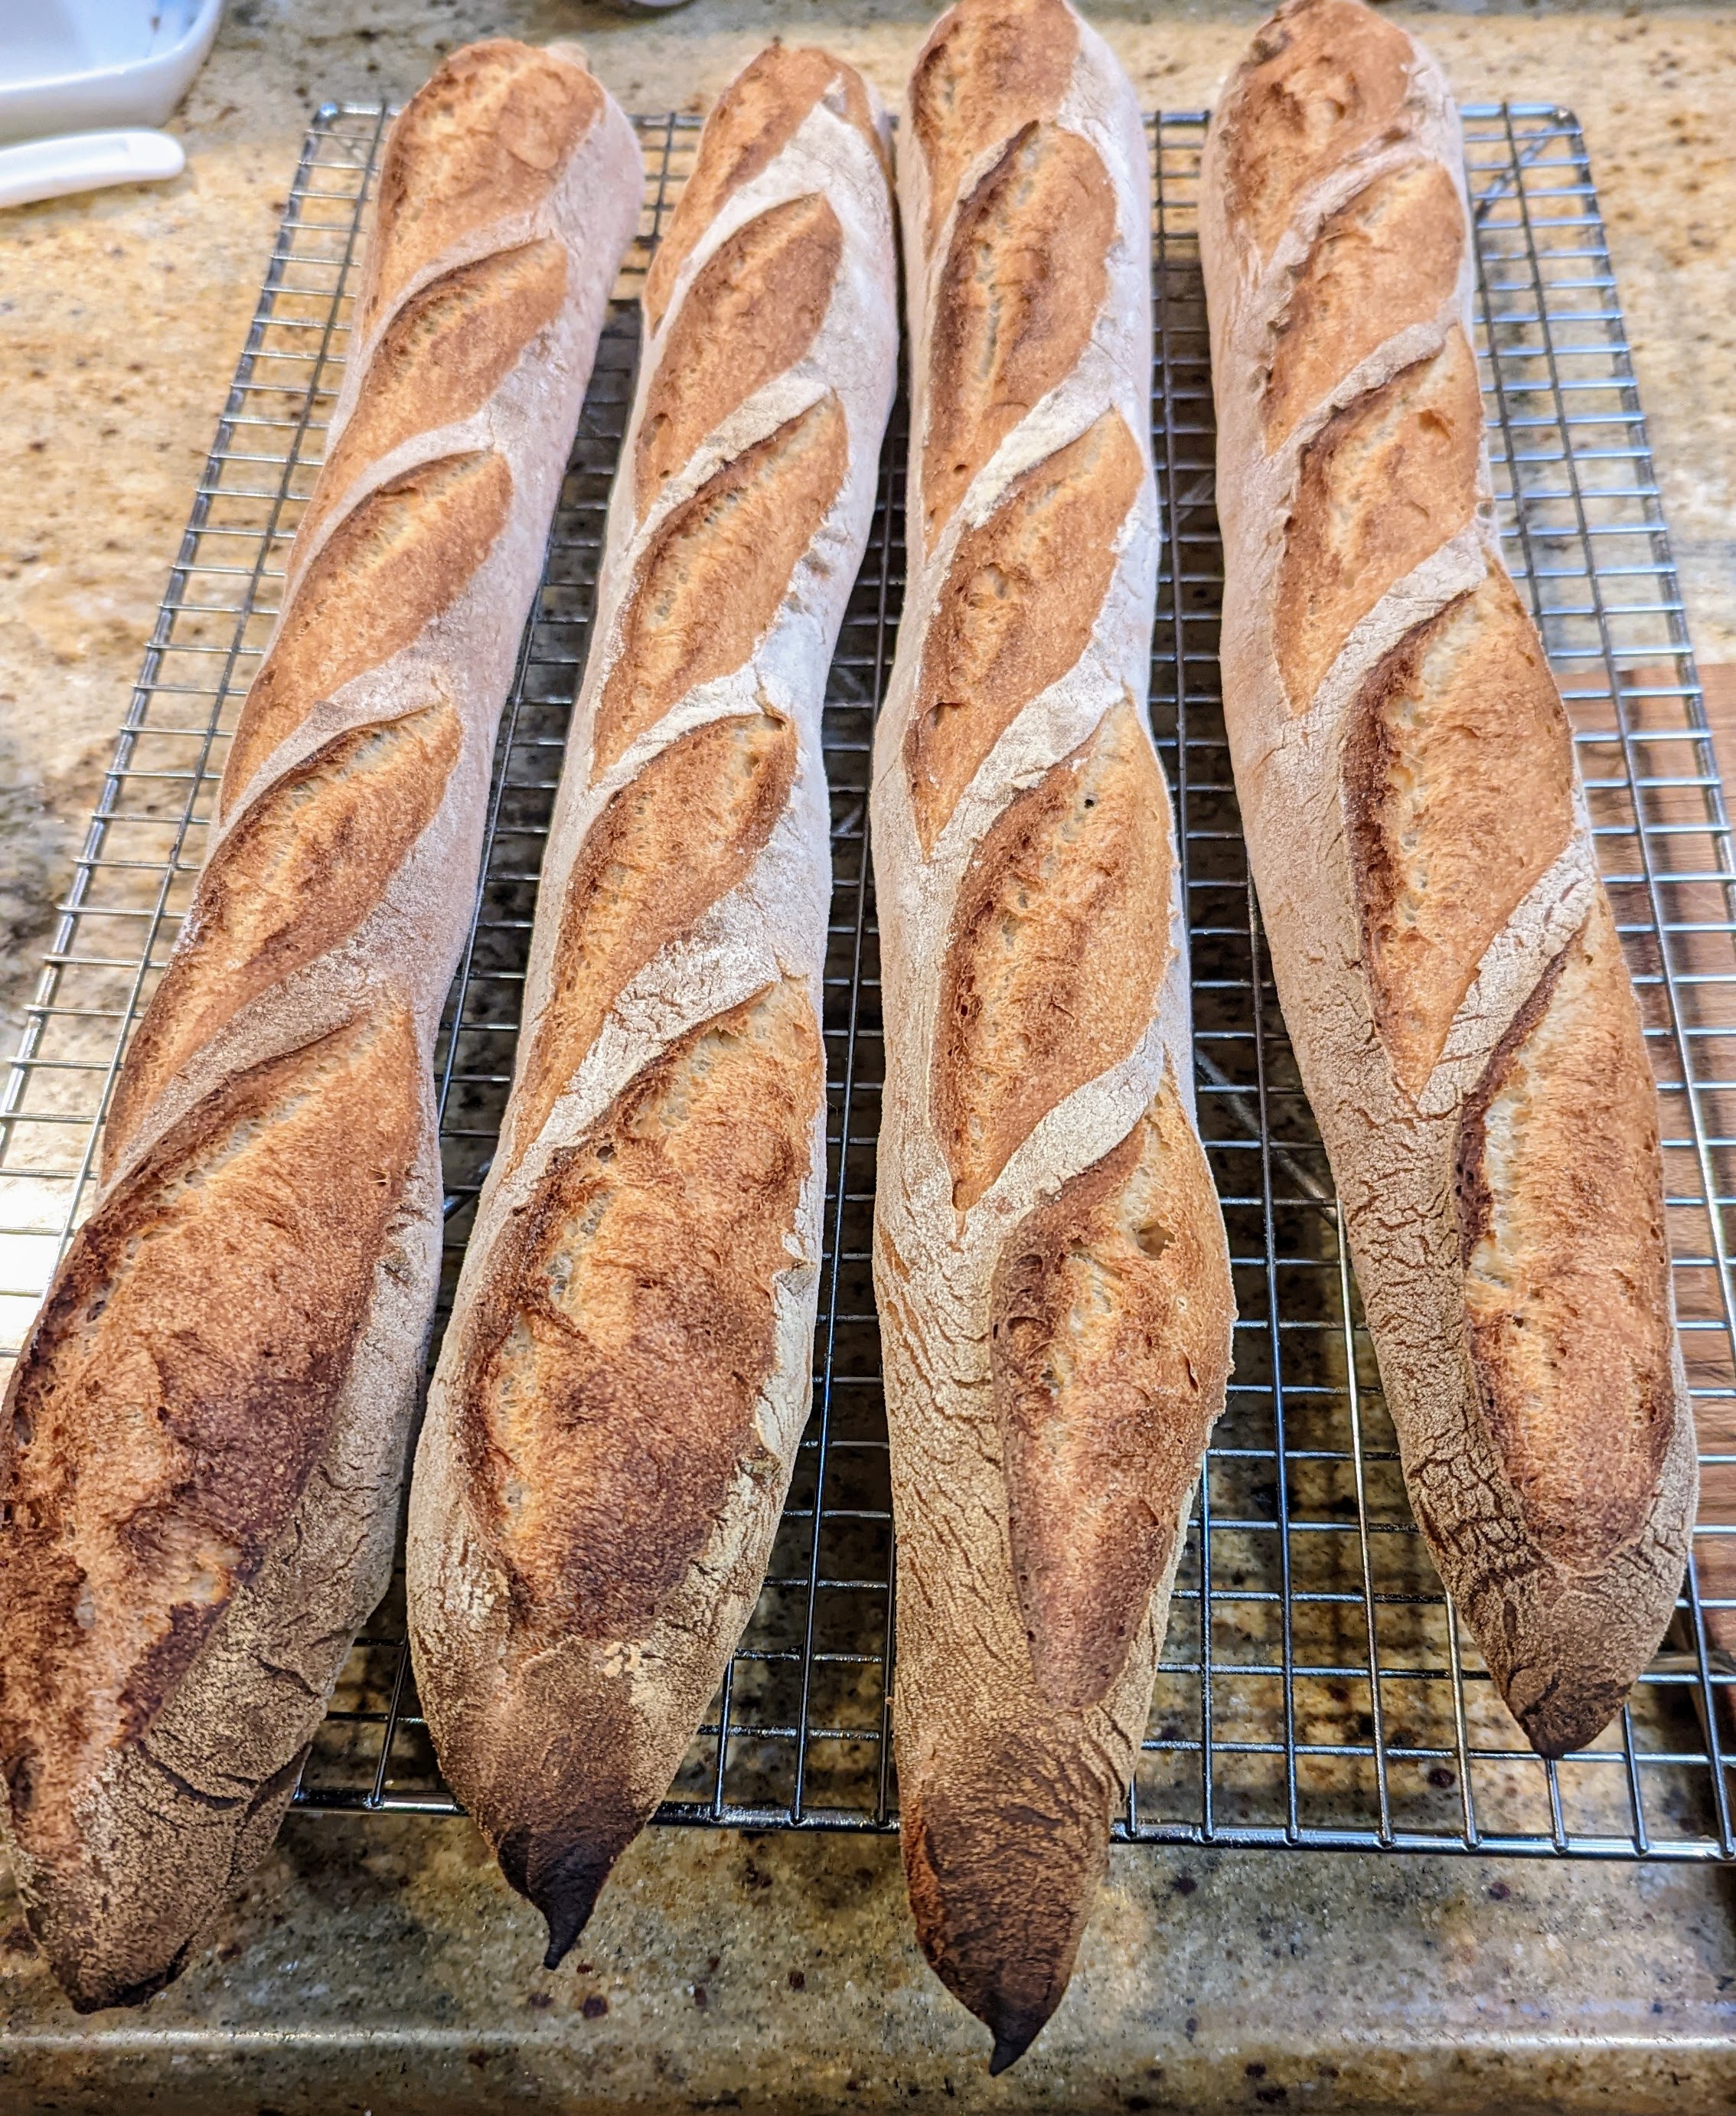
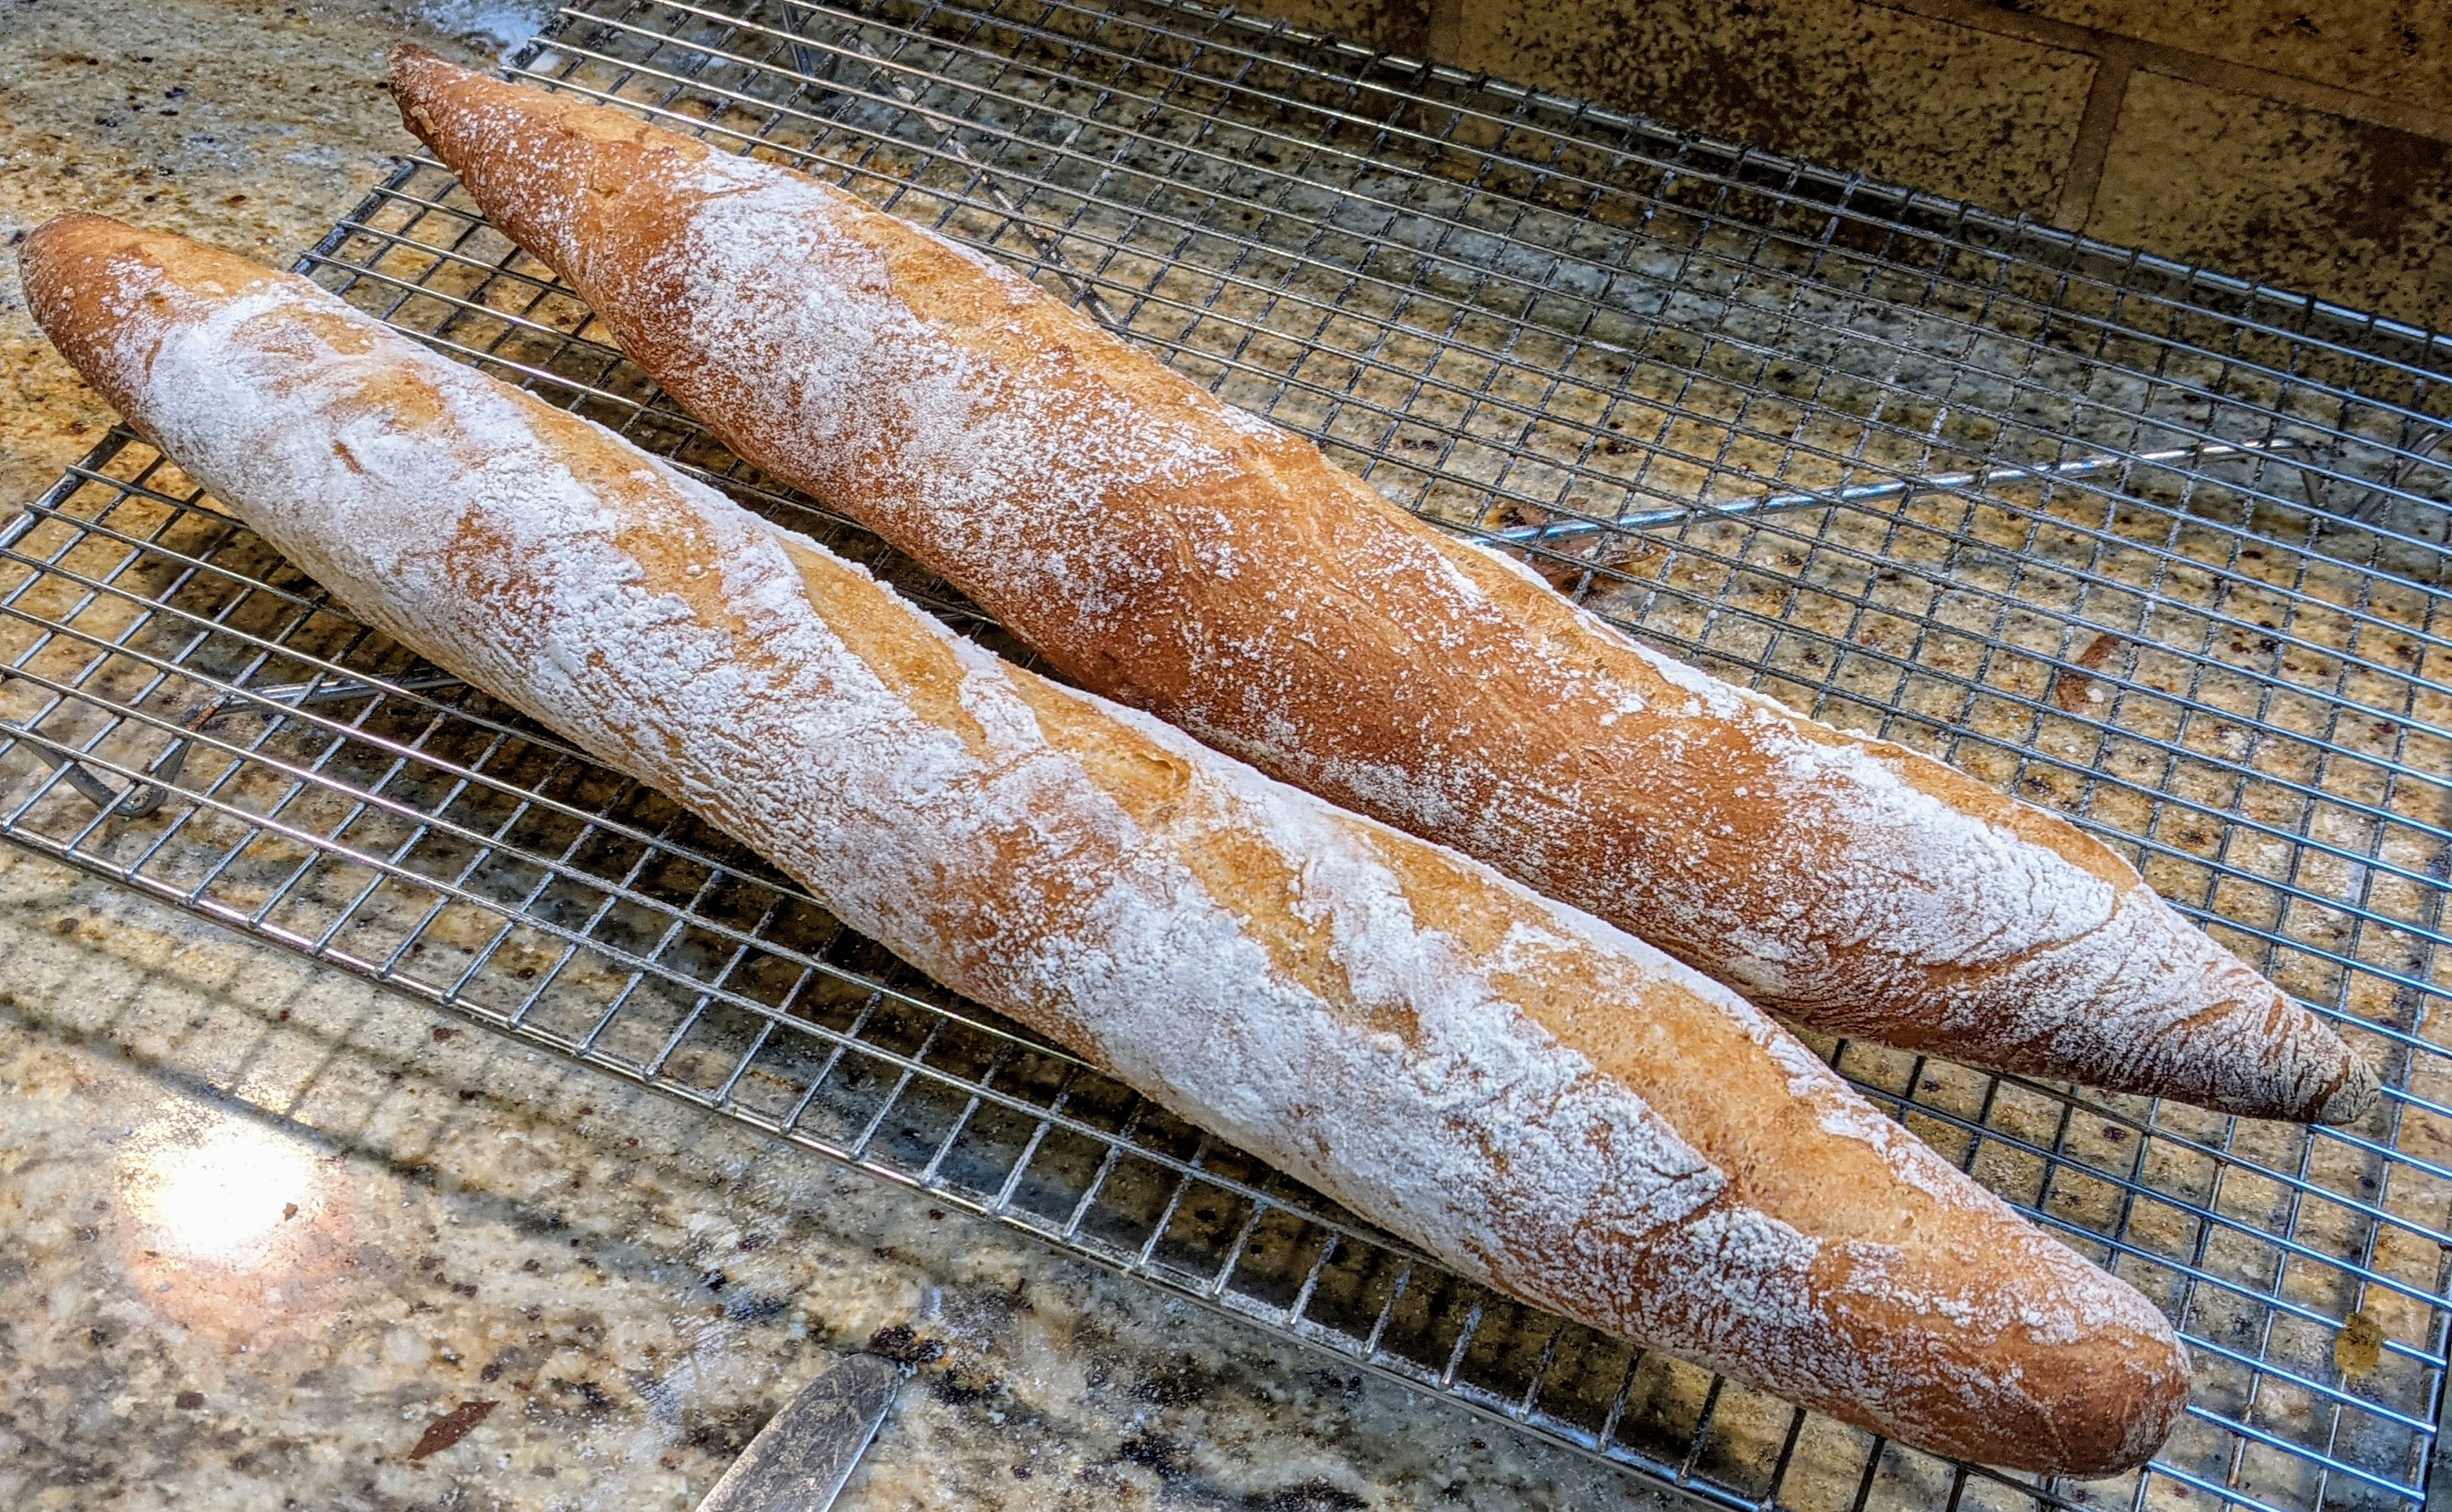
Bake. Transfer the loaves to a transfer board and score (see below). Bake at 475ºF with steam for 12-15 minutes or until the loaves start taking on color. Vent the steam and remove your steaming container, then bake for 12-15 minutes at 425ºF or until the loaves turn a nice, deep, golden brown.
NOTE: The bake times are approximate! The temperatures I listed work for my home oven. They may not work for yours. The important thing to note is that within the first 10-15 minutes while the loaves are on steam, the baguettes take on just a little bit of color. If they’re golden-brown to dark in that short period of time, your oven is too hot, or you need to lower your rack a little the next bake. It takes a few times to get the sweet spot.
Alternate Baking Technique. I just started experimenting with a gentler baking temp: 400ºF. 15 minutes with steam, 20 minutes dry. This will produce a slightly thick, crunchy crust and a light, airy and creamy crumb. It’s pretty awesome! And the oven spring is pretty amazing!
This morning, I was thinking about the several different types of techniques of baguettes that I make: Pointage en Bac, Baguettes de Tradition, Poolish, Levain, Poolish, and Sourdough, Sourdough and Yeast; not to mention varying the hydration and flour blends to achieve different textures. The baguettes pictured above are Poolish and Levain baguettes ala Tartine Bread. They’re a low hydration double preferment bread that produces a crunchy crust and a chewy crumb. My Baguettes de Tradition on the other hand create a light, crispy crust with a light, airy crumb.
In any case, I realized that I use two dough development techniques depending on the type of rising agent I use: One for yeasted and another for sourdough. So I thought I’d share them here so I could just link to them in my future baguette recipes as I’m tired of duplication.
Flour Type
People ask me what flour I use for making baguettes. Traditionally, baguettes are made with white flour. But unless I’m teaching a basic technique or introducing a new recipe, I invariably use a mix of different kinds of flour to affect different flavor profiles in my bread.
Sift Your Flour!
Whether or not you use a blend of different flour, you should always sift it before mixing. This will prevent large lumps from forming during the mixing process.
Yeasted Baguette Dough Processing
Mix. Mix all the ingredients together to form a shaggy mass. With my yeasted dough baguettes, I normally don’t do an autolyse.
Bulk Fermentation. 1 1/2 to 2 hours or 6-18 hours in the fridge. Bulk fermentation is finished when the dough has expanded about 50%.
Folding. Whether doing a cold bulk fermentation or not, stretch and fold the dough every 20 minutes in the first hour. By the third fold, the dough should be smooth and luxurious and will be highly extensible.
Levain Baguettes
Whether I’m making a double-preferment (both poolish and levain) or just a straight levain dough, I use the same process for both, which leans heavily on Chad Robertson’s dough development technique.
Initial Mix. Reserve 50g of the water and set it aside. In a large bowl, dissolve the preferments(s) into the remaining water to create a slurry. Add the slurry to the flour and mix until no dry ingredients are left and you’ve formed a shaggy mass. Cover and allow to rest 30-60 minutes.
Final Mix/Bassinage. Sprinkle the salt over the dough, then add the reserved water to the bowl. Work the salt and water thoroughly into the dough until all the water is absorbed and you can no longer feel any grittiness from the salt.
Bulk Fermentation. 3-4 hours @ room temp. Bulk fermentation is complete when the dough has expanded about 25%-30% in volume.
Folding. Fold up to 6 times every 30 minutes for 3 hours. That said, really feel the dough and check its extensibility before each folding session. This folding schedule is based on the Tartine method which calls for 6 folds over 3 hours. However, I’ve rarely gone past 4 folding sessions with the flour blends I use – they get strong real fast, even if I’m handling them gently!
Once you’ve built up dough strength, you can either proceed to shaping or pop the dough into the fridge for further flavor development from 8-18 hours.
Both Yeasted and Levain Baguettes
Divide and Pre-Shape. All the baguette recipes I post here either make 4 X 335g baguettes or 6 X 220g baguettes. Whichever you choose, divide the dough into pieces of that weight. Once divided, letter fold each piece by stretching one side, then folding it to the center, then stretch the other side and fold it over the body of the piece. Then roll the piece up like a jelly roll perpendicular to the folds, seal the seam, then place the piece seam-side-up on a well-floured couche.
No matter the shaping technique you use, bear in mind that shaping a baguette is not just rolling the dough into a long, skinny log. The first part of getting it into a cylindrical shape builds skin tension prior to rolling it out. This is absolutely critical to achieve ears on your cuts when you score! I will submit that this particular step is the most important step of shaping.
Final Fermentation: Depending on the ambient temp of your kitchen, final fermentation can take anywhere from 30 minutes for yeasted baguettes to 2 hours for levain baguettes. In either case, to determine when the loaves are ready for the oven, poke a floured or wet finger about a half to three-quarters of an inch into a loaf, then pull your finger back quickly. Observe the rate at which the indentation comes back. If it doesn’t come back at all, pop the loaves into the oven immediately – you’re extremely close to over-fermenting the dough. If it comes back quickly, and almost fills the indentation back up, give it a bit more time. If it comes back quickly, but immediately slows down, then you’re ready to bake!
Scoring. Scoring should be done in the middle third of the loaf, using fairly straight lines that overlap each other by about a third. The lame or scoring blade should be at an extreme angle to create a flap which will in turn bake into an ear as seen in the picture below.
Don’t cut across the loaf! This will only create diagonal slashes!
Though Chef Markus mentions overlapping the scores, he doesn’t discuss why you need to do it. If you don’t overlap the scores, your baguettes will indeed open at the scoring sites, but they’ll come out as bulges and remain narrow where the cuts didn’t overlap, so the sides of your baguettes will be wavy, not straight.
Baking. Bake at 475ºF with steam for 12-15 minutes or until the loaves start taking on color. Vent the steam and remove your steaming container, then bake for 12-15 minutes at 425ºF or until the loaves turn a nice, deep, golden-brown.
Alternative Baking Method. Bake at 400ºF for 20 minutes with steam. Remove the steaming container, then finish baking at 425ºF for 25-30 minutes. I know it sounds backward, but it actually works great!
As is our habit after we dine in a particular town, my wife and I ended up perusing a book store where I, of course, sought out the bread books. I ran across this nice book called, “Boulangerie at Home,” and immediately thought to myself, There’s got to be a baguette recipe in there… I wasn’t wrong.
As for the book, it was beautifully laid out with lots of pictures, but though the title implied it was written for home bakers and perhaps even beginners, it’s a bit more advanced than that. I’ve been baking a long time, so I can look at a recipe and work out the baker’s math pretty much in my head. But these aren’t recipes that a newbie could do with ease.
But despite that, I found the baguette recipe and I snapped a picture of it. Then when I got home I started working through the baker’s percentages. The basic formula is below:
Overall Formula
AP Flour (King Arthur or Bob’s Red Mill) or T65* flour
100.00%
Water
71.43%
Salt
2.00%
Yeast – Instant**
0.25%
*T65 flour is flour with a protein content of 12%-13.5%. You could use King Arthur or Bob’s Red Mill bread flour for this, but I myself prefer King Arthur AP Flour at 11.7% protein content. The author calls for the use of high-gluten flour, but T65 is not THAT high. To me, high-gluten flour has protein over 15% (check out Janie’s Mill High-Protein flour – it’s expensive but wonderful). **The recipe from the book calls for fresh yeast, and if you have some, use 0.7%. For this recipe that would be about 6-7 grams of fresh yeast
Levain
The author called this “liquid starter,” but that just means it’s a 100%+ hydration starter. In this case, it’s a 100% hydration starter.
Preferment Flour % of Total Flour
4.80%
Hydration %
100%
Preferment Flour Weight
37g
Preferment Water
37g
Preferment Required for Recipe
75g
Final Dough
Flour
742g
Water (lukewarm)
519g
Salt
16g
Yeast
2g
Preferment
75g
Total Yield
4 X 335g loaves 6 X 222-225g loaves 1353g total
Optimal Dough Temp
78°-80°F
For dough development, I prefer my own method. The one in the book wasn’t bad, but I’ve been making baguettes for a long time, and the method I’ve developed works for me, so that’s what I’ll share here.
Note that this employs a hybrid rising method that uses both a levain and some yeast to rise the dough. The levain adds flavor and contributes a bit to the rising, whereas the yeast does the heavy lifting. You could use the levain exclusively, but then bulk fermentation will go on for much longer, and I suggest taking a Tartine approach and fold the dough every half-hour for 3 hours. Like any sourdough, depending on the ambient temp of your kitchen, bulk fermentation at room temp could take 6-8 hours.
Make the levain. If you have a mature starter already, take 20-30 grams of it then mix it with 100g of flour and 100g of water, essentially making a 1:5:5 (1-part starter, 5-parts flour, 5-parts water) ratio levain. The levain will be ready when it passes the float test. You’re not going to do several builds with this as you want to use a relatively young starter to limit the sourness of the bread.
Initial Mix/Autolyse. Reserve 50 grams of the water, then dissolve the starter in the remaining water. Add this mixture to all of the flour and mix until no dry ingredients are left. You’ll form a shaggy mass. Let this rest (autolyse) for 30-45 minutes. This will get the natural yeasts going.
Final Mix. Sprinkle the salt and the yeast over the dough, add the reserved water, then work them into the dough until thoroughly combined. The dough will still be a little shaggy, but considerably smoother than the initial mix.
Bulk Fermentation. 2-5 hours at room temp (depending on the ambient temp of your kitchen) or cold ferment (39°F to 42°F) for 6-12 hours following folding. If you decide to do a cold bulk fermentation, use half the yeast. Bulk fermentation is finished when the dough has risen about 50% (don’t let bulk fermentation go much further than this).
Folding. In the first hour of bulk fermentation, fold the dough 3 times at 20-minute intervals. After the third fold, let your dough rest and check its expansion. As I mentioned above, you only want the dough to expand about 50%.
Divide and Preshape. Pour out your dough onto a lightly floured surface. Gently work it into a rectangle, then divide it into 4 X 335g pieces. With each piece, letter fold the left and right sides of the piece (stretch out a side then fold it over the body of the piece, then jelly-roll the piece over the seams. Place each piece seam-side-up on a well-floured couche, the let them rest for 20-30 minutes (or just a little more) depending on how tight you rolled each piece. You want the dough to be nice and relaxed. You may see a little rise out of the pieces during this time.
Shape. Shape the rested logs into baguettes, then place the shaped loaves on the couche for final fermentation.
Final Fermenation. 1-1 1/2 hour or until the loaves have puffed up to about 75-85% – just under doubled.
Bake. Transfer the loaves to a loading board, score them, then bake at 475°F for 12 minutes with steam. Remove the steaming container, turn the oven down to 425°F, then bake for another 12-15 minutes or until the crust is deep, golden-brown. This bread really benefits from a full bake.
I read some reviews of the book online and there were lots of people who wrinkled their noses at the use of commercial yeast in the recipe. The plain fact of the matter is that there are numerous ways to leaven bread. For me, as long as you’re not using chemical additives to leaven dough, you’re golden. But to eschew a technique just because it’s not sourdough, to me at least, lends itself to elitism. There’s more to bread than sourdough, folks…
The same goes for those who won’t bake bread that has a hydration rate of less than 75%. Even Jeffrey Hamelman shakes his head at that in his book Bread, calling it a shame that people cut themselves off from learning different techniques and methods because of this. I get it, though. The thinking is that higher hydration makes it easier to form holes in the dough. And for the most part, that’s true. But a lot ALSO has to do with how you handle the dough.
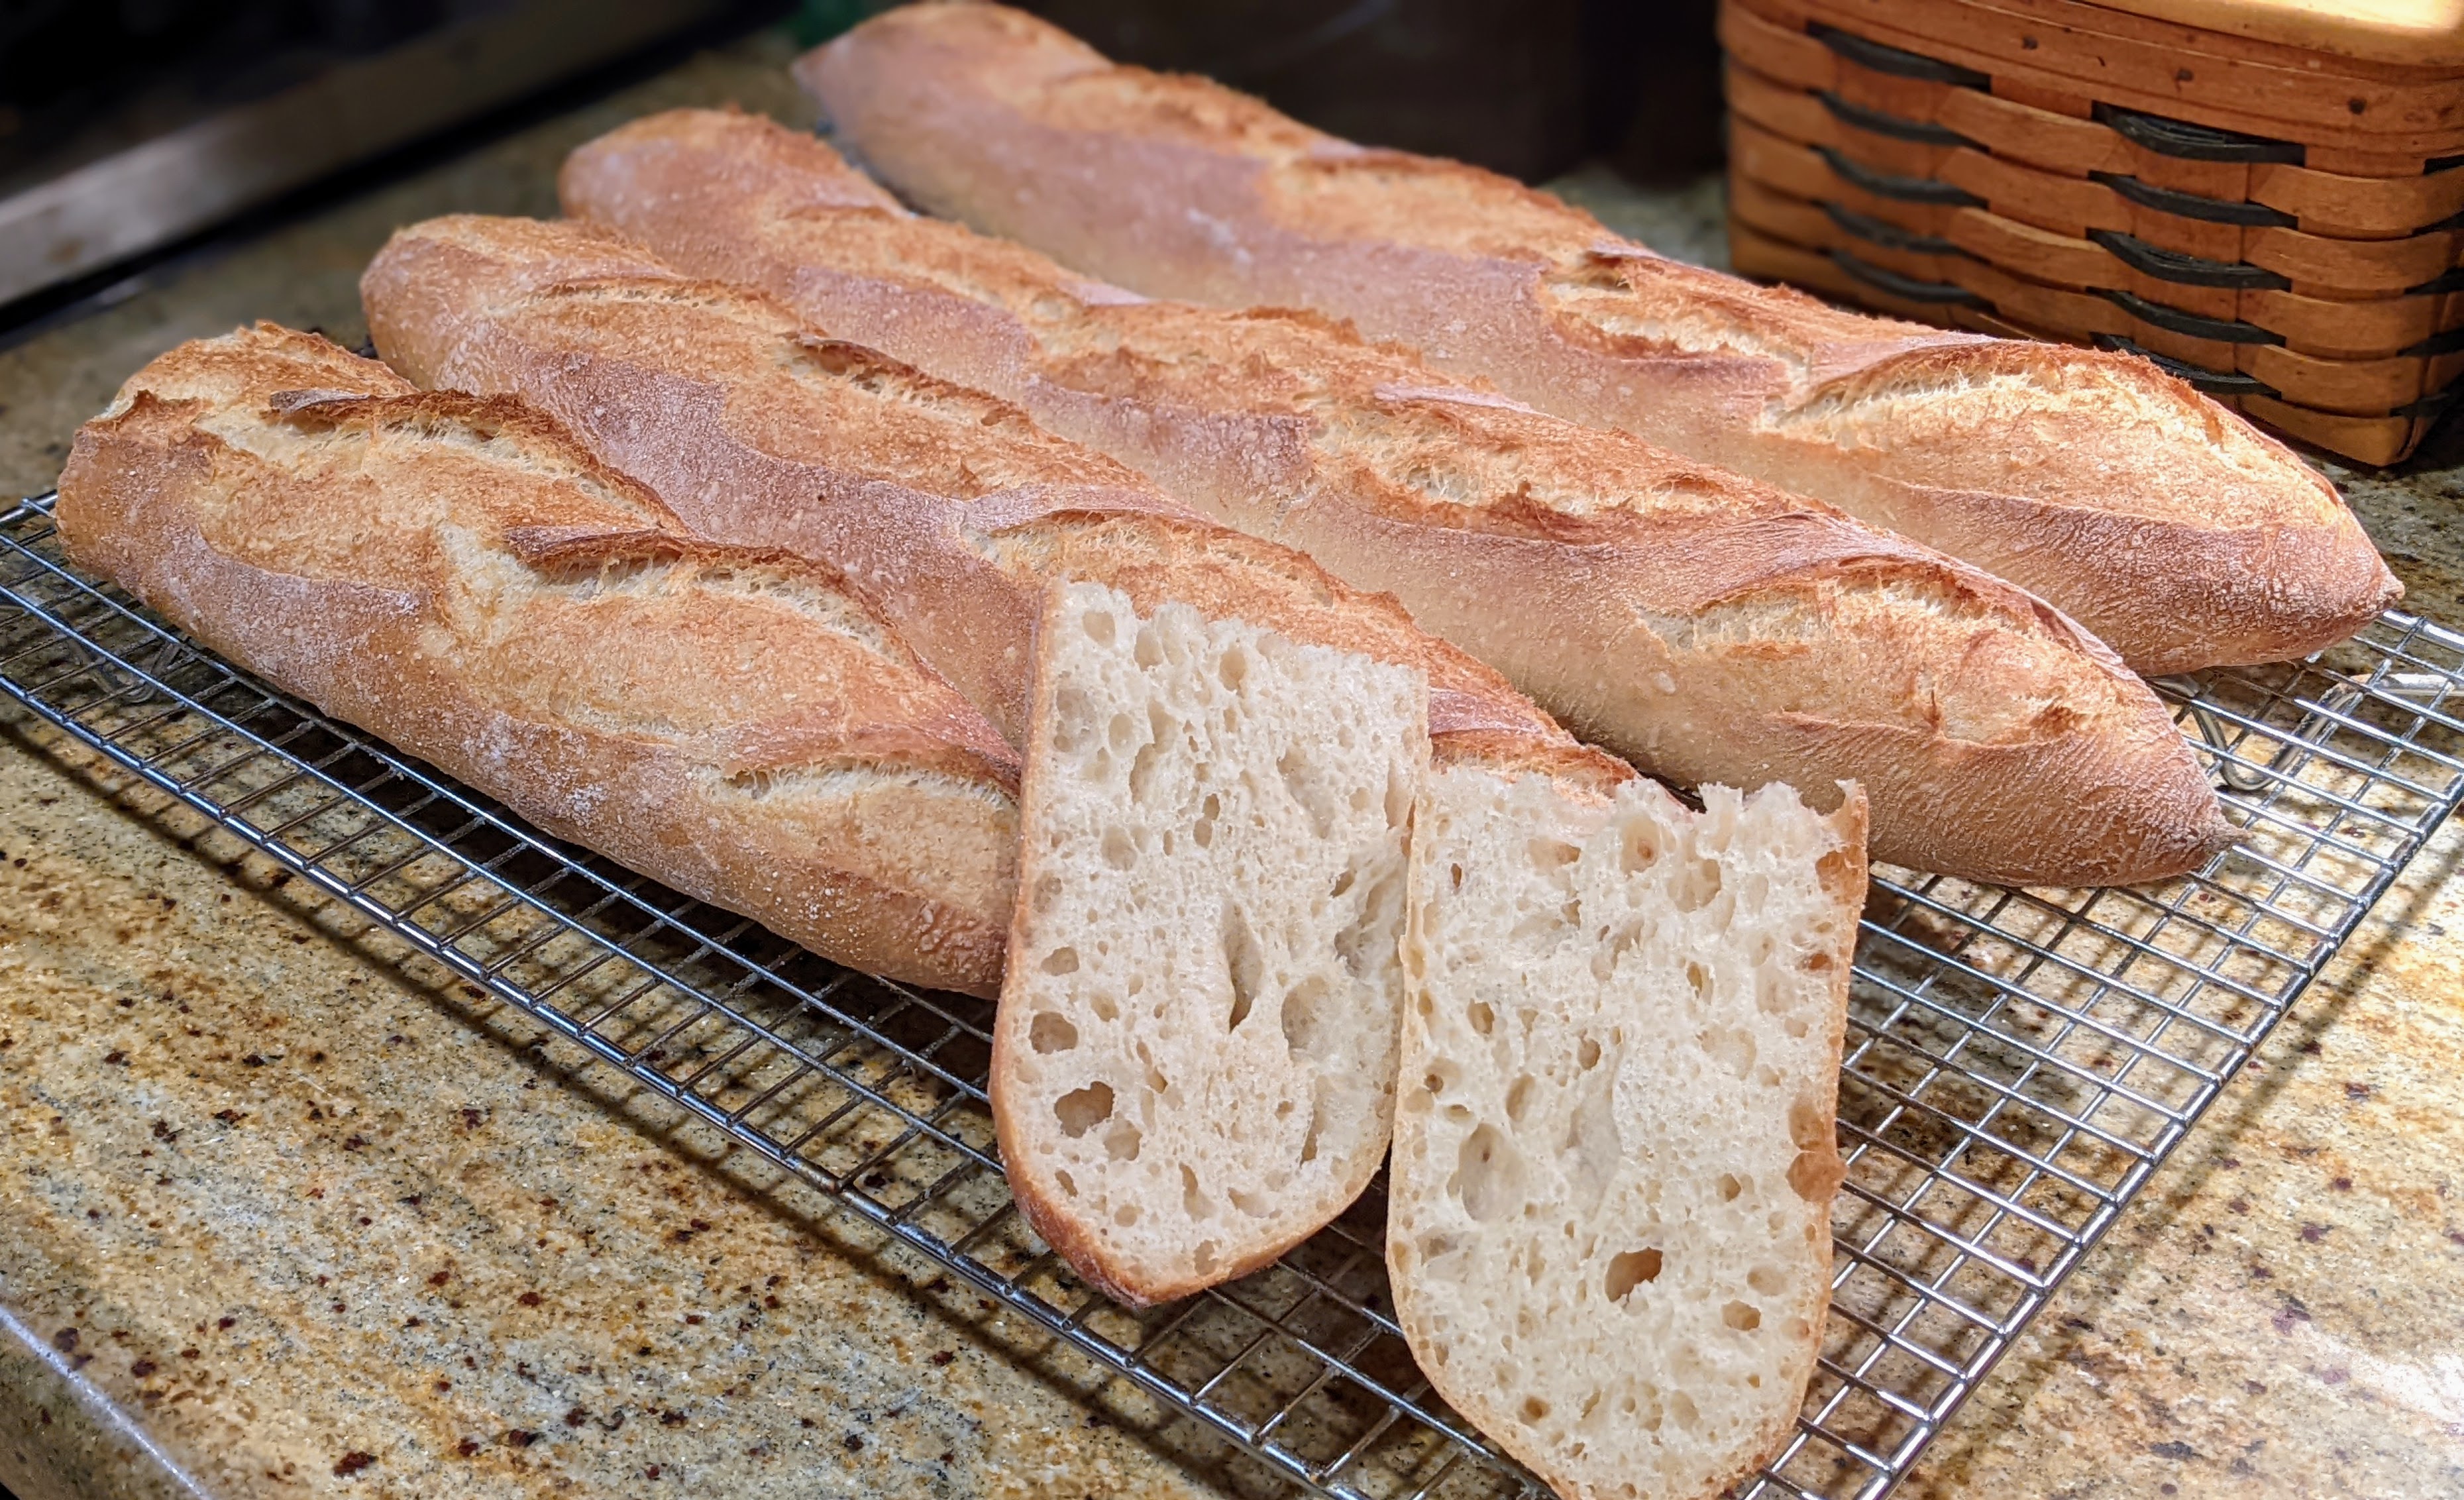
For instance, look at the picture to the left of the baguettes I made from the Tartine Bread book by Chad Robertson. What a crumb! Really open with lots of holes. Guess what? The dough that came from was 64% hydration! It was my gentle handling of the dough and its thorough development that allowed that to happen, not the hydration.
I have to admit that I was a little incredulous myself when I worked out the formula. But after having made these several times now, I love the technique!
I wrote a post saying that I had some issues with the Tartine Bread baguette recipe, especially with the yield, which was much more than the two or three baguettes that the recipe said it would produce. It was more like seven or eight baguettes. Not a bad thing, but the inconsistency kind of bugged me. I was also a little dubious about the hydration being only 64% and that the poolish used a seemingly large amount of yeast for such a small poolish amount.
But despite my issues, these baguettes totally intrigued me because Chad Robertson employed both a levain AND a poolish. And unlike most poolish baguette recipes that add a little yeast to the final dough, the rising potential with both types of preferments completely eliminates the need to use any extra commercial yeast other than what goes into the poolish!
Using two preferments was all I needed to know to want to make these baguettes. Chad’s reasoning was that they’d contribute tons of flavor to the bread – they do – but also give the dough lots of extensibility and a longer shelf-life (and I could attest to that because my pure sourdough baguettes will last a week).
But I didn’t want to make as much dough as the recipe in the book yields, so I had to scale it down. To scale it down I had to get the overall formula, then figure out my ingredient weights from that. I shared all this in my previous post, but I’ll put it down here now:
Overall Formula
Flour
100.00%
Water
64.00%
Salt
1.70%
Levain
In Tartine Bread, Chad Robertson says to use a tablespoon of mature starter – it’ll be somewhere around 30-40g of mature starter. The important thing is to make near a 300g levain.
Mature Starter
30-40g
AP Flour
150g ~14.25% of total flour
Water
150g
Optimal Fermentation Temp.
78°-82°F
Poolish
The book says to use 3 grams of yeast for 200 grams of flour and water each. Even if he meant fresh yeast, that’s an awful lot for such a small amount of flour (instant yeast weight would be 1.2g – that’s an insane amount). It’s not necessarily wrong, but the poolish will mature much faster than 3 hours with that amount of yeast and the aim is to get both preferments to peak near the same time.
AP Flour
150g ~14.25% of total flour
Water
150g
Instant Yeast
0.4g
Optimal Fermentation Temp.
78°-80°F
Poolish should develop in a warm environment to make the 3-hour schedule.
Final Dough
Bread Flour
170g
AP Flour
402g
Water
286g
Salt
14g
Poolish
229g
Levain
229g
Total yield
1330g 4 X 330g 60cm loaves 6 X 220g 40 cm loaves
Optimal dough temp
78°-82°F
Yield is just a little more than 1300g which is the target to account for loss due to evaporation or processing (dough sticking to stuff).
Note the relatively high dough temperature of 78°-82°F. This is consistent with Chad Robertson’s method of a warm bulk ferment. You can achieve this by placing your bulk fermentation container in a cold oven with the light on. The light bulb will provide enough heat to maintain that temperature range. But keep an eye on the temp. You don’t want it to get too warm. Propping the door open with a dish towel or oven mitt will help control the temperature.
This is a fairly straightforward formula. BTW, in case you’re interested, both the Poolish and Levain flour contribute 14.25% each to the total flour. So if you want to scale this up, you can use that percentage to determine how much flour you’ll need for both. Without further ado, let’s get into the dough development!
Make the Preferments
One thing to note is that both preferments should be made from predominantly AP flour. The reason for this is that whole grain flours will have much more fermentation activity.
Build the Levain
For the levain, take about 30-40 grams of mature starter and mix it with 150g each of flour and water. Your starter should have enough activity where the levain will be ready in three to four hours. Or if you have a regular schedule, try to coincide the peak of the levain with the peak of the poolish.
Poolish
With the poolish, thoroughly mix all ingredients together. Set aside in a warm place to promote yeast activity. Poolish will be ready when it is heavily bubbled on the top.
Both preferments should pass the float test to ensure optimum activity.
Initial Mix/Fermentolyse. Set aside 50 grams of water. Measure out what you need from both preferments and place in a mixing bowl. Liquify the preferments with the rest of the water, then sift all the flour and add to the liquid. Mix well until there are no dry ingredients and no large lumps in the mix. It’ll be shaggy. Cover and rest for 30-60 minutes.
If you’ve made baguettes previously, you will notice how stiff the dough is. Don’t be alarmed and add more water! The fermentation action of the starters will soften and aerate the dough. Also, note that this is not a true autolyse as the preferments are included. But it does help to hydrate the flour!
Final Mix/Bassinage. Sprinkle the salt all over the dough mass, then add the remaining 50 grams of water. Note that for this small amount of dough, I just mix it by hand, squeezing the salt and water into the dough. Mix until all the water has been incorporated and you don’t feel any salt crystals when you squeeze the dough.
You could use a stand mixer for all the mixing. But if you do, mix only on the lowest setting! I’ve found that with baguettes, you actually don’t want to develop the gluten too much in the mixing stage. You’ll do all that through the folds.
Bassinage Explained
Bassinage is a term you’ll occasionally hear from bakers from time to time. The literal translation of the word is “bathe.” From the perspective of dough development bassinage is the process of folding reserved water into an already mixed dough; basically bathing the mixed dough. You hold back some water (typically 5%-10%), then mix the dough with the remaining water to start the gluten formation. At a later time, you add in the reserved water.
The idea behind it is actually kind of ingenious. The thinking is that the initial mix will get gluten formation started. Then when the reserved water is added, though some water will obviously combine with the remaining flour, other water molecules will get trapped in the gluten matrix, thus forming little pockets of water, which in turn will help in the formation of a more open crumb.
Given that, especially with a moderately stiff dough like the Tartine baguettes, bassinage conceivably will help with creating an open crumb as the trapped water molecules will form steam bubbles during baking.
Bulk Fermentation. 3-4 hours. As with Chad’s basic country loaf, you’re looking for about 25-30% dough expansion. I let the bulk fermentation go for about 4 hours to get to that kind of expansion.
Folding. Fold every 30 minutes within the first three hours up to a total of six folds. Truth be told, I got to the fourth fold and the dough had plenty of strength, forming a nice windowpane. As with any kind of bread, you should never be too parochial about the folding suggested in a recipe. Once you’ve developed enough strength, stop folding. Continuing will just degas the dough.
To be honest, having made these a few times now, I’m not convinced the dough needs this many folds. The hydration is so low that the gluten bonds form quickly. I’ve never gone past four folds. The bulk fermentation does take four to five hours though. With that in mind, I’d suggest doing four folds every 45 minutes instead of six every 30 as is written in the book. But this also depends on your flour. When I use my Azure Standard Bread Flour, two folds is all I need.
Divide and Preshape. Gently turn the dough onto a lightly floured surface and tug it into a rough rectangle, then scale out four 330g pieces for 60cm baguettes, or six 220g pieces for 40cm baguettes. With each piece, letter-fold the dough in an east-west direction, then roll it up like a jelly roll and seal the seam and ends. Take care not to roll too tightly. Add just a little tension! Place seam-side-up on a well-floured couche. Rest for 30-45 minutes depending on how tightly you rolled the pieces. With this low-hydration dough, you need the dough to be well-relaxed.
Shape. I always use Master Chef Markus Farbinger’s baguette shaping technique. But if you have a shaping method already, feel free to use it. One thing that Chef Farbinger doesn’t mention in shaping is that while rolling, your fingertips and the heels of your hands should have contact with your board as you roll the dough out, forming a natural cup. To lengthen the log, you simply flatten your hands a bit – not completely – and the dough will push out to the sides.
Final Fermentation. Up to 3 hours. Yes, you read that correctly. Remember, this is a stiff dough, and after shaping, you want to give it plenty of time to relax. With my last batch, my dough was ready in about an hour and a half. It was a warm afternoon when I baked, and I didn’t want to run the risk of over-fermenting the loaves. In hindsight, I could’ve let it go out for about two hours. To tell if the loaves are ready to bake, if you do the poke test, the surface should give easily. And once you press a little deeper, the interior should have a little more tension, but it should give as well. Once you remove your finger, observe how the dough springs back. It should spring back slowly.
I can’t stress enough how important this last fermentation step is! This step will make or break the bake – even more so than the bulk fermentation because that rest period will allow the bubbles to re-form, which is crucial to achieving an open crumb. Remember, this is a stiff dough at 64% hydration compared to the standard hydration of 75%. And though the acid in the preferments will aid in the extensibility of the dough, it still needs time to develop the bubbles. So, once you’ve shaped, give this dough time to expand.
Bake. During the last hour of final fermentation, warm up your oven to 500°F. I use a stone to bake, but you can bake on a sheet or even a dedicated baguette pan. Use lots of steam! When I bake baguettes, I use both a broiler pan that I put hot water into, plus two loaf pans that have well-soaked terry-cloth towels in them to provide a steamy environment (NOTE: Your oven should be steamy when you place the baguettes in it). These are in the oven for about 10-15 minutes before I pop the loaves in (allowing my oven to come back to temperature). Quickly place your loaves in the oven, then immediately turn it down to 475°F. Bake for 12-15 minutes on steam or until the crust just starts getting color. Remove the steaming containers, turn down the oven to 425°F, then bake for another 12-15 minutes until the loaves turn a deep golden brown.
Cool on rack. You can eat these warm!
Notes
The trick to this recipe is getting the preferment timing close. You might expect the poolish to ferment more quickly than the levain, but having made these a lot, it’s hard to predict timing. But do not worry if one is ready before the other! It just means the yeast ran out of food. Once you mix everything together, the yeast will have a new food source.
The crumb, while open, is very much like a sourdough crumb. It’s tender, but a lot chewier than the baguettes I normally make. I realize that that could be a function of the flour I used. The next time I make these, I will use all AP flour – most probably Central Milling flour as it is only 10.7% protein. This should lend itself to a much lighter crumb texture.
While I appreciate the romanticism of baking on a stone, I always use parchment paper on my transfer board to get my loaves into the oven. Especially with baguettes, since I load them into the oven along their long sides, I’ve had too many mishaps where the loaves roll off my board! So, I use parchment paper. When I remove the steaming containers, I also remove the parchment paper from underneath the loaves.
The loaves could’ve benefited from a longer final fermentation. As you can see in the pictures, they turned out fine, but I think I could’ve had them even puffier had I let the final fermentation go longer. That said, I will have to monitor their progress carefully if I use low-protein flour.
Once the final fermentation is complete, I cannot stress enough that you handle the shaped loaves as gently as possible.
I must admit that I’m still a little bugged by the yield in the original recipe and the recommendation to break up the dough into 2 or 3 pieces. But despite that, I will relegate that to copy-editing oversight.
Update 9/4/2025 – To be honest, I never liked the low hydration of the dough because the texture of the crumb was more like traditional sourdough in that it was chewy. Baguette crumb should be chewy to some extent, but not nearly as toothsome as sourdough. So, I used the same technique but changed the hydration to the standard 75%. They’re much lighter with a nice, open crumb. Plus, I add a bit of diastatic malt powder (0.5%) to help soften both the crumb and crust.
When you see the Real Bread loaf mark, it indicates that this recipe produces bread with no artificial additives and is leavened either by a natural starter or commercial yeast.
Okay… who am I that I should even have the audacity to correct Chad Robertson? But when I see a recipe in a book that’s obviously wrong – I don’t care if the author is a world-renown baker and I’m just a peon baker of a relatively unknown micro-bakery – I’m going to point it out.
So what got this bug up my ass about the baguette recipe in Tartine Bread? There are a few things I found in the recipe that seem off. The first issue is that the total yield of the recipe far exceeds what you actually need to make 2 to 3 baguettes as suggested in the book. Furthermore, the amount of yeast used in the poolish seems a little much for the amount of flour and water. And finally, the hydration seems awfully low based on my own research and experience.
By themselves, these issues aren’t really that bad. I have no doubt that the recipe will yield some very tasty baguettes. But all together, they make the recipe seem a little off to me. Again, these are minor things, though the dough yield is actually pretty major. Let’s dive in…
Here’s the recipe from the book:
Leaven
400g
Water
500g
Poolish
400g
All-Purpose Flour
650g
Bread Flour
350g
Salt
24g
Total Yield
2324g
Before the recipe, he writes:
Makes 2 or 3 baguettes
When I originally read that, I immediately thought that recipe amounts would be pretty small. But when I saw the amounts he was calling for, I immediately said out loud, “No friggin’ way!” Then that made me analyze the recipe even more.
Right-sizing the Recipe for Home Baking
I know, I know. Who am I to correct a master? But from everything I’ve learned about making baguettes, 40cm demi-baguette dough generally weighs about 220g. Standard 60cm baguettes are about 330-350g apiece depending on the oven. The amounts listed in the recipe would make 10 demi-baguettes or 7 full-size baguettes! Even if we scale out 400g pieces (as he mentions his are in Tartine Bread), that is enough dough to make more than 5 of those! So that must’ve been a typo. Furthermore, if you look at the pictures in the book, there’s no way that the dough pieces are 400g. But look, if you read the book and follow the recipe, just know that it’ll make more than 2 or 3 baguettes.
In light of that, here’s what I’ve been able to glean from the recipe in the book.
Overall Formula
Flour
100.00%
Water
64.00%
Salt
1.70%
Yeast
0.00%
Total Percentage
165.70%
Preferment (Both Levain and Poolish)
Note that the flour from both the levain and the poolish contributes ~14.25% of the total flour apiece. So for the final dough, you’ll need about 230g of each of the levain and poolish. I just combined the two for my calculations.
Preferment Flour %*
28.6%
Hydration %
100%
Preferment Flour Weight
229g
Preferment Water
229g
Preferment Required
459g
NOTE: Both starters use AP flour
Final Dough
Flour
575g
Water
286g
Salt
14g
Preferment
459g
Yield
1330g
4 X ~330g loaves 6 X ~220g loaves
This yield is much more sensible for a home baker. I realize that many folks don’t have a baking stone and can’t make full-size baguettes. Not a problem. The final dough weight of 1330 will make 6 X 220g 40cm baguettes, which is about 15″. If you have 15″ baguette trays, these will fit right on them!
As far as dough development is concerned, Chad Robertson uses the same process for his basic country loaf, which involves 6 folds over a 3-hour period after mixing.
An Issue with the Poolish
Another anomaly I saw in the recipe is that the poolish is made of 200g AP flour, 200g water. and 3 grams of active dry yeast, or 2.25 grams instant yeast. His instructions state to let that stand for 3 to 4 hours at room temp or overnight in the fridge. Based on my experience, that’s way too much yeast for that small amount of poolish. That poolish will be ready in less than two hours, even in cold weather. An overnight fridge rest will have exhausted all flour. I would say use 0.5g instant yeast, or 0.75g active dry. Ideally, you want the poolish and the levain to be peaked at roughly the same time. With that amount of yeast, the poolish will be ready long before the levain. But maybe that’s not necessarily a bad thing as once the poolish is incorporated into the dough, the yeast will have a new food source.
Hydration? Hmm…
You’ll notice that the overall hydration is 64%. That’s not a bad thing, but it does make a stiffer dough. I have to admit that I’m a little dubious of the openness of the crumb with hydration that low. However, Hamelman’s Poolish Baguettes in Bread are only 66%. I guess there are many ways to skin a cat. But that said, everything I’ve learned about baguettes is that in general, they’re at least 75% hydration – but that has just been my personal experience. And no, I’m not being a high-hydration snob.
Believe me, I don’t want to come off as being some know-it-all, and I’m not the kind to actively look for fault in someone’s approach just to make myself feel better. That’s absurd behavior. But being a home-based baker myself, I wanted to point out a few minor anomalies I found. Especially with the dough yield, I just couldn’t imagine making a baguette from almost 1200g of dough! 🙂
As for the dough itself, I see no problem with it. In fact, the high amount of preferment that’s used will make the dough much more extensible, despite it being such comparatively low hydration to what I’m used to – at least that’s what I’m thinking will happen. But there’s no better way to find out than to make these! I’ve never even considered using both a levain and a poolish together. I’m excited to see how it will turn out!
The way I learned to make baguettes was from Master Chef Markus Farbinger, who uses a slow rise or pointage en bac method. It is a straight dough, but bulk fermented and retarded overnight. This allows the amino acids and lacto- and acetobacillus bacteria to develop, while retarding the activity of the yeast. The results, as shown in the picture to the left, are pretty magnificent.
But I learned another technique called Baguettes de Tradition from Jeffery Hamelman’s book, “Bread” that he learned from Japanese bakers. This is a straight dough that differs rather significantly from slow-rise baguettes. First of all, these baguettes are baked in just a few hours from the final mix, so you’re working with room-temperature dough. Second, where I would normally use an 11.7% protein AP flour mixed with about a third high-extraction flour, this recipe calls for 100% bread (strong) flour. And finally, this is a wetter dough than what I’m used to using at 76% hydration.
As Hamelman puts it: “…a baker could be excused for concluding that the dumpster and not the belly is the destination for the bread.” This is because mixing is done gently, so after mixing – even using a stand mixer – there’s virtually no gluten development! The dough just comes apart. But with the folding schedule, the gluten develops quickly, and by the last fold, the dough is luxuriously smooth and supple – and strong.
Chef Hamelman warns that this is a challenging bread and certainly not one for beginners. I can attest to this as the dough at this hydration using pure bread flour is tacky and will easily stick – especially since you’re handling a room temperature dough. So keep your hands floured when shaping and use quick motions!
But the end result is pretty fabulous. You will notice right away when the loaves come out of the oven, that you will not get pronounced ears. This is because with these particular baguettes, you minimize the creation of a skin during shaping. The crumb is significantly different from my other baguettes in that there were not many huge voids. But that could be more of a function of how I handled them during shaping. But in spite of that, the texture of the crumb is magnificent, redolent with numerous pockets.
Overall Formula
Ingredient
Bakers %
Bread Flour
100%
Water
76%
Salt
1.8%
Yeast
.75%
Total
178.55%
Final Dough
Flour
769
Water
585
Salt
14
Yeast
6
Total Yield
4 X 340g pieces
Optimal Dough Temp
76°F
Especially with this recipe, before you get started, I highly recommend sifting your flour to avoid creating lumps which are a pain to get out, especially if you’re mixing by hand.
Mix. Combine flour, salt, yeast in a mixing bowl and mix thoroughly until all the dry ingredients are well incorporated. Whether or not you use a stand mixer, gradually add the water until you form a shaggy mass, then stop. I know that it might not make any sense, but believe me, the end result will be pretty amazing!
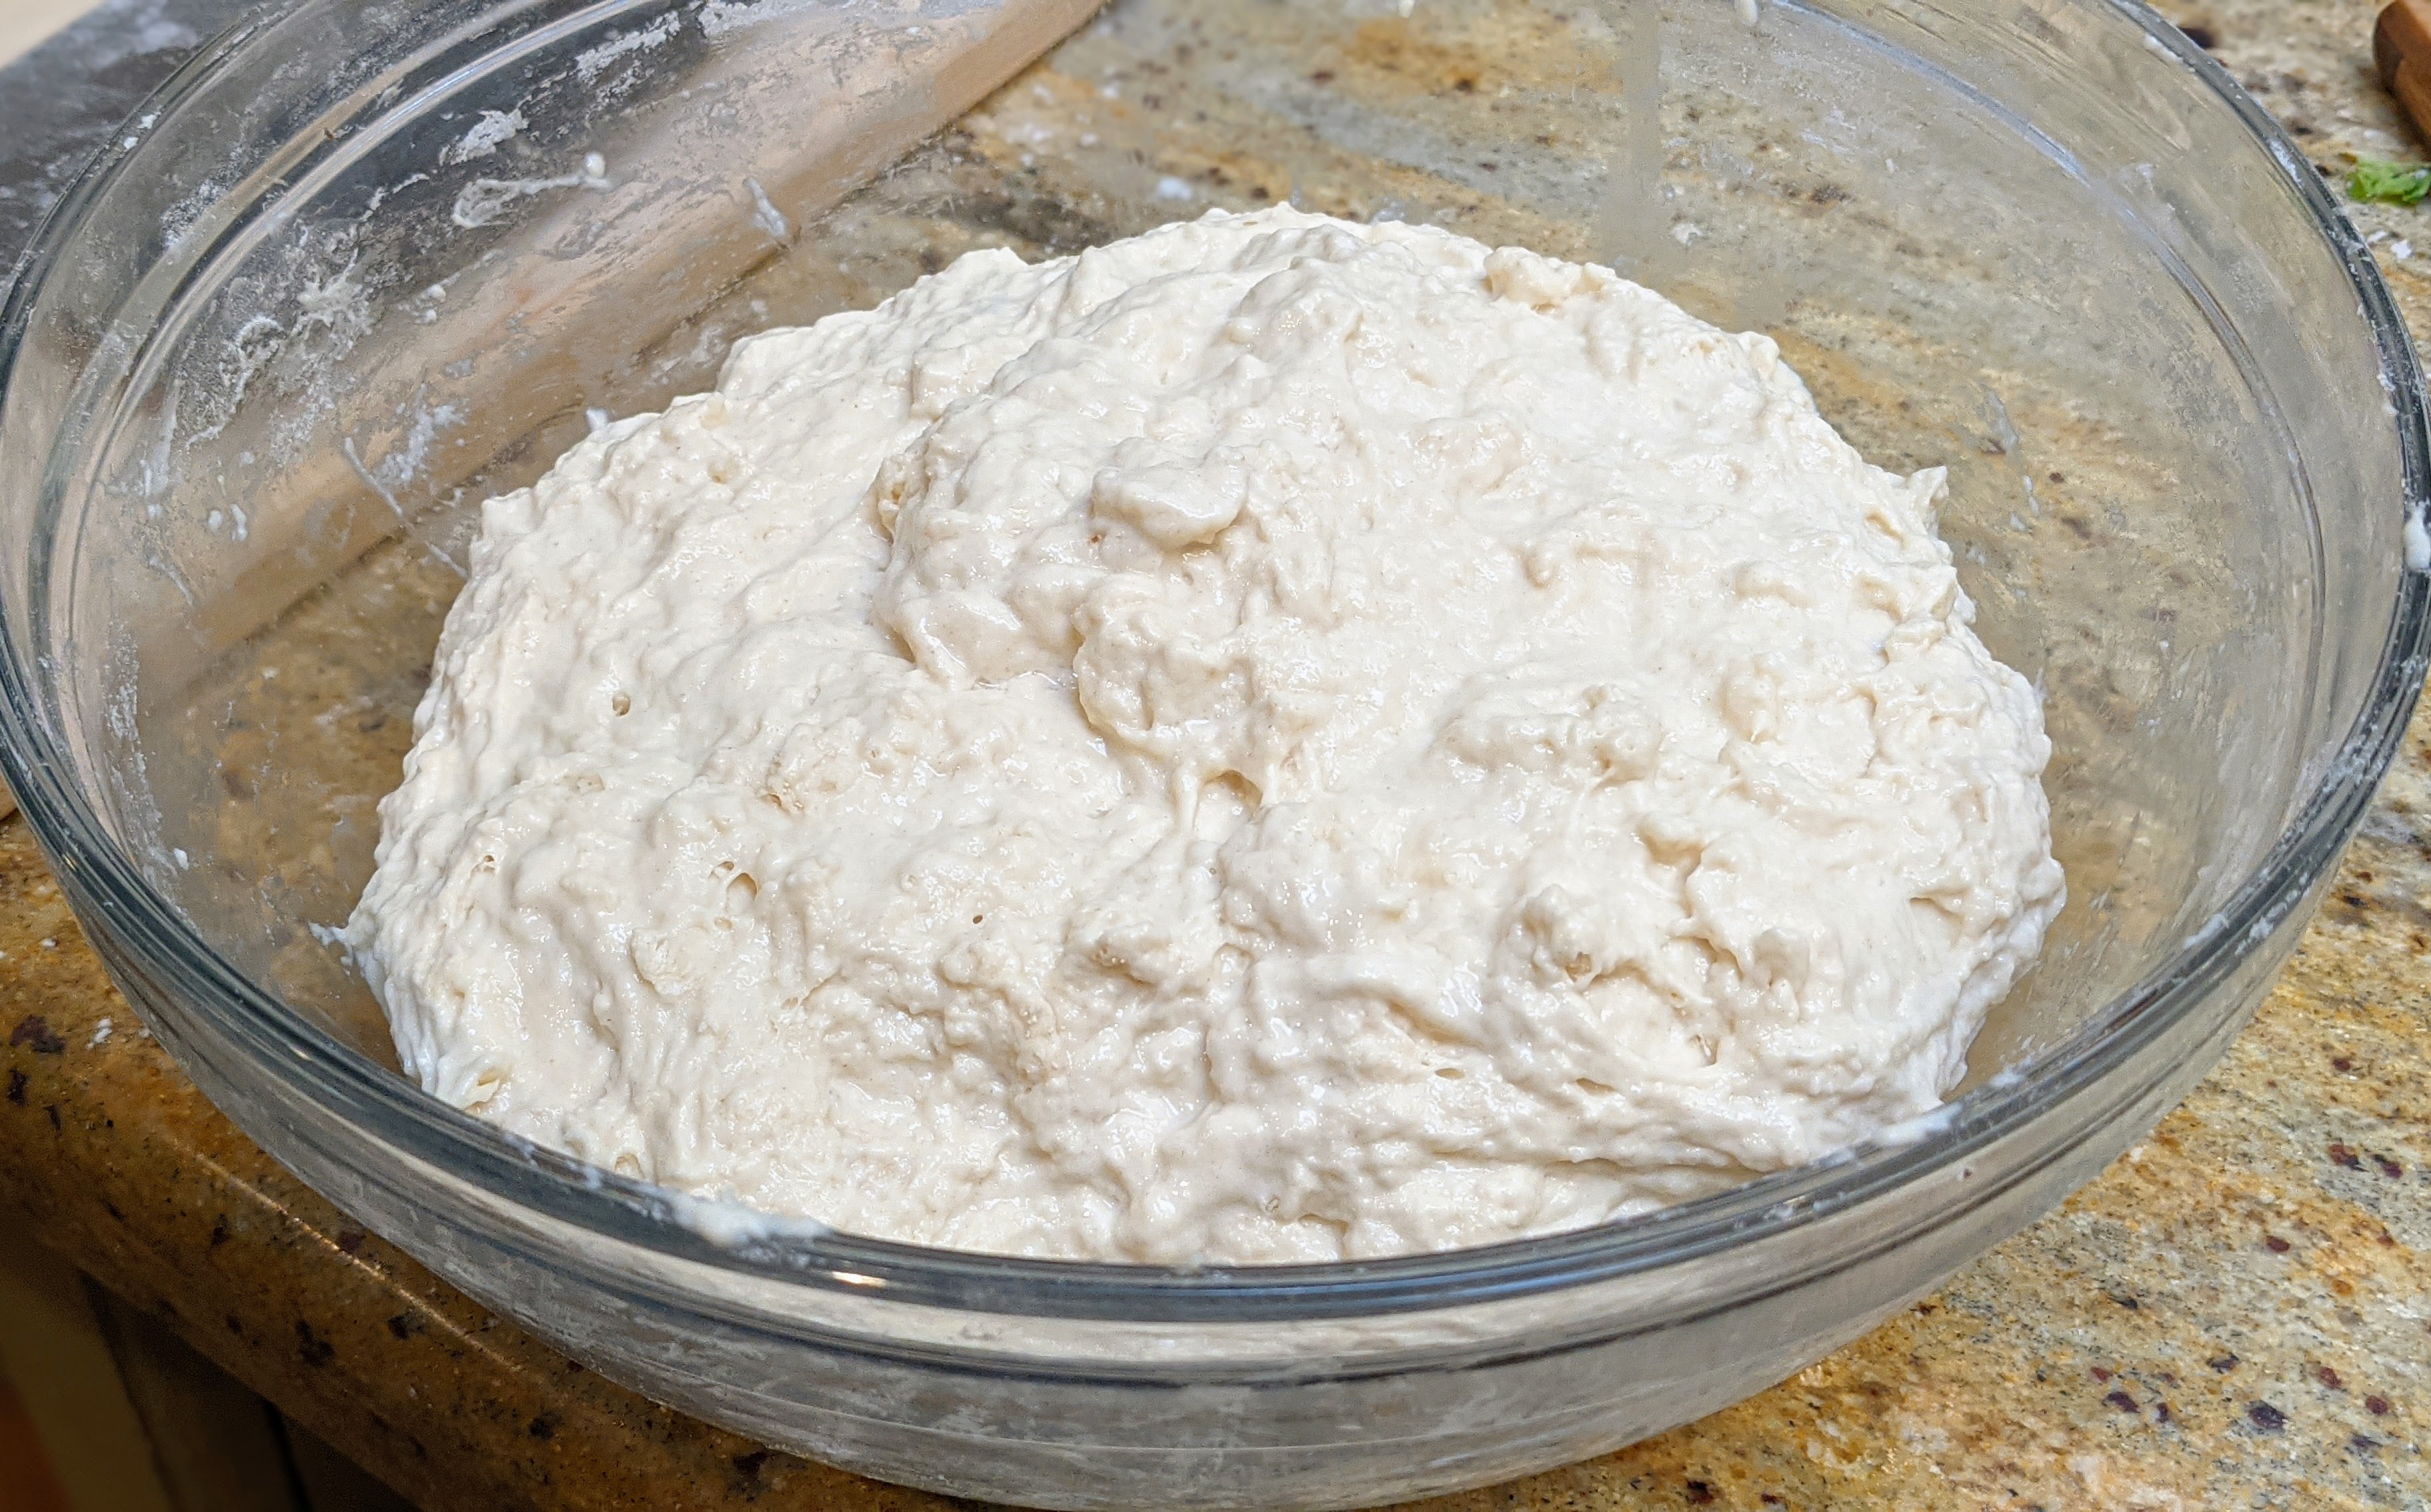
The dough is a shaggy mass after the initial mix
Bulk Fermentation. 1.5 to 2.5 hours (could be shorter) depending on the ambient temp of your kitchen. I know it’s a wide margin, but on hot days, things will happen quickly! Do not take bulk fermentation out too far, otherwise, you will shorten the final fermentation, and a lot of the final magic of creating nice holes happens there. I recommend 50%-75% volume expansion.
Right before the second fold. The dough has already started puffing up and is well-domed at the top!
Folding. During the first hour, gently stretch and fold the dough at 20, 40, and 60 minutes, being careful not to degas the dough too much. For each folding session, make sure to stretch the dough to its extent without tearing it and feel the tension and tenacity build up in the dough – eventually, it will fight you and not want to be stretched. When you’ve finished folding, turn the dough onto the seams. By the end of the third fold, you will have a very luxurious and supple dough! I never cease to be amazed by the transformation, plus the gentle, but frequent folding in the first hour really helps build the gas-retention properties of the dough. As such, I use this folding technique for all the baguettes I make!
Pro Tip: Wet your folding hand often!
By the end of the third fold, the dough is super-strong and smooth, with proonounced bubbles inside. This picture was taken about a minute after I turned it over on its folds to show how well it holds together.
Divide and Shape. Divide the dough into 4 equal pieces (for this recipe, they’ll be 340g). Gently letter fold each piece, pulling one side over two-thirds of the dough, then repeating that on the other side. Roll against the seam like a jelly roll, seal the seam, then place seam-side-up on a well-floured couche. Let rest for 15-30 minutes ensuring the dough has sufficiently relaxed before shaping. Shape into baguettes then transfer back to the couch for final fermentation.
Final Fermentation. 30-90 minutes depending on ambient temp. No matter how gentle you are, shaping a baguette is a bit of a violent affair on the dough. This is why you want to leave as much room for final fermentation to let the dough recover from the shaping process. Use the poke test at about 30 minutes to see how fast the dough pops back up. If it’s real quick and leaves no mark, then it’s not ready. Check it after 15 minutes to see how things are progressing. It’s a real feel thing with baguettes!
After final fermentation, baguette loaves should be puffy. Note that the skin on these is very delicate so scoring must be quick and decisive. You cannot pause the blade.
Bake. Bake at 475°F with steam for 15 minutes. Remove the steaming container, then bake at 425°F with convection (if you have it) for 15-20 minutes. If you don’t have a convection setting, finish the bake at 435°F. When you remove the loaves from the oven, check how they weigh in your hands. They should feel lighter than they look and the crust should not be soft. It will soften a bit later but fresh out of the oven, it should be firm and a bit crackly. If you feel they still have a little mass or if the crust is soft, pop them back into the oven for a few minutes.
Finished product. I kind of messed up on the shaping of these, but they generally turned out fine. The crust should have a slight sheen and the crumb should be riddled with holes of various sizes.
Notes
Though I provided specific ingredient amounts in the table above, I always work backwards in figuring out how much of the ingredients I need. For instance, for my oven, my standard batch is 4 baguettes scaled out to 335g apiece. So I know I’ll need 1340g of dough. I always add a fudge factor of about 1% due to loss during processing, so I’ll up that to 1350g. Given that, I can easily calculate the flour I’ll need by dividing the total yield of 1310g by the total of the percentages – in our case here it’s 178.55%. So 1310 / 178.55% = 734g of flour. From there, I can just use the ingredient percentages to figure out the amounts for the rest of the ingredients.
As far as scaling out the pieces is concerned, officially, a baguette should be 60 cm in length and weigh 250 grams. I’ve found through experimentation that I can get there if I scale the baguettes to 335 grams. However, I myself prefer a little bit wider baguette, so I scale my dough out to 340 grams. But as a rule of thumb, I use a factor of 5.5 or 5.6 and multiply that by the length of the baguette I want to make. This factor is basically dough weight/centimeter. 40cm demi baguettes typically scale out to 220g.
As with any high-hydration white flour dough, this dough is tacky! I can’t stress enough the quick, definitive movements I had to make to work with this dough. I also had to make sure that during shaping I was dipping my hands in my pile of flour to prevent sticking.
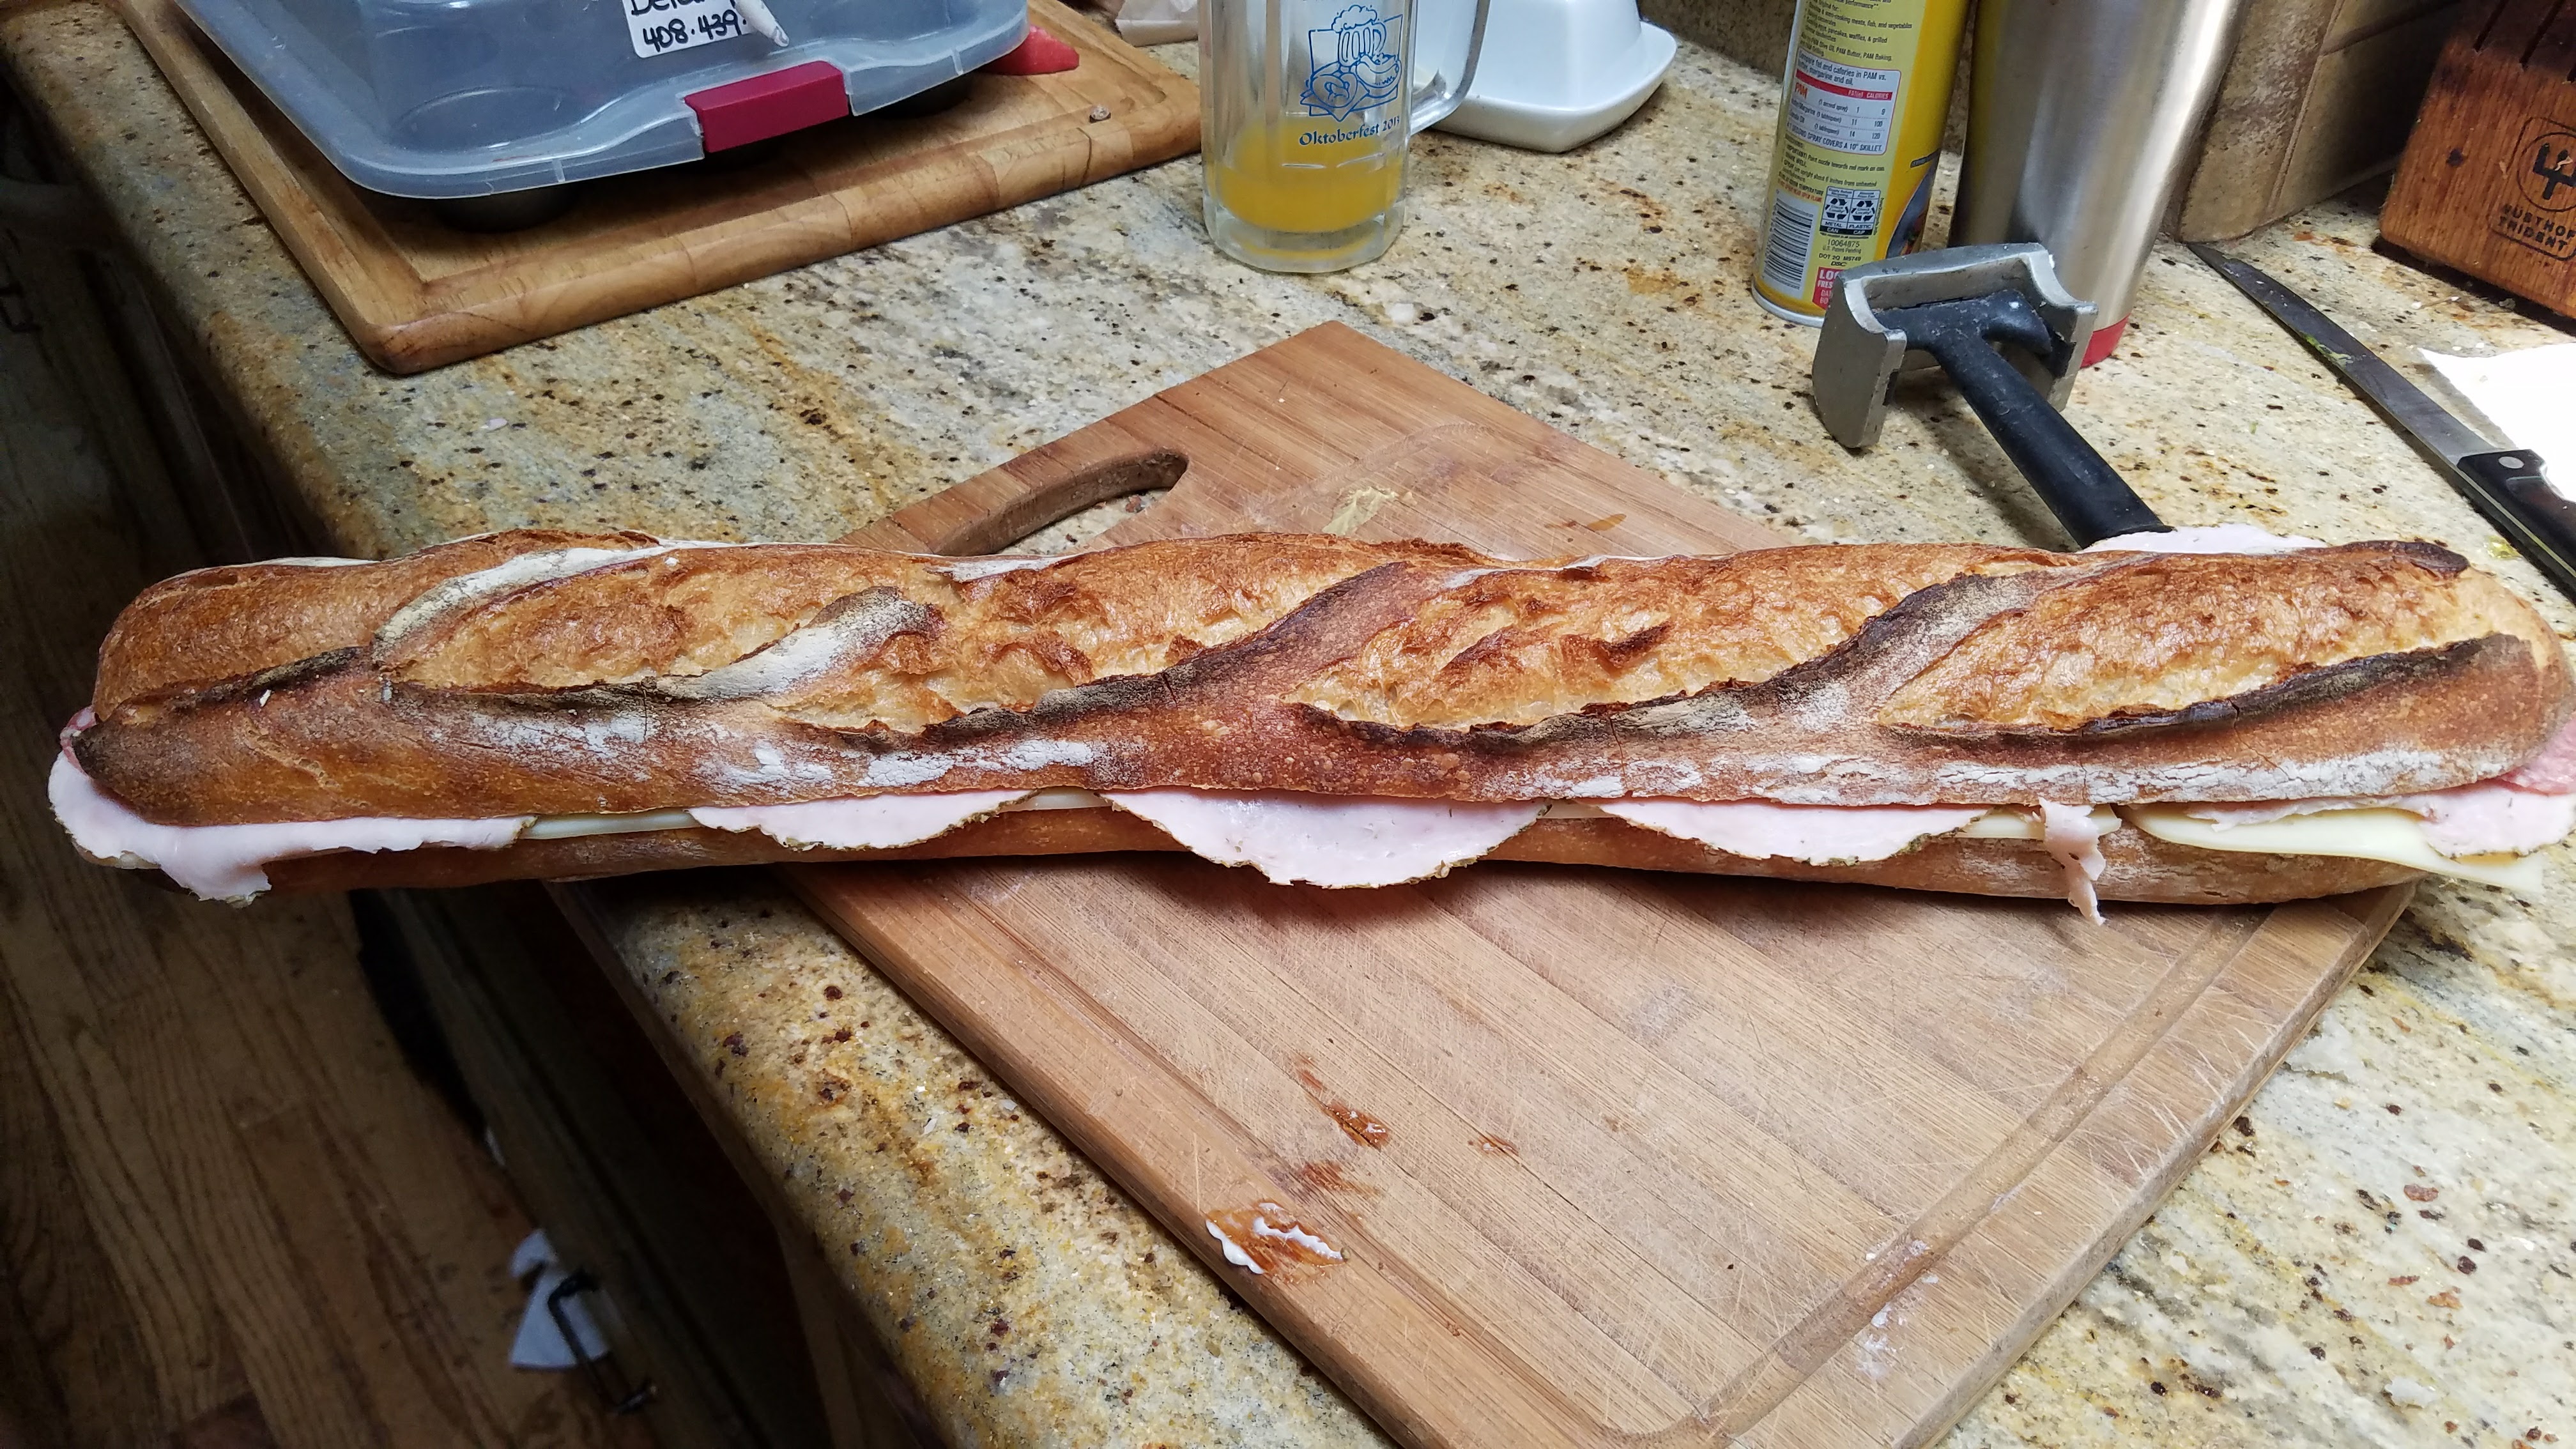
As I’ve often mentioned in the past, baguettes are my favorite bread to make. Nothing gets me in the zone as much as making baguettes. The reason for this is that though they seem so easy to make at first blush, they’re actually incredibly difficult to get right. For me at least, making baguettes requires me to be on my game every step of the way; forcing me to be absolutely mindful of what I’m doing because one misstep can result in total disaster. Which explains why I haven’t released a sourdough baguette recipe until now. I’ve had quite a few disasters and I didn’t want to publish a recipe until I had a few successful runs.
As with all my baguettes, I make them for the express purpose of being a platform for sandwiches. But they work just as well for tearing up and dipping into olive oil and balsamic vinegar. They’re also optimized for baking in a domestic oven, so they’re more demi-baguettes than full-sized 60-80 cm loaves.
Also, these use a hybrid rising technique using a levain and some yeast. Yeah, yeah, yeah, I can hear the sourdough purists out there screaming, but I prefer the results of the hybrid technique over a pure levain-risen dough. I’ve baked several permutations and I have to be honest: While I love the flavor profile of a pure levain-risen dough, it’s far too extensible, and backing off the hydration creates too tight of a crumb. The small amount of commercial yeast used here helps open the crumb. But that said, you still can choose to not use any commercial yeast. The process will take longer and the crumb may not be as open.
This can be up to a two-day process, depending on how long you want to do the bulk fermentation. But unlike a poolish baguette where you make the poolish the day before then mix, shape, and bake the final dough the next day, with this you’ll build the levain and mix the final dough on the same day, then either bake that day or cold ferment overnight. Let’s get to the formula:
Overall Formula
Flour
100.00%
Water
76.00%
Salt
2.00%
Yeast
0.50%
Total Percentage
178.50%
Levain
Preferment Flour % of Total
25%
Hydration %
100%
Levain Flour
192.5
Levain Water
192.5
Levain Required for Recipe
385
Final Dough
Flour
577
Water
392
Salt
15
Yeast
4
Levain
385
Total Yield
~1374g total dough 4 X 340g loaves (60 cm) 6 X 226g loaves (40 cm)
Optimal Dough Temp
76°F
Levain. Build a levain to yield the amount you’ll need for the bake. With these baguettes, the flour of the levain represents 25% of the total flour needed in the recipe, which would be 192.5g out of a total of 770g. Your levain will be ready when it passes the float test.
As far as the type of starter to use, for baguettes, I normally use one based on AP flour as I want less sourness in my dough. But you can use any flour to evoke different flavor profiles.
NOTE: I’m not going into building a levain as there are plenty of resources available for making and building a 1:1 (flour:water) starter. As for how much you should make,while the requirement for this recipe is 385g of levain, make more than that – like 400g – to account for evaporation and levain sticking to your mixing utensil.
Initial Mix/Autolyse. Reserve 50-75g of the water. In the remaining water, break up the levain until it’s fully dissolved, then add the flour and combine well, being careful not to develop the gluten much. Autolyse for at least 20-30 minutes on up to an hour (remember, there’s starter in this, so you don’t want fermentation to progress too far).
Final Mix. Sprinkle the yeast over the dough. Dissolve the salt into the reserved water, then mix in the, salt, and reserved water into the dough until well incorporated with no large lumps. The dough should be shaggy.
Folding. Gently stretch and fold 3 times in the first hour at 20-minute intervals. By the third fold, the dough should be smooth and supple, with bubbles forming. When you do your stretches, try to be as smooth as possible, but do make sure to stretch the dough to its full extent. This is important, especially with baguettes because you only have a narrow window – one hour – in which to build dough strength.
I love this part of the process because the dough goes from this ugly, uneven mass and transforms into a smooth, luxurious and structured dough.
Bulk Fermentation. 1-2 hours depending on room temp. Or you could pop the dough into the fridge for a long, cold nap. In either case, take the dough out to about 75-80% and NOT doubled as you might see in other recipes. You don’t want to take it too far.
Divide and Shape. Pour dough out onto a floured surface and gently tug it into a rectangle of even thickness. Scale out 4 X 340g pieces. Letter fold each piece, making sure to stretch the sides out when folding, then roll each piece out into a jellyroll shape, and seal the seam. Place seam-side-up on a well-floured couche and let relax for at least 20 minutes (maybe more depending on how tightly you rolled the logs). After resting, shape the logs into baguettes.
Final Fermentation. 1-1½ hour. This could be shorter in warm weather.
Bake. Transfer loaves to a loading board or baguette pan. Score, then bake at 500°F for 8-10 minutes with steam (baguette should just start getting color). Remove your steaming container, then bake at 425°F for 12-15 minutes on convection if you have a convection setting, otherwise bake at 435°F for 12-15 minutes. Bake longer to a deep russet color, but beware that because of the acid in the dough, you don’t want to take these out too far as the crumb will dry if baked too long.
NOTE: You could technically leave out the commercial yeast, especially if your levain is super-active. With its flour representing 25% of the total flour, there will be plenty of yeast to rise the dough. However, if you do this, lengthen the time between folds to 30 minutes and be super gentle with your folding. Consider doing a coil fold for the final fold. Pure sourdough dough is much less forgiving than one that has commercial yeast. Also, final fermentation time will increase as the density of yeast in a levain is much less than that of commercial yeast.
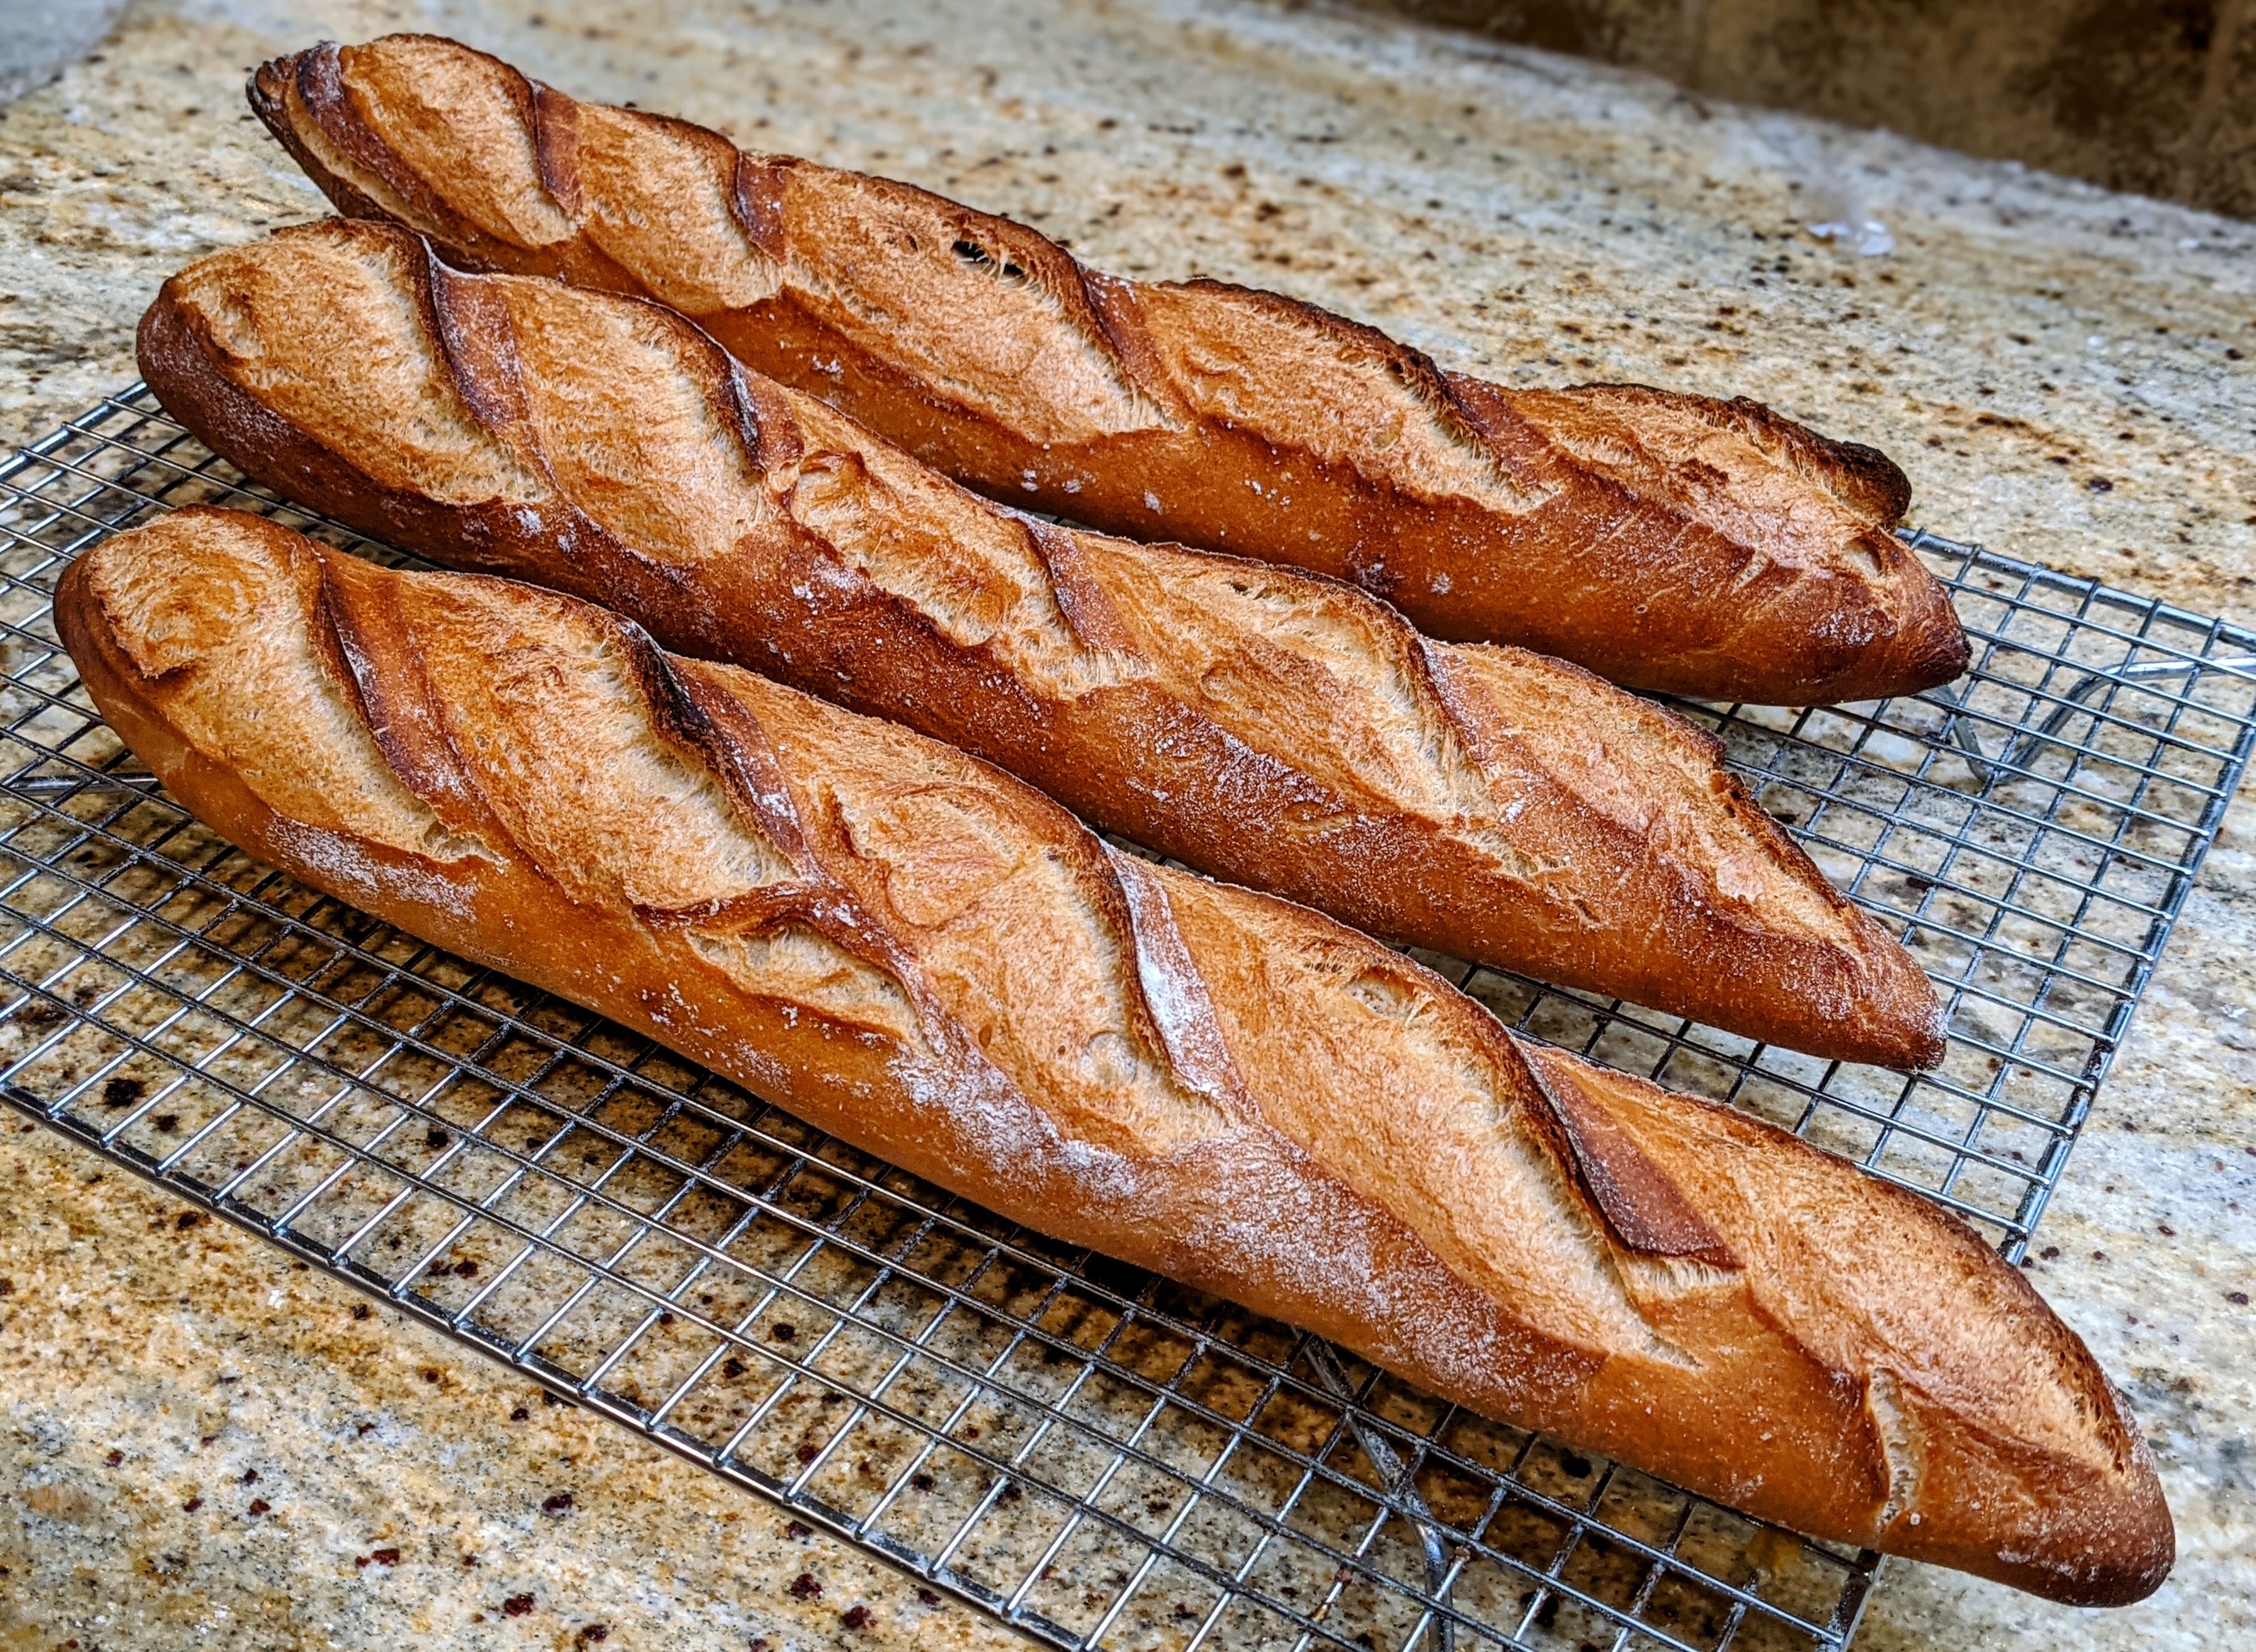
Okay, I admit it. I’m a baguette freak. I make baguettes at least once or twice a week. And up until this past week, I’ve been experimenting with different methods from baguettes made with a poolish to paté fermenté to levain. But to tell you the truth, my favorite baguette to make is based on the slow rise or pointage en bac method; a method similar to the one Master Baker Markus Farbinger teaches in his baguette and ciabatta video series.
So what is the pointage en bac method? Simply put, it’s a straight dough that slowly rises in the fridge. Traditionally, it was retarding the shaped dough. The technique has its roots in busy French bakeries where bakers wanted to provide baguettes throughout the day. After all, baguettes are best eaten within the first hour or two of baking – and they’re MUCH better warm! However, that had an issue of the shaped loaves collapsing, so to prevent that, the bakers would add dough conditioners to help the shaped loaves maintain their structure. Not a fan.
However, as Jeffrey Hamelman put it in “Bread,” the close cousin to this technique is to create a huge batch of dough then separate it into several batch buckets and allow the individual batches to bulk ferment in a cold environment. From a production standpoint, this has huge advantages because all the baker has to do is pull a bucket from the retarder, then shape and bake as opposed to whipping up another batch of dough. This is the method that Chef Markus Farbinger teaches in his baguette video series, though he only makes a single batch.
I prefer this technique simply because it keeps things simple: Throw all the ingredients into a mixing bowl, let it ferment for an hour, fold the dough, cover it, then pop it into the fridge for 6-18 hours. I’ve even used a third of the amount of yeast called for and let it ferment for over 24 hours to develop flavor. It’s a very flexible technique that can easily be adjusted to accommdate different schedules.
AND if you’re going to be baking in separate batches, it’s an ideal method. For instance, in the next couple of days, I’m going to have to make a few batches for an upcoming graduation party. I’m going to make a huge batch of dough, then separate it into separate batches. When the dough’s ready, I’ll take a batch from the fridge, shape it, then bake it. While those loaves are in the oven, I’ll remove the next batch from my fridge, shape them, then let them go into their final fermentation. By the time the previous batch is finished and the oven comes back to temp, the next batch should be ready to bake.
What makes it possible is retarding the dough. Yes, the later batches will be slightly more fermented, but there shouldn’t be too much of a flavor difference between the batches. Let’s get to the formula/recipe, shall we?
Note that the final dough will produce 4 loaves at 335g apiece. With the baking method, the finished loaves will have be approximately 250 grams, which is the official French weight for a baguette (those French are very exacting about their bread standards).
Formula
Ingredient
Baker’s %
Final Dough
AP Flour (11-12% protein)
100%
763g
Water
75%
573g
Salt
2%
15g
Yeast
0.3%
2g
Total Yield (Accounts for about 1% weight loss during processing)
1353g
Optimal Dough Temp
76°F
Target dough temp: 78-80°F
The yeast amount can be varied. Go up to 5g if you intend to just bake them that day, but 2g and an overnight cold rest yield the best flavor!
Process
This is one of the few doughs that I make where I mix entirely by hand mainly because I only make enough dough to make 4 X 330g pieces for a single batch. I use a mixer if I’m doing multiple batches.
Mixing. Use a mixer or mix by hand and mix to a shaggy mass with no large lumps. As I mentioned above, I almost always mix by hand for a single batch, though I use a Danish dough whisk – that’s a must-have tool. Make sure though to sift the flour if you mix by hand.
Shaggy mass with very little gluten development. The folds at 20-minute intervals will build the strength and has-retention properties of the dough!
Bulk Fermentation: 6-18 hours. 1 hour @ room temp; the rest of the time in the fridge.
Folding. Fold 3 times at 20-minute intervals for the first hour to develop the gas-retention properties of the dough. This is gentle folding. Though I do stretch and folds I do my best to not press down on the dough too much when folding a flap over. After the third fold, pop the dough into the fridge for a long, cold rest, or until the dough has expanded around 50%. It’s best not to let it go too much further than this.
You may notice that this folding schedule is different from my original instructions of letting the shaggy mass sit for an hour, then doing a single fold and popping it into the fridge. But once I started making Baguettes de Tradition, I’ve preferred this folding schedule because it ensures equal distribution of the yeast and salt AND the dough develops lots of strength, especially if I mix by hand so I now use this folding schedule for all the baguettes I make.
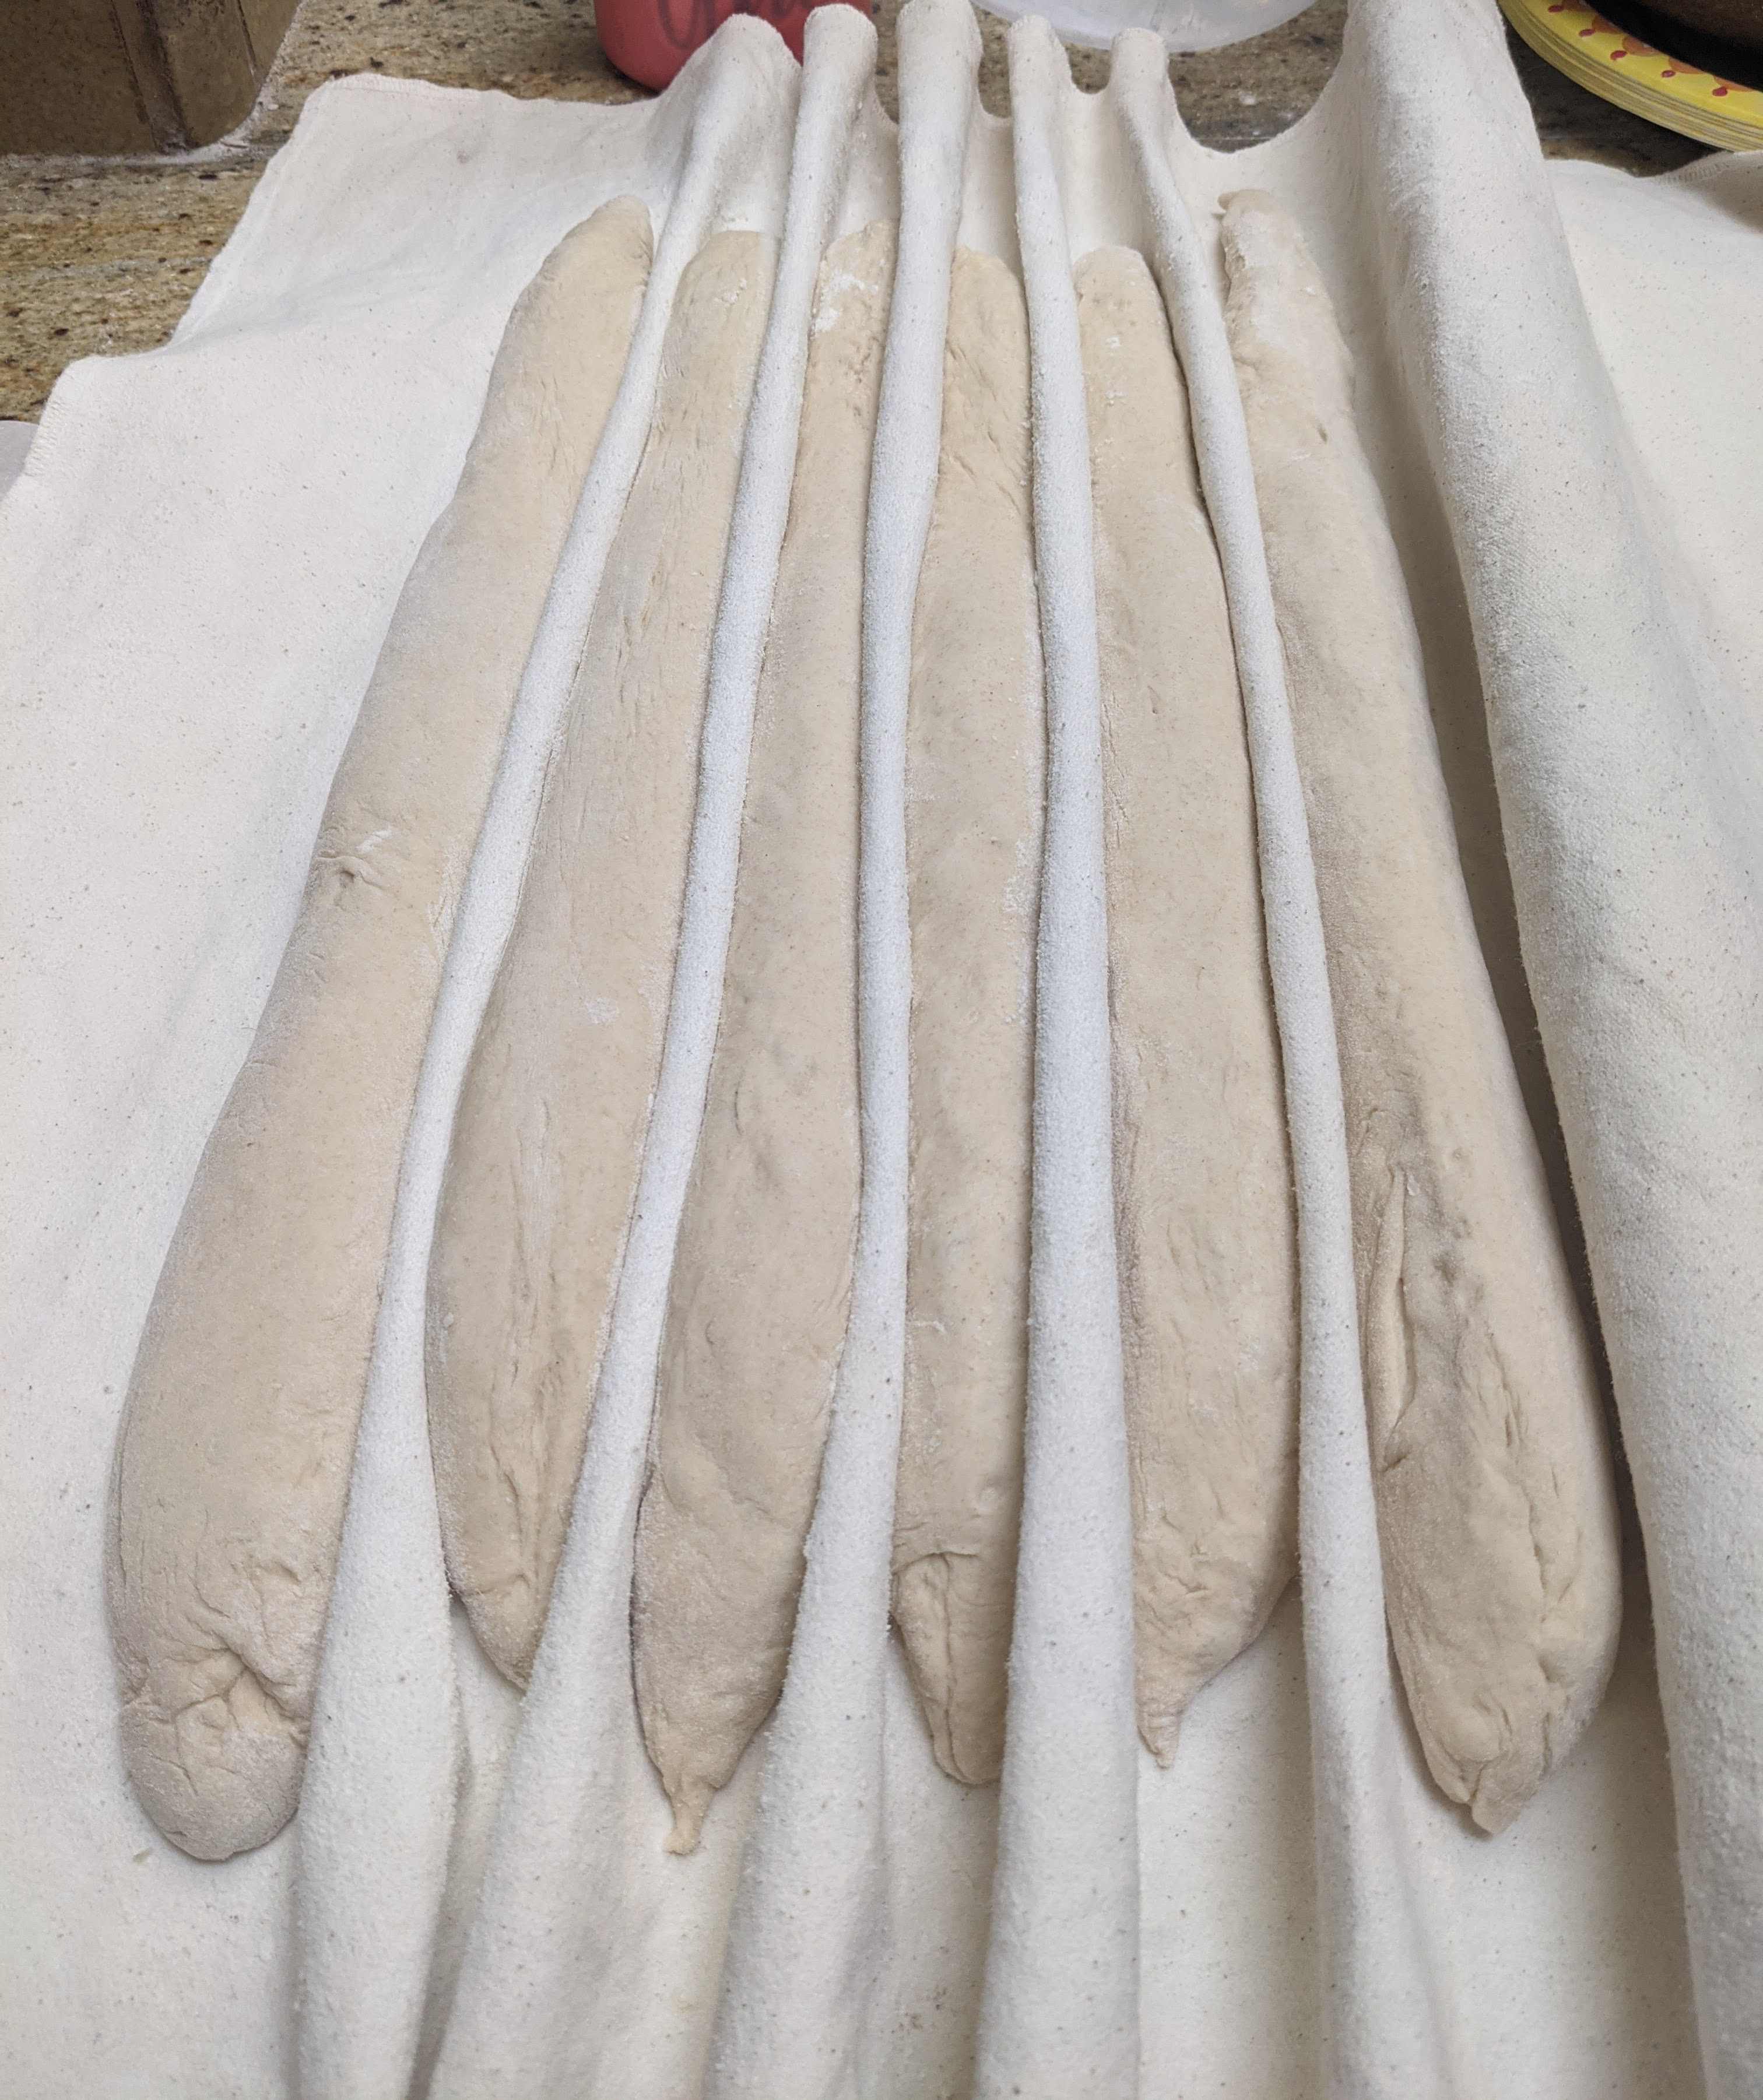
Divide and Shape. Dump your dough out onto a lightly floured surface, tug the dough into a rough rectangle with even thickness throughout, then scale out 335g pieces. Preshape each piece by letter folding it, then rolling it like a jelly roll into a log. Seal the seams, then set aside on a well-floured couche – seam-side-up – for 20-30 minutes to relax the dough (this could be longer if you rolled the log tight, but don’t go over 45 minutes). After resting, shape the dough into baguettes, returning each piece to the couche, giving ample room for the loaves to expand.
There’s technically no official weight and length, though in general, the accepted final weight and length of a finished loaf is around 250g and 60cm in length. After a lot of tweaking with different weights, I found that a 335g dough weight is optimal to achieve the 250g finished weight.
Final Fermentation. 30-minutes – 1 1/2 hour depending on ambient temp. This is where feel is extremely important. While traditionally “doubling” is a decent visual cue, that will take the loaf close to full fermentation and leave very little room for expansion in the oven. And with a dough like this, which is wet and narrowly shaped, the finger dent test isn’t revealing because when you poke into it, most of the time, the dent will remain – even in the early stages of the final fermentation. So it’s best to check the loaves every 30 minutes. The loaf will be ready when it feels like poking a marshmallow.
65% AP flour / 35% Kamut flour. Whole grain flour will limit spring but will provide tons of flavor!
Score. Score the loaves according to the diagram below. Do not score on the bias! Even though the scoring may appear to be on the bias, the slashes are actually fairly parallel, with just a few degrees of deflection down the middle third of the loaf. Though there’s no rule governing how many slashes you make, aesthetically, an odd number looks better.
Scoring should be done within the middle third of the loaf, with each slash overlapping roughly 1/3 of the previous slash. Your blade angle should be about 20-degrees to the surface of the dough.
Bake. Bake at 475°F/250°C for 12 minutes with steam. Remove steam container, then bake for 12-15 minutes at 435°F/225°C, or if you have a convection setting, 425°F/220°C. These baguettes really benefit from a full bake.
Okay… I have to admit that this is a bit of a rant – at myself. As I sit and write this post, I’m pissed off! I just finished shaping a set of baguettes and while ultimately they’ll turn out okay, the dough fought me every step of the way, and I tore the skin – not bad, mind you, but I still did it – on each and every one! The dough seemed to fight me every step of the frickin’ way! The gluten was so tight. On top of that, it kept on sticking to my left palm, hence the tearing!
What I should have done was let the dough rest a little more because they were obviously not relaxed. And what I also should’ve done was to make sure my palms were nicely floured. DUH!
The big lesson here is that you can’t force the dough to do something it just won’t do. You need the patience to let it get to the point where you can manipulate it the way you want.
And I think what pisses me off so much is that I KNOW this! Yet this morning, I was being a stubborn ass because I was already pissed off about another thing. Oy-vay!
The point of all this is that me being pissed off completely threw me off my game. Simple things like flouring my hands that I would normally just do I didn’t do! The patience that I normally have was just gone. And that affected the quality of my work, and it only pissed me off even more that I knew I was messing up yet couldn’t get back on my game!
And that’s the thing about baguettes. Once you start messing up, it’s hard to recover; not impossible, but it’s frustrating just the same. The dough’s so simple to make, and it’s so beautiful when it’s ready for shaping. But I’ll be damned if one little mistake can turn into an uncontrollable fiasco, like that little crack on a windshield that seemingly expands to a fissure all on its own.
Luckily, I was able to recover somewhat. After my dough relaxed after shaping, I was able to nudge and pull the loaves a bit on my couche and they ultimately turned out alright. But even still, that only slightly lightened my mood.
So I whipped up another batch of dough and did a redemption batch of Baguette de Tradition Francaise which, in my mind, are the most difficult of the baguette doughs with which to work – especially for a same-day bake. The 76% hydration with AP flour makes handling tricky, and you REALLY have to be on your game. This batch turned out gorgeous! Now I’m back in my happy place!
As I mentioned previously, my favorite bread to make is a baguette. And I think the primary reason is that I love to make sandwiches out of baguettes! To me, happiness is a great sandwich made with great bread. But I was SO excited because I think I finally found the perfect flour blend for my baguettes!
Yeah, yeah… I’m always tweaking. Well, not for my boules and batards any longer. I have the flour blend down for that. But with my baguettes, I’ve been trying to strike a good balance between texture, taste, and especially, nutritiousness. I didn’t want to do a pure white flour baguette, but I also didn’t want the bread to be as heavy as my 75-25 high-extraction/whole wheat blend. So I decided to lighten it up. But instead of using bread flour, I decided to use regular old AP flour, and the results were magnificent!
Before I get into the recipe, especially if you’re new to making baguettes, the formula and process may seem a bit daunting. But I wanted to include as much detailed information as possible because there’s a lot to know and frankly, baguettes are one of the hardest breads to make well. I’ve learned how to make baguettes through a lot of trial and error plus a variety of sources, both online and from books. What I’m presenting here is kind of a conglomeration of all the stuff I’ve learned.
Flour That I Use
In general, I use high-quality and if possible organic flour. For common AP flour, it’s almost always King Arthur or Bob’s Red Mill. Both offer consistent quality for baking (though I’ve recently taken to using Central Milling organic AP flour – it’s very nice).
For my baguettes, I use a blend of flour that is predominantly unbleached AP flour. By using a substantial amount of AP flour, I lower the protein content slightly. The one thing I found about baguettes is that you don’t want a real tight internal gluten structure. You want a nice, taut skin when shaping, but internally, you don’t want nearly as much dough strength as you would a boule or batard – just enough dough strength to hold the bubbles together.
Azure Market Organics Unbleached Bread Flour, Ultra Unifine, Organic – In its place you can use a Type 85 flour or another high-extraction flour. And make sure that the flour is ground fine- to extra-fine. If you can’t find any high-extraction flour, no problem. Just use regular bread flour. However, one of the main reasons I suggest using high-extraction flour is that it retains most of the natural yeasts, oil, and microbes that are essentially removed from white flours; not as much as whole grain flour, but certainly much more than white flour. They will add more complexity to the overall flavor of the bread!
As for 100% whole-wheat flour, you should sift it before mixing. Retain the bran, then sprinkle it over the shaped loaves right before baking. It’ll give the tops of the baguettes a rustic look.
AP Flour – I struggle with this because technically you could use standard grocery store brands like Gold Medal or store label AP flour. King Arthur, Bob’s Red Mill, and Azure Standard are 11.5% to 11.7% protein. It’s really not that much difference in protein amount, but it makes a world of difference in oven spring and dough strength!
Bleached or Unbleached Flour?
My preference is to use unbleached flour which is aged naturally as opposed to bleached flour which uses chemical agents to speed up the aging process. From a taste perspective, you shouldn’t notice any differences. Texturally, it is said that unbleached flour has a denser grain and tougher texture, but I’ve only used unbleached flour, so I couldn’t tell you the difference.
Without further ado, here’s the formula.
Overall Formula
Flour
100%
Water
75%
Salt
2%
Yeast
0.43%
Total Percentage
177.43%
Poolish*
Flour
100%
200
Water
100%
200
Yeast
0.16%
0.3
Flour of the poolish represents 25% of the total flour (see below Final Dough)
*It’s a good idea to make more poolish than you actually need. There will always be some loss due to evaporation and dough sticking to your mixing utensil. So even though the dough technically calls for 190g of flour/water (380g poolish), I’d use at least 200g flour and water each.
Final Dough
Flour
572g AP flour (75%): 428g, High-extraction (25%): 143g
Water
381g
Salt
15g
Yeast
5g Use half if bulk fermenting cold
Poolish
380g
Yield
1340g (+ 13g wiggle room) 4 X 335g (60cm) loaves 6 X 225g (40cm) loaves
Optimal Dough Temp
76°- 80°F
Total Flour (incl. poolish)
762g
Total Water (incl. poolish)
572g
Instructions
Day 1
Prepare the poolish 6-12 hours before you intend to mix the final dough. I usually make it the evening before my bake, but also, since I’m an early-riser, I’ll make the poolish at 5-6am, then mix the final dough in the afternoon.
Day 2
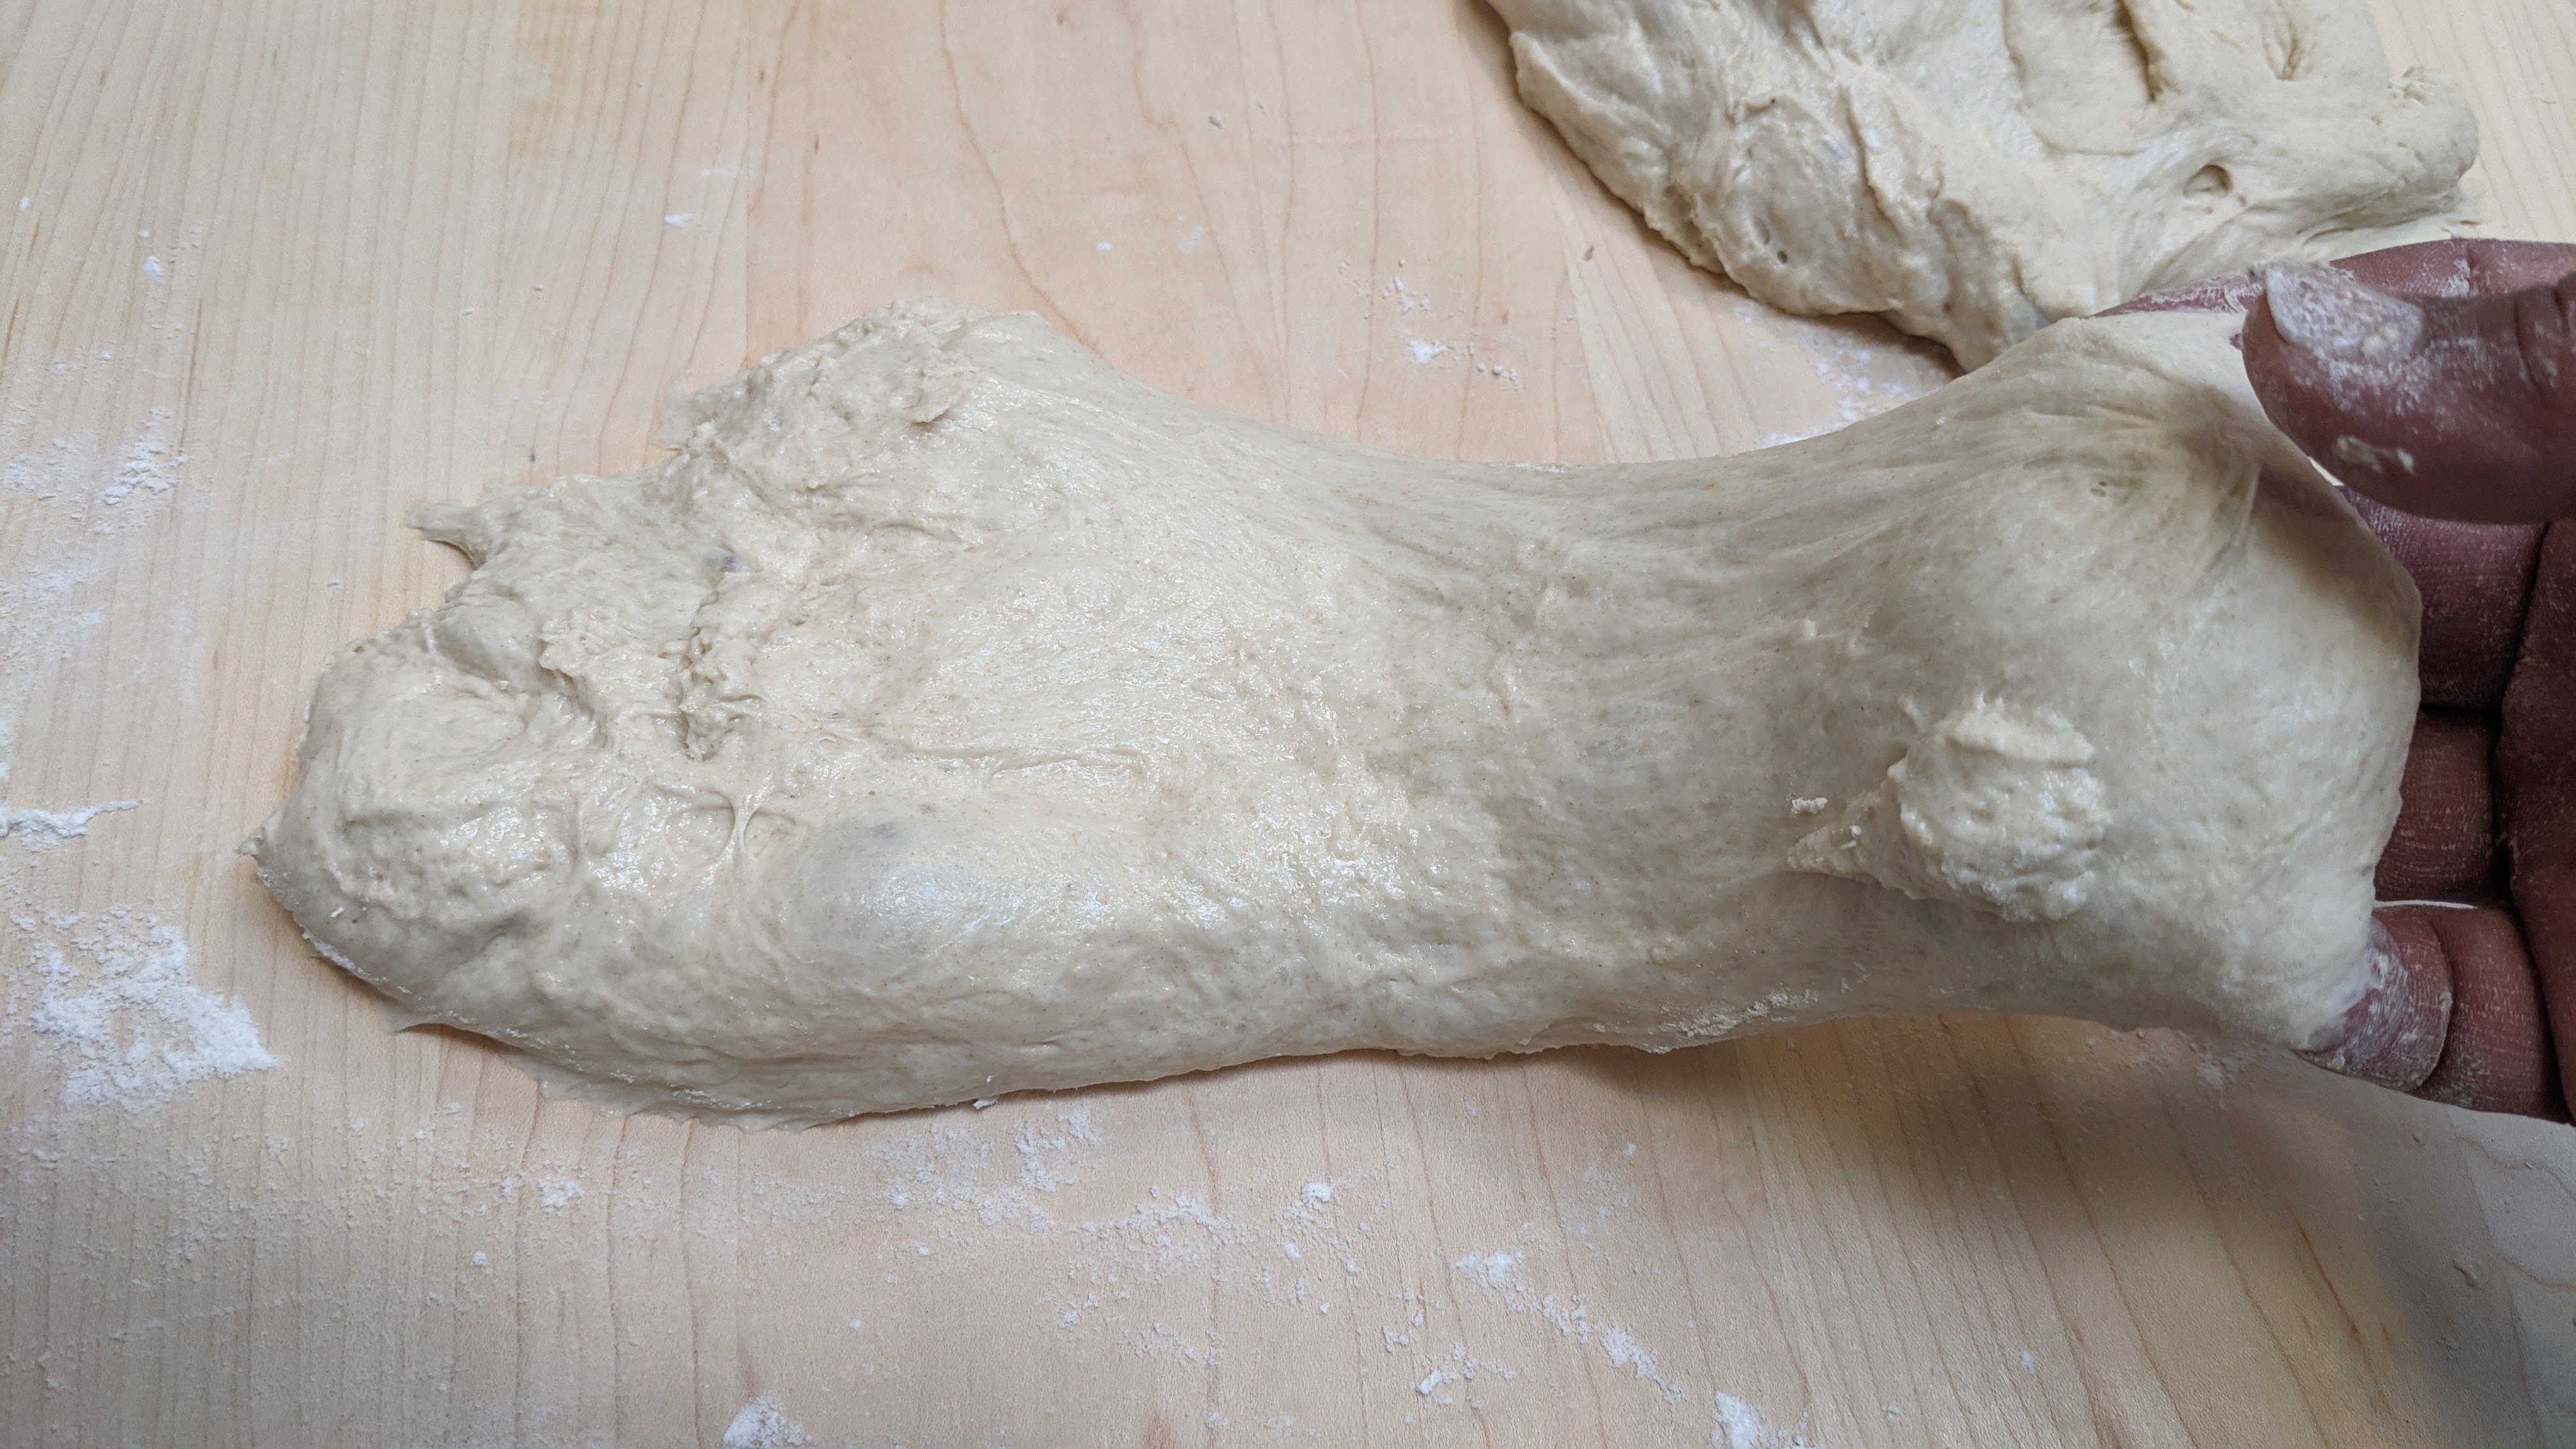
Mixing. Break up and completely dissolve the poolish into the water. In a separate bowl, thoroughly combine all the dry ingredients. Then mix the wet and dry ingredients together. Mix until all the ingredients are combined with no large lumps. If mixing by hand, a Danish dough whisk works great! If using a mixer, mix on the slowest speed and regularly scrape down the sides. Mix until you form a well-combined, but shaggy mass as shown to the left.
Bulk Fermentation. 2 – 2½ hours. Take the dough to no more than 50% of its original size. Though you can take it to double, you want some food for the final ferment, and doubling cuts it real close. Rolling out the baguettes will degas the dough, so you want to have enough yeast activity for the shaped dough to rise.
Folding. Fold three times (stretch and fold in the bowl), every 20 minutes in the first hour. I want to stress that you need to be very gentle with the folding. Definitely stretch the dough but be very careful to not tear it or degas it too much! Stretch and fold until the dough no longer wants to be stretched then stop. By the end of the third folding session, your dough will be smooth and luxurious, as in the picture to the right. You will see bubbles formed just beneath the surface of the dough.
(optional) Cold Bulk Fermentation. After the first hour, you can pop the dough into your fridge for some further flavor development. With this amount of commercial yeast though, I wouldn’t recommend doing this for more than 6-8 hours. You want to make sure the dough is still well-domed when you remove it from the fridge. The reason for this is commercial yeast – even at 36°F- 39°F – are pretty hardy little buggers. They’ll certainly slow down, but unlike indigenous yeast, they’re like little Energizer Bunnies! 🙂 That said, if you want to do an even longer cold bulk fermentation, cut the yeast in half or even down to a quarter of what I listed and you can cold bulk for a couple of days!
Divide and Pre-shape. Gently pour the dough out onto a lightly floured surface. Tug it into a rectangle, then divide it into 4 X 335g pieces for standard 60cm baguettes or 6 X 220g pieces for 40cm baguettes. Letter fold each piece by gently pulling out the sides and folding to the middle, then jelly-roll it perpendicular to the letter fold seam to form a rough, short log. Seal the seam, then place on a well-floured couche, seam-side-up (on the left). Allow the dough to relax for 10-30 minutes depending on how tightly you rolled the initial log. The dough should be very relaxed before you shape, otherwise, it will fight you!
Shaping. After the bench rest, shape the logs into baguettes about 15-20″ depending on the size of your oven (I have a baking stone, so I roll mine out to 24″). and return to the couche for final fermentation. Make sure to leave lots of room in between the pieces to prevent tearing during the final ferment. You’ll know the dough’s relaxed enough when you can stretch it and it doesn’t fight you. If you find the dough fighting you, let it sit for a few minutes then resume shaping.
Final Fermentation. 1 – 1½ hour. This could be shorter or longer depending on the weather! Use 1 hour as the baseline, but during warm weather, check the progress of the loaves at 30 minutes.
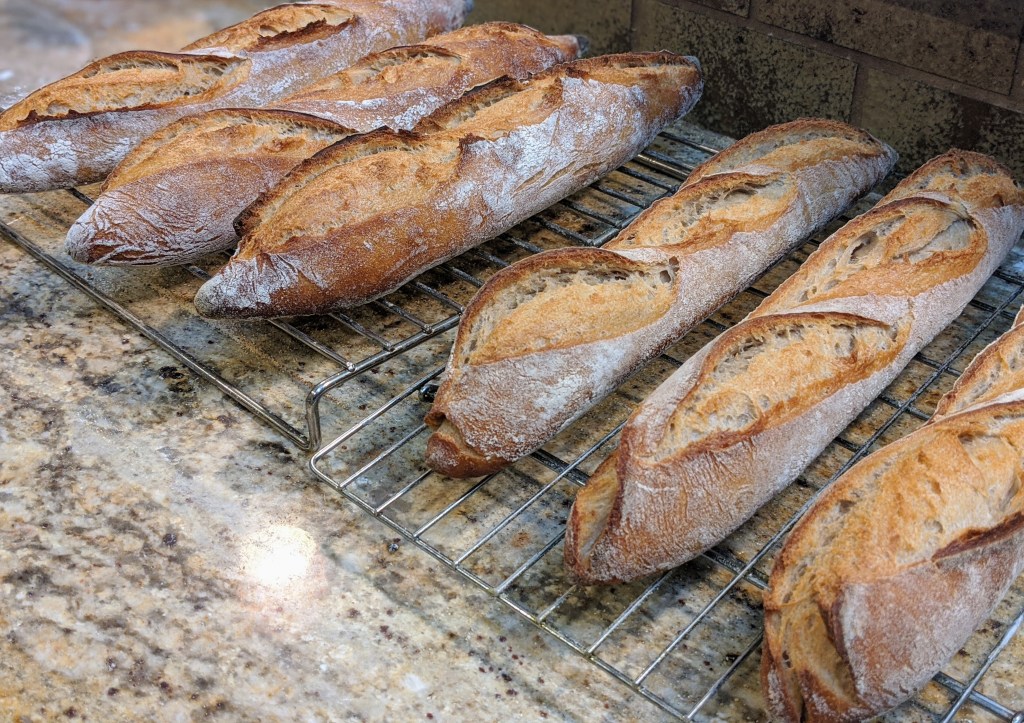
Bake. Transfer the loaves to a transfer board, score, then bake at 475°F for 12 minutes with steam. Release steam (remove your steaming container), turn down oven to 425°F and bake another 15-20 minutes until you achieve a rich, russet color. Personally, I’m not a fan of taking baguettes out to super-dark. The crust at that point becomes too hard to be enjoyable. But that’s just me.
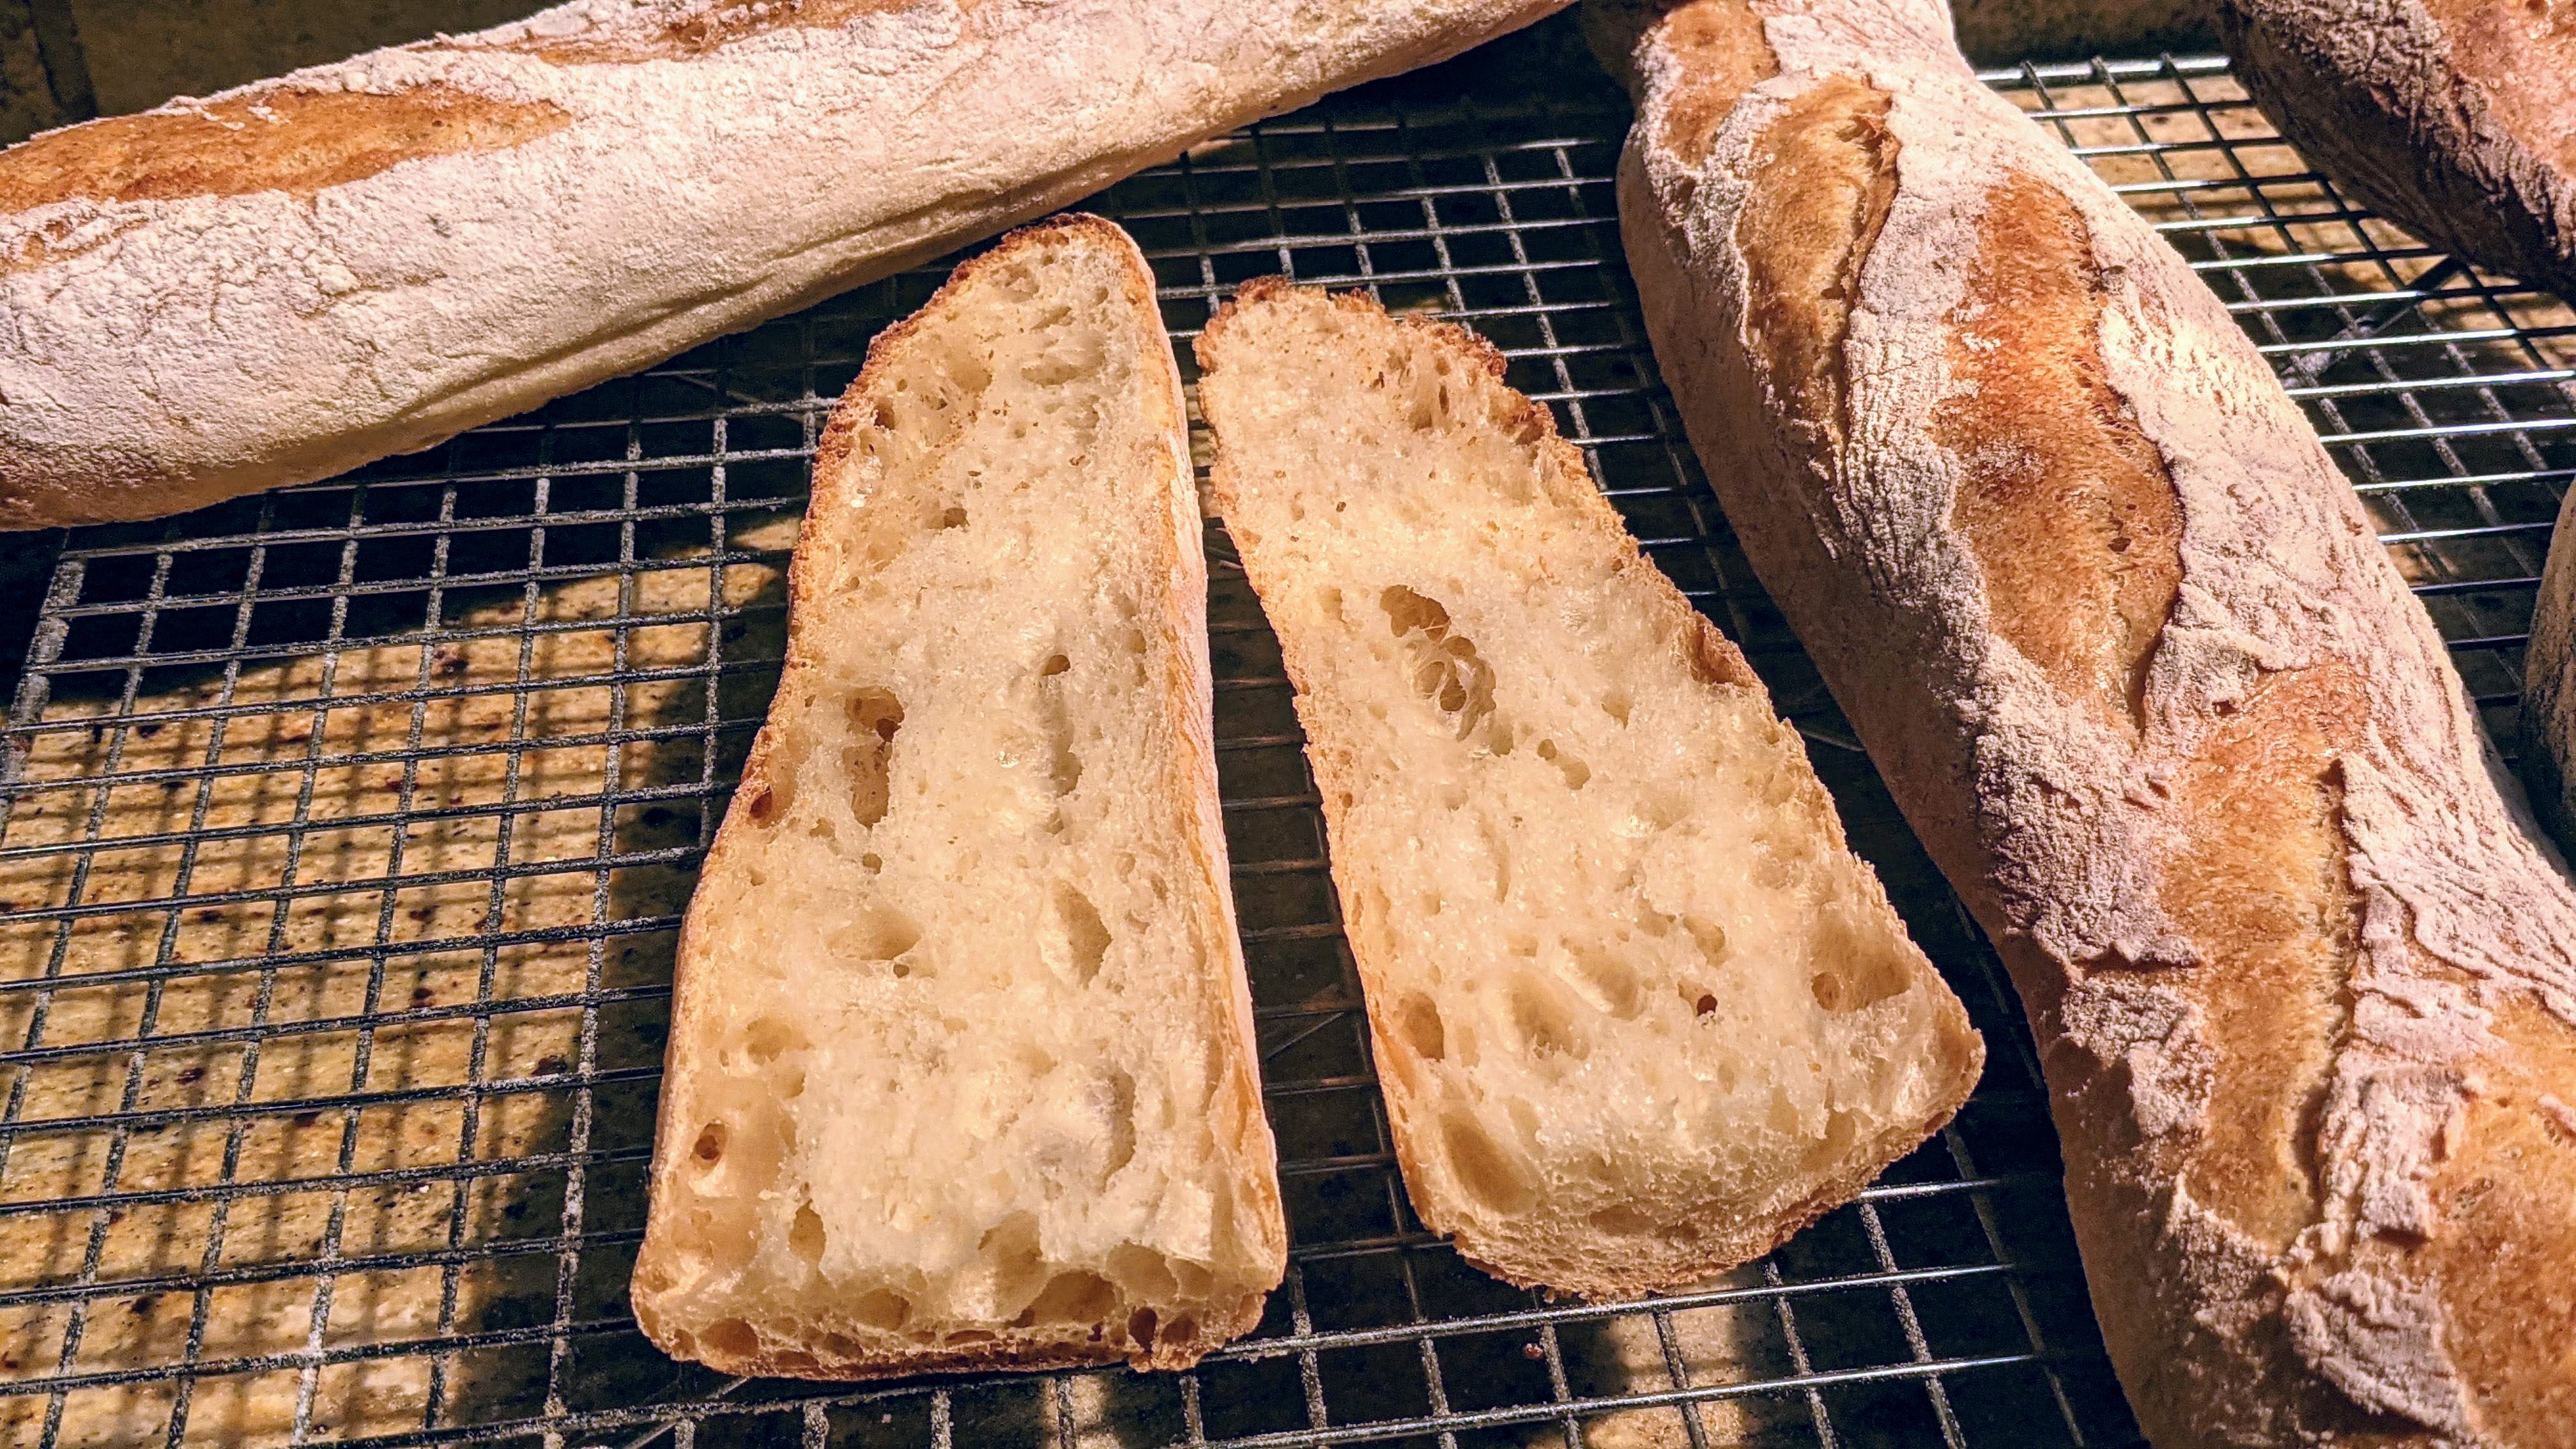
The ideal baguette will have various sized holes that dot the crumb.
I allowed these demis to get a bit of a skin, thus they formed ears.
Notes
You might be wondering where I got the 380g of poolish. That represents 50% of the total flour, including the poolish flour. To calculate total flour for any formula, take the the Total Dough Weight divided by the Total Formula %, so 1353 / 177.43% = 762. Technically, 50% of that is 381, but I like nice, round numbers.
You can replace the poolish with sourdough starter. But make sure it’s at peak activity (passes the float test) and is nice and bubbly. The process will slow a bit because the yeast density of starter is not nearly as high as with commercial yeast.
The pre-shape step is absolutely critical, not just in starting to orient the gluten strands but it also acts as an intermediate fermentation stage, however short.
When shaping baguettes, make sure your hands are lightly floured lest the dough sticks to your palms and tears the skin. You need to avoid that! And remove any rings!
Having made hundreds of baguettes, I’ve learned not to put too much importance on forming ears on the loaves as you can see with the loaves above. I actually cold-fermented the shaped loaves before I baked them because I had other loaves in the oven. They kind of formed a skin even though I had them covered. And though they were delicious, they were pretty crunchy. The aesthetic that I go for now is to get a moderately crunchy crust, but not to go overboard.
It is ULTRA-important that you don’t take the final fermentation all the way to the finish. You actually want to get to about 85-90% fermentation, then bake. This’ll ensure that you get great oven spring. Otherwise, the loaves will be flat.
As mentioned above, if you want to do a longer cold bulk fermentation, use less yeast. I’d start out by using half the yeast. But you could treat the bulk like pizza dough and use even less and take a couple of days for bulk fermentation. If you do that, use less than a gram of yeast.
What If I Can Only Bake Half the Shaped Loaves at a Time?
If you don’t have room to bake all the loaves at once, then pop the other loaves into your refrigerator while the other loaves bake. Once your oven comes back up to temp after the first batch, remove the extra loaves from the fridge and place them on your board.
You could also pop them in the freezer, but I don’t recommend doing that for more than 30 minutes.