When I read Tartine Bread by Chad Robertson, he recommended using a Dutch oven for baking as that would create a steamy environment that promoted oven spring. He further asserted that as domestic ovens were designed to vent steam, he wasn’t able to trap enough steam to get a good oven rise.
Then I saw a video the other day comparing results baking with a Dutch oven vs. a baking stone. Luckily the guy didn’t say one was better than the other, but I totally disagreed with his conclusions that one is better suited for everyday baking (Dutch oven) and the stone is much better for baking multiple loaves. Irrespective of his results, when I saw his oven setup, it didn’t surprise me that his loaf baked on a stone didn’t have as much oven spring as his Dutch oven.
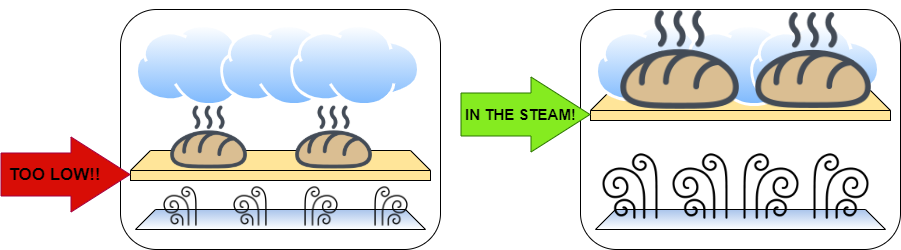
So… based on what Chad Robertson and on what that video showed, I have one thing to say: They probably didn’t set up their ovens correctly and have their stones appropriately positioned in the oven to catch the steam. It’s physics. Heat makes things rise, so the steam is going to collect in top half – or at least in the case of my oven – the top 30%-40% of the oven. If you have your stone too low, your dough will not get enough steam and your oven rise will seriously suffer. Take a look at the diagram below:
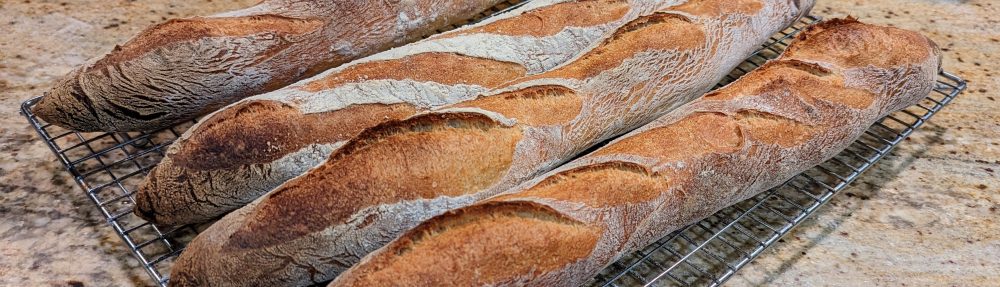
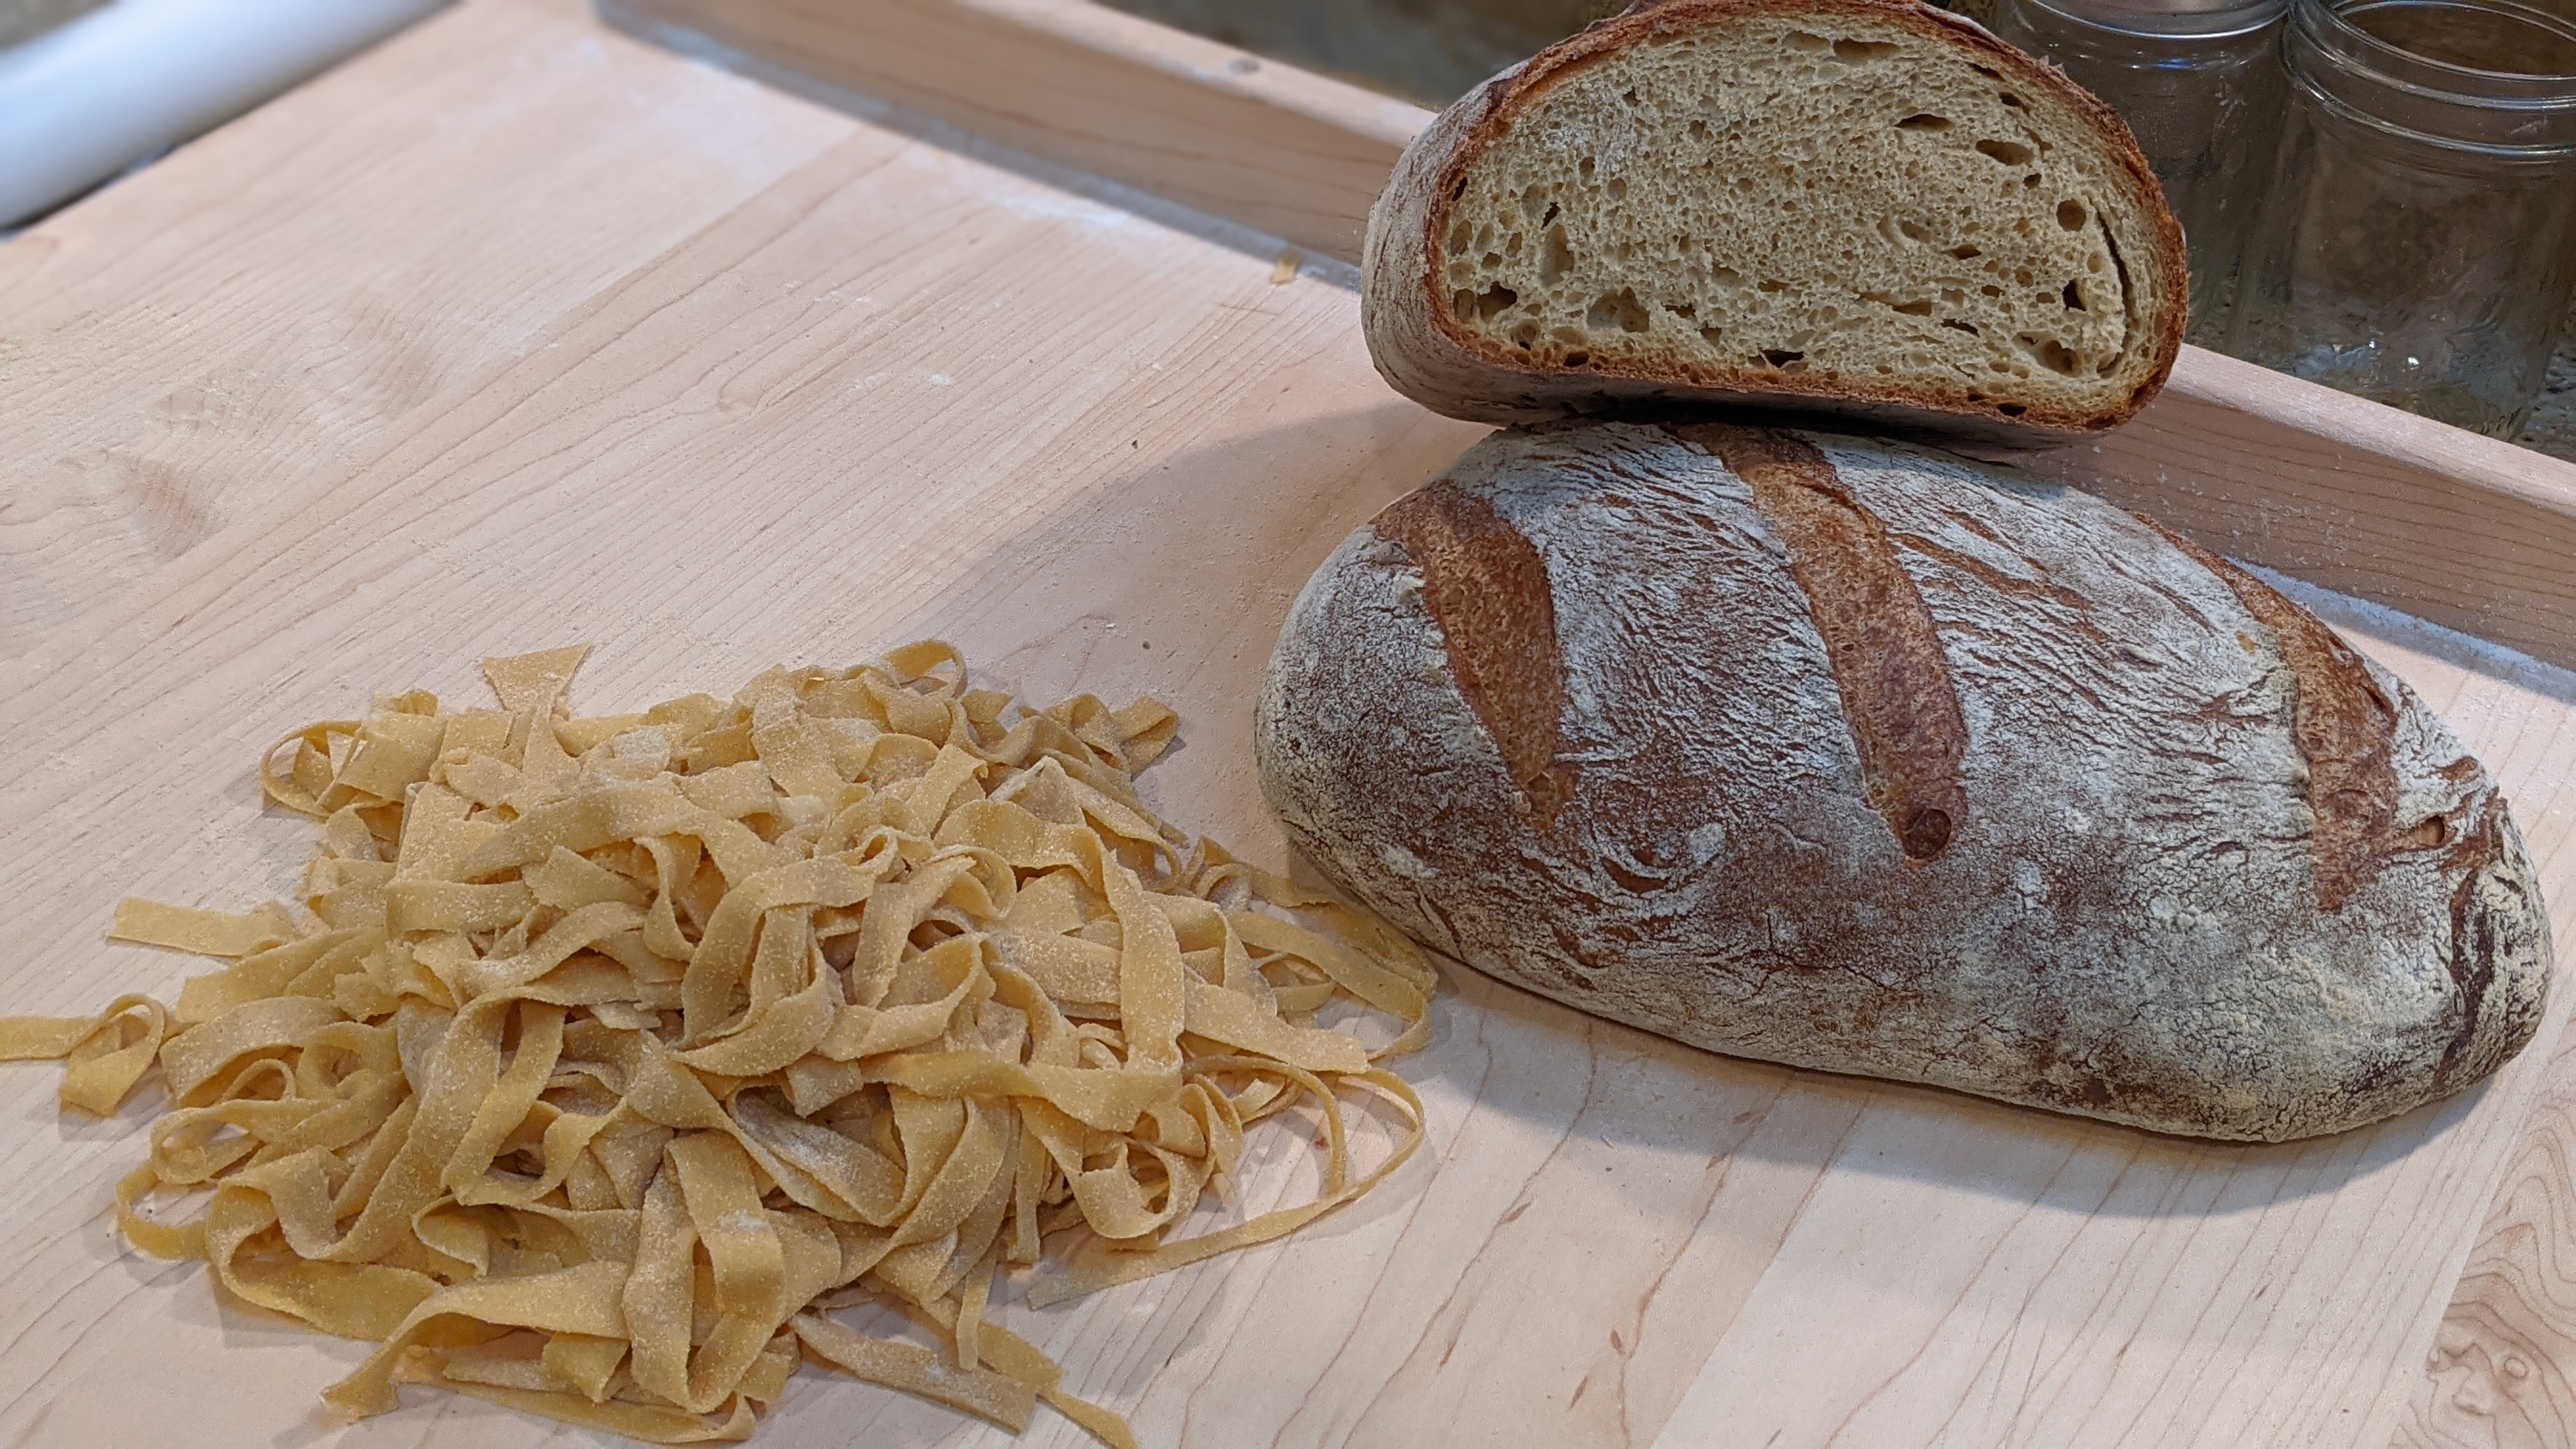
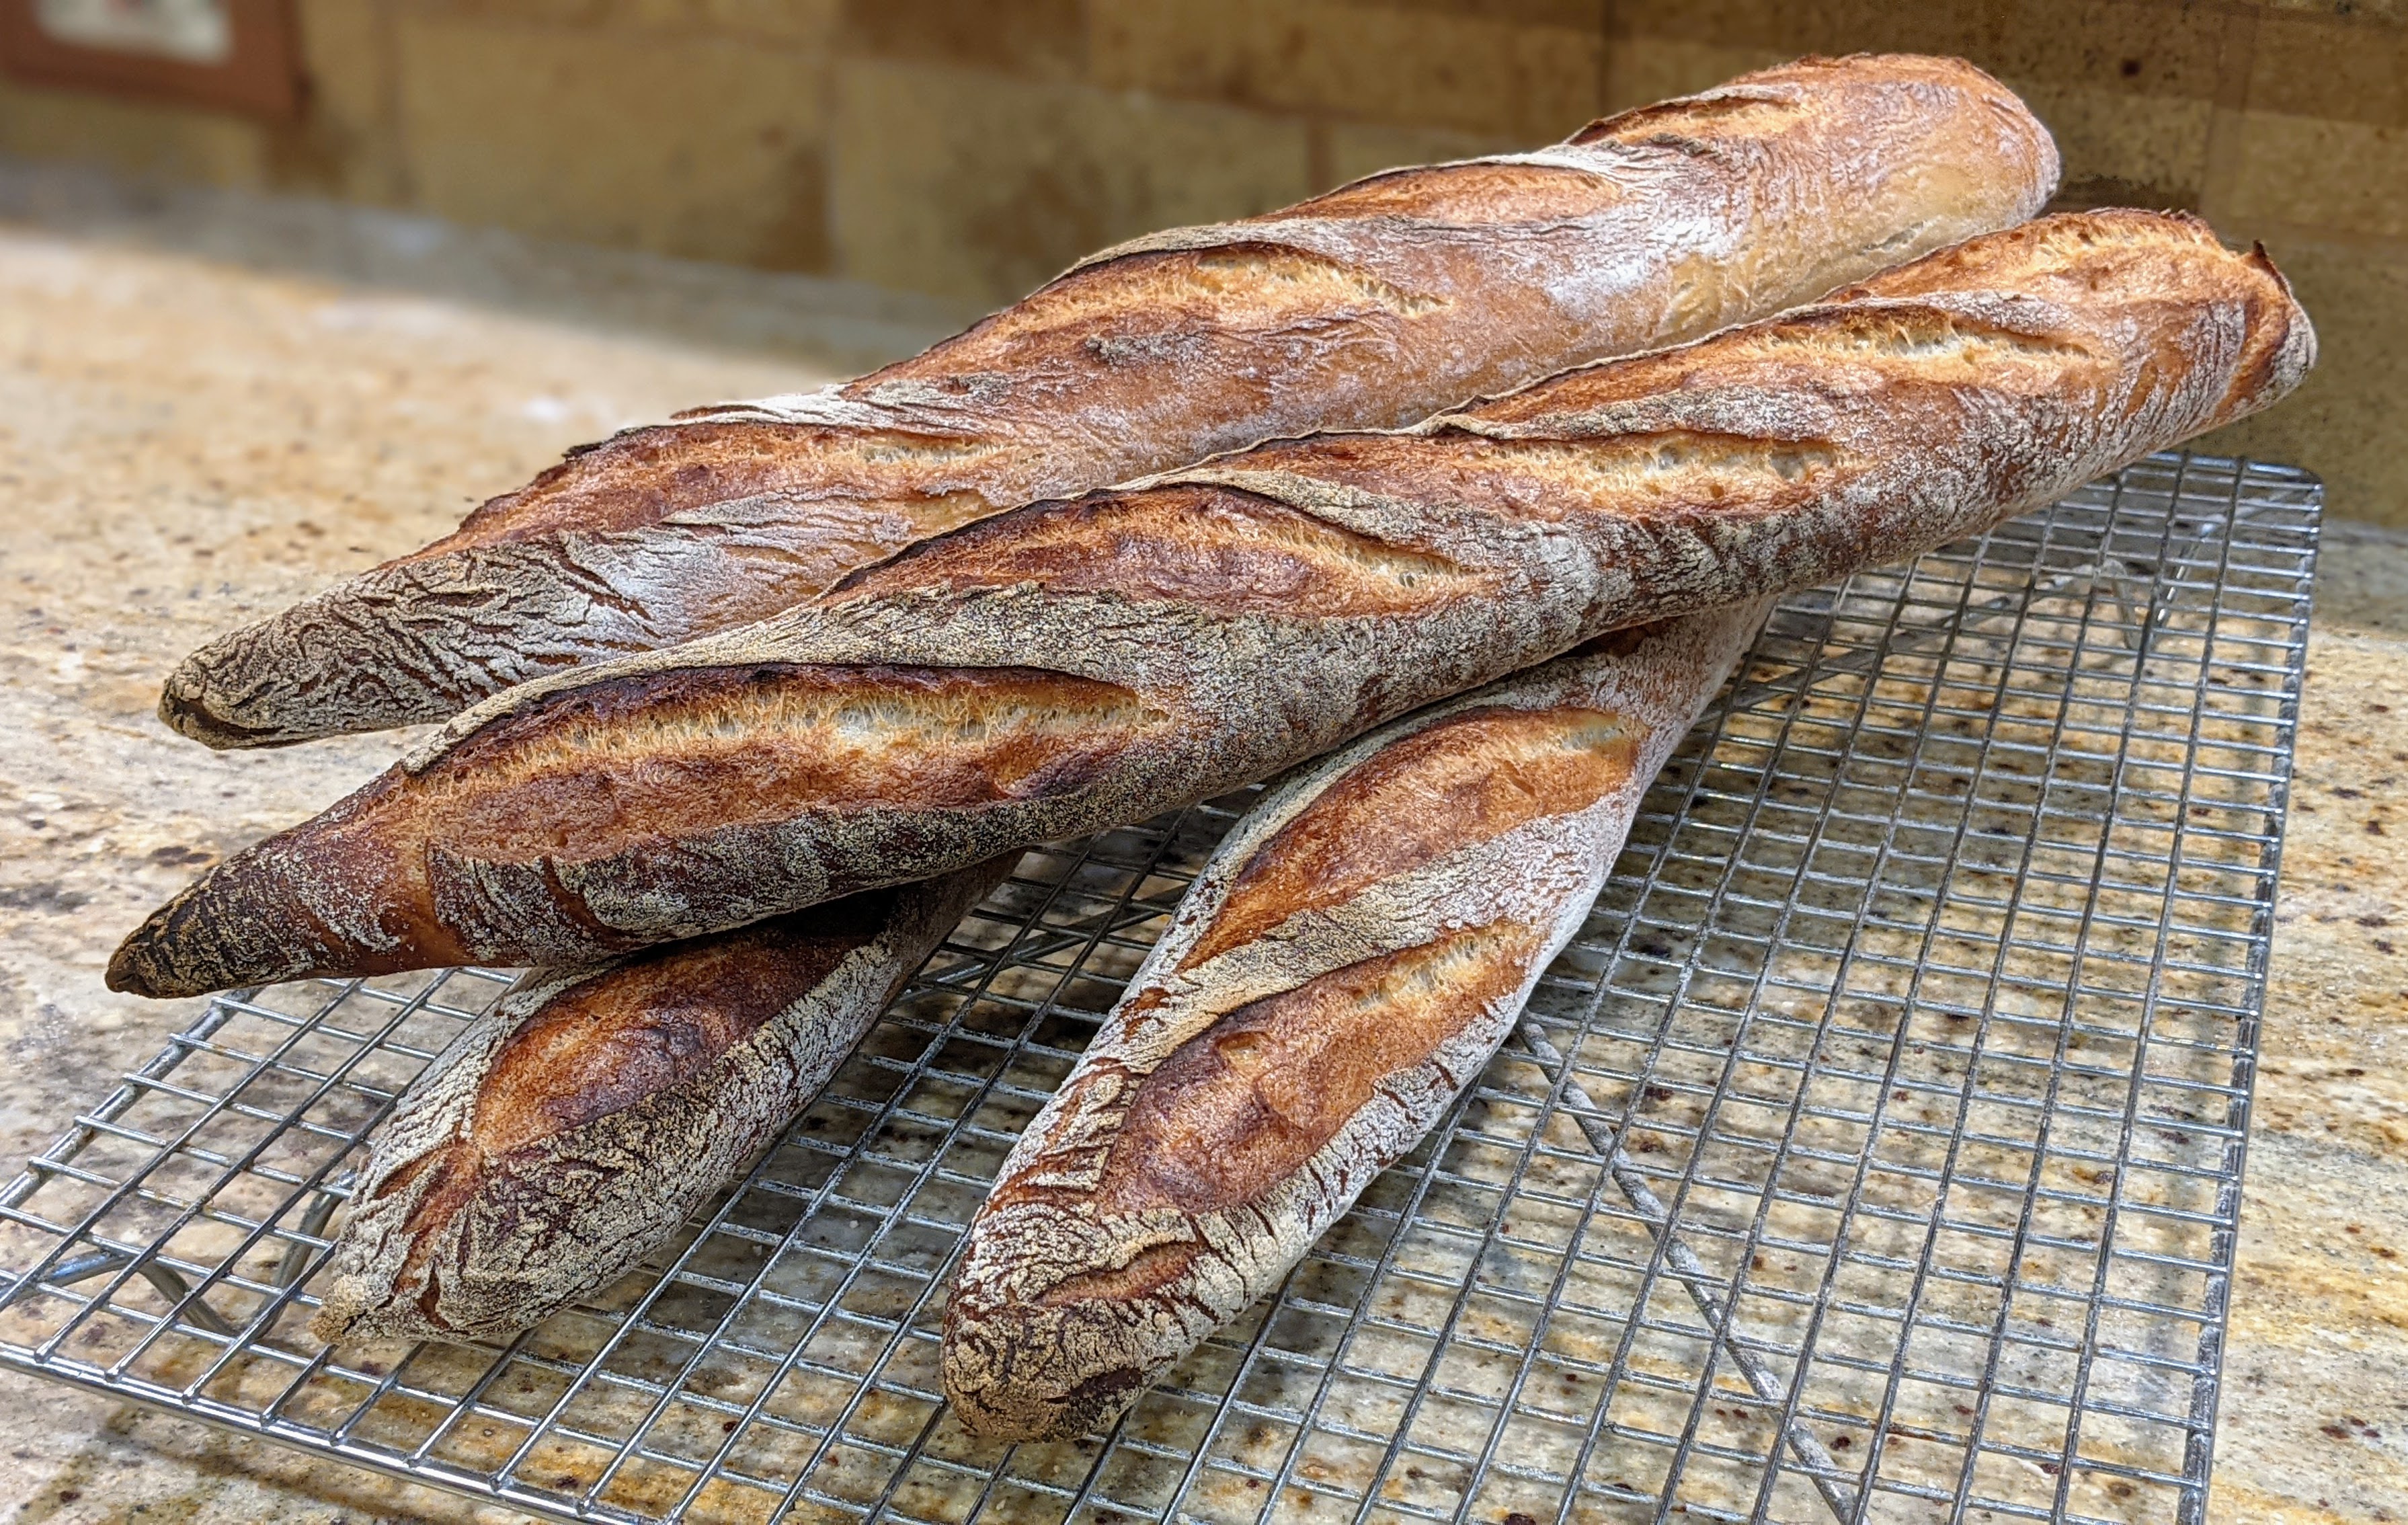
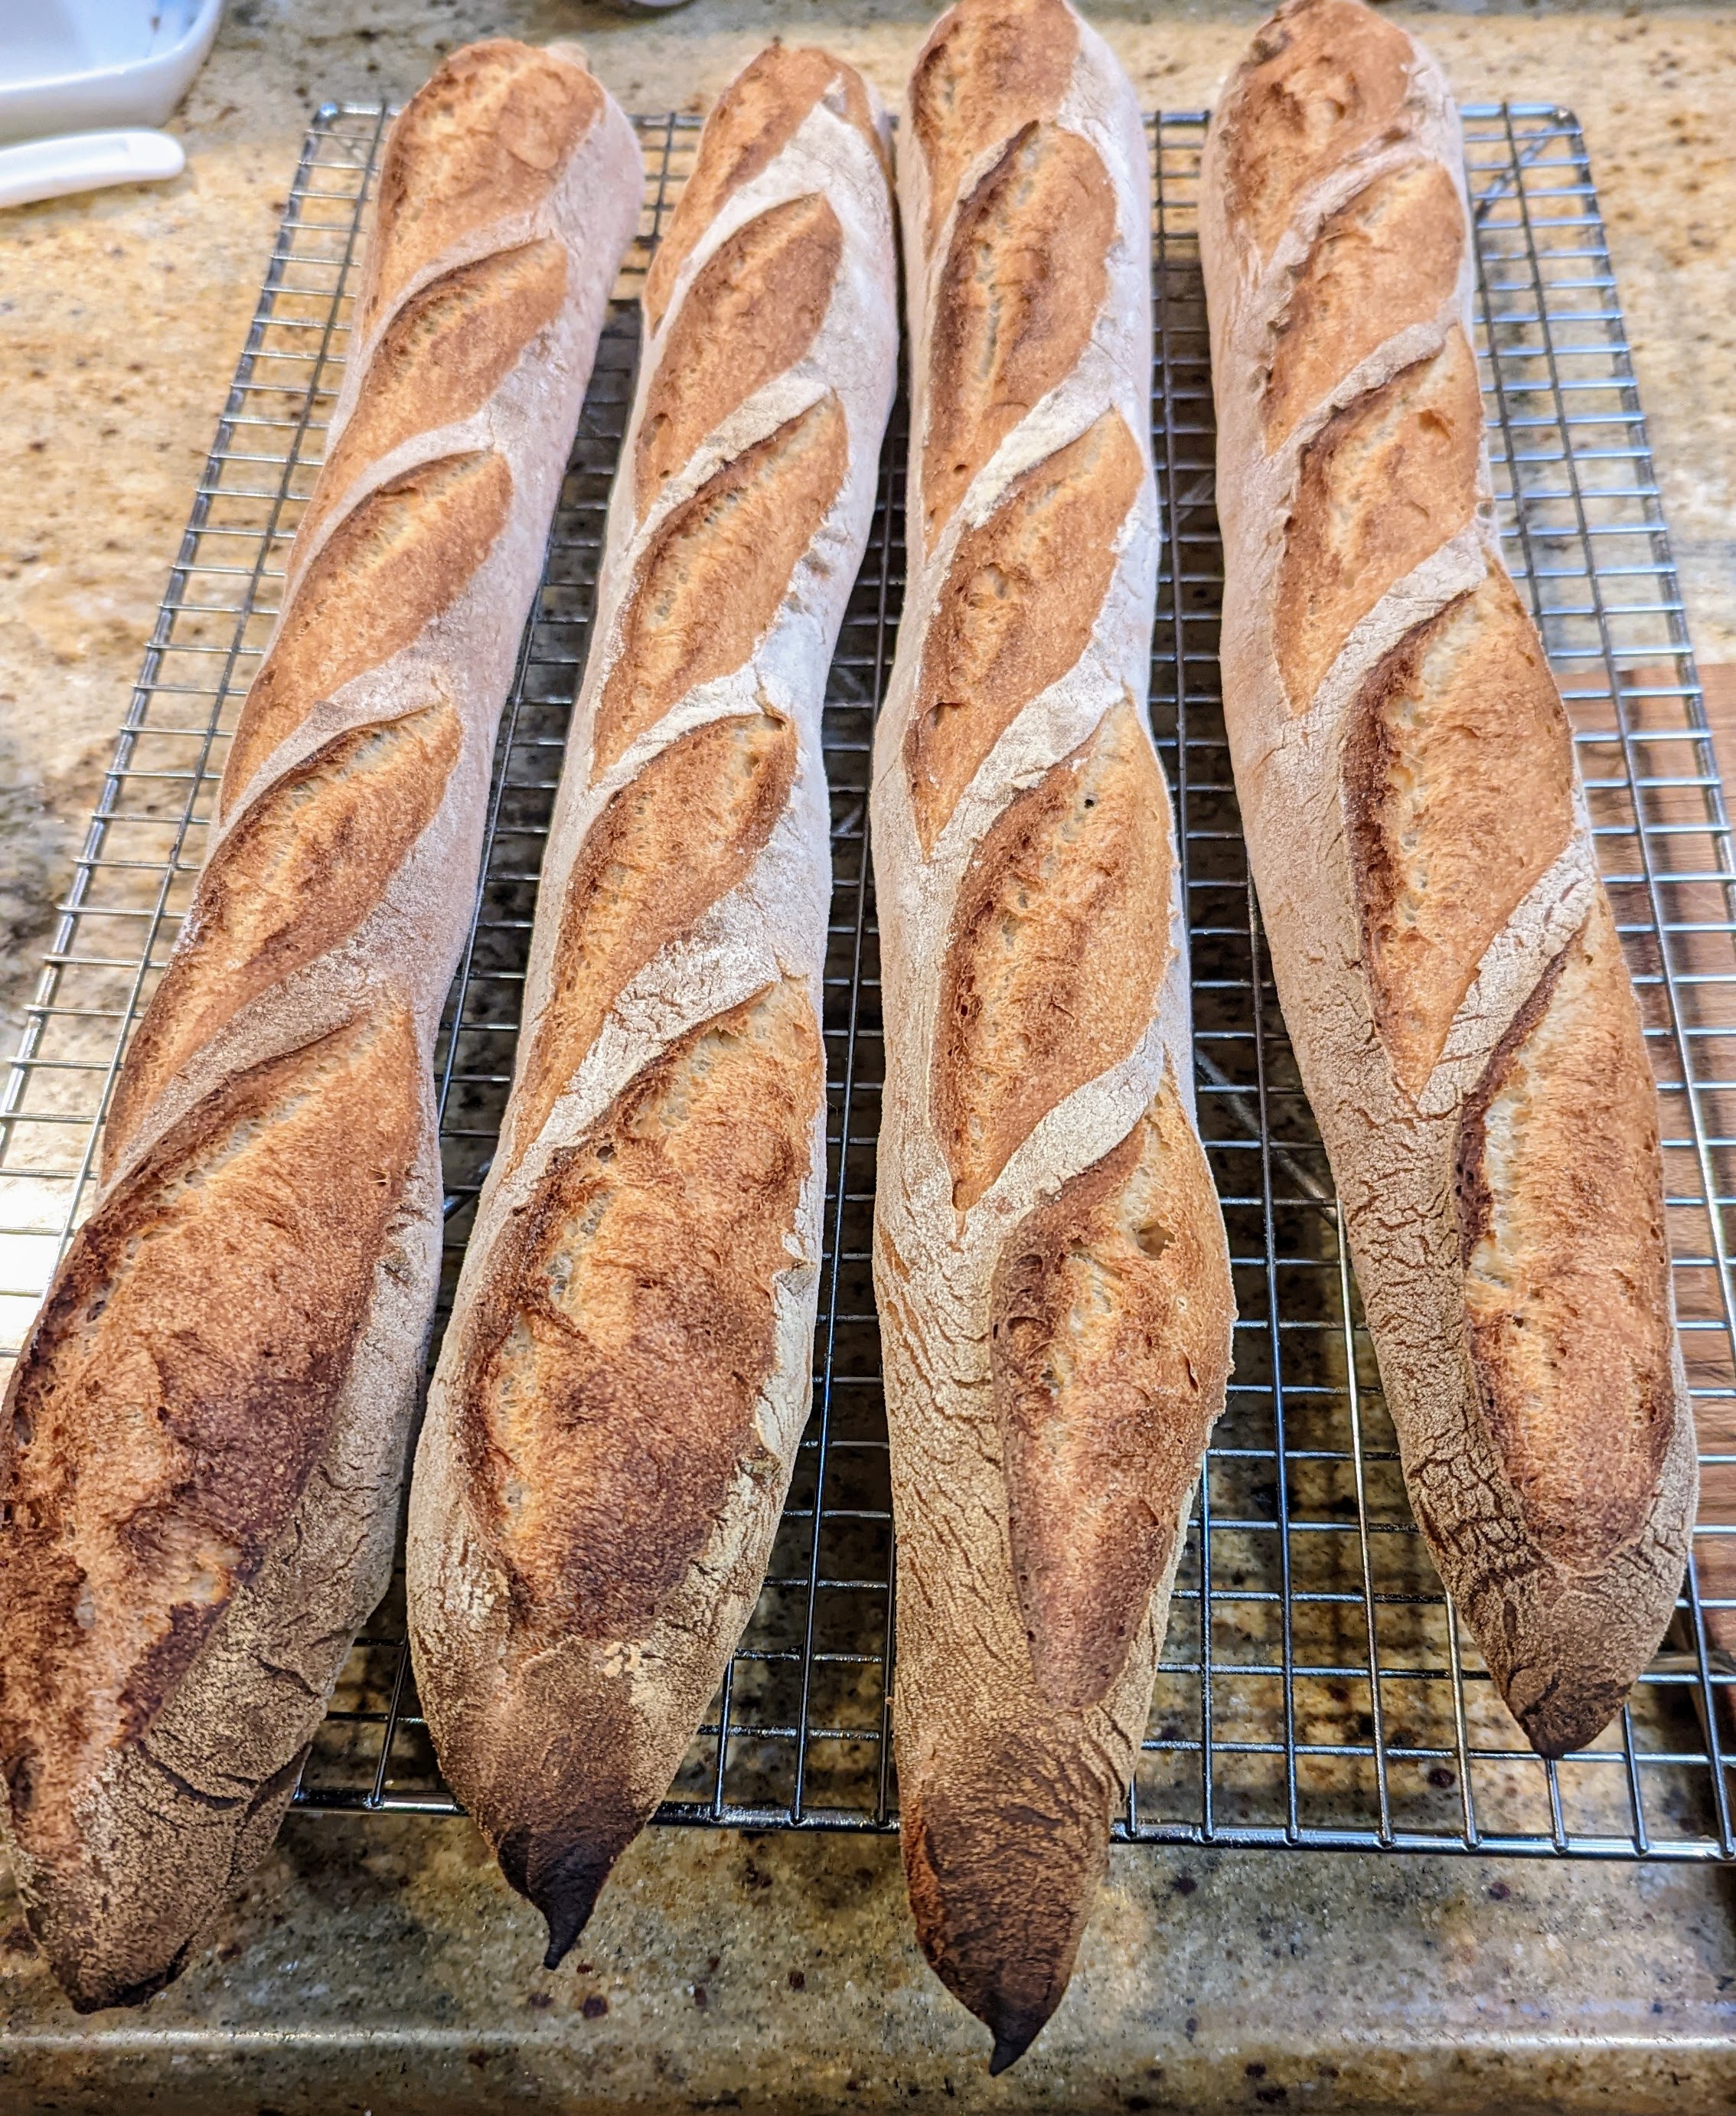
With my stone correctly positioned, I get GREAT oven spring because my baking stone is placed so that my loaves catch the steam! Check out the bread that I’ve made in the last few days…
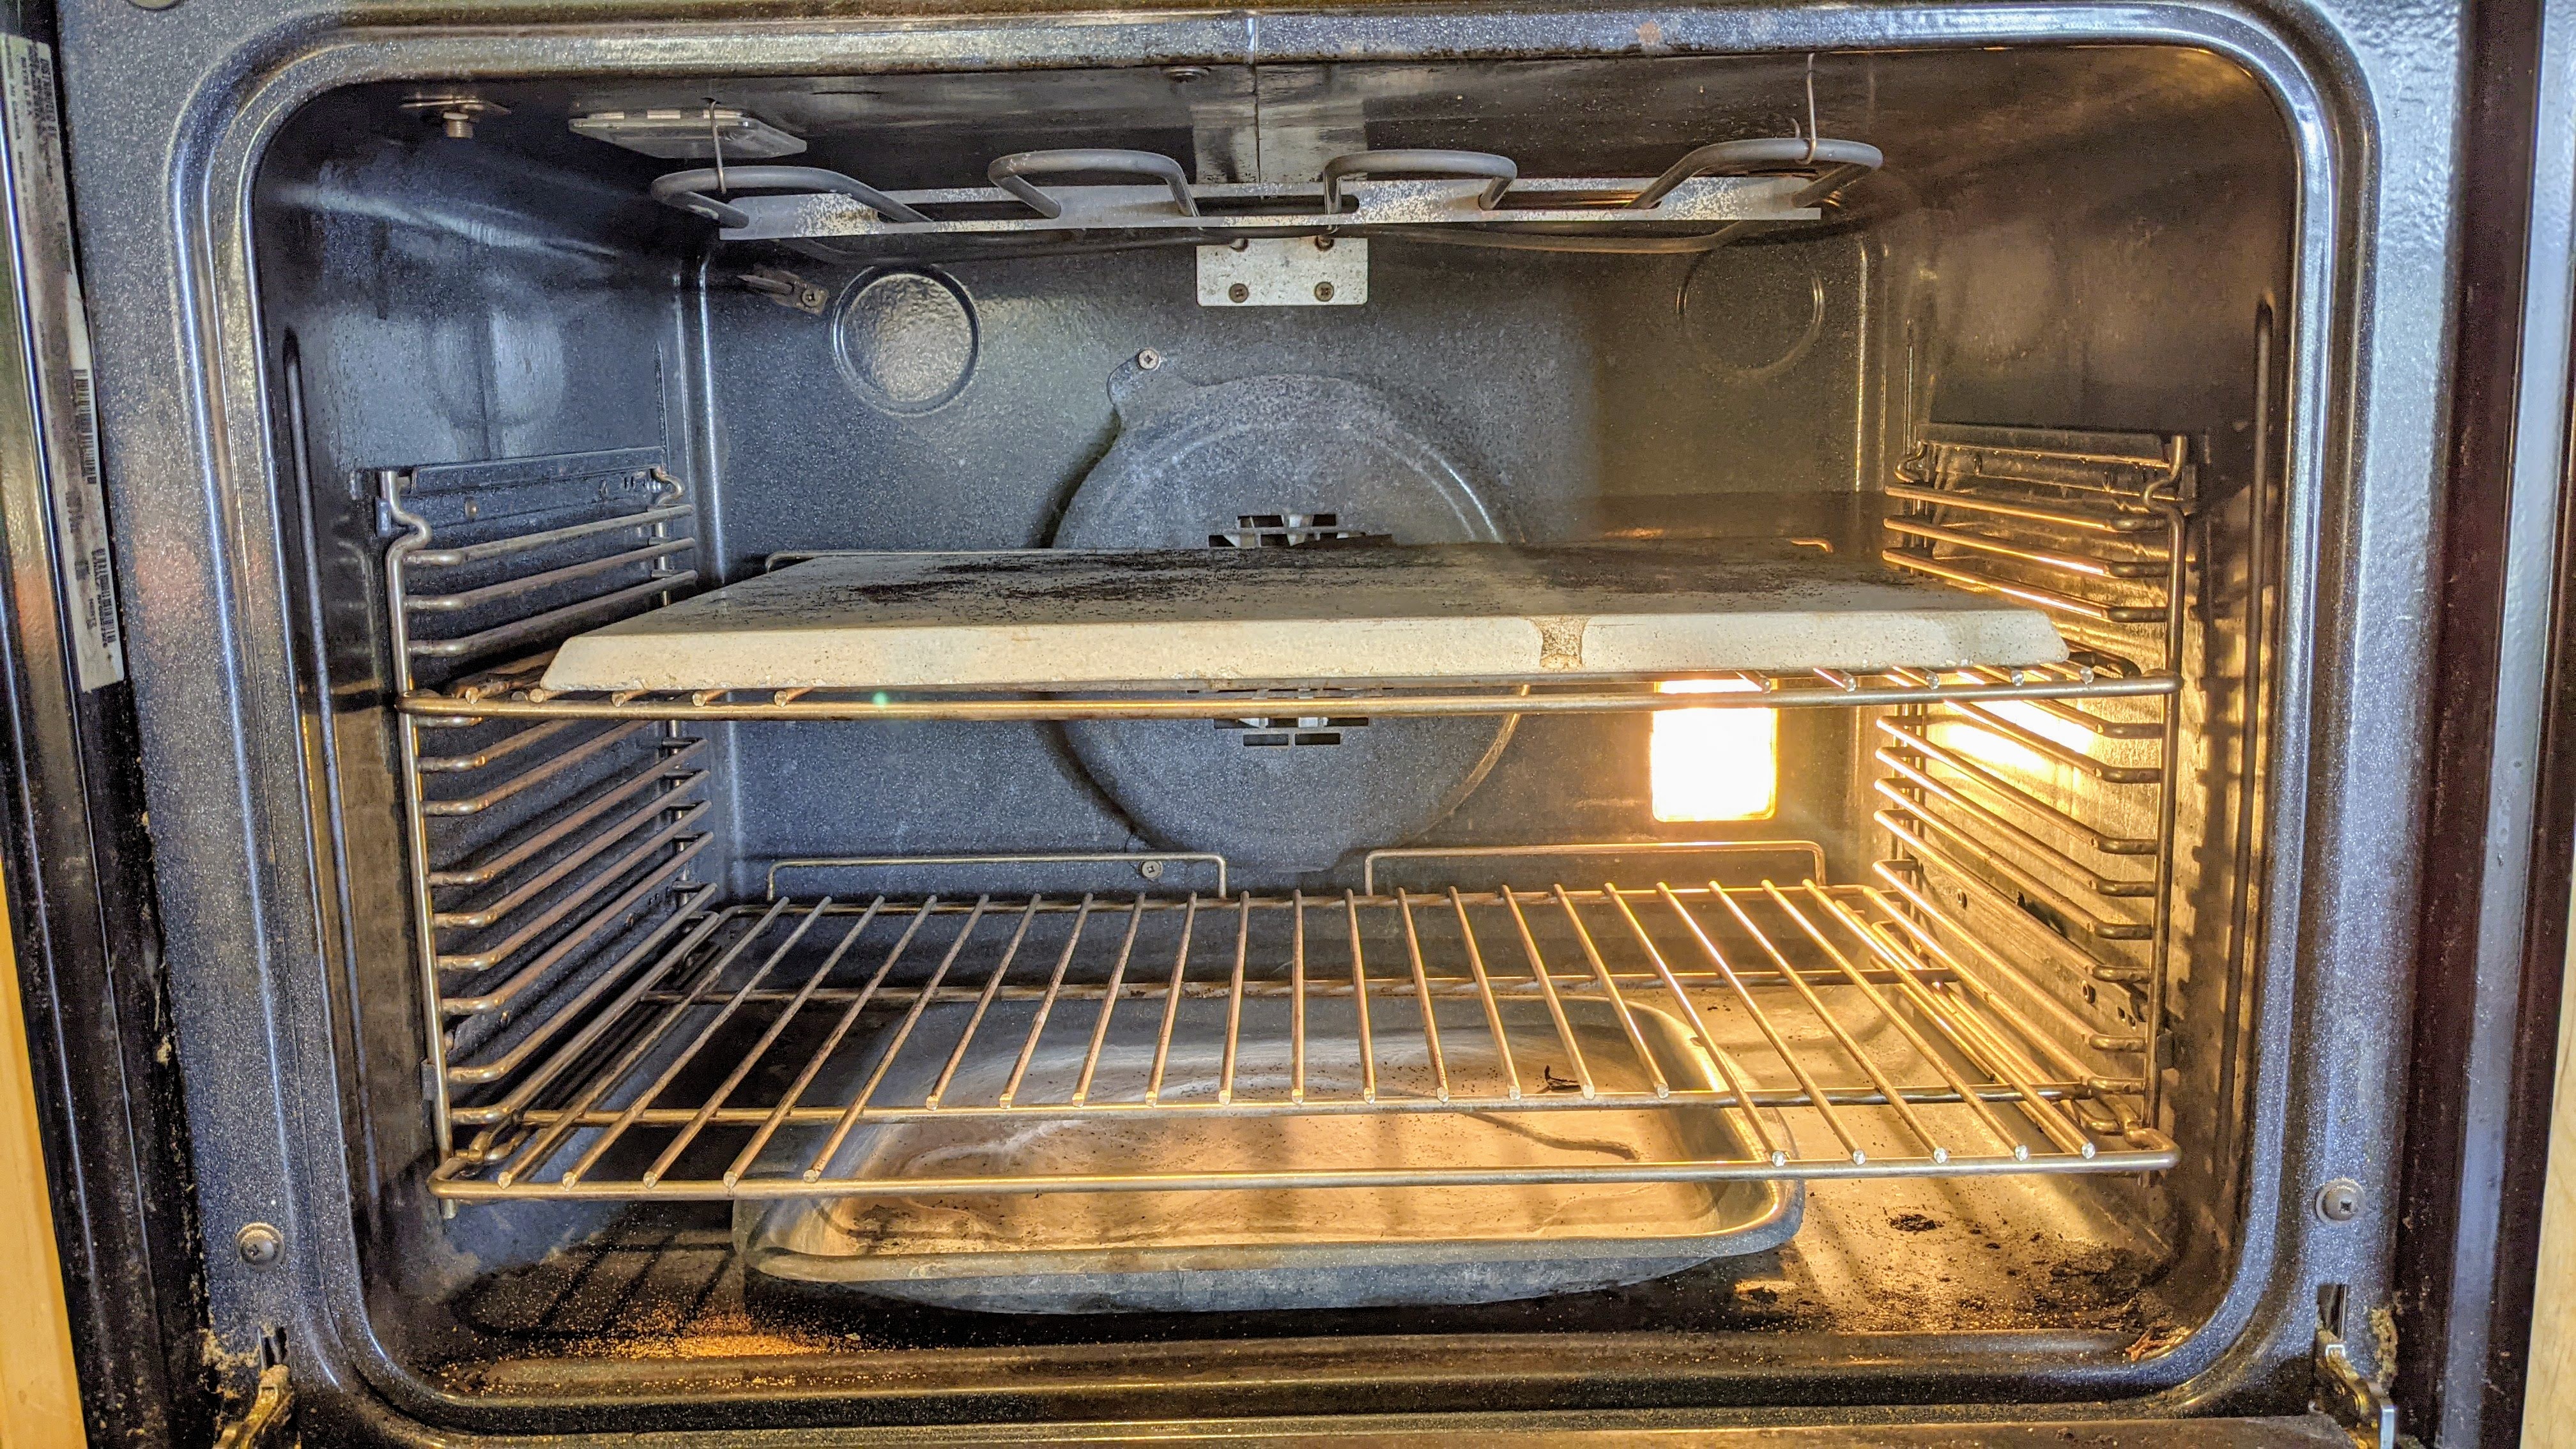
And here’s how my own oven is set up:
When I bake ciabatta and baguettes, I move the stone one notch up as they are low-profile loaves and I want to make sure they’re in the steam. In addition to my broiler pan, I also use two loaf pans with water-soaked towels in them to provide even more steam. I had to do this because my oven is very good at venting moisture, so I have to produce more steam at a faster rate than the rate my oven can exhaust it.
I woke up early this morning with a question in my head: Am I being a bit too academic with my bread-making? Like many bakers, I live by my formulas. They ensure that my loaves are consistent, no matter what I bake. But it occurred to me that bakers long before me had been baking by feel for centuries. They’ve developed a certain instinct about how their dough should look and feel.
Then I remembered watching four-part series on Netflix by Michael Pollan called Cooked. In the bread episode, there was a woman who made her bread in a wide bowl, just adding her ingredients in a seemingly free-form manner. It was fascinating watching her work! Then I harkened back to a video I saw of an Amish farmer making bread. No measurements, just going by the consistency of his dough. Again, fascinating. Then finally, at the world-famous Poillane Bakery in Paris, the bakers don’t use any measuring devices. They study the process for a year and a half!
That got me thinking: Have I developed those kinds of chops? After all, I’ve been baking bread for over 40 years. And especially in the last year, I feel I’ve developed certain instincts of how my dough should look, feel, and behave. So I decided to challenge myself today and go completely native, that is, use absolutely no measuring devices of any kind to assemble my dough.
The Starter
I had tailings leftover from my bake yesterday, so I fed my starter this morning with some AP flour, eyeballing the flour and water to relatively equivalent amounts.
I’m going to do something a bit different once it’s ready to be used and that is to mix it with a large quantity of water, then gradually add it to some flour until I get a consistency that’s similar to 65% to 70% hydration dough. This is consistent with what I do already by dissolving the starter in the water (sans a reserved amount for bassinage), then adding that to the flour.
I’ll let that mixture autolyse for a half-hour or so, then I’ll add the rest of the water and the salt, which I will also eyeball. Truth be told, I eyeballed what I think is 20 grams of salt based on the little crucible that I normally use for weighing my salt.
I am going to do a bit more of a bassinage. Normally, it’s about 50 ml of water. I think I may reserve more. I’ll play that by ear. Once I have the mix to the consistency I want, then I’ll do the standard 3-hour bulk fermentation with folds every 30 minutes or until I get about 25%-30% expansion.
I’m a little torn right now about the dividing and shaping. I’m a little anal about things being equal, so I’m leaning towards dividing my dough using a scale. But we’ll see when I get there… That said, I just might not do that to see if I have the chops to create consistently-sized loaves without a scale. We’ll see…
As far as shaping is concerned, I will do my best to not use any bannetons. Everything will be hand-shaped. This means I will have to rely entirely on my dough development and shaping skills to produce loaves that will literally stand up. And as I write this, I’m actually pretty excited. In the back of my mind, I’m confident that I’ll be able to pull it off with good results. But as with anything, you never know until you see the finished product.
The Process
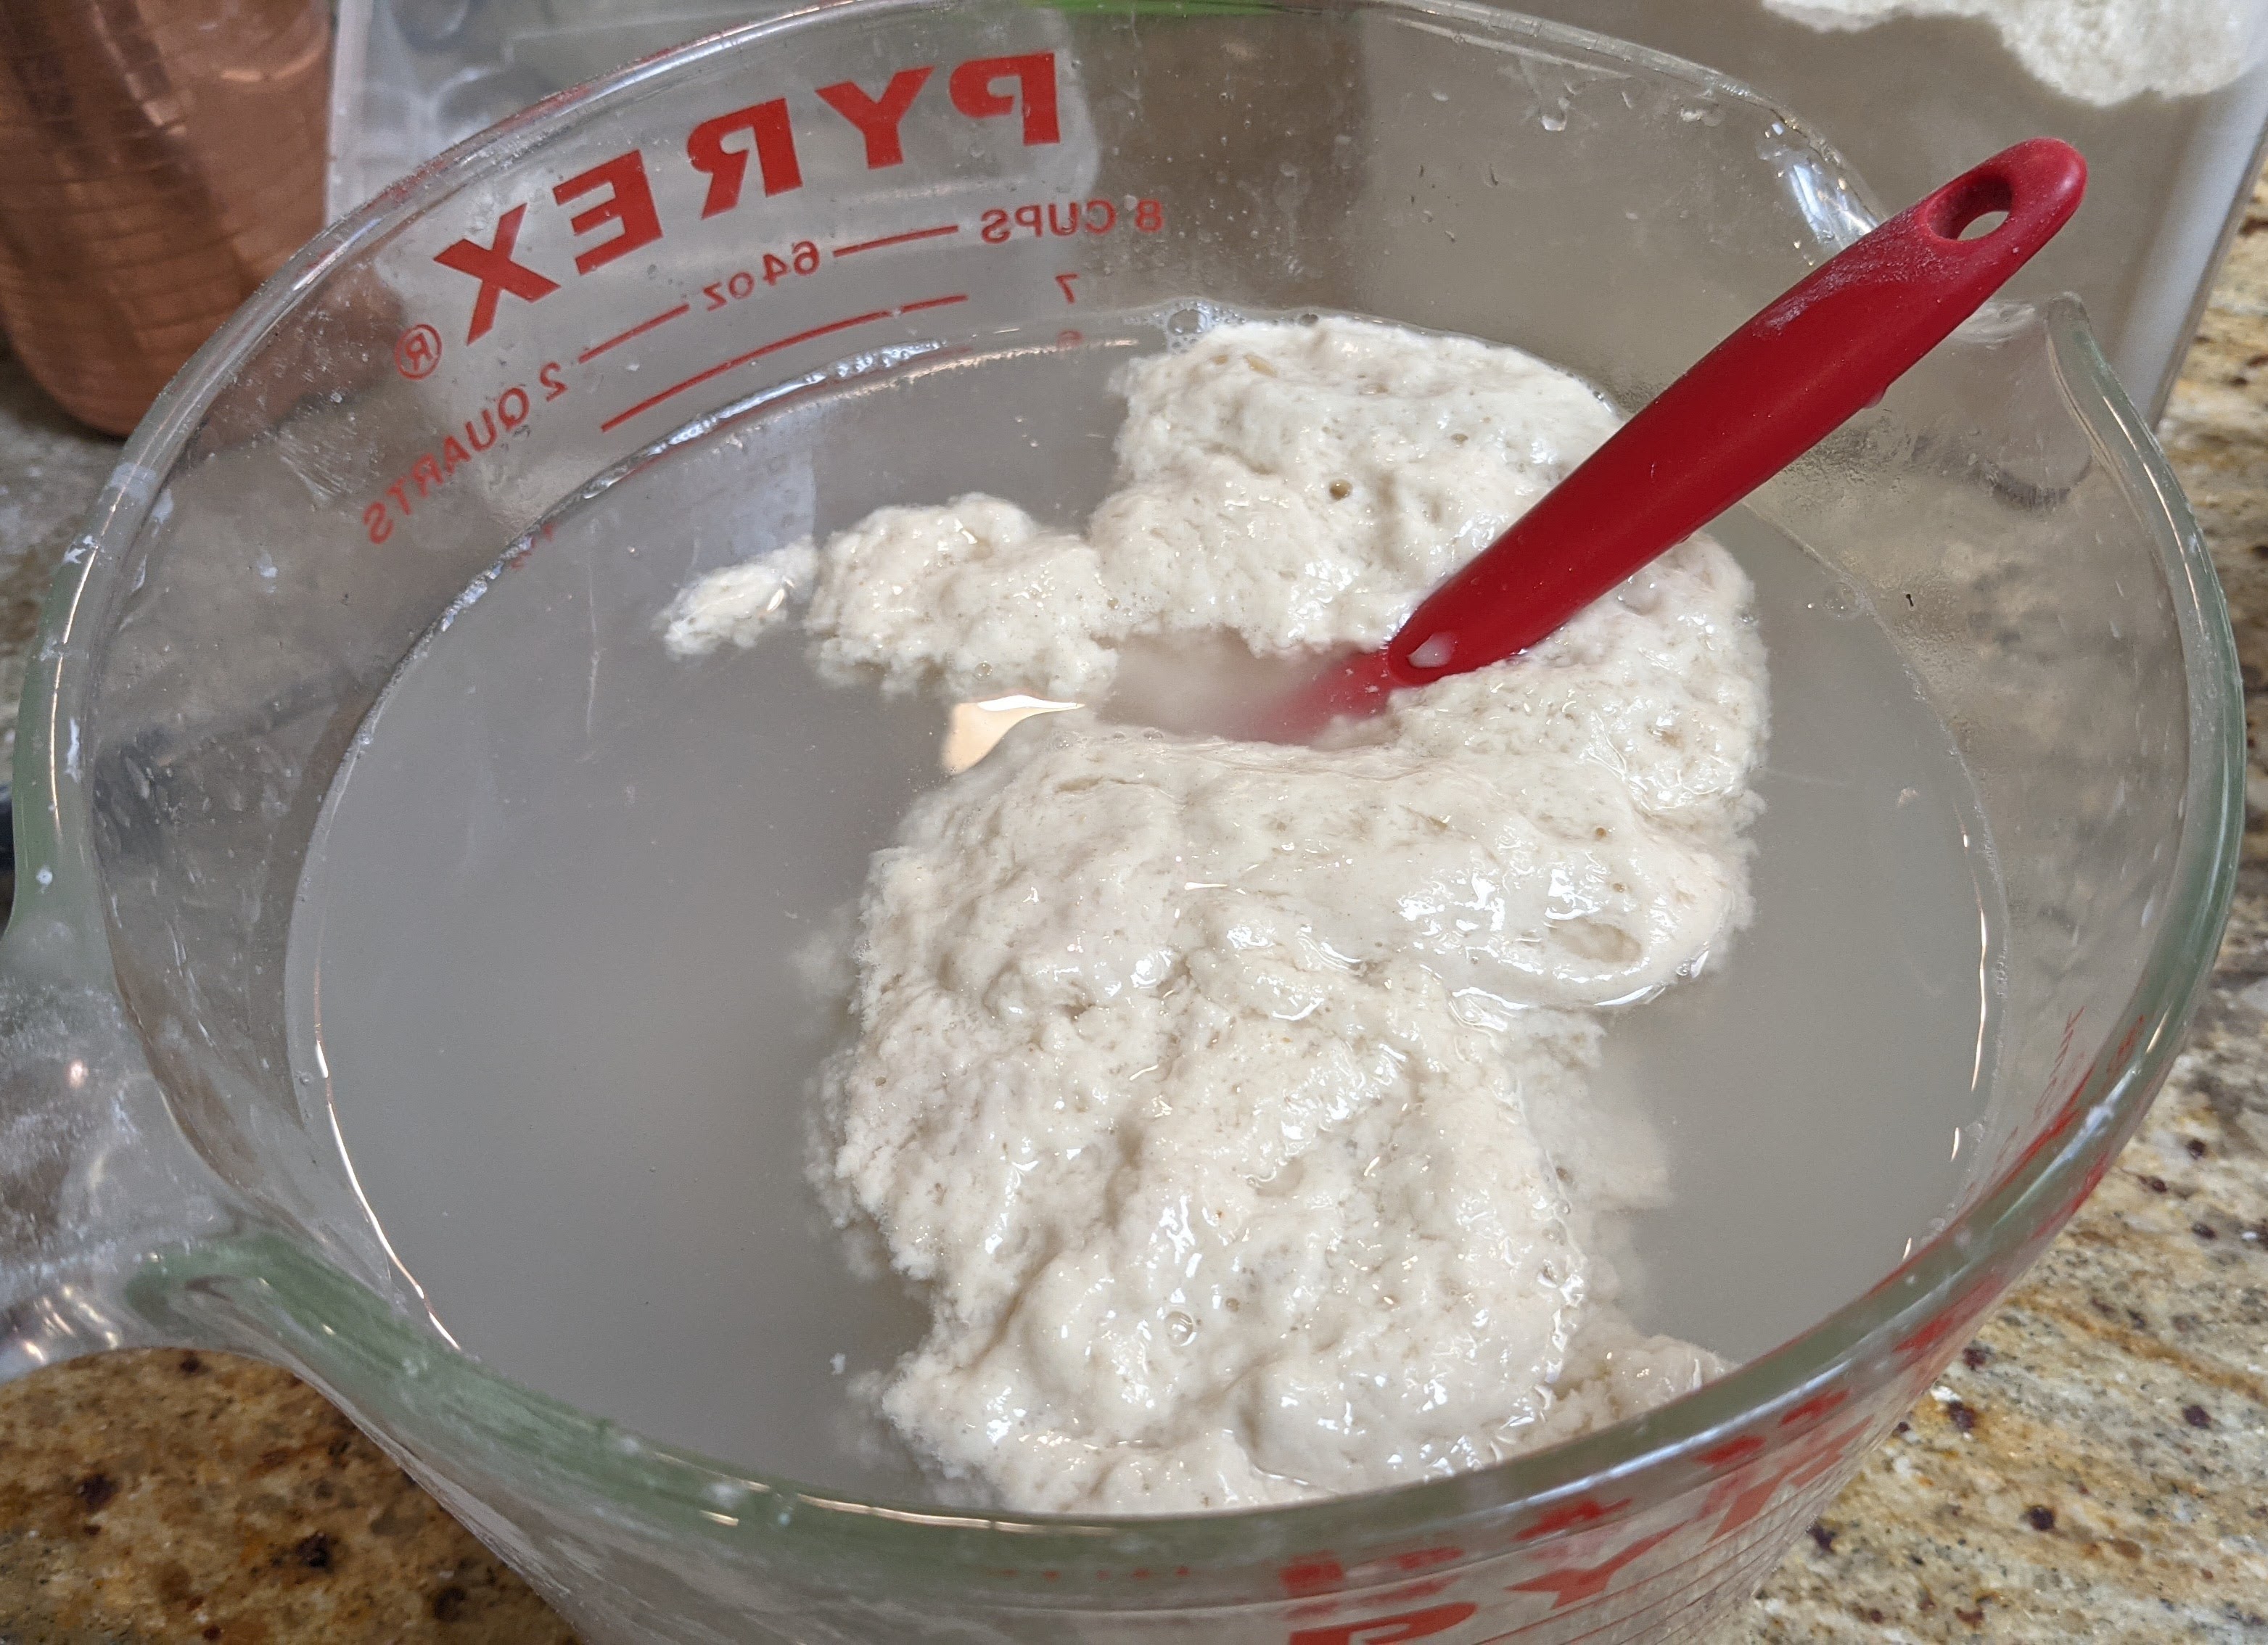
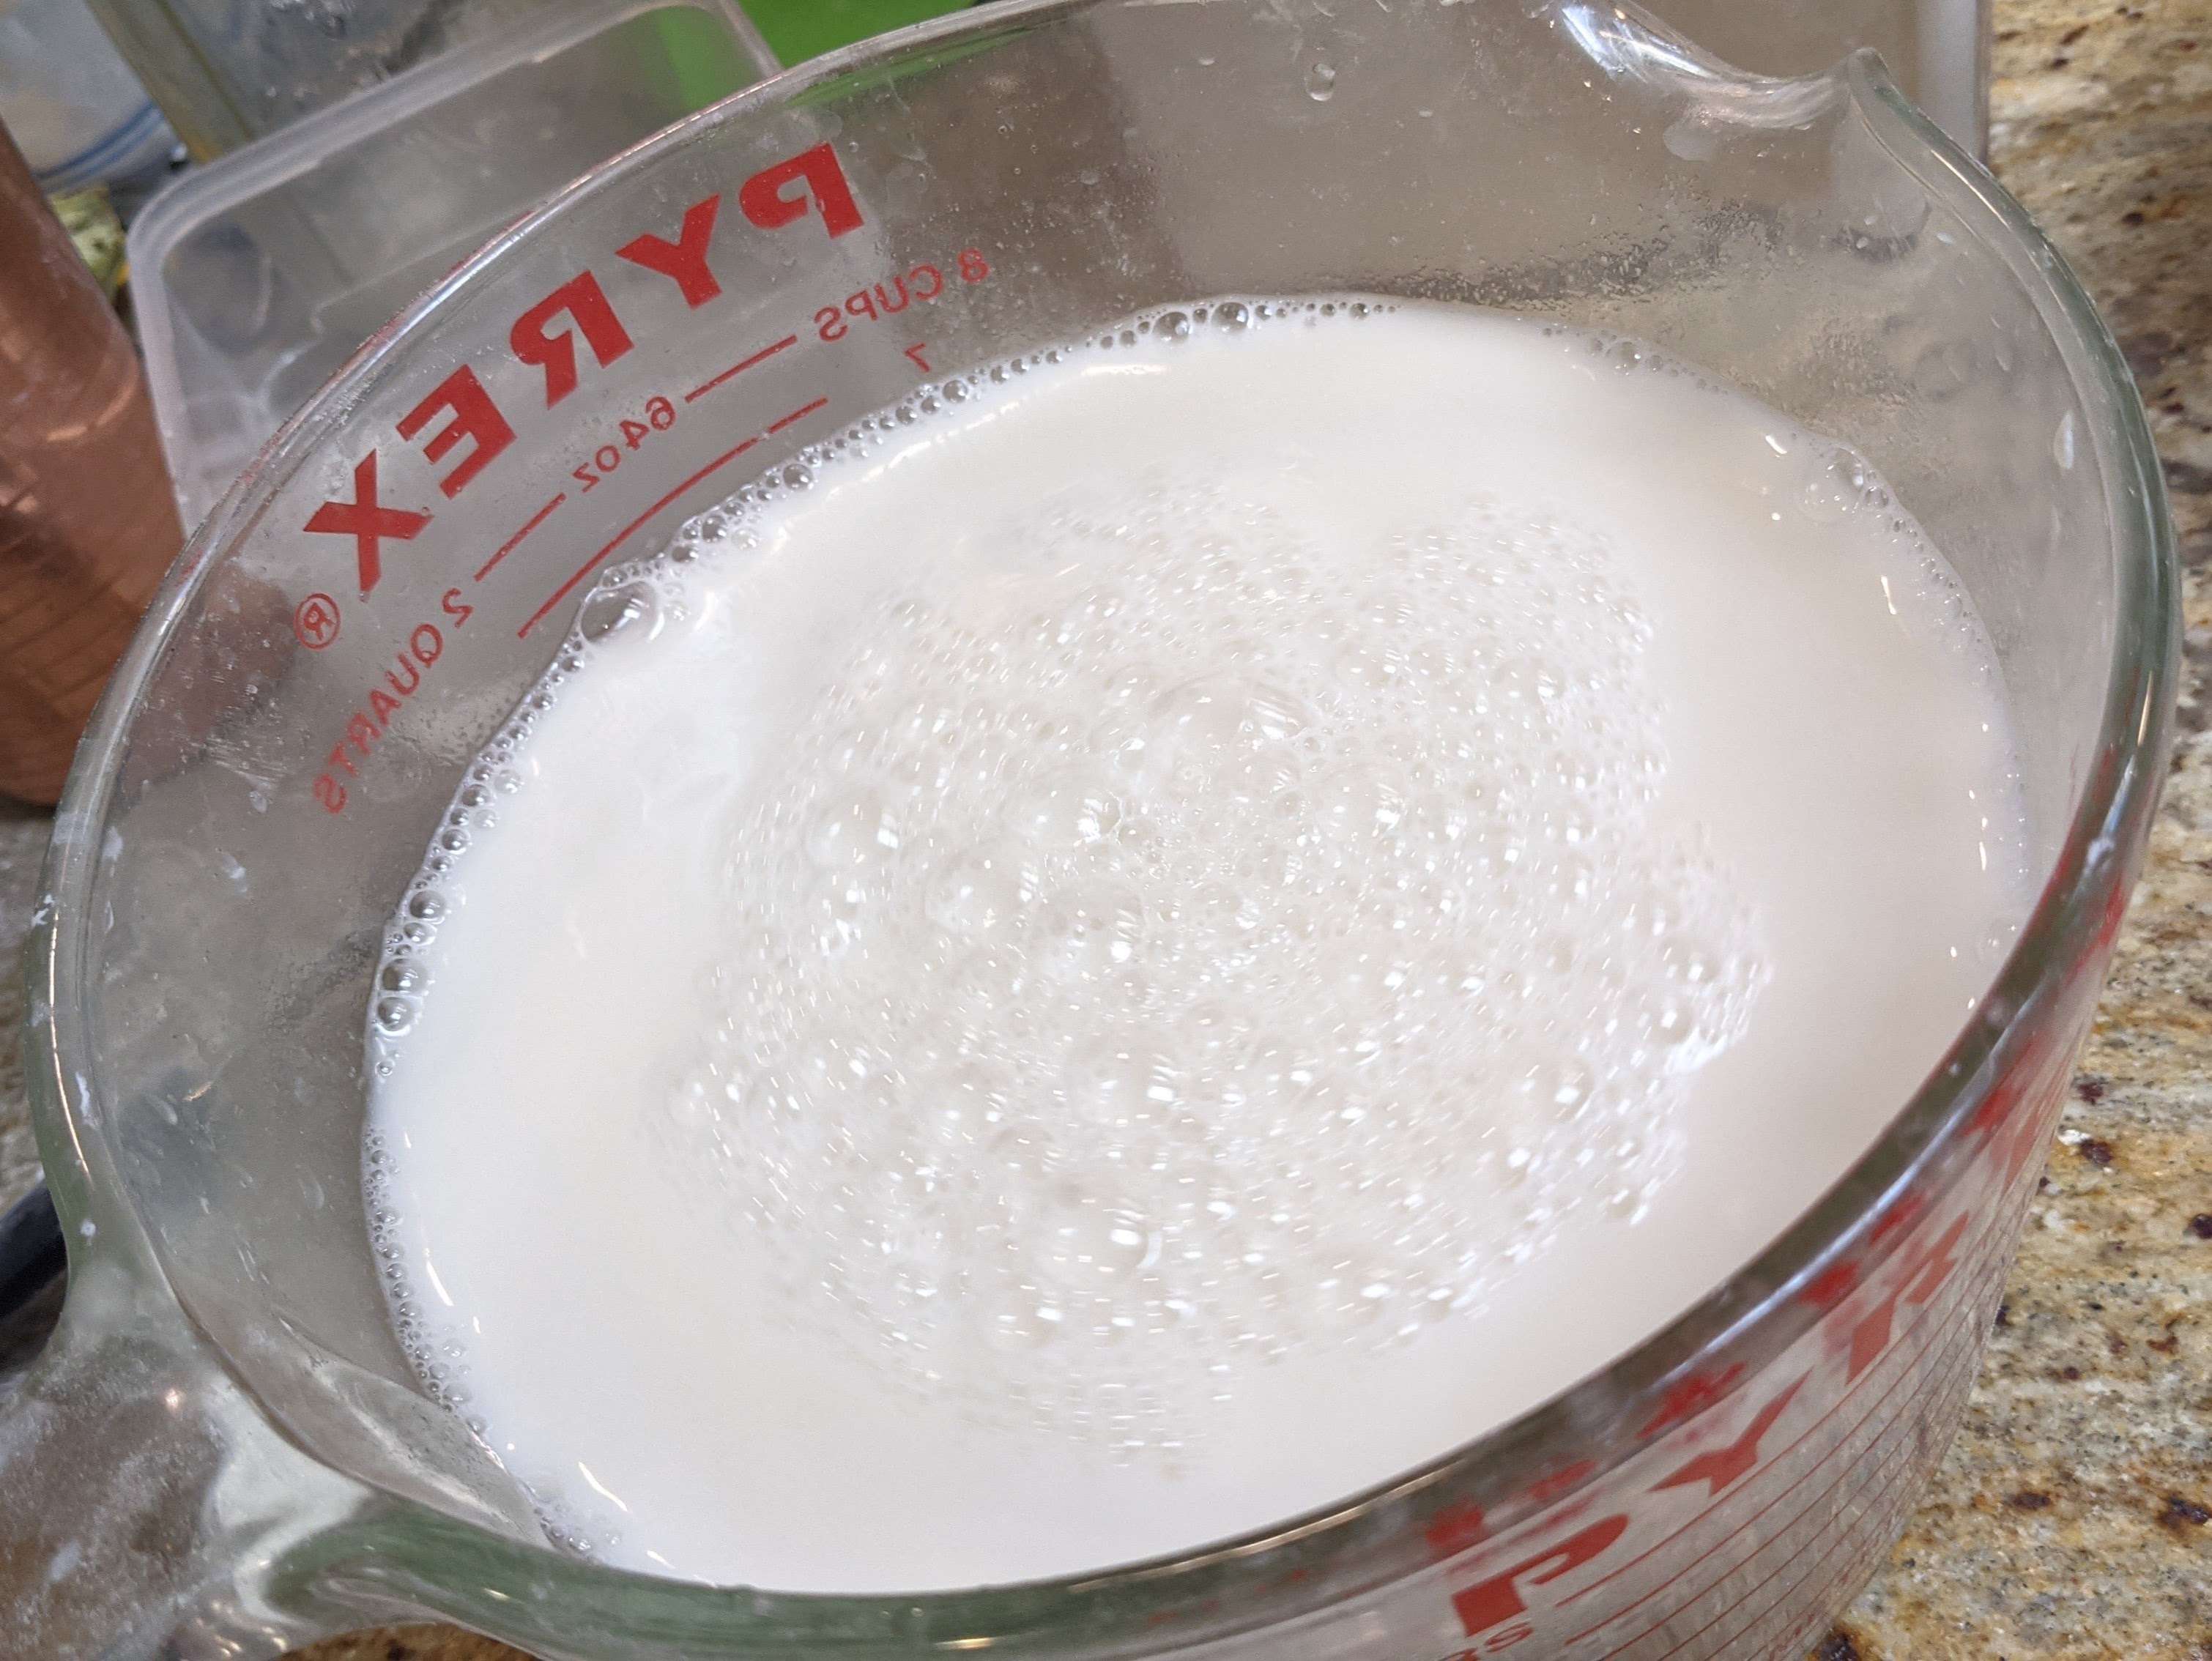
The first step in the process was to completely liquify the starter. This liquid would then be added directly to the flour as shown below.
Using a Danish dough whisk made quick work of bringing the liquid and flour together.
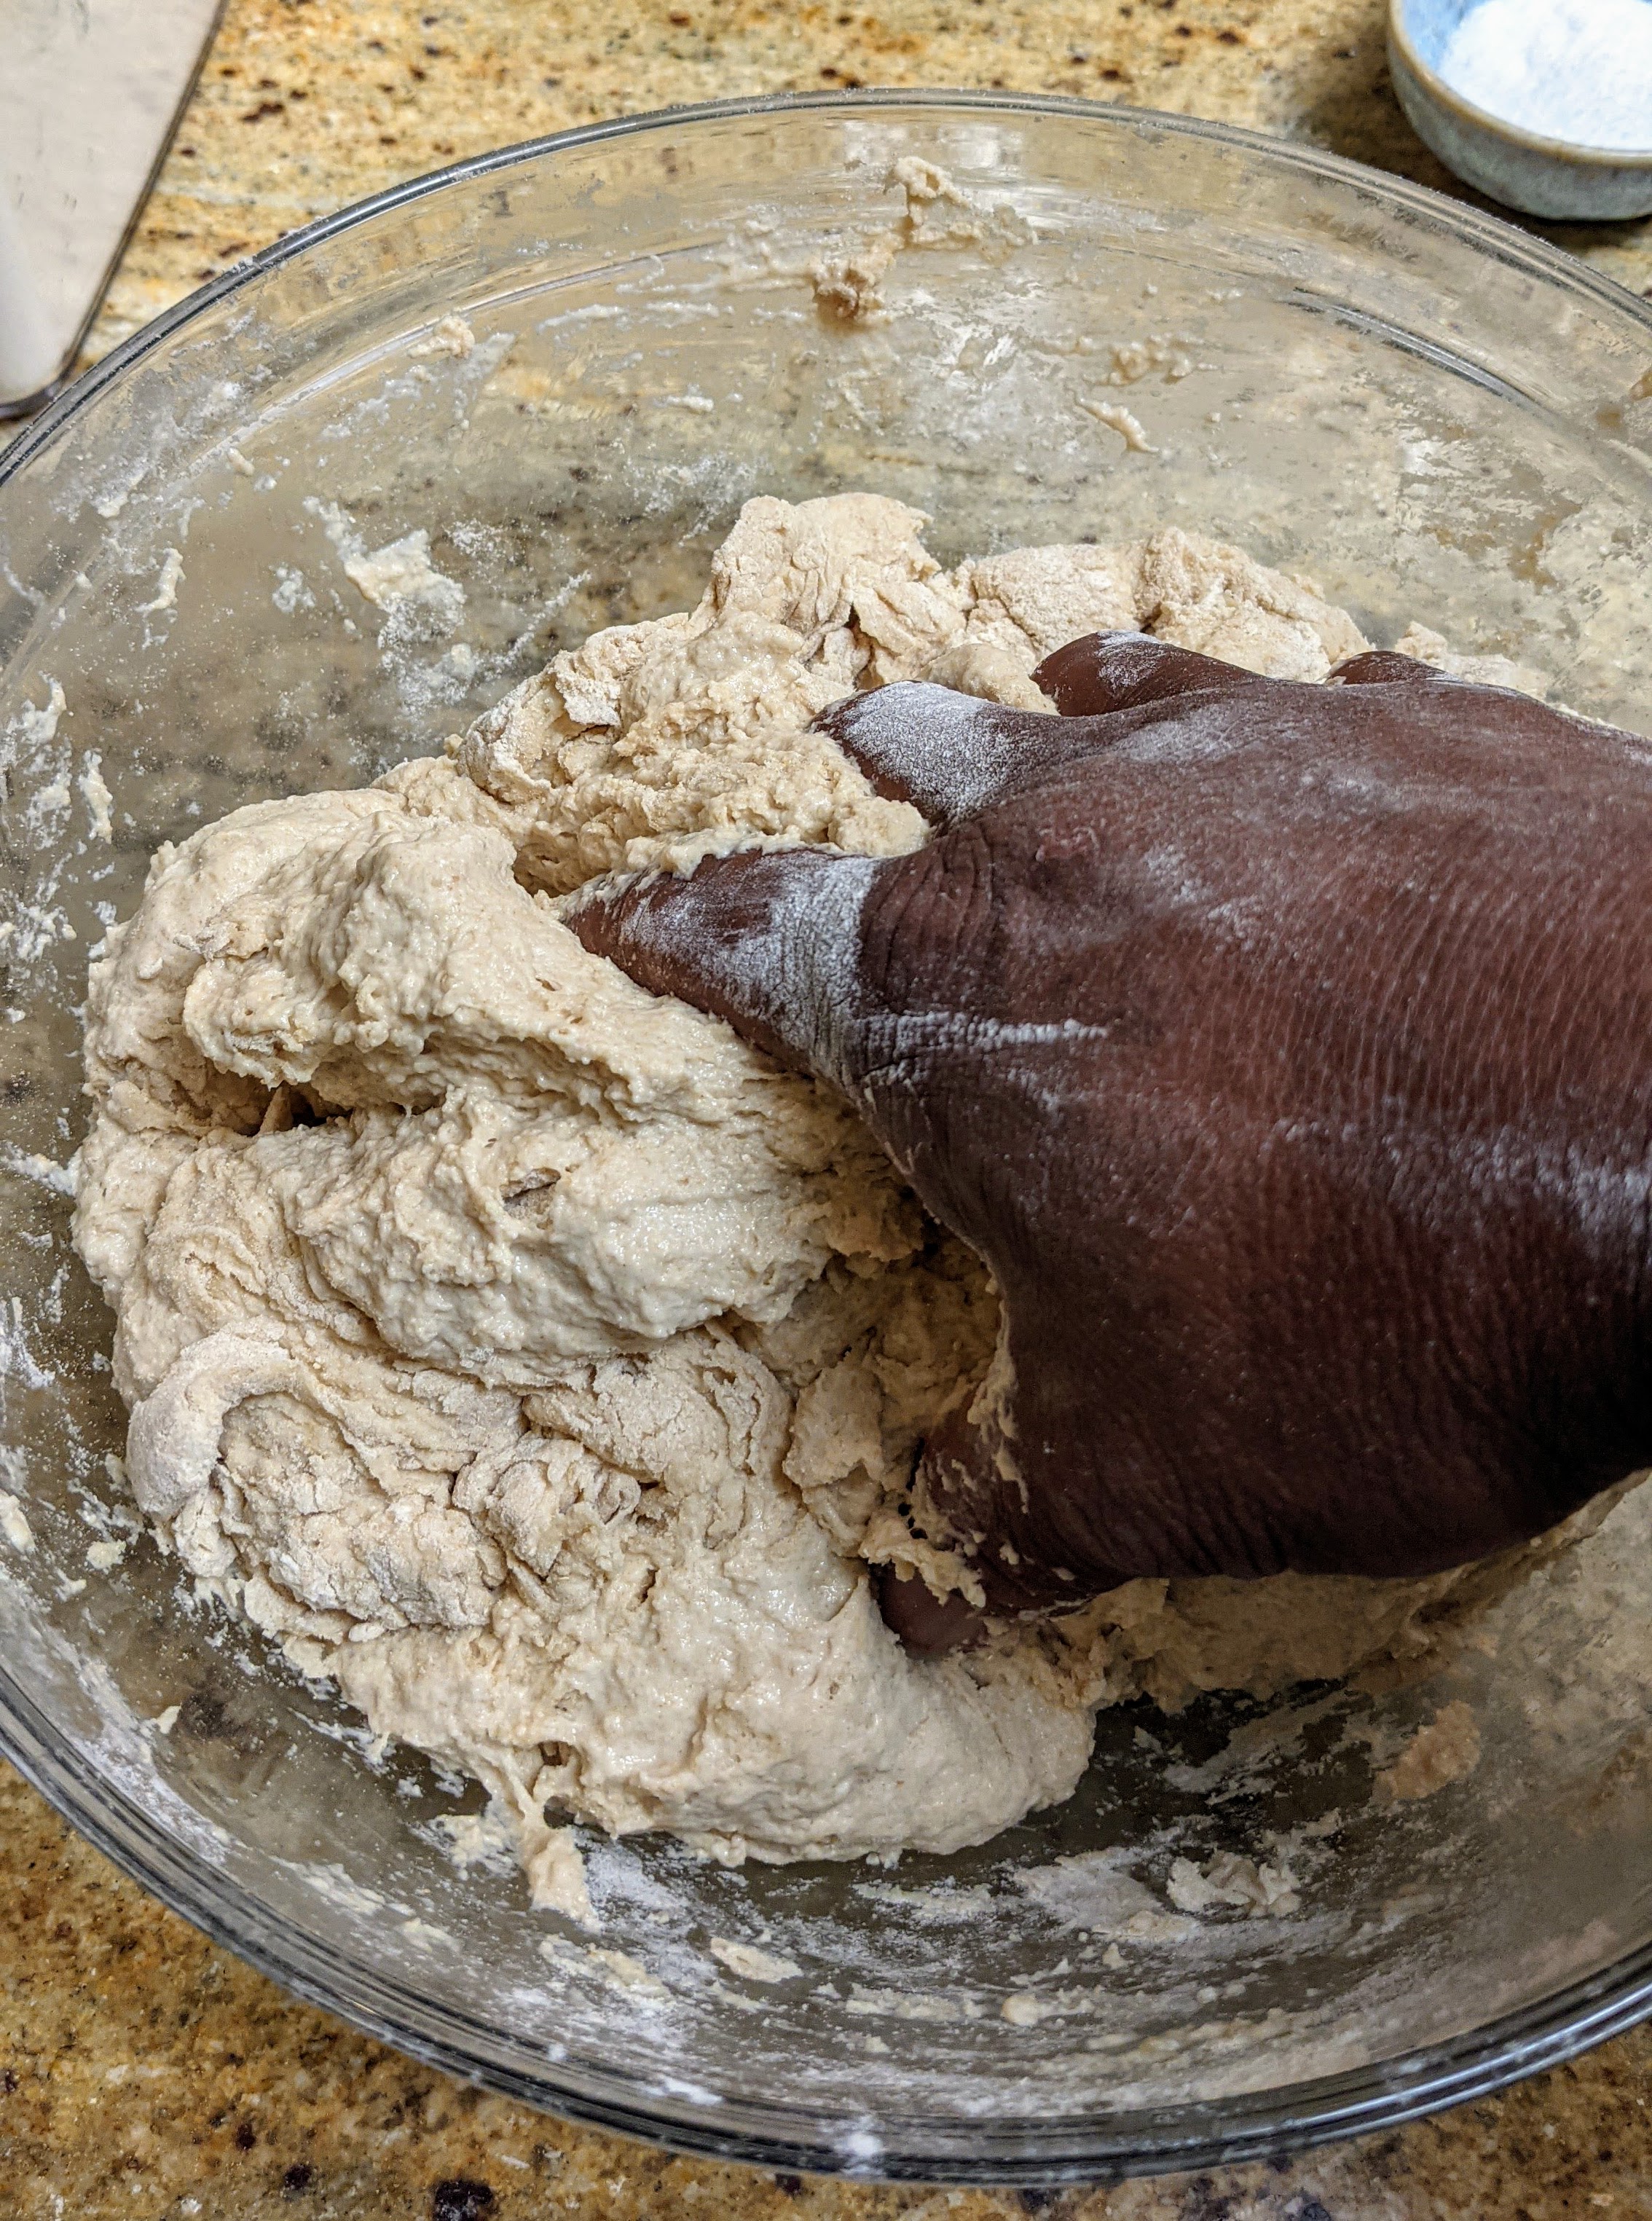
Once I had everything mixed, I dialed in the consistency of the dough by mixing by hand, adding a little extra flour and liquid as I didn’t feel I had enough dough. Mixing by hand at this point was important because it allowed me to really feel the dough.
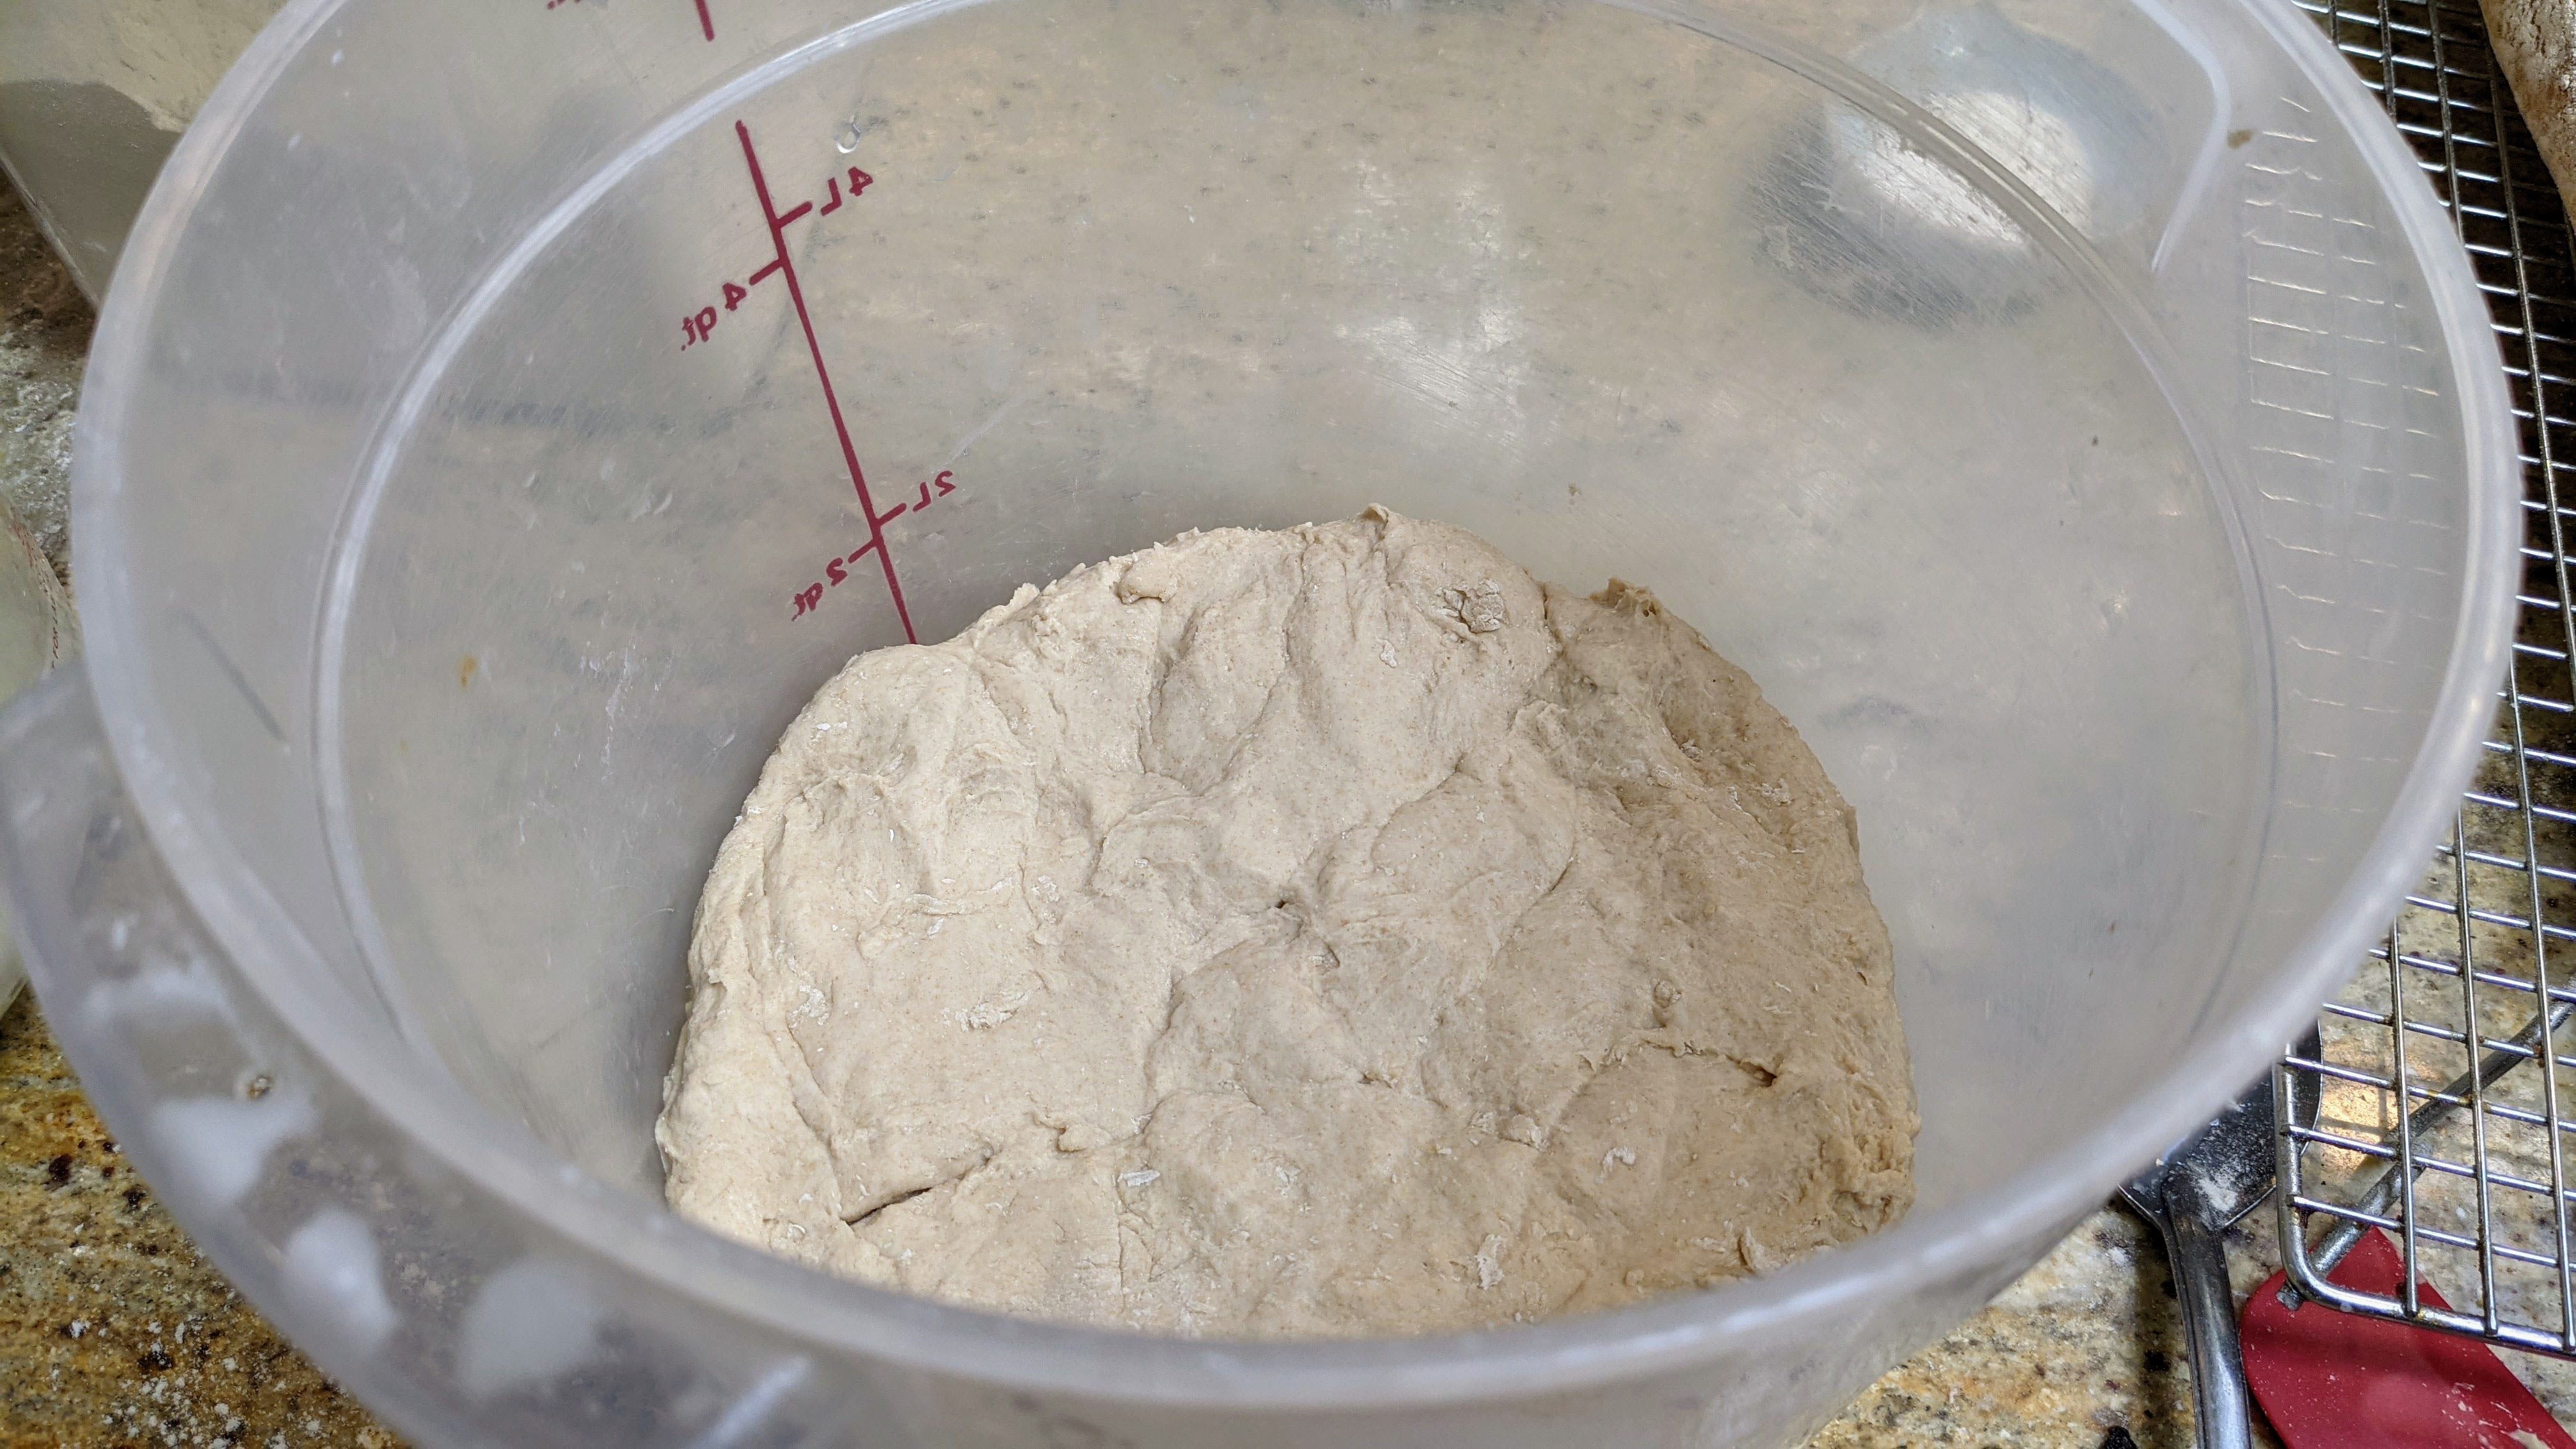
Once I dialied in the dough’s consistency, I transferred it to my bulking container to autolyse for 30-45 minutes. After that’s done, I’ll add the salt and a little more liquid to get to the approximate hydration (feel) that I want. There’s whole grain Kamut in this flour, so I’ll probably go a little wetter with the final dough.
I will admit that I’ll be leaning a lot on what I learned in Tartine N°3 in developing dough with whole grain flour. In that book, Chad Robertson employs his basic country loaf process, but has some valuable handling tips (read: being freakin’ gentle with the dough) accompanied by a fairly long final fermentation that has made a HUGE difference in how my whole-grain loaves come out.
After five sets of stretch and folds, the dough was super extensible, so I decided not to proceed with the sixth fold and let fermentation proceed untouched for another hour or so. Since I have a lot of high-extraction and whole grain flour in the dough, I need to be absolutely careful to not degas the dough and ruin all the work it has done the last two and a half hours.
I’ve mentioned in the past that I try not to be too parochial with recipes and techniques. That’s important because dough is affected by so many different factors. For instance with this particular batch of dough, about a third of the flour is really strong high-protein flour (17%+). I usually use it in conjunction with whole grain flour to help compensate for the bran that tends to cut the gluten.
But I have to say that at this point, the dough is feeling absolutely luxurious and is beginning to get nicely aerated. I should be shaping in the next couple of hours.
The Next Day…
Yeah… I was going to freestyle the loaves, but I ran out of time as I had plans for the evening. So I decided to shape up a couple of batards, put them in baskets and let them do their final ferment in my dough retarder. And yes, I did scale them out, though I got VERY close eyeballing them when I originally divided the dough and only fell about 20 grams short on one piece. Next time, I’ll probably just eyeball it…
But it’s probably best that I put the dough in baskets. When I was shaping the loaves, They felt like they were 90%+ hydration. Of course, I don’t know
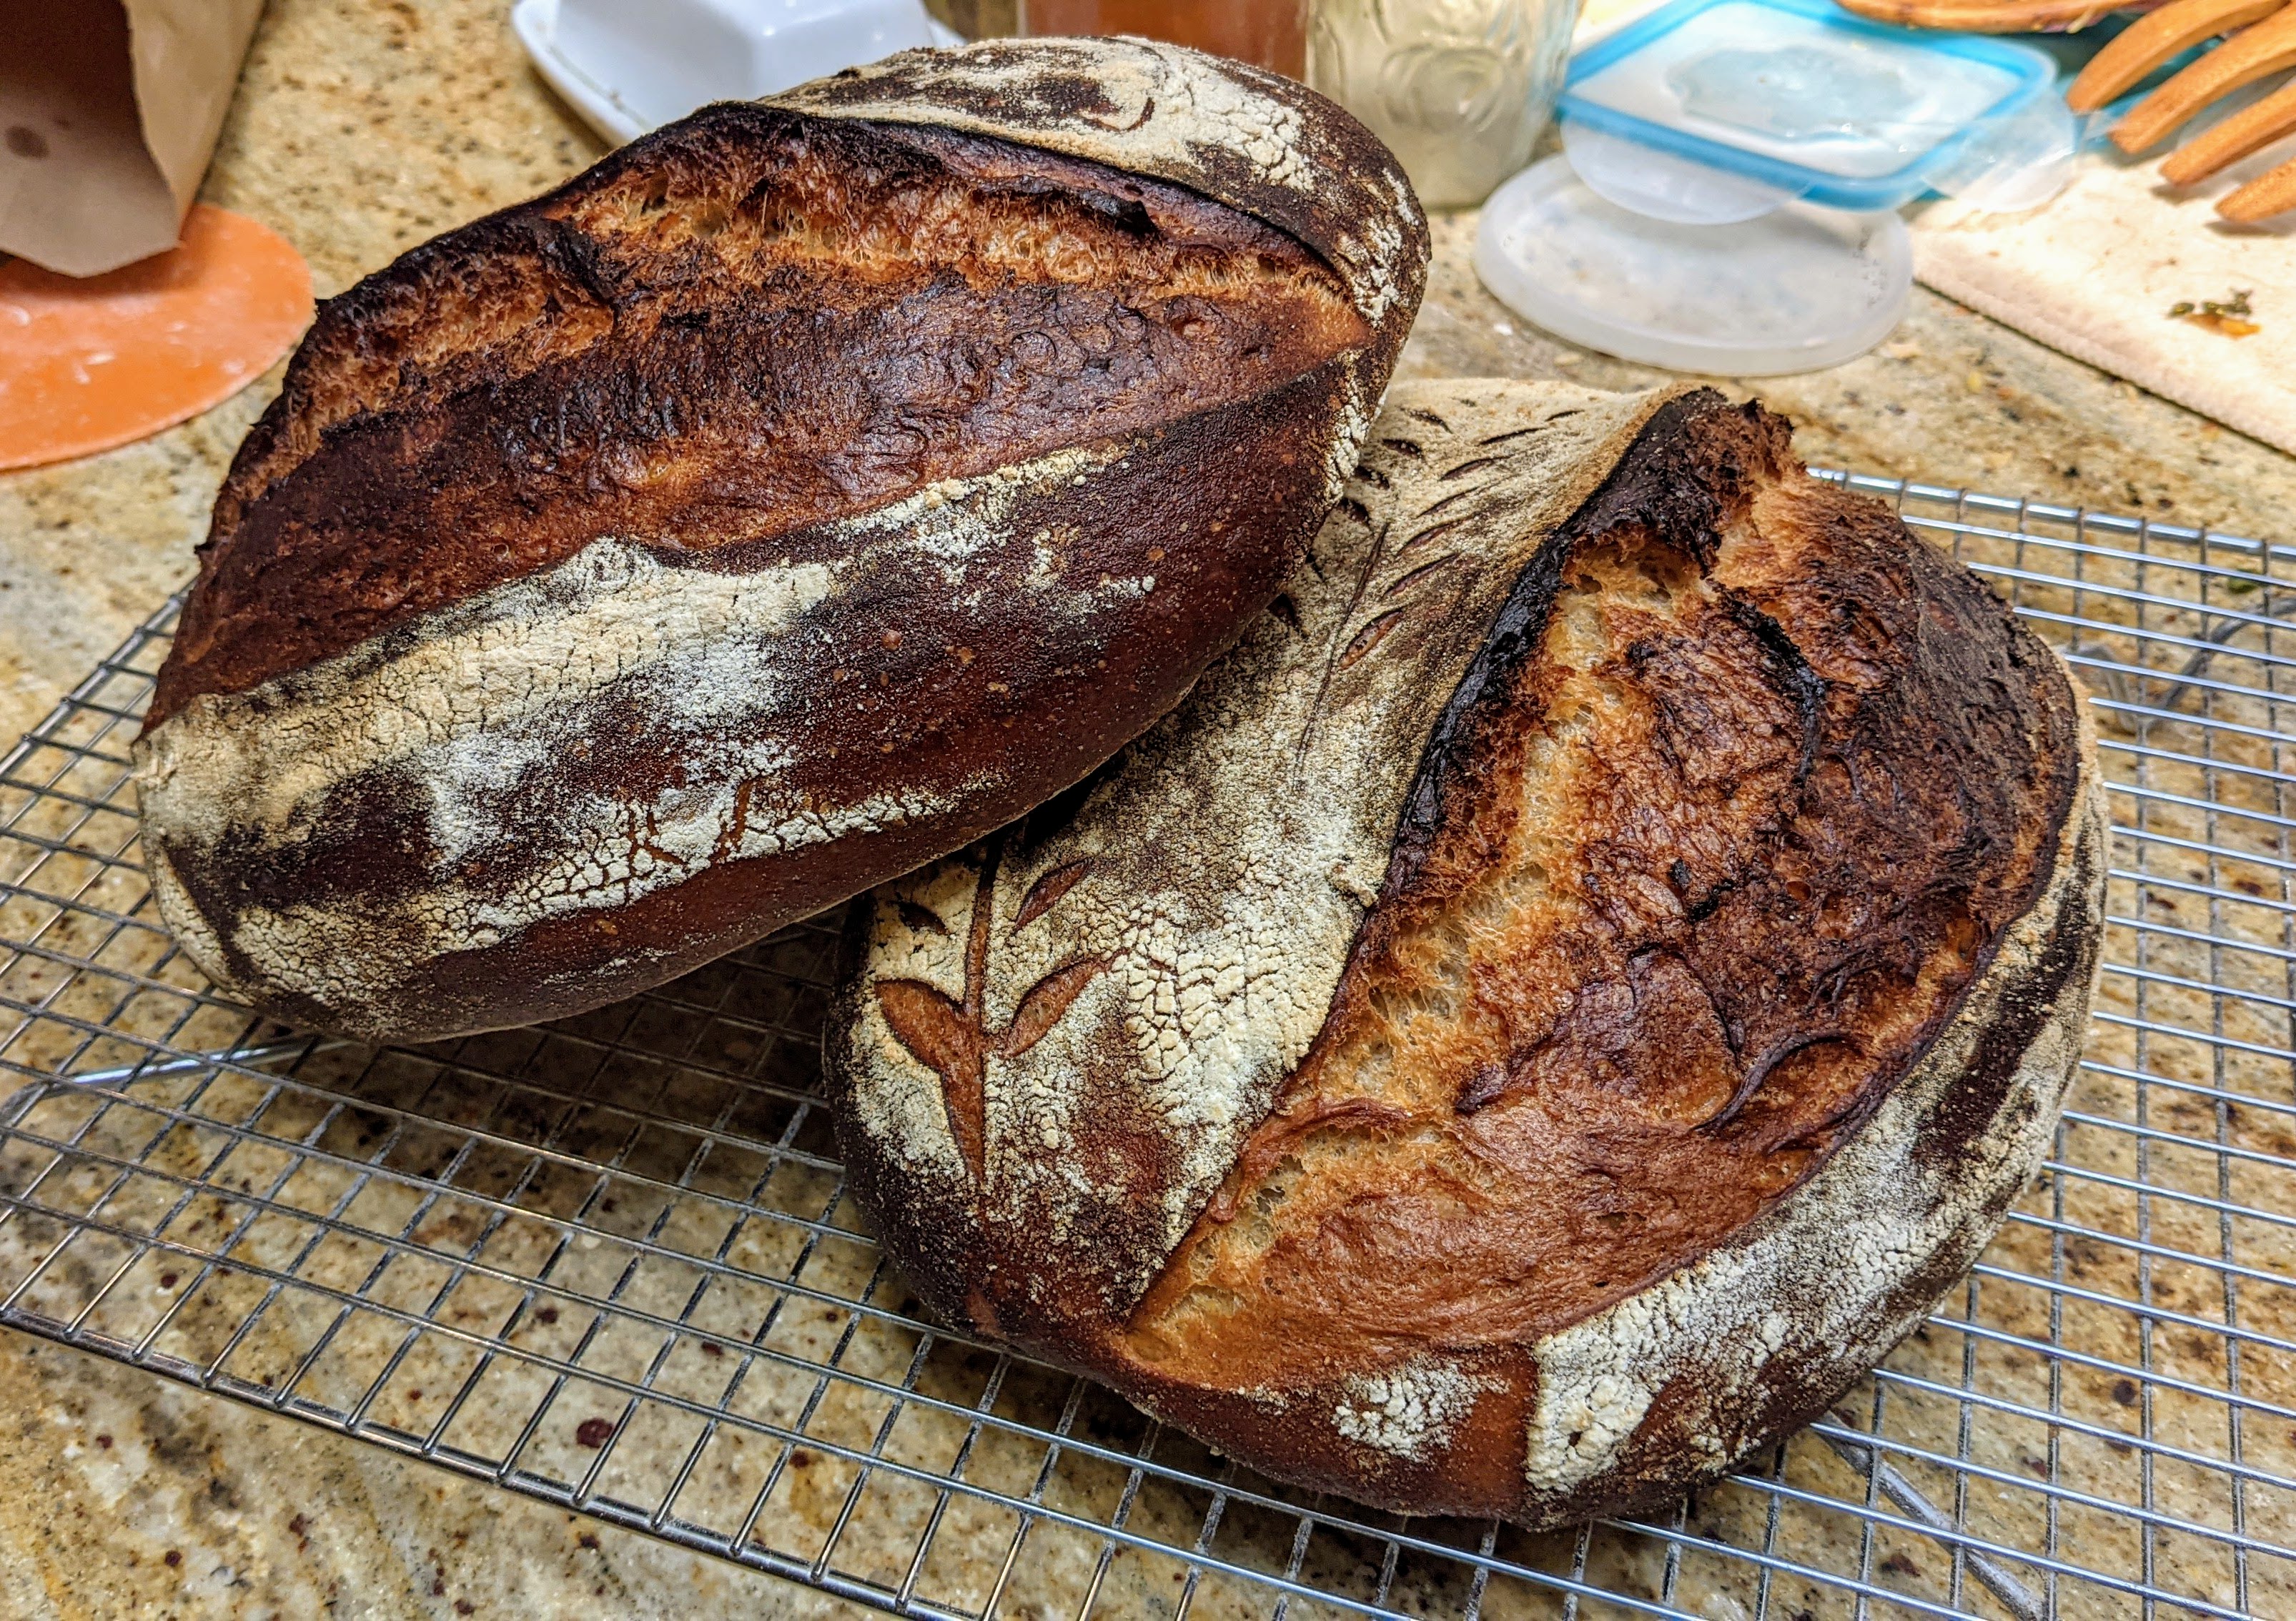
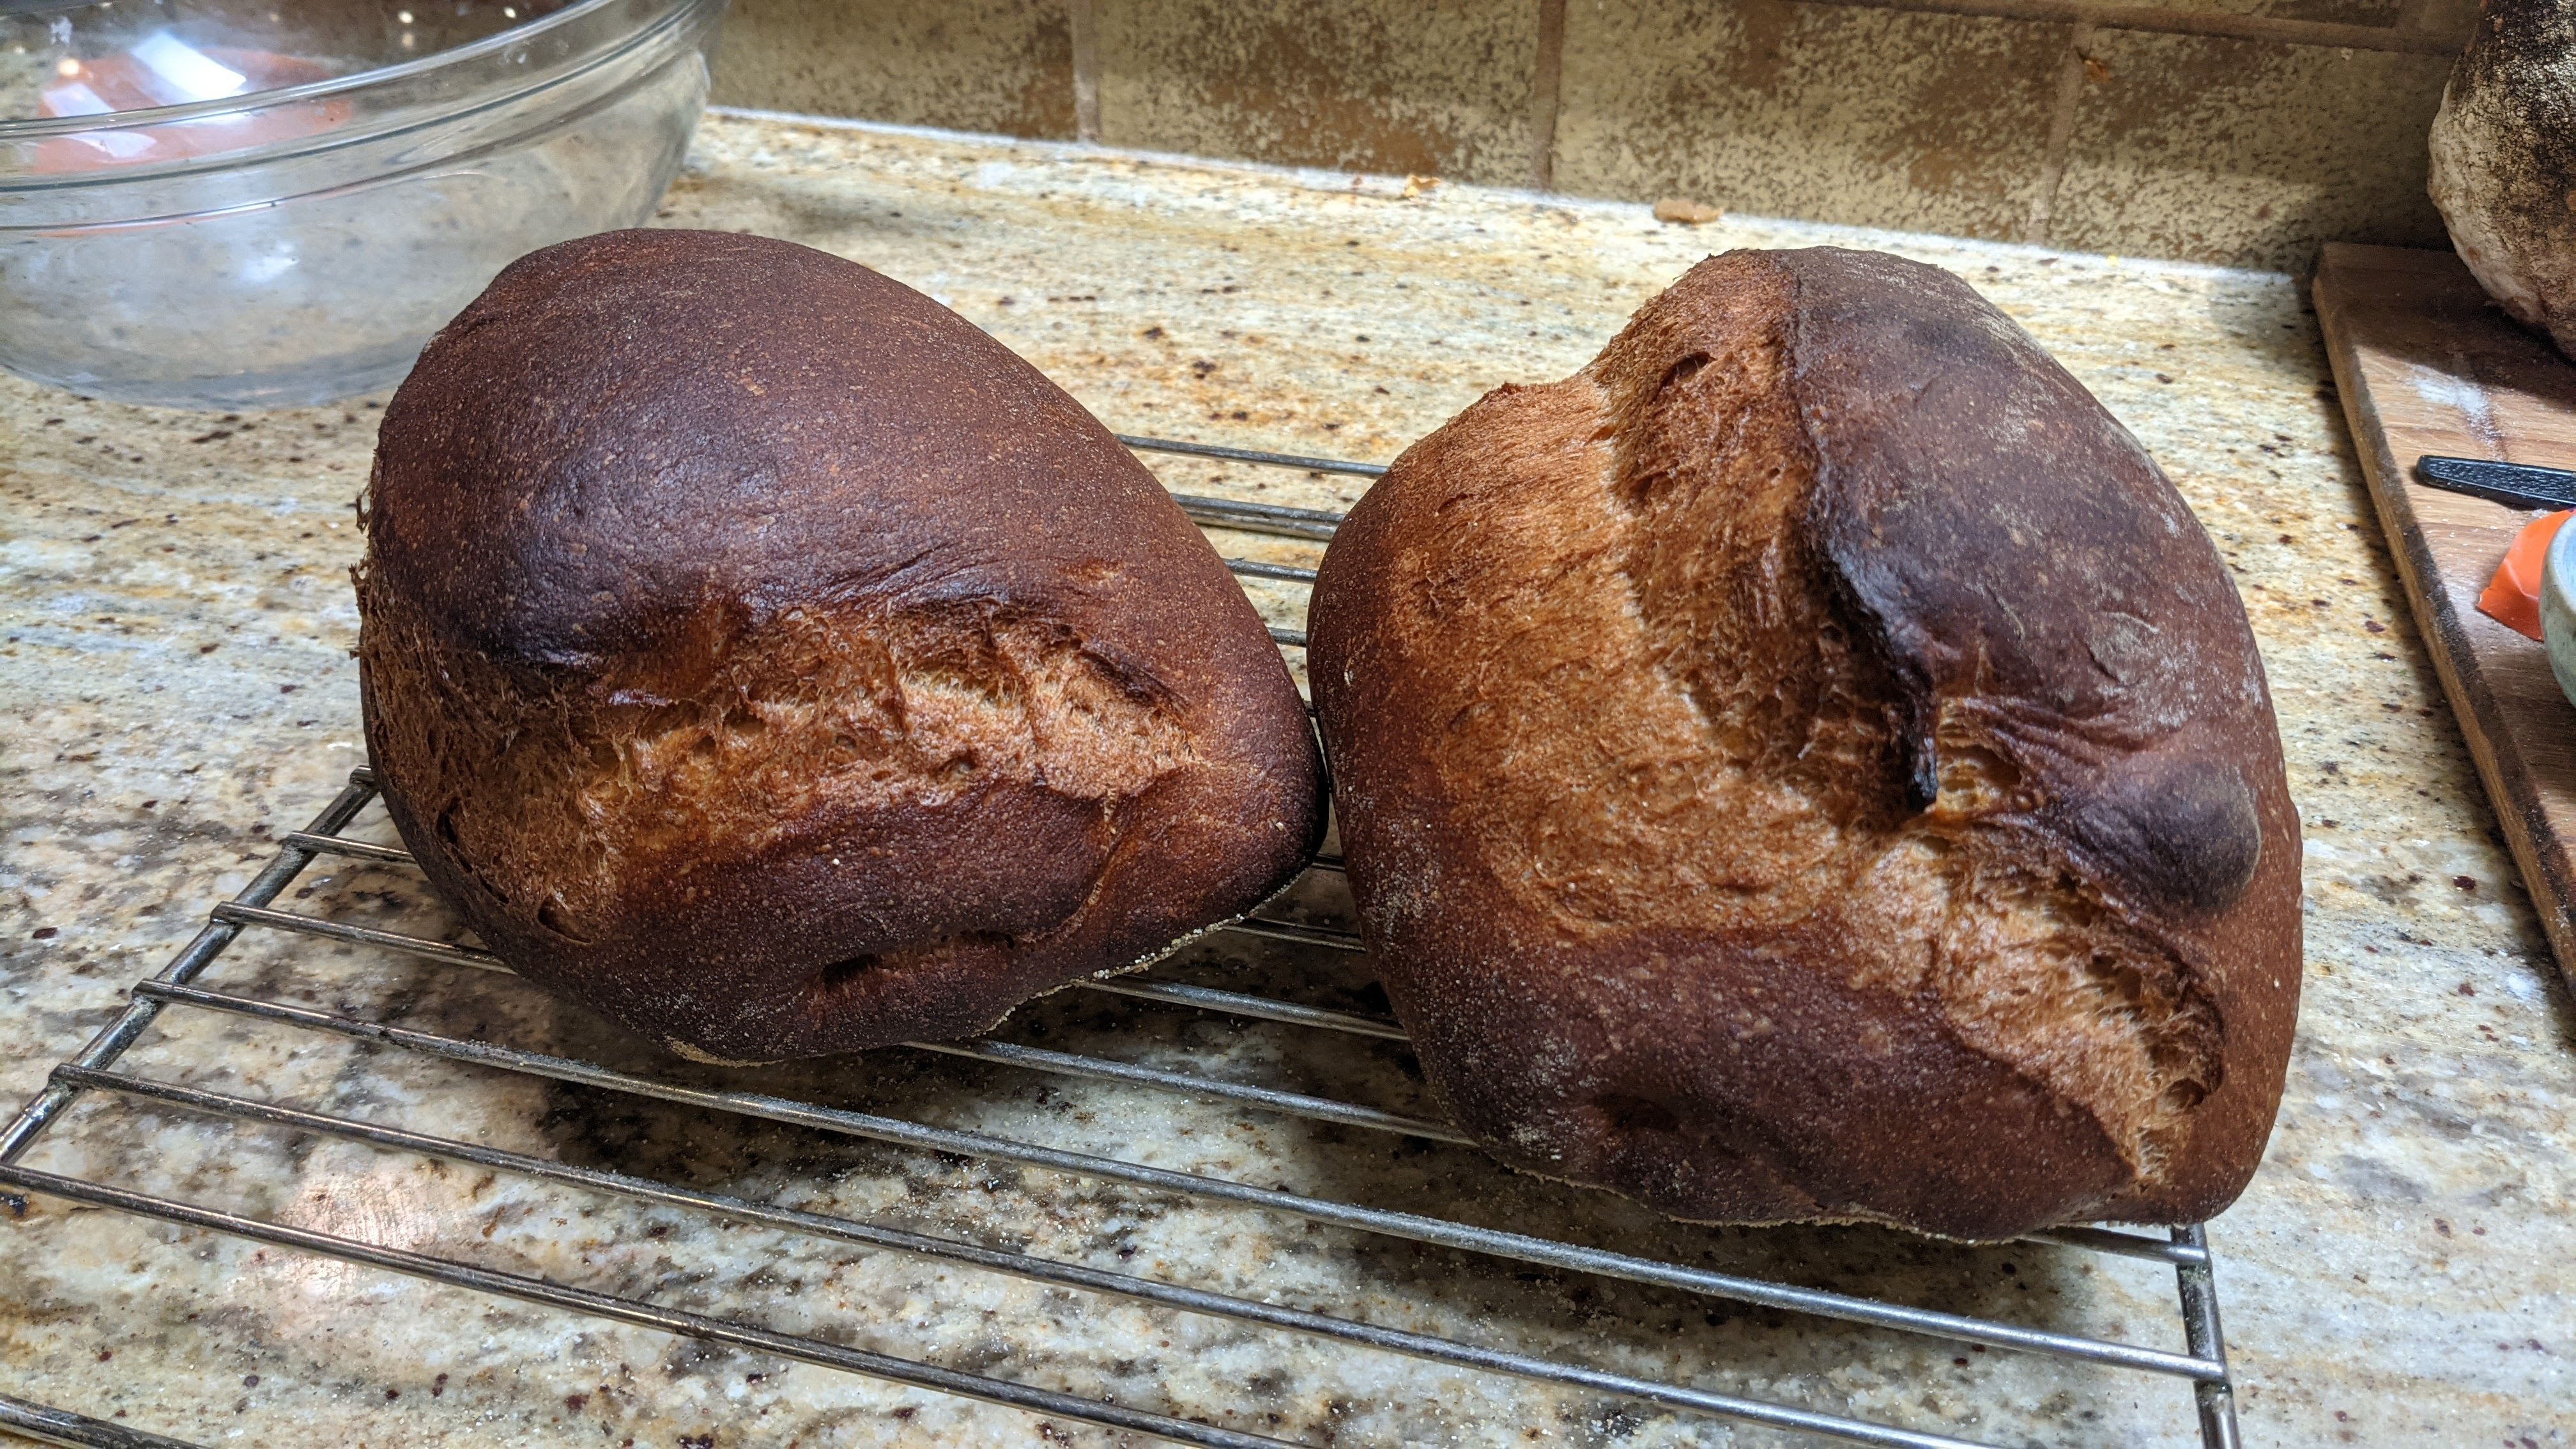
The loaves are looking great in the oven right now! I was expecting the loaf on the left to be a little flatter than the one on the right as it came out of its banneton a little cockeyed. Oh well… But I’m loving the oven spring! With the predominance of whole-grain and high-extraction flour in my flour blend, I wasn’t too concerned about vertical lift. However, I was VERY concerned about overall spring and oven expansion. The wide fissure on each loaf indicates that the loaves expanded quite a bit and that pleases me to no end!
Notice how high up my baking stone is in my oven. I think I can go one more notch higher before my loaves touch the top. The reason I’ve got them up that high is that I used to have it down a few notches and I wasn’t getting enough steam on my loaves. With my stone higher up, all the steam created by my soaked towels and the water in the broiler pan at the bottom go right to the top of my oven. It’s kind of difficult to see in the picture, but the skin on each loaf at this point is quite damp. Since I’ve done that, my oven spring has been absolutely stellar!
I just pulled these out of the oven. I am VERY pleased with the results! Admittedly, it was a little nerveracking at first because I’ve been so used to being fairly exact with my measurements. But having gone through it and trusting in my dough development skills, I’m probably going to do this a bit more often.
That said, what I will definitely do is have predetermined flour blends that I normally use – I’ve been meaning to do this for a while anyway. This will make it easy to assemble my dough and take a little guesswork out of my different doughs’ performances so I should be able to achieve a fair amount of consistency.
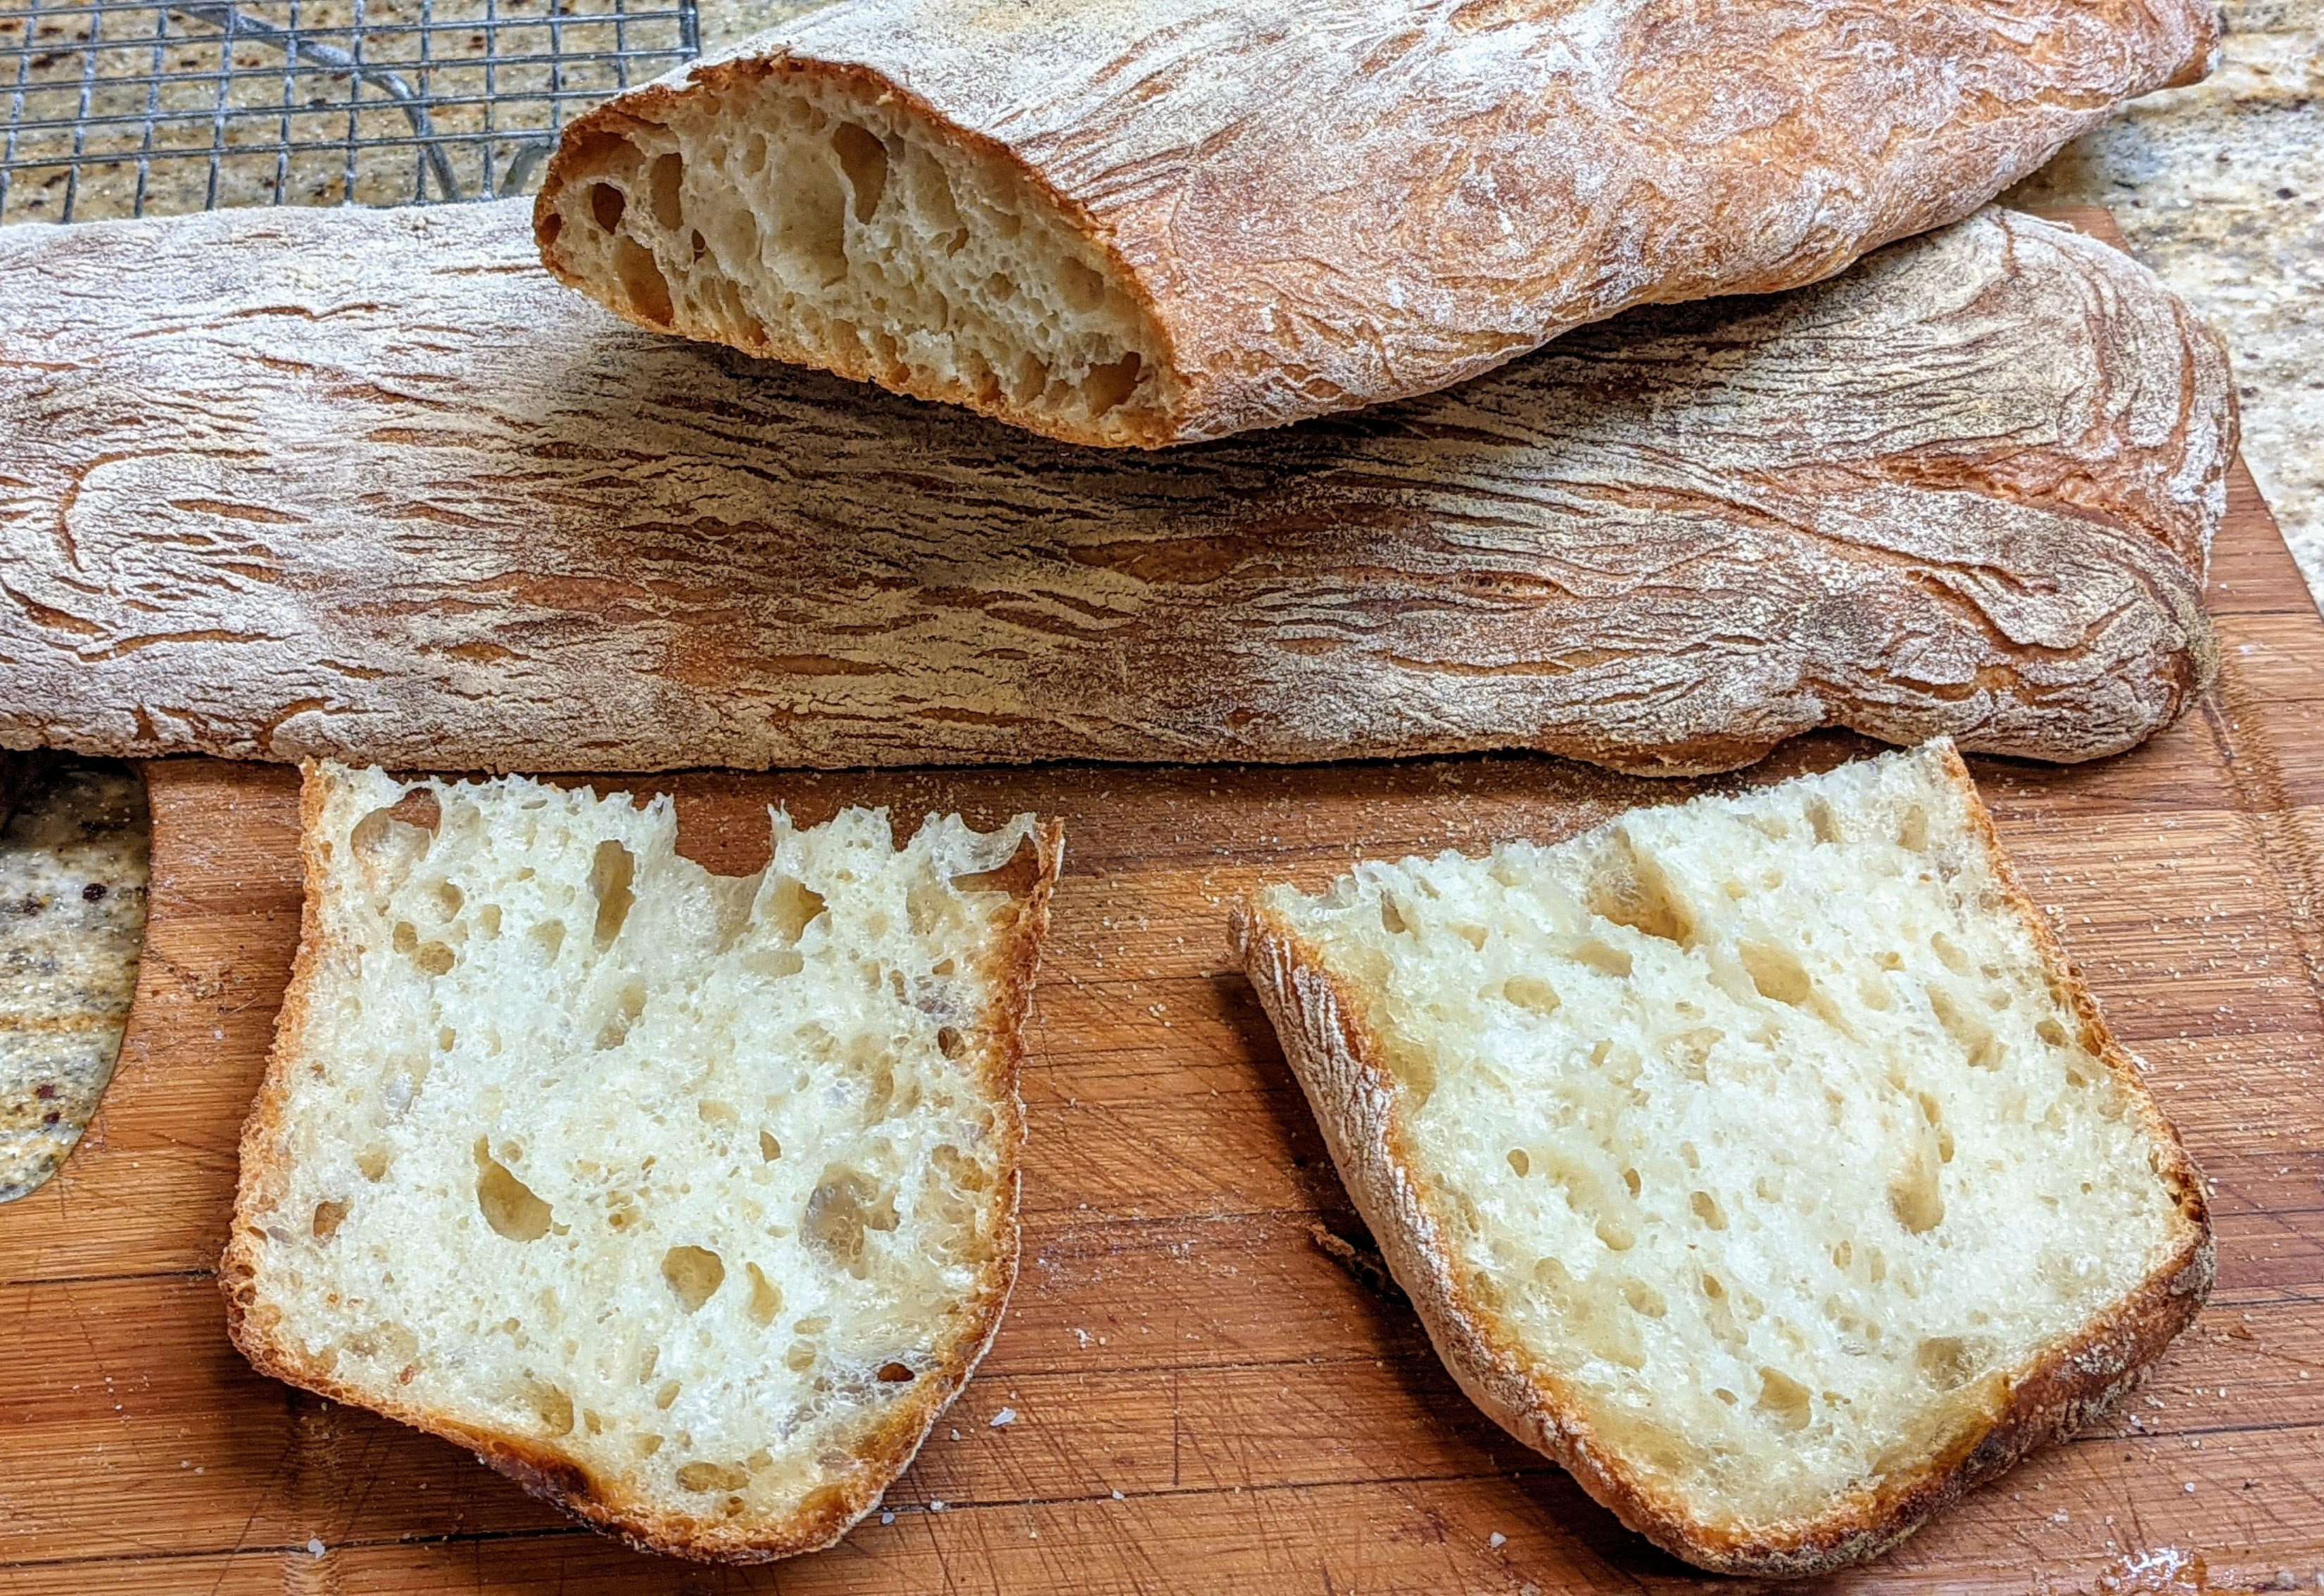
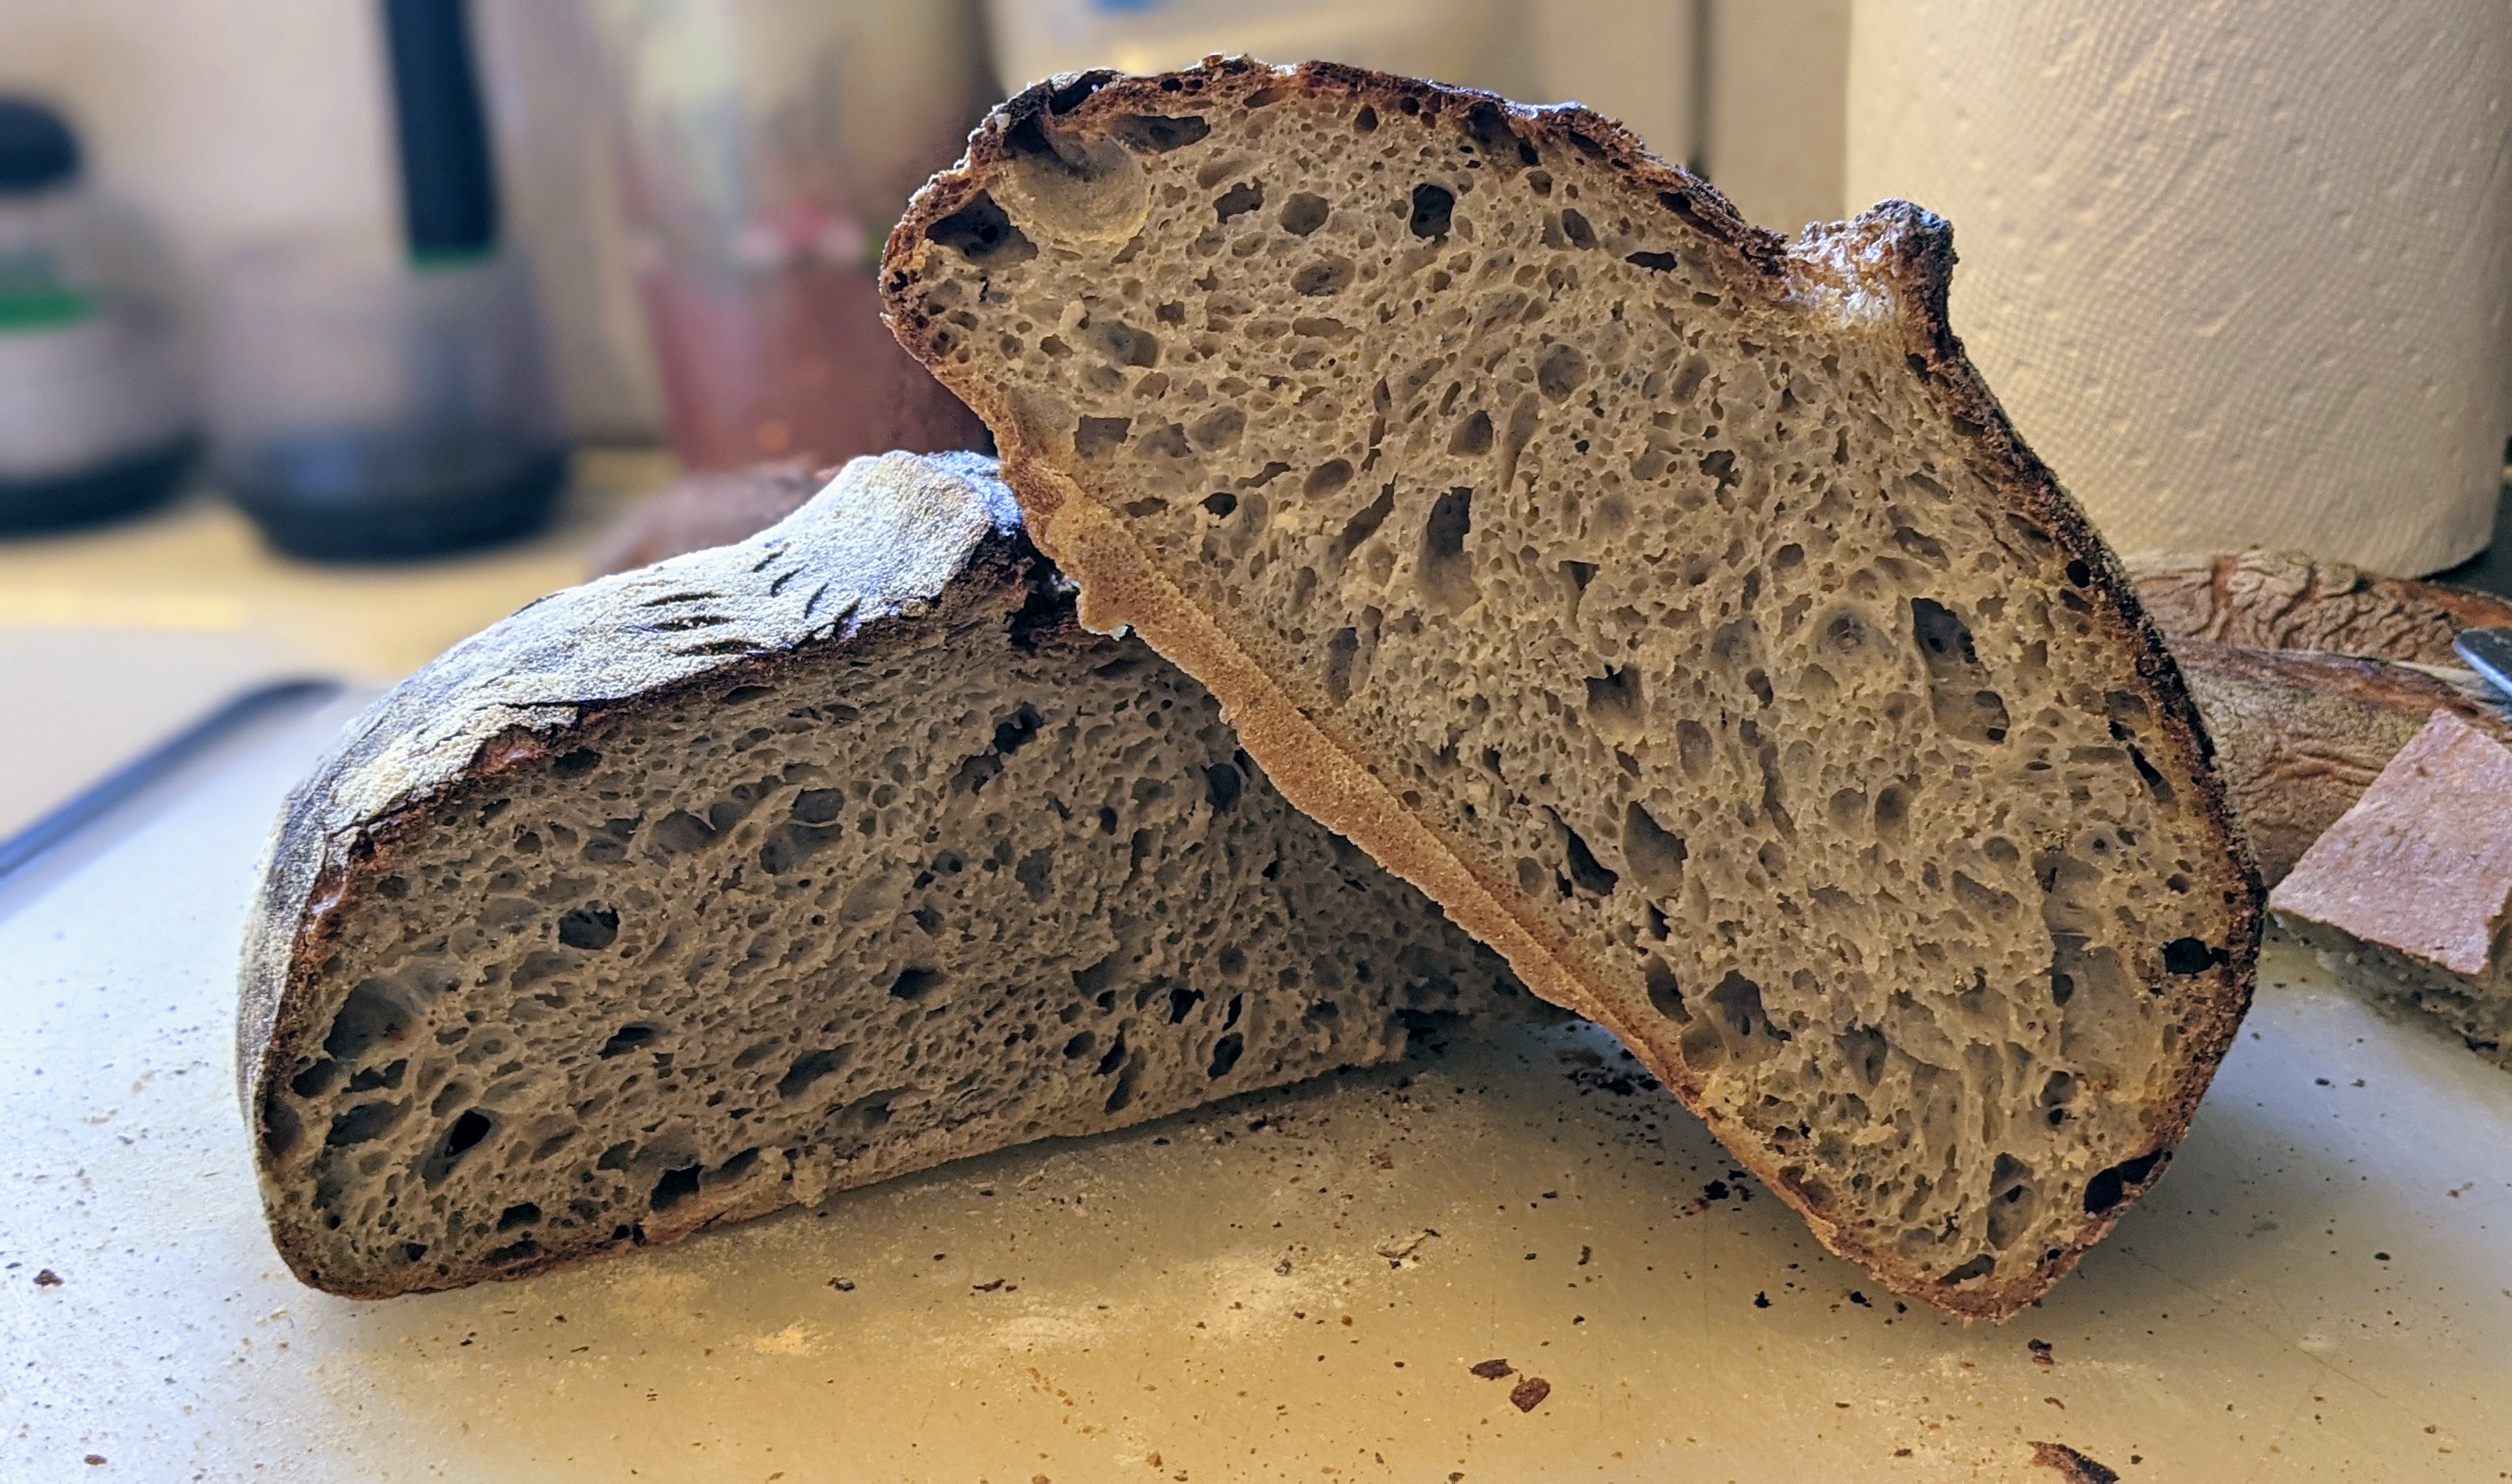
Finally got a crumb shot of my loaves! Wow! I wasn’t expecting them to have such an open crumb because of all the bran in my dough. But hey! Who’s arguing? 🙂 I kind of felt as if I’d get a good crumb, because of the great oven spring, but did not expect it to be this good. In any case, the bread was a hit at the dinner party I attended this evening. It was a going-away-to-college party for one of my daughter’s friends so there were lots of teenagers there. They devoured the bread! I was quite pleased to see that!
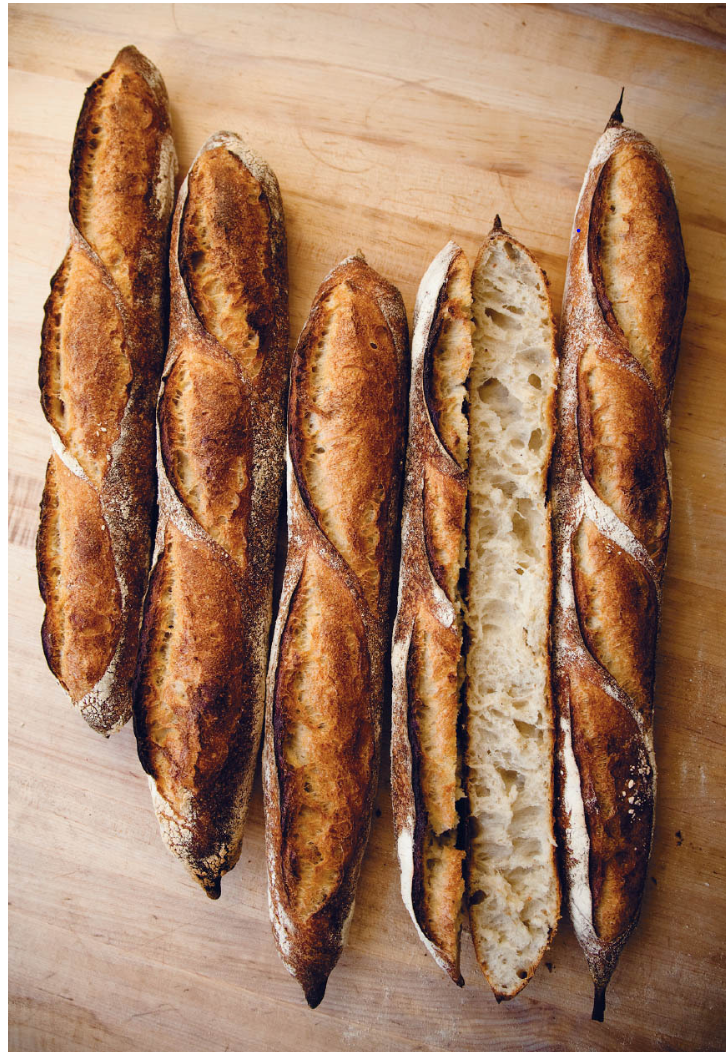
I wrote a post saying that I had some issues with the Tartine Bread baguette recipe, especially with the yield, which was much more than the two or three baguettes that the recipe said it would produce. It was more like seven or eight baguettes. Not a bad thing, but the inconsistency kind of bugged me. I was also a little dubious about the hydration being only 64% and that the poolish used a seemingly large amount of yeast for such a small poolish amount.
But despite my issues, these baguettes totally intrigued me because Chad Robertson employed both a levain AND a poolish. And unlike most poolish baguette recipes that add a little yeast to the final dough, the rising potential with both types of preferments completely eliminates the need to use any extra commercial yeast other than what goes into the poolish!
Using two preferments was all I needed to know to want to make these baguettes. Chad’s reasoning was that they’d contribute tons of flavor to the bread – they do – but also give the dough lots of extensibility and a longer shelf-life (and I could attest to that because my pure sourdough baguettes will last a week).
But I didn’t want to make as much dough as the recipe in the book yields, so I had to scale it down. To scale it down I had to get the overall formula, then figure out my ingredient weights from that. I shared all this in my previous post, but I’ll put it down here now:
Overall Formula
Flour
100.00%
Water
64.00%
Salt
1.70%
Levain
In Tartine Bread, Chad Robertson says to use a tablespoon of mature starter – it’ll be somewhere around 30-40g of mature starter. The important thing is to make near a 300g levain.
Mature Starter
30-40g
AP Flour
150g ~14.25% of total flour
Water
150g
Optimal Fermentation Temp.
78°-82°F
Poolish
The book says to use 3 grams of yeast for 200 grams of flour and water each. Even if he meant fresh yeast, that’s an awful lot for such a small amount of flour (instant yeast weight would be 1.2g – that’s an insane amount). It’s not necessarily wrong, but the poolish will mature much faster than 3 hours with that amount of yeast and the aim is to get both preferments to peak near the same time.
AP Flour
150g ~14.25% of total flour
Water
150g
Instant Yeast
0.4g
Optimal Fermentation Temp.
78°-80°F
Poolish should develop in a warm environment to make the 3-hour schedule.
Final Dough
Bread Flour
170g
AP Flour
402g
Water
286g
Salt
14g
Poolish
229g
Levain
229g
Total yield
1330g 4 X 330g 60cm loaves 6 X 220g 40 cm loaves
Optimal dough temp
78°-82°F
Yield is just a little more than 1300g which is the target to account for loss due to evaporation or processing (dough sticking to stuff).
Note the relatively high dough temperature of 78°-82°F. This is consistent with Chad Robertson’s method of a warm bulk ferment. You can achieve this by placing your bulk fermentation container in a cold oven with the light on. The light bulb will provide enough heat to maintain that temperature range. But keep an eye on the temp. You don’t want it to get too warm. Propping the door open with a dish towel or oven mitt will help control the temperature.
This is a fairly straightforward formula. BTW, in case you’re interested, both the Poolish and Levain flour contribute 14.25% each to the total flour. So if you want to scale this up, you can use that percentage to determine how much flour you’ll need for both. Without further ado, let’s get into the dough development!
Make the Preferments
One thing to note is that both preferments should be made from predominantly AP flour. The reason for this is that whole grain flours will have much more fermentation activity.
Build the Levain
For the levain, take about 30-40 grams of mature starter and mix it with 150g each of flour and water. Your starter should have enough activity where the levain will be ready in three to four hours. Or if you have a regular schedule, try to coincide the peak of the levain with the peak of the poolish.
Poolish
With the poolish, thoroughly mix all ingredients together. Set aside in a warm place to promote yeast activity. Poolish will be ready when it is heavily bubbled on the top.
Both preferments should pass the float test to ensure optimum activity.
Initial Mix/Fermentolyse. Set aside 50 grams of water. Measure out what you need from both preferments and place in a mixing bowl. Liquify the preferments with the rest of the water, then sift all the flour and add to the liquid. Mix well until there are no dry ingredients and no large lumps in the mix. It’ll be shaggy. Cover and rest for 30-60 minutes.
If you’ve made baguettes previously, you will notice how stiff the dough is. Don’t be alarmed and add more water! The fermentation action of the starters will soften and aerate the dough. Also, note that this is not a true autolyse as the preferments are included. But it does help to hydrate the flour!
Final Mix/Bassinage. Sprinkle the salt all over the dough mass, then add the remaining 50 grams of water. Note that for this small amount of dough, I just mix it by hand, squeezing the salt and water into the dough. Mix until all the water has been incorporated and you don’t feel any salt crystals when you squeeze the dough.
You could use a stand mixer for all the mixing. But if you do, mix only on the lowest setting! I’ve found that with baguettes, you actually don’t want to develop the gluten too much in the mixing stage. You’ll do all that through the folds.
Bassinage Explained
Bassinage is a term you’ll occasionally hear from bakers from time to time. The literal translation of the word is “bathe.” From the perspective of dough development bassinage is the process of folding reserved water into an already mixed dough; basically bathing the mixed dough. You hold back some water (typically 5%-10%), then mix the dough with the remaining water to start the gluten formation. At a later time, you add in the reserved water.
The idea behind it is actually kind of ingenious. The thinking is that the initial mix will get gluten formation started. Then when the reserved water is added, though some water will obviously combine with the remaining flour, other water molecules will get trapped in the gluten matrix, thus forming little pockets of water, which in turn will help in the formation of a more open crumb.
Given that, especially with a moderately stiff dough like the Tartine baguettes, bassinage conceivably will help with creating an open crumb as the trapped water molecules will form steam bubbles during baking.
Bulk Fermentation. 3-4 hours. As with Chad’s basic country loaf, you’re looking for about 25-30% dough expansion. I let the bulk fermentation go for about 4 hours to get to that kind of expansion.
Folding. Fold every 30 minutes within the first three hours up to a total of six folds. Truth be told, I got to the fourth fold and the dough had plenty of strength, forming a nice windowpane. As with any kind of bread, you should never be too parochial about the folding suggested in a recipe. Once you’ve developed enough strength, stop folding. Continuing will just degas the dough.
To be honest, having made these a few times now, I’m not convinced the dough needs this many folds. The hydration is so low that the gluten bonds form quickly. I’ve never gone past four folds. The bulk fermentation does take four to five hours though. With that in mind, I’d suggest doing four folds every 45 minutes instead of six every 30 as is written in the book. But this also depends on your flour. When I use my Azure Standard Bread Flour, two folds is all I need.
Divide and Preshape. Gently turn the dough onto a lightly floured surface and tug it into a rough rectangle, then scale out four 330g pieces for 60cm baguettes, or six 220g pieces for 40cm baguettes. With each piece, letter-fold the dough in an east-west direction, then roll it up like a jelly roll and seal the seam and ends. Take care not to roll too tightly. Add just a little tension! Place seam-side-up on a well-floured couche. Rest for 30-45 minutes depending on how tightly you rolled the pieces. With this low-hydration dough, you need the dough to be well-relaxed.
Shape. I always use Master Chef Markus Farbinger’s baguette shaping technique. But if you have a shaping method already, feel free to use it. One thing that Chef Farbinger doesn’t mention in shaping is that while rolling, your fingertips and the heels of your hands should have contact with your board as you roll the dough out, forming a natural cup. To lengthen the log, you simply flatten your hands a bit – not completely – and the dough will push out to the sides.
Final Fermentation. Up to 3 hours. Yes, you read that correctly. Remember, this is a stiff dough, and after shaping, you want to give it plenty of time to relax. With my last batch, my dough was ready in about an hour and a half. It was a warm afternoon when I baked, and I didn’t want to run the risk of over-fermenting the loaves. In hindsight, I could’ve let it go out for about two hours. To tell if the loaves are ready to bake, if you do the poke test, the surface should give easily. And once you press a little deeper, the interior should have a little more tension, but it should give as well. Once you remove your finger, observe how the dough springs back. It should spring back slowly.
I can’t stress enough how important this last fermentation step is! This step will make or break the bake – even more so than the bulk fermentation because that rest period will allow the bubbles to re-form, which is crucial to achieving an open crumb. Remember, this is a stiff dough at 64% hydration compared to the standard hydration of 75%. And though the acid in the preferments will aid in the extensibility of the dough, it still needs time to develop the bubbles. So, once you’ve shaped, give this dough time to expand.
Bake. During the last hour of final fermentation, warm up your oven to 500°F. I use a stone to bake, but you can bake on a sheet or even a dedicated baguette pan. Use lots of steam! When I bake baguettes, I use both a broiler pan that I put hot water into, plus two loaf pans that have well-soaked terry-cloth towels in them to provide a steamy environment (NOTE: Your oven should be steamy when you place the baguettes in it). These are in the oven for about 10-15 minutes before I pop the loaves in (allowing my oven to come back to temperature). Quickly place your loaves in the oven, then immediately turn it down to 475°F. Bake for 12-15 minutes on steam or until the crust just starts getting color. Remove the steaming containers, turn down the oven to 425°F, then bake for another 12-15 minutes until the loaves turn a deep golden brown.
Cool on rack. You can eat these warm!
Notes
The trick to this recipe is getting the preferment timing close. You might expect the poolish to ferment more quickly than the levain, but having made these a lot, it’s hard to predict timing. But do not worry if one is ready before the other! It just means the yeast ran out of food. Once you mix everything together, the yeast will have a new food source.
The crumb, while open, is very much like a sourdough crumb. It’s tender, but a lot chewier than the baguettes I normally make. I realize that that could be a function of the flour I used. The next time I make these, I will use all AP flour – most probably Central Milling flour as it is only 10.7% protein. This should lend itself to a much lighter crumb texture.
While I appreciate the romanticism of baking on a stone, I always use parchment paper on my transfer board to get my loaves into the oven. Especially with baguettes, since I load them into the oven along their long sides, I’ve had too many mishaps where the loaves roll off my board! So, I use parchment paper. When I remove the steaming containers, I also remove the parchment paper from underneath the loaves.
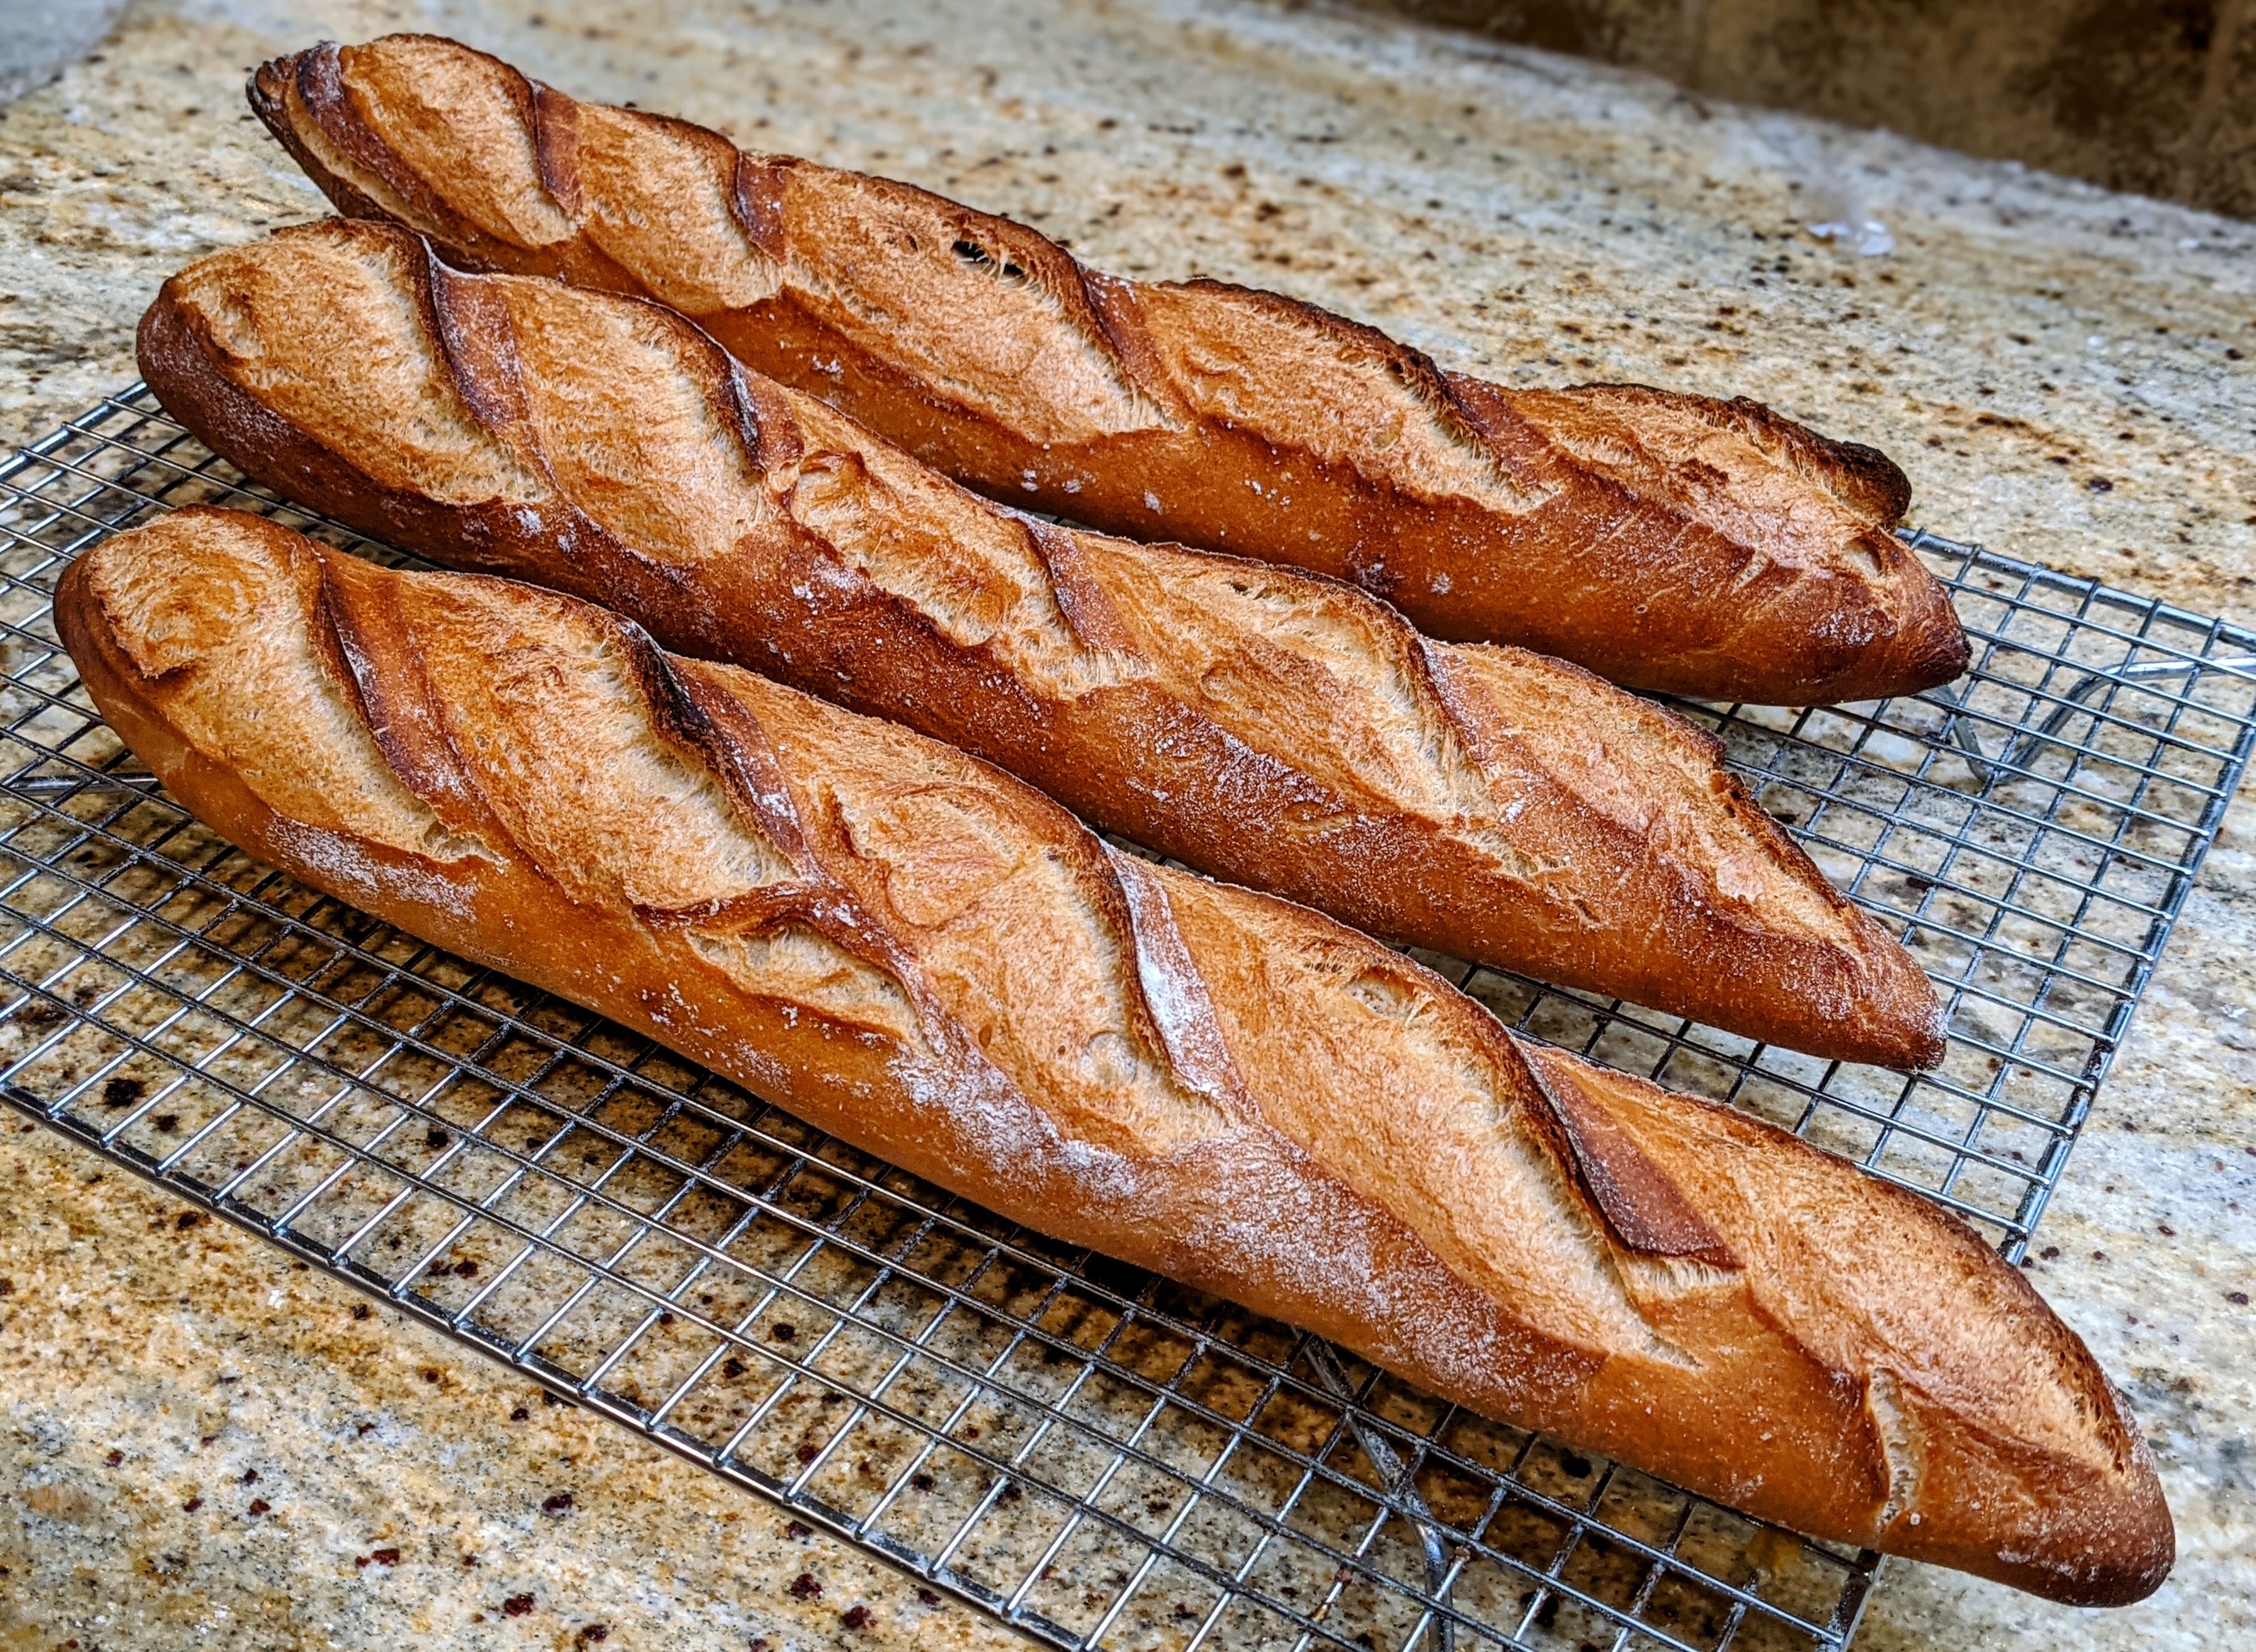
The loaves could’ve benefited from a longer final fermentation. As you can see in the pictures, they turned out fine, but I think I could’ve had them even puffier had I let the final fermentation go longer. That said, I will have to monitor their progress carefully if I use low-protein flour.
Once the final fermentation is complete, I cannot stress enough that you handle the shaped loaves as gently as possible.
I must admit that I’m still a little bugged by the yield in the original recipe and the recommendation to break up the dough into 2 or 3 pieces. But despite that, I will relegate that to copy-editing oversight.
Update 9/4/2025 – To be honest, I never liked the low hydration of the dough because the texture of the crumb was more like traditional sourdough in that it was chewy. Baguette crumb should be chewy to some extent, but not nearly as toothsome as sourdough. So, I used the same technique but changed the hydration to the standard 75%. They’re much lighter with a nice, open crumb. Plus, I add a bit of diastatic malt powder (0.5%) to help soften both the crumb and crust.
When you see the Real Bread loaf mark, it indicates that this recipe produces bread with no artificial additives and is leavened either by a natural starter or commercial yeast.
Okay… who am I that I should even have the audacity to correct Chad Robertson? But when I see a recipe in a book that’s obviously wrong – I don’t care if the author is a world-renown baker and I’m just a peon baker of a relatively unknown micro-bakery – I’m going to point it out.
So what got this bug up my ass about the baguette recipe in Tartine Bread? There are a few things I found in the recipe that seem off. The first issue is that the total yield of the recipe far exceeds what you actually need to make 2 to 3 baguettes as suggested in the book. Furthermore, the amount of yeast used in the poolish seems a little much for the amount of flour and water. And finally, the hydration seems awfully low based on my own research and experience.
By themselves, these issues aren’t really that bad. I have no doubt that the recipe will yield some very tasty baguettes. But all together, they make the recipe seem a little off to me. Again, these are minor things, though the dough yield is actually pretty major. Let’s dive in…
Here’s the recipe from the book:
Leaven
400g
Water
500g
Poolish
400g
All-Purpose Flour
650g
Bread Flour
350g
Salt
24g
Total Yield
2324g
Before the recipe, he writes:
Makes 2 or 3 baguettes
When I originally read that, I immediately thought that recipe amounts would be pretty small. But when I saw the amounts he was calling for, I immediately said out loud, “No friggin’ way!” Then that made me analyze the recipe even more.
Right-sizing the Recipe for Home Baking
I know, I know. Who am I to correct a master? But from everything I’ve learned about making baguettes, 40cm demi-baguette dough generally weighs about 220g. Standard 60cm baguettes are about 330-350g apiece depending on the oven. The amounts listed in the recipe would make 10 demi-baguettes or 7 full-size baguettes! Even if we scale out 400g pieces (as he mentions his are in Tartine Bread), that is enough dough to make more than 5 of those! So that must’ve been a typo. Furthermore, if you look at the pictures in the book, there’s no way that the dough pieces are 400g. But look, if you read the book and follow the recipe, just know that it’ll make more than 2 or 3 baguettes.
In light of that, here’s what I’ve been able to glean from the recipe in the book.
Overall Formula
Flour
100.00%
Water
64.00%
Salt
1.70%
Yeast
0.00%
Total Percentage
165.70%
Preferment (Both Levain and Poolish)
Note that the flour from both the levain and the poolish contributes ~14.25% of the total flour apiece. So for the final dough, you’ll need about 230g of each of the levain and poolish. I just combined the two for my calculations.
Preferment Flour %*
28.6%
Hydration %
100%
Preferment Flour Weight
229g
Preferment Water
229g
Preferment Required
459g
NOTE: Both starters use AP flour
Final Dough
Flour
575g
Water
286g
Salt
14g
Preferment
459g
Yield
1330g
4 X ~330g loaves 6 X ~220g loaves
This yield is much more sensible for a home baker. I realize that many folks don’t have a baking stone and can’t make full-size baguettes. Not a problem. The final dough weight of 1330 will make 6 X 220g 40cm baguettes, which is about 15″. If you have 15″ baguette trays, these will fit right on them!
As far as dough development is concerned, Chad Robertson uses the same process for his basic country loaf, which involves 6 folds over a 3-hour period after mixing.
An Issue with the Poolish
Another anomaly I saw in the recipe is that the poolish is made of 200g AP flour, 200g water. and 3 grams of active dry yeast, or 2.25 grams instant yeast. His instructions state to let that stand for 3 to 4 hours at room temp or overnight in the fridge. Based on my experience, that’s way too much yeast for that small amount of poolish. That poolish will be ready in less than two hours, even in cold weather. An overnight fridge rest will have exhausted all flour. I would say use 0.5g instant yeast, or 0.75g active dry. Ideally, you want the poolish and the levain to be peaked at roughly the same time. With that amount of yeast, the poolish will be ready long before the levain. But maybe that’s not necessarily a bad thing as once the poolish is incorporated into the dough, the yeast will have a new food source.
Hydration? Hmm…
You’ll notice that the overall hydration is 64%. That’s not a bad thing, but it does make a stiffer dough. I have to admit that I’m a little dubious of the openness of the crumb with hydration that low. However, Hamelman’s Poolish Baguettes in Bread are only 66%. I guess there are many ways to skin a cat. But that said, everything I’ve learned about baguettes is that in general, they’re at least 75% hydration – but that has just been my personal experience. And no, I’m not being a high-hydration snob.
Believe me, I don’t want to come off as being some know-it-all, and I’m not the kind to actively look for fault in someone’s approach just to make myself feel better. That’s absurd behavior. But being a home-based baker myself, I wanted to point out a few minor anomalies I found. Especially with the dough yield, I just couldn’t imagine making a baguette from almost 1200g of dough! 🙂
As for the dough itself, I see no problem with it. In fact, the high amount of preferment that’s used will make the dough much more extensible, despite it being such comparatively low hydration to what I’m used to – at least that’s what I’m thinking will happen. But there’s no better way to find out than to make these! I’ve never even considered using both a levain and a poolish together. I’m excited to see how it will turn out!
I’ve been looking to get a dedicated oven for baking bread for well over a year now. It has been a bit frustrating using my regular ovens in my kitchen because as with most standard ovens, they’re built to vent steam. So no matter how much steam I create, it doesn’t seem to be enough.
You could say, “Why don’t you just use a Dutch oven? That’ll provide plenty of steam.” That is true, but you can’t bake baguettes or ciabatta in a Dutch oven. And no, I don’t want to get long loaf combo pans.
The first oven I looked at was the Rofco B40 oven. Great oven and there are lots of micro-bakeries like mine that use it. My only problem is that it doesn’t have built-in steam. You have to buy a separate steam tray that you place on the stone. That takes away valuable real estate from what is also a relatively small baking surface. Moreover, the B40 is almost $3300! It’s a bit pricey.
Another option I considered was the Nero 400. It has a built-in steam feature and though compact, has a more conventional deck oven profile. But it’s something like $3500.
Enter the Tom Chandley Compacta Pico Plus. This is it for me! It has an 18″ X 30″ stone, built-in steam, runs on standard 220V (my house is wired for 220 already), and not only that, it’s modular, so I can stack them as my demand grows. And get this: The Pico Plus is only $2195 per unit. While it doesn’t give me the whole total capacity of the Rofco B40, the built-in steam allows me to use the whole stone! That’s such a selling point for me!
Not only that, I can bake full-size baguettes, which are 60cm standard. I can already do that in my home oven, but as I mentioned above, most domestic ovens are built to vent steam, and baguettes need LOTS of moisture in the first 10-15 minutes of the bake – probably more so than boules and batards.
A couple of months ago, I was going to pull the trigger on a Rofco B40. I’m so glad that I didn’t.
Chad Robertson is legendary and like Nancy Silverton, his bread has achieved cult status. Defying the conventions of traditional French bread, Chad sought to create bread with a lacy, open, tender crumb that has since become a benchmark for home-based artisan bakers the world over.
I’m not necessarily one of those who seeks that kind of crumb. I seek to create a crumb that is more open than closed but not nearly as open and lacy as Chad Robertson’s. That’s a personal choice.
But after having read so many different bread books, it occurred to me that I hadn’t read Tartine Bread and that given the legendary status of his bread, it would probably do me well to read. Mind you, it’s not that I was shunning it. I just hadn’t gotten to it yet.
But that changed when I picked up a copy of Tartine Book N° 3, which focuses on baking with whole grain flour. Reading through his techniques and putting them into practice, I couldn’t believe the wonderful results I got. So after baking his 60% Kamut loaf a few times and getting an open crumb with mostly whole grain flour (I used a combination of Kamut, white whole wheat, and strong bread flour), I knew I had to get the original book to see what his Country Loaf was all about.
So I got it. And I LOVE it! Though it’s rife with recipes, what I really dig about the book is Chad Robertson’s philosophical discussions and his instinctive approach to making bread. When I started making artisanal bread many years ago, I realized that so much of the process was instinctual; I couldn’t just follow a recipe and expect a good result. I learned to identify telltales in look and feel that were indicators of the dough’s progress.
And though Chad speaks a lot about his journey, those tidbits of what to look for – at least to me – are the most valuable information in the book! For instance, in his instructions for making his basic country loaf, he says:
During the first hour of bulk fermentation, the dough will feel dense and heavy. Watch how the surface becomes smooth soon after you turn the dough. By the end of the third hour, the dough will feel aerated and softer. A well-developed dough is more cohesive and releases from the sides of the bowl when you do the turns. The ridges left by the turn will hold their shape for a few minutes.
Chad Robertson, Tartine Bread
Sure, I know this. Most experienced bakers do as well. But the book is peppered with what I call telltales like this, and it’s what I love about it because it’s filled with insight – a baker’s insight. And that’s important to me because so many books tend to take a more academic approach to baking. Bread by Jeffrey Hamelman is a great example of the academic approach. But that said, Bread is basically a textbook and discusses food science and the more technical aspects of baking. It’s my go-to reference.
But Tartine is both a story of how Chad Robertson got started as well as a compendium of insights he has gleaned from years of baking. And that appeals to me as an artisan. I need the technical perspective to get the mechanics down. But I also need the insight to develop my craftsmanship. Tartine has that down in spades!
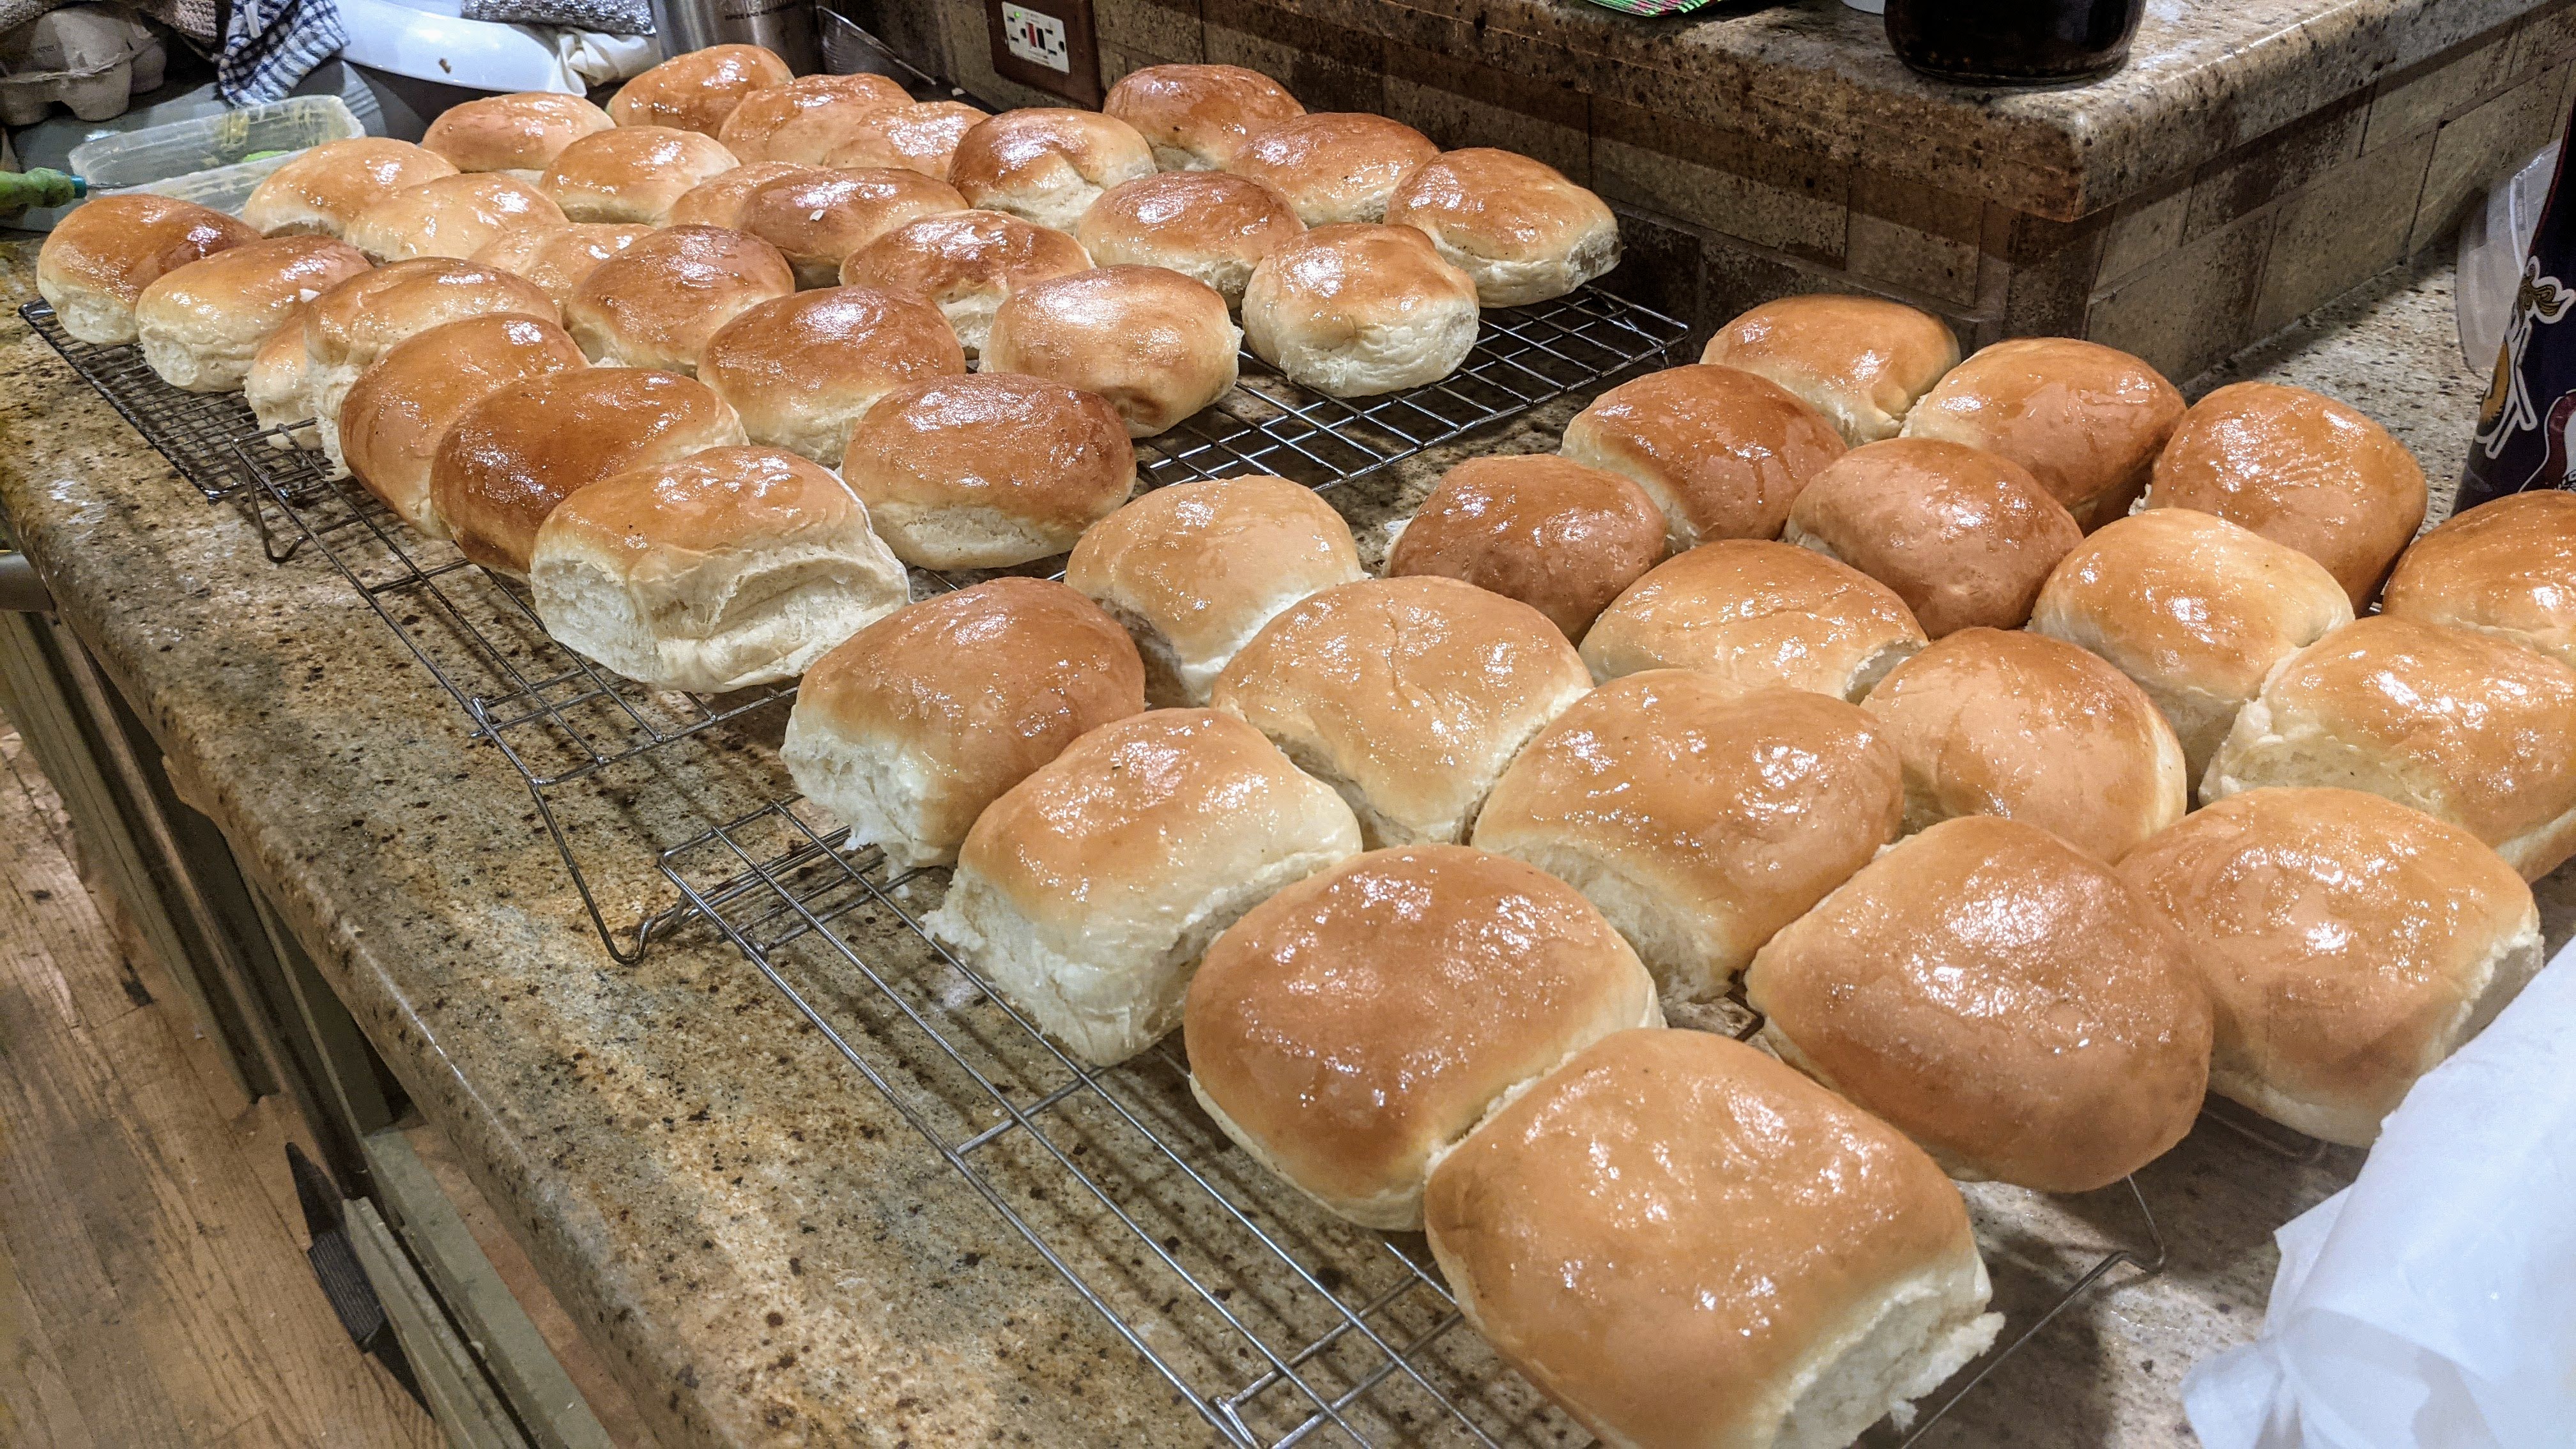
Yesterday I baked 8 dozen butter buns for another luncheon today at the Opportunity Center in Palo Alto, CA. I normally provide them with a few Poillane-style miches, but my wife, who now runs the outreach program for our church, came up with a new luncheon menu: BURGERS!
I didn’t consider that a bad thing at all, but it did mean scaling the recipe up to a size that I previously hadn’t baked. We’re talking over 21 pounds of dough! The most I had baked for the Center was just over half that amount, as I’d make four 3 1/2 pound miches. I’d easily be able to cut those up into 100-120 slices.
But this bake? This was different. Not only did I have to stage the actual baking, I had to stage the entire production as my mixer could only handle the dough for 24 buns. So I had to do a bit of planning.
The way I figured it, since I could bake on baking sheets, I could bake 48 buns at a time using convection to ensure an even distribution of heat. That wouldn’t be a problem. The challenge was going to be making the dough batches. With the amount of yeast the recipe calls for, as soon as I transferred a batch to one of my bulking containers (I used two, big 8-liter rectangular bulking tubs), the batch would start rising quickly, so time was of the essence.
The idea was to do two separate big batches with each bulking container holding the dough for 48 buns apiece. To deal with having to make two batches in a row, I kept the temperature of the water of the first batch below 70ºF. Working the dough in my mixer would raise the temp a couple of degrees so the dough would start at about 72ºF. Then with the second batch, I’d make the water temp around 86-89ºF. Then when I combined the two batches, the final temp would come out near 80ºF, which is the optimal temperature for this dough. OMG! It worked!
This was a very active dough, so I didn’t immediately start making the second big batch until the first batch of 48 buns was in the oven. I probably should’ve waited a little longer as the buns weren’t cooled down long enough for me to clear the counters. So I had to pop that batch into my retarder fridge. That slowed things down a tad, but that dough still rose a ton and was pushing the lid off the container by the time I was ready to shape. The next time I bake this amount I’ll take that into account. But I think what I’ll do instead is simply do the bulk fermentatino of the second batch at a lower temperature.
Details, details. But I love it! With baking, there’s so much that I have to consider all the time; not just in the present, but also the corrections I have to make for future bakes.
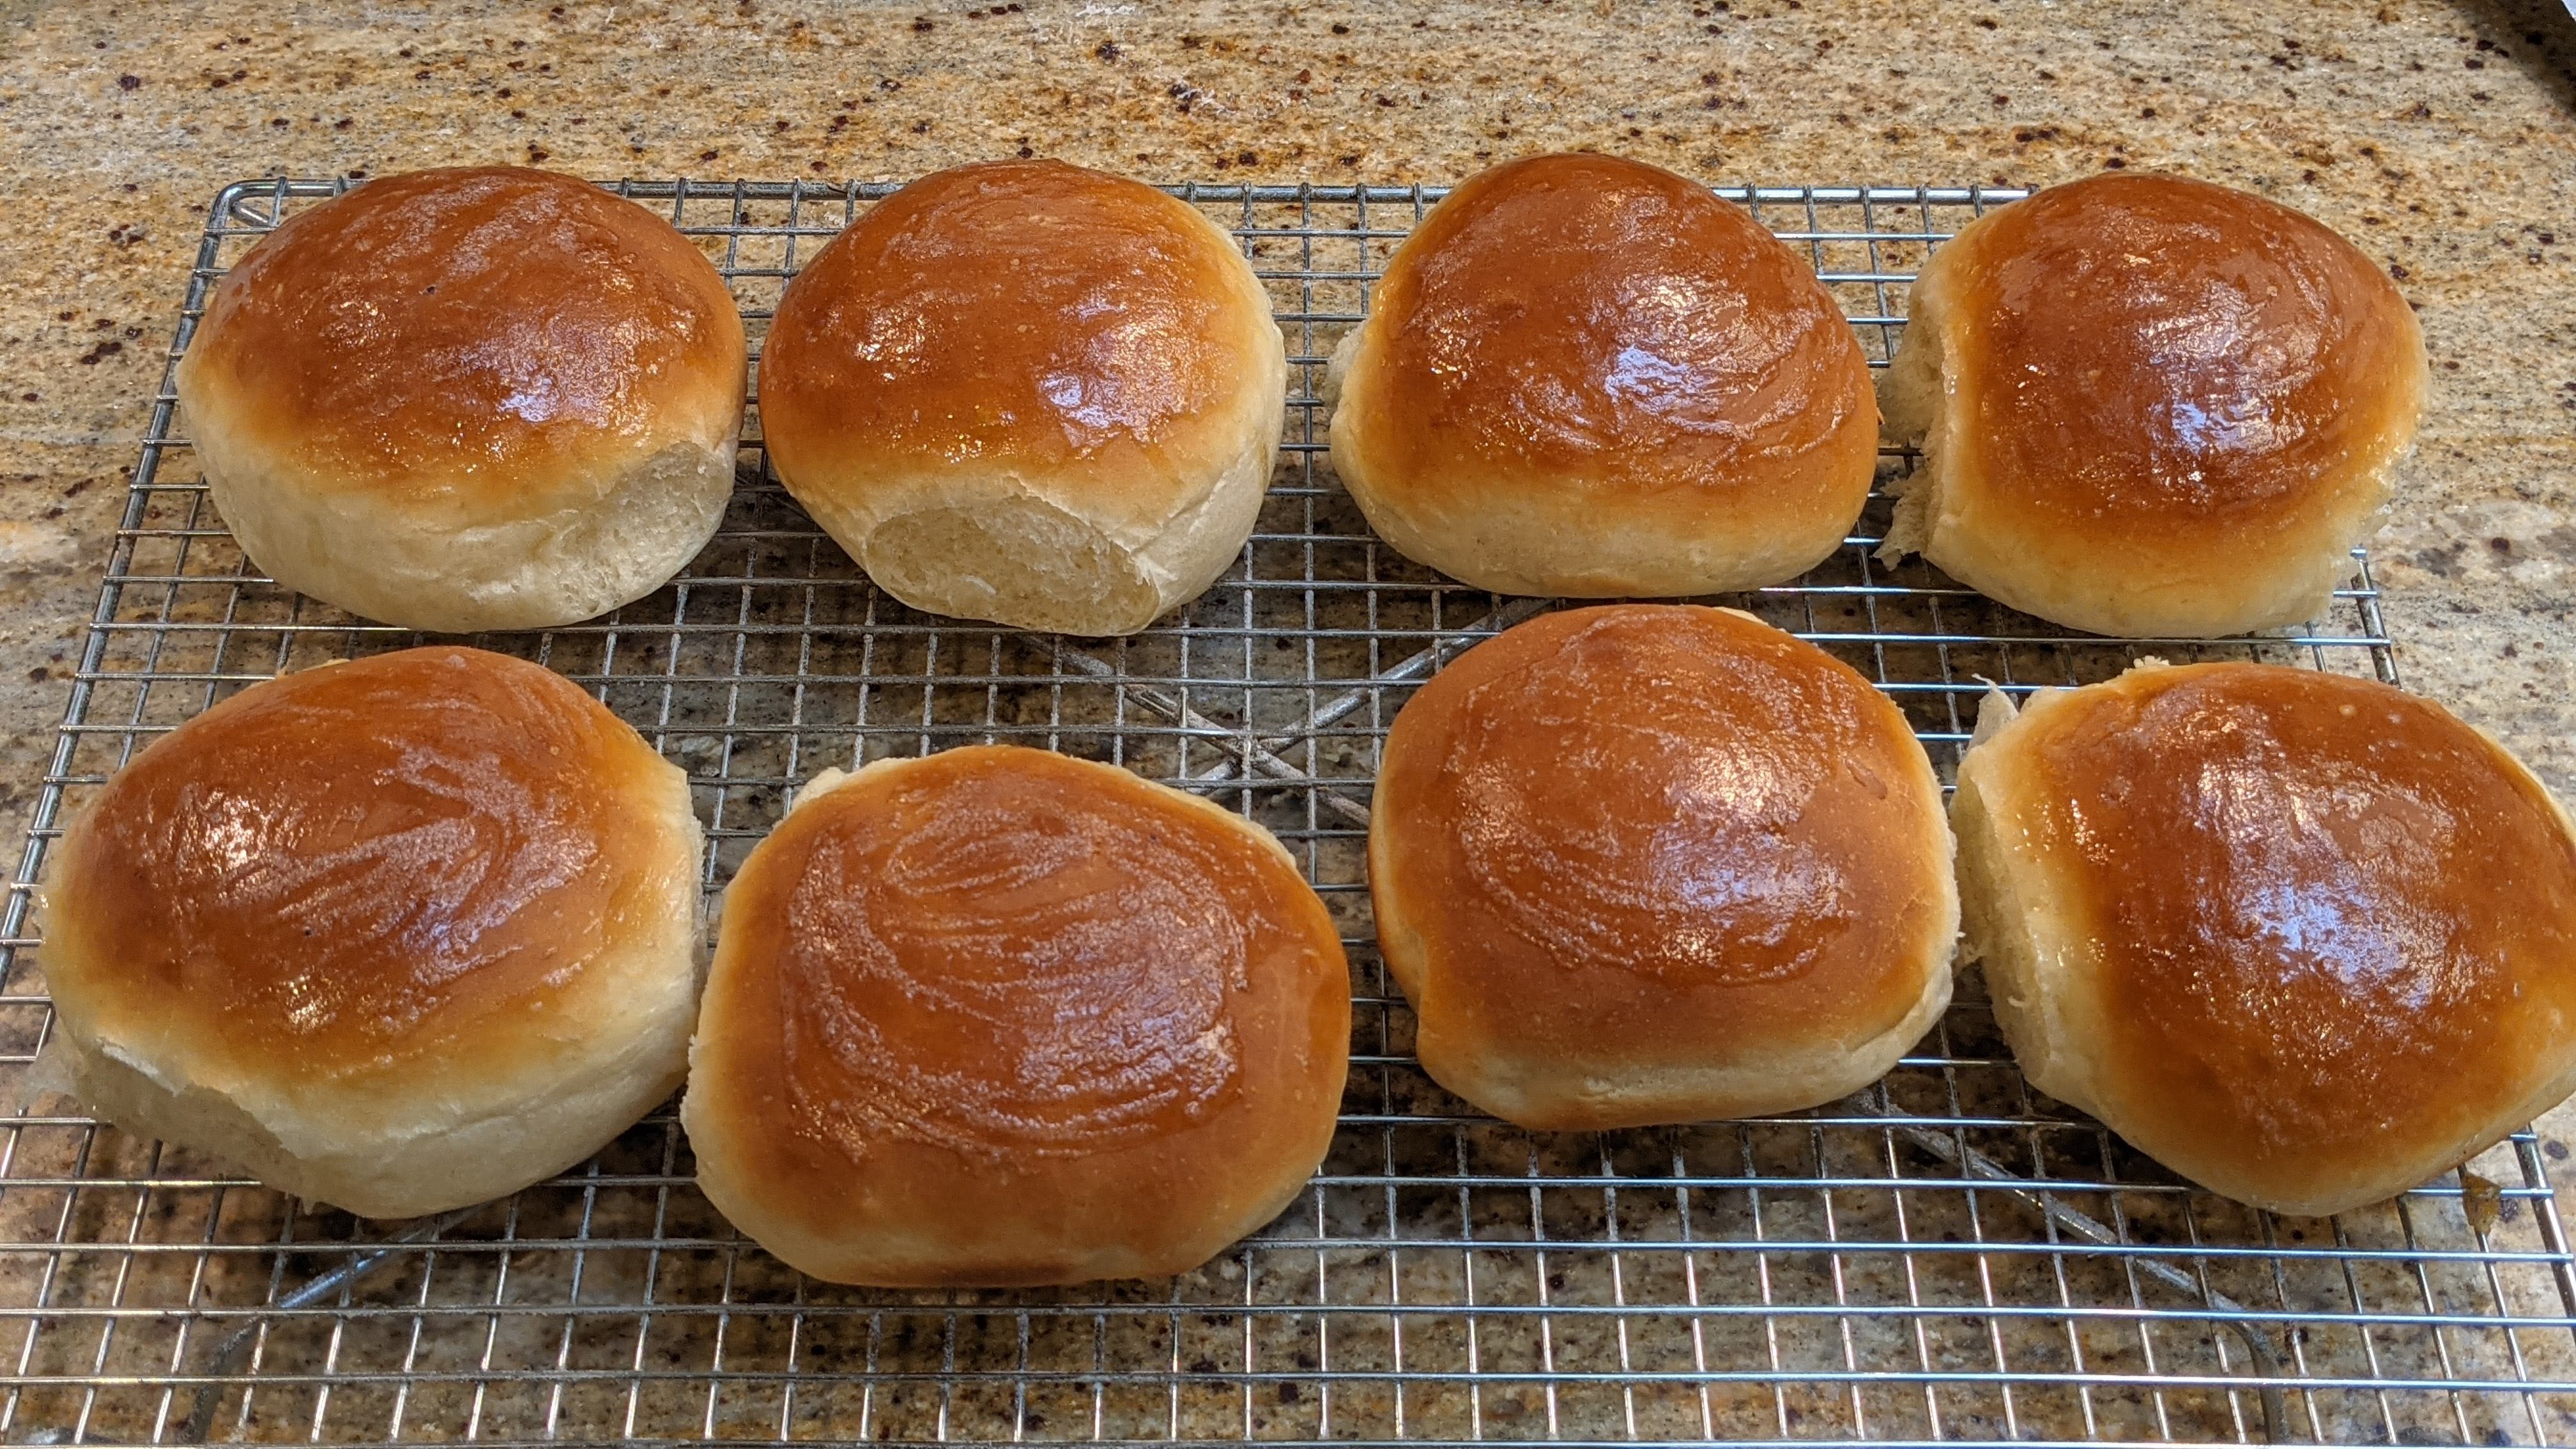
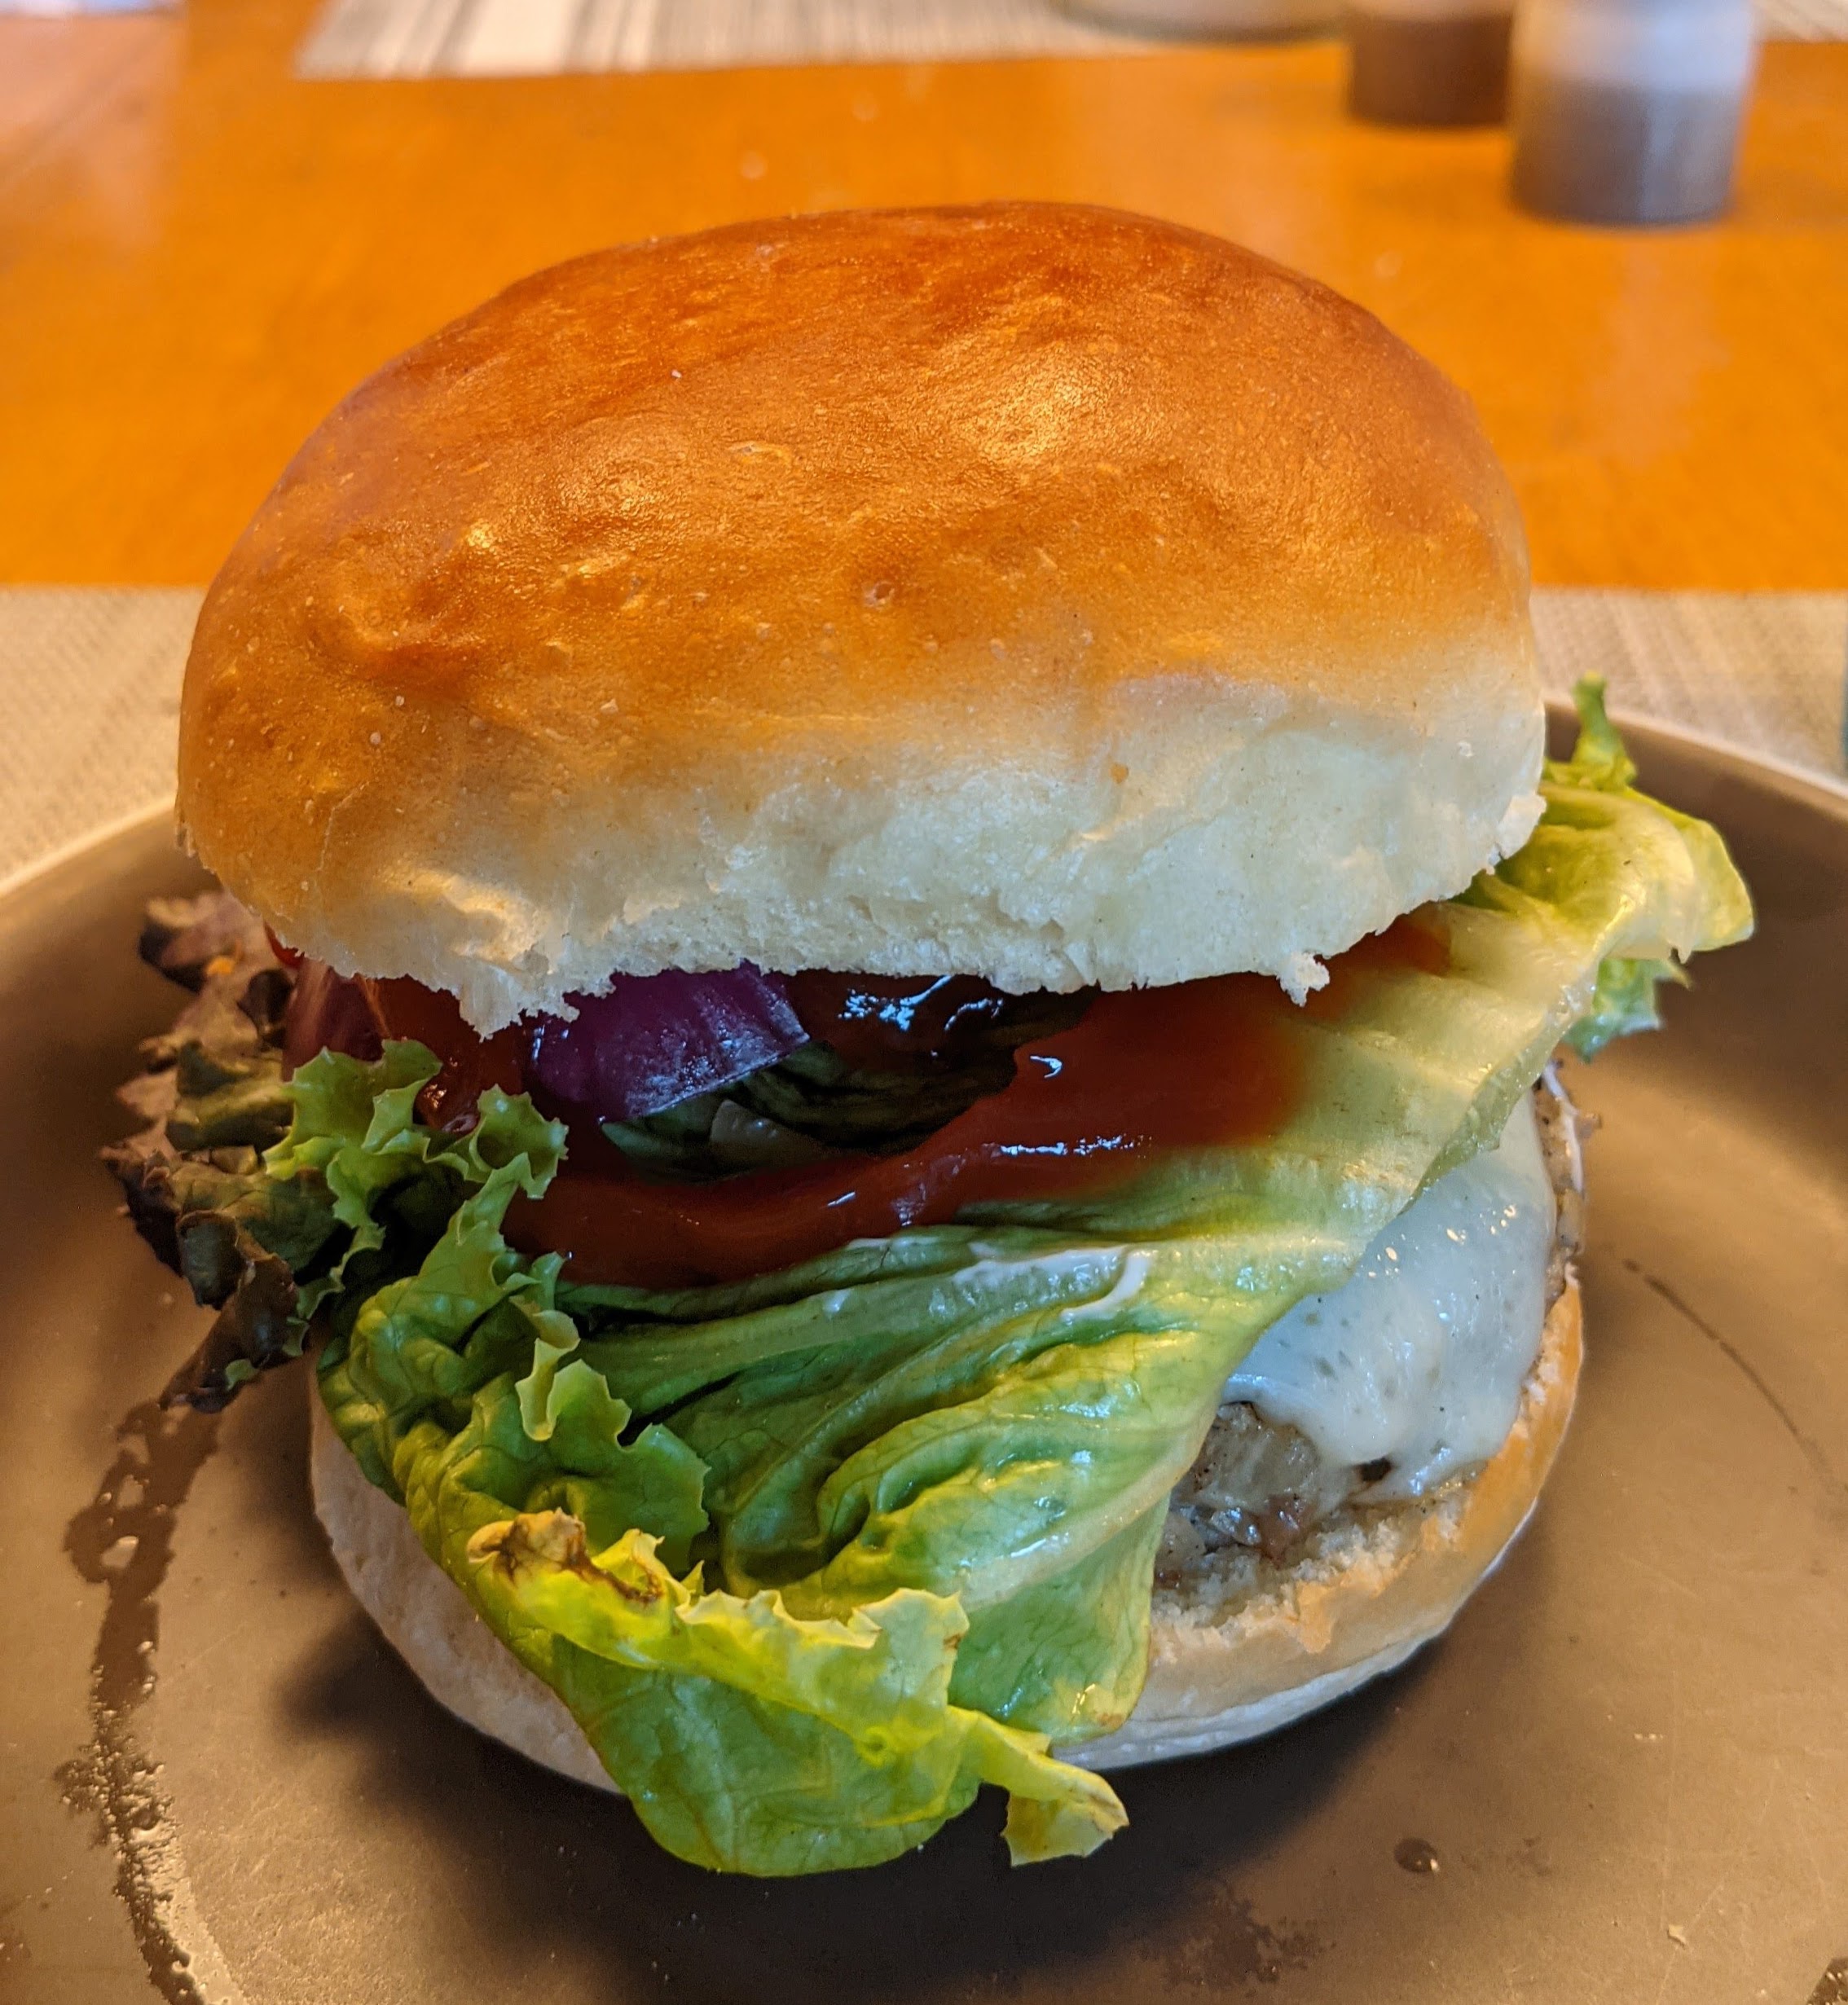
Yesterday before she left for work, my wife prepared one of the family’s favorite dishes: The meat for Turkey-Mushroom and Swiss Burgers. As she was walking out the door, she asked if I could make burger buns – specifically buns I’ve made a few times that are light, airy, chewy, and packed with yeasty goodness. With the butter and sugar in them, they’re very similar to brioche, but not as sweet and not as buttery – but they’re close, which is why I call them butter buns.
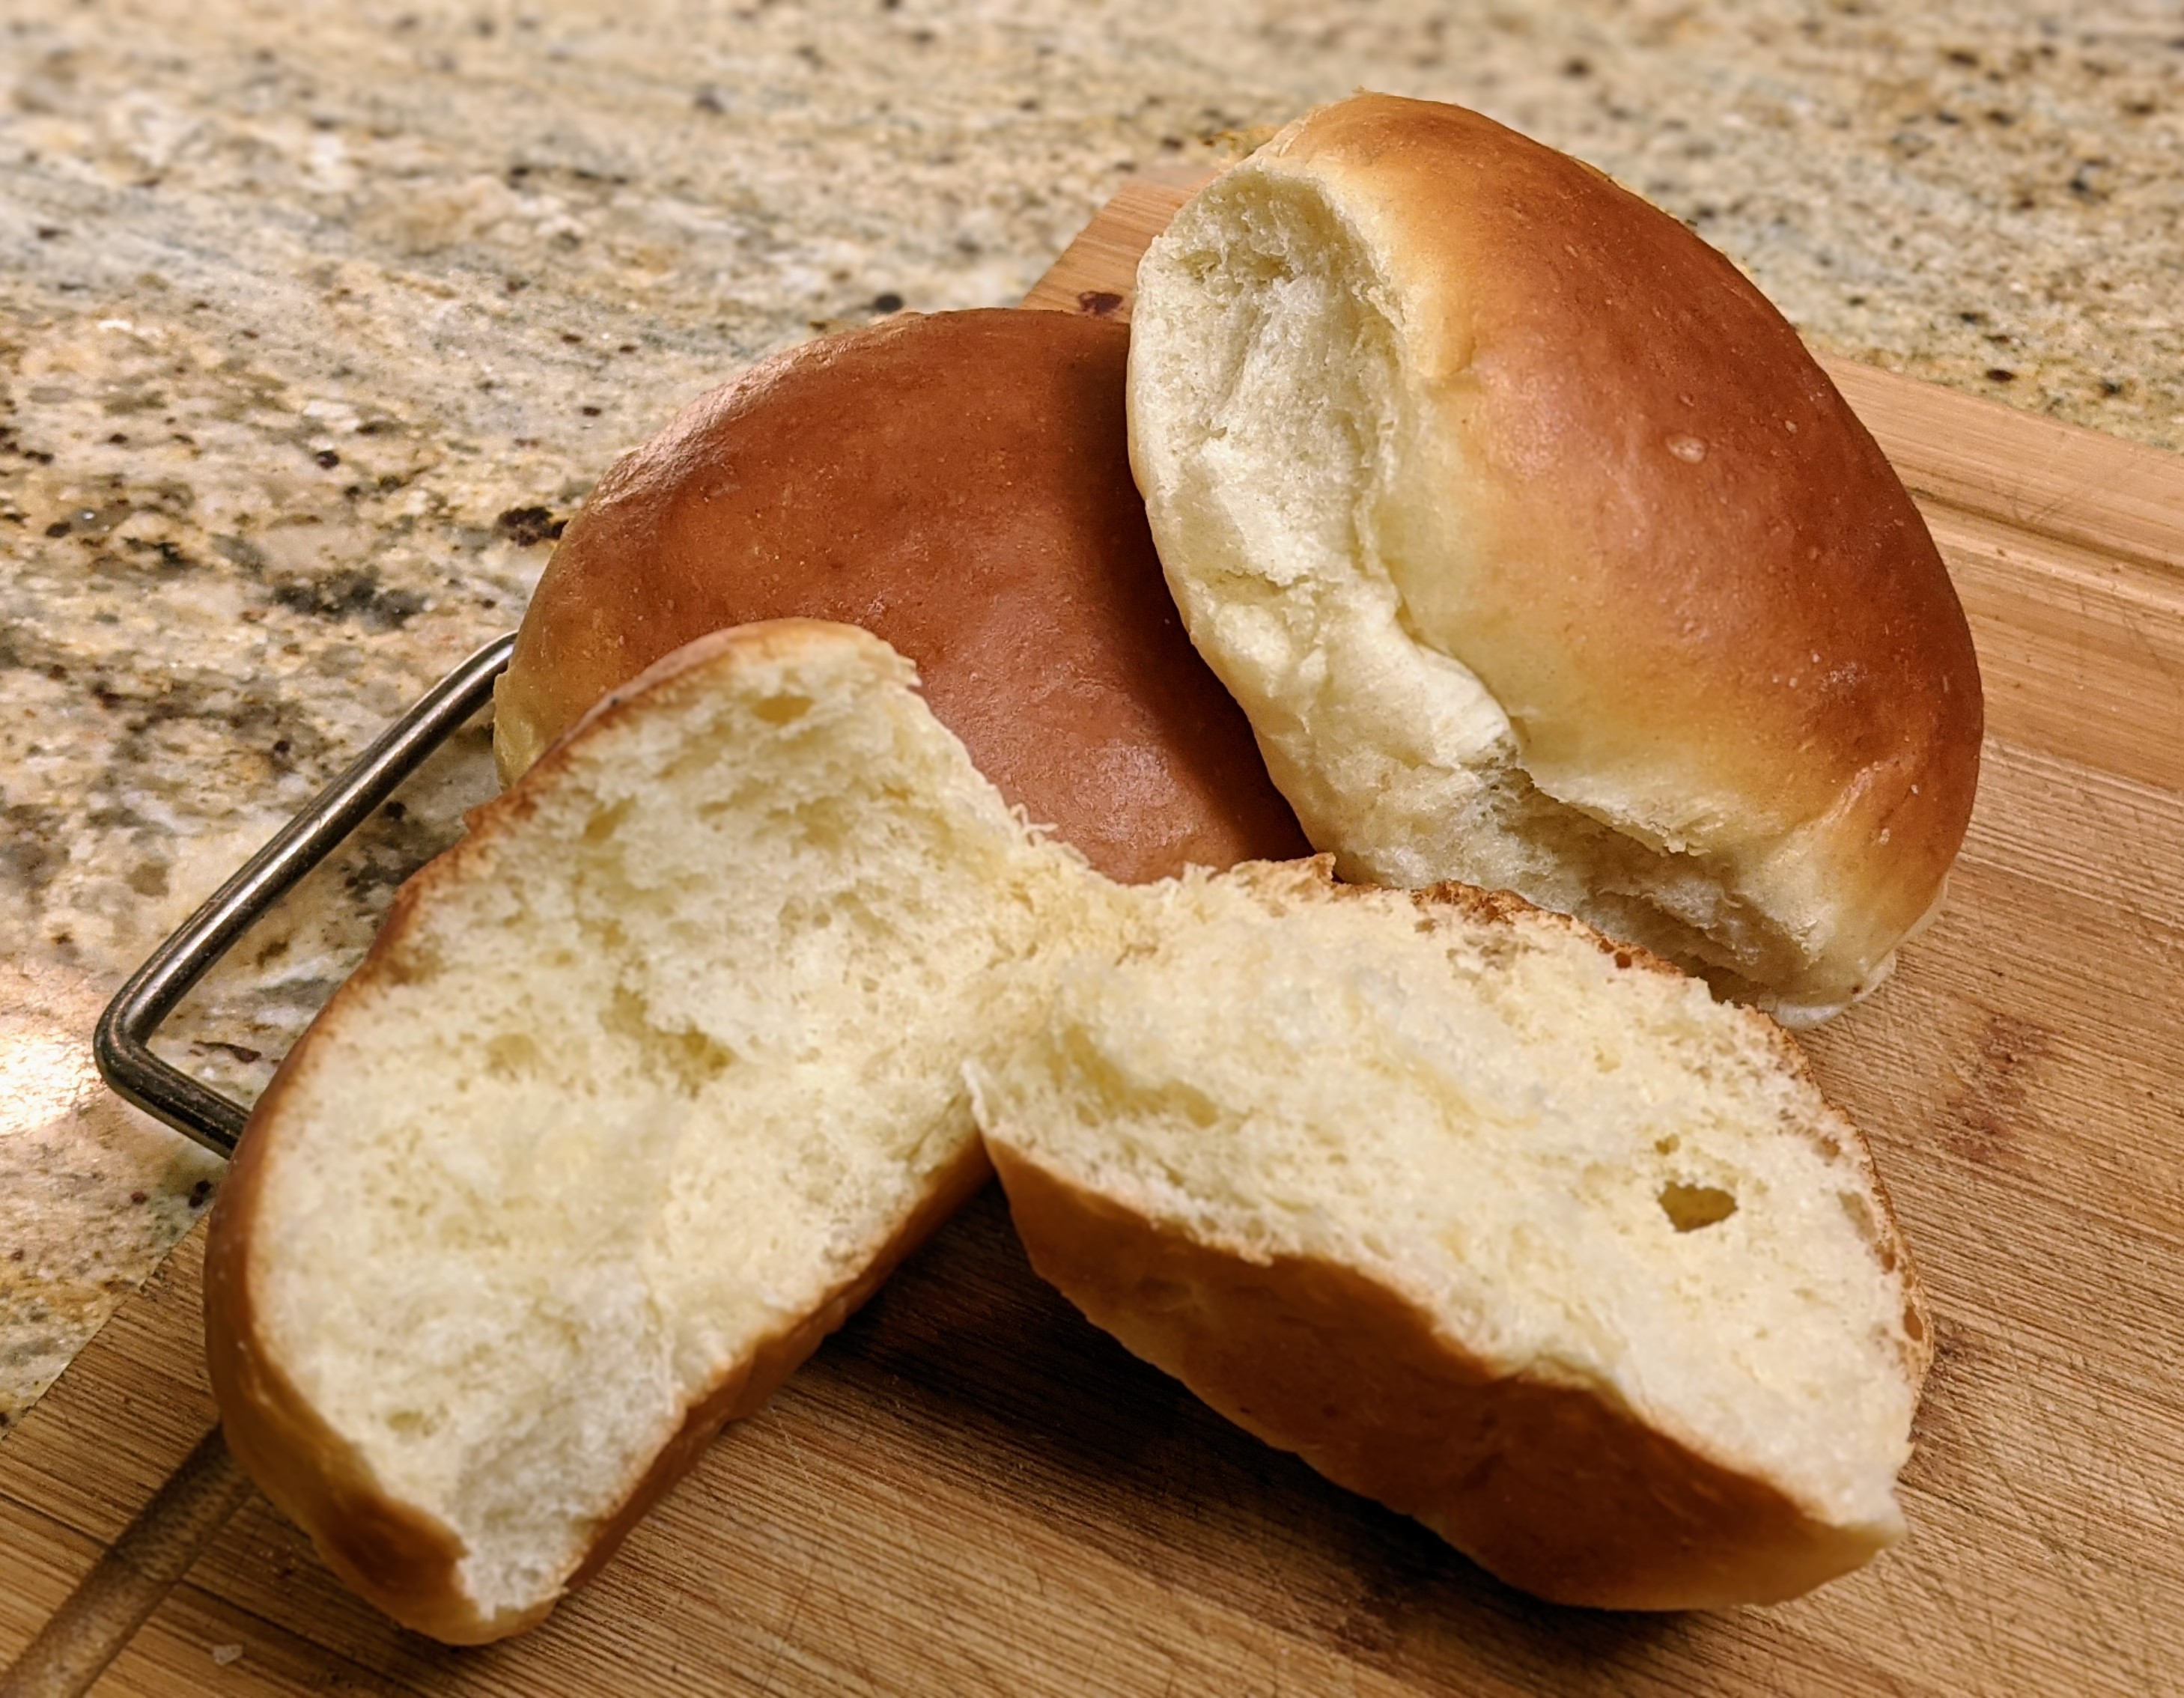
But I have to be honest: This is NOT my original recipe, though I’ve refined it over the last year. This is a riff on King Arthur’s “Beautiful Burger Buns” recipe. And these burger buns really are beautiful. But not only that, they’re super easy to make!
When I first made these buns, I was surprised to see that there was no milk or powdered milk used in the recipe. I was also surprised at how low the hydration was (46-48%). But the egg and butter make up for the lack of hydration. Plus, the butter combined with the egg gives the crumb a slightly yellowish hue.
And though there’s sugar in the formula, these buns are not sweet overly sweet. The sweetness is much more subtle considering the amount of sugar used.
I’ve made these buns several times and to be honest, I recommend using a mixer, especially if you’re pressed for time. I made the buns entirely by hand yesterday and hand-kneaded the dough. But I had a bit of time, and hadn’t kneaded by hand for a long time (gotta keep my chops up). In any case, let’s get into the formula:
Overall Formula
Baker’s %
Final Dough
AP Flour (pref. unbleached, unbromated)
100%
473
Water (lukewarm)
46%-50%
207-225
Egg (1 lg. egg – room temp)
8%
36
Sugar
12%
57
Butter (room temp)
7%
33
Salt
2%
9
Yeast
3%
14
Totals
179%
808
Optimal Dough Temp
80ºF
This will yield 8 100g buns and provides 1% of loss during processing. Note that this is a warm bulk fermentation!
Dough Development
Note that the hydration is 46%-50%. On cooler days, I recommend using the lower number. On warm days, use the higher number. That said, I always start with the lower number, then as I’m mixing will add a bit of water to get to that smooth consistency. Also, make sure your water is nice and warm! It helps incorporate the butter much easier.
Preparation. Before you start mixing the dough, mix the water, sugar, and yeast together in a mixing bowl to dissolve the sugar and activate the yeast; yes, even if you’re using instant yeast. Beat the egg so the yolk and white are well-combined. Note that I don’t bother measuring out the weight of the egg if I’m making a single batch and just drop a large egg into the mix. But if I scale up, I will beat a few eggs together and weigh according to the formula.
Mixing. Combine the flour, butter, and salt in a mixing bowl. Add the egg and water mixture and mix until all the ingredients come together there are no dry ingredients present. If you’re using a mixer, combine the ingredients at low speed, then once mixed go to the second speed to knead the dough for 2-3 minutes (dough should be smooth and pulling off the walls of the bowl). If mixing by hand, turn the dough out onto your board and knead until the dough is smooth (about 8-10 minutes).
Bulk Fermenation: 1-2 hours @ 80ºF or until the dough has almost doubled. In warm weather, this will happen FAST! With this amount of yeast, bulk fermentation will happen pretty quickly so you need to keep an eye on it.
Divide and Shape. Turn the dough out onto your board, then scale out 100g pieces. Roll the pieces into tight balls (you can do two at a time), then let them bench rest for 10 minutes. Place each ball on a baking sheet lined with parchment paper and press them out into 3″ disks. Gently dimple the tops as you would a ciabatta (believe it or not, this promotes even rising). If you’re using a standard-size baking sheet, you might want to stagger the pieces so they fit better. Don’t worry if they touch when you press them out. They’ll expand even further during final fermentation and baking.
Final Fermentation. Allow the shaped disks to rise for up to another hour or until they’ve clearly expanded and are puffy. On warm days, my dough’s ready in about 30 minutes. In any case, check them after about 30 minutes. Preheat your oven to 375°F.
Baking. Right before you bake, lightly brush the tops of the buns with melted butter. Bake them for 15-18 minutes until the tops are a light, gorgeous, golden-brown. Remove from the oven, then brush them again with butter. Cool for at least an hour before cutting.
Some Alternatives
I love this formula because you can use it for a couple of different kinds of bread besides burger buns!
Dinner Rolls. Instead of flattening out the rolls, place them in a round or a 13X9 pan to make dinner rolls.
Hawaiian Rolls. Half the sugar, up the butter to 10%, and replace 70%-75% of the water with pineapple juice and you’ll get a VERY close approximation to Hawaiian bread! Load the rolls into a pan as with the dinner rolls! You could also replace the remaining water with milk for an even fluffier texture!
I made the loaf above a few days ago. It tastes great. It has a great texture. It is flat! Flat! FLAT!!! F$%k!!! The worst of it is that I knew it would turn out like this because it was WAY too hydrated for the protein content of the flour I used. Well… serves me right for following a recipe without compensating for the ingredients I had on hand.
That loaf is Chad Robertson’s 60% Kamut loaf from his Tartine No. 3 book, which focuses entirely on baking bread with whole grain flour. In his recipe he mentioned, “Due to the high protein in Kaumut flour, this dough can take a lot of water.” Stupid me, I took that at face value and made the bread straight from the recipe before checking on the actual protein content of the Kamut flour I have.
My Kamut flour is only 11.7% protein, the same protein content as AP flour. And I upped my hydration to 92% based on his notes in the book that say he usually takes the hydration up past 90%.
STUPID! STUPID! STUPID!
I’m actually laughing as I write this because it’s SUCH a rookie move. And I admit that I probably let my excitement over Chad Robertson doing a recipe with one of my favorite flours get the better of me. And in my zeal, I pushed through the process and didn’t spend enough time studying. Oh well, lesson learned.
This time around, there are a few things I’m going to do to make this a successful bake:
I will use vital wheat gluten to up the protein content of my flour to provide more mechanical strength. I did some research and I saw Kamut flour ranging in protein content from 15% to 17%.
One thing I missed in Chad Robertson’s instructions was that he does a fermented autolyse in that he performs his autolyse with the starter incorporated into the flour and water. I will do that this time around. That will really get the yeast in my starter going!
I will also stick with his basic 85% hydration to start out with. If the dough is still a little stiff at this level, I will do a bassinage in one of my folding sessions to give time for protein to build up first.
As much as it is frustrating, I love the learning process. I may swear a lot in the process, but damn! A good finished product trumps any failures!
I was on a home baker’s forum and saw a post where some dude’s wife took pictures of him proudly displaying his jar of sourdough starter that he just pulled out of his suitcase. The caption read something like, “My hubby took his starter with him on vacation!” When I saw that picture and read the caption, I chuckled, then thought to myself, I thought I was obsessive… But this takes it to a whole different level! Several people chimed in on the discussion thread and said they had done the same. That kind of amazed me.
Then I asked myself, “Why in the world would someone do that?” The only thing I could come up with is that home sourdough enthusiasts seem to have this notion that they have to feed their sourdough every day – some even twice a day – thinking that their starter will die if they don’t feed it.
Though I do my best to be nice, there’s no other way to put this: Your starter won’t die if you don’t feed it. And yeast is extremely hard to kill! In other words, go on your damn vacation and don’t let your starter dictate your schedule! 🙂
I studied Biology in college with an emphasis on Microbiology and Virology. Though that was decades ago, one of the things I learned about yeasts is that they’re extremely hard to kill. As opposed to dying, when they don’t have a food source, they enter into a sort of suspended animation and go dormant. They can be in this state for thousands of years and be revived, amazingly enough (click on that link – it’s pretty fascinating).
So where does this daily feeding thing come from? Probably from professional bakers or home enthusiasts who bake sourdough every single day. They have to be on a schedule because they need their starter daily. But for those who don’t make sourdough every day, there’s just no need to feed the starter until it’s needed. In the meantime, it can sit in the fridge.
And why go through the hassle of discarding all that flour? It’s nonsense. From a purely practical standpoint, how many crackers and pancakes can you eat? Sheesh!
Look, I bake every day, but I don’t feed my starter daily because I don’t make sourdough every day. So when I’m not making sourdough, my starter is in the fridge. When I know I’m going to bake sourdough bread, I begin feeding it the day before – no discard, by the way, and I’ll get into my method below – or early that day if I make my dough in the afternoon.
For me, I use a tailings method with all my starters (I currently have 3 in my fridge right now). In each Kilner container, I probably have 100 grams of starter. When I’m going to use one, I remove it from the fridge, add 100 grams each of warm water and flour for the first feeding, then when it doubles, I do another feeding. The amount of flour and water I use varies based on how much starter I’ll need. I’ll actually make more than what I need so I will have extra once I add the starter to my dough. That extra – the tailings – goes back into the fridge.
This morning, I revived some tailings that are well over a month old as I have been traveling this past month and have only managed to bake yeasted bread while I was home. As of this writing, the levain I’m building is in the midst of its second feeding and it’s highly active. I’ll be ready to build my dough in another hour or so – that’s literally four hours since I removed it from the fridge! The point is that I let it sit for a long time and it still came back.
That said, yes, a starter can indeed slow down. But kill off the yeast? It’s highly unlikely unless the starter was exposed to some really extreme conditions. But in a cold environment like a fridge, all the microbes slow down, so competition in the environment will also slow (read: You can let it sit for quite a while).
But… if you want to take your starter on vacation, no one’s stopping you. But if it’s because you feel you have to feed every day, you just don’t need to do it. Pop your starter in the fridge and go enjoy yourself. Don’t let your starter dictate what and when you can do things.