During the pandemic lockdown, I discovered just how wonderful KamutTM flour was. But now, for some reason, it has become a little scarce. So I started searching for different kinds of flour to replace the Kamut, and I discovered dark rye flour. Yeah, yeah, there are lots of folks who’ve been baking with rye for a long time, but truth be told, I kind of stayed away from it because of that traditional rye bread taste. Little did I know that that particular bitter, almost nutmeg-like taste comes from the caraway seed that’s often added to traditional rye bread dough.
Plus, up until I started baking with it, my primary experience with rye bread was that marbled rye that you get with Reuben sandwiches. But after doing a bit of research on rye flour and baking with it regularly, I was soon corrected, and I have to say that I absolutely LOVE baking with rye flour!
Part of the reason why I love it so much is that it behaves very much like Kamut flour in that doesn’t form gluten. Like Kamut, the proteins that are formed when water is added to the flour don’t at all contribute to the structure of the dough. So you either have to be super, super-gentle with the dough, or use a smaller percentage, just as I’m using with these baguettes.
But even at this lower percentage of 25% (technically 12.5% rye flour to the total flour), the flavor that the rye flour contributes is incredible. Plus, being whole-grain flour, it contributes a nice textural element that contrasts nicely with the white flour.
Overall Formula
Flour
100.00%
Water
75.00%
Salt
2.00%
Yeast
0.57%
Poolish
My advice is to make the poolish the night before you mix the dough, giving it at least 10-12 hours to ferment. Whole-grain flour has lots of great bacteria that will produce organic acids that will add to the overall flavor profile of the bread.
Sometimes I just want some basic bread; something I don’t have to work too hard at. But by the same token, I don’t want to make just plain, white bread because that’s just boring. As I wrote in a previous article, there are lots of ways to make bread more flavorful. But my primary way of accomplishing that is to use various blends of flour.
In this case, I’m using a blend of 50% Fine-ground whole grain semolina and 50% bread flour. The bread flour I’m using is Bob’s Red Mill Artisan Bread Flour. This is a wonderful flour that has a nice, high protein content of 13.7%. This is one of my favorite flours to use in conjunction with whole-grain flour as the higher protein content ensures that I can build plenty of structure in the dough. The semolina flour adds sweetness and corn-like flavor and a gorgeous, natural yellow color to the crumb that looks like an egg was added to the dough.
The best thing about this bread is that it is absolutely straightforward and easy to make! So without further ado, let’s get into the recipe.
Formula
Flour (50% Fine-Ground Semolina, 50% Bread Flour)
100.00%
Water
80.00%
Salt
2.00%
Yeast
1.00%
Final Dough
The following recipe will make 2 1-kilo loaves:
Bread Flour
552g
Fine-ground, Whole-grain Semolina Flour
552g
Water
883g
Salt
22g
Yeast
11g
Total Yield
2020g
Note: The recipe makes 1% more than the 2 kilos to account for possible loss during processing.
If you really want to make things easy on yourself, do your mixing in a mixer, especially if you opt to use a delayed fermentation.
Mix. Combine all the dry ingredients and mix well enough so there’s even distribution. Add all the water and mix until smooth with moderate gluten development.
(optional) This recipe really lends itself to delayed fermentation. If you want to do that, use ice water to mix your dough. As recommended above, use a mixer and mix at medium-low for a few minutes to get gluten development started. Once the dough starts climbing up your hook, you will have mixed and kneaded it enough. Then put the dough in the fridge for up to 24 hours. The rest of the process is the same as below once you remove the dough from the fridge.
Bulk Fermentation. How long bulk fermentation will take depends on the ambient temperature of your kitchen. But it should generally take 1 1/2 to 2 1/2 hours. However, if you delayed fermentation, count on at least a few hours to allow the yeast to wake up. The dough will have finished bulk fermenting when it has expanded almost 35-40% of its original size.
Folding. You only need to fold this dough once, 30 minutes after mixing. If you did a delayed fermentation, there’s no need to fold.
Divide and Shape. Divide the dough into two 1-kilo pieces. Shape the loaves as you would batards, but roll them out into logs. I use 14″ bannetons for proofing but you could also just proof the loaves on a well-floured couche. Alternatively, you could just place the loaves on a large baking sheet that is covered with parchment paper. You’ll both proof and bake on the sheet.
Final Fermentation. As with bulk fermentation, final fermentation will vary based on the ambient temp of your kitchen. The loaves will be ready when they pass the poke test.
Bake. Bake at 425°F with steam for 20 minutes. Remove the steaming container after 20 minutes then bake at 400°F for 20-30 minutes to cure the loaves and reduce moisture in the crumb.
Because semolina is whole-grain flour, don’t expect large holes to form. But that’s okay. Your loaves will spring and have a wonderfully soft crumb!
When I first started making baguettes, I learned the pointage en bac method of making my baguette dough. To date, this is my most-used method for making baguettes. The slow rise significantly slows the yeast activity and allows the amylase enzymes to break down the starches in the flour and release more sugars into the dough than can be processed by the yeast that would otherwise be converted to alcohol and CO2. Plus it allows the lactobacillus and acetobacillus bacteria to release organic acids into the dough as well. With that method, I start with a dough temperature that is about 76℉-78℉, so when I finally put the dough into the fridge, fermentation has already started then gradually slows as the dough temp equalizes with the fridge temp.
But there is a bread called pain à l’ancienne whose fermentation is retarded at mixing using ice-cold water. Once mixed, the dough is then put into the fridge overnight. The dough is then removed from the fridge in the morning and allowed to come to room temp; thus, delaying fermentation and benefitting from the other microbes not having to compete with the yeast. But the two techniques differ in that with the pointage en bac method, the dough is immediately shaped out of the fridge as opposed to the pain à l’ancienne that is allowed to wake up for a period of time before shaping.
It actually makes a bit of sense to allow the dough to wake up because fermentation was delayed from the start. The cool thing is that when fermentation is allowed to proceed in earnest, the yeast have plenty of sugars on which to feed since the amylase enzymes had time to break down the starches overnight. Plus, the organic acids released into the dough will make it much more extensible. All good!
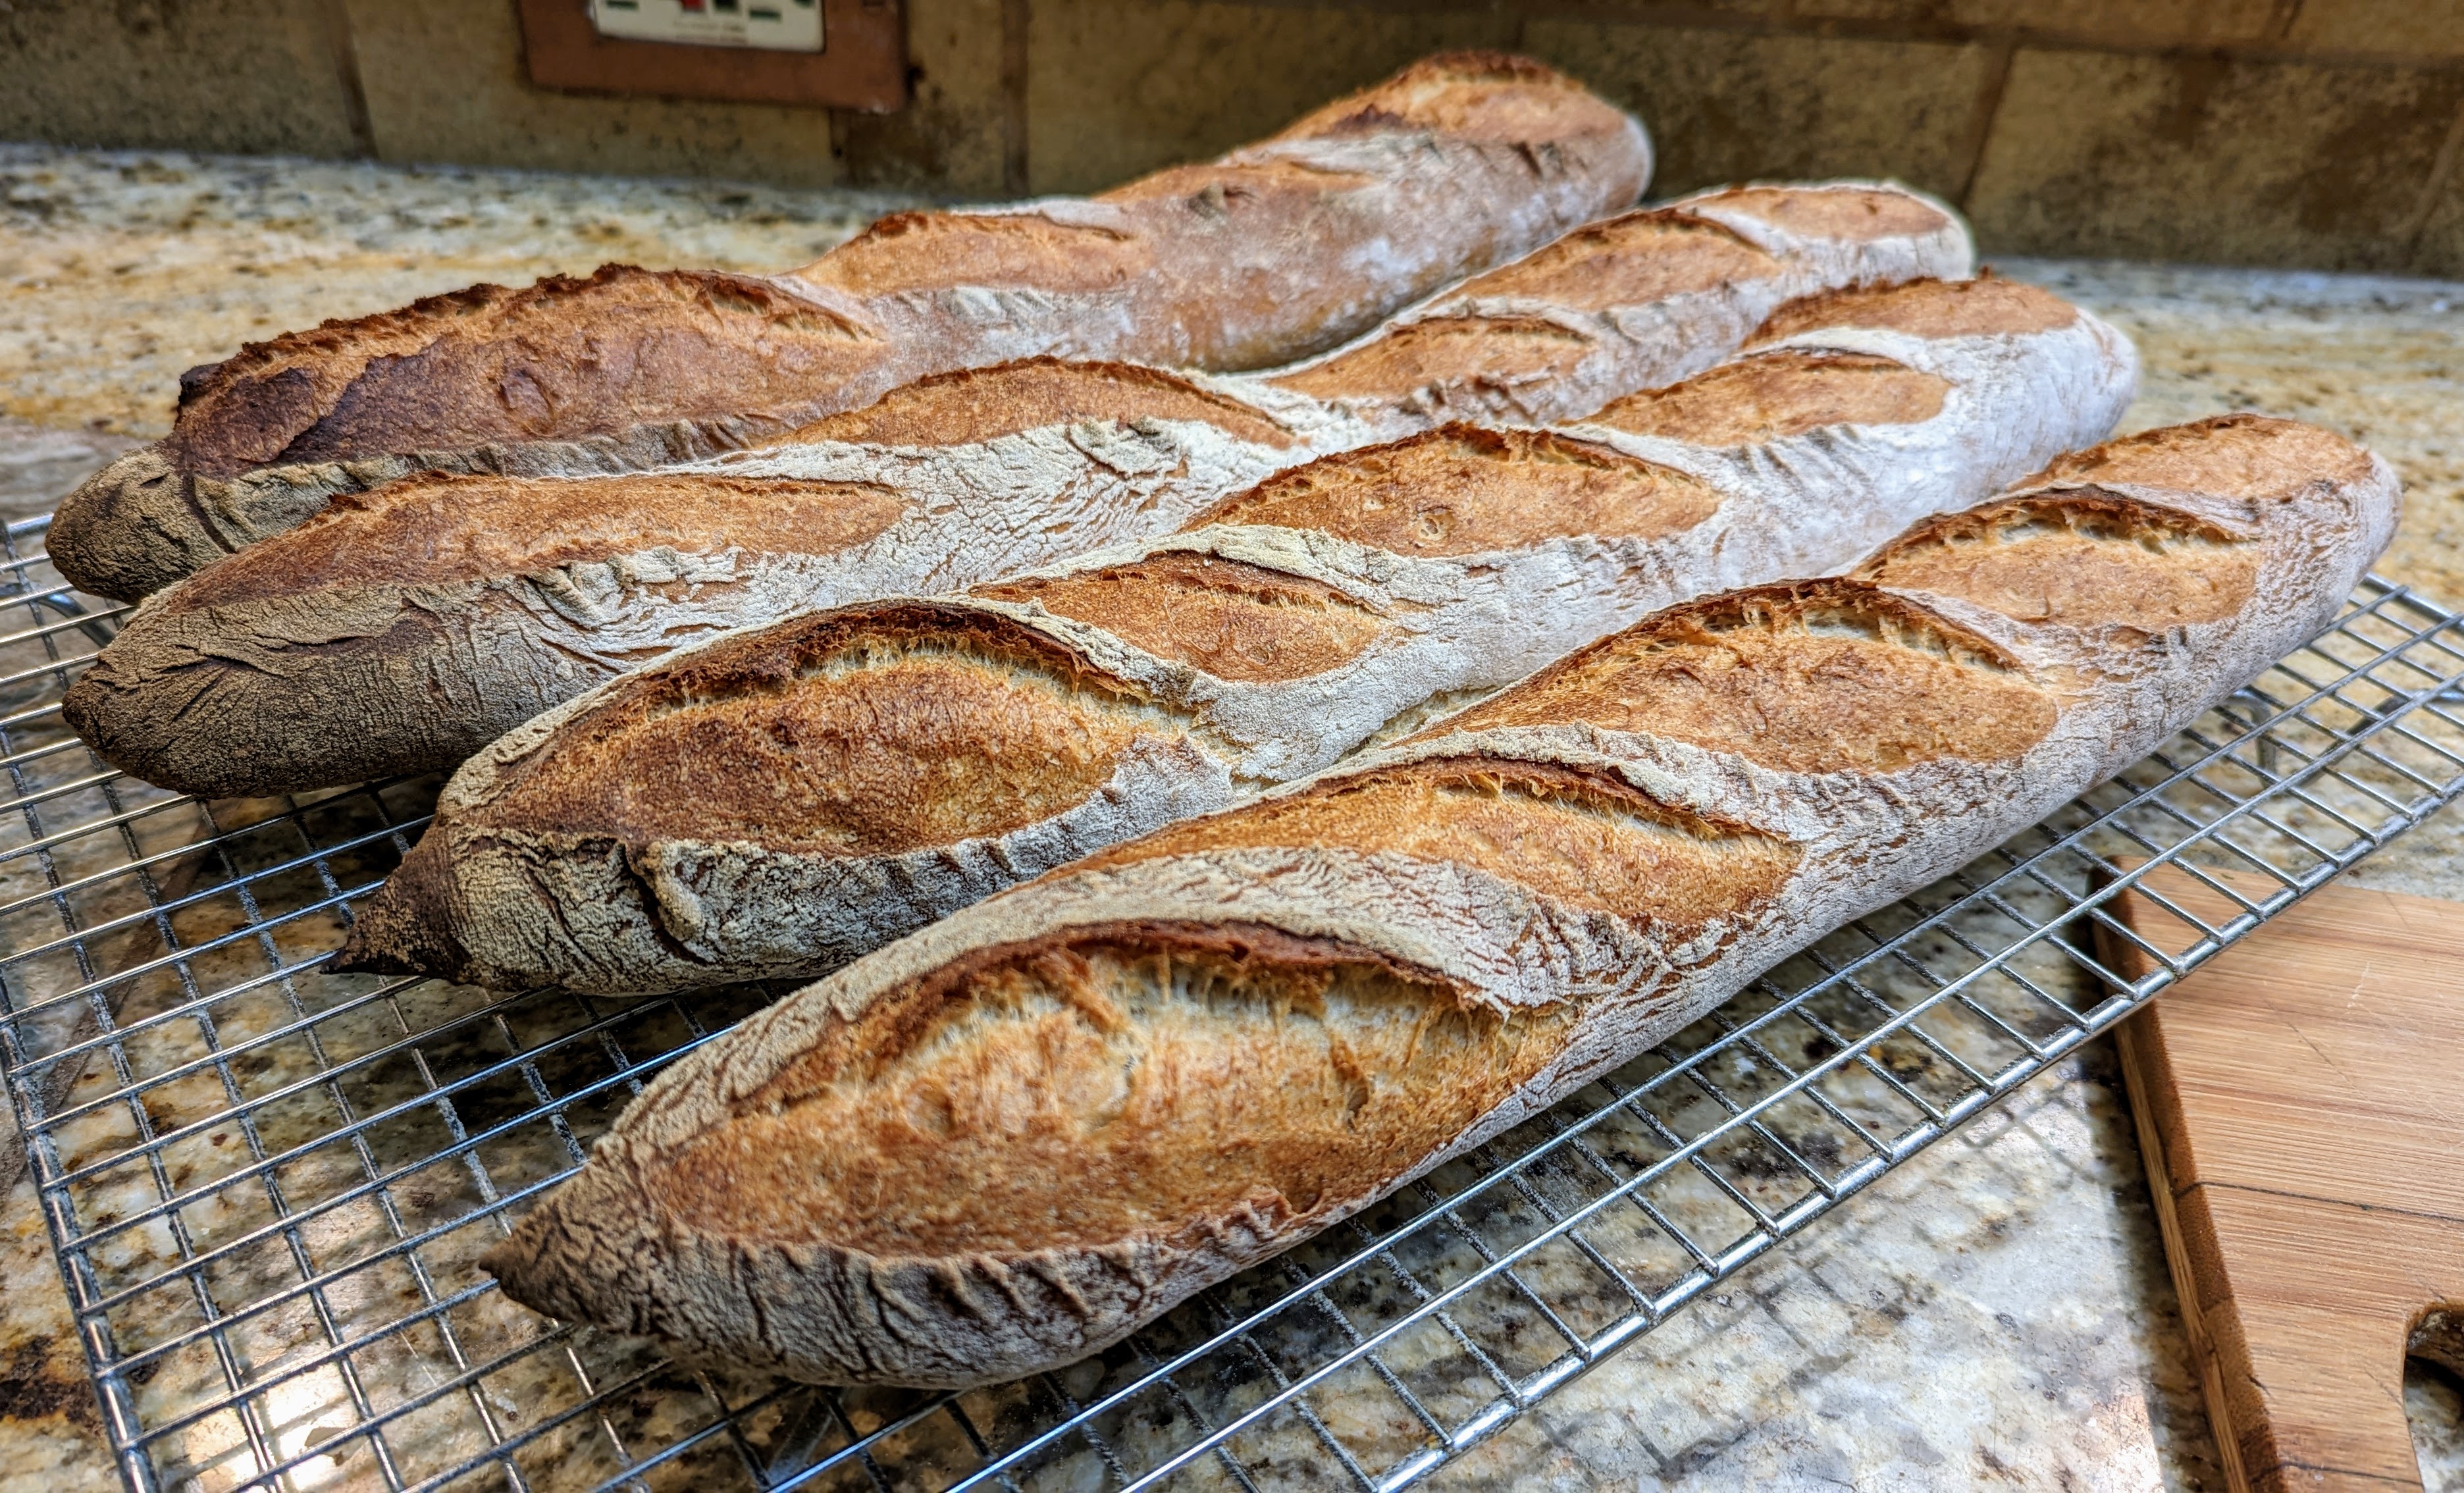
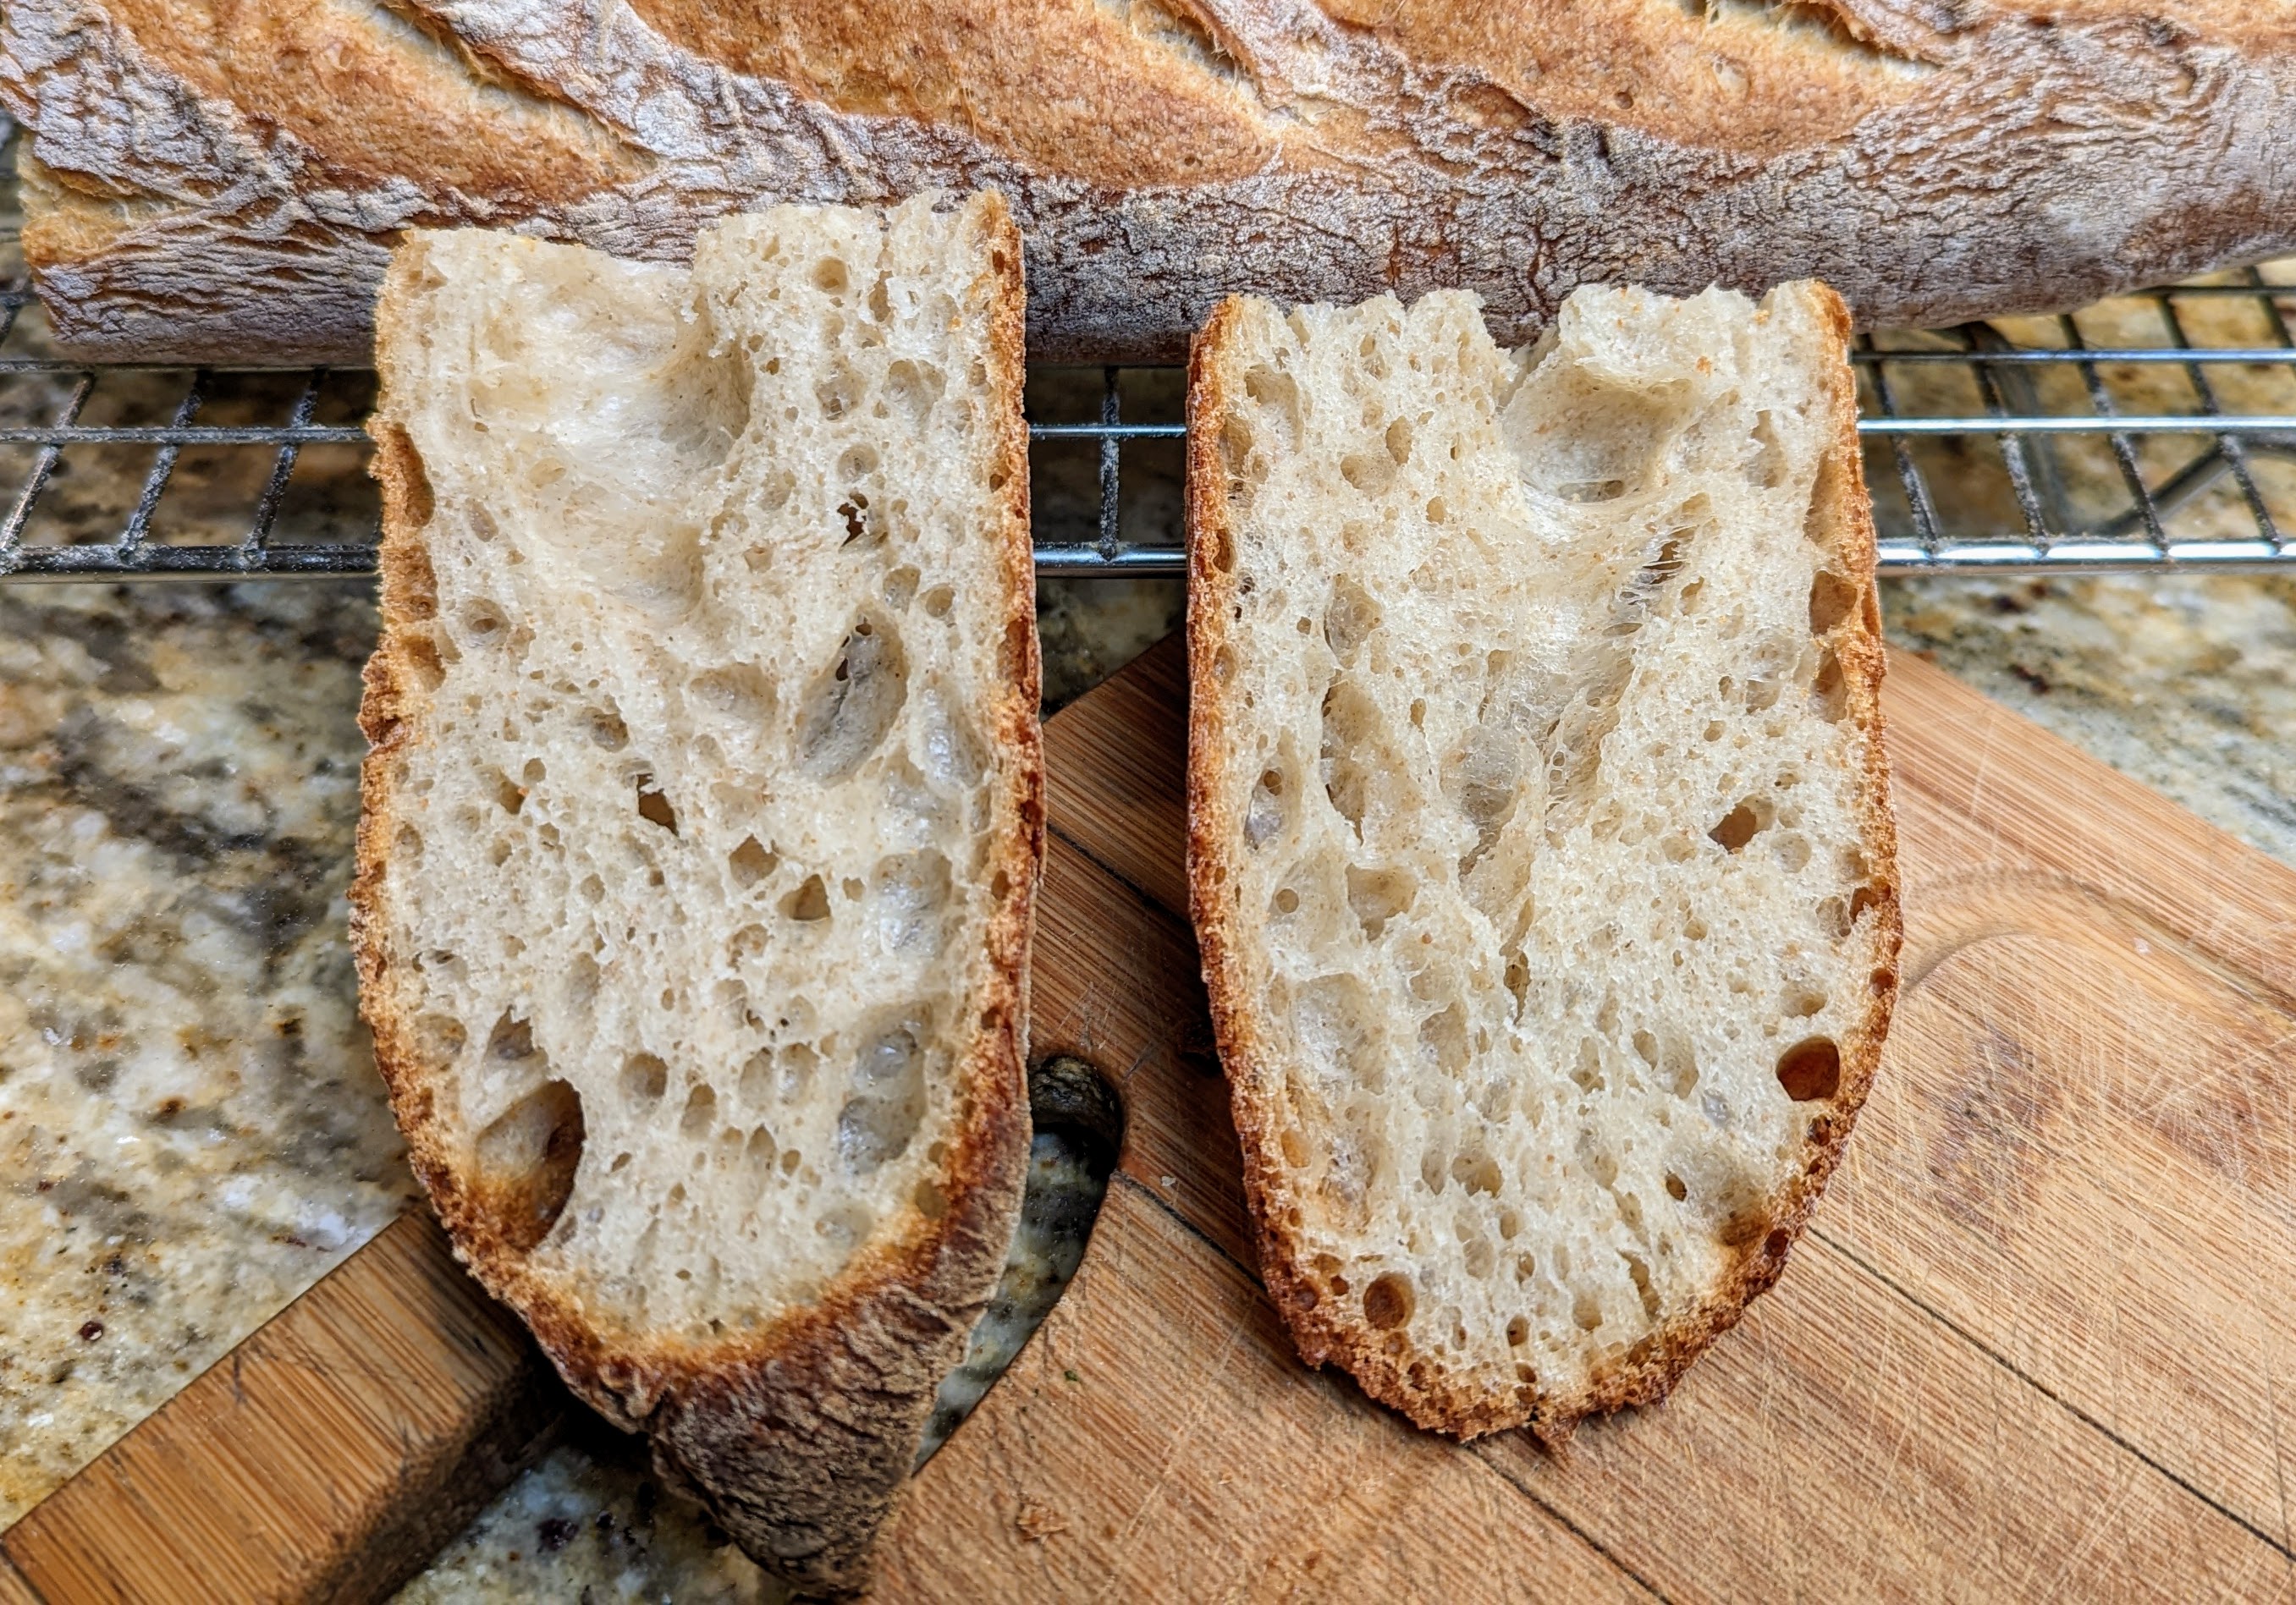
I did a riff on the pain à l’ancienne technique with my latest batch of baguettes and they turned out fabulous!
Formula
Flour
100.00%
Water
76.00%
Salt
2.00%
Yeast (instant)
0.38%
Total %
178.38%
Final Dough
Kamut Flour (sifted)
190g
AP Flour
569g
Water (35℉ – 40℉)
577g
Salt
15g
Yeast
3g
1353g 4 X ~335g loaves
As you can see above, I used a blend of sifted Kamut and AP flour. This is a 25% Kamut/75% AP blend.
Mix. Thoroughly mix ALL dry ingredients together until fully combined. For the ice water, I just filled a bowl with ice water then used a strainer when adding it to the dry ingredients. Mix until you have a shaggy mass with no large lumps. Cover the mixing bowl, then place it in the fridge for 30 minutes to maintain the dough temp. After 30 minutes, take the bowl out, then stretch and fold the dough until smooth.
Retard. Return the dough to the fridge and let it sit for at least 8 hours. There will be yeast activity during this time, but it will minimal.
Bulk Fermentation. Remove the dough from the fridge and allow it to wake up for 1-1 1/2 hr. During this time you still won’t see much expansion of the dough mass, but that’s okay. There’s actually a lot that has happened overnight. All in all, you should see about a 50% expansion of the dough from its original size.
Divide and Preshape. Divide the dough into 335g pieces. Letterfold each piece, then roll up the piece perpendicular to the seams like a jelly roll. Alternatively, you can create rounds. After preshaping, place the piece on a well-floured couche and let the pieces rest for 30 minutes. This is an important step because the dough is still cool at this point and needs time to relax. After that time, if you pick up a piece, it should feel billowy and the dough should give.
Shape. Rather than write down the process, here’s a GREAT shaping method that Martin goes into in detail.
Final Fermentation. This last part is a little tricky in that it really require a bit of feel. But because the dough started out cold, the minimum final fermentation would probably be one hour. But when I baked these today, my kitchen was 72℉ and it took a little over two hours to finish final fermentation. Use the poke test to determine readiness. With this dough, the indentation should remain, but still eventually fill in. If your poke disappears completely, the dough isn’t ready. It’s really critical that you give final fermentation plenty of time as shaping will have degassed the dough slightly. Final fermentation will allow the holes to reform.
Bake. Bake at 475℉ with steam for 12 minutes or until the crust is set and you start seeing color. Remove steam, then finish baking at 425℉ for 15-20 minutes. This bread really benefits from a full bake.
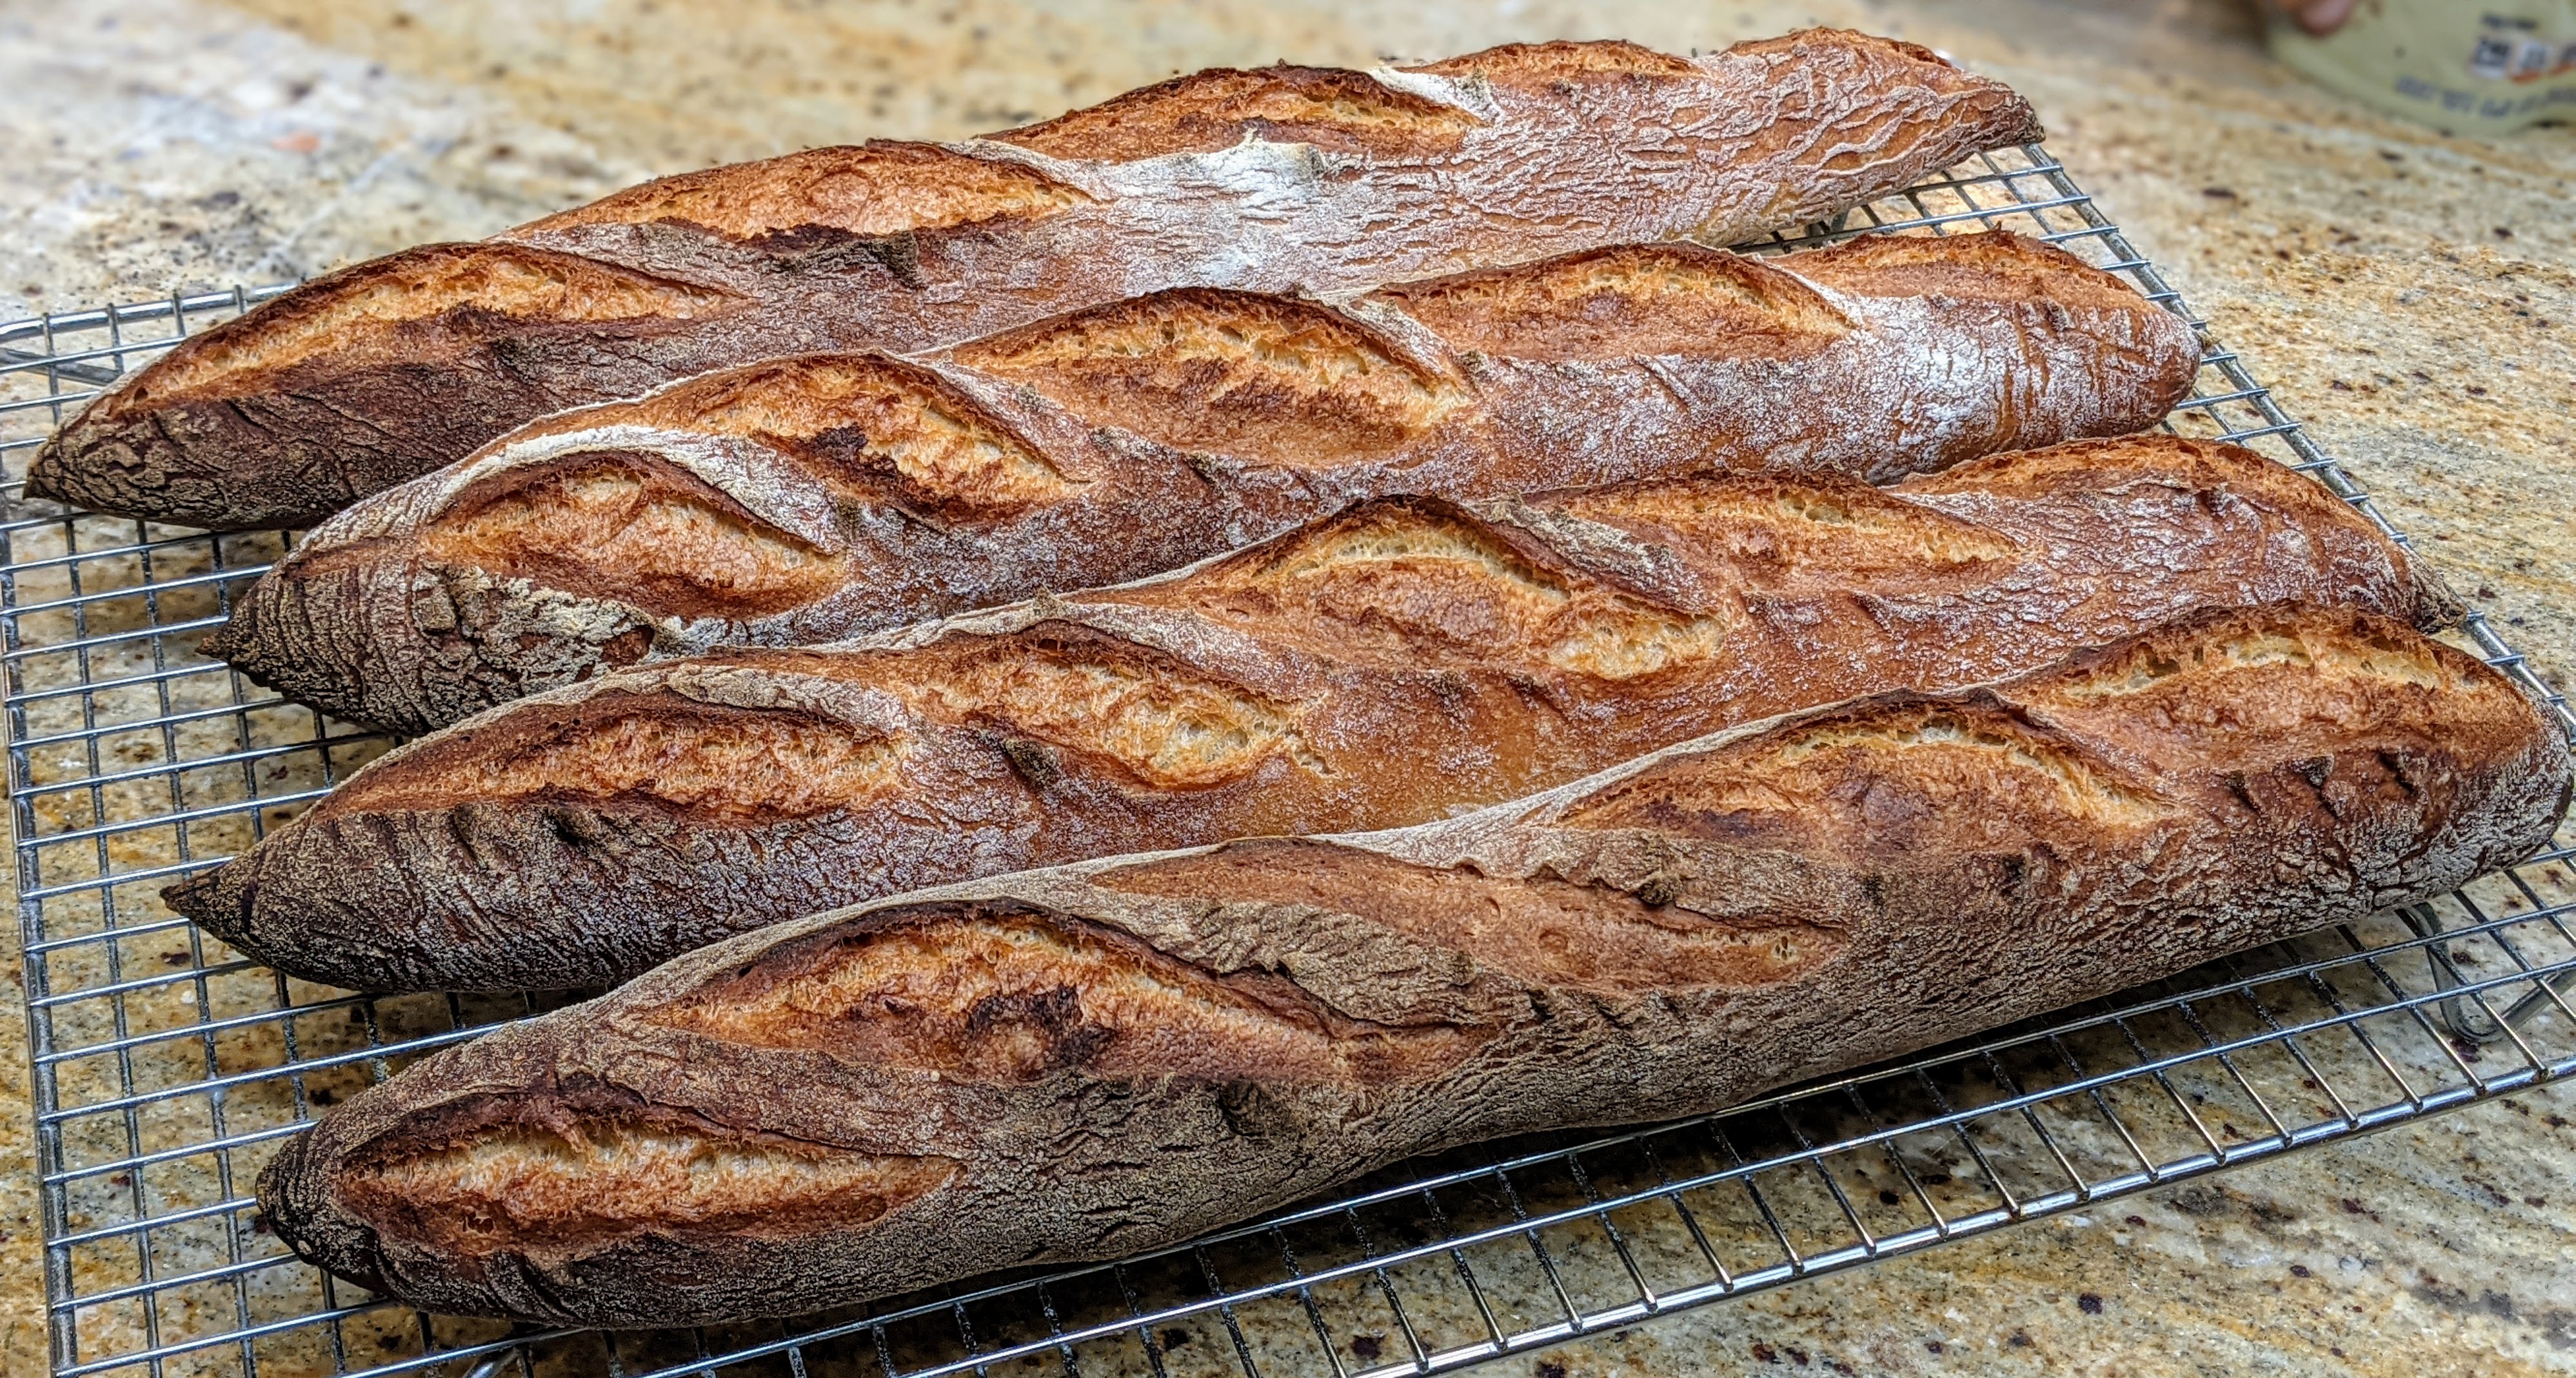
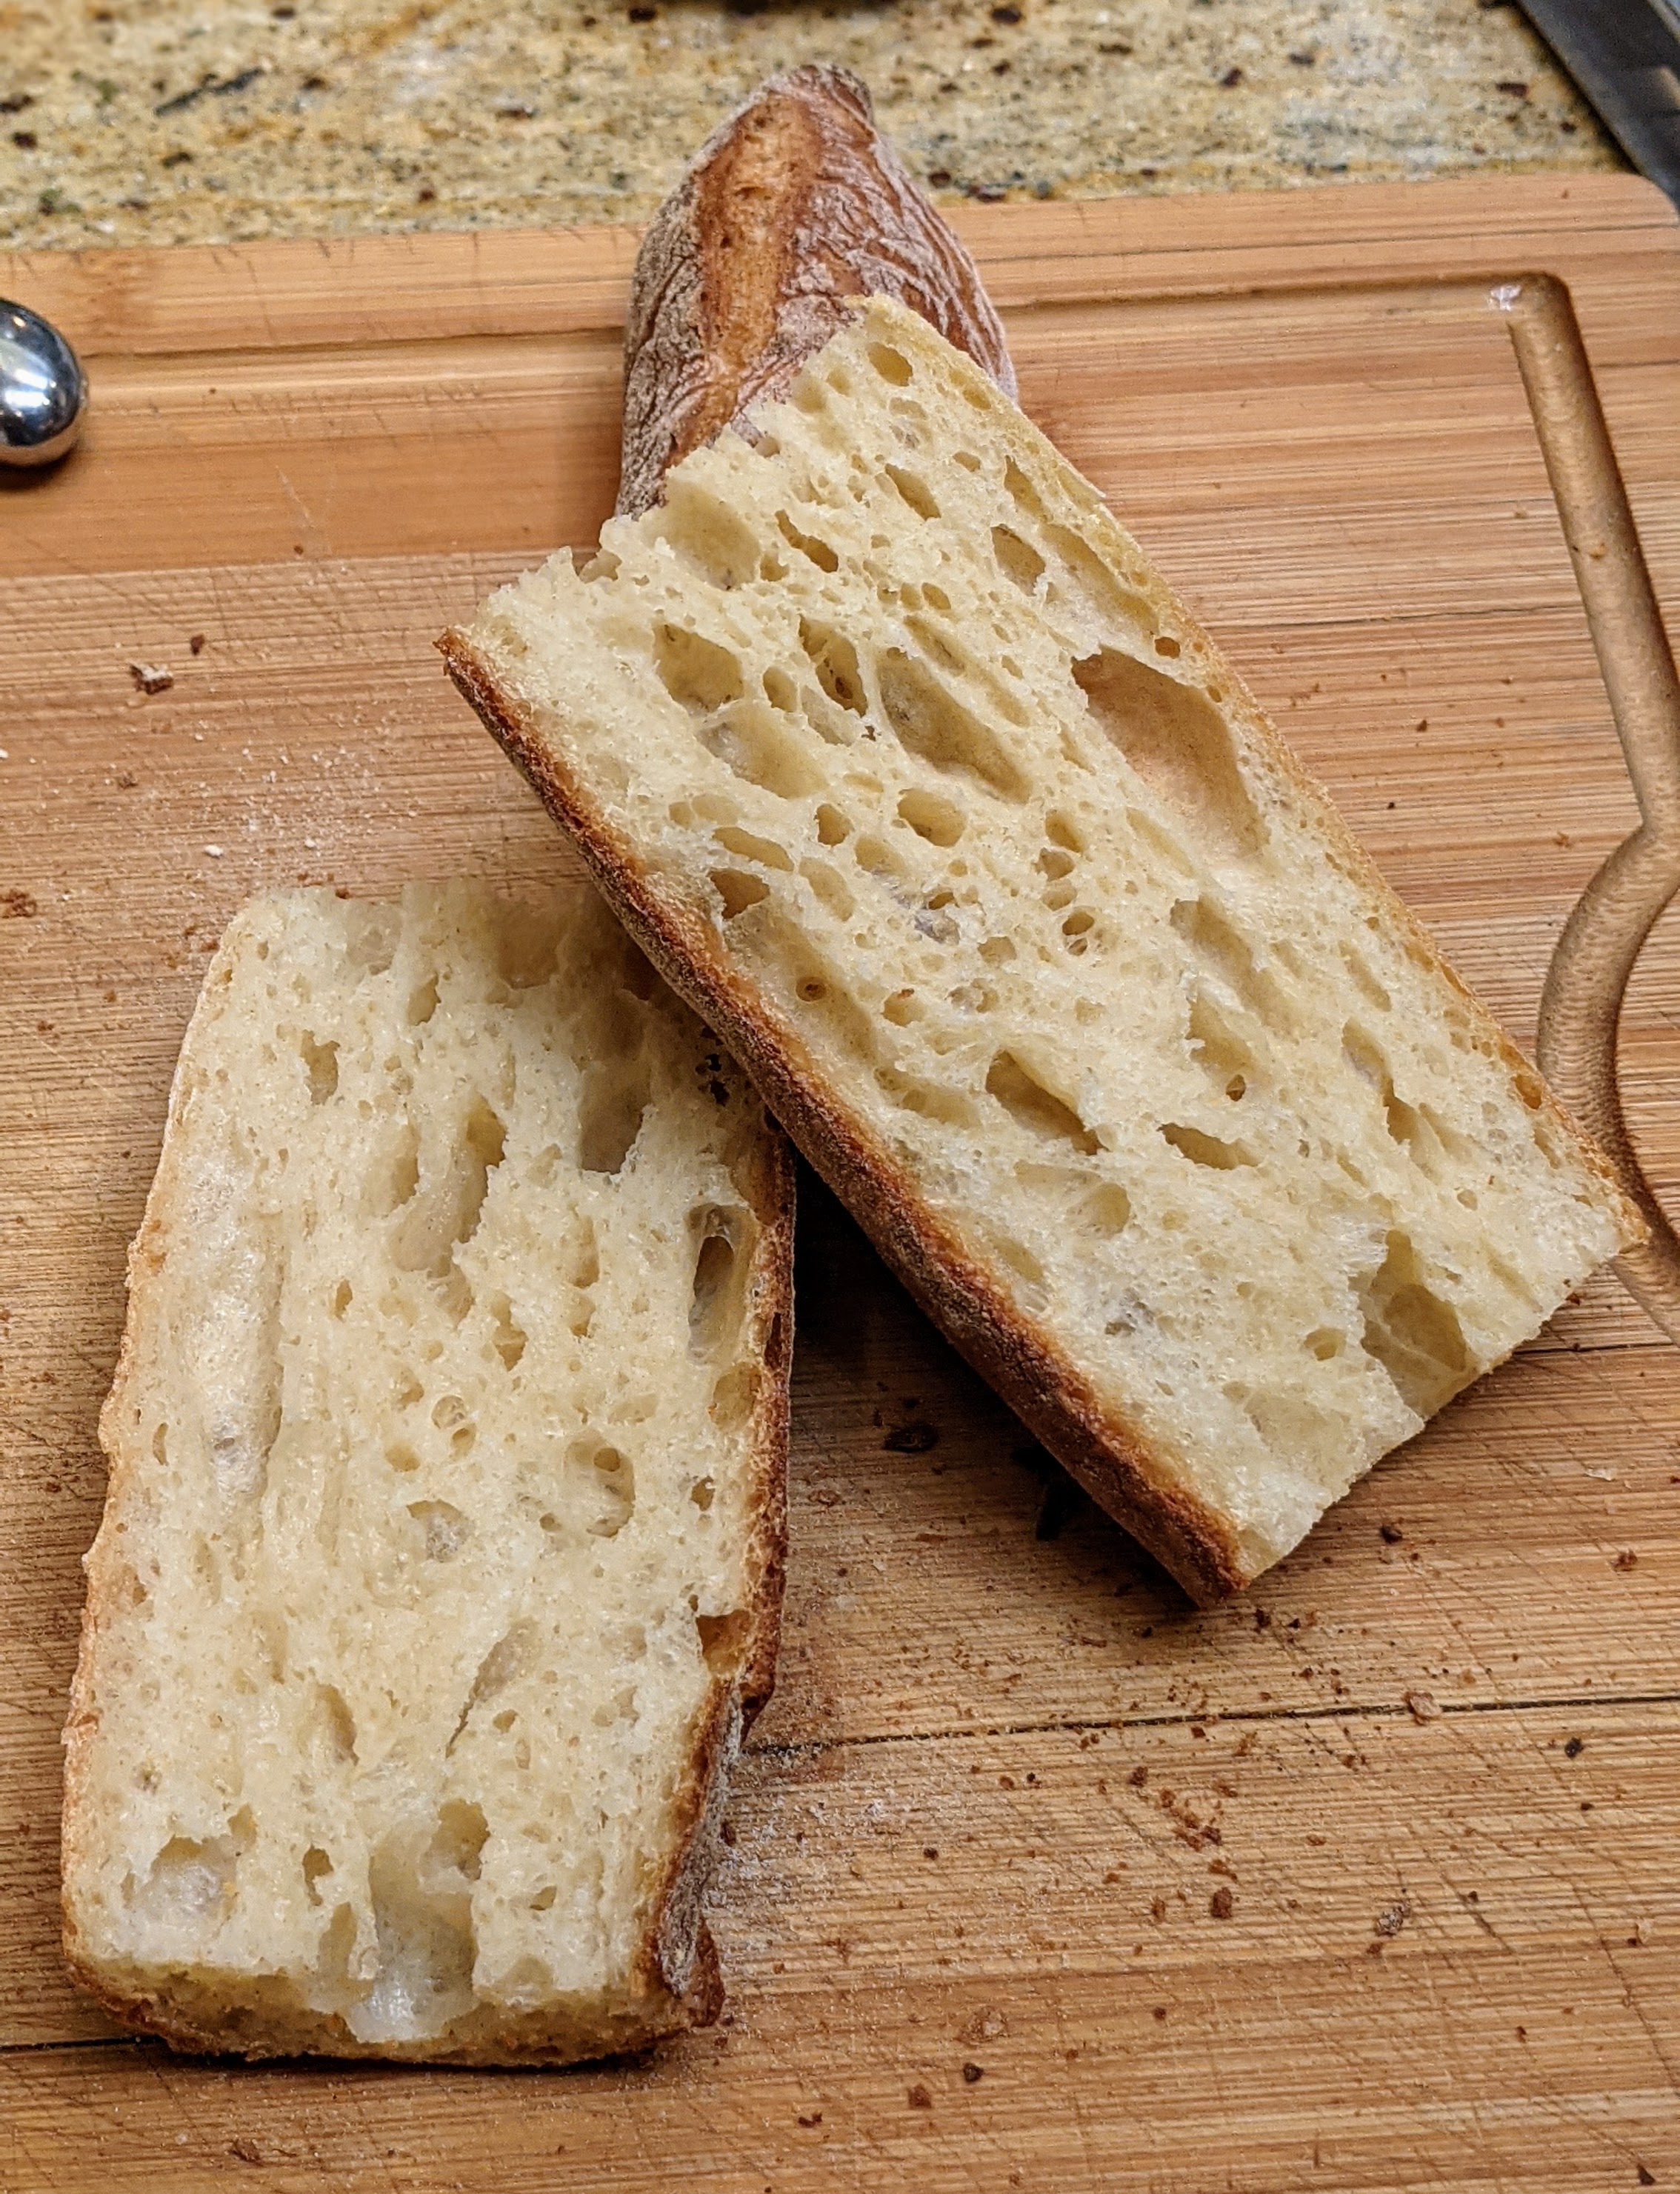
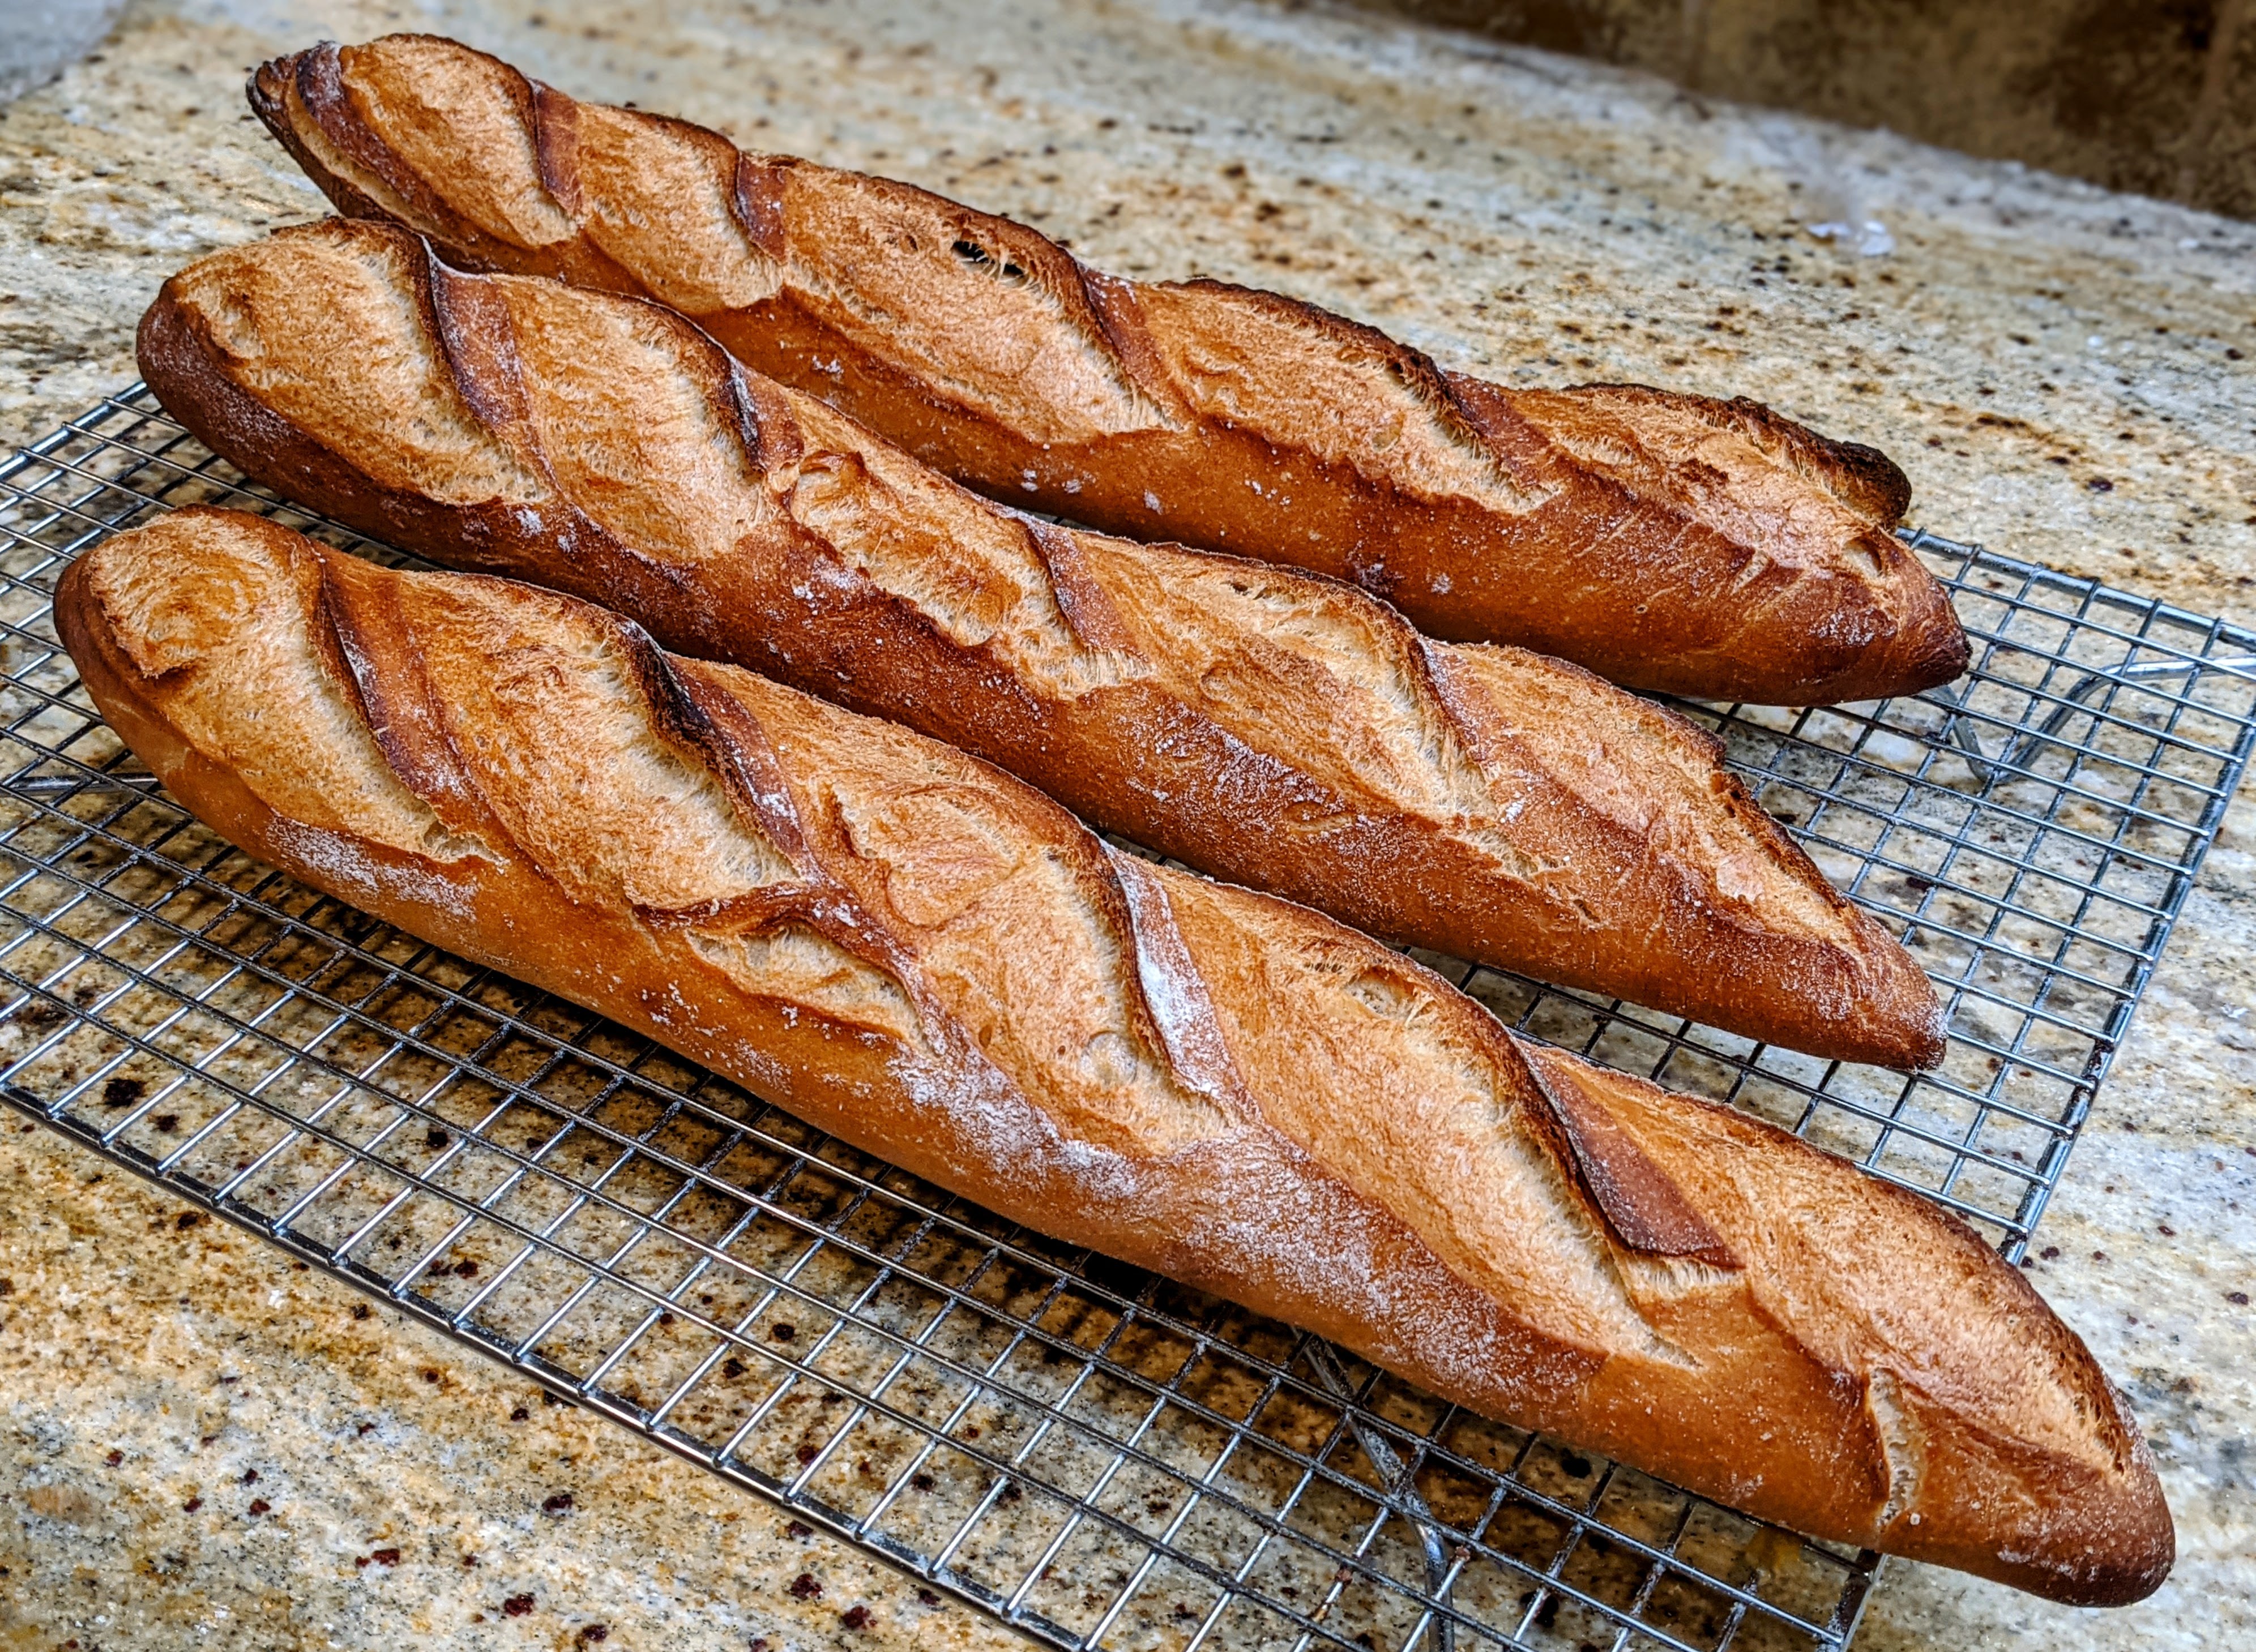
If you’re wondering what the difference between this type of baguette is and a standard baguette, look at the pictures below:
Pain à l’ancienne techniqueBaguettes de Tradition
On the left are the baguettes made using the pain à l’ancienne technique and to the right are a recent batch of Baguettes de Tradition. They were both baked in pretty much the same way, at the same temperatures. But notice how the pain à l’ancienne style baguettes are darker. This is because of the carmelization of the sugars that were released into the dough overnight. Baguettes de Tradition, on the other hand, are processed all within a few hours time; not enough time for sugars to be released.
Ever since I learned Jeffrey Hamelman’s Roasted Garlic Levain bread, I’ve used roasted garlic in a number of recipes. But up until now, I didn’t think about using it in ciabatta. There is nothing like the smell of garlic roasting in the oven, and when incorporated into the dough and baked, the result is a luxurious and delectable bread that you’ll want to make all the time!
Since I go on long airplane trips several times a year, I’ve learned to bring my own food as opposed to buying the crappy food they now serve – and you have to purchase – on the plane. Tomorrow, my family is traveling to New York City to attend our daughter’s graduation from Fordham University this weekend, so true to form, I made sure to have sandwiches for the trip.
Normally, I make fat baguettes, but this time I wanted to make ciabatta. But to put a twist on it, I thought I’d add roasted garlic and give the bread a little kick. The formula and recipe are below:
Formula
Flour
100.00%
Water
81.00%
Cream
0.80%
Salt
2.00%
Yeast
1.00%
Olive Oil
4.00%
Garlic
6.00%
Total Percentage
194.80%
Final Dough
Flour My blend: 30% Kamut Flour, 30% Bread Flour, 40% AP Flour
622g
Warm Water (about 100°F)
504g
Cream or Half & Half
5g
Salt
12g
Yeast
6g
Olive Oil
25g
Garlic (peeled)
37g
Total Yield
1,212.00 2 X 600g loaves (+1% due to process loss)
Process
Because this is such a super-wet dough, I highly recommend using a stand mixer.
Roast the garlic. Weigh out the garlic you need then place the cloves in a square of foil with a little olive oil (don’t worry if you have too much garlic – personally, I usually exceed the required amount by a few grams). Cinch up the foil, the roast at 400°F for 30 minutes. The garlic should be slightly brown and mashable. Transfer to a small bowl, and mash up the garlic with the oil. Don’t worry if there are harder bits. Just break them up.
Mix. If you’re using a flour blend, thoroughly mix the different flour types together first (the mixer paddle is perfect for this). Add the salt and yeast, then continue mixing for several seconds until all the ingredients are evenly incorporated.
By the way, it’s a myth that salt kills yeast. It doesn’t, at least not at this low concentration, and especially if both are dry. Besides, if salt did kill yeast, once you add salt to a yeasted dough, it shouldn’t rise!
In a separate container, combine all the liquids. Attach the dough hook, then turn on your mixer to slow, then slowly add about 75% of the liquid. Allow the dough to form. Once the dough starts climbing up the hook, slowly add the rest of the liquid until all the ingredients are combined (make sure to use a spatula to get all the oil out of the container). Once the liquid is incorporated, add the roasted garlic. Turn the mixer up to medium-low and mix until the dough is smooth (it’s more like a batter at this stage).
At this stage, you can transfer the dough to a standard mixing bowl or just keep it in the mixer’s bowl.
First Fermentation. Let the dough rest for 30 minutes. Then using a wet hand, do a series of stretches and folds. The dough at this point will still be quite wet. But using hand like a spoon, scoop under the dough and pull up. Eventually you will feel the dough strengthening a bit.
Second Fermentation. Again, let the dough rest for 30 minutes. Then pour it out onto a well-floured surface. You have to be pretty generous with the flour. Letter fold the dough. Once you’ve finished the pattern, pat the dough down, then letter fold it again. Once you’re done, roll it over onto its seams, then transfer it into a well-oiled bowl.
I’d start preheating my oven at this point – my oven is slow to come to temp, so I start preheating after the first fermentation.
Third Fermentation. Finally, let the dough rest 20 minutes. You should see some expansion of the dough mass with bubbles starting to form on the surface. Pour the dough out oil-side-up onto a well-floured surface. Divide the dough into two pieces. Personally, I eyeball it, but still scale out one of the pieces to 600 grams. At this point, handle the dough gently. You don’t want to degas it too much!
Final Fermentation. Gently tug the two pieces into rectangles, then transfer them to a couche or well-floured dish cloth. Let the loaves rest for 20 minutes.
Bake. Transfer the loaves to a loading board generously covered with cornmeal. Load your oven, then bake the loaves at 460°F with steam for 15 minutes. After that, expel the steam, then finish baking at 400°F for 20 minutes.
If you don’t use a baking stone, you can bake the ciabatta on a regular baking pan.
Like many baking enthusiasts, during the pandemic lockdown, I watched A LOT of baking videos to learn different bread baking techniques. I started out watching regular YouTubers. Some are great like Sune, the Foodgeek, but as with any social media platform, the real good stuff takes some searching. So eventually, I found pros like Markus Farbinger, Jeffrey Hamelman, and Chad Robertson (I read the latter two’ book as well). But then I discovered and also followed Scott Megee, Master Baker of Australia and owner/proprietor of The Artisan Crust in Victoria, Australia. And I tried out his easy version of ciabatta.
In short, this bread rocks! Not only is it easy to make, but despite not using a preferment at all, it’s delicious! The trick is using really good olive oil – first cold-pressed is the best. Don’t make the mistake of using “first pressed” or “cold-pressed” olive oil. It has to be “first cold-pressed” as that is the real deal extra virgin olive oil. Of course, there’s lots of chicanery in the olive oil business, so it’s never entirely clear.
For me, I use California extra virgin olive oil produced by the Sciabica family. I originally became familiar with them through the Dominican Sisters. Each year, they have the olives harvested from the grounds of their convent in Mission San Jose, and the Sciabica family presses and processes their olive oil.
As for the Sciabica family olive oil, though I usually purchase 1.5-liter boxes directly from them, in California, you can also find their oil in grocery stores under the “Mission Trail” brand. This is a very nice oil made from olive trees in Northern California. It’s wonderfully fruity with a peppery finish.
Okay, let’s get to the important stuff!
Overall Formula
Flour AP Flour: 50% Bread Flour: 25% Kamut Flour: 25%
100.00%
Water
76.00%
Salt
2.00%
Yeast
0.50%
Olive Oil
3.00%
Total %
181.50%
Final Dough
Flour* AP Flour: 501g Kamut Flour: 167g
668g
Water
508g
Salt
13g
Yeast
3g
Olive Oil
20g
Total Yield
1212g 2 X 600g loaves
Optimal Dough Temp
82°F (28°C)
*You can use your own blend or just use AP flour. I wouldn’t recommend 100% high-protein bread flour as it would make the crumb chewy.
Mix: Mix all the dry ingredients together thoroughly. Reserve 20% of the water and combine it with the oil. Then mix the dry ingredients together with 80% of the water. Mix until smooth and you achieve a bit of gluten development. Once the initial mix has come together, slowly add the oil and water mixture and work it into the dough (this is known as bassinage). Mix until smooth, then transfer to a lightly oiled bowl. Cover the container, then let the dough rest for 45 minutes.
Note: I recommend using a mixer for ciabatta (Hey! The Italians do!), but you can certainly mix the dough by hand.
Process. At this point, it’s a lot easier to learn Scott Megee’s technique by watching his video:
Note that where I started the video, Scott is measuring the temperature of the dough and it reads 23°C. But his recipe actually lists the optimal dough temp to be 28°C.
Bake. Bake with steam for 20 minutes at 450°F. Then finish baking for another 20 minutes without steam. If the crust color seems a little dark after the first 20 minutes, reduce oven temp to 400°F. Internal dough temp should be 200°F to ensure the dough is fully cooked.
I was at a retreat this past weekend and on Saturday afternoon, I happened to pass by the cafeteria kitchen to see a big 20-quart mixing bowl almost spilling over with proofing dough! It smelled absolutely wonderful! I was drawn to the bowl and chatted it up with one of the cooks, sharing with her that baking bread is one of my life’s passions. I never got the chance to speak with the head cook, but I’m going to be contacting them to see if I could volunteer in the kitchen to bake bread for retreat attendees in the future. So cool!
In any case, the loaves they produced were straight-forward yeasted loaves, probably about 1.5 kilo each. And though they didn’t have an open crumb, the crumb was still nice and airy. Much like a quickly risen, yeasted loaf. And that got me thinking: Sometimes it’s just nice to make an uncomplicated yeasted loaf. It’s so easy to get caught up in sourdough this and sourdough that that I miss the real point of making bread and that is to feed people! So, inspired by those simple loaves, I resolved to bake a loaf like that for my family when I got home.
But instead of making a simple loaf, I thought I’d give it a little pizzazz and add a bit of that wonderful Middle Eastern herb mixture, zatar. I only added just enough to add a real subtle flavor, but just that little bit has a HUGE impact on the taste. Let’s get to the recipe!
Overall Formula
First I started out with my basic baguette formula, but instead of my normal 0.38% yeast, I went to 1% yeast…
Flour
100.00%
Water
75.00%
Salt
2.00%
Yeast
1.00%
Total %
178.00%
Final Dough
Flour
851g
Water
638g
Salt
17g
Yeast
9g
Zatar*
1-2g It doesn’t take much…
Yield
1 X 1500g loaf
*I didn’t factor the Zatar into the overal formula because I just measured out a couple of grams (honestly 2 teaspoons) of the mixture and added it to the flour. As for the yield, if you add everything up, it’ll come to 1516g, but I always add a fudge factor to account for loss during processing.
To be completely transparent, I actually used three flours for my dough in this recipe: 50% High-extraction bread flour, 30% Kamut flour, and 20% AP Flour. They were measured as follows:
High-extraction bread flour
426g
Kamut flour
255g
AP flour
170g
Mix. Combine all the dry ingredients and mix well. Add the water and mix thoroughly until there are no dry ingredients left. Work the dough until it starts forming a smooth consistency. If you’re using a mixer (that’s what I did), mix until the dough become smooth and starts climbing up the hook (about 3 minutes at medium-low speed). If you’re mixing by hand, knead the dough in the bowl until smooth and it starts coming off the sides of the bowl (about 5-7 minutes).
Bulk Fermentation. About 1 1/2 hr.
Fold. The dough only needs to be folded once after 1/2 hour. After that, let it rise in the container until nearly doubled in size.
Preshape. After the dough has finished bulk fermentation, transfer it to an unfloured work surface and work it into a round. Allow it to bench rest for 15-20 minutes or until it has relaxed.
Shape. This is a really versatile dough, so you shape it into a round or an oval or even a long loaf. For my loaf, I did a standard batard shape, but rolled it out a little to form a longish loaf that I let rise in a 14″ banneton.
Final Fermentation. 30-45 minutes. By this time, the yeast will be really active and if it’s warm, final fermentation will happen quickly. So watch it! Use the standard poke test to determine the springiness of the dough. Your indentation should pop back a bit after poking the dough, but never fully come back.
Bake. Bake for 45 minutes at 450°F (no fan, please). During the first 15 minutes use steam to help the loaf rise. It will really spring up with this much yeast!
A little disappointed with the bottom of the loaf. Not sure if my stone was hot enough, so that could be my bad there for not letting the stone fully come to temp.
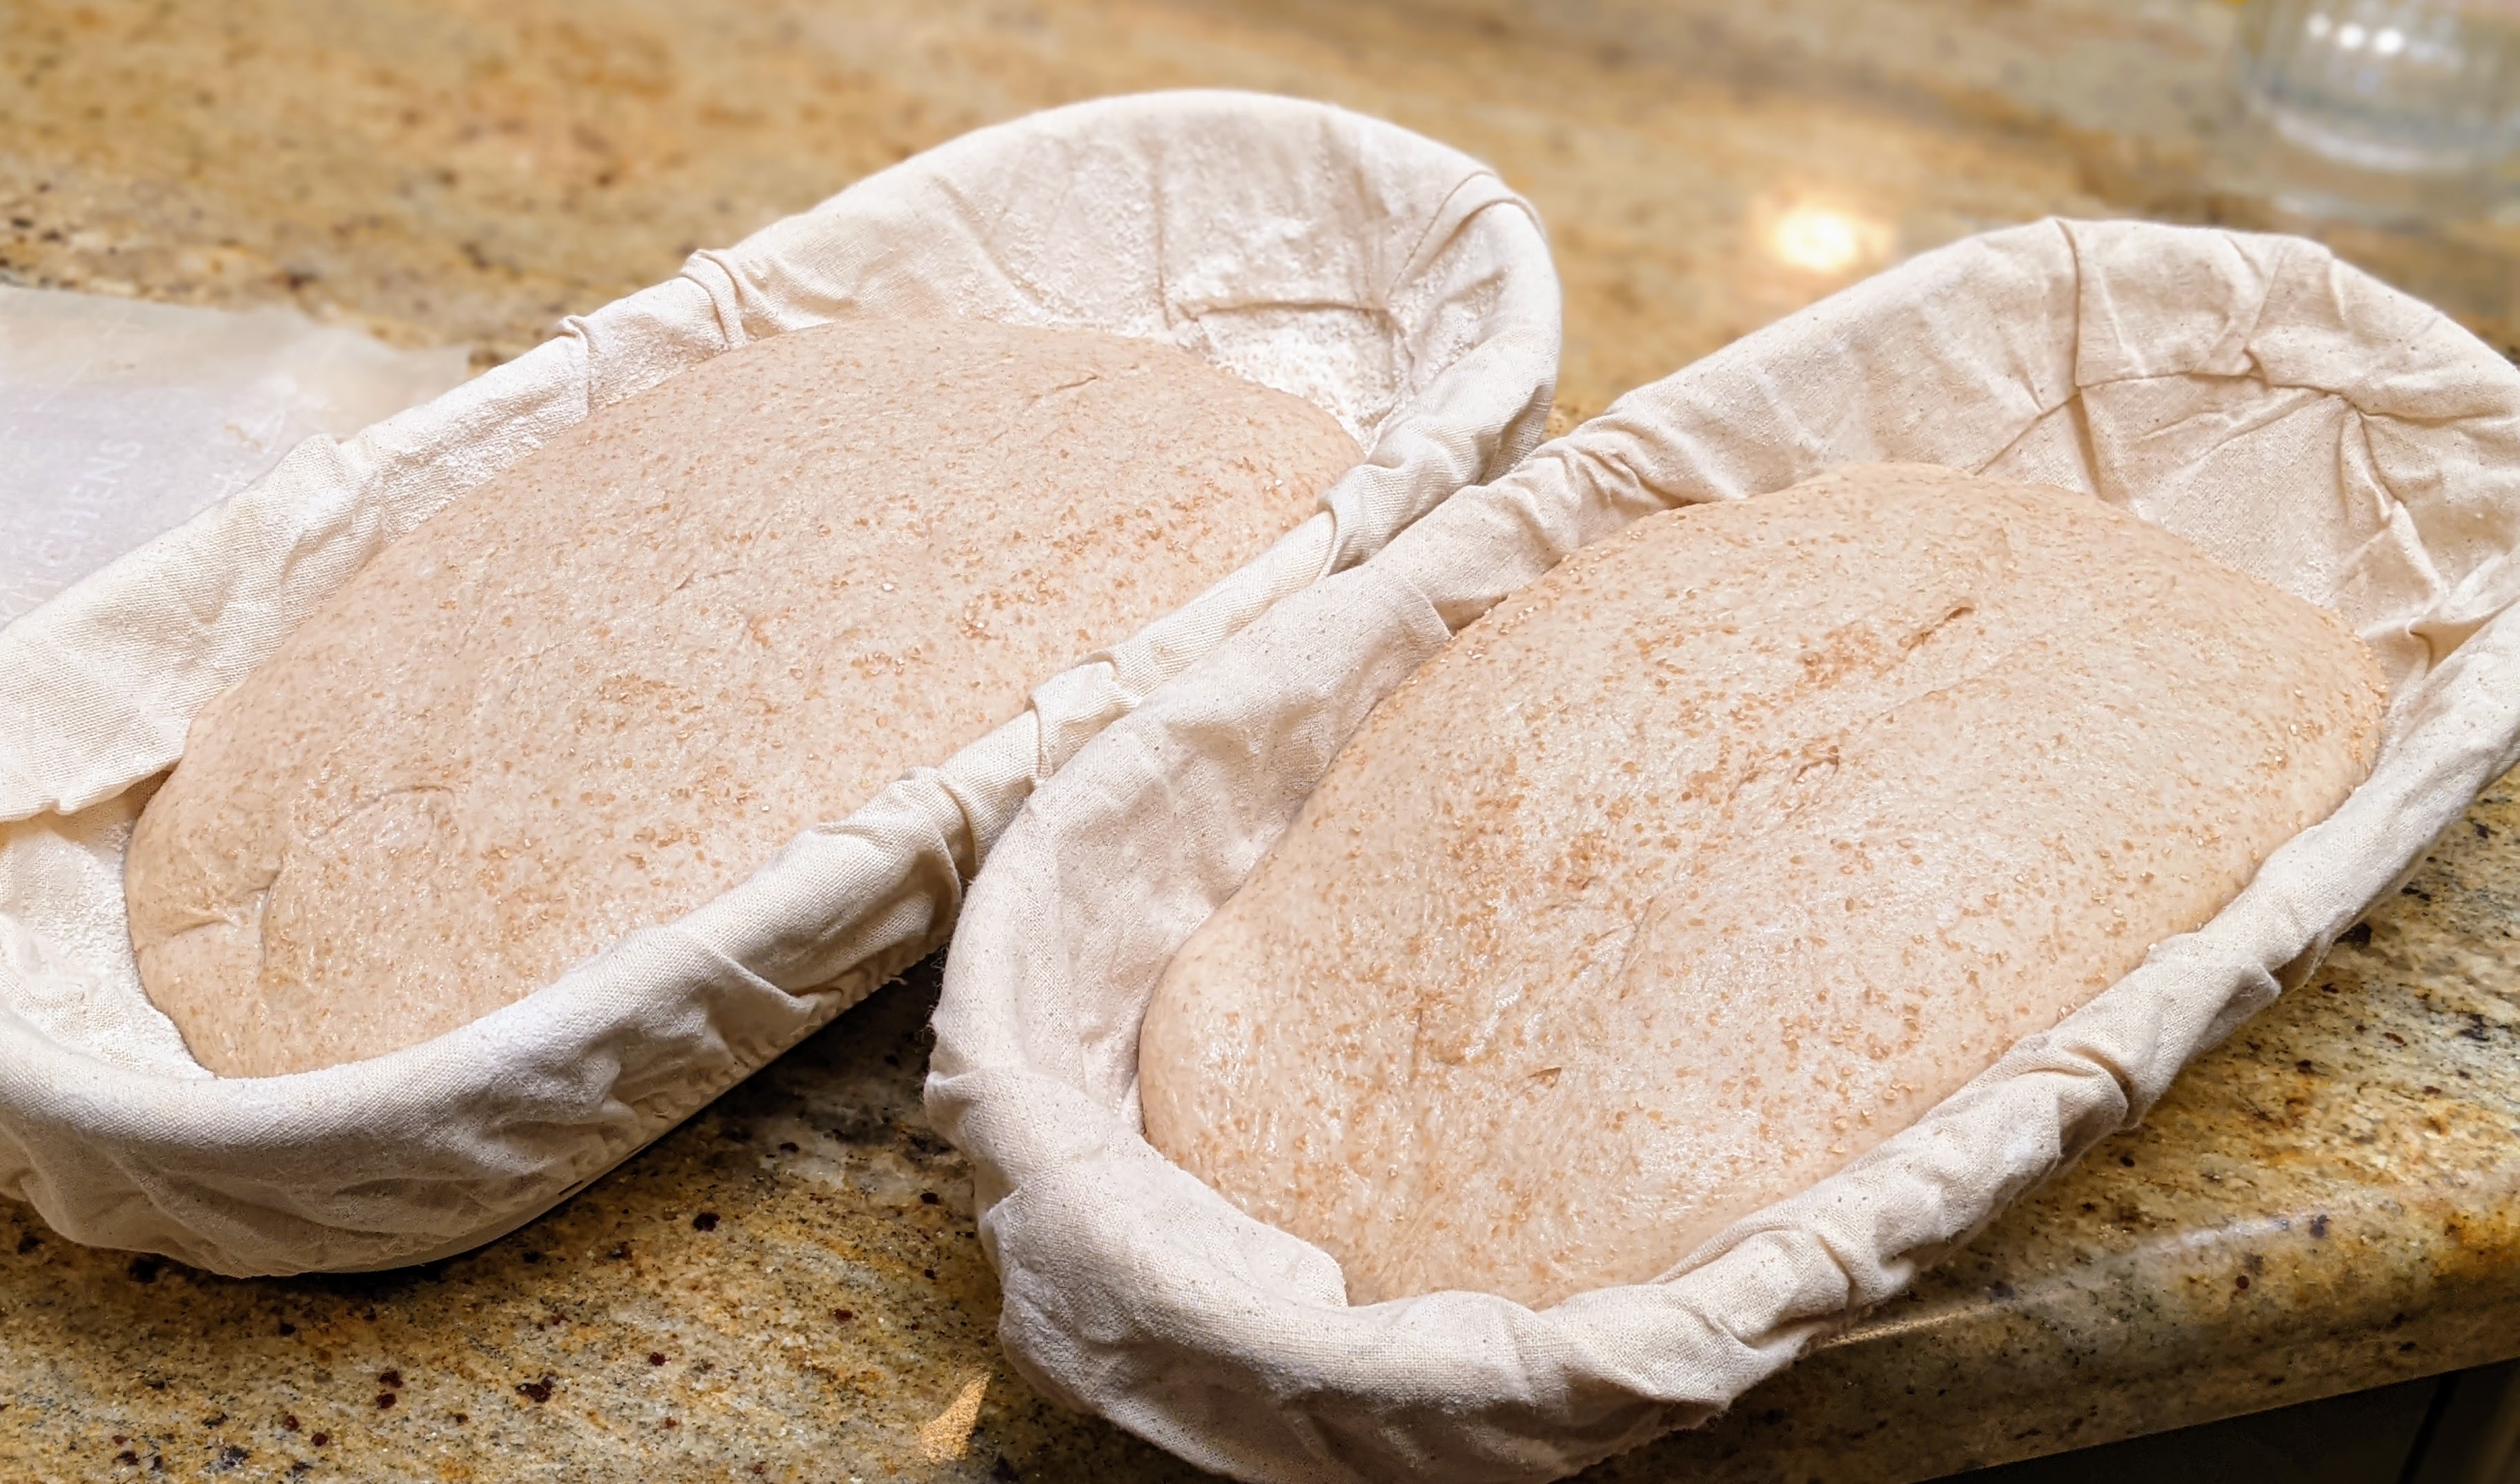
After re-reading Tartine No. 3 recently, I got inspired to start experimenting again with super-high hydration sourdough production. My typical hydration for sourdough is 75%, but Tartine goes even past 90% hydration! My earlier forays into 90%+ hydration were a little discouraging. I produced pretty flat loaves that, though possessed of a really open crumb, didn’t have much vertical rise. Then I saw some pictures of full loaves of Tartine and realized they had similar results!
But for me, I wanted to find a balance between extreme hydration and maintaining some oven rise. So I decided to do some tests, of which this is the first. The loaves in the pictures above were made with 85% hydration dough. I have a feeling that that is probably the limit of the type of flour I’m using, but the next bake, I’m going to push it to 90%.
These turned out a lot better than my previous forays. And part of that – I think – is due to the baskets I used. I watched some videos of both Tartine and several other bakers that were making high-hydration oval loaves and they all used what appeared to be 14″ baskets. So I got a couple. I think it makes a difference as it allows the dough to expand. But I won’t be absolutely sure until I make loaves using a standard oval basket and a long basket at the same time.
Baker’s Formula
Flour
100.00%
Water
85.00%
Salt
2.00%
Diastatic Malt Powder (optional)**
2.00%
Total Percentage
189%
*Levain percentage factors the flour from the levain into the total flour **Depending on the flour bread flour I use, I’ll add malt if there’s none added by the miller.
*Levain is calculated as 25% of the total flour which can be arrived at by taking the target dough weight and dividing it by the total percentage, so 2020 / 189%.
The Process
Make the Levain. Like Tartine, I prefer to use a young levain because I like the nutty flavor characteristics of a young levain and prefer to develop sourness during final fermenation. Even if I end up fermenting the dough enough to make it sour, it won’t be overpowering. For this particular recipe, I take about 50g of mature starter (I maintain a separate mother) and combine it with 150g flour and 150g water (warm enough to get my dough to about 80°F). Levain is ready when it passes the float test (anywhere from 2 – 5 hours depending on weather).
Initial Mix/Autolyse. Reserve about 50g of water, then mix the rest with all of the flour (if you’re using diastatic malt powder, add it now so the enzymes have a chance to break down the starches in the flour). When I use whole grain flour, I will typically autolyse for 2-4 hours, in parallel with my levain maturing.
Final Mix. Add all the levain, salt, and reserved water to the dough. Mix thoroughly until all ingredients are fully incorporated.
Bulk Fermentation. 4-6 hours depending on ambient temp or rate of fermentation or until the dough has expanded about 30-35% of its original size. There are a lot of variances in the timing. With the loaves shown above, they took a long time to bulk ferment, even at 80°F.
Divide and Pre-Shape. Divide the loaves into 1-kilo pieces, then work into rounds, developing a little surface tension. Bench rest uncovered for 20-30 minutes until the balls have relaxed.
Shape. Shape into rounds or ovals, then place into baskets.
Final Fermentation. 12-24 hours at 39°-42°F. The longer you go, the sourer the bread. I’ve taken loaves out to 36 hours but by that time, the acids started breaking down the gluten and I didn’t get much oven spring.
Bake. Bake at 475°F for 20 minutes with steam (if using a Dutch oven, then 20 minutes with the lid on). Remove the steaming container, then bake for 25-35 minutes dry at 425°F or until the crust has baked to a deep, golden brown.
Last night, my wife told she was going to be attending a potluck dinner party this evening and asked me if I could bake something for her to bring. Of course, any excuse to bake bread is just fine by me so I told her I’d make baguettes. I was going to make my standard pointage en bac baguettes where I mix everything together then cold retard the bulk fermentation but decided instead to make poolish baguettes.
But I didn’t want to do my standard poolish baguettes where the poolish flour was only 25% of the total flour. I wanted to challenge myself a little. Then I remembered the white bread with poolish recipe from Ken Forkish’ Flour Water Salt Yeast book that uses 50% of the total flour for the poolish! That’s a challenging dough because it is SO easy to get the poolish wrong; that is, over-ferment it, as it calls for an overnight ferment at room temp. And as ambient temperatures vary wildly, I’ve had some real poolish fails in the past.
But luckily the weather is turning cooler and Ken’s requirement of a 65°-70°F temp is now possible. In fact, the temp in my house dropped even below 65°F overnight, so when I woke up this morning to check the poolish, it wasn’t yet ready. Whew! I could catch it at its peak!
To be honest, I hadn’t made baguettes with this dough yet. But at 75% hydration, I had a feeling this would be perfect dough for making baguettes! I wasn’t wrong. They turned out beautifully, with a crisp, golden crust, and a light, airy, and buttery crumb! Here’s the recipe!
Overall Formula
Flour
100.00%
Water
75.00%
Salt
2.00%
Yeast
0.43%
Poolish
Bread Flour 25% (96g) AP Flour 75% (286g)
382g
Preferment Water
382g
Yeast Weight
0.3g
As I always recommend, make a little more poolish than you need because you will lose some weight due to processing and evaporation. In this case, I’d do 400g flour water each.
Final Dough
Bread Flour 25% (96g) AP Flour 75% (286g)
382g
Water (~100°F)
191g
Salt
15g
Yeast
3g
Preferment
763g
Total Yield
1353g 4 X 335g, 60cm loaves 6 X 225g, 40cm loaves
Make the Poolish. The night before you bake, make the poolish and place it in a cool place where you can maintain about 65°-70°F. At that temp, it’ll take about 10-12 hours to be ready. Just like with a levain, the poolish will be ready when it passes the float test. Visually the poolish should be a bit more than doubled, its top mottled with bubbles, and the top surface slightly domed.
Mix. Thoroughly mix all the dry ingredients together in a large bowl. Pour the water around the edges of the poolish to help release it from its container. The poolish will then slip right out of its container. Add the poolish to the dry ingredients then mix thoroughly until you form a shaggy mass with no dry ingredients remaining.
Bulk Fermentation. 1 1/2 to 2 1/2 hours depending on ambient temp. My kitchen was pretty cool this morning, and even though I put the dough in my oven with the light on and door slightly cracked, it still took 2 1/2 hours. Bulk fermentation is done when the dough has expanded 50%-75% its original size.
Ken Forkish has his dough go out to 2 1/2 to three times volume. But he has a VERY short final fermentation at 30 minutes. I prefer to take the dough only as far as 50% and having a longer final fermentation to let the dough recover from shaping.
Folding. Fold three times in the first hour after mixing at 20-minute intervals.
Divide and Preshape. Pour the dough onto a lightly floured surface, then gently tug it into a nice, even rectangle. Divide the dough into four equal pieces. For this recipe, scale each piece to 335g for 60cm loaves. Alternatively, you can make six 40cm loaves. Scale those out to 225g. If you have any leftover dough, just cut it into pieces and distribute to the pieces. Preshape the loaves into small logs by letter folding them, then rolling them up like a jelly roll. Rest the logs seam-side-up on a well-floured couche for 20-30 minutes or until the dough has relaxed.
Shape. Shape each piece into a baguette, then place each shaped loaf onto a well-floured couche for final fermentation.
Final Fermenation. 45 minutes to 1 1/2 hour, depending on ambient temp. As I mentioned above, my kitchen temp this morning was pretty cool, and it took and hour and a half for the loaves to be ready to bake. The loaves will be ready when you do the finger dent test and the hole fills in very slowly.
Bake. Bake at 480°F with steam for 15 minutes. Remove steaming container, reduce oven temp to 425°F, then bake another 15-20 minutes or until the crust becomes a deep, golden-brown. These really benefit from a full bake!
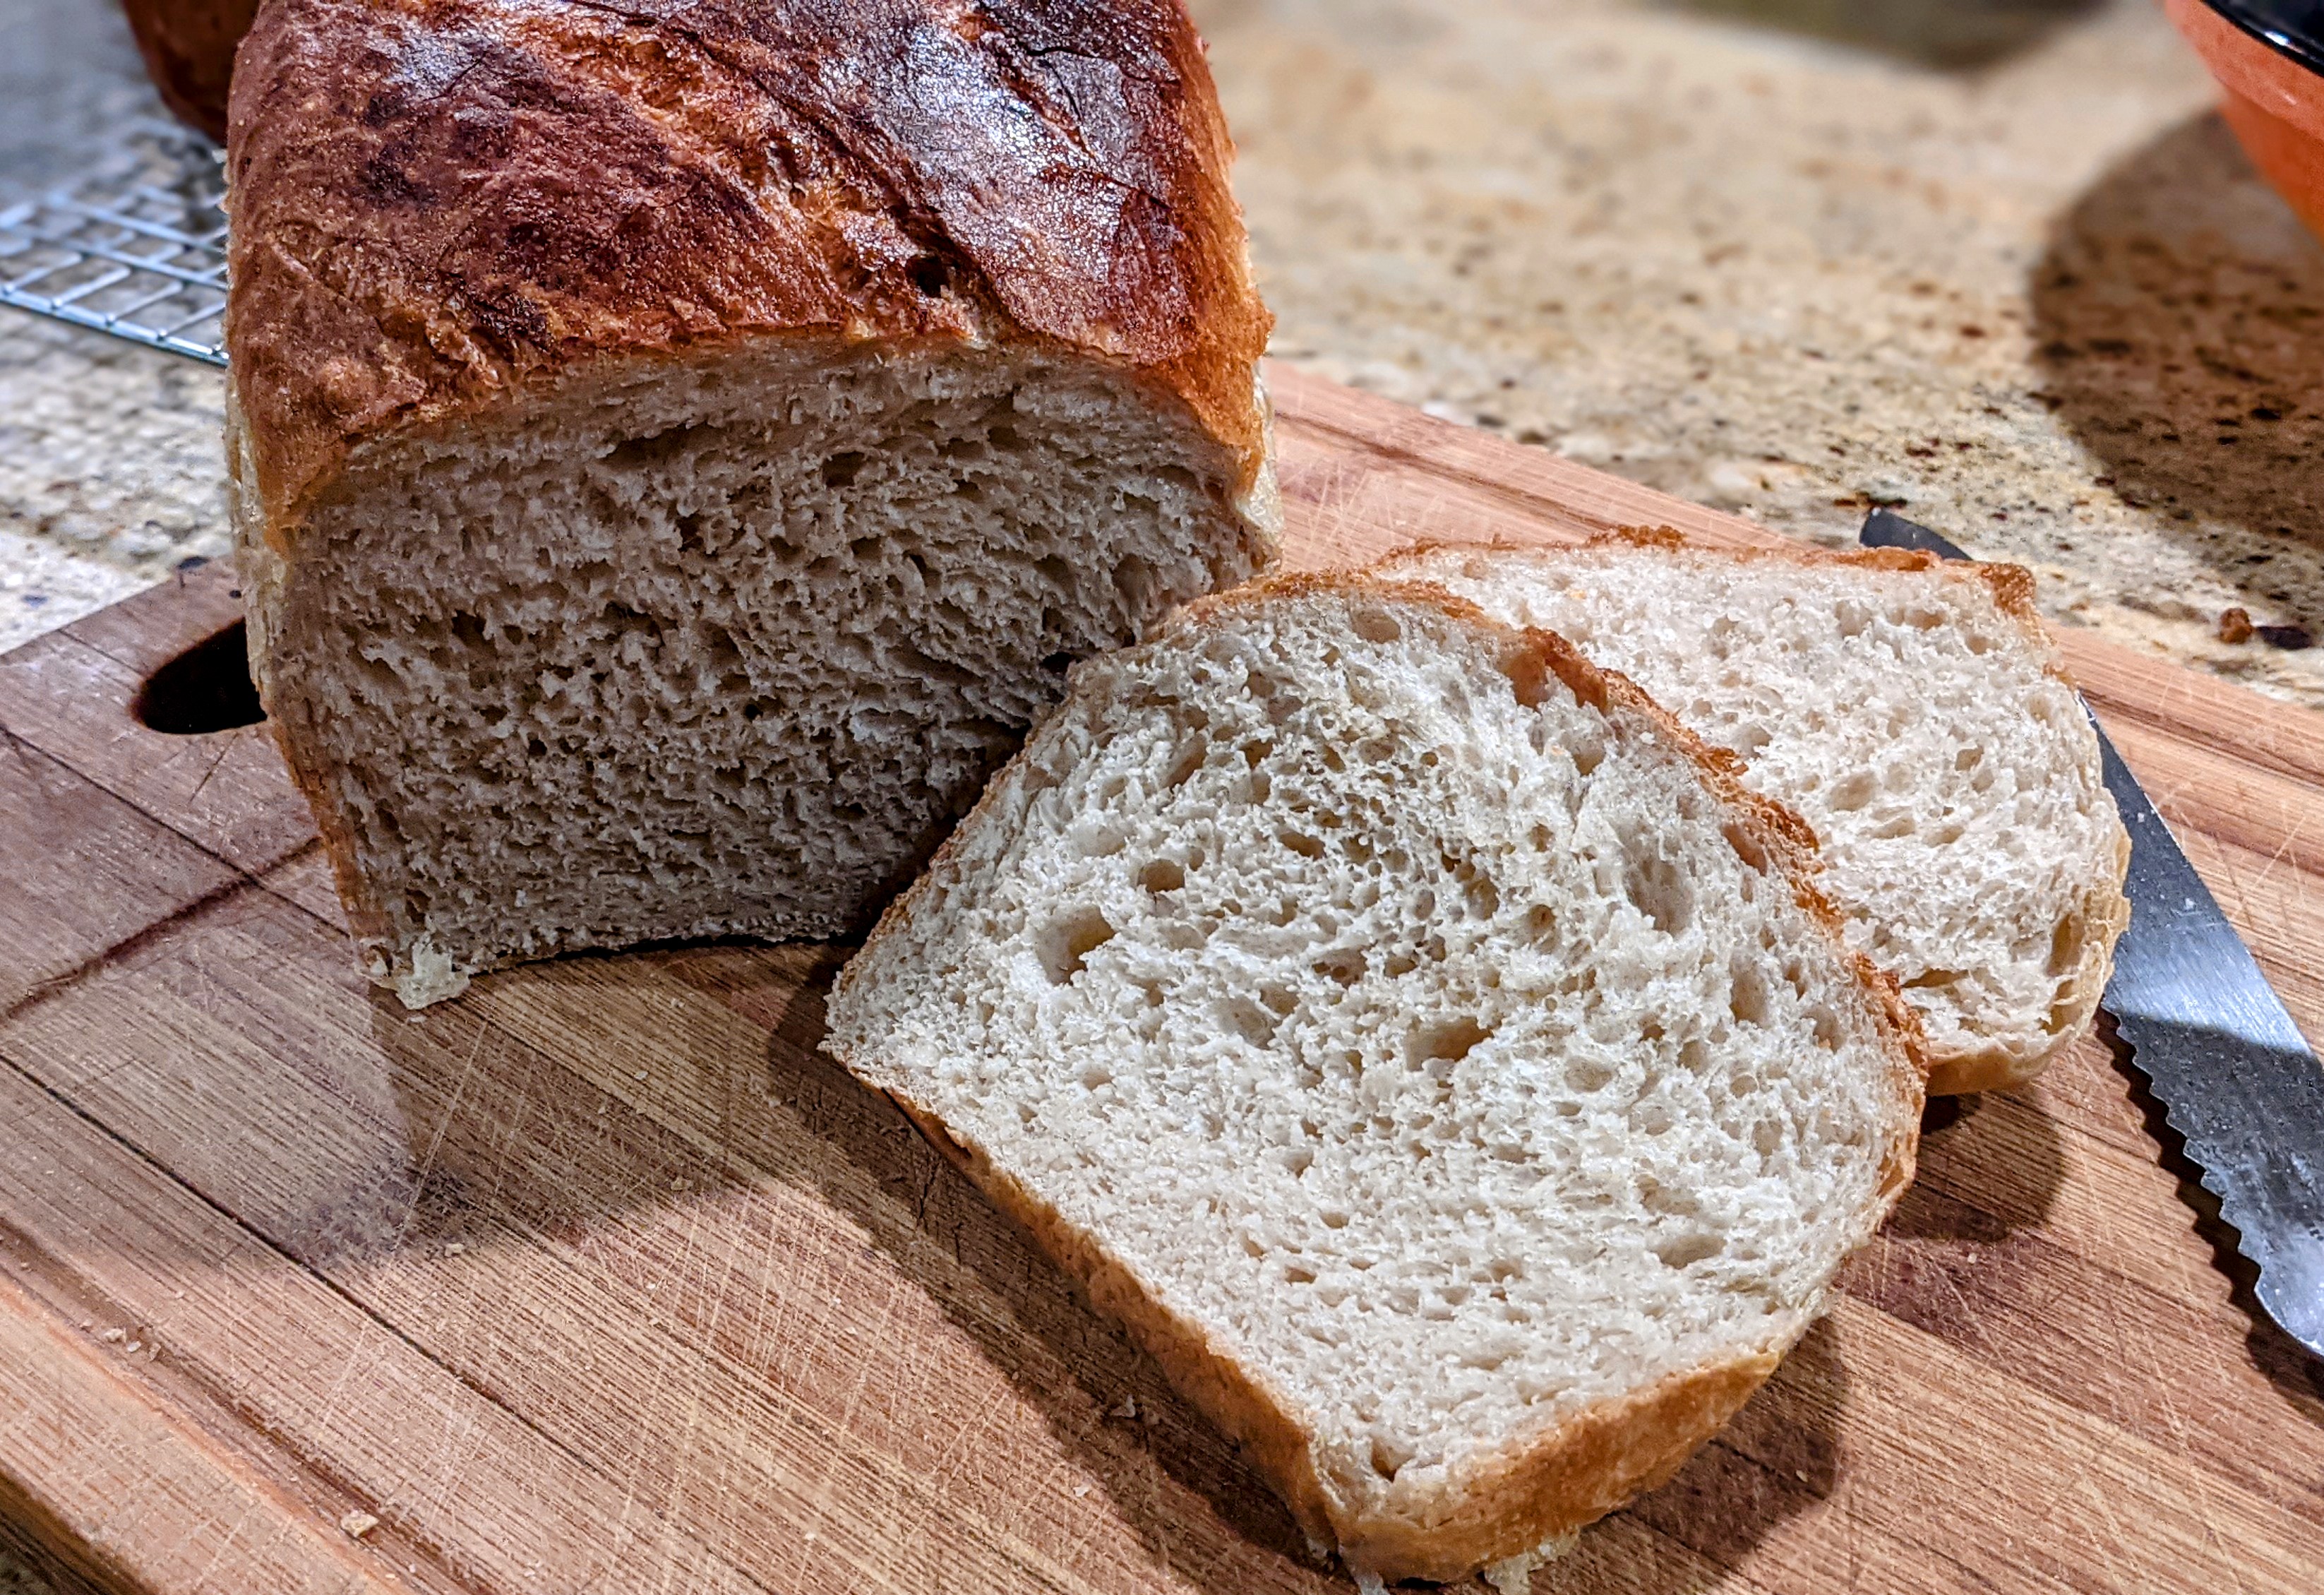
I know there’s this general obsession over sourdough this and sourdough that. And while making – and eating – fresh, sourdough bread is certainly satisfying, sometimes I get a real hankering for simple, yeasty bread. Plus, with my now very busy schedule that doesn’t permit me to bake nearly as much as I’d like, there are times when I just need the process to be absolutely straightforward. And I couldn’t think of an easier bread to make than simple, yeasty pan loaves!
I just pulled the loaves pictured above out of the oven about 20 minutes ago and the wonderful aroma of yeasty bread pervades my entire house! As with any bread, these take a few hours to prepare and bake, but the process is as straightforward as can be. These are perfect for those “work from home” days!
And the results! These have a light, thin, and crispy crust with a light, airy, and chewy crumb. Talk about a versatile bread! I just had some with butter and honey, but these make GREAT sandwiches!
Overall Formula
Bread Flour*
100.00%
Water
71.00%
Salt
2.00%
Yeast
1.25%
I used a 70%/30% blend of King Arthur Bread flour (12.7% protein) and Azure Standard Ultra-Unifine Bread Flour (14.7% protein but it’s also high-extraction)
Final Dough
Flour
933g
Water (~90ºF)
663g
Salt
19g
Yeast
12g
Total Yield
2 X 800g loaves
Optimal Dough Temp
~80ºF
Initial Mix/Autolyse. In a large bowl or container (I use an 8qt Cambro), mix all of the flour and all but 50g of the water until no dry flour remains. Once mixed, let it rest for 30 minutes to autolyse.
Final Mix. Sprinkle the salt and yeast evenly over the top of the dough mass, then pour the reserved water over the salt and yeast. Using a squeezing motion, work the water, salt, and yeast into the dough until fully incorporated. The dough will still be a little shaggy but that’s okay.
For both bulk and final fermentation steps, I place the dough and loaves into an oven with a slightly cracked door. The oven light will provide a little heat that will maintain the 80ºF dough temp I want.
Bulk Fermentation. About 1 1/2 to 2 hours or until the dough has expanded about 2 1/2 times in volume.
Normally, I recommend about 25% to 30% expansion. But we’re using a lot of yeast and it acts quickly and vigorously!Don’t worry, final fermentation is relatively short so we won’t be over-fermenting the dough.
Folding. Fold the dough 2 times in the first hour.
Divide and Preshape. Divide the dough into two 800g pieces. Shape into rounds, then let them rest for 15 minutes.
Shape. Shape tightly into logs that will fit into a 9″ X 5″ loaf pan. I use my batard shaping method that essentially creates an oval and I rely on the rising action to expand the dough in the pans. Once shaped, place each loaf into a 9″ X 5″ loaf pan.
Final Fermentation. 45 minutes.
Bake. Bake at 460ºF for 30 minutes. Use steam for the first 15 minutes. Brush with melted butter as soon as they’re out of the oven.
I told ya! This is as simple and straightforward as can be!
I’m surprised I haven’t posted a recipe for my poolish baguettes after all this time! I suppose I’ve been making pointage en bac baguettes for so long I completely forgot about these. But this evening after dinner I thought about what I’d like to bake and it occurred to me that I hadn’t made poolish baguettes in a long time. So I prepared a poolish for a nice 10-12 hour ferment. I can’t wait to bake them tomorrow morning!
What’s so special about using a poolish? The standard answer is that it adds flavor as the long fermentation time of 6-18 hours allows longer enzymatic activity adding to the complexity of the flavors of the dough. Plus, with the very small amount of yeast used, the bacteria have some time to do their thing and release organic acids into the dough. That adds flavor, but the acid also helps in making the dough more extensible. Cool stuff!
With these baguettes, the flour of the poolish represents 25% of the total flour of the recipe. Or put in simpler terms, the poolish weight is 50% of the total flour.
Overall Formula
Flour
100.00%
Water
75.00%
Salt
2.00%
Yeast
0.43%
Poolish
AP Flour
200g
Water
200g
Yeast
0.2g
Final Dough
Flour – You can use different flour blends. It doesn’t have to be only bread and AP flour.
571g
Water
381g
Salt
15g
Yeast
1g (cold ferment) 3g (room temp)
Preferment
381g
Total Yield
1353g 4 X 335g 55-60cm loaves 6 X 225g 40cm loaves
Optimal Dough Temp
78°-80°F
Make the Poolish. Though the recipe only calls for 381g of poolish, I recommend making 400g, as there will always be some loss in the process. Combine all ingredients in a bowl, cover with plastic and let sit overnight at least 6-8 hours. The poolish will be ready when it’s nicely bubbled on top and passes the float test (it could be doubled, but don’t necessarily rely on that). Note that in cooler weather, the poolish will take longer to mature, sometimes up to 18 hours.
Mix. Mix all the ingredients together to form a shaggy mass.
Bulk Fermentation. 1 1/2 to 2 hours or 6-18 hours in the fridge. Bulk fermentation is finished when the dough has expanded about 50%.
***If you want to do a long, cold bulk fermentation, I recommend using no more than 1 gram of yeast. Technically, you could forego the yeast altogether as the poolish will be full of yeast.***
Folding. Whether doing a cold bulk fermentation or not, stretch and fold the dough every 20 minutes in the first hour. By the third fold, the dough should be smooth and luxurious and will be highly extensible.
Divide and Pre-Shape. Divide the dough into 4 pieces at 335g or 6 pieces at 225g. Once divided, letter fold each piece by stretching one side, then folding it to the center, then stretching the other side and folding it over the body of the piece. Then roll the piece up like a jelly roll perpendicular to the folds, seal the seam, then place the piece seam-side-up on a well-floured couche.
At this point, it’s probably a good idea to preheat your oven to 475°F.
Final Fermentation: Depending on the ambient temp of your kitchen, final fermentation can take anywhere from 30 minutes to 2 hours. To determine when the loaves are ready for the oven, poke a floured or wet finger about a half to three-quarters of an inch into a loaf, then pull your finger back quickly. Observe the rate at which the indentation comes back. If it doesn’t come back at all, pop the loaves into the oven immediately – you’re extremely close to over-fermenting the dough. If it comes back quickly, and almost fills the indentation back up, give it a bit more time. If it comes back quickly, but immediately slows down, then you’re ready to bake!
Score. See below…
Make sure your cuts overlap 1/3 of the previous cut!
The important thing to note with scoring (and unfortunately Chef Markus doesn’t mention this) is that you have to make sure that the angle of your blade is extremely shallow (almost flat) because you want to create a flap. Also, your cut doesn’t have to be deep – no more than 1/2 inch. So, as the chef says, your cuts need to be as parallel as possible down the loaf, and your blade angle needs to be as shallow as possible to create a flap.
Bake. Transfer the loaves to a transfer board and score (see below). Bake at 475ºF with steam for 12-15 minutes or until the loaves start taking on color. Vent the steam and remove your steaming container, then bake for 12-15 minutes at 425ºF or until the loaves turn a nice, deep, golden brown.
NOTE: The bake times are approximate! The temperatures I listed work for my home oven. They may not work for yours. The important thing to note is that within the first 10-15 minutes while the loaves are on steam, the baguettes take on just a little bit of color. If they’re golden-brown to dark in that short period of time, your oven is too hot, or you need to lower your rack a little the next bake. It takes a few times to get the sweet spot.
Alternate Baking Technique. I just started experimenting with a gentler baking temp: 400ºF. 15 minutes with steam, 20 minutes dry. This will produce a slightly thick, crunchy crust and a light, airy and creamy crumb. It’s pretty awesome! And the oven spring is pretty amazing!