Baking By Feel The Old School Way – No Recipe!

I woke up early this morning with a question in my head: Am I being a bit too academic with my bread-making? Like many bakers, I live by my formulas. They ensure that my loaves are consistent, no matter what I bake. But it occurred to me that bakers long before me had been baking by feel for centuries. They’ve developed a certain instinct about how their dough should look and feel.

Then I remembered watching four-part series on Netflix by Michael Pollan called Cooked. In the bread episode, there was a woman who made her bread in a wide bowl, just adding her ingredients in a seemingly free-form manner. It was fascinating watching her work! Then I harkened back to a video I saw of an Amish farmer making bread. No measurements, just going by the consistency of his dough. Again, fascinating. Then finally, at the world-famous Poillane Bakery in Paris, the bakers don’t use any measuring devices. They study the process for a year and a half!

That got me thinking: Have I developed those kinds of chops? After all, I’ve been baking bread for over 40 years. And especially in the last year, I feel I’ve developed certain instincts of how my dough should look, feel, and behave. So I decided to challenge myself today and go completely native, that is, use absolutely no measuring devices of any kind to assemble my dough.

The Starter

I had tailings leftover from my bake yesterday, so I fed my starter this morning with some AP flour, eyeballing the flour and water to relatively equivalent amounts.

I’m going to do something a bit different once it’s ready to be used and that is to mix it with a large quantity of water, then gradually add it to some flour until I get a consistency that’s similar to 65% to 70% hydration dough. This is consistent with what I do already by dissolving the starter in the water (sans a reserved amount for bassinage), then adding that to the flour.

I’ll let that mixture autolyse for a half-hour or so, then I’ll add the rest of the water and the salt, which I will also eyeball. Truth be told, I eyeballed what I think is 20 grams of salt based on the little crucible that I normally use for weighing my salt.

I am going to do a bit more of a bassinage. Normally, it’s about 50 ml of water. I think I may reserve more. I’ll play that by ear. Once I have the mix to the consistency I want, then I’ll do the standard 3-hour bulk fermentation with folds every 30 minutes or until I get about 25%-30% expansion.

I’m a little torn right now about the dividing and shaping. I’m a little anal about things being equal, so I’m leaning towards dividing my dough using a scale. But we’ll see when I get there… That said, I just might not do that to see if I have the chops to create consistently-sized loaves without a scale. We’ll see…

As far as shaping is concerned, I will do my best to not use any bannetons. Everything will be hand-shaped. This means I will have to rely entirely on my dough development and shaping skills to produce loaves that will literally stand up. And as I write this, I’m actually pretty excited. In the back of my mind, I’m confident that I’ll be able to pull it off with good results. But as with anything, you never know until you see the finished product.

The Process

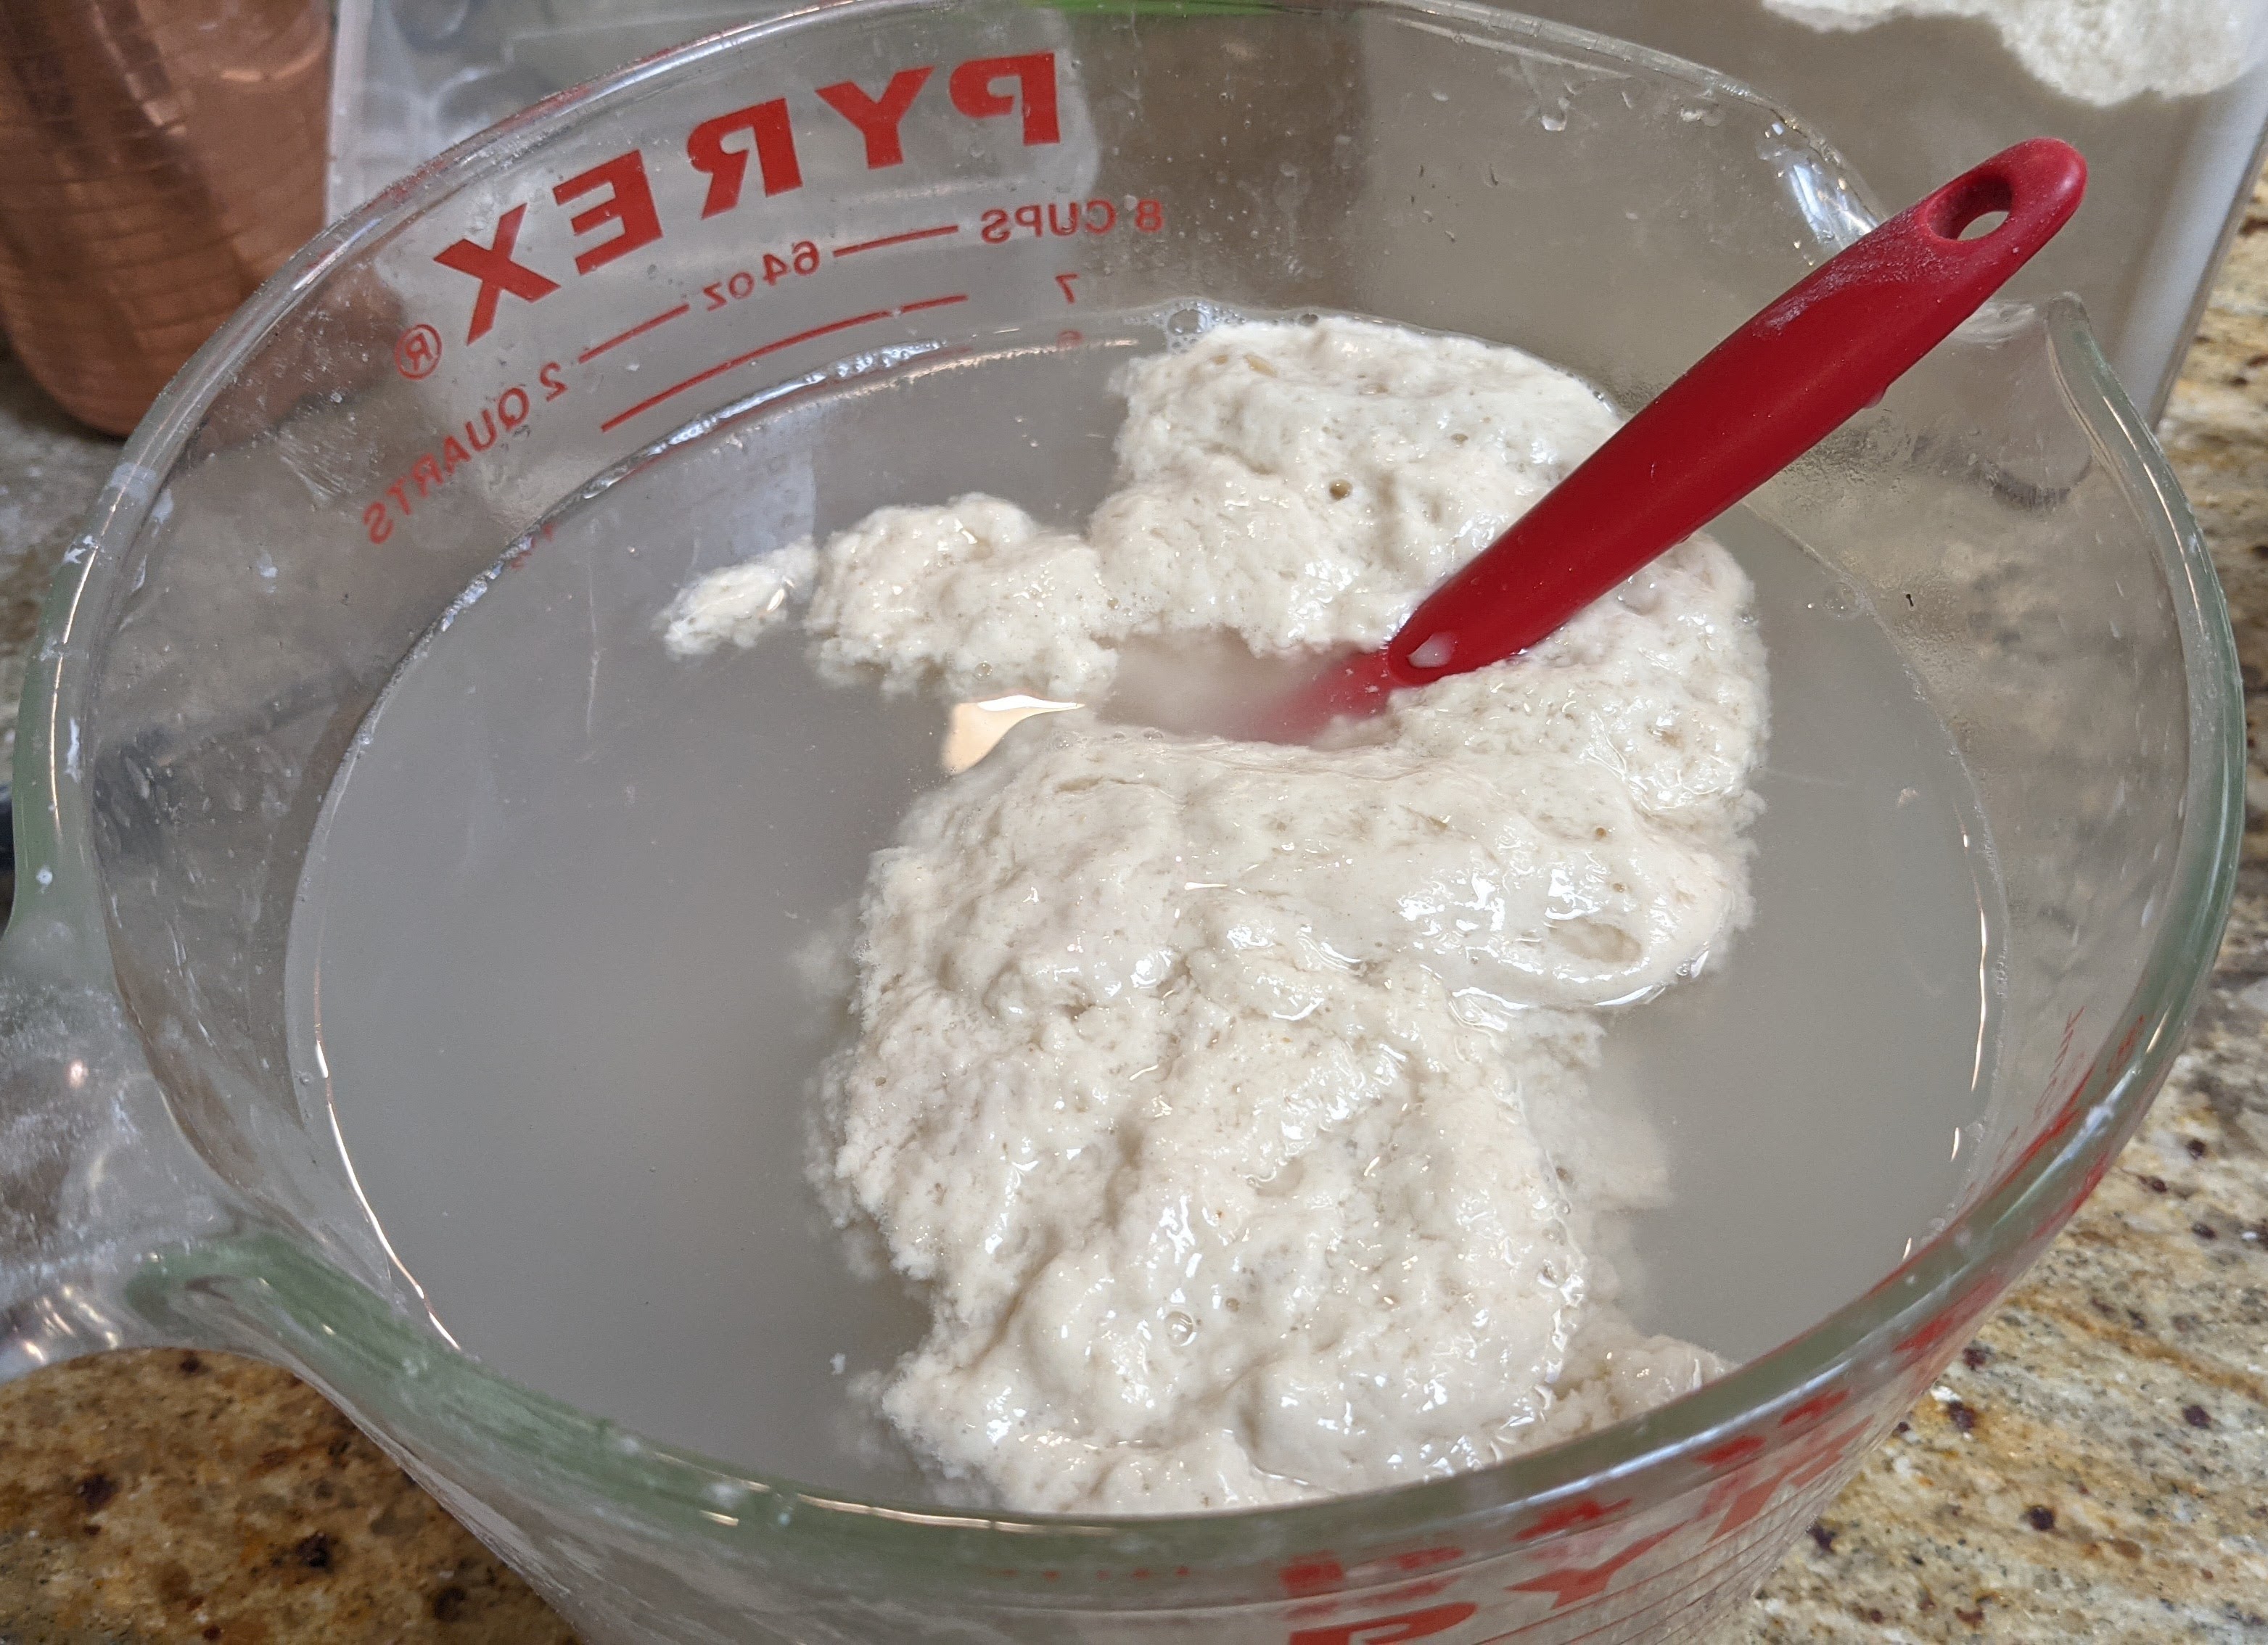
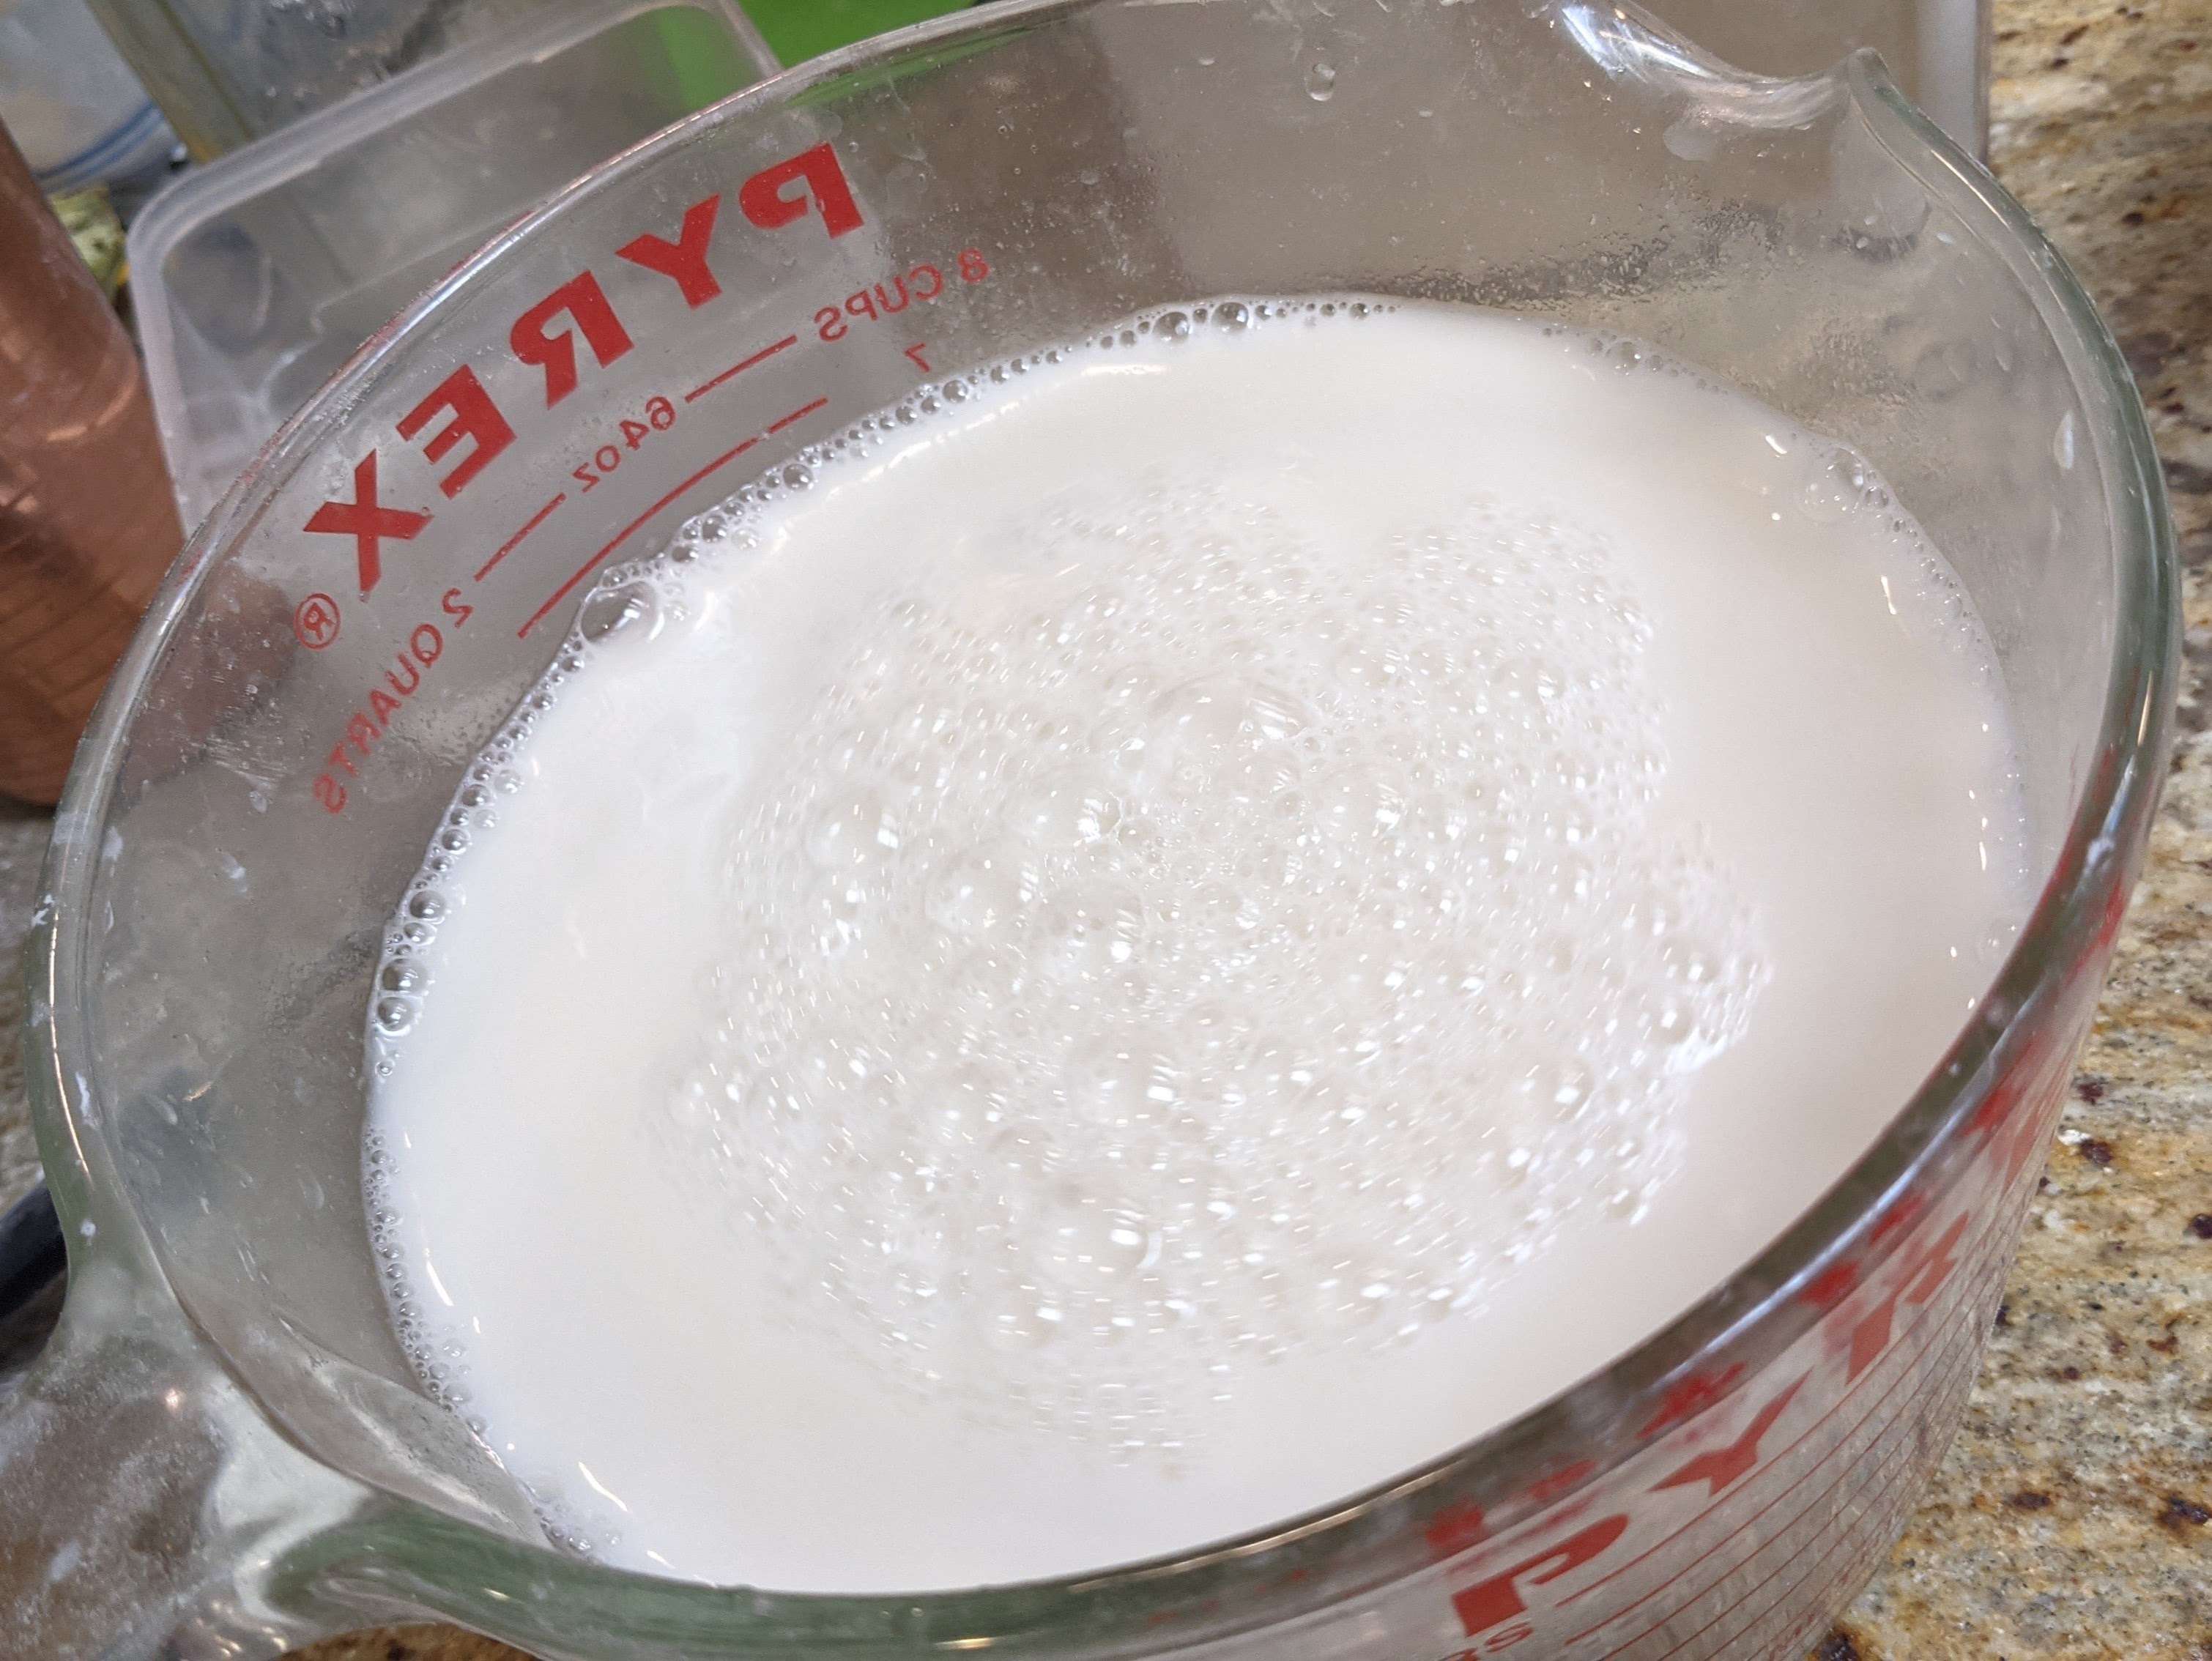
The first step in the process was to completely liquify the starter. This liquid would then be added directly to the flour as shown below.

Using a Danish dough whisk made quick work of bringing the liquid and flour together.

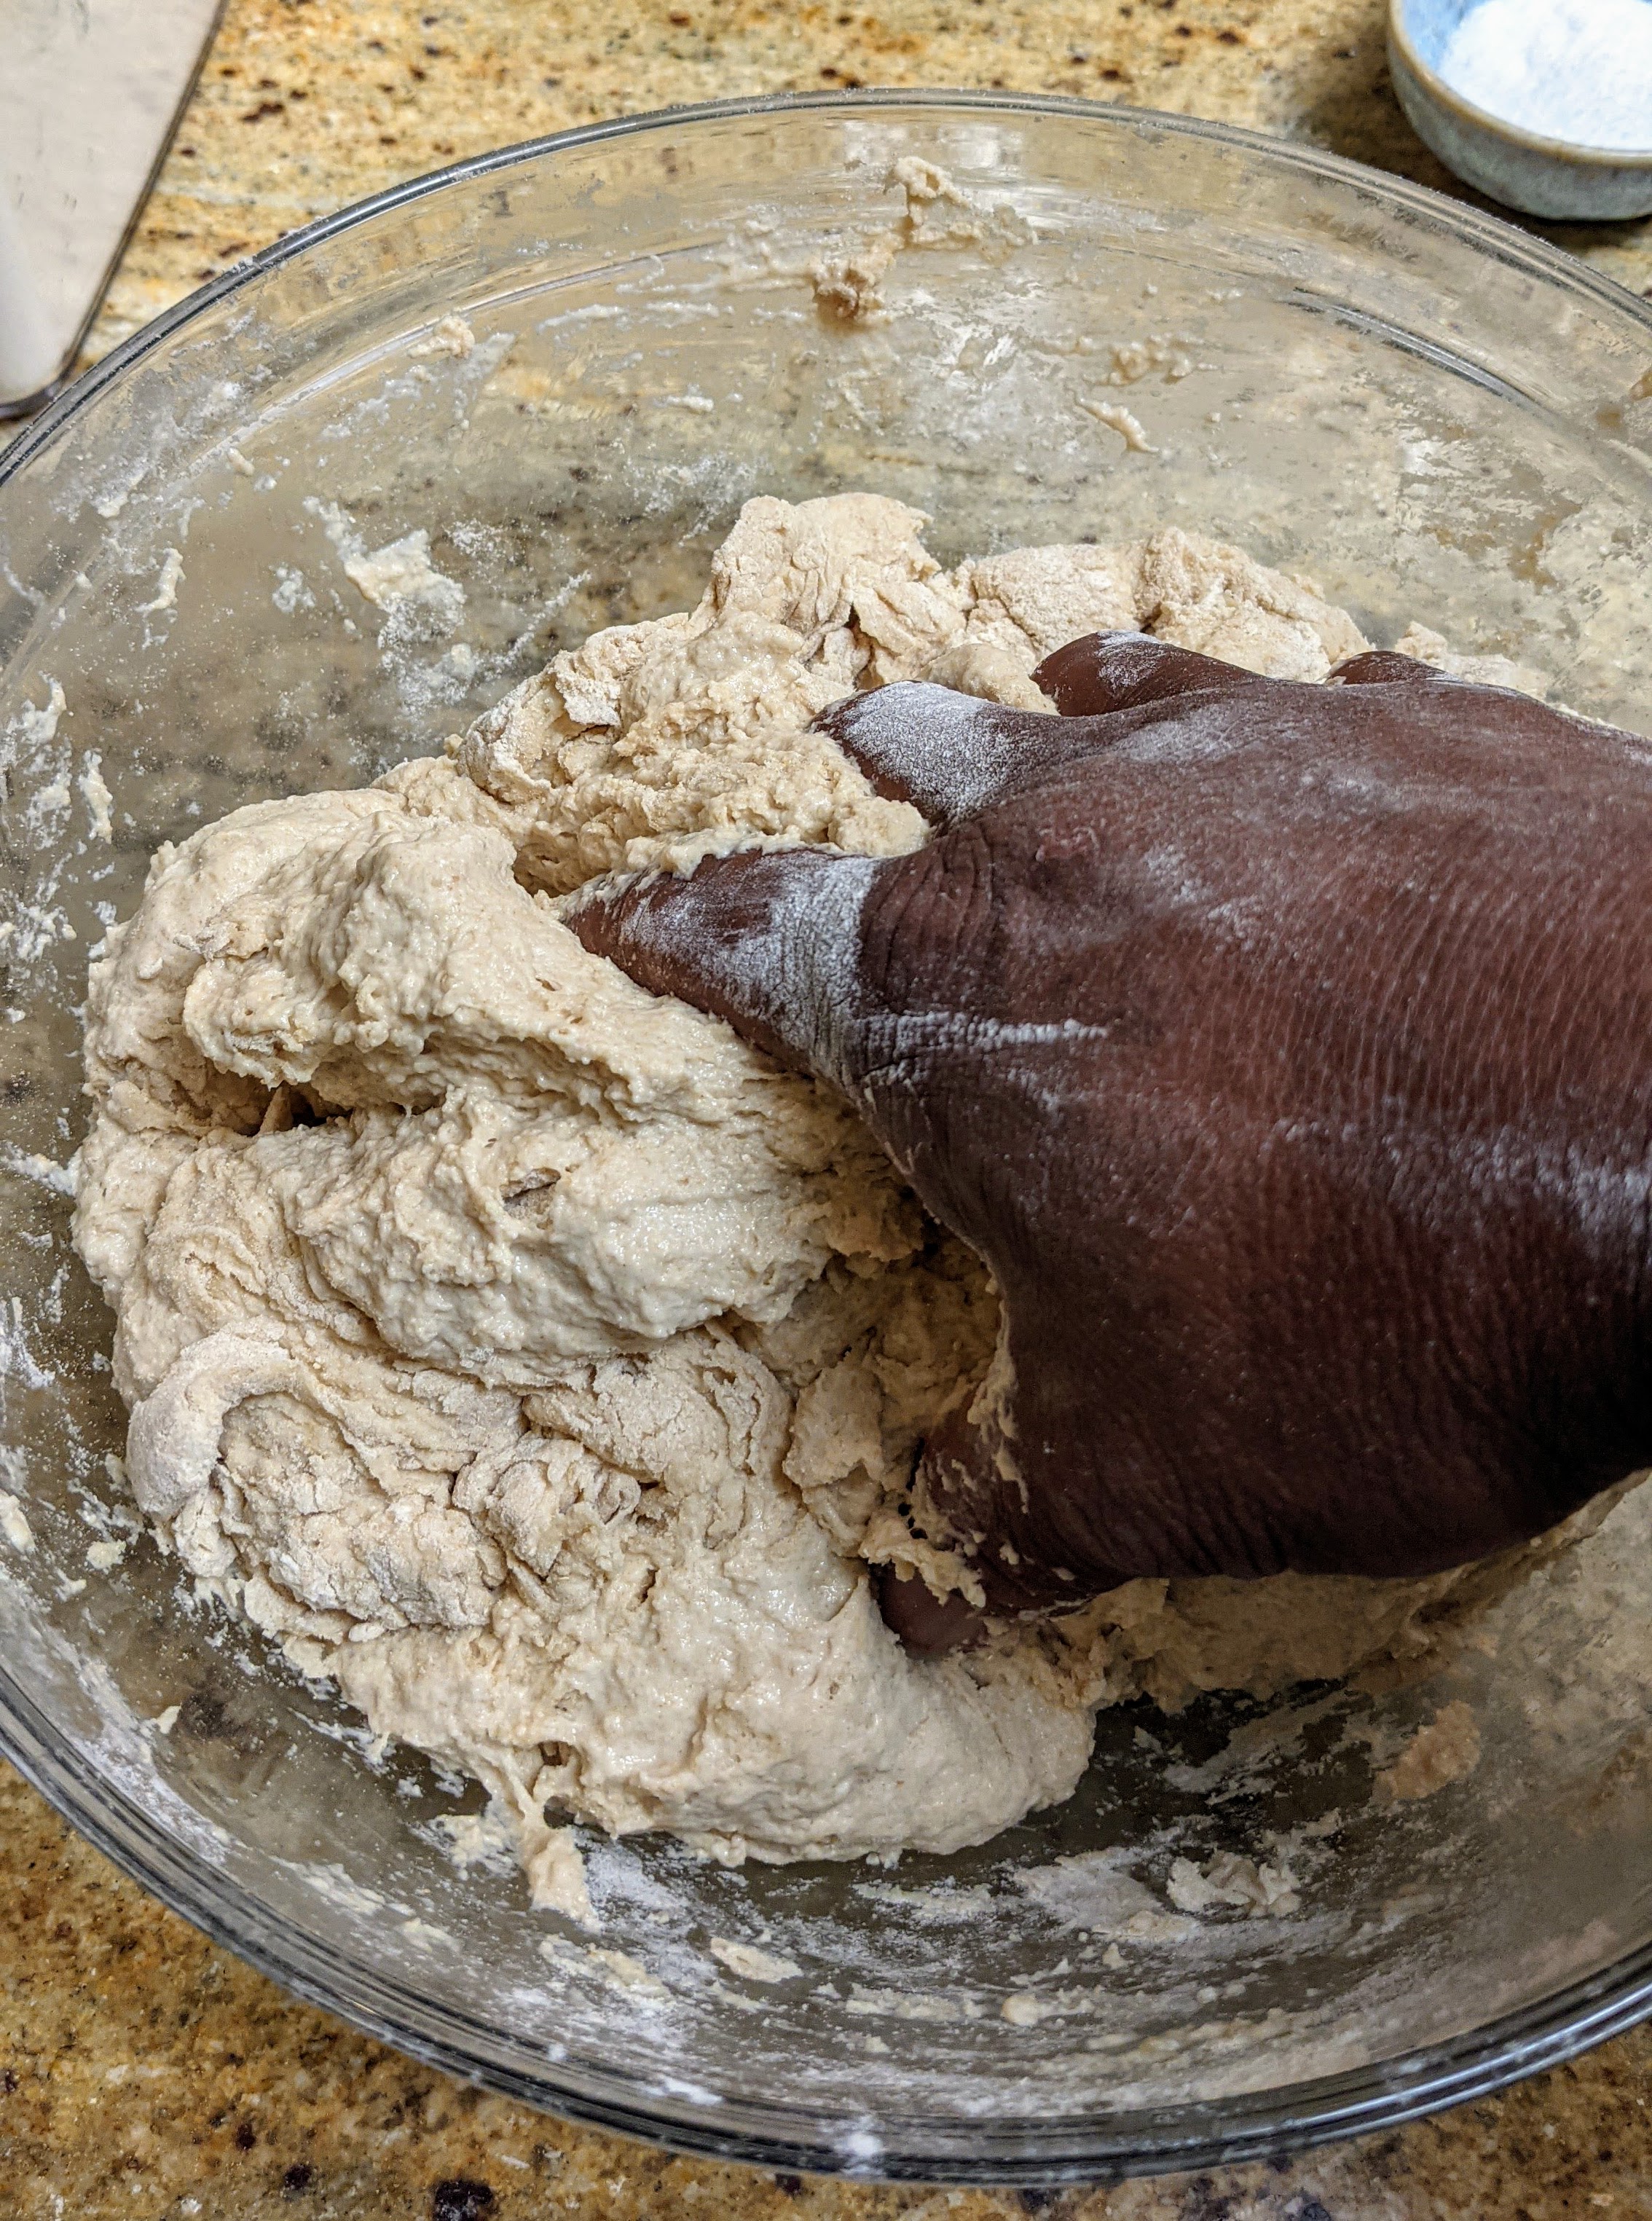
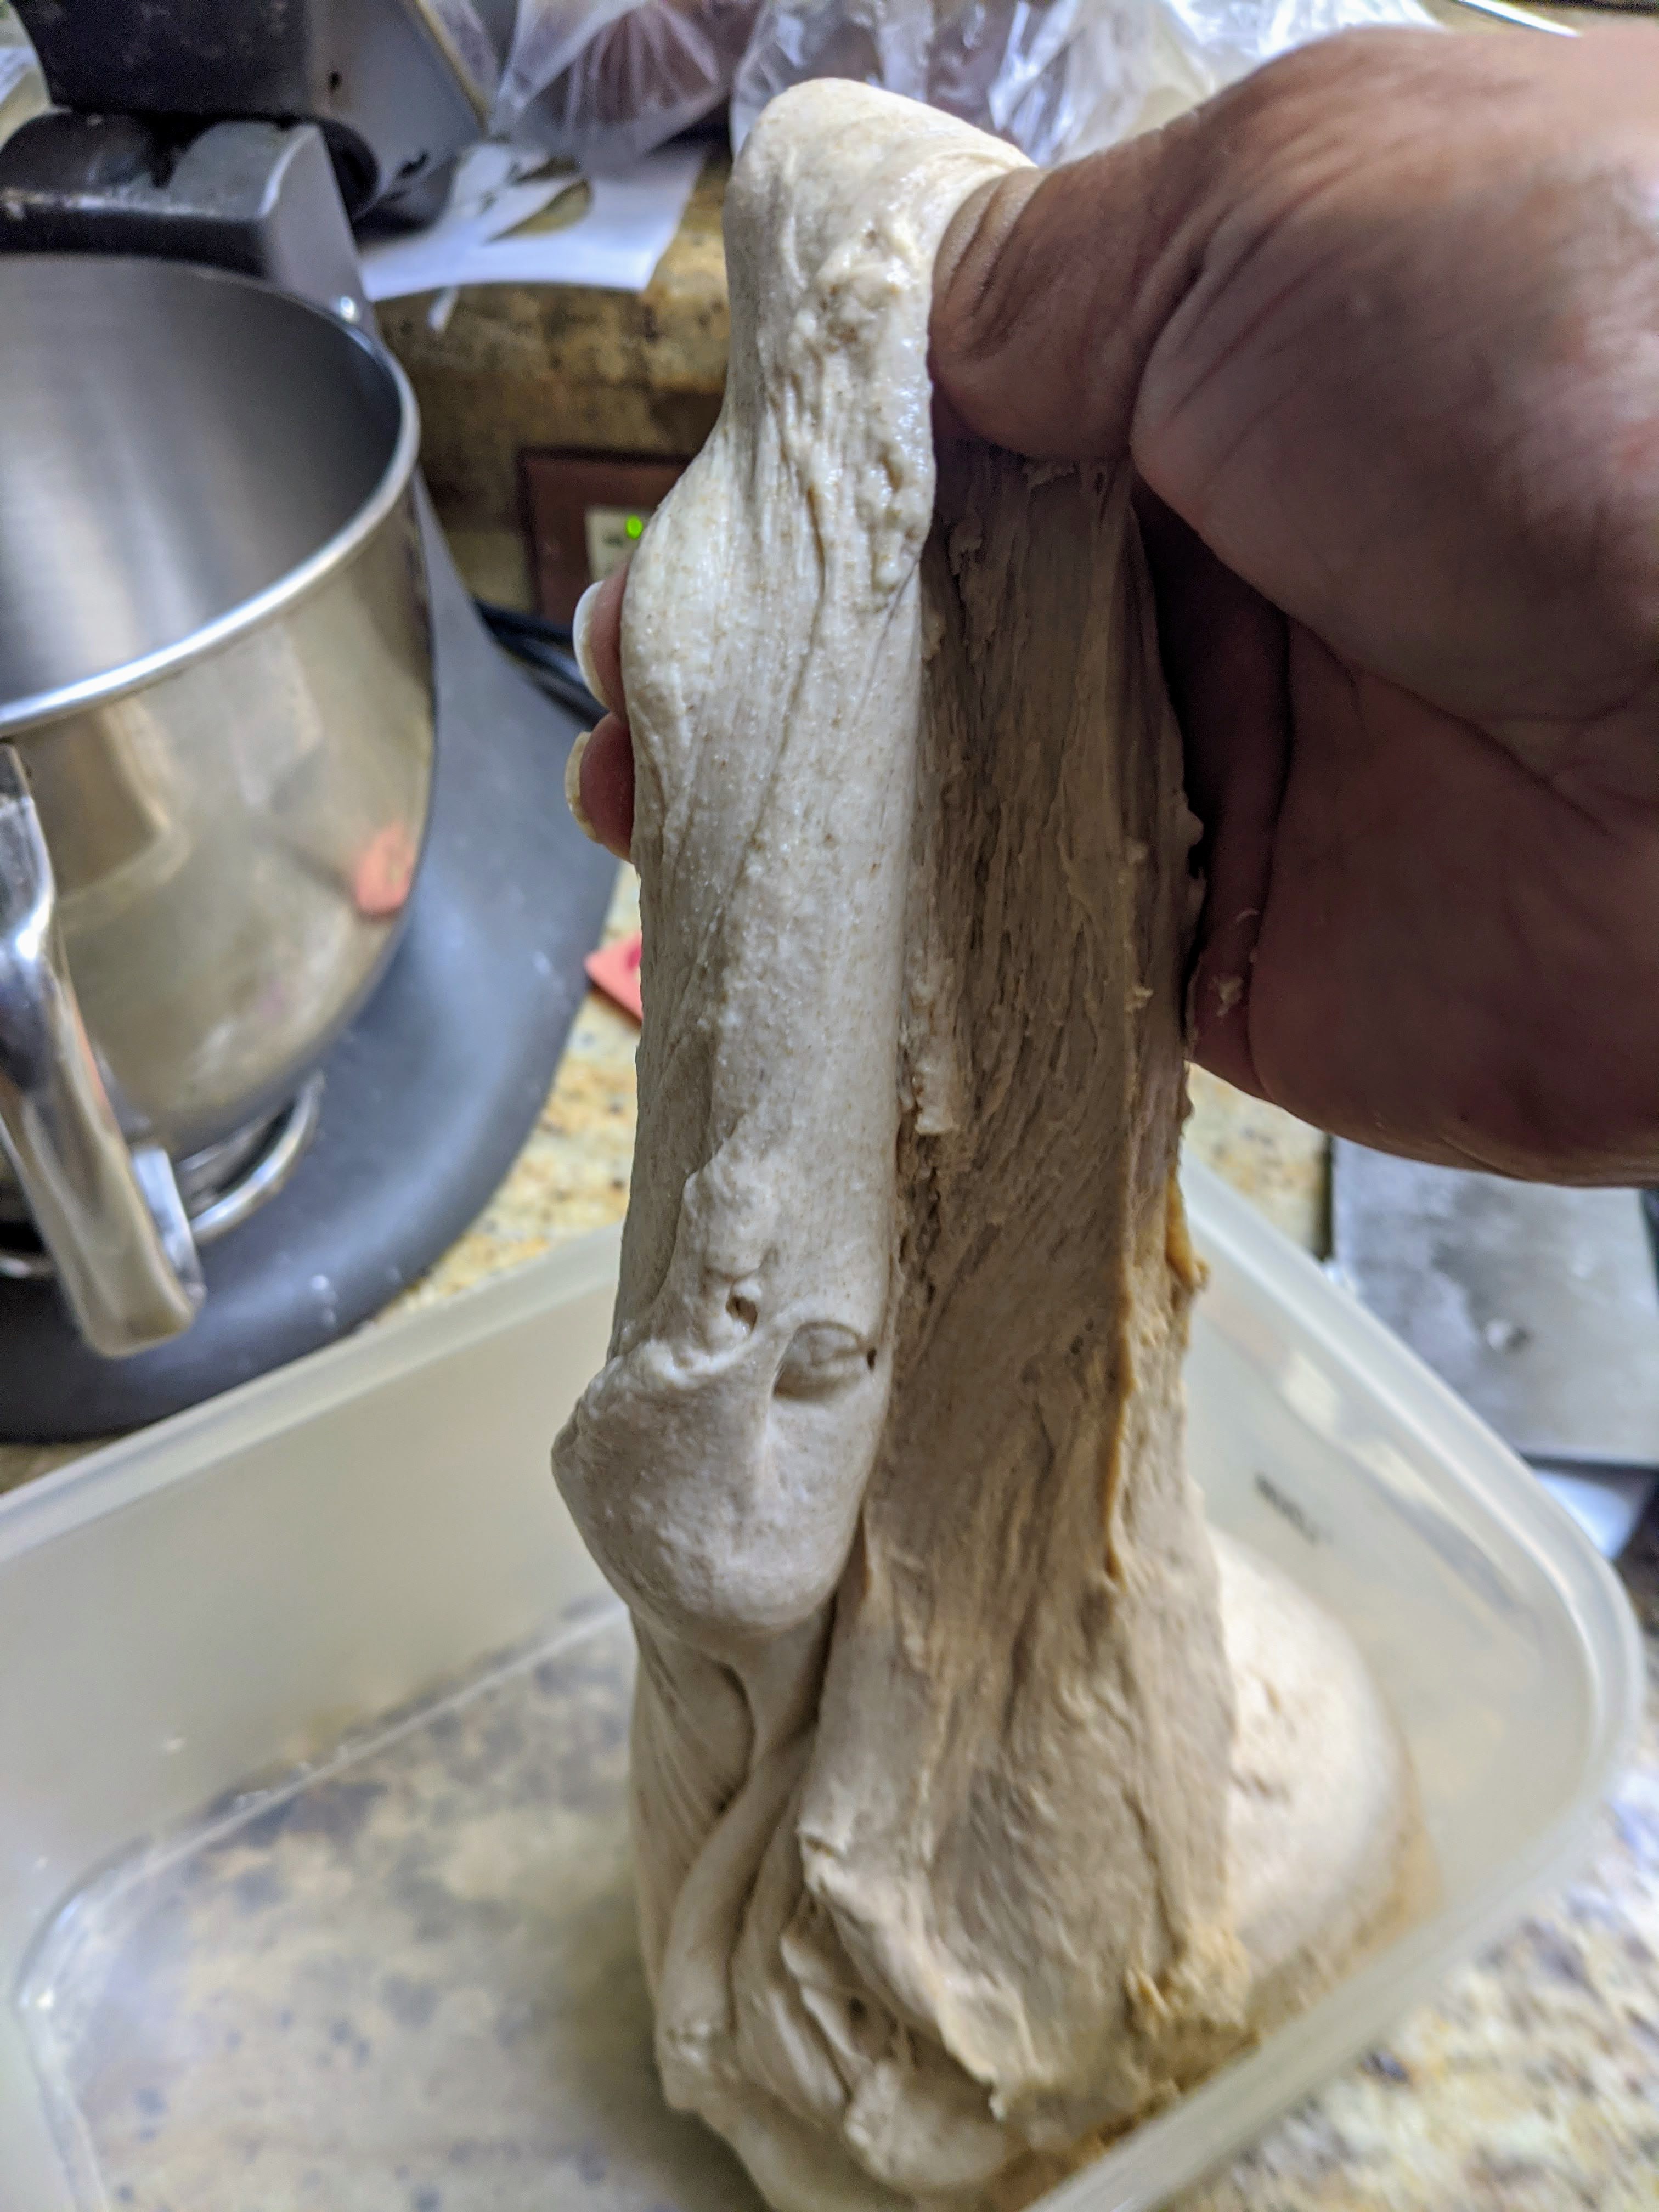
Once I had everything mixed, I dialed in the consistency of the dough by mixing by hand, adding a little extra flour and liquid as I didn’t feel I had enough dough. Mixing by hand at this point was important because it allowed me to really feel the dough.

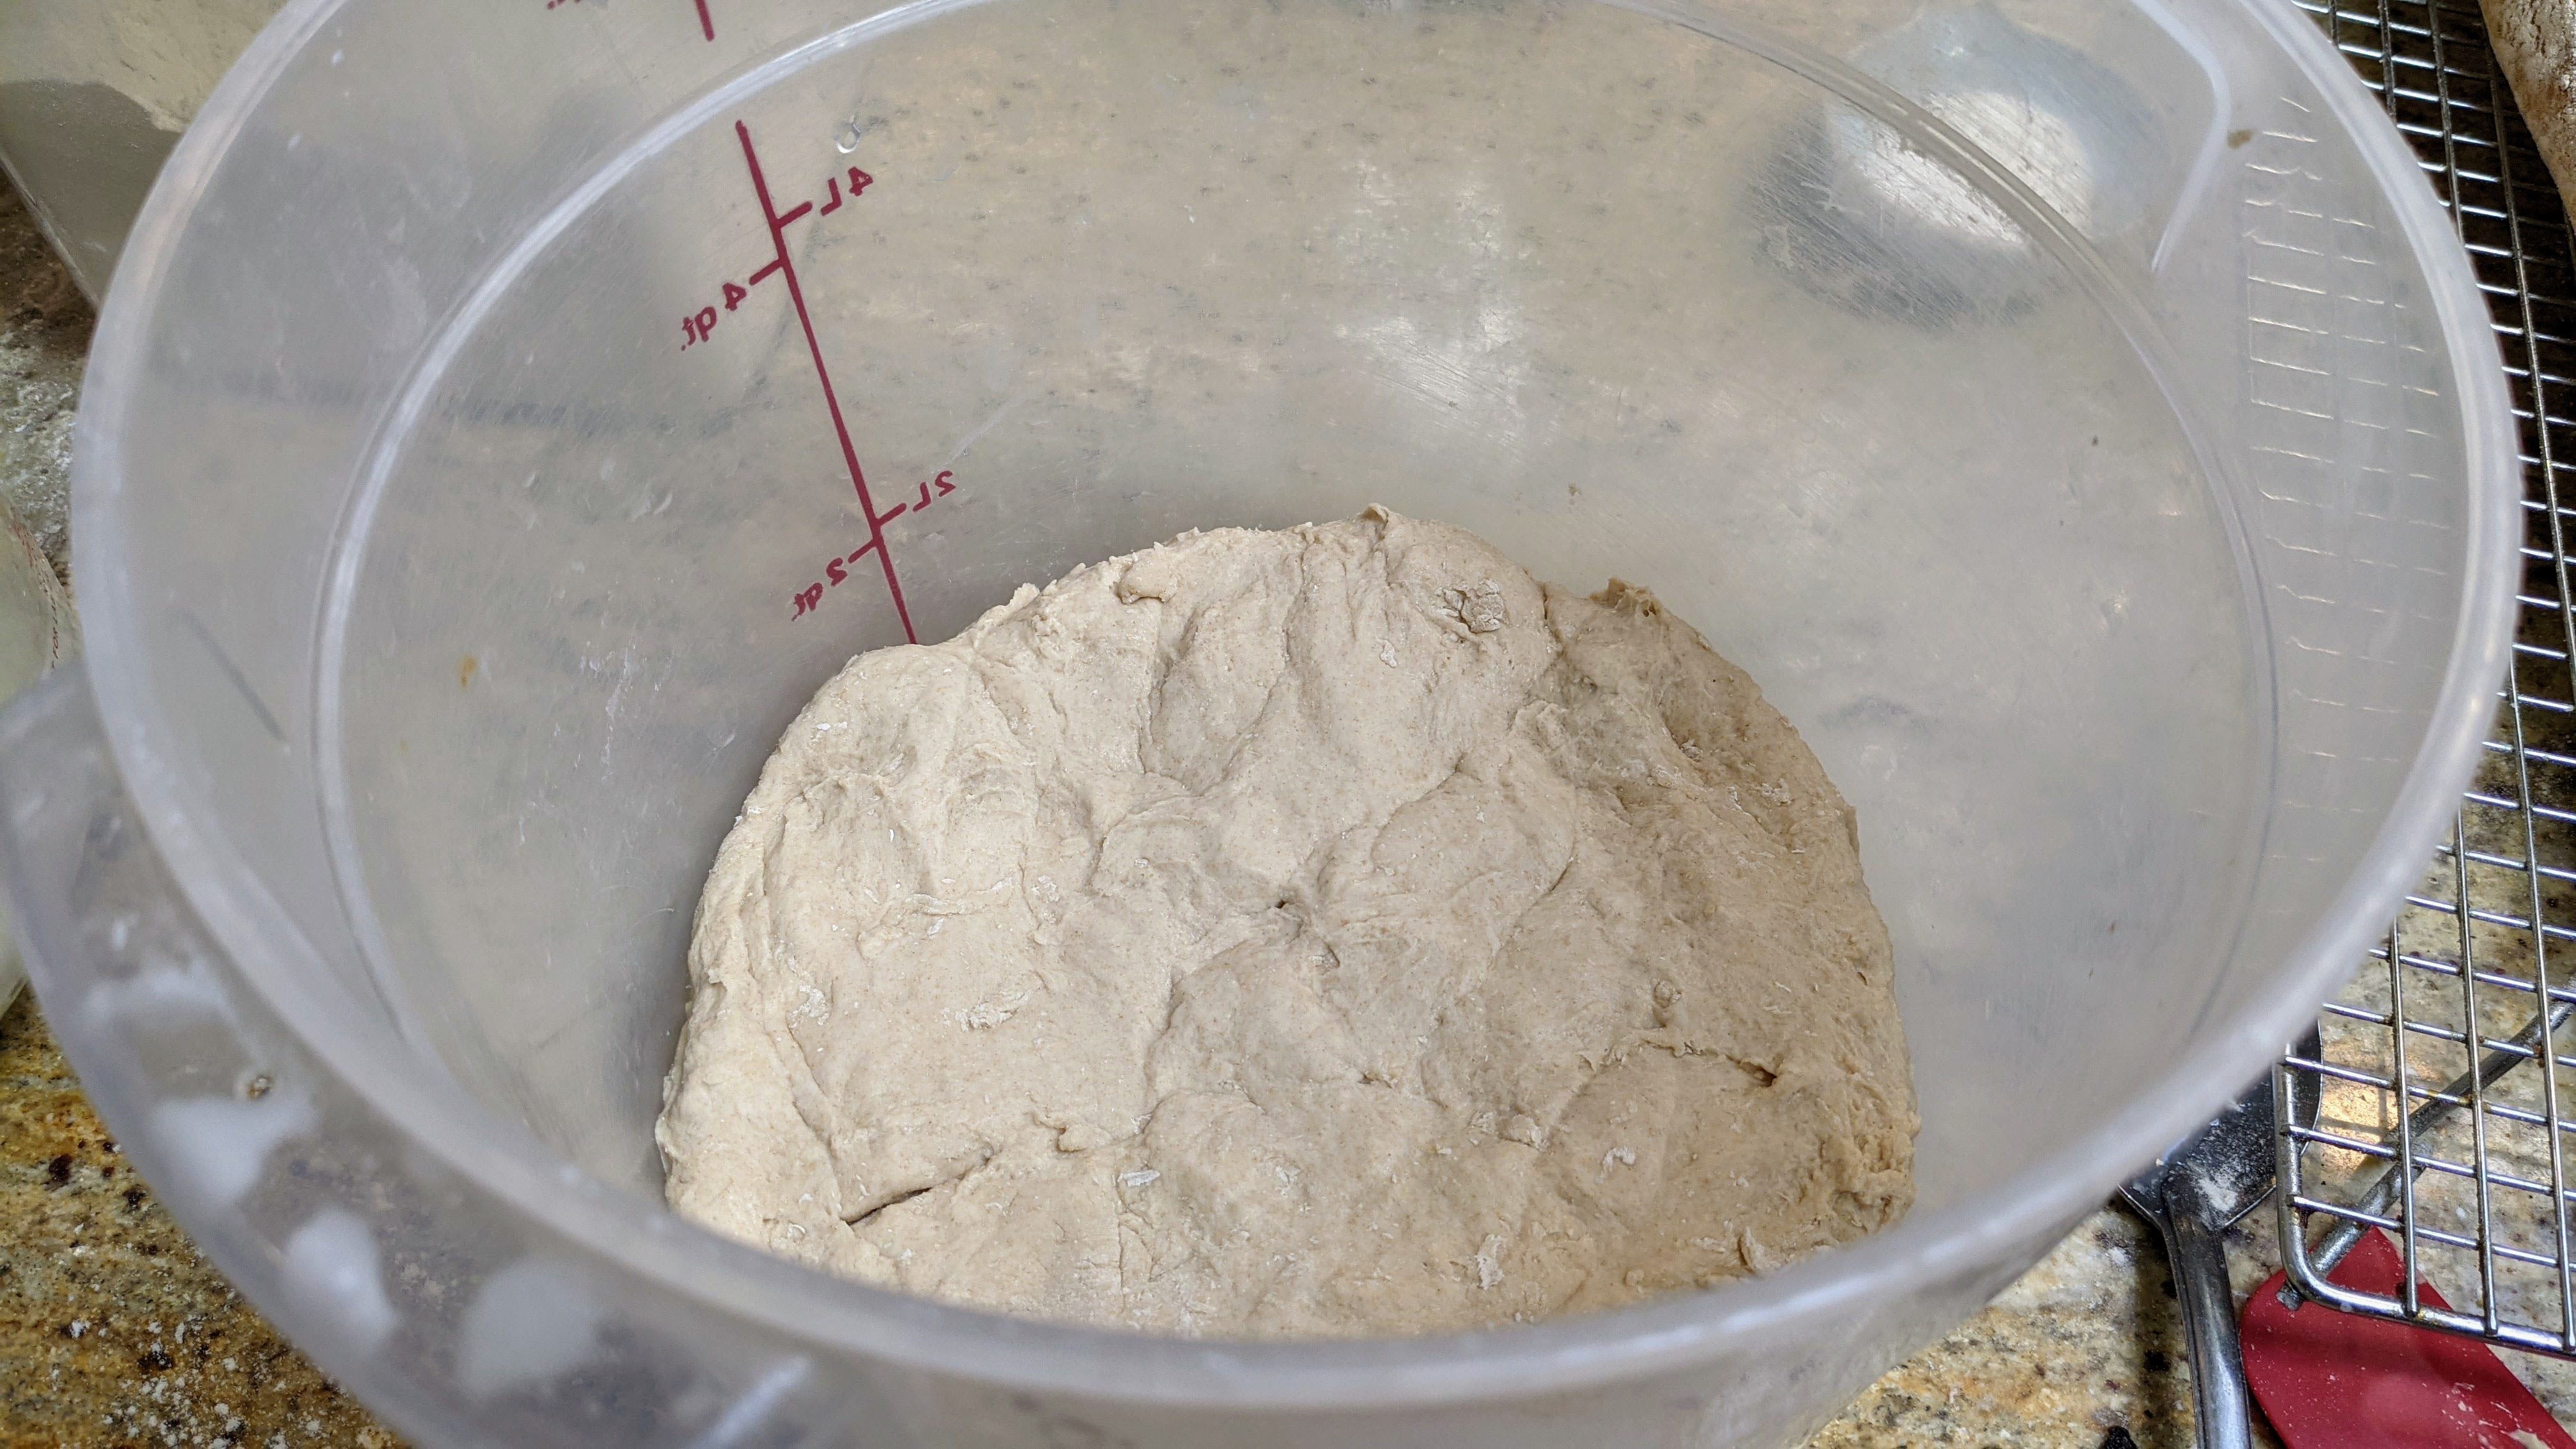
Once I dialied in the dough’s consistency, I transferred it to my bulking container to autolyse for 30-45 minutes. After that’s done, I’ll add the salt and a little more liquid to get to the approximate hydration (feel) that I want. There’s whole grain Kamut in this flour, so I’ll probably go a little wetter with the final dough.

I will admit that I’ll be leaning a lot on what I learned in Tartine N°3 in developing dough with whole grain flour. In that book, Chad Robertson employs his basic country loaf process, but has some valuable handling tips (read: being freakin’ gentle with the dough) accompanied by a fairly long final fermentation that has made a HUGE difference in how my whole-grain loaves come out.

After five sets of stretch and folds, the dough was super extensible, so I decided not to proceed with the sixth fold and let fermentation proceed untouched for another hour or so. Since I have a lot of high-extraction and whole grain flour in the dough, I need to be absolutely careful to not degas the dough and ruin all the work it has done the last two and a half hours.

I’ve mentioned in the past that I try not to be too parochial with recipes and techniques. That’s important because dough is affected by so many different factors. For instance with this particular batch of dough, about a third of the flour is really strong high-protein flour (17%+). I usually use it in conjunction with whole grain flour to help compensate for the bran that tends to cut the gluten.

But I have to say that at this point, the dough is feeling absolutely luxurious and is beginning to get nicely aerated. I should be shaping in the next couple of hours.

The Next Day…

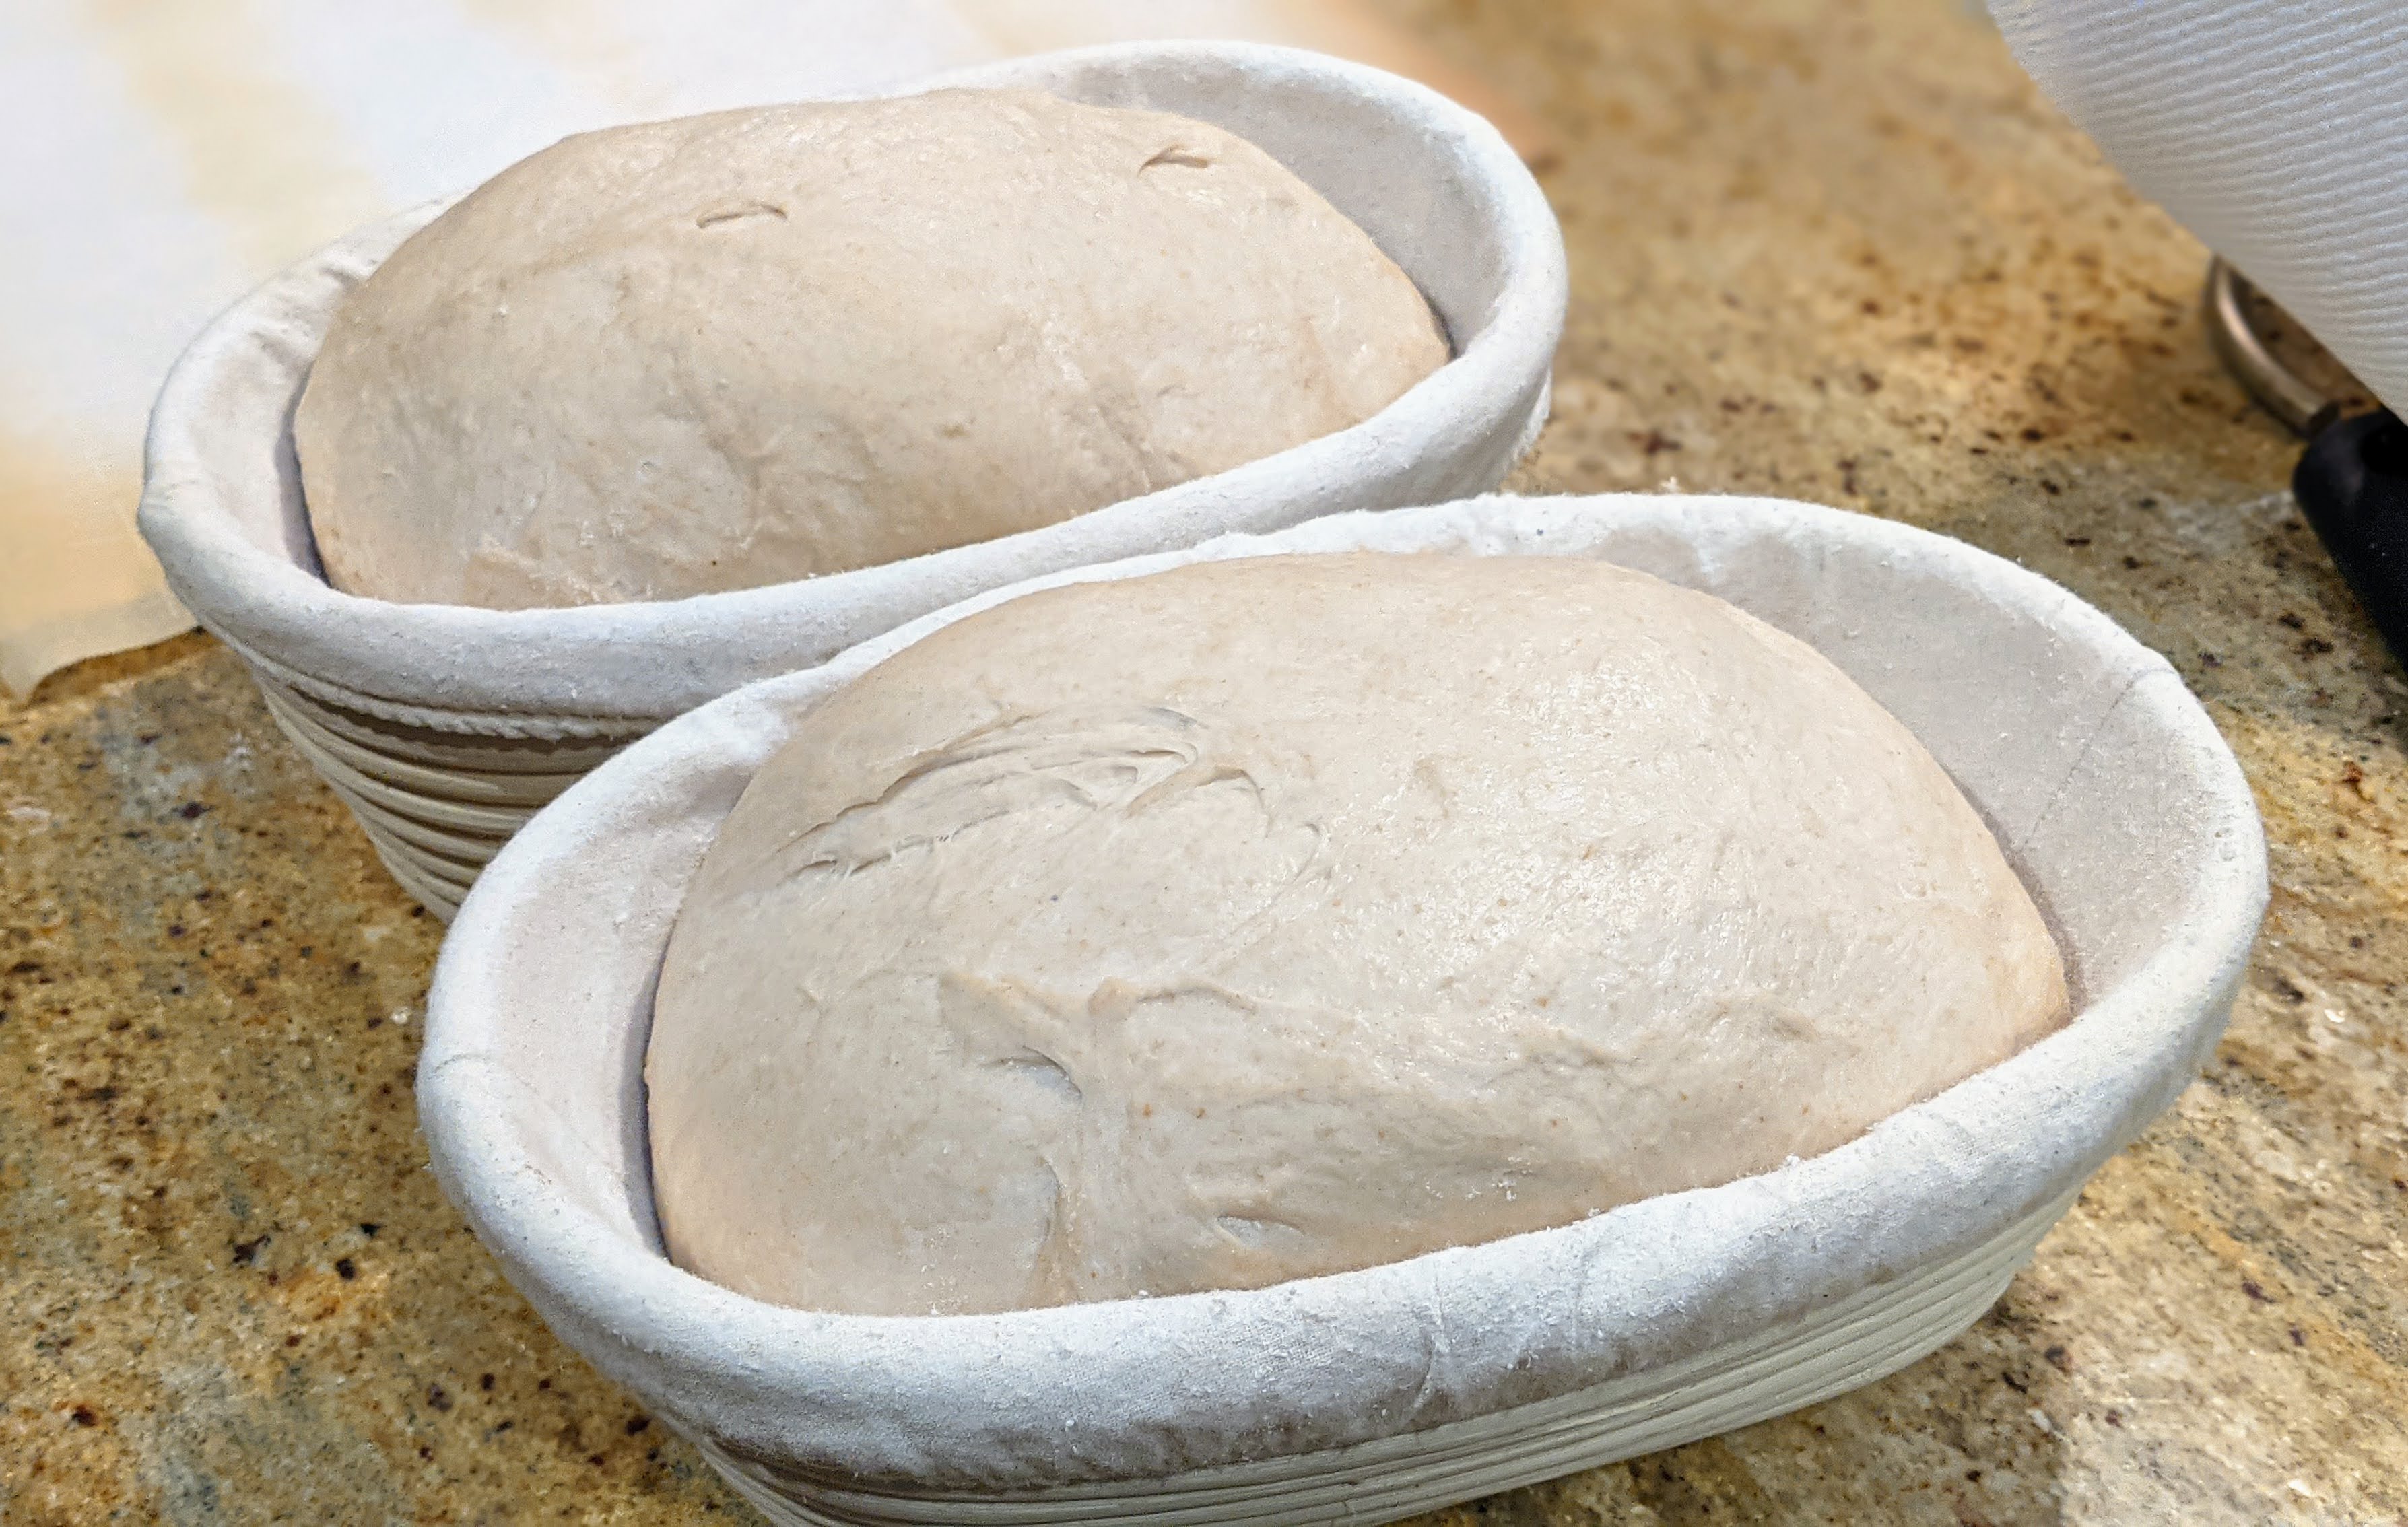
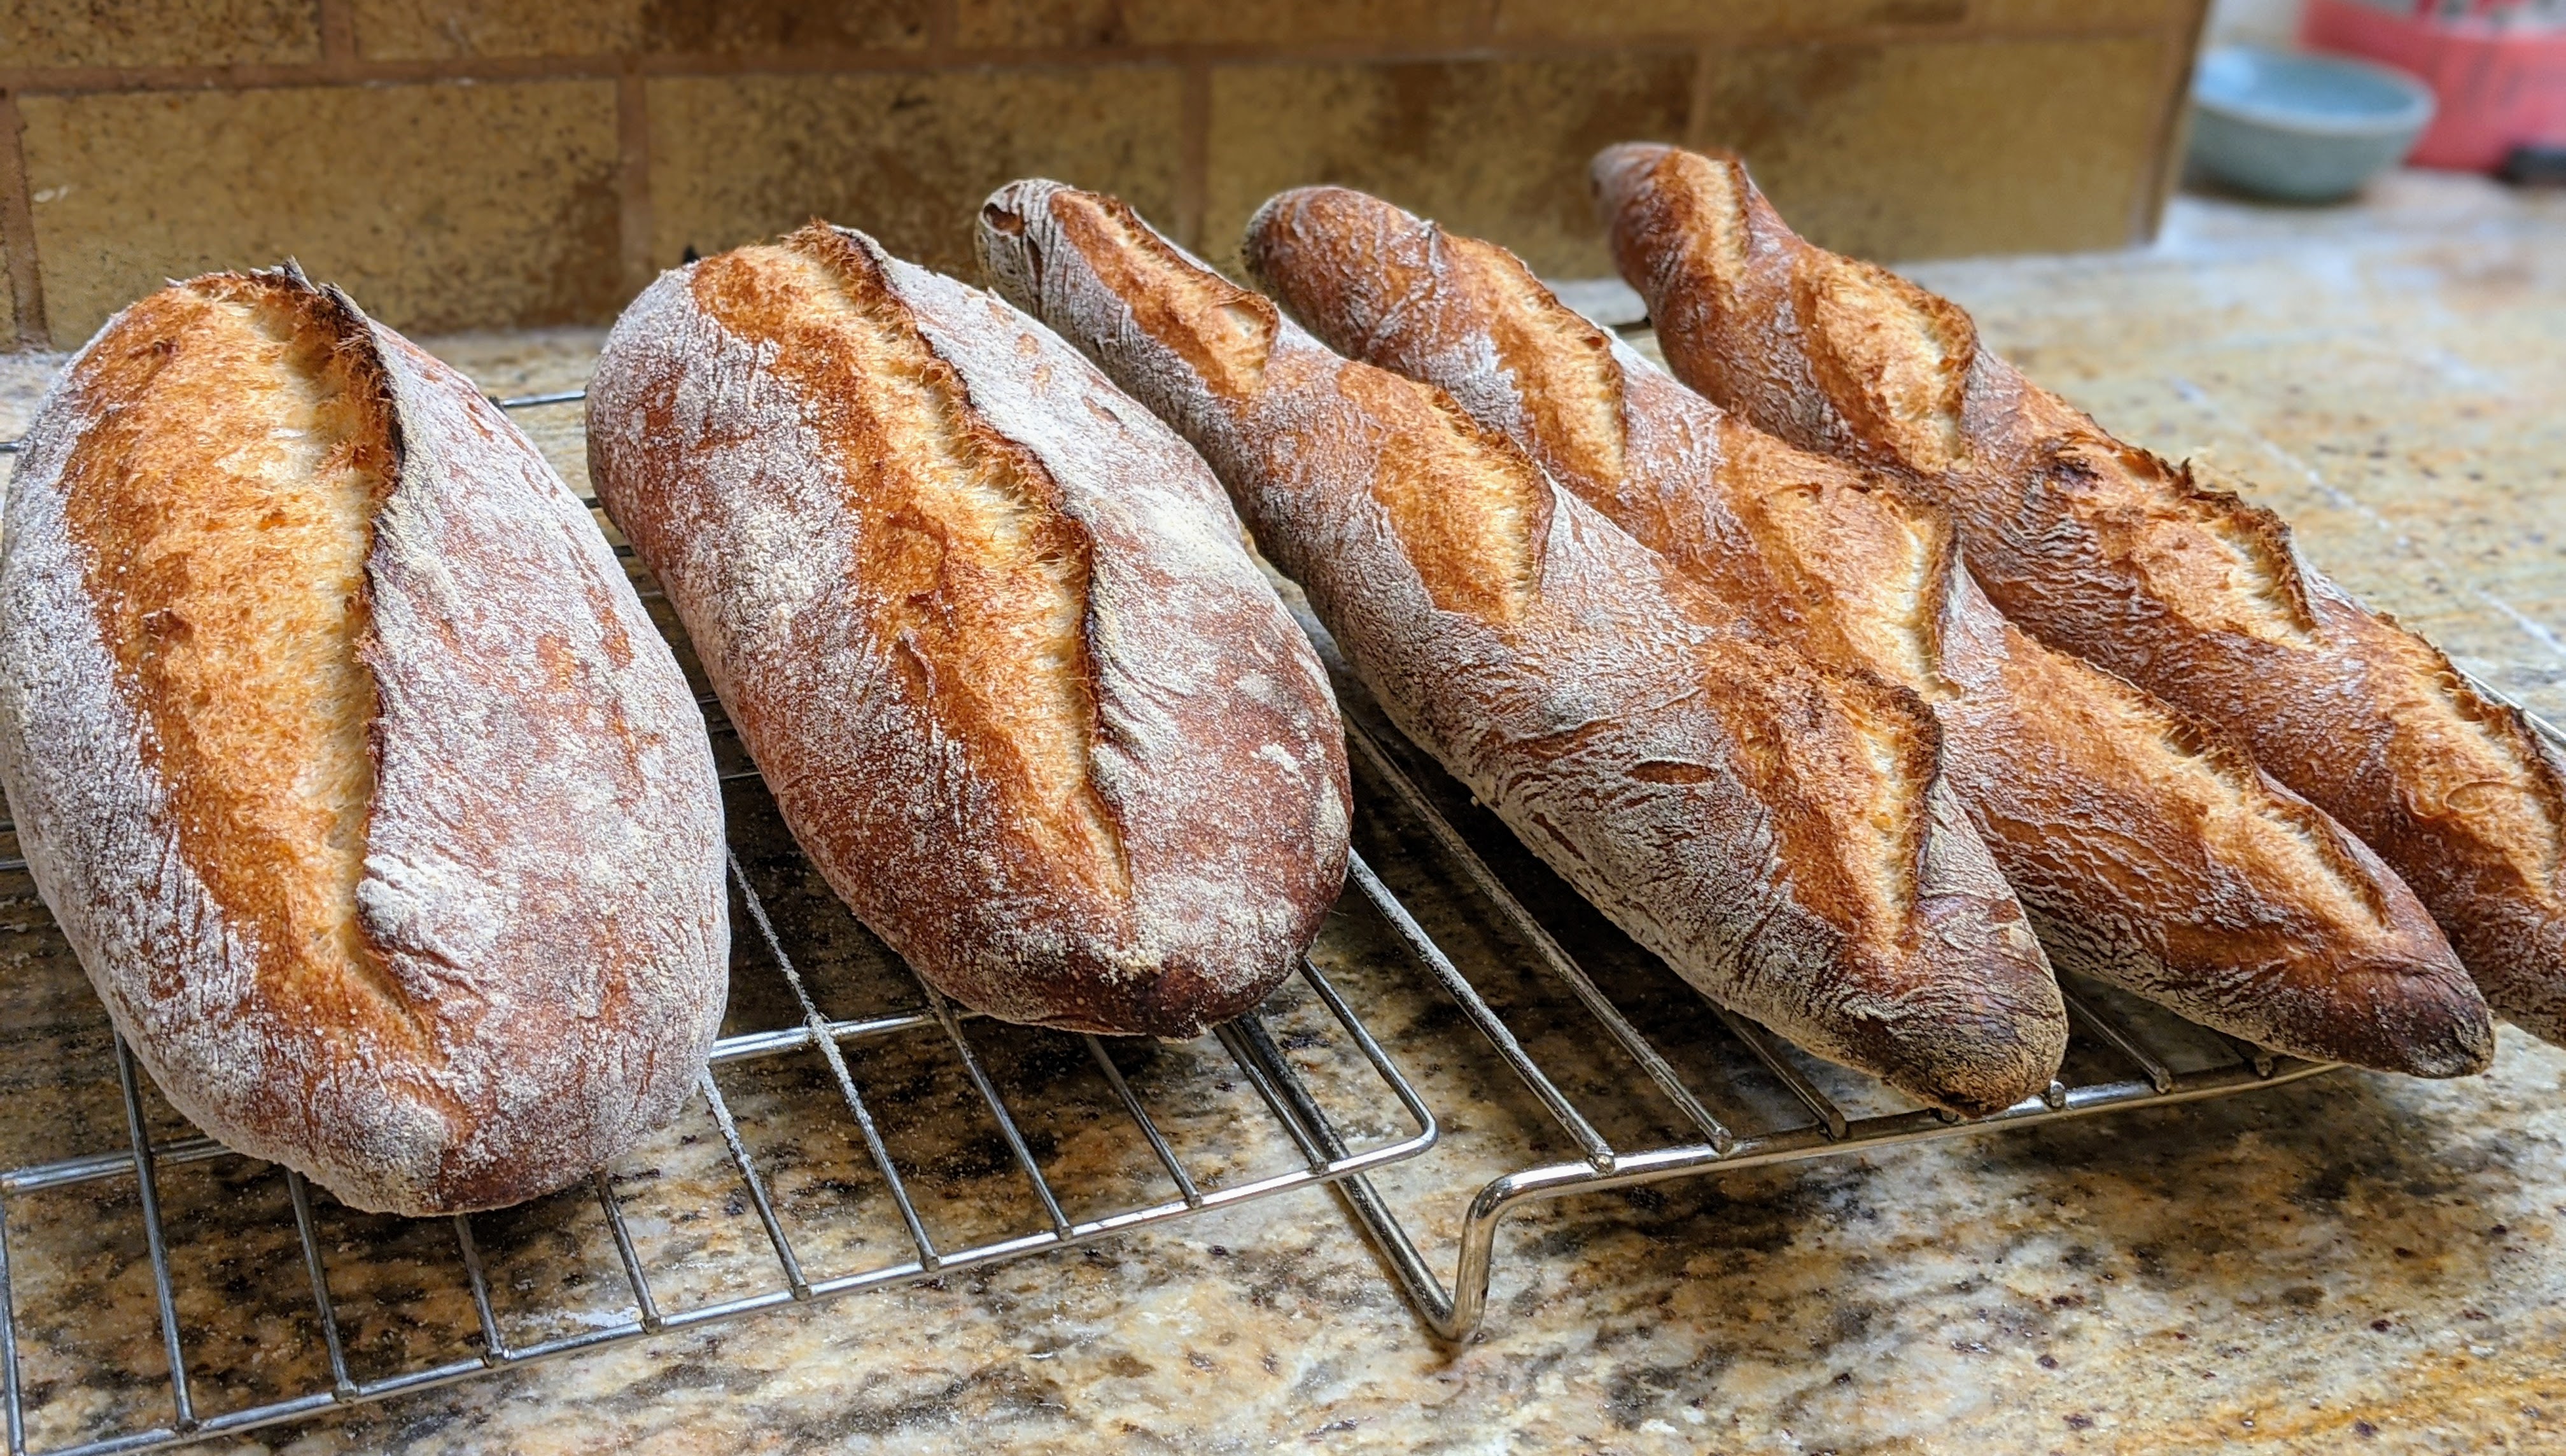
Yeah… I was going to freestyle the loaves, but I ran out of time as I had plans for the evening. So I decided to shape up a couple of batards, put them in baskets and let them do their final ferment in my dough retarder. And yes, I did scale them out, though I got VERY close eyeballing them when I originally divided the dough and only fell about 20 grams short on one piece. Next time, I’ll probably just eyeball it…

But it’s probably best that I put the dough in baskets. When I was shaping the loaves, They felt like they were 90%+ hydration. Of course, I don’t know

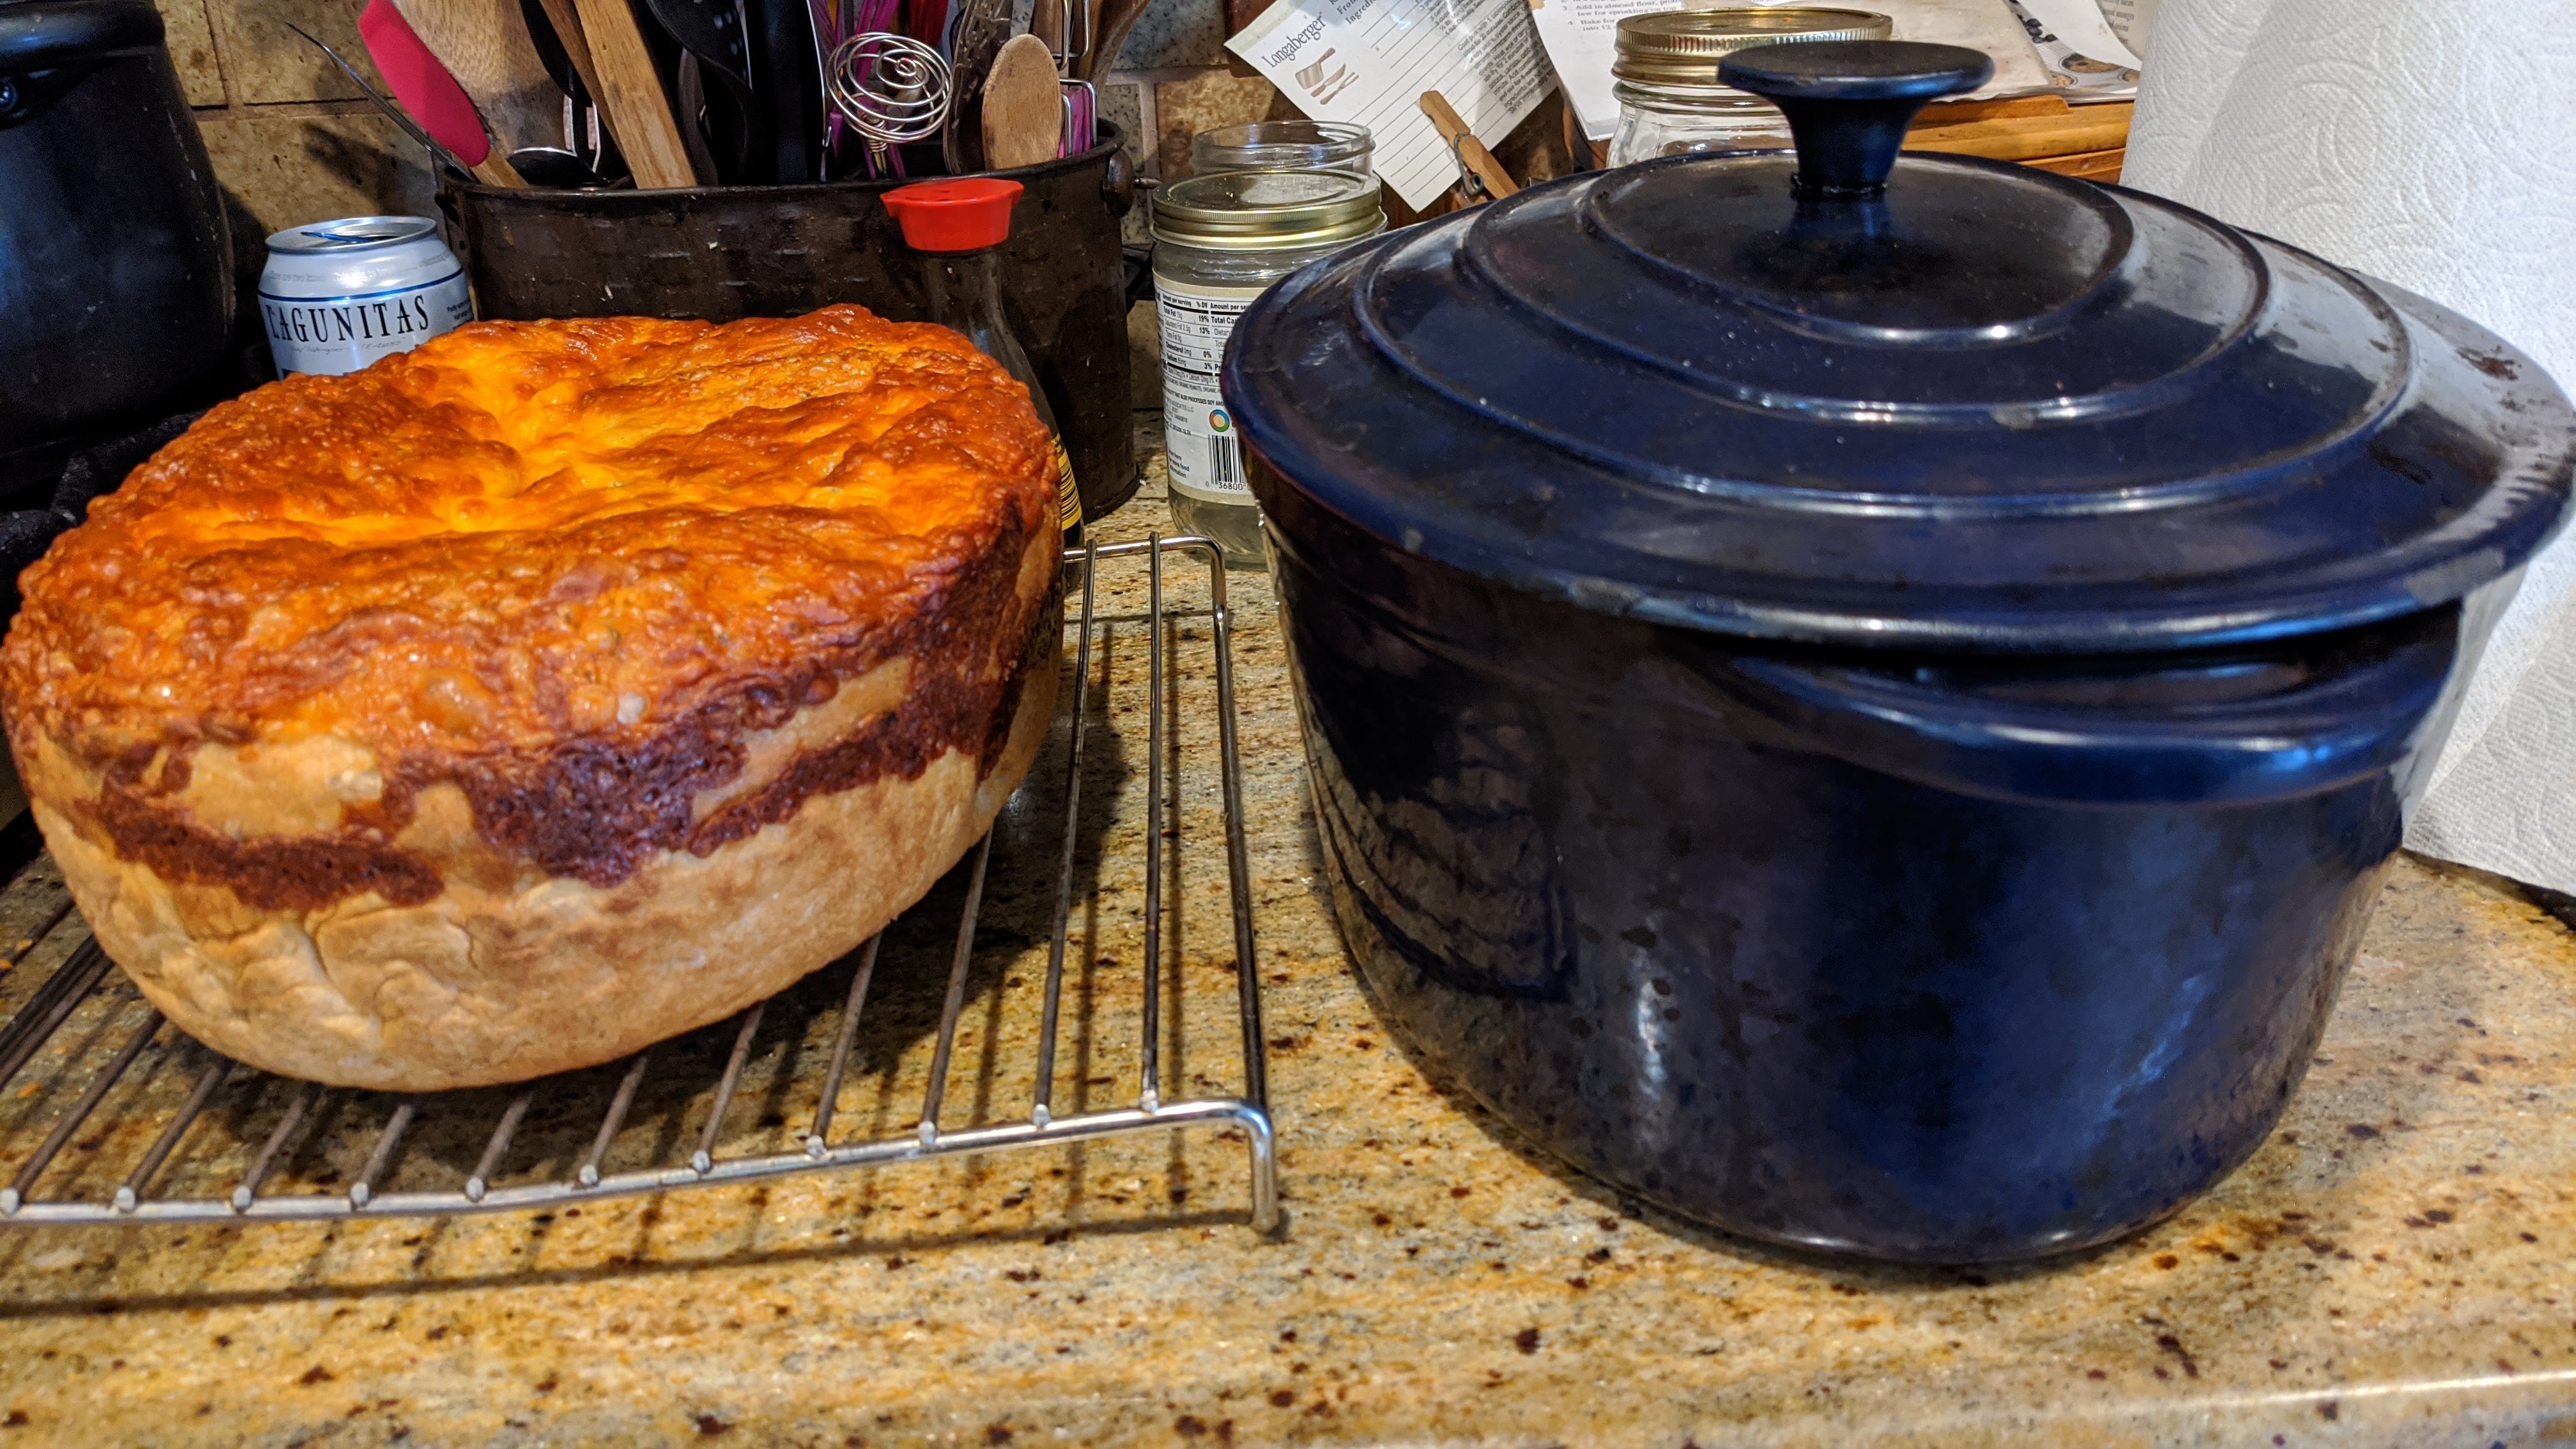
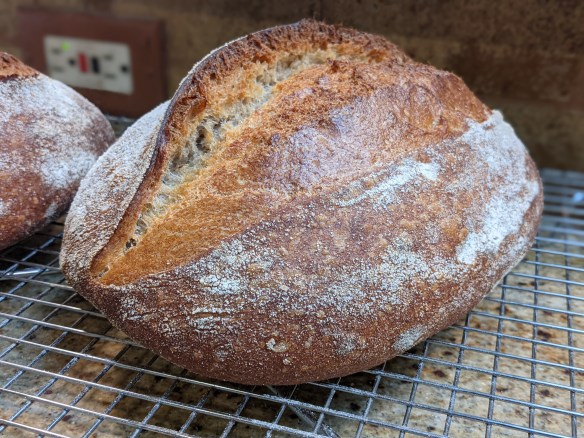
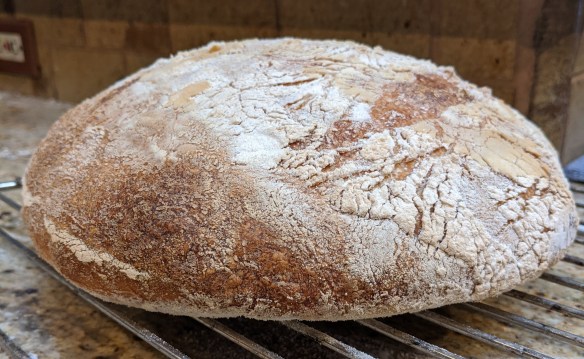
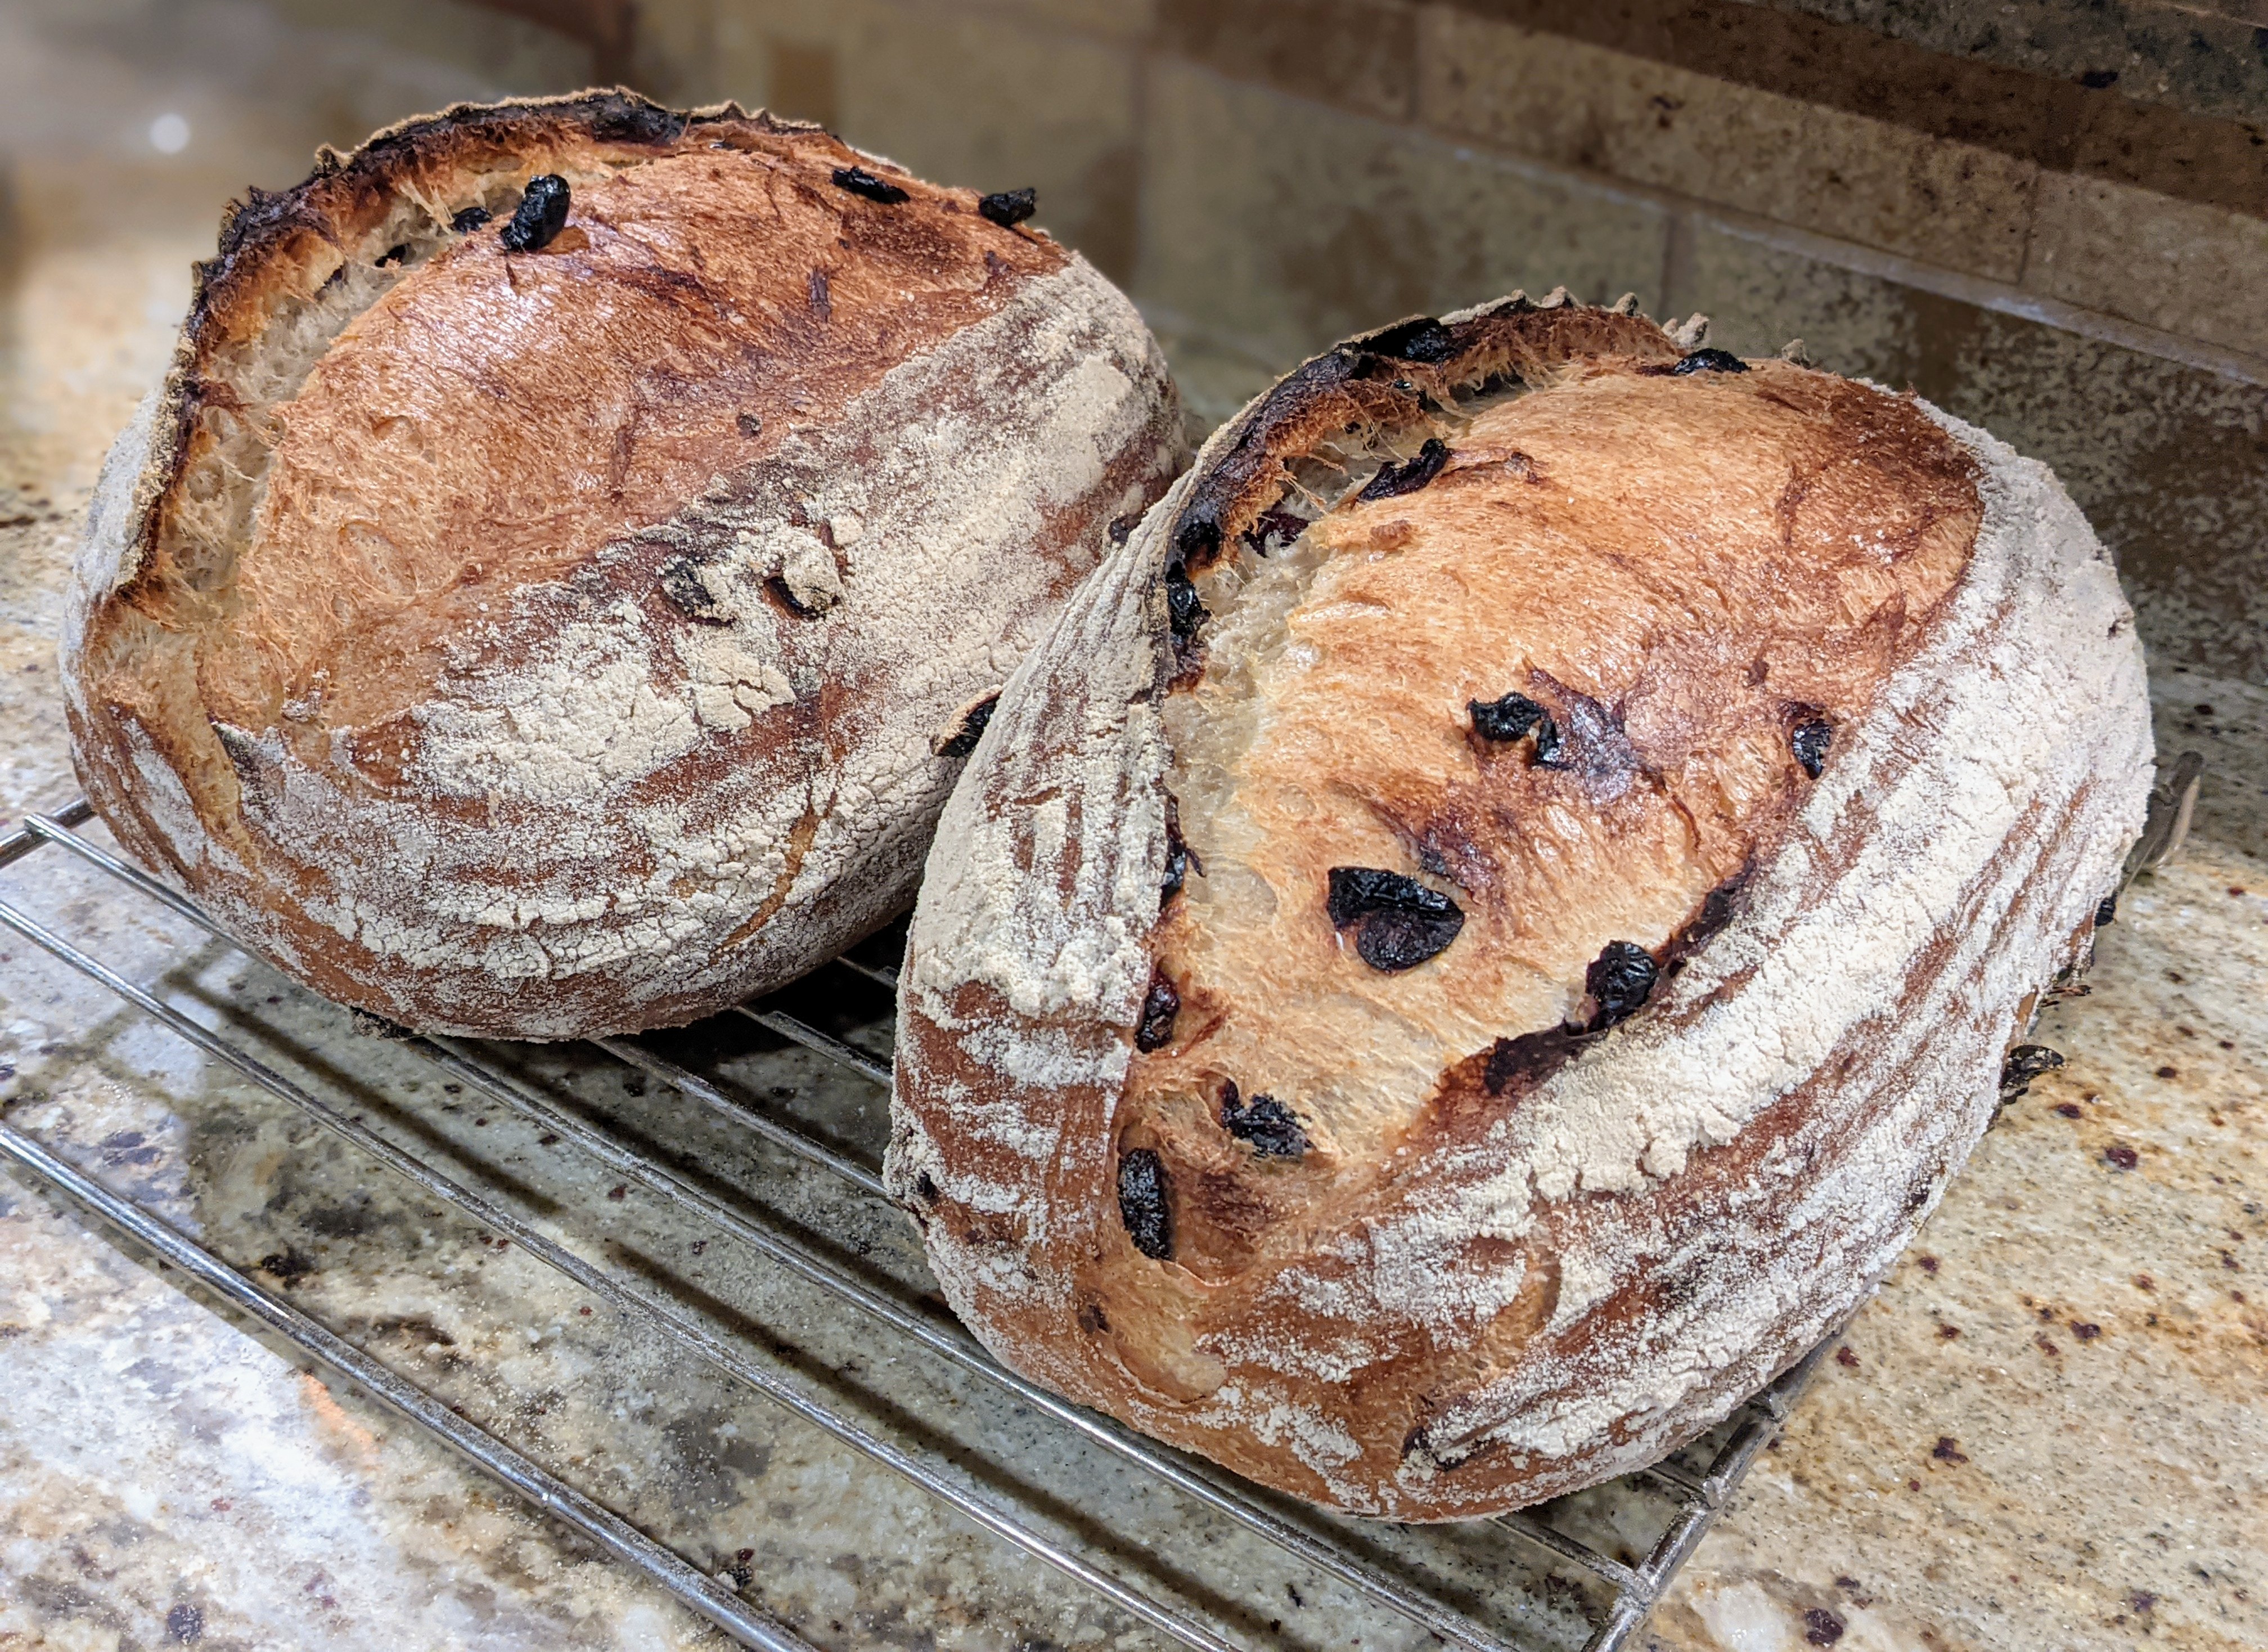
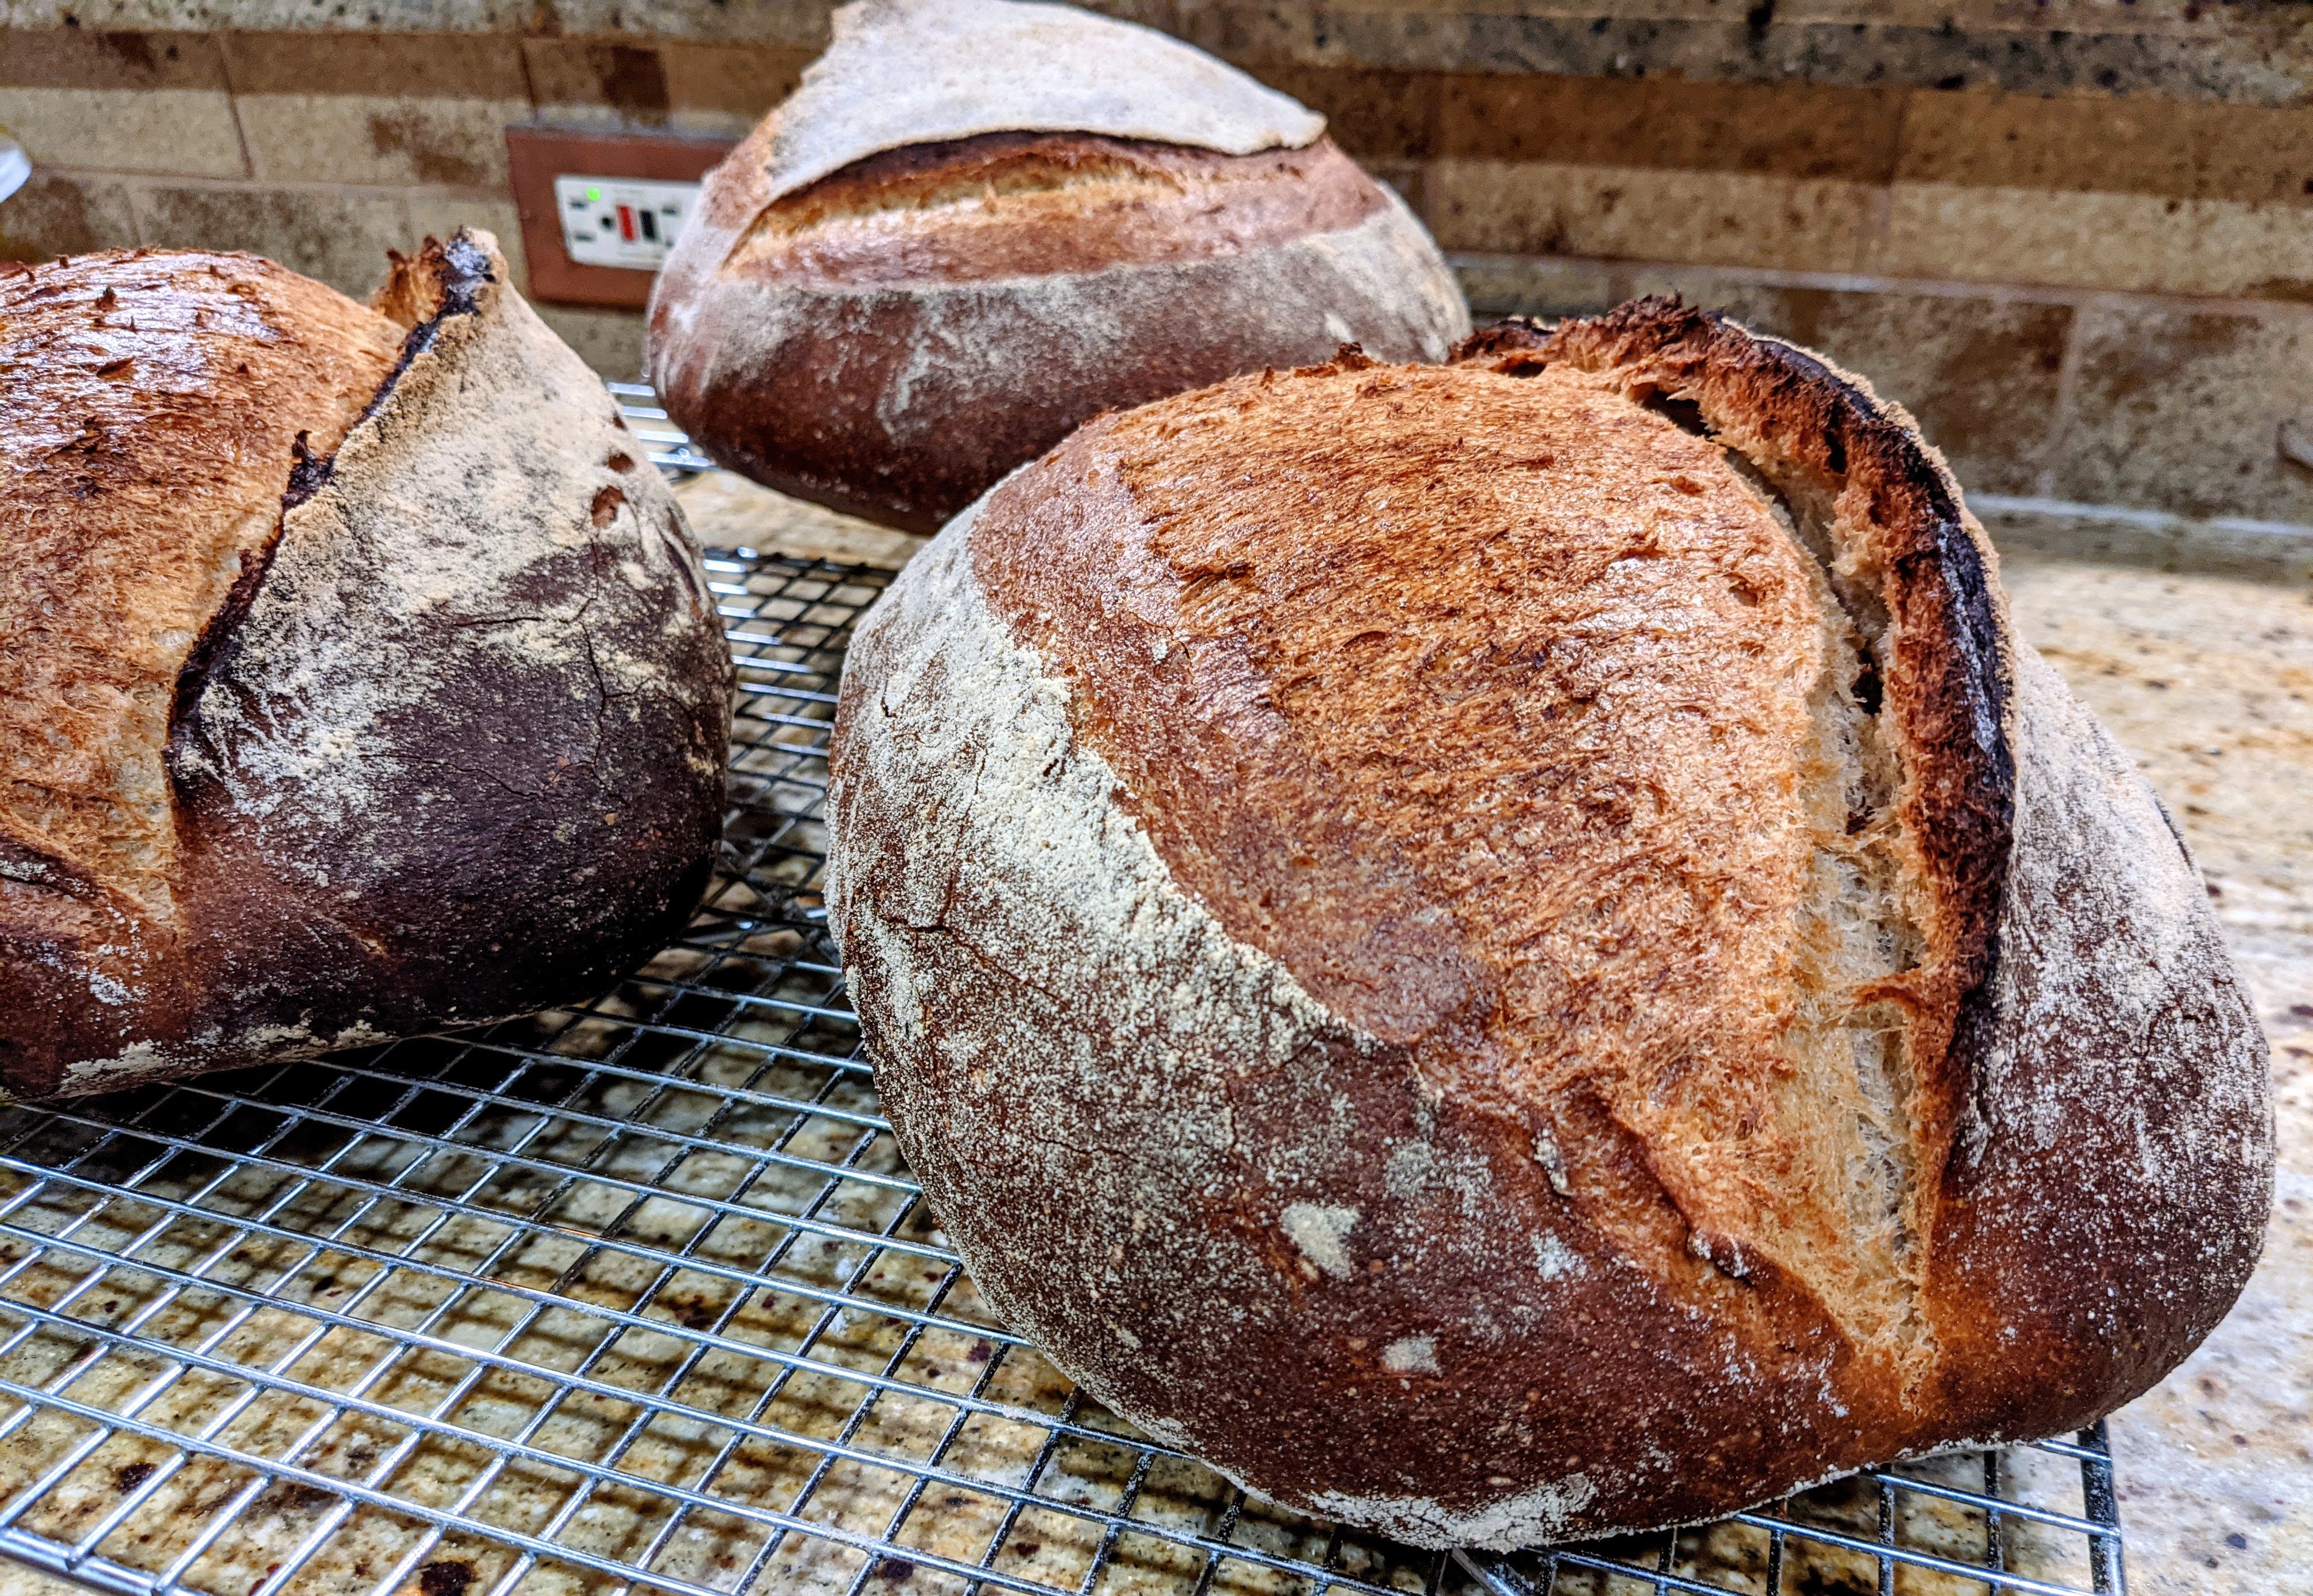
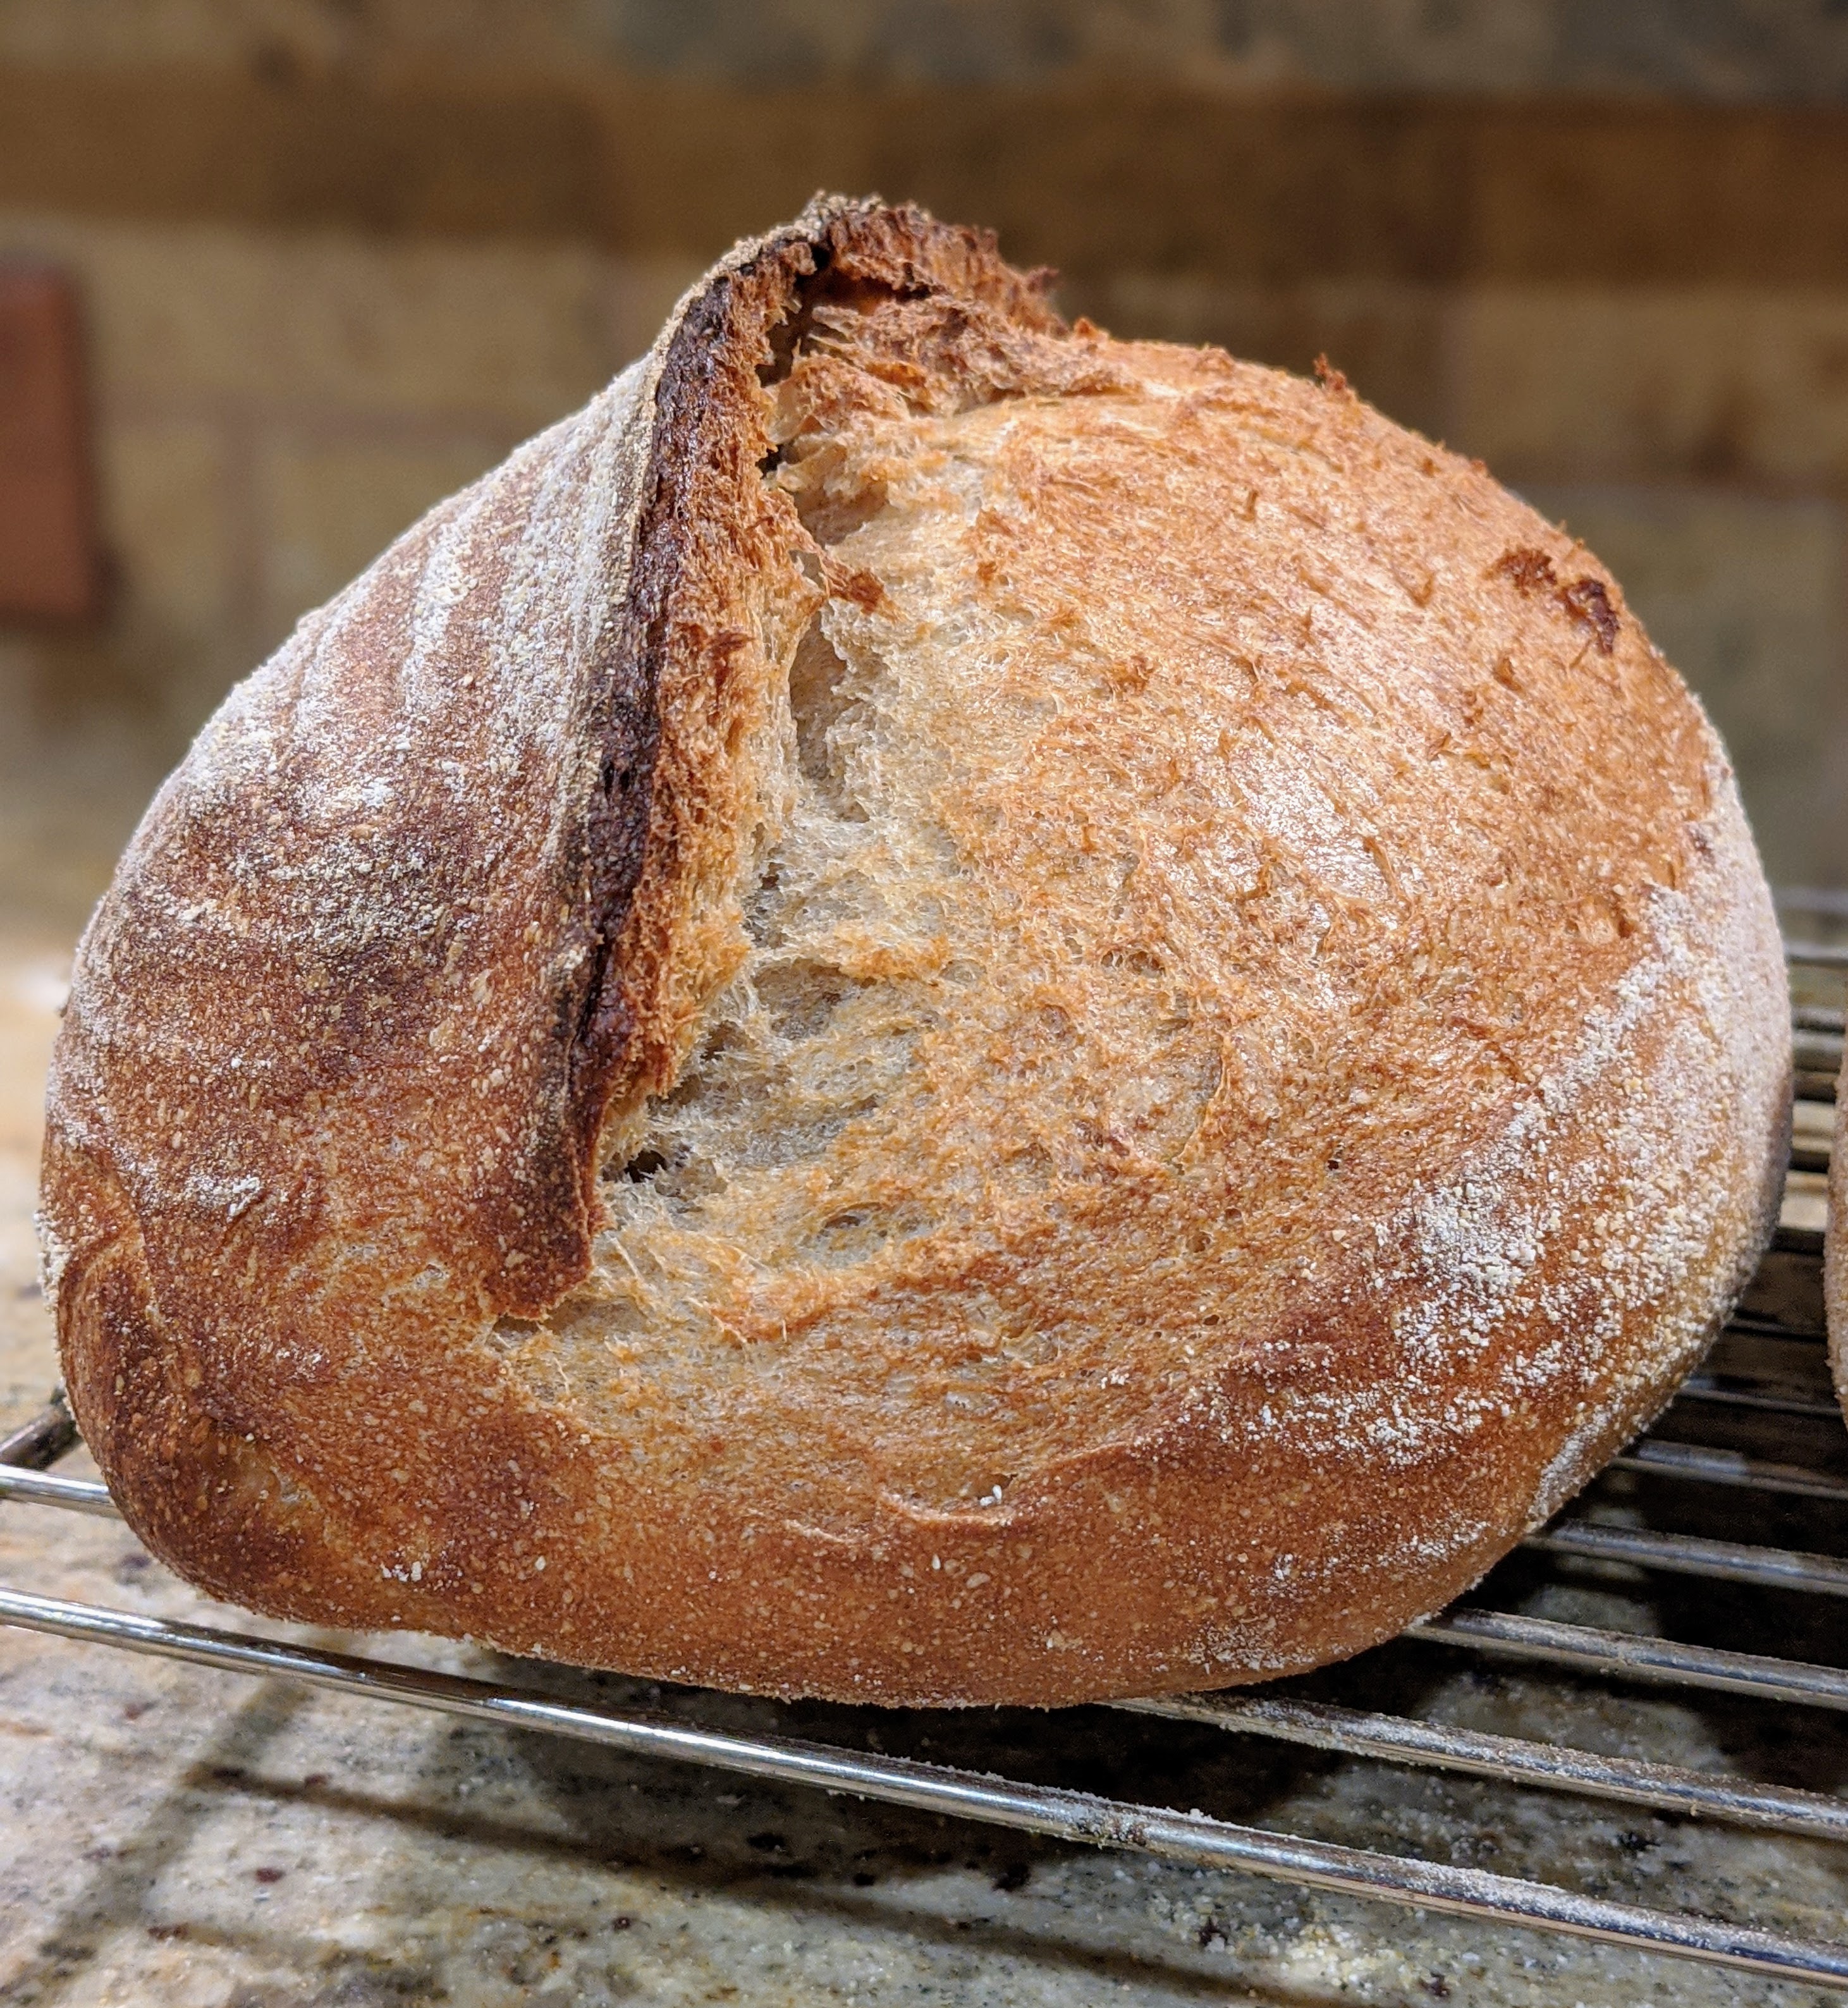
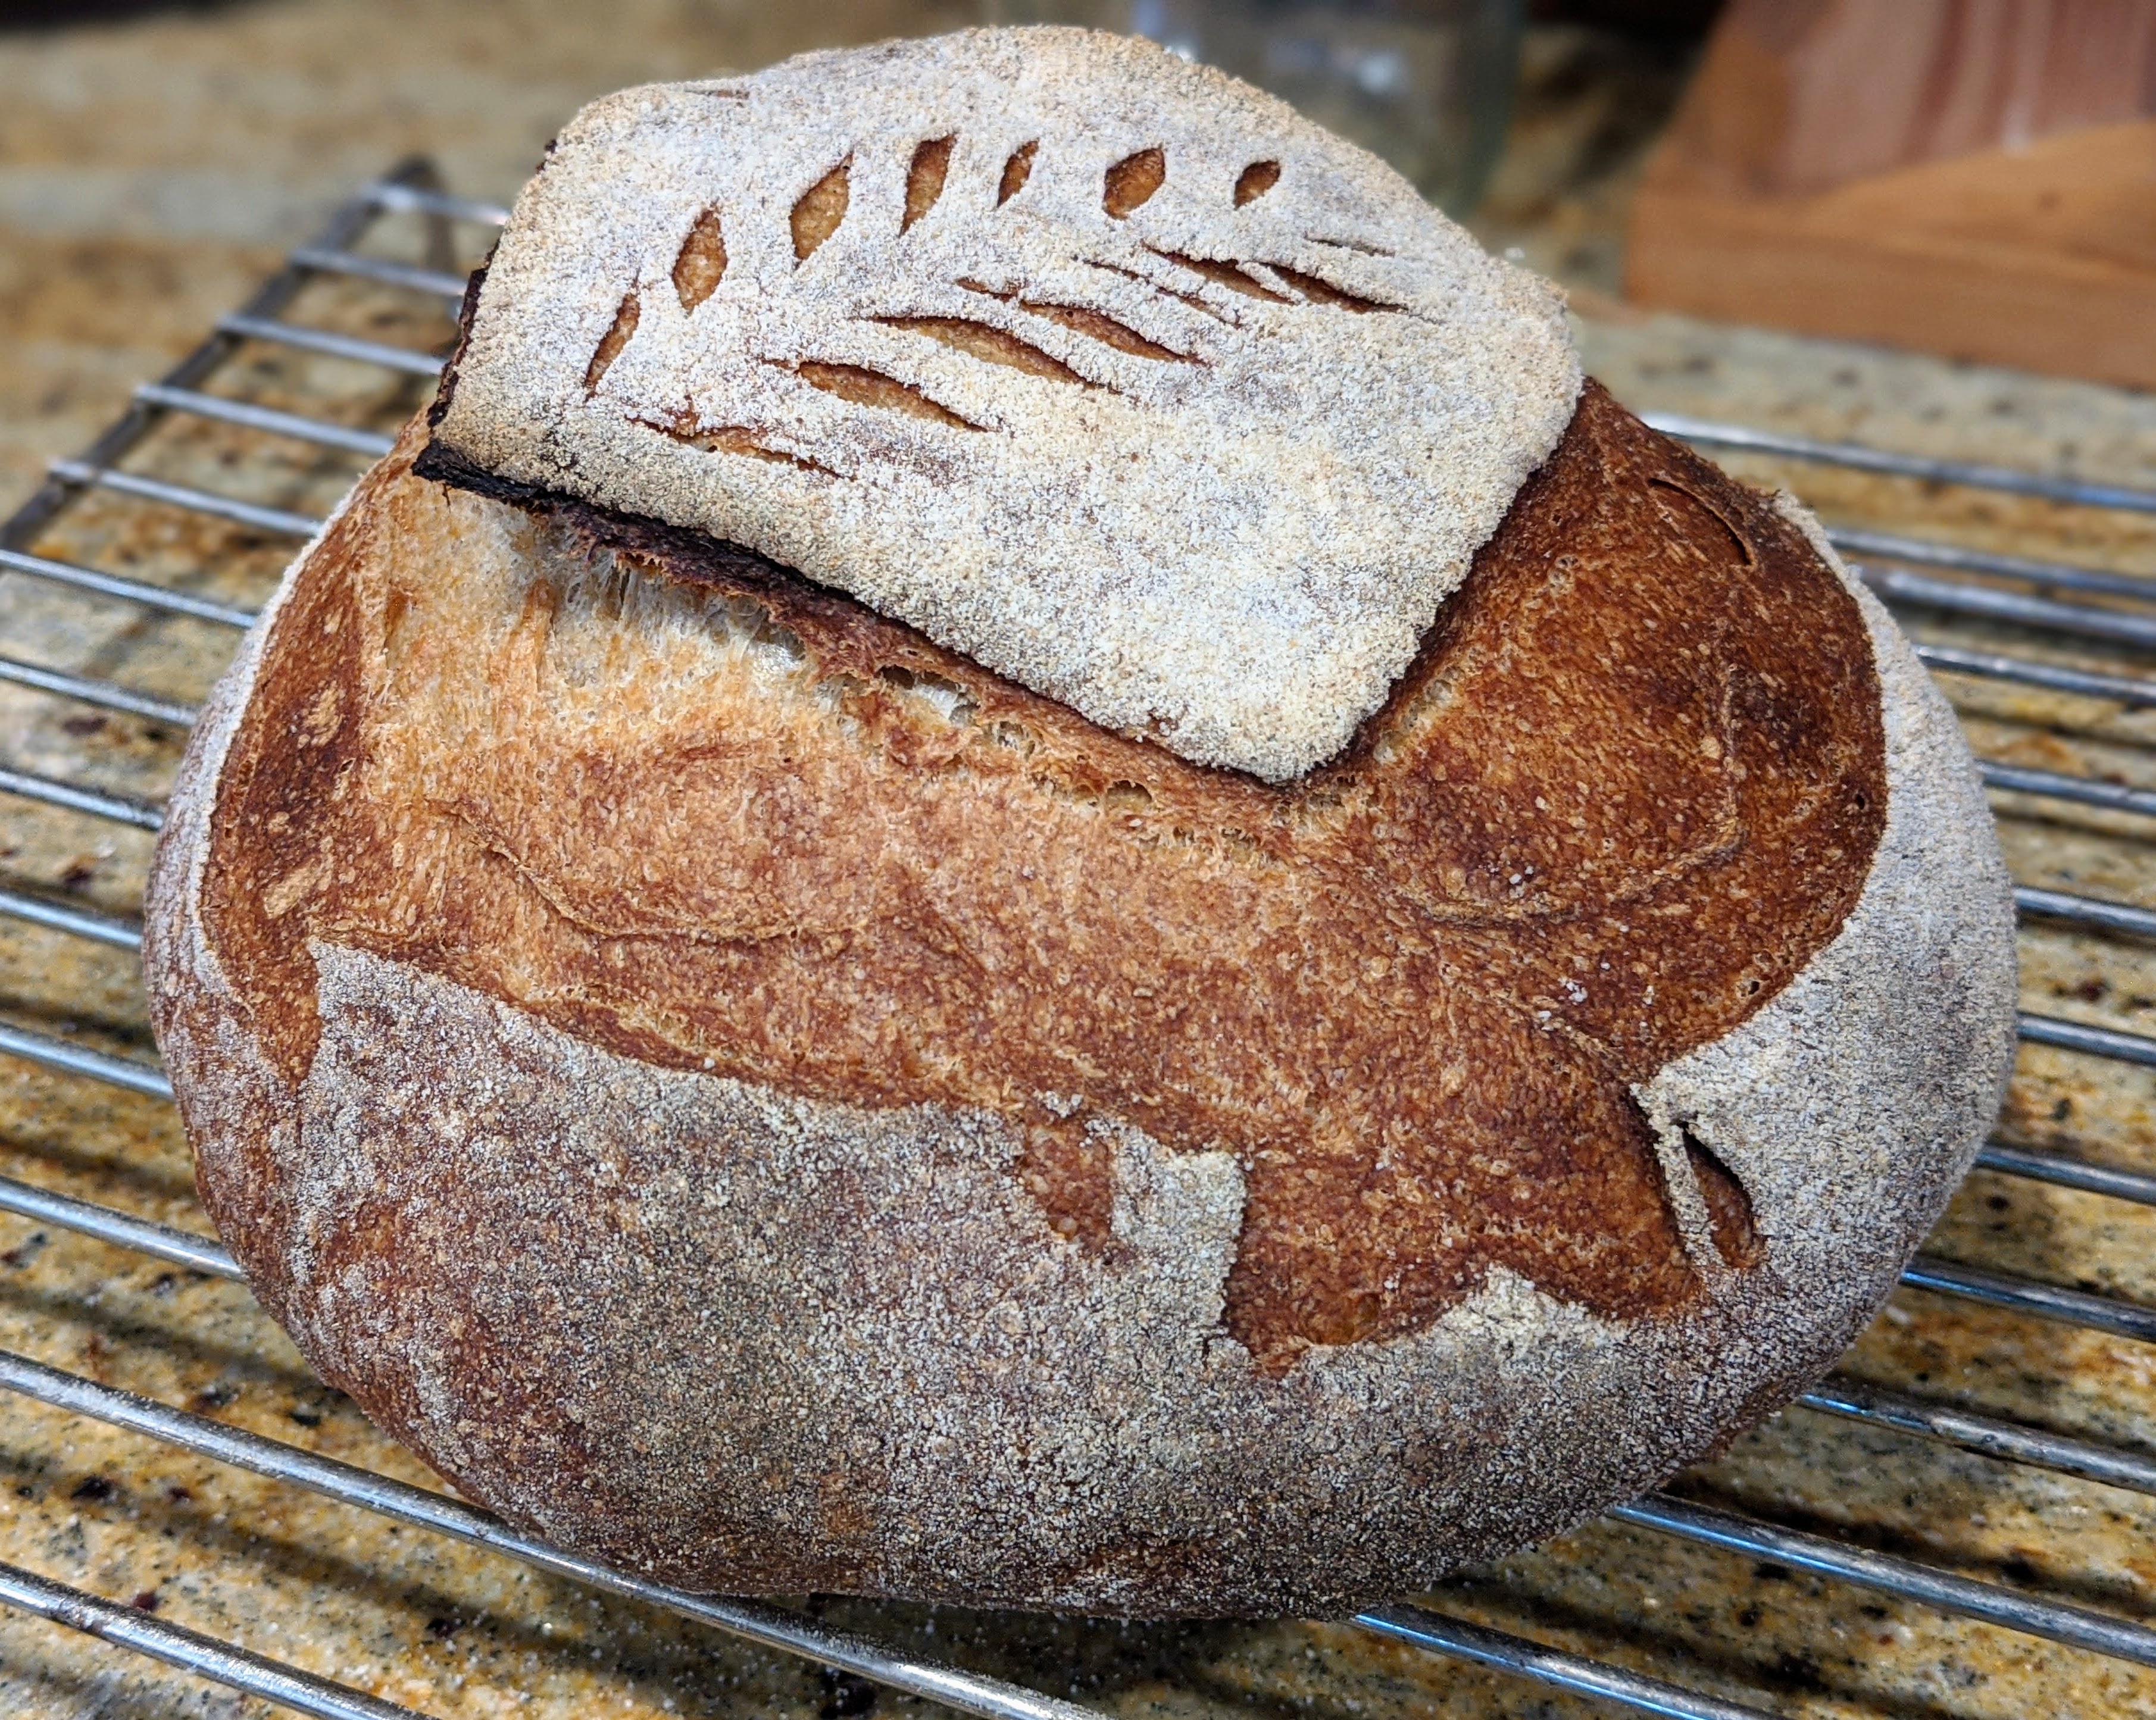
The loaves are looking great in the oven right now! I was expecting the loaf on the left to be a little flatter than the one on the right as it came out of its banneton a little cockeyed. Oh well… But I’m loving the oven spring! With the predominance of whole-grain and high-extraction flour in my flour blend, I wasn’t too concerned about vertical lift. However, I was VERY concerned about overall spring and oven expansion. The wide fissure on each loaf indicates that the loaves expanded quite a bit and that pleases me to no end!

Notice how high up my baking stone is in my oven. I think I can go one more notch higher before my loaves touch the top. The reason I’ve got them up that high is that I used to have it down a few notches and I wasn’t getting enough steam on my loaves. With my stone higher up, all the steam created by my soaked towels and the water in the broiler pan at the bottom go right to the top of my oven. It’s kind of difficult to see in the picture, but the skin on each loaf at this point is quite damp. Since I’ve done that, my oven spring has been absolutely stellar!

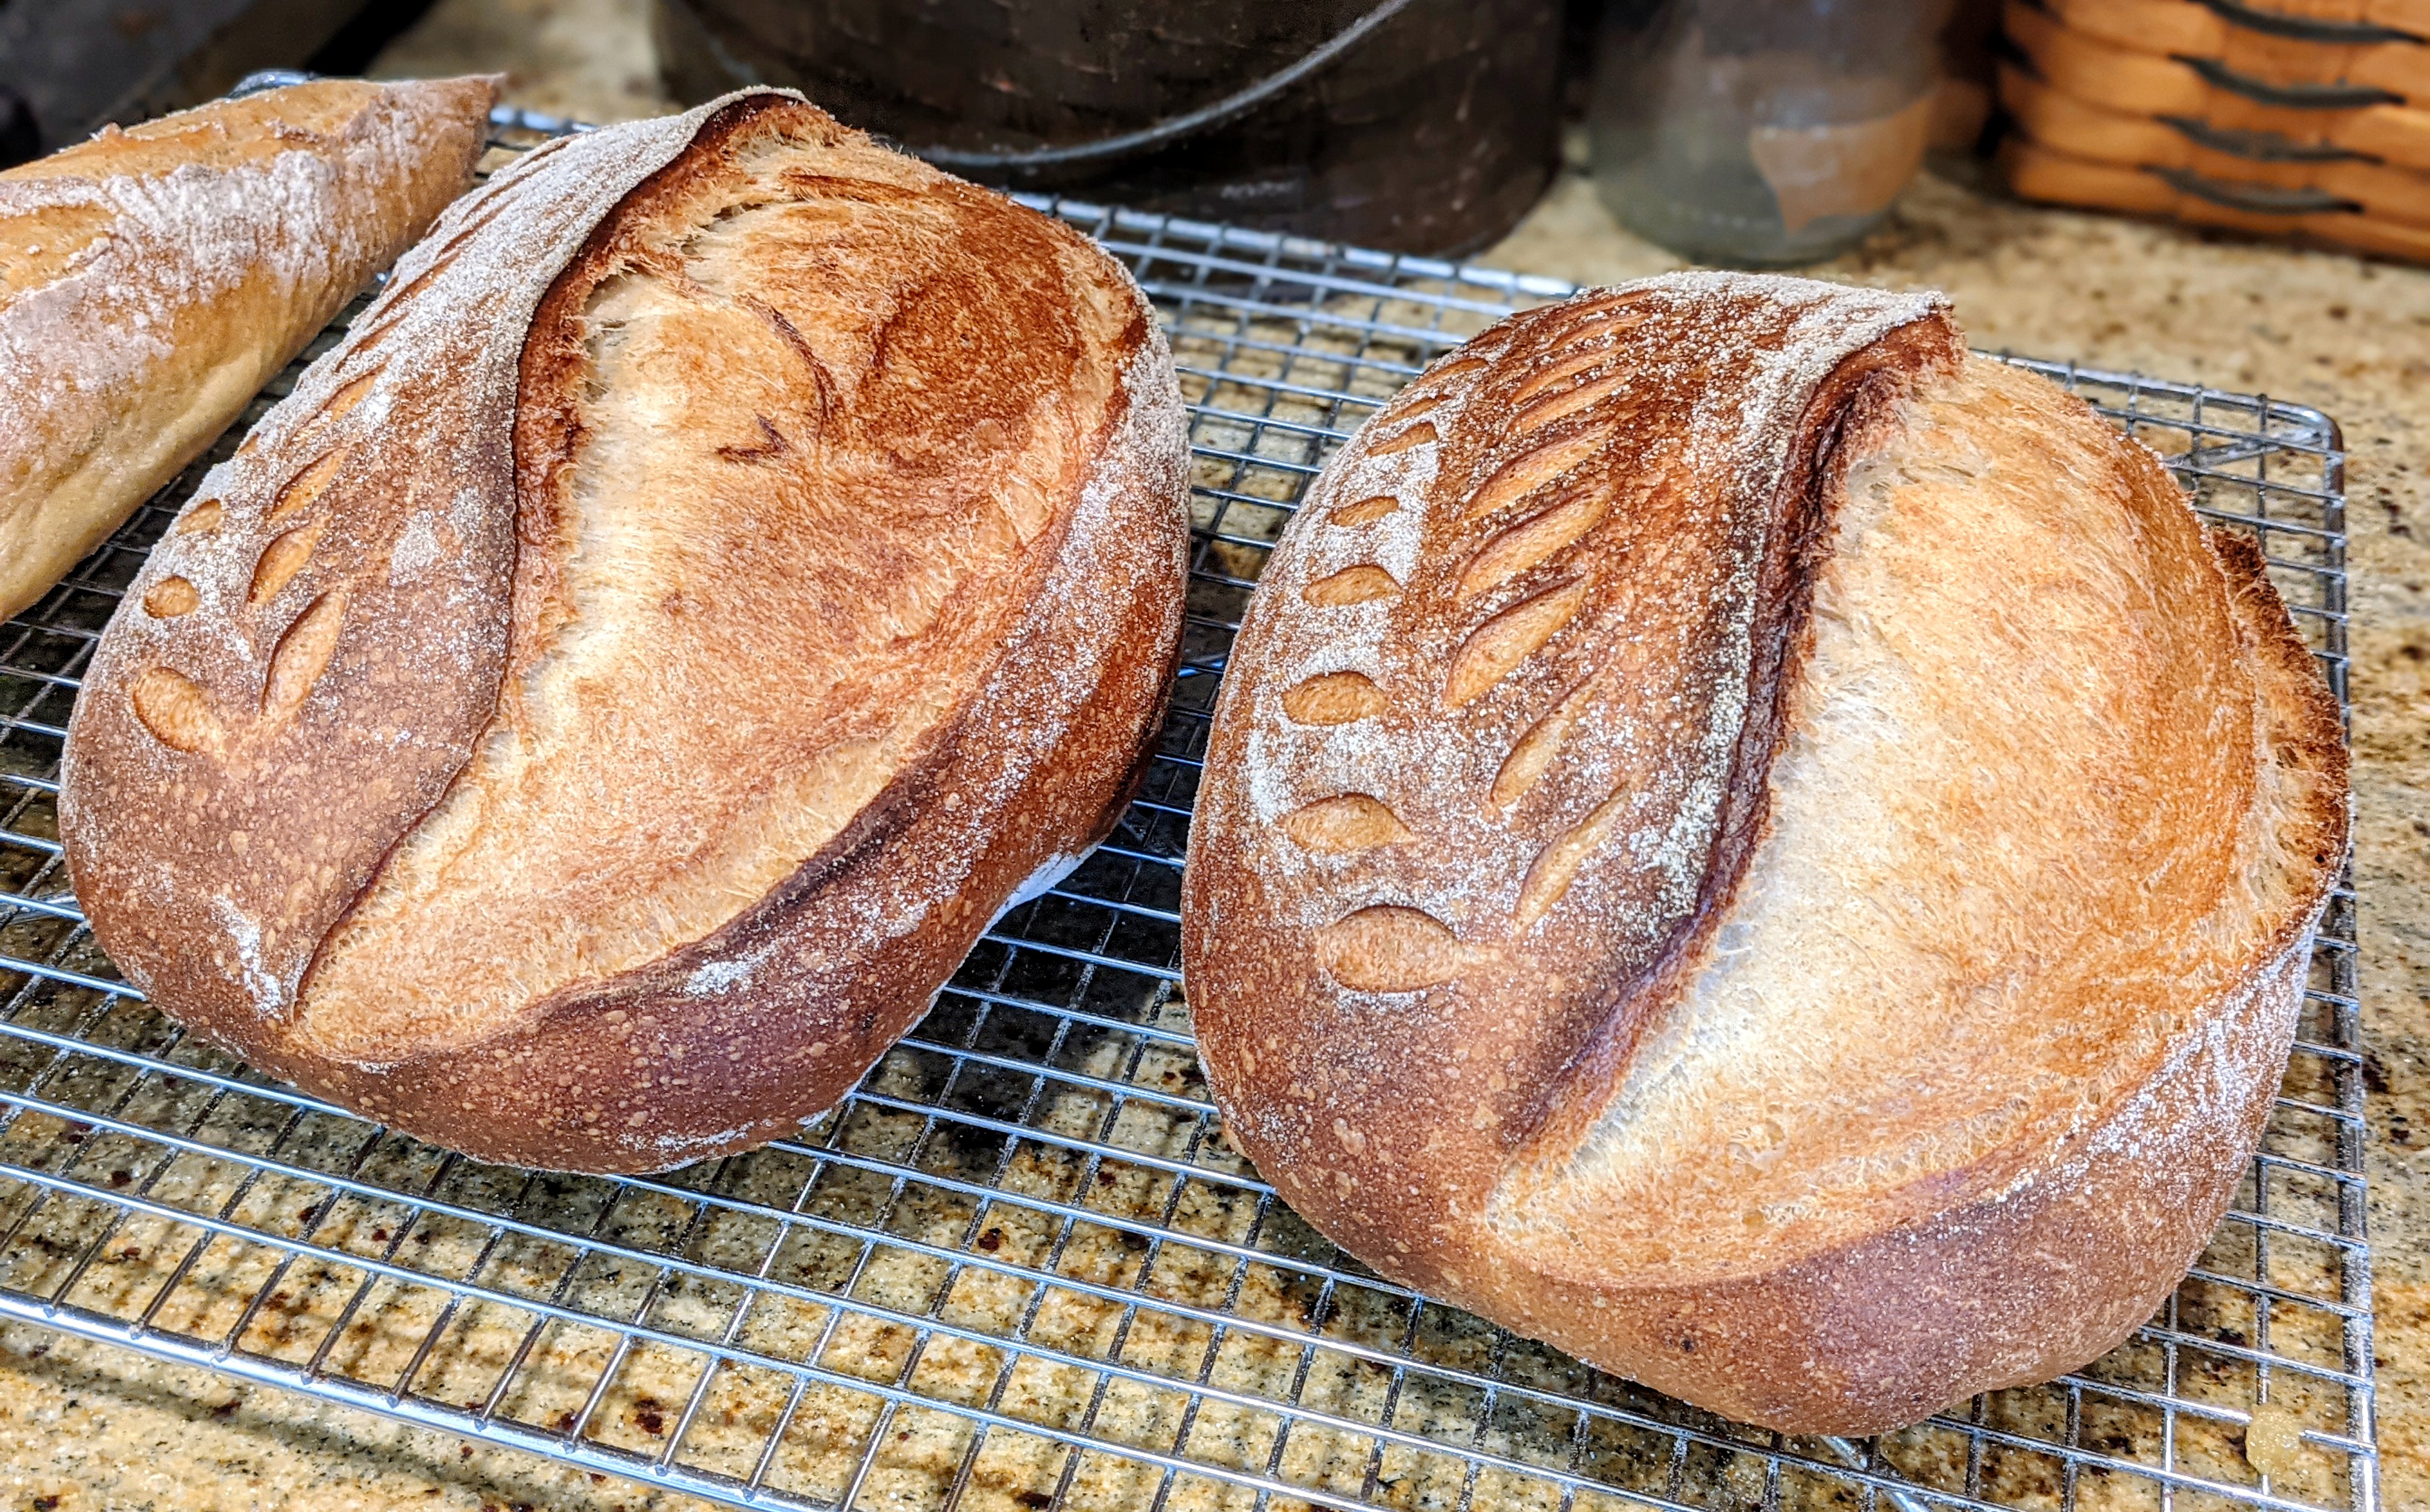
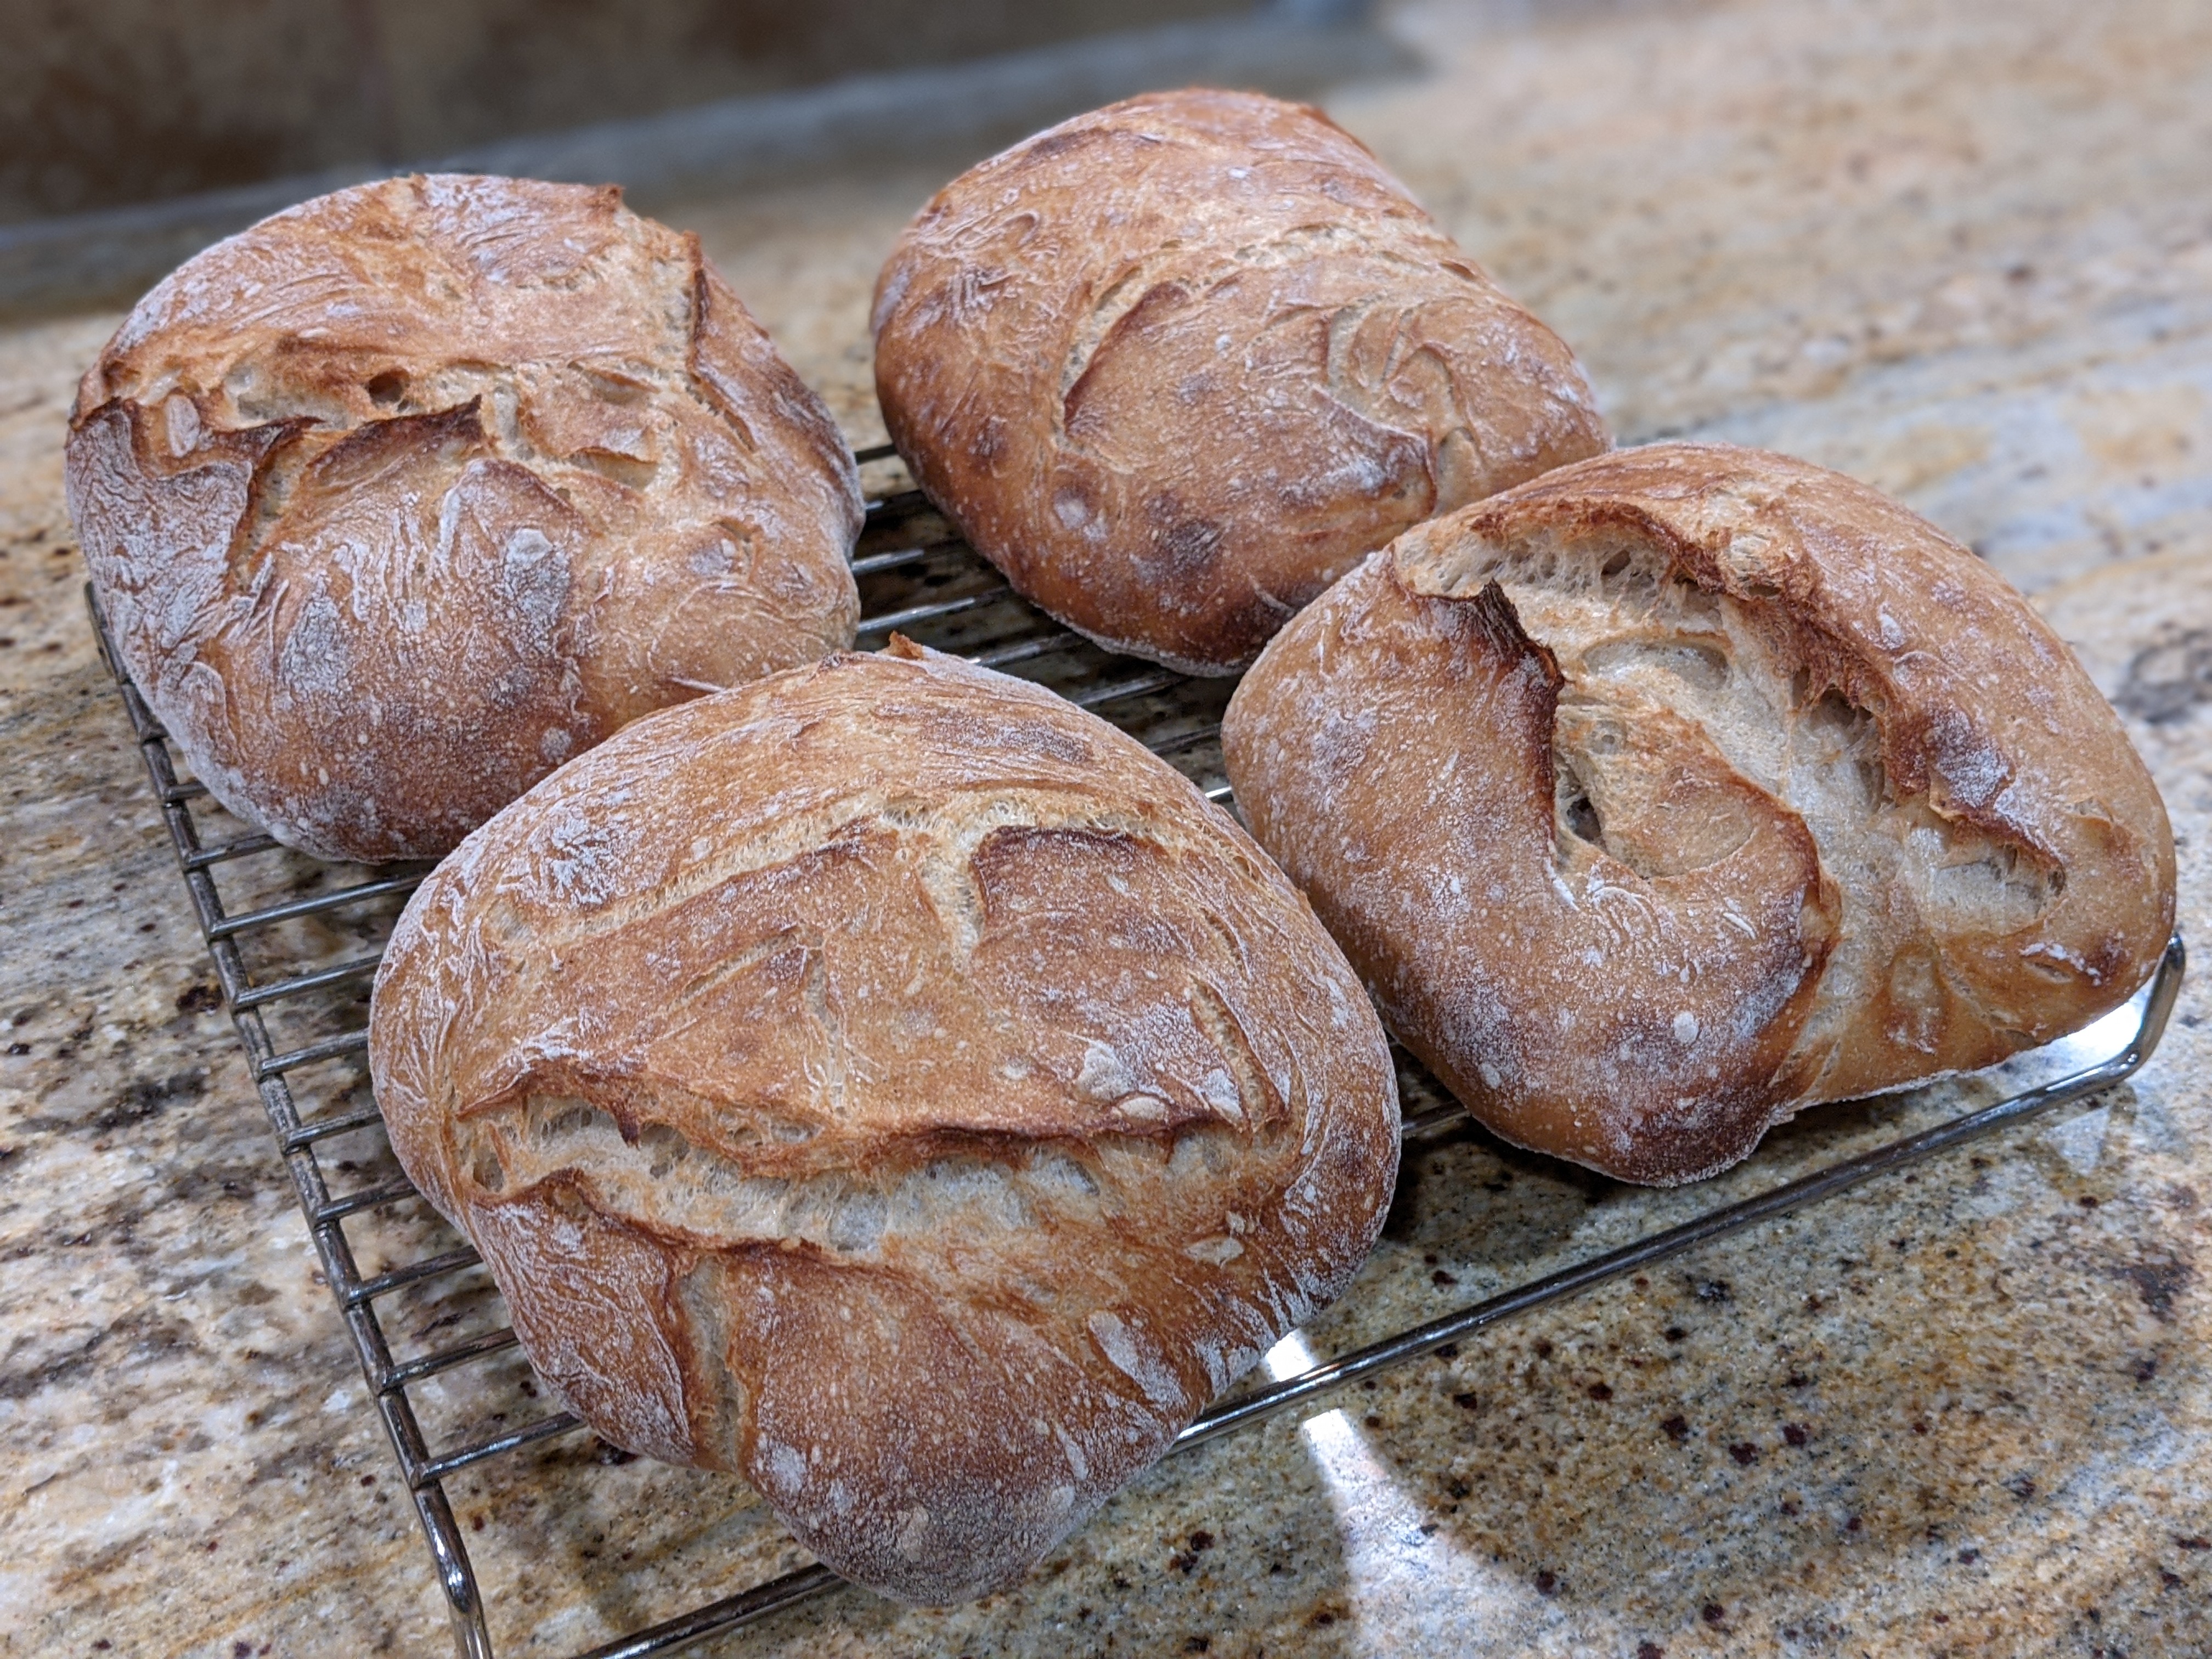
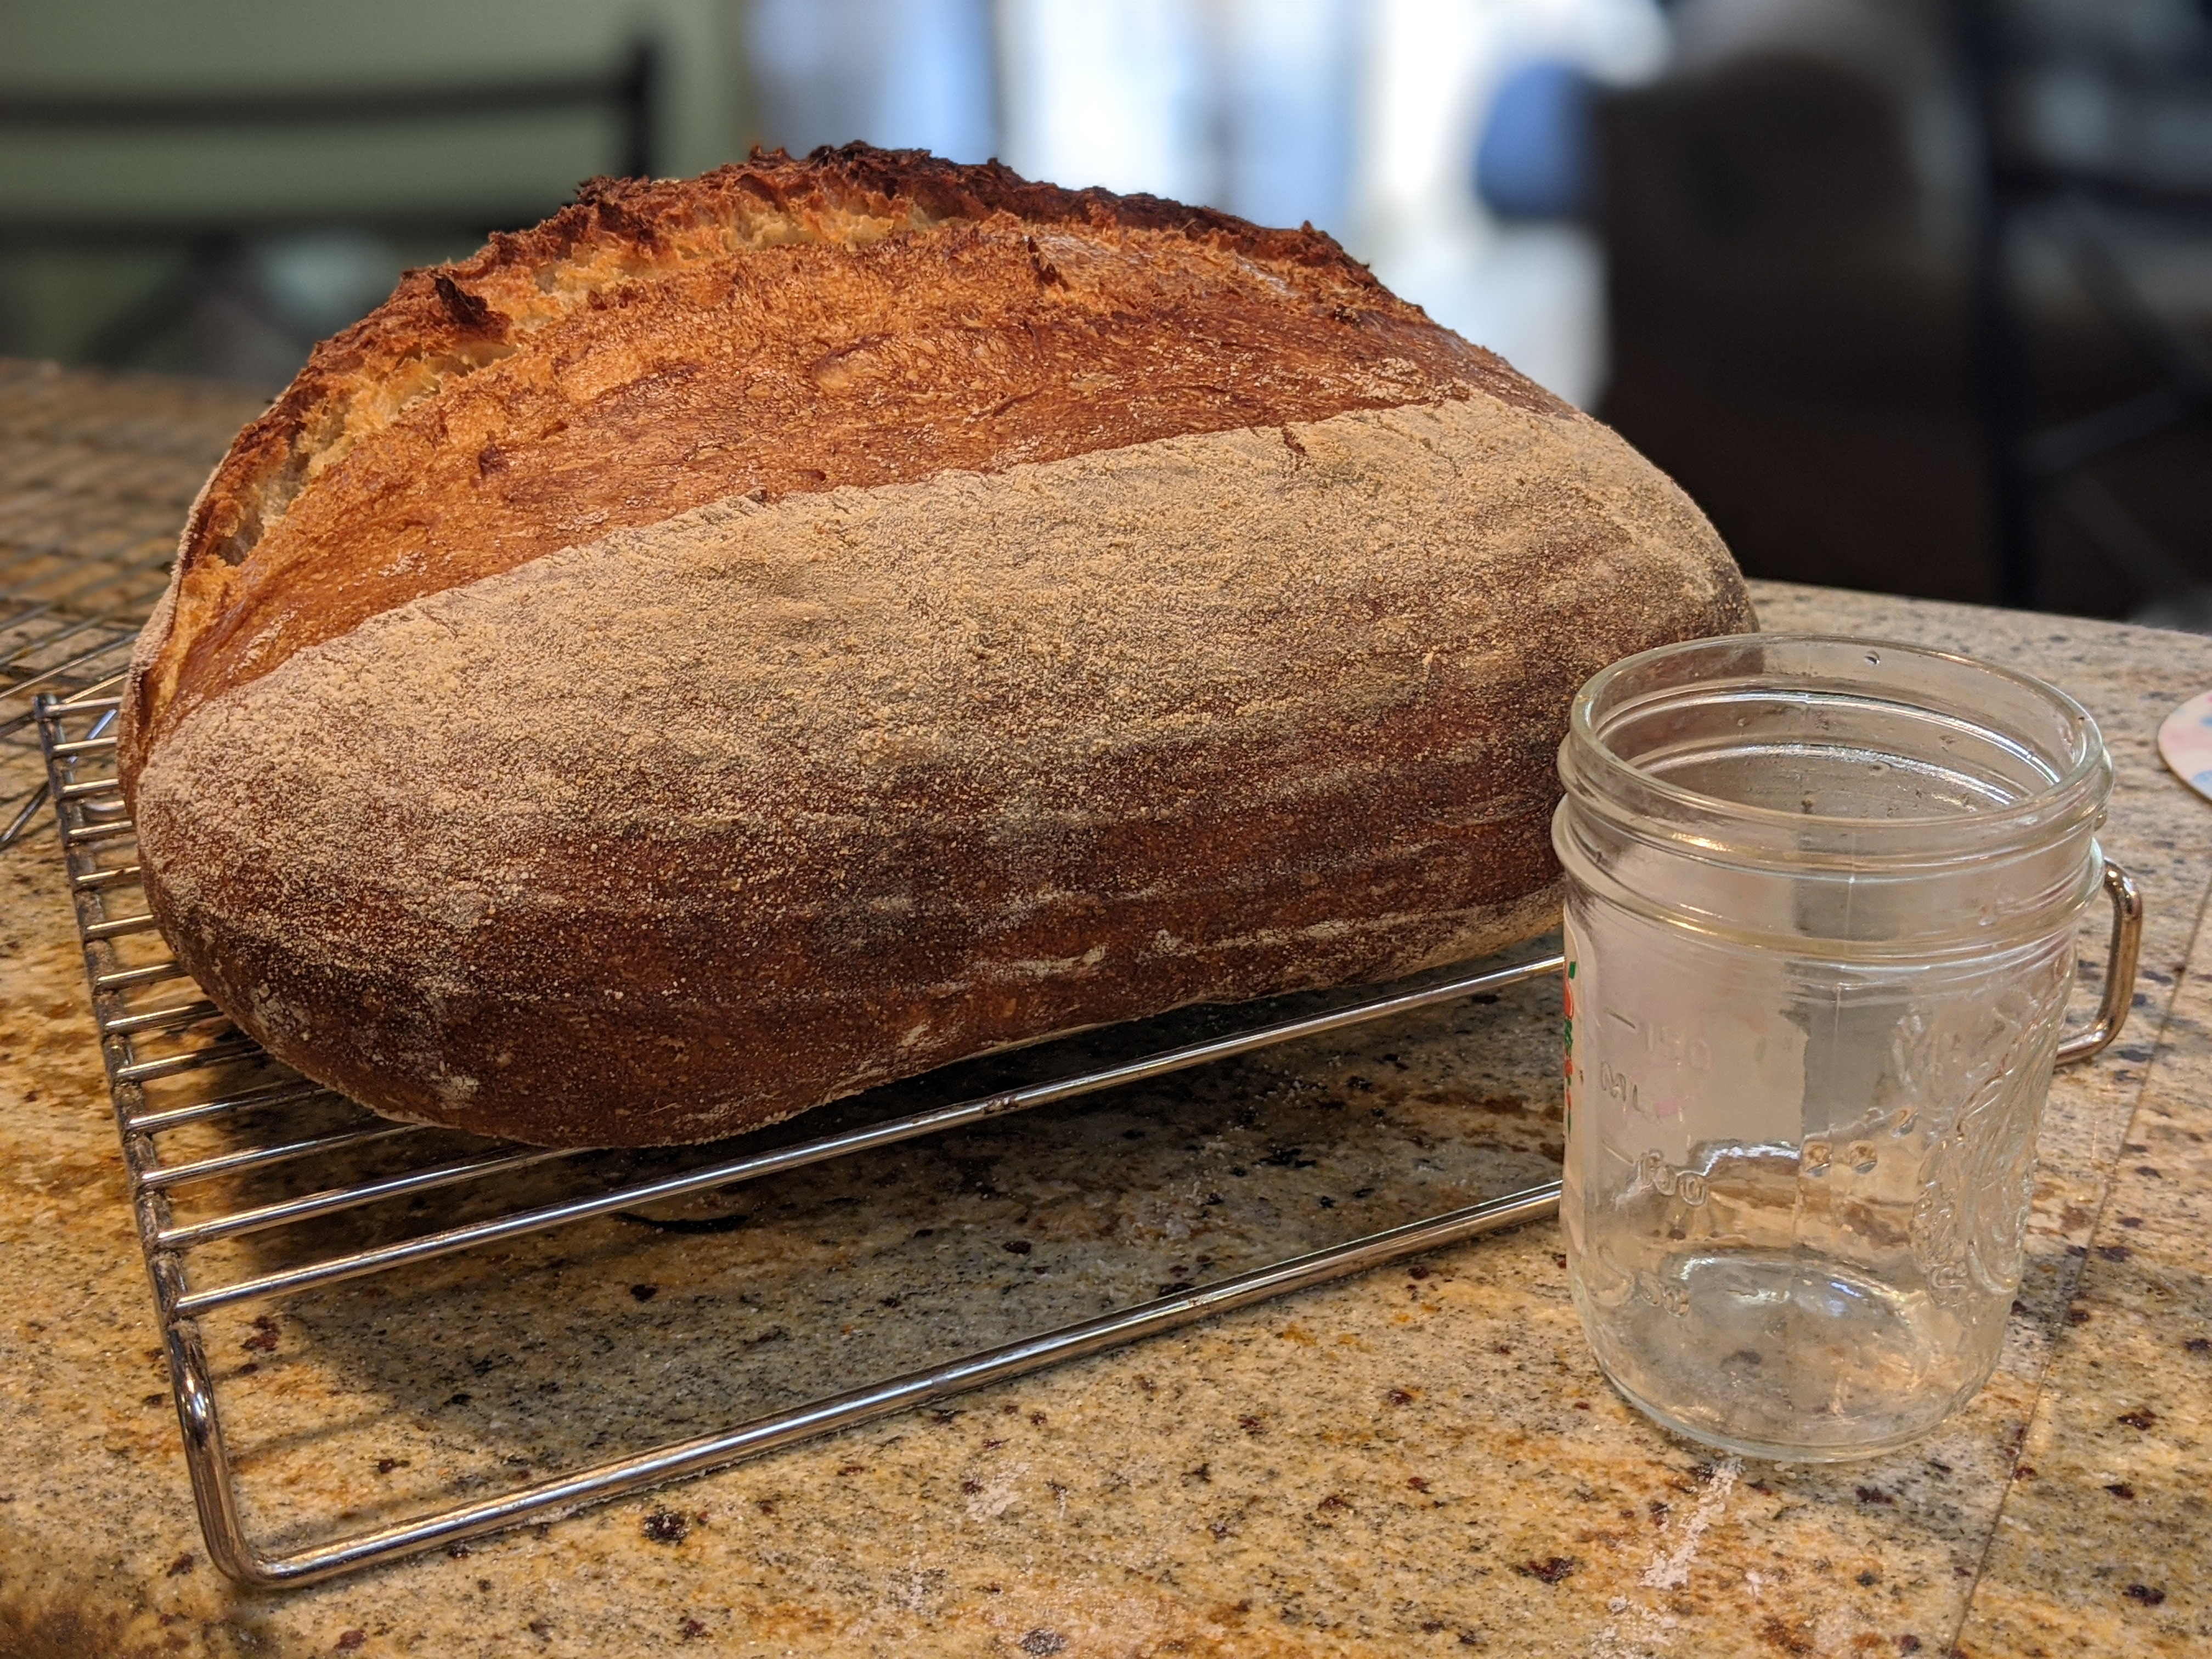
I just pulled these out of the oven. I am VERY pleased with the results! Admittedly, it was a little nerveracking at first because I’ve been so used to being fairly exact with my measurements. But having gone through it and trusting in my dough development skills, I’m probably going to do this a bit more often.

That said, what I will definitely do is have predetermined flour blends that I normally use – I’ve been meaning to do this for a while anyway. This will make it easy to assemble my dough and take a little guesswork out of my different doughs’ performances so I should be able to achieve a fair amount of consistency.

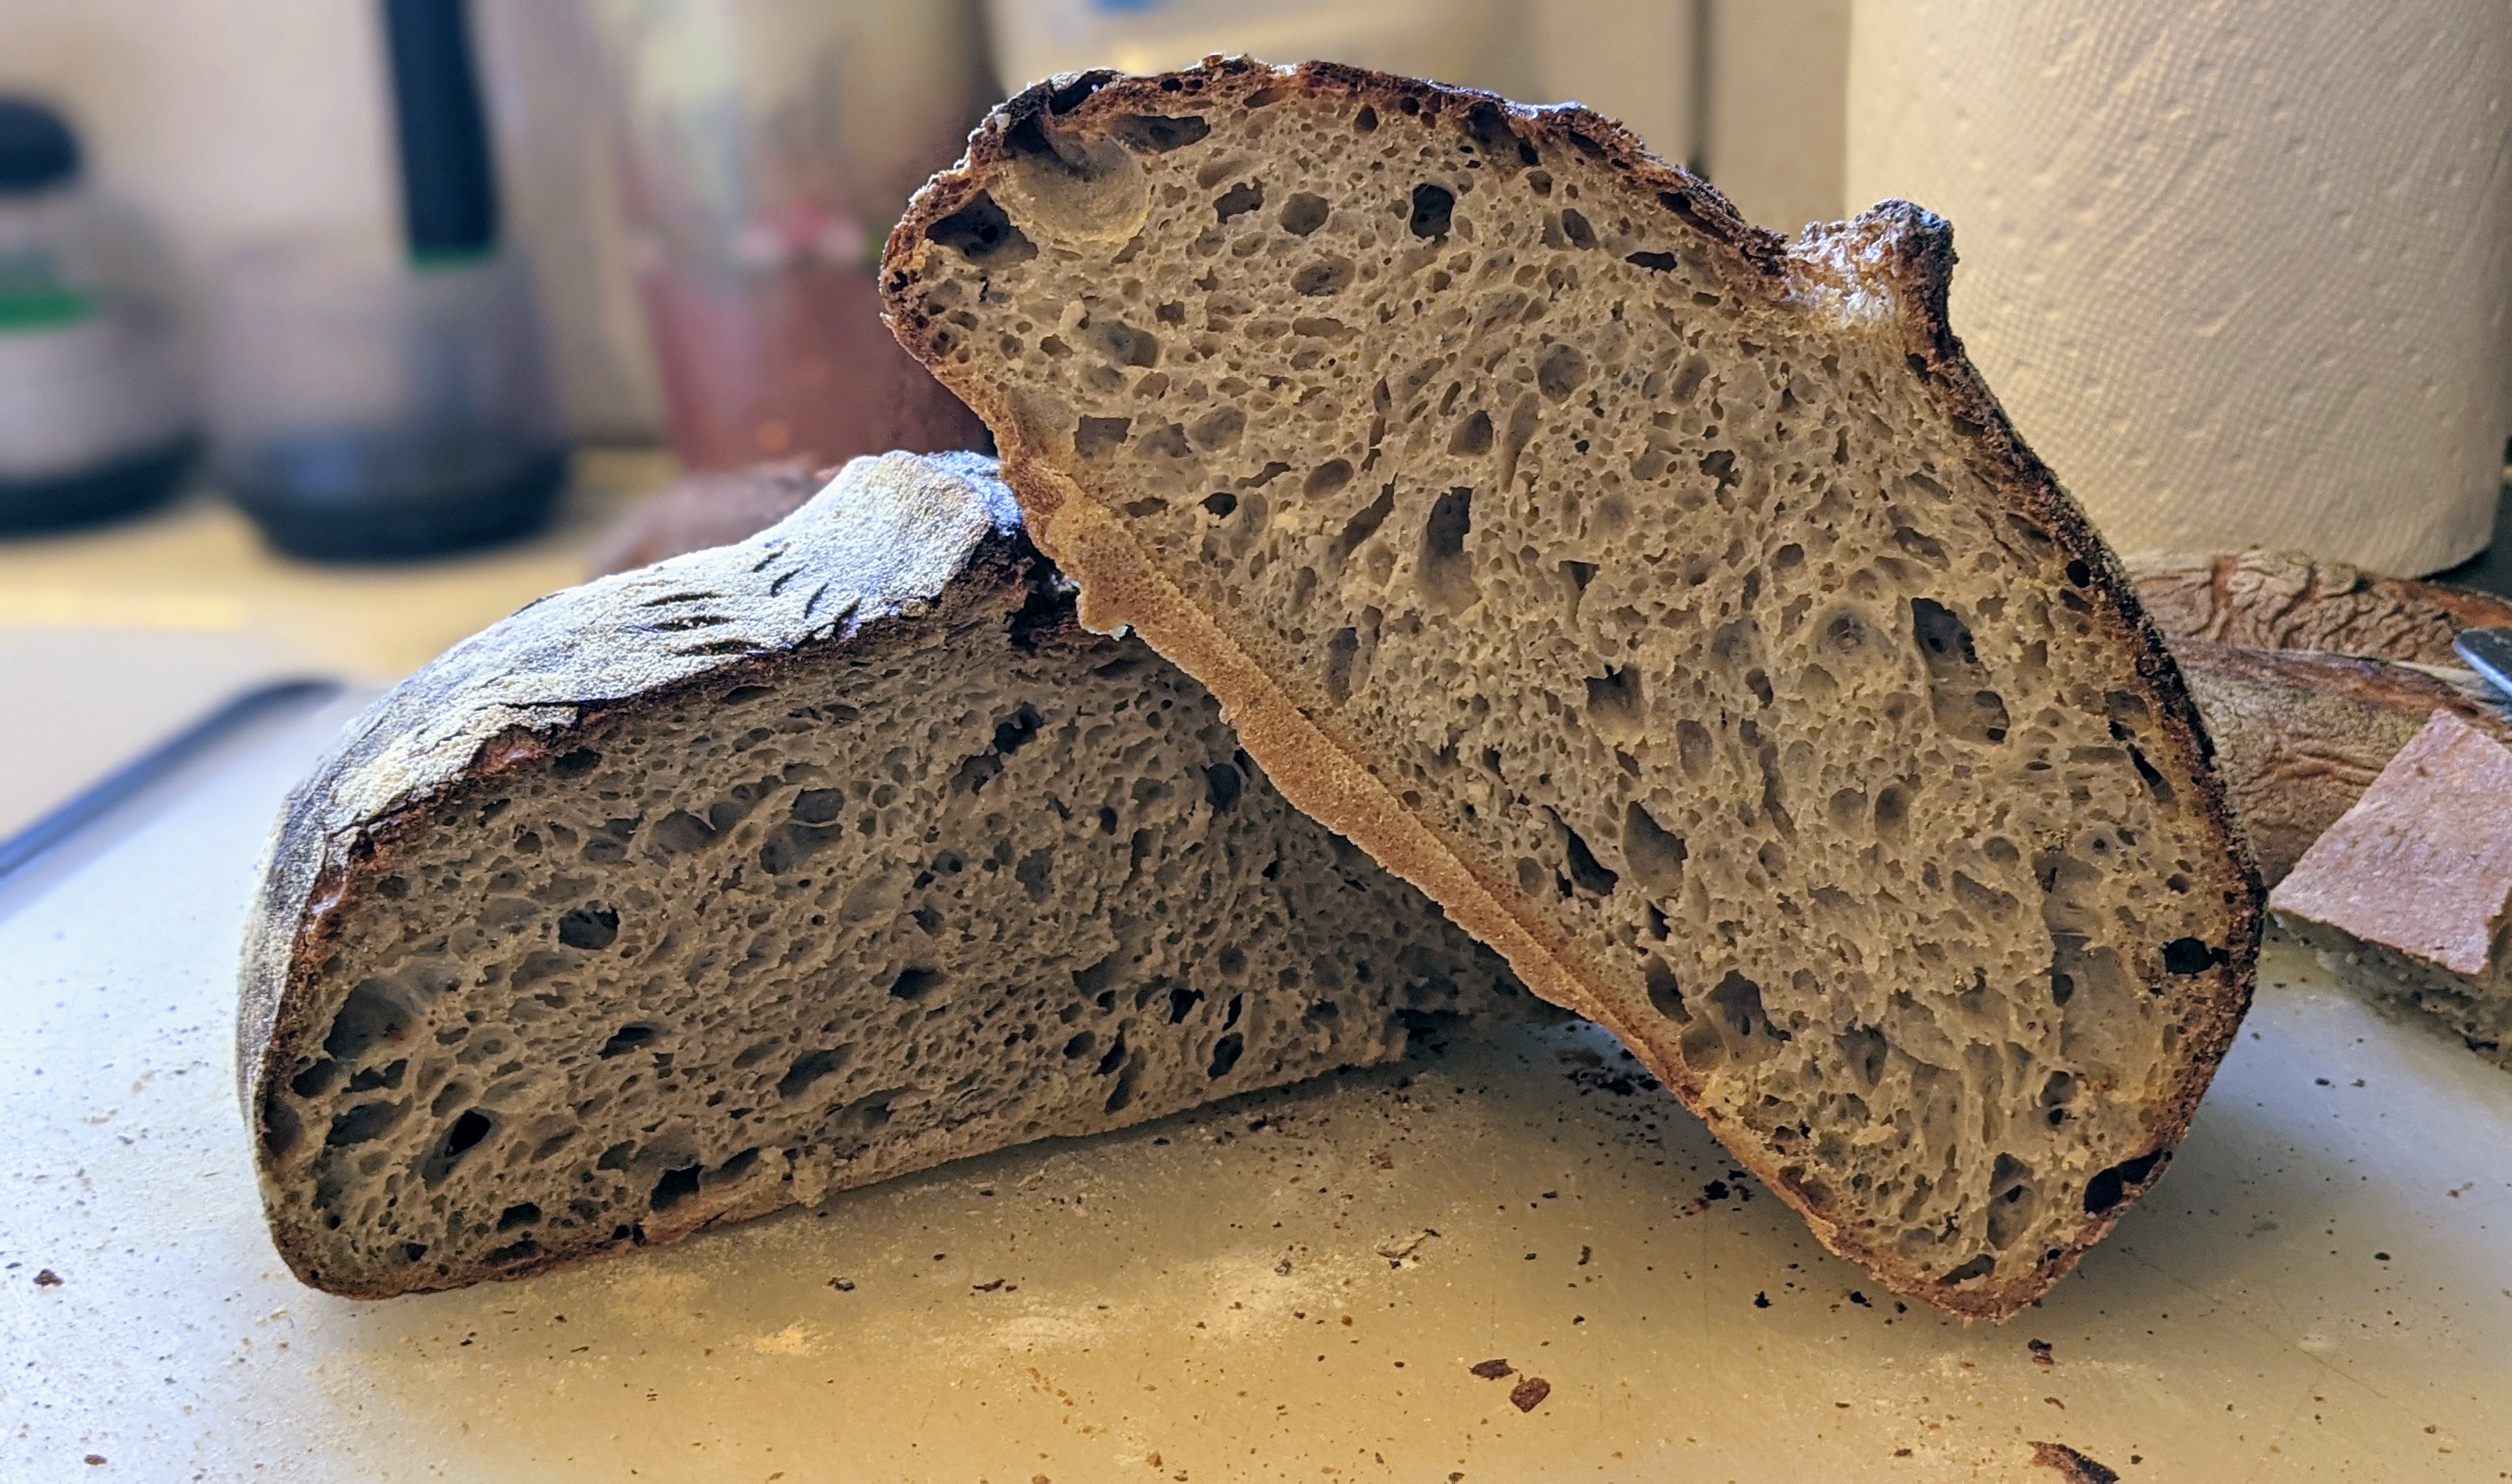
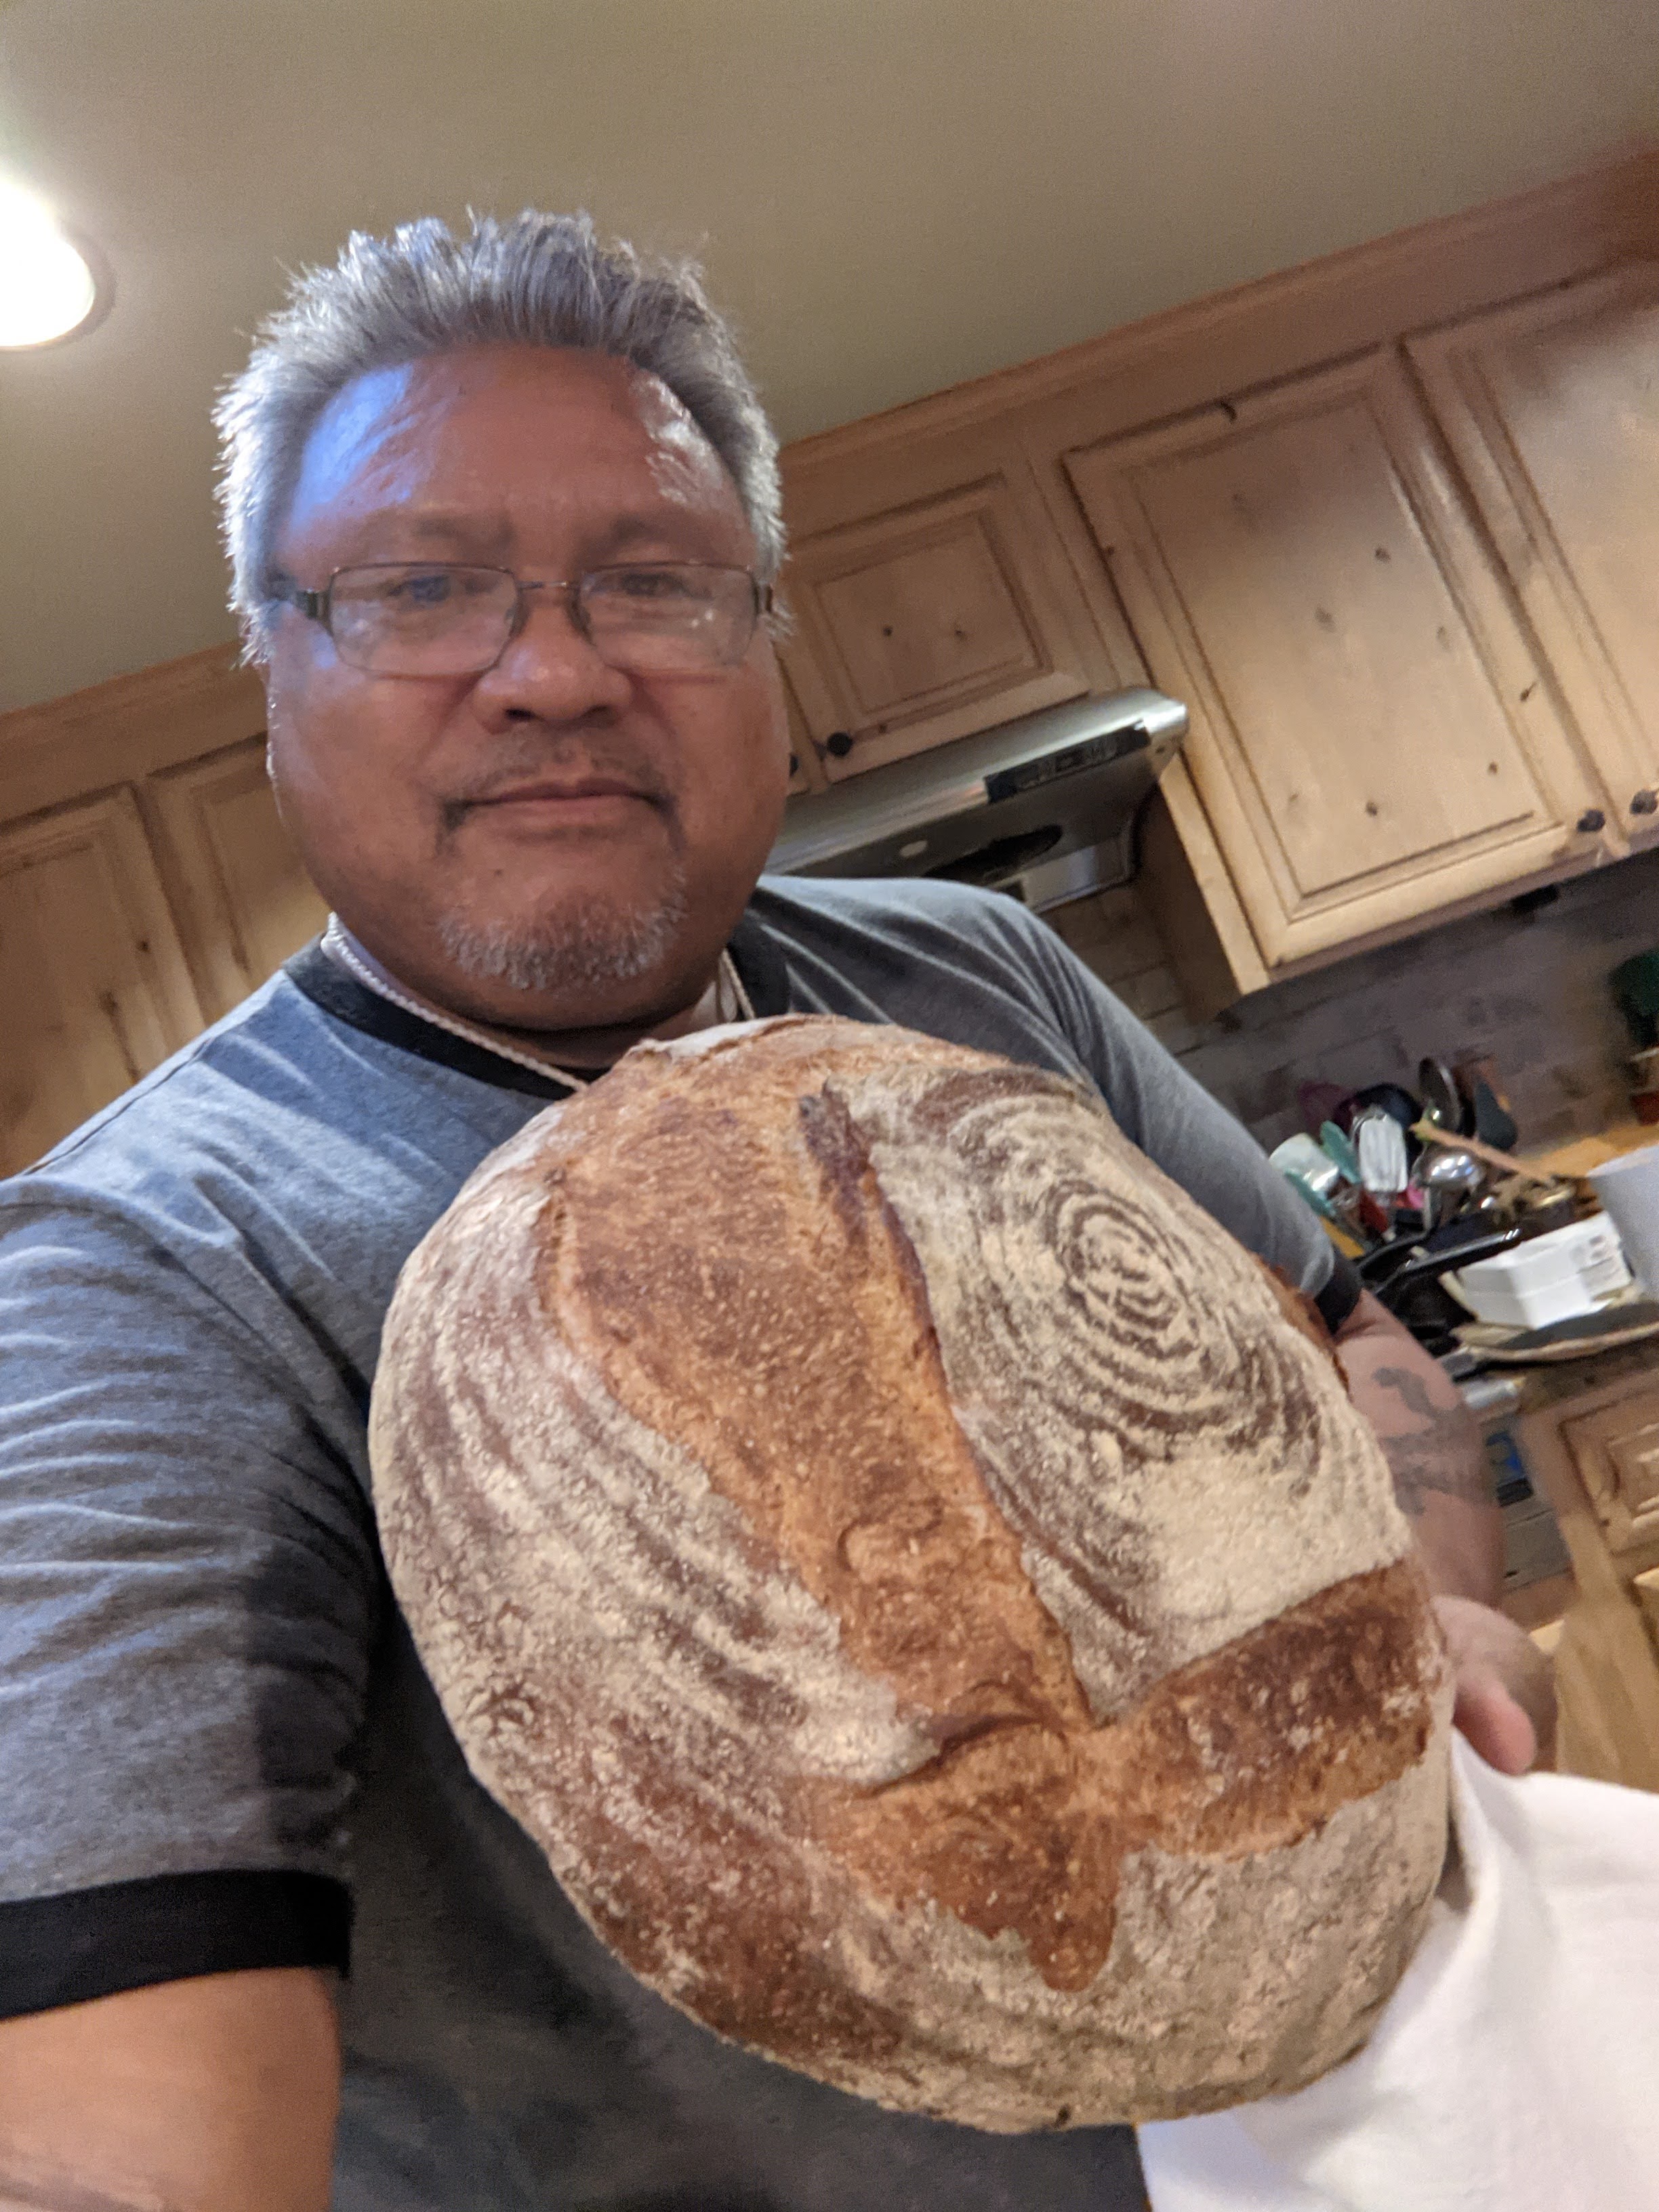
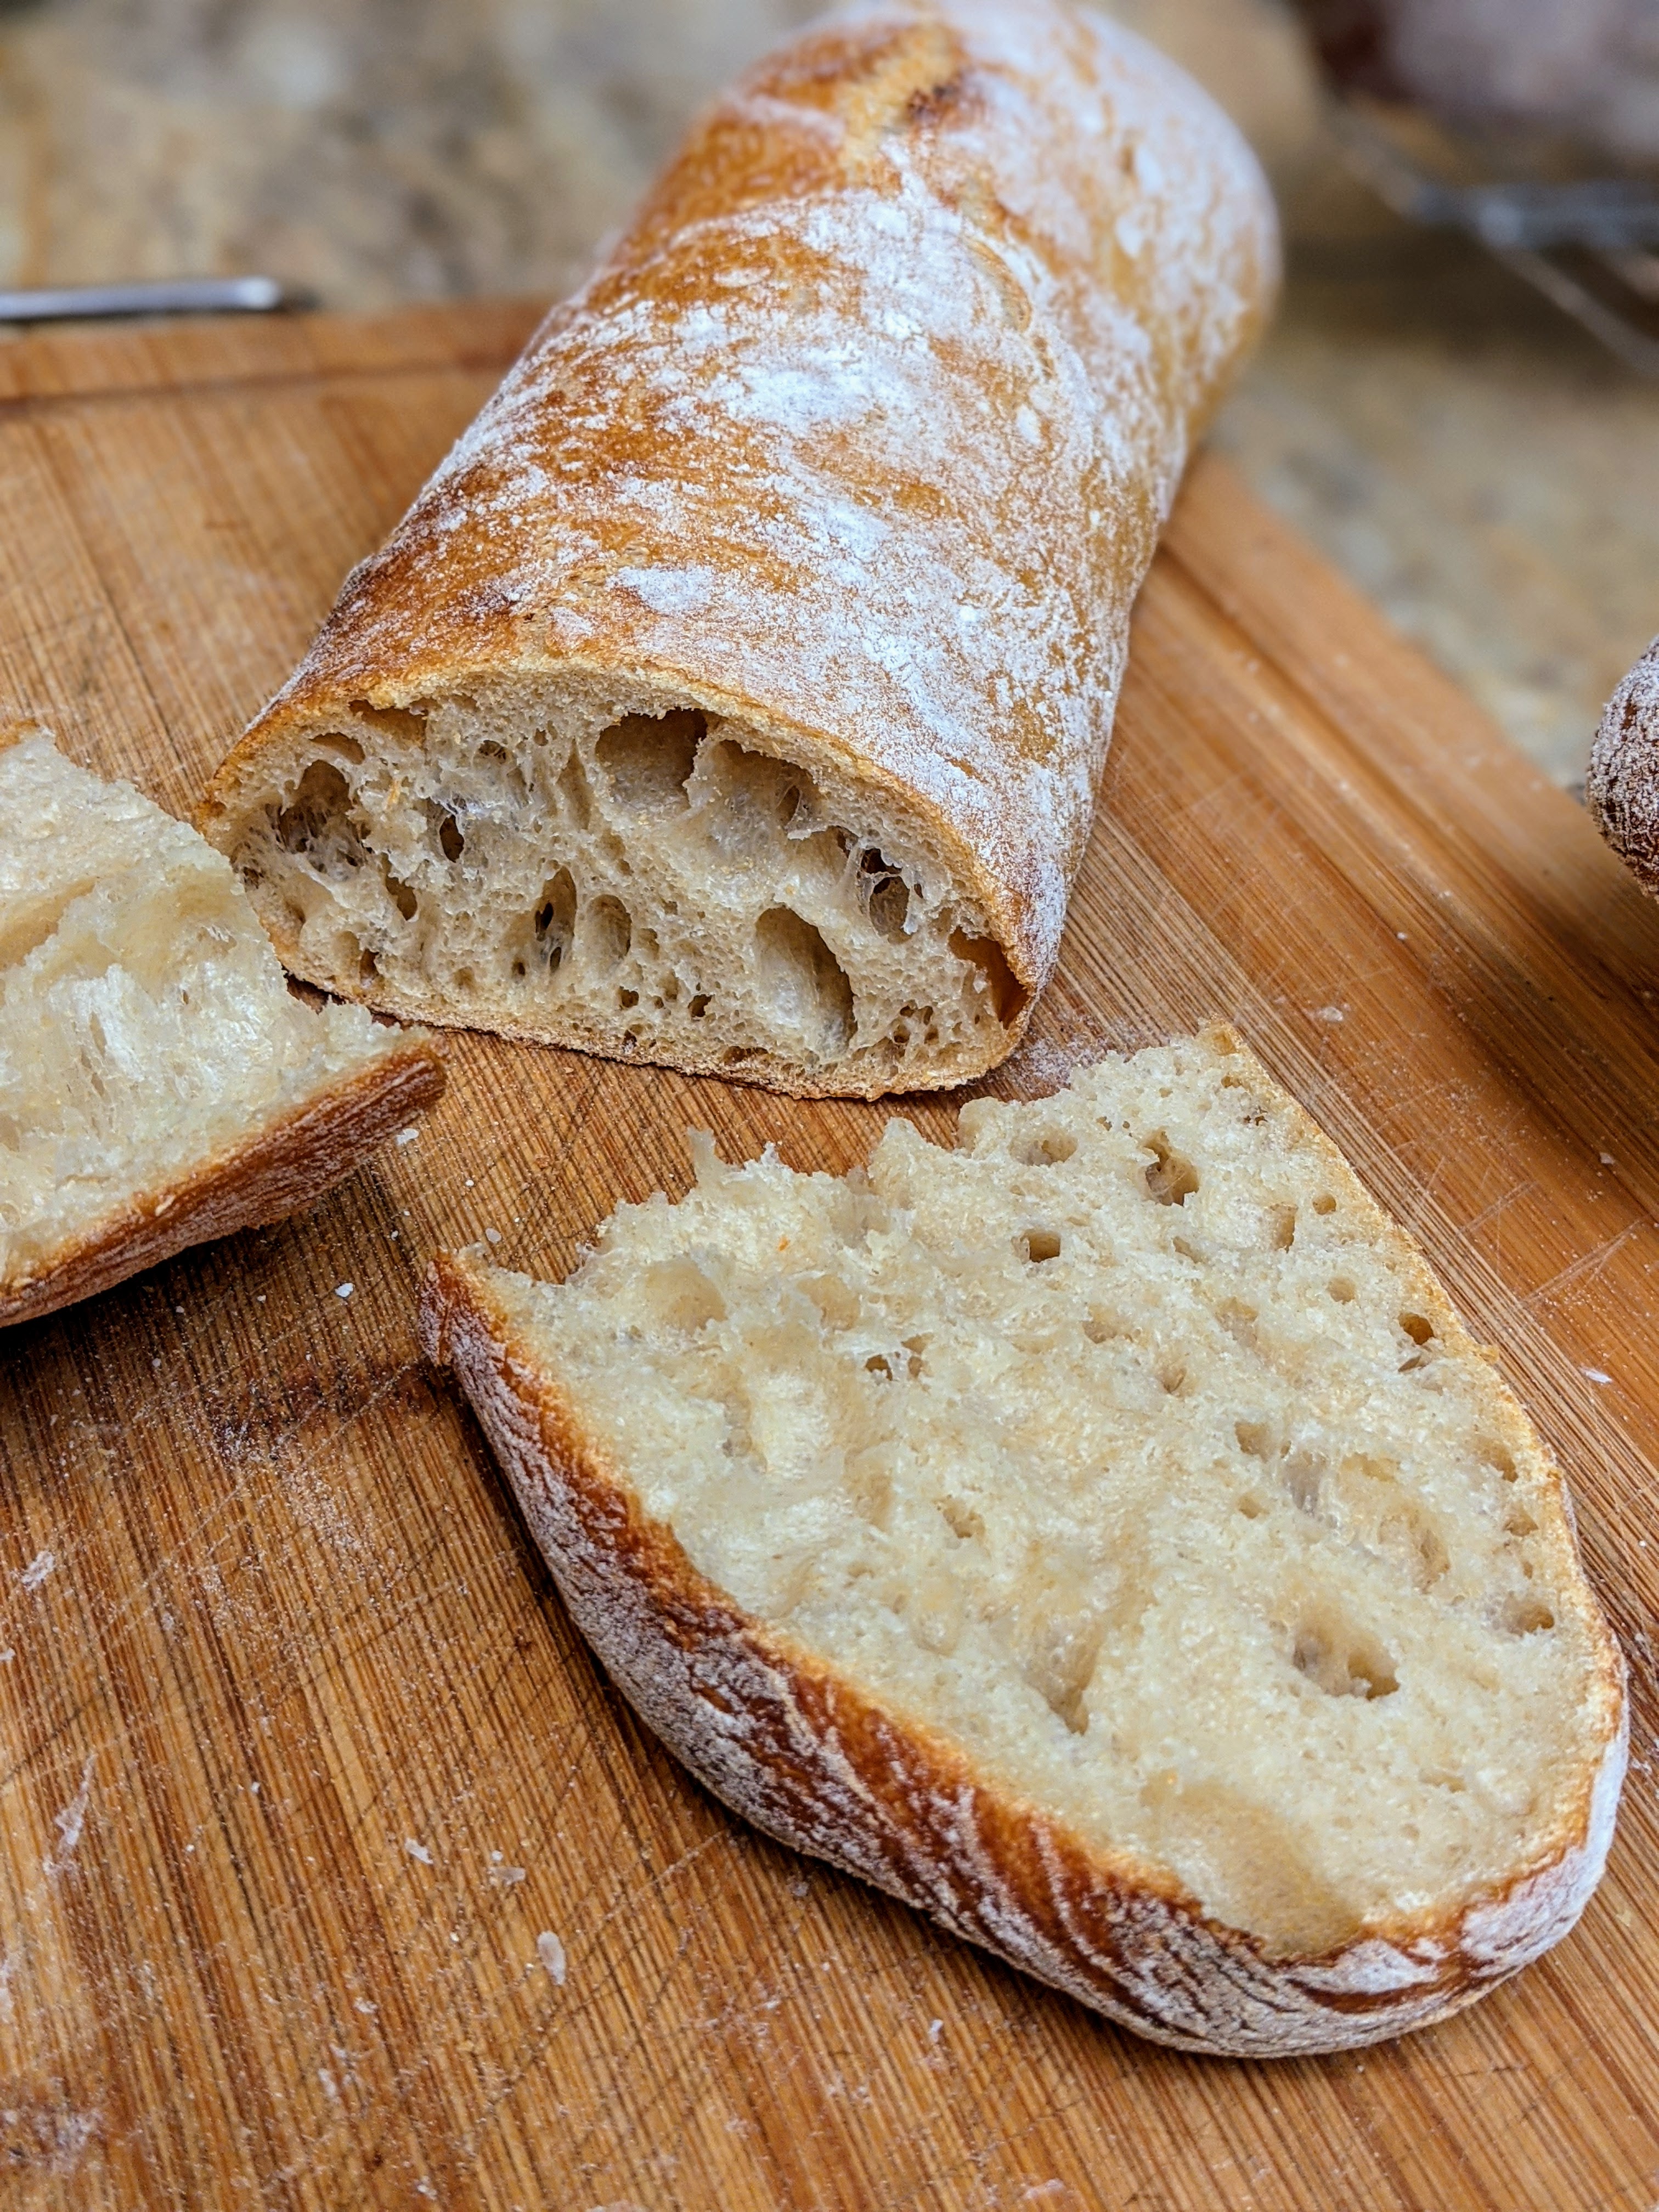
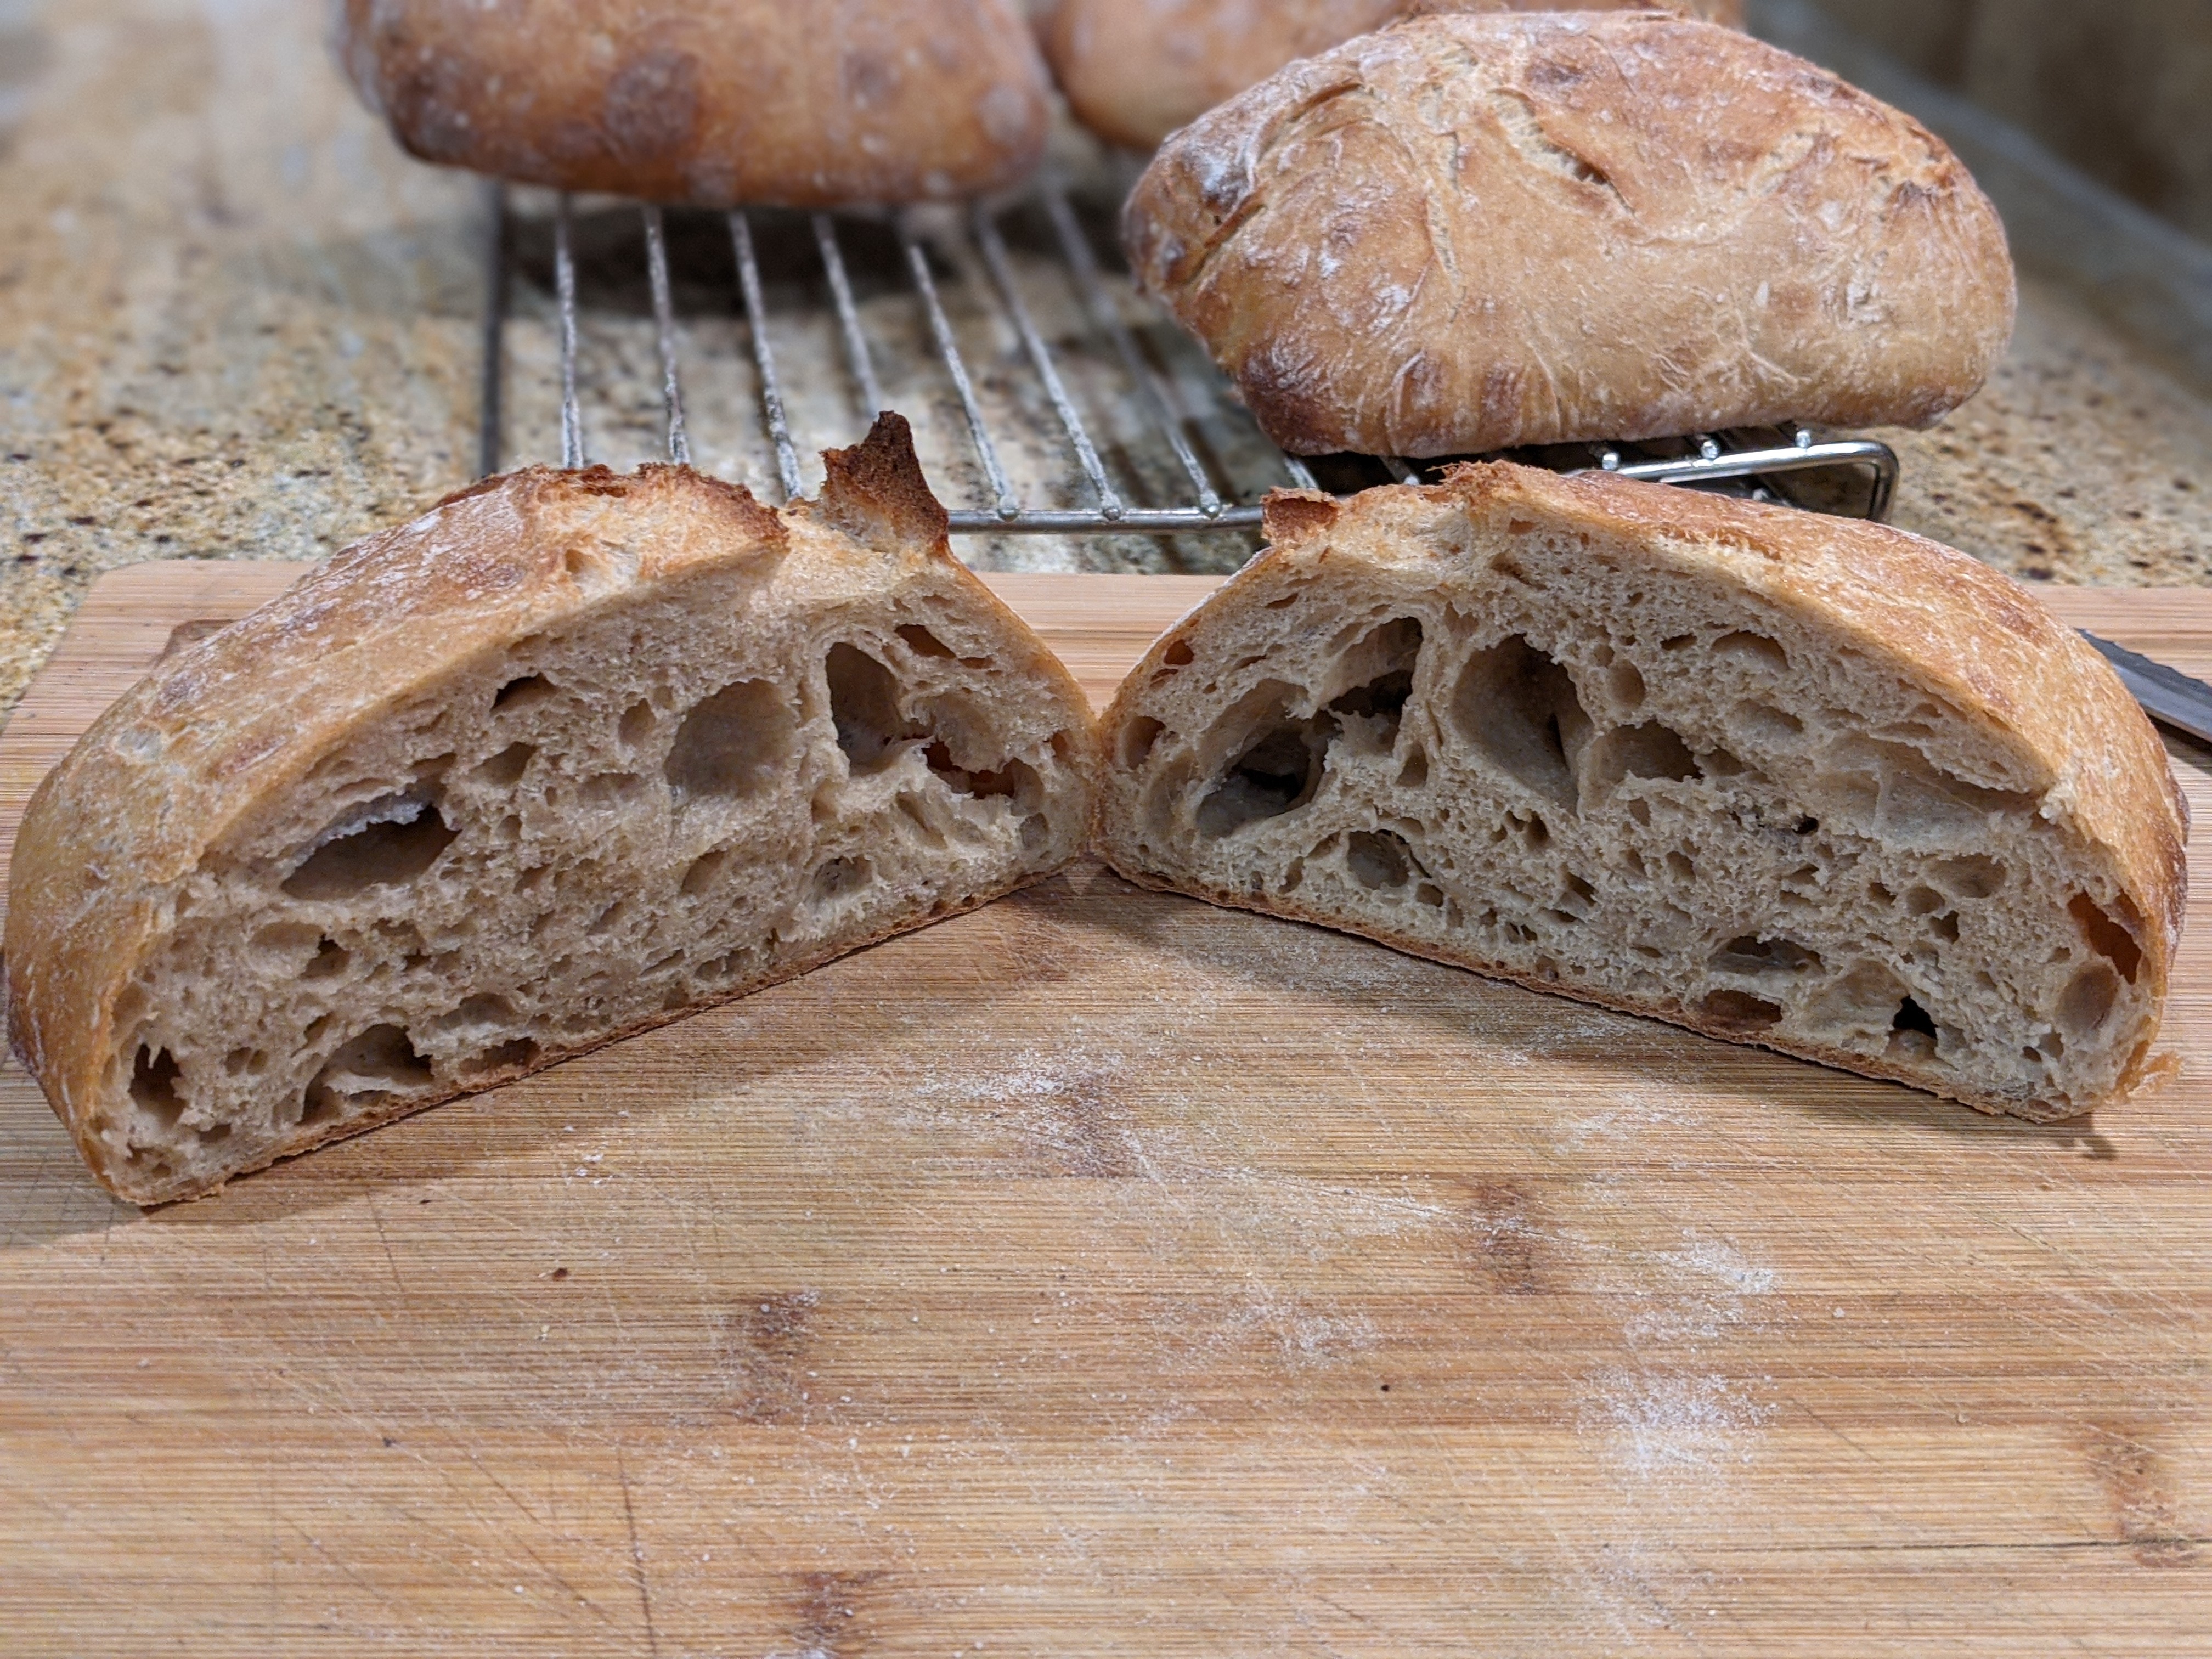
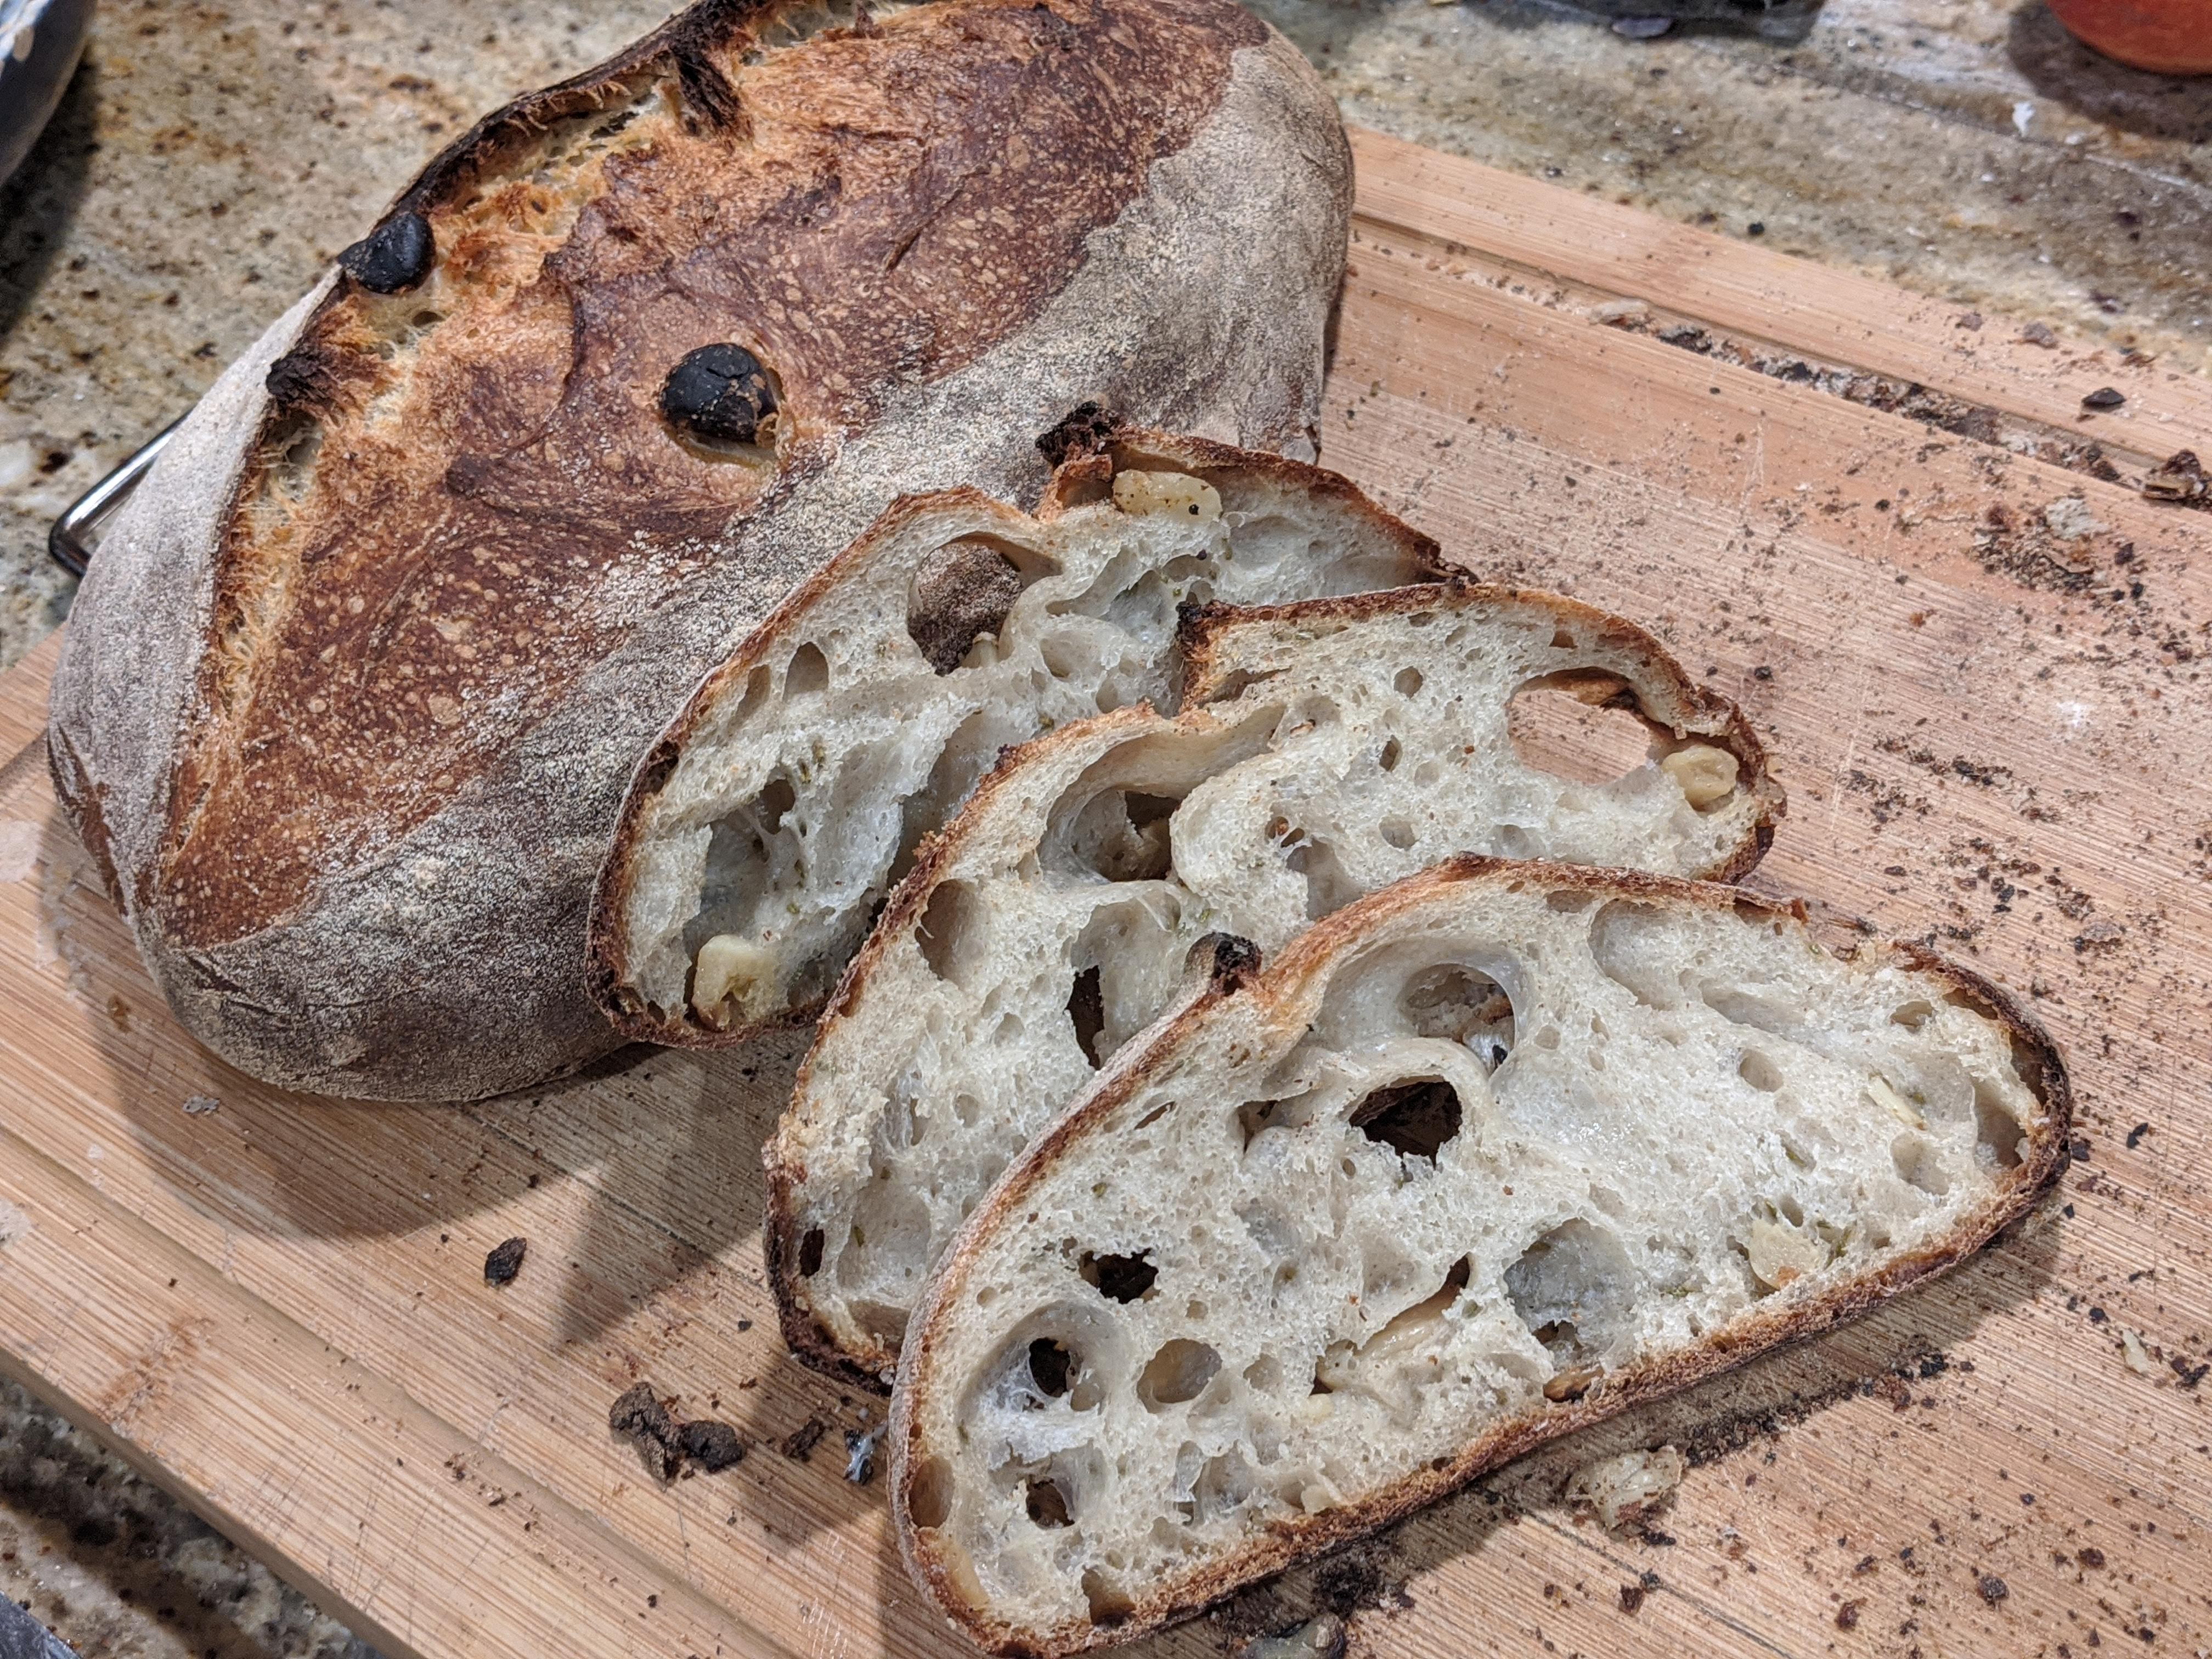
Finally got a crumb shot of my loaves! Wow! I wasn’t expecting them to have such an open crumb because of all the bran in my dough. But hey! Who’s arguing? 🙂 I kind of felt as if I’d get a good crumb, because of the great oven spring, but did not expect it to be this good. In any case, the bread was a hit at the dinner party I attended this evening. It was a going-away-to-college party for one of my daughter’s friends so there were lots of teenagers there. They devoured the bread! I was quite pleased to see that!

Issues with the “Tartine Bread” Baguette Recipe?

Picture of the baguettes from “Tartine Bread”

Okay… who am I that I should even have the audacity to correct Chad Robertson? But when I see a recipe in a book that’s obviously wrong – I don’t care if the author is a world-renown baker and I’m just a peon baker of a relatively unknown micro-bakery – I’m going to point it out.

So what got this bug up my ass about the baguette recipe in Tartine Bread? There are a few things I found in the recipe that seem off. The first issue is that the total yield of the recipe far exceeds what you actually need to make 2 to 3 baguettes as suggested in the book. Furthermore, the amount of yeast used in the poolish seems a little much for the amount of flour and water. And finally, the hydration seems awfully low based on my own research and experience.

By themselves, these issues aren’t really that bad. I have no doubt that the recipe will yield some very tasty baguettes. But all together, they make the recipe seem a little off to me. Again, these are minor things, though the dough yield is actually pretty major. Let’s dive in…

Here’s the recipe from the book:

Leaven400g
Water500g
Poolish400g
All-Purpose Flour650g
Bread Flour350g
Salt24g
Total Yield2324g

Before the recipe, he writes:

Makes 2 or 3 baguettes

When I originally read that, I immediately thought that recipe amounts would be pretty small. But when I saw the amounts he was calling for, I immediately said out loud, “No friggin’ way!” Then that made me analyze the recipe even more.

Right-sizing the Recipe for Home Baking

I know, I know. Who am I to correct a master? But from everything I’ve learned about making baguettes, 40cm demi-baguette dough generally weighs about 220g. Standard 60cm baguettes are about 330-350g apiece depending on the oven. The amounts listed in the recipe would make 10 demi-baguettes or 7 full-size baguettes! Even if we scale out 400g pieces (as he mentions his are in Tartine Bread), that is enough dough to make more than 5 of those! So that must’ve been a typo. Furthermore, if you look at the pictures in the book, there’s no way that the dough pieces are 400g. But look, if you read the book and follow the recipe, just know that it’ll make more than 2 or 3 baguettes.

In light of that, here’s what I’ve been able to glean from the recipe in the book.

Overall Formula

Flour100.00%
Water64.00%
Salt1.70%
Yeast0.00%
Total Percentage165.70%

Preferment (Both Levain and Poolish)

Note that the flour from both the levain and the poolish contributes ~14.25% of the total flour apiece. So for the final dough, you’ll need about 230g of each of the levain and poolish. I just combined the two for my calculations.

Preferment Flour %*28.6%
Hydration %100%
Preferment Flour Weight229g
Preferment Water229g
Preferment Required459g
NOTE: Both starters use AP flour

Final Dough

Flour575g
Water286g
Salt14g
Preferment459g
Yield1330g
4 X ~330g loaves
6 X ~220g loaves

This yield is much more sensible for a home baker. I realize that many folks don’t have a baking stone and can’t make full-size baguettes. Not a problem. The final dough weight of 1330 will make 6 X 220g 40cm baguettes, which is about 15″. If you have 15″ baguette trays, these will fit right on them!

As far as dough development is concerned, Chad Robertson uses the same process for his basic country loaf, which involves 6 folds over a 3-hour period after mixing.

An Issue with the Poolish

Another anomaly I saw in the recipe is that the poolish is made of 200g AP flour, 200g water. and 3 grams of active dry yeast, or 2.25 grams instant yeast. His instructions state to let that stand for 3 to 4 hours at room temp or overnight in the fridge. Based on my experience, that’s way too much yeast for that small amount of poolish. That poolish will be ready in less than two hours, even in cold weather. An overnight fridge rest will have exhausted all flour. I would say use 0.5g instant yeast, or 0.75g active dry. Ideally, you want the poolish and the levain to be peaked at roughly the same time. With that amount of yeast, the poolish will be ready long before the levain. But maybe that’s not necessarily a bad thing as once the poolish is incorporated into the dough, the yeast will have a new food source.

Hydration? Hmm…

You’ll notice that the overall hydration is 64%. That’s not a bad thing, but it does make a stiffer dough. I have to admit that I’m a little dubious of the openness of the crumb with hydration that low. However, Hamelman’s Poolish Baguettes in Bread are only 66%. I guess there are many ways to skin a cat. But that said, everything I’ve learned about baguettes is that in general, they’re at least 75% hydration – but that has just been my personal experience. And no, I’m not being a high-hydration snob.

Believe me, I don’t want to come off as being some know-it-all, and I’m not the kind to actively look for fault in someone’s approach just to make myself feel better. That’s absurd behavior. But being a home-based baker myself, I wanted to point out a few minor anomalies I found. Especially with the dough yield, I just couldn’t imagine making a baguette from almost 1200g of dough! 🙂

As for the dough itself, I see no problem with it. In fact, the high amount of preferment that’s used will make the dough much more extensible, despite it being such comparatively low hydration to what I’m used to – at least that’s what I’m thinking will happen. But there’s no better way to find out than to make these! I’ve never even considered using both a levain and a poolish together. I’m excited to see how it will turn out!

Bassinage Is Really the Way to Go

The more I use the bassinage method, the more convinced I am that it’s the way to go with building great dough structure. For those that are unfamiliar with bassinage, it’s a process of adding water to the dough during bulk fermentation – bathing the dough as the word translates from French.

Mind you, what you’re doing is actually holding back a bit of the total water during mixing to promote the formation of gluten. While it requires water to form gluten, it forms more readily in a relatively drier environment. For the loaves above, my final hydration was 75%. But I only hydrated the initial dough to 70%, reserving that small amount of water to be added once I built up the gluten. I added the rest of the water – less than 40g – during my first fold about 10-15 minutes after mixing.

What is apparently happening with bassinage is your initial mix allows gluten strands to form (as I stated gluten forms more readily in lower hydrations which is why low hydration dough is stiffer). Then when you add more water later to get to your final hydration, some of that water combines with stray flour to form more gluten and some water molecules get trapped in between gluten strands. So conceivably, you’re going to get better oven spring because of the trapped water.

The effect of holding back some of the water was pretty incredible. If you look at the loaves in the picture above, they look like they absolutely exploded. But see how sharply the extreme ends of the loaves rise up and how the loaves haven’t filled the basket to the edges? I believe that is a function of dough strength that I built up in before bassinage and the loaves holding their shape after shaping, not rising action.

Before I started using the bassinage technique, my dough would fill the baskets to the edges, then rise above the rim. But by employing the bassinage technique, I was able to build lots of strength in the dough first, then get it to its final hydration. I’ll tell you, that dough was absolutely magnificent to work with!

When I made baguettes this past weekend, I used the Baguette de Tradition method, which is a same-day, 76% hydration dough. I applied the bassinage technique when making this dough, and thank goodness I did! Truth be told, I actually slightly over-proofed the shaped loaves as it was a pretty hot day. But if you look at the picture to right, they puffed up rather nicely in spite of being a little over-proofed. I owe that to the strength I built into the dough before getting to my final hydration. There was enough strength left in it that the loaves maintained their structure.

When I put the loaves in the oven, I was worried they’d come out flat. But when I pulled them out of the oven, I was SO jazzed. They came out nice and puffy!

As I mentioned in a previous article, I actually stumbled upon this technique before I even found out that it’s actually a formal technique and had been using it for months before I heard Jonathan at Proof Bread on YouTube talk about it. For me, it really is the way to go!

Bathing Your Dough – Bassinage

It’s funny how we sometimes stumble upon a technique, not really knowing it was a technique in the first place! One of the things that I started to do a few months ago to fine tune the hydration and temperature of my dough was to hold back a small amount of the total water in my formula (about 50g – 100g, depending on the bread I was making), then add it in during folding. I had no idea that this was technique called bassinage.

When I started doing this, my thinking was that with high-hydration dough, gluten development was challenging when the dough was really wet. So I’d hold back some of the water and let bulk fermentation start with the lower amount of water to promote the formation of gluten as I had read somewhere that a drier environment helps gluten form much more easily.

Now as I write this, I’m laughing because it never even occurred to me to include this in the formulas I share. And I didn’t think anything of it because formulas I’d learn from prominent bakers such as Jeffrey Hamelman never even mention this in their formulas! But it’s an actual technique that the French call eau de bassinage, or bathing water.

I looked up the term in Hamelman’s “Bread” book and as he explains:

It is often difficult to mix wetter doughs to adequate gluten development when using a planetary mixer (such as a Hobart or KitchenAid). One tactic that is effective is the following: When mixing the final dough, hold back a portion of the liquid (hold back more or less liquid depening upon the total hydration of the dough). This technique (called bassinage in French) can also be used with spiral mixers for wet doughs. The gluten will develop more readily in this drier environment. When the dough has attained the degree of strength you seek, turn off the mixer. Make an opening the place where the dough hook enters the both of the dough. Pour the rest of the liqui into this hold, turn the mixer back on, and mix just until the liquid is incorporated. I find this to be an effective technique when I mix at home, not just for notoriously we doughs like ciabatta, but for many other doughs as wel, especially those whose hydration is abouve about 70 percent.

Hamelman does this during mixing, but when I started researching this technique for this article, I found that different people do it at different stages. For instance, one baker I found does it to incorporate the salt and yeast after autolyse. Another does it as I do during the first fold, adding a little water at a time to the bottom of the container and folding the dough over it. No matter what stage bassinage is performed, one thing is common: Gluten formation takes place beforehand.

I have to do a bit more research into this as I’m interested in the food science behind the technique. But from what I’ve been able to gather thus far, as the gluten has already formed, the added water acts as a lube of sorts to help the dough become more extensible as the water molecules penetrate the dough and get in between the gluten strands. Pretty cool.

All that said, I don’t do this will all my bread – not even all the high-hydration bread I make. But if I know I’m coil folding a dough, I usually fold in water during the first folding session, or when I feel that sufficient gluten development has taken place.

The Yin-Yang of Artisan Baking

In ancient Chinese philosophy, the Yin and the Yang denote a duality in life; how seemingly opposite forces can actually be connected and interdependent. In physics, this can be expressed as Newton’s Third Law that states the for every action there is an equal an opposite reaction.

Back when I was in high school physics class, my teacher gave us a word problem describing a boat with a single sail, and at the stern of the boat, sat a wind machine that could generate enough force to fill the sail and move the boat.

Mr. Calvelli, my physics teacher, went on to elaborate on the weight of the boat and the friction of the hull against the water. Then he asked a simple question: How much force must be generated by the wind generator to move the boat?

It was obviously a trick question because of Newton’s Third Law. No matter how hard the wind generator worked, or how efficient the sail was (it was assumed it was 100% efficient), the boat would stay in place because the force of the wind blown forward would be negated by the force that would propel the boat backward.

Sorry, I was reminiscing and took a detour… So what does this have to do with baking bread?

I’m actually going to turn to other anecdotal experience for this. I spent the better part of the first half of my life studying martial arts. I then moved onto – believe it or not – ballet, which I did for about 10 years. In studying both disciplines, there was a yin-yang nature that always fascinated me. On the one hand, I had to be absolutely focused on what I was doing at the time (yin). But on the other, I had to be completely aware of everything outside of me (yang).

When I started getting into making artisan bread, I realized that to master the craft, I had to apply that focus-awareness type of approach to my baking. Take mixing ingredients for example. On the outside, it’s a simple, pedestrian step. But it’s not enough to just go through the motions of getting the ingredients together. You have to be aware of how the mixing will affect the dough further into the process.

For instance, yesterday I mixed ingredients for two different types of bread. The first was a roasted garlic levain bread, the second was a traditional long-fermentation sourdough. I used the exact same flour blend for both bread, and they both had the same hydration at a little over 70%. But I mixed them completely different.

The garlic loaf used both levain and a tiny bit of yeast, so I fully mixed and did initial kneading with my mixer. With the traditional sourdough, which used nothing but natural leaven, I was much more gentle and mixed to a shaggy mass, then did stretch and folds over the course of a few hours. Both mixing actions required absolute focus to get the dough to the right state. But at the same time, I had to be cognizant and aware of what I’d have to do following those actions. So… yin and yang.

Though I used mixing as an example, it applies to every step of the process. Of course, this could be extended to other things out of bread-making, but I’ll stick with bread-making…

I can’t stress the criticality of this yin-yang in bread-making. With respect to focus, it’s not about concentrating on something to the exclusion of everything else – that would defeat awareness of other things. But at the same time, it’s not letting yourself get distracted. On the other side of things, we need to be simultaneously aware of our surroundings and our dough and respond to the infinite variables.

So what’s the point of all this?

Simply that for those of us who’ve immersed ourselves in the craft, it’s not about just crafting a single loaf, but the same kind of loaf consistently. As Bruce Lee put it…

I fear not the man who has practiced ten-thousand kicks once, but I fear the man who has practiced one kick ten-thousand times.

~Bruce Lee

To put a finer point on it, in “Bread,” Jeffery Hamelman wrote:

…if we acquire the skill to make a dozen or a hundred or a a thousand loaves, the next level of proficiency is to be able to make them consistently. And that for both the professional and the home baker, is probably the greatest challenge: to be able, day after day, to adjust to the specific needs of the day’s doughs, to factor in and accomodate the slight changes in ambient temperature and humidity, as well as the degrees of ripeness of the poolish or biga or soudough and the tolerance of the dough during fermentation…

~Jeffery Hamelman

It’s fine to say this, but the backdrop is this idea of the yin-yang of making bread.

Happy baking!

BTW… I’ve been writing this entry while baking and I just pulled the garlic loaves out of the oven! The traditional sourdough loaves have at least another day in my retarder.

I’ll provide a recipe later on, but I adapted it from Jeffery Hamelman’s book, “Bread.” His recipe uses bread flour, but I used a high-extraction/AP flour blend.

Engaging the Five Senses

It was supposed to be a batard… 🙂

I’ve been baking bread for over 40 years, but I haven’t really taken it seriously until this past year. My only goal up to that point was to create something edible. Take, for instance, the loaf pictured above. It was absolutely delicious. But I remembered thinking it didn’t look right. It completely conformed to the shape of my Dutch oven. It was supposed to be a batard! But it exploded in my pot probably due to it being under-fermented.

My wife, ever supportive of my new passion, told me that it didn’t matter as long as the bread tasted good. But I showed her pictures from Ken Forkish’s “Flour Water Salt Yeast” and said that I wanted to make bread that looked like the bread in the pictures and further explaining that as an artist (I’m a part-time professional musician), aesthetics are important to me.

After that conversation, I put my foot down and decided to not only make bread that tasted good, but it had to look good as well.

But since then, I’ve evolved my sense of aesthetics. Now, I feel as if a successful bake is one in which the bread appeals to all five senses.

Sight – I’ve broken down the visual sense into two categories: 1) Similarity to the archetype of the loaf I’m creating and; 2) General visual appeal, or how appetizing the loaf looks. For the first item for example, do the baguettes I made look like what I expect baguettes to look like. The second one is easy. Does it look good?

For example, look at the loaves above. Both are sourdough batards. If I placed the two side-by-side for consumption, I’m willing to bet that the loaf on the left would be cut into first for the simple reason that it just looks better than the loaf on the right that has collapsed (it was over-proofed).

Visual appeal is important to me at this stage in the game. A “hug” should look like a hug. A ciabatta should look like ciabatta and have a beautiful, open crumb.

Touch – What does the loaf feel like? Again, does the loaf feel like it should? For hearth bread, even for large loaves, when I pick one up, I want them to feel lighter than what my eyes tell me. Take the batard on the left above. That loaf weighed over two pounds. It was a big loaf. But when I picked it up, it felt light and airy. The crumb reflected that:

Not only that, the texture of the crumb was spongy and soft – and I was even using a predominance of whole wheat and high-extraction flour!

Aroma – Pretty much any homemade bread smells great coming out of the oven. But I found so much complexity in aroma by using a blend of different flour. To me, there’s nothing like the aroma of whole grains when they’ve been subjected to high temperature.

Taste – Though they’re not listed in any particular order, I purposely didn’t list taste first because it’s kind of a given. And frankly, similarly to wine, taste goes along with aroma. As with aroma, what I strive for with my bread is a complexity in flavors. And since there’s technically on three ingredients in naturally leavened bread, achieving complexity is a system of trade-offs.

For instance, because I use a healthy percentage of whole wheat and high-extraction flour (typically 10% whole wheat, 50% high-extraction) in my flour blend, my loaves generally don’t have a super-open crumb. I also tend to bake my loaves more aggressively to ensure good caramelization of the sugars on the crust (though I do my best not to take things out to black).

A more “aggressive” bake

Sound – This one isn’t as apparent as the others. But when I pick up a loaf and give it a light squeeze, I want to hear the bread sing as the crust gently crackles beneath my fingers. I also listen to my loaves as they cool and expect an occasional crackle as the loaf contracts and the crust cracks. It’s a sign that the crust is crispy, but also has some give in it.

There’s really nothing like that sound!

You Have to Be Adaptable

Last night, I created an overnight levain before going to bed as an experiment. It contained 400 grams of culture, 400 grams of high-extraction bread flour, and 400 grams of water. By morning, it was ready. So… to get the flour to a nice, round kilo, I added 400 grams of AP flour, and 150 grams of water to get the hydration to 75%.

My thought was to make a batch of sourdough baguettes. But this time, I’d try out the process of making baguettes traditional, which involved a loose mix, followed by stretch and folds every 20 minutes for an hour, then bulk fermenting for a couple of hours (though I’d check after an hour).

What I should’ve done was check after 30 minutes because at the 1-hour mark, the dough completely overproofed! It was a sticky mess with absolutely no strength. Pulling on the dough would tear it! And worse yet, it was highly acidic!

BUT!

Rather than chucking the dough, I thought to myself, why not add a bunch of flour and water and use that dough as a pre-ferment? So I took my mixer out, then gradually added flour and water until I got a dough texture that was consistent with an approximately 75% hydration dough.

But my yield completely changed by doing this! Normally, my dough yield is about 1.7 – 1.8 kilo of dough, which allows me to create 6 X 290-295 gram baguettes. Adding flour and water literally doubled my normal yield!

So my next thought was that when bulk fermentation was finished, I’d divide the dough such that I could make 6 X 250 gram baguettes, then divide the rest of the dough into two medium boules or batards.

It was a great idea on paper, but when bulk fermentation was finished (as shown in the picture above), although it looked normal, the dough was SO acidic that it was overly extensible and super-sticky even though I could feel there was plenty of strength in the dough. Shaping that kind of sticky dough into baguettes was completely out of the question.

Furthermore, I knew instinctively that though I could shape the dough into three or four batards or boules, the dough wouldn’t stand up to the sheer size of the loaves and though they’d expand, they’d expand outward instead of up. So in the end, I decided to create 6 small, free-form batards.

My thought was that they’d be big enough to create some decent slices for finger sandwiches or what-not, but small enough that they wouldn’t collapse under their own weight. Thankfully, it was the right decision. The loaves popped up beautifully in the oven!

As you can see in the picture above, I got great oven spring with all of them. And I was actually surprised to see the moderate crumb considering the dough consisted predominantly of high-extraction flour that has lots of bran in it. I owe that to the acidity of the dough which, as I mentioned, adds extensibility.

This whole exercise provided a couple of HUGE lessons for me!

First of all, there’s always a way to salvage an over-proofed dough, and secondly – and most importantly – you have to be adaptable and flexible enough in your thinking to respond to different conditions. If I went ahead and tried to create baguettes, they’d tear in the shaping process, and with baguettes, it’s all about the skin because there’s little internal structure, so you have to rely on shaping.

Granted, this is probably something I wouldn’t have figured out early on in my journey. I would’ve chucked the dough. So this experience presents yet another important lesson: Never stop studying and practicing! I’ve spent so much time studying not only techniques, but the science behind dough fermentation.

Just last night, I read about how acid content affects the dough and makes it more extensible as well as eventually breaking down the gluten structure! Thank freakin’ gawd that I learned that! That information allowed me to respond to the high acid content in my dough! So for those of you who read this who are on their own journey, you can never learn enough.

Finally, I’ve learned to approach bread making much like Bruce Lee approached martial arts in that the technique you use is dictated by the situation. Especially early in my process of learning artisanal bread making, I was fairly canonical in my approach and followed recipes and techniques I’d learn fairly religiously. But I was always wondering why my bread wouldn’t turn out the way I was expecting. It wasn’t until I allowed myself to tweak on the fly and respond to different situations that I started seeing much better results.

So yeah… You have to be adaptable!

I Use a Stand Mixer. So There!

When I’m mixing my ingredients, I use my handy-dandy KitchenAid Artisan mixer. I love that contraption! It has made my life so easy. I’m sorry, but I don’t have any romantic notions about mixing dough by hand. I did it when I first started on this artisan bread obsession, but then when I started baking daily, I abandoned doing that in favor of having a more automated way of bringing my ingredients together.

Like many, I’ve read books and watched videos where the bakers extoll hand-mixing, elevating the process to one of honor. It’s like there’s a certain romanticism attached to the whole artisan bread making process and making bread the old fashioned way where every step is done completely by hand. I bake bread at least six days a week and I’m doing it while I’m working at home. I don’t have time to do everything by hand for goodness’ sake! I’ve got meetings to attend and actual work to do. So the more efficient I can be the better.

But I laugh when professional bakers say to mix by hand because you know they’ve got an 80-quart Hobart (or maybe even a few of them) mixing up their dough! I realize their intent is pure and that they’re trying to reinforce that we learn and know what it’s like to feel the dough develop. But for me, once I learned what to look and feel for, I went straight to the mixer so I could “git ‘er done!”

That said, I think that it’s important to mix by hand when you first start out. That way you know what the dough feels like at every stage of mixing. And to this day, even though I use a mixer, I frequently stop it to feel my dough. I don’t just set it and forget it. I monitor the state of my dough carefully and get it to the point where I can throw it into its fermentation container, or dump it out onto my board to knead. Yes, I hand-knead my lower-hydration dough. I have to because it strains my mixer too much.

But one thing that my mixer does that I can’t do without a lot of effort – and time – is evenly and efficiently distribute the ingredients. Okay, yes, I can achieve that with time. But I have to admit that mixing ingredients is probably my least favorite baking activity. So I’d rather have a machine do it for me, then I’ll take over and do the rest.

I do have to admit that I feel just a little guilty about using a stand mixer at times. But then I remember how much I don’t enjoy mixing by hand, and that guilt disappears – quickly.

Happy Baking!

My Rules for a Successful Bake

An artist by nature, I’m not naturally inclined to being disciplined. But I’ve had to be very disciplined to bake the loaves I bake with any semblance of consistency. To that end, I’ve come up with rules that I follow to ensure all my bakes are reasonably successful.

Rule 1: Be Prepared

In a commercial kitchen, this is generally known as mise en place, where everything that I need – from ingredients to implements – is within easy reach and my workspace is cleared and set up for my process. There is nothing worse to me than having to scrounge and scramble for something I need in the middle of the process.

Rule 2: Keep It Clean

“It” means pretty much everything. I’m obsessive about keeping my hands clean, but I also keep my workspace clean. If I flour my bench, as soon as I’m done, I use my scraper to clean up the loose flour and put it back in its container. As soon as I’m done with a mixing bowl, I wash it and put it away. Clutter is the enemy!

Rule 3: No Peeking!

Actually, this is another way of saying, “Be patient.” This especially applies to bulk fermentation. When I first started out, I’d check my dough every 15 minutes to see if something was happening. But with the generally small amount of yeast I normally use, things just don’t happen very fast. Of course, I’ve gotten to the point where I implicitly know how long things will take given different parameters. So when I set the timer for some part of my process, I just let the dough sit. That said, I do usually check about 2/3 of the way through, but it’s a quick inspection just to confirm everything’s okay.

Rule 4: You Do You!

Like many, I learned a lot by watching videos and participating in online forums, and interacting with lots of different bakers. All that activity was critical to my process because it opened my eyes to different shaping and scoring possibilities and even more importantly, showed me the most efficient ways to do things. But once I established a sense of what works for me, I stopped trying to achieve a particular look or follow someone else’s process. Especially with respect to my process, I had to work out what worked for me and my equipment and environment.

Rule 5: Use the Right Tools for YOU

You’ll read or get advice that you should get this or that or whatever. But my advice would be to not have a knee-jerk reaction and get everything you read about or hear about and instead try to use what you have on hand first. For instance, when I first started taking bread-making seriously, like many, I read Ken Forkish’ Flour Water Salt Yeast book. In it, he recommended getting a 12-quart tub. When I read that, I immediately got a quizzical look on my face because that size of tub seemed awfully big for the amounts of dough in the recipes. Lucky for me I already had some food-safe tubs on hand and I used those until I finally got an 8-quart tub (I actually still use them as pre-ferment containers). But I’ve encountered so many people who purchased one of those 12-quart tubs and now no longer use it because it’s TOO DAMN BIG! But that story aside, you probably have a lot of the tools you’ll need already. Yes, they may be old, but that doesn’t make them obsolete.

One Size Does NOT Fit All

Though all bread is basically made with just four ingredients, what makes them different lies in the ratios of the ingredients and especially the processing techniques. For instance, with boules and batards where the ingredient ratios and fermentation times tend to be exactly the same, just a little thing like shaping completely changes the texture of the bread. Crusts bake completely different.

The reason I’m bringing this up is because early on, I learned that lesson. Reading Ken Forkish’s Flour Water Salt Yeast (FWSY) was a revelation in artisan bread baking, but it also had the effect of metastasizing my thinking that I could use the same principles I learned in the book to every single type of bread that I wanted to bake. That, even though Ken often said that his recipes were general guidelines and that depending on my kitchen and equipment, I’d have to work out what worked best.

I thought I could use the basic Saturday white bread recipe to make baguettes. After all, I thought to myself, it was just dough, and I was just shaping it differently. But to my frustration and consternation, my baguettes kept on coming out too heavy. Yet in my stubbornness, I pulled an Einstein, “Insanity is doing the same thing over and over again and expecting different results…” I finally had to get over the fact that FWSY was not the be-all/end-all to baking artisan bread, and I had to change things up.

I now make baguettes that are airy on the inside and crispy on the outside and if you looked at my process, it’s WAY different than any recipe in FWSY. And mind you, I’m not cutting down anything in the book. But I had to break free and diverge from the book, which is what I believe Ken intended all along.

To be honest, everything changed for me when I decided to make long loaves like baguettes. You can’t make them in a Dutch oven, and I didn’t want to purchase a bunch of special pans to bake the different kinds of breads I had in mind. So when I purchased a baking stone, it was game over as far as FWSY recipes were concerned. I still made my boules according to the recipes in the book for the most part, but for other loaves, I took different routes.

And this is where I realized that one size doesn’t fit all with respect to making bread. Even the slightest tweak can yield significantly different – and admittedly, sometimes unexpected – results. For example, in FWSY, Ken promotes this idea of letting the dough bulk ferment to double or even triple the original size. I never do that because it runs the risk of over-proofing the dough. And since I use a baking stone, I don’t have an enclosed container that will limit the spread of my dough should it be over-proofed.

For me, I want to have plenty of energy left over for intermediate and final proofing. So I cut bulk fermentation short at about 50% rise, so I have plenty of fuel for the final two fermentations after pre-shaping and shaping, respectively. Furthermore, I will err on the side of slightly under-proofing my dough (not too much). My final product may be a little tighter than a fully-open crumb, but I also avoid making flat loaves.

So for those just starting out, I have to say that just don’t take my word for it. You’ll have to learn these lessons by baking over and over. But the important thing is to keep an open mind to different techniques and processes. One size does not fit all!