Unknown's avatar

About Unco B

Known as "Goofydawg" for decades, a few years ago, I reinvented myself from the geeky image I used to portray to that of a patrician whose life has been refined from experience. And I realized that I'm at the time of my life where I want to share that experience and hopefully pass on some of the knowledge and wisdom I've gained over the years.

No-Knead, No Oven Spring? No Problem!

I lurk a lot in online bread baking forums in search of tidbits of information and insights that will help me improve my skills. And though I’ve finally reached a point where I can consistently make a pretty good loaf of bread, I’ve refrained from contributing to public forums. But that doesn’t mean I don’t want to share, which is one of the reasons I devoted this blog to bread baking. A large part of this blog is a diary of the things I discover, the other part of it is sharing the lessons I learned. And a HUGE lesson I’ve learned is this:

With no-knead bread, if you want good oven spring, you have to have achieve sufficient dough strength so the gluten network retains the gases to promote forming gas pockets and be strong enough to hold the dough’s general shape in the first 10-15 minutes of baking.

Okay, for the experienced baker, this is a given. But for many folks like myself up until recently, it wasn’t an intuitive thing. I now know how to feel that my dough has strength and the telltales, but when I first started making bread, I was just following the recommendations in the recipes I’d follow.

Specifically, I’m talking about the recipes in Flour Water Salt Yeast (“FWSY”) by Ken Forkish, which seems to be the “reference” book for many home bakers. It surely was mine when I first started out. I still follow many of the principles Ken lays out in the book, but after having created dozens upon dozens of loaves over the last few months (I bake at least two loaves a day), I realized that there was one discussion that was missing in the book, or more implied rather than specifically called out and that is developing dough strength and why it’s important.

On page 35 of FWSY, he has a page devoted to folding. The salient point of the section is in the first paragraph:

Doing this [folding] several times during the bulk fermentation of the dough helps organize the dough’s gluten network, which allows it to holod on to gases produced as the dough ferments… The more complexly knit this network of gluten becomes, the more strength the dough has.

That nails it. And for a more experienced baker, the implication is clear: Developing dough strength gives you a better rise and oven spring.

But for the beginning baker following recipes, they don’t have the experience and, more importantly, haven’t developed the feel for dough strength. So like me, they’ll just follow the recommendations as in the Saturday White Bread which specifies just two folds. But that’s assuming you’re using AP flour or white bread flour. But even with those flours, if you haven’t sufficiently folded the dough and developed the gluten network, even those will collapse or spread out in the oven like the loaf shown below:

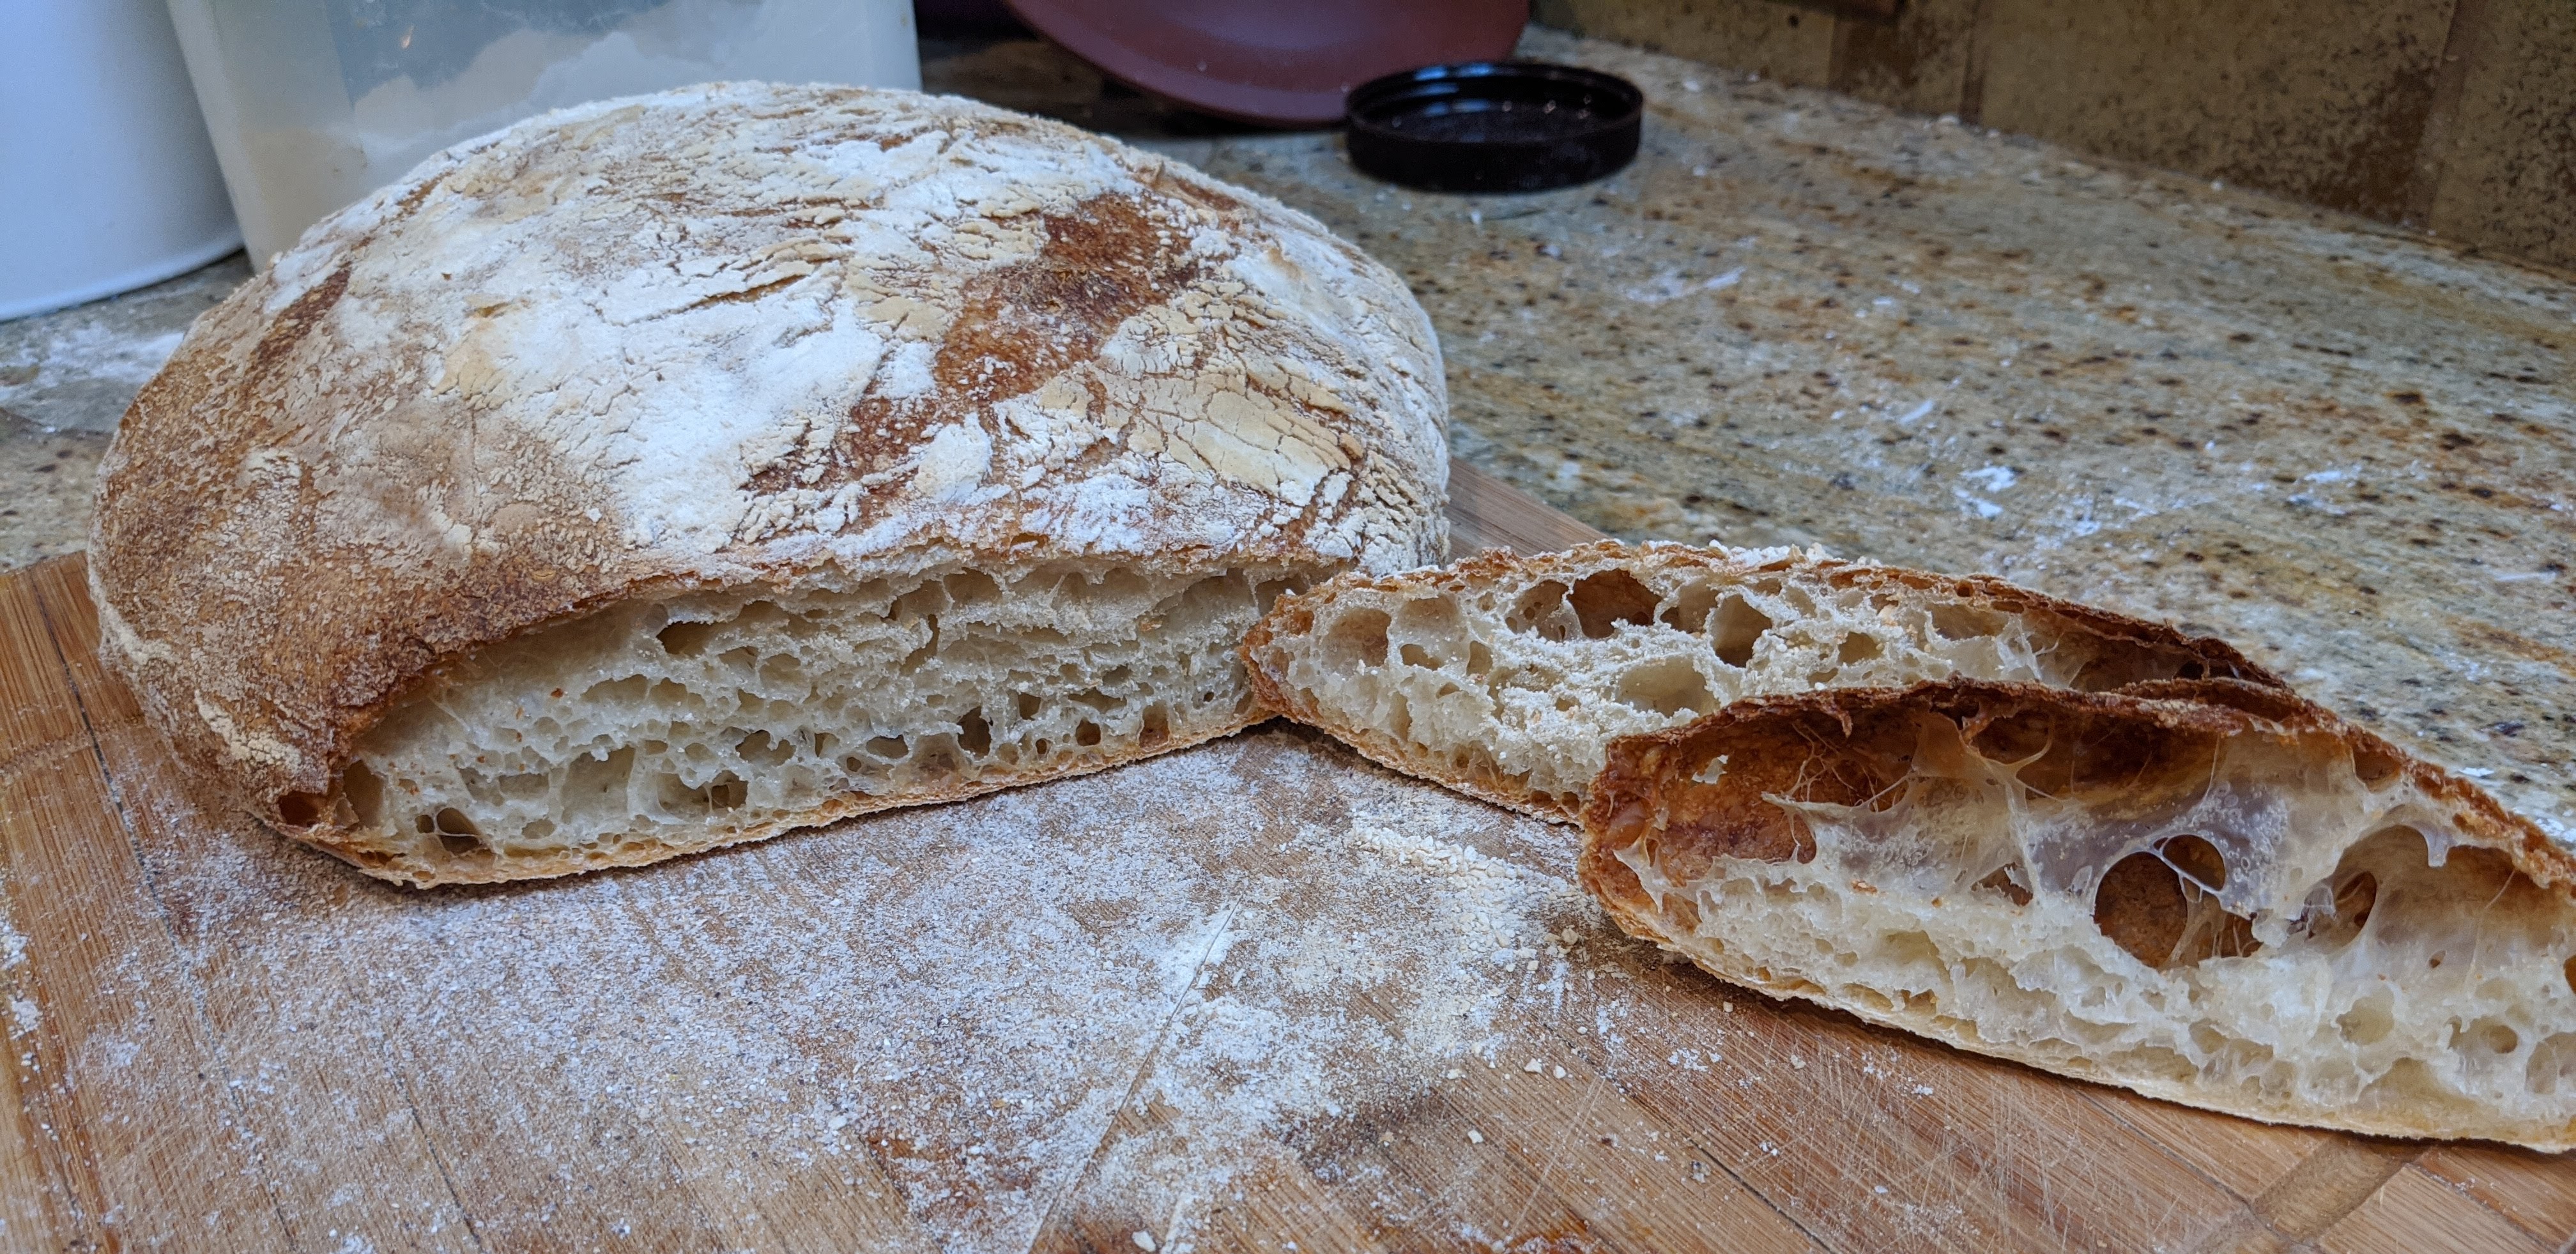
As you can see, the crumb on that loaf actually wasn’t all that bad. At first, I thought it was a proofing issue, but if it was, I would’ve gotten a really weird, uneven rise. So after doing a bit of research, I learned that I hadn’t developed enough strength in my dough.

I have to admit that I kind of scratched my head at that discovery because I followed the Saturday White Bread recipe in FWSY absolutely closely. But two folds was just not enough. As a dough expands in the oven, you should get both horizontal AND vertical rise. If you don’t get much vertical rise, it means the gluten network isn’t strong enough to support the vertical height. Also, if you look at the loaf, it’s also not scored on the top. That also could be a contributing factor as there may have not been enough give in the top skin, which forced the bread to expand outward instead of up, but that’s another discussion altogether. For now, we’ll just focus on developing dough strength.

How Do You Know Your Dough Has Strength?

I’m just going to start off by saying that there is no magic number to the amount of folding you need to do. Even Ken Forkish says in the last paragraph of “What Is Folding?” on page 35:

The recipes in this book each give guidance on the time and number of folds recommended, usually specifying a range, such as three to four folds. However, I don’t want to be overly hard and fast with rules about this. When working with your douh, you’ll be able to see the physical change after you’ve folded it. If, based on what you observe, you want to give it one more fold, go ahead and do it.

I remember reading that last line and saying out loud, “What the f$#k am I supposed to observe?” But despite that, I went on reading because I thought he might delve a littler deeper into the observation. Unfortunately, that’s about as far as he went with it.

So I had to do a bit of research and did a lot of baking and have a couple of telltales that I use to make sure I’ve developed enough strength in my dough.

The first test is a common one that you’ll probably see online – a lot. It’s known as the windowpane test. Basically, you take a hunk of your fermenting dough and stretch it. If you can stretch it into a thin membrane (window) without it tearing, then you have good dough strength.

But there’s also a way to feel the strength developing when you’re doing your stretch and folds that I use to gauge how far along my dough is. When it’s time to do a stretch and fold, if, when you do the first stretch, the dough stretches really easy and you can stretch it to two times the width of the dough ball, it’s likely not strong enough. And when you finish the last fold, if the whole dough ball doesn’t want to come along when you pull, you don’t have enough strength in your dough.

Furthermore, when you stretch and fold, you’re supposed to turn the dough over onto the folds after you’ve formed a ball. You should be able to do this easily if your dough is strong. But if you finish and the rest of the dough settles back, then you don’t have enough strength and you’ll need to do more rounds of folds.

That said, if you’re working with a super high-hydration dough (like above 80%), your dough will have a tendency to collapse, no matter what you do. But when you stretch high-hydration dough, the dough mass should come along with your stretch. If it shows signs of tearing, you’ll need more folds.

For this very reason, as opposed to following the guidelines in FWSY, I’ve taken the Tartine Bakery approach where they do 6 folds over the course of 3 hours, doing one every half-hour. I know, that’s very involved. By the time you do the last stretch and fold, you can really feel the resistance!

Folding Forms the Foundation

A lot of emphasis is put on shaping and creating a taut skin to get a good oven spring. No doubt, it is critical. But if you don’t have the good foundation of a well-developed gluten network with which to start, you won’t get as good an oven spring. It’s really the combination of a well-developed gluten network AND a nice, tight skin that will give you great oven spring, at least as far as structure is concerned. There are other factors as well, but those are beyond this particular discussion.

For me, I started getting great oven spring when I started to trust what I was feeling in the dough as I folded it. Was it too easy to stretch? Did it feel like tearing? Or did it put up some resistance and want me to take the whole dough ball in one pull? These questions led me to fold the dough more than the prescribed or suggested amount of folds in FWSY, and since then, I haven’t had to worry that my loaves will collapse, even with really wet dough. And especially now that I’m using a whole wheat and high-extraction flour combination, those extra folds have worked wonders with my oven spring.

I thought that maybe it was my folding technique that was flawed. But as I mentioned in a previous article, this is exactly what they do at Tartine Bakery!

Now all that said, I’m only sharing what works for me. You may do fewer folds and still get great results. The great thing about making bread is that though there is a certain exactitude to the process, there’s also a lot of variability. So what may work for some, may not work for others and vice-versa.

Happy baking!

Beouf Bourguin-off

There are two stews that I love to make. Beouf Bourguignon and Beef Stroganoff. One day, I thought to myself, what if I made a bastard stepchild from the two dishes. Would the ingredients clash, or would they come together and form a merry union? It turns out, that they can go together REALLY well. You just have to change a few things up, and it’ll work.

The first thing is that you don’t use cheap meat. Beouf Bourguignon is traditionally made of cheap cuts, and you braise the crap out of the meat till it’s tender. On the other hand, Beef Stroganoff uses better cuts like ribeye or top sirloin. Personally, I prefer top sirloin because I just can’t get myself to stew a nice ribeye steak. So I use top sirloin. Believe me, it’s worth it using a better cut of meat instead of stew meat.

With this recipe, you have your choice of starch to serve it over. But frankly, I just like sopping up the gravy with a hearty artisan bread. And since I make a lot of bread, it’s always on hand!

Without further ado, let’s get the recipe!

Ingredients

2 lbs. sirloin steak cut into 1″ cubes
4 whole garlic cloves, chopped
1 cup beef broth/stock (unsalted)
1 cup Burgundy or Pinot Noir (it doesn’t have to be expensive, but it should be drinkable)
4 medium carrots cut in 1″ pieces on the bias
1/2 pound of whole mushrooms, halved
1 small can of tomato paste
1 medium onion, sliced thin
1 pint sour cream
1 tbls herbs de province
2-3 tbls flour
Salt and fresh-ground pepper to taste

  1. Preheat oven to 450
  2. In a 5-qt Dutch oven or large oven-safe pot, add about 1 tbls olive oil and begin to heat on the stove over medium heat.
  3. When the olive oil starts reaching its smoking point, add the garlic and vigorously sautee, being careful not to brown it.
  4. Once the garlic starts becoming fragrant – about 45 seconds – add the meat.
  5. Add salt and fresh-ground pepper and brown the meat until all sides are grey
  6. Add about 1/2 of the beef broth and all of the tomato paste and stir to coat the meat completely and cook for a few minutes.
  7. Add all the wine and the rest of the broth.
  8. We want to get to the point where the liquid is barely covering the meat, so add the rest of the stock, then if the meat is still not covered, keep on adding wine in small amounts till you get there. 🙂
  9. Bring the mixture to a boil, then cover and let simmer until your oven comes to temp.
  10. Once your oven comes to temp, transfer the pot to the oven, then immediately turn the heat down to 350.
  11. Bake at 350 for an hour. After an hour, turn the oven down to 275.
  12. After the second hour, add the carrots and gently fold them into the mixture so you don’t break up the meat. Cook for half an hour.
  13. In a cast iron skillet, saute the sliced onions in olive oil.
  14. Once the onions begin to wilt, add the mushrooms and saute for about 4-5 minutes until the mushrooms start to soften.
  15. Add a bit of beef broth, then sprinkle the flour over the mixture to thicken it up. Make sure there are no lumps! If there are work them out and add a bit of beef broth, but you don’t want it too liquid.
  16. Finally, add a pint of sour cream, mix thoroughly, then set aside.
  17. When the beef and carrots are finished, remove the pot from the oven, then over low heat, add the onions and mushrooms and fold until everything’s incorporated.
  18. Let simmer for 10 minutes for all the flavors to marry.
  19. Serve over rice or noodles or sop up the gravy with bread!

It’s the Microbes, Baby!

Bread is the product of fermentation. Without it, all we’d have are bricks if we just combined flour and water and heated them. But luckily for us, we have yeasts and bacteria that gas up the flour-water mixture, interact with the enzymes in the flour and produce a plethora of pleasing flavors from nutty to sugary to sour and sometimes, even a bit of umami. And the little critters are responsible for giving us the gift of bread.

They’re everywhere and there’s no escaping them. This is why you can mix flour and water and leave it sitting and after a couple of days you’ll see it bubbling. There are natural yeasts and bacteria in the flour and in the air. And when you give them some food to eat by adding water flour, which in turn releases enzymes on which the yeasts and bacteria feed, they literally go on a feeding frenzy that we know as fermentation.

And it never ceases to amaze me that fermentation is a form of decay. Yes, decay. The yeasts and bacteria actually break down the starches and sugars in the flour. The things that they produce in the process that give us all that pleasing taste are actually- to put it plainly – the microbes’ shits and farts. Yeasts give off CO2 which creates pockets and bubbles in the dough. The lactic acid bacteria produces acids as well as other by-products. And we are rewarded with their excrement! I know… when you put that way, it’s a little gross. But given the product of that fermentation, personally, I can live with it…

My Master “Sourdough” Recipe

I purposely put quotes around “Sourdough” because even though the bread has a slightly sour taste, it is not made from a levain, but from a pre-ferment; specifically a poolish. What? Sourdough bread from a poolish? Well, give it a bit of time and it’ll turn sour, then when added to the final dough, that will give the microbes plenty more to feed on, and it’ll produce a very pleasing, sour taste throughout the loaf.

One might argue that a bread like this will not be as complex in taste as a traditional sourdough bread. But I disagree. Just as with cooking, complexity can come from several sources. I’ve joined the school of thought that doesn’t depend solely on the microbes to provide the flavor complexity. The combination of the flours I use plays an immense role in influencing the flavor and texture of the bread.

If you read this blog, you know I’ve written another batard with poolish recipe. That one works great, and even though the proportions are exact, the fundamental difference with that recipe and this are the number of stretch and folds that are done with this recipe. The original had just four folds, this has six. The extra two folds make a HUGE difference in the structure of the dough!

Here’s the recipe:

FlourWaterSaltYeast
Poolish250*2500.40
Final Dough750**500†192.6***
Totals1000750193.00
Bakers %100.00%75.00%1.90%0.3%
* Whole Wheat Flour (fine or extra-fine ground)
** You can use regular, high-protein bread flour here, but I recommend using a high-extraction flour such as Type 85.
*** Add a bit more yeast (up to a gram) if your kitchen is around 70-degrees. The amount listed here is for 75+-degree kitchen, like mine is in the summer.

†You really want to have your dough be in the 75-80 degree range. So take the temperature of your flour with a food-grade thermometer, then use the table in this article to determine what your water temp should be.
  1. In a separate container, make the poolish mixing everything together until smooth. This is wet, and you don’t want any lumps.
  2. Allow the poolish to rest for at least 12 hours, but probably not more than 16 hours. With this long of a resting time, make the poolish at about 8-9 PM at night, and it’ll be ready in the morning.
  3. When you’re ready to make the final dough, transfer the poolish to a large mixing bowl or a stand mixer bowl. Add most of the water and whisk until the poolish is dissolved. Then use the rest of the water to rinse out your poolish container so you get everything.
  4. Add the flour to the poolish mixture, and combine until there are no dry spots. It’ll be shaggy. Cover the bowl with a damp cloth or plastic wrap and let it autolyse for 30 – 45 minutes. It’s important not to mix to a smooth state because all we’re trying to do here is help the flour with water absorption and not start to develop the gluten structure. Note that with the poolish in there, fermentation will start, but that’s okay.
  5. Once autolyse is complete, sprinkle the salt and yeast evenly over the top of the dough and start mixing until smooth. Admittedly, I do this with a stand mixer because it does it better than I can with my hands. I used to do this step with my hands but using a stand mixer saves me a little time; especially when the bulk fermentation takes over three hours.
  6. One the mixture is smooth, transfer the dough to the container you’ll be using for fermentation. Once transferred, immediately do a stretch and fold of the dough to form it into a ball. Then turn the ball over onto its folds. I use Ken Forkish’s stretch and fold technique and stretch and fold in my fermentation container. There are lots of others but I started out with Ken’s technique and it’s what I’m used to. In any case, once you’ve done the stretch and fold, cover your container and put it a place where you can reasonably maintain the temperature of your dough.
  7. Repeat step 6 every half hour for the next 3 hours. Yup… you read that right. This one takes time, but it is SO worth it! Also, note that you want to treat the dough gently and not degas it. When you stretch and fold in the bulk fermentation stage, you want to be gentle and not tear or press down on the dough.
  8. After the last fold, let the dough rest for 45-60 minutes. You should see nice bubbles in the dough, but it shouldn’t be going crazy. Your dough should be a bit jiggly from the air pockets that have formed.
  9. Now, carefully pour the dough onto an unfloured work area. You don’t want to degas it and ruin all the work the microbes have done. Divide the dough into two reasonably equal portions, then lightly flour the tops of the pieces. These will be the tops of your dough.
  10. Take a portioned piece and flip it over onto the floured side (with a little flour on your board). Try to gently move the dough. If it sticks, just lift it up and sprinkle some flour underneath the sticky area. Pre-shape the piece into a nice, tight ball then flip it over onto the seams. Repeat this with the other piece.
  11. Lightly flour the tops then cover with a floured cloth and let them rest for 15 minutes.
  12. Once the balls have rested, shape them into the type of loaf you want and place them into an appropriate proofing container, seam side up.
  13. Place the containers in separate plastic bags, then put them in a cool, dark place place to proof for up to 2 hours. Check after an hour though and if your dough passes the finger dent test, then it’s ready to bake.
  14. While the dough is proofing, preheat your oven to 475-degrees. If you’re using a Dutch oven, place it in the oven now. I use a baking stone and it needs a minimum of an hour to come to temp. If using a baking stone, also place a metal baking pan (I use a 9″ cake round) on the bottom rack of the oven.

Baking

Dutch Oven

Remove your preheated Dutch oven from your oven, then place a loaf directly into it. Carefully score the top of the bread, cover the pot, then put it back into the oven. Bake covered at 475-degrees for 20 minutes, then uncovered for 10 minutes to harden the crust.

If you only have one Dutch oven, then pop the other container in the fridge while the first loaf is baking. Once it’s done, you can transfer the chilled dough directly to the Dutch oven.

Baking Stone

Before you transfer your loaves to your peel, put about a cup of hot water into the metal baking pan to start generating steam. If your oven doesn’t have heating coils at the bottom, you can help with the steam by pouring a little on the bottom of the oven. Immediately close the door, so your loaves will enter a humid environment.

Now, transfer your loaves to your peel, then score the loaves. Now, as quickly – and safely – as you can, place your loaves onto your baking stone and get the door shut as quickly as you can. You can do the water at the bottom of the oven to get the steaming process going again.

Bake at 475-degrees for 35 minutes.

After 20 minutes, remove the water pan from the oven to allow the crust to set and harden for the last 15 minutes.

Final Thoughts

The cool thing about this is that with the stretch and folds, I recently started doing this because my previous loaves kept on collapsing on my peel. You have to expect a little collapse, but these were laying out too much. It was perplexing because I knew I nailed the proofing times and I’d get a big ear and an open crumb – just not much vertical rise. So I thought I needed to work the dough a bit more to get some more structure.

It turns out that this is exactly what the famous Tartine bakery in San Francisco does! I just read several Tartine recipes by various people (yes, even the famed NY Times recipe) and each had six stretch and folds over the course of three hours! Pretty awesome!

Stumbling Into Technique

I’m not a professional baker, but like many other avid amateurs, I’ve totally immersed myself in the process of making bread with the goal to create bread that I can call my own; that has kind of my own personal stamp. It’s not an ego thing. It’s akin to a musician doing a cover of someone else’s work. And from that perspective, I can actually speak as a professional because I’m a part-time professional musician.

For my solo acoustic gigs, in addition to doing some of my own original compositions, the bulk of my repertoire is comprised of covers. And though there will never be a mistake that I’m covering a song, my arrangement of a song often tends to be significantly different than the original song. After all, I’m playing just an acoustic guitar. So the song sounds like “Take It Easy” by the Eagles, but I’m the one performing it, so I don’t sing it like Glenn Fry and I do some other riffs than Joe Walsh.

And I take a similar approach to bread making. Especially with my latest loaves, it looks like sourdough bread, it tastes like sourdough bread, so you inherently know it’s sourdough bread. But it has a slightly different texture than a traditional San Francisco hard loaf. There’s a distinct nutty aftertaste due to the kinds of flour I use. But the kicker is that instead of using a sourdough starter, I actually use a poolish that I make the night before.

And while I’d love to say that it was all planned out and I took a real scientific approach in arriving at my “sweet spot,” I have to be honest and say that I stumbled upon it more than anything else. Sure, I took notes of all the tweaks I did and how they affected the final product, and believe me, I literally spent hours poring over books and the Web to gain as much insight into the process. But in the end, how I arrived at my sweet spot was the result of lots of trial and error.

And I still don’t have it 100% down! I’m close, but I’m still perfecting the technique. While I’ve figured out the flour and am pretty sure what the optimal hydration rate is, I’m still figuring out the optimal fermentation and proofing times. Admittedly, I’ve pretty much got it down, but I’m running tests to see what the boundaries are so I can zero in on the most optimal process.

And talking about stumbling onto technique, one of the things that I started to do was to do a BUNCH of stretch and folds for three or so hours – every 30 minutes for a total of six times. I had read that when working with any amount of whole wheat flour, you have to work it a bit more than with standard white bread flour. And as I made the switch to a combination of high-extraction bread flour and whole wheat flour, I just started doing this to ensure that the gluten network gets sufficiently formed.

So imagine my pleasant surprise when I ran across a Tartine bread recipe (it was a link in a blog entry) and that’s exactly what they do! They do six stretch and folds over three hours during the bulk fermentation! I I literally had no clue of they did this. As I mentioned above, I started doing this because of the flour I was using. I have to admit that it gave me a real smile to know that I was doing something a famous sourdough bread bakery did with their dough.

And apparently, making Tartine-style bread (from the famous San Francisco bakery) is a rite of passage for makers of sourdough. I had no clue that it had this much importance when I first started making bread. My foundation was Ken Forkish’s Flour Water Salt Yeast book and Bonnie Ohara’s wonderful book, Bread Making for Beginners. I knew of Tartine Bakery though I never had their bread, but I didn’t know just how influential the bakery was in the sourdough world. So it’s cool to stumble onto what they’re doing!

The great thing about this bread journey is that I really don’t know where it’s going to take me. Who knows what I’ll stumble upon next?

I Gotta Laugh At Myself!

That loaf above is supposed to be a boule. And to the untrained eye it looks fine and truth be told, it’ll taste great. I’ve really gotten a handle on my sour poolish! But see the white bottom? That’s a telltale that it wasn’t proofed long enough, and the oven spring was uneven through the loaf. Here’s an extreme example of under-proofing that I’ve shared before:

With those loaves above, I was really impatient! Actually, I was over-excited. I got a great rise in my bulk fermentation, and I got a little over-zealous… 🙂

But back to my most recent fail… Rather than get mad about it, I just laughed. In fact, ever since I started making bread, I’ve really had to learn to laugh at myself and my blunders. Despite the fact that I’ve come a long way in a fairly short amount of time, I’m still a novice at this. I’ve certainly gotten to the point where I can consistently make a good loaf of bread. But I also have accepted that I haven’t experienced all the pitfalls and of this craft and there will be times when things don’t go as expected – like this time.

Admittedly, it’s a challenge for me to not freak out. As a Type 4 on the Enneagram scale, I’m highly individualistic, self-motivated, and driven to excellence, which can easily devolve into perfectionism which, in turn, can lead to self-loathing and depression. But enough of the psychoanalysis! Let’s just say that I’m driven to always do a great job, and when I fall short, it’s easy for me to get down on myself.

So to combat this, I remember that making bread is a joyful experience. After all, I’m doing it purely by choice and not for survival. And besides that, there’s always another loaf to bake! So when I screw up a loaf, I laugh at my blunder, take stock of what I could’ve done differently. Then I move on.

And this has been a valuable reminder and lesson for me in my life in general. Especially with all the stuff about image that we’re bombarded with day in and day out, it’s so easy to take ourselves way too seriously. I’ve done that in the past, but that has led to pretty dark places that I never want to visit again. So I remember the joy and I laugh at myself!

There’s Nothing More Sublime Than Feeling A Dough Transform

The one positive thing that has come from this pandemic lock-down is that a lot of people – myself included – have started making bread. And many like me have learned how to make bread using the traditional methods which involve manually working the dough, either through the entire process, or at least a good portion of it.

I freely admit that I’m in the latter camp. I do all my initial mixing of ingredients in my trusty stand mixer; not because I’m lazy, but because it does a better job of creating a consistent mix. I started out doing all my mixing by hand so I knew what it was like and once I felt what a good mixed dough should feel like, I switched to using my stand mixer. But I did make a promise to myself that I’ve never broken: After doing the initial mix, I would work the dough – either kneading or folding – entirely by hand.

The reason is that there’s really nothing like working a dough and seeing it transform from a shaggy mess into a smooth, pliable ball if I’m kneading it or; if I’m working with a high-hydration dough, feeling the dough transform from a wet, gooey, and sticky blob into a cohesive network of gluten strands that gradually resist my ministrations. Plus, it just FEELS good as the dough becomes smooth and luxurious. And the ONLY way to see and feel the transformation of the dough is by touching it and working with it with your hands.

What I’ve come to realize is that artisan bread is really not about creating beautiful loaves of bread. The loaves are a by-product of the artisanship and craftmanship in the process leading up to actually baking the dough. For instance, look at this antique hutch that’s sitting in my dining room:

That was handmade in the 1930’s and restored by a local artist. The door panels were hand-carved. And even after all these years, according to the artist who restored it, it was crafted so well that even after all these years, it was so structurally sound that all she had to do was clean and refinish it.

The craftsmanship of bread is similar. In order to create a beautiful loaf, you have to build the structure of the dough. Just like you don’t throw random pieces of wood together to create hutch like the one to the left, you don’t just throw ingredients together and expect to create a loaf of bread that’s aesthetically pleasing, both in taste and visually. So in essence, the craft in bread is in manipulating the dough: Working it with your hands, adjusting hydration, the type(s) of flour; even the salt and yeast. We do this to create a structurally-sound base on which our dough will bake.

And the thing about baking bread is that it’s not forgiving. Even if you’re simply following a recipe you find online, to achieve the result that you see in the pictures the author provides, you have no choice but to apply at least some craftsmanship to the process. I think that’s the reason why so many bread recipes you read are incredibly verbose.

The bakers who write them know that there is an inherent and unavoidable craftsmanship in baking bread. They provide the gotchas and pitfalls because they know that there are lots of variables that affect the structure of the dough. And invariably, almost all the recipes involve some sort of manual handling of the dough because the bakers also know that it’s difficult to understand how a dough is being affected unless you physically touch it!

But to me, as I’ve alluded throughout this post, feeling the dough is incredibly sublime and pleasing. As I write this article, I’ve been taking breaks to fold a dough I created this morning. I just popped it into my fridge to bulk ferment for 24 hours. That dough gave me the inspiration to write this article. From the first fold to the final fold, the dough went from a slightly shaggy pile to this gorgeous, velvety-smooth ball that I could stretch and stretch without it tearing. It’s so satisfying! And I wouldn’t have known this if I did use my hands.

Measuring By Weight Changed My Life!

When I first started baking bread, I followed recipes that listed ingredients by volume, and I stuck to them because that’s all I knew. But looking up recipes online and in books, the bakers always provided weights and percentages, stating that it was easier to remember the specific ratios of ingredients and more importantly, be able to scale up or scale down the recipes as needed.

But I resisted because I fashioned myself an expert in the kitchen. Cooking was and has been my lifelong passion and I just knew my way around a kitchen. Bread? Pah! I could do it, no problem! And I did do it! To make my first loaves, I followed the same basic recipe and made my bread in a Dutch oven. But like I said in a previous post, I quickly got bored of making boules.

Then on top of that, for Fathers Day, my son got me Ken Forkish’s Flour Water Salt Yeast and he wrote out all his recipes in grams. And though he provided volume equivalents, rightfully so, he did say they were approximations at best. But in my arrogance, I just followed his volume listings. And after a few loaves of not being able to make bread nearly as pretty as the loaves in the book, nor getting anything consistent from bake to bake, I knew I had to get over my ego and start measuring by weight if I was going to achieve good results.

So I made the switch and got myself a couple of digital scales. I use one for weighing my bulk ingredients and scaling dough portions, and I have a precision scale for measuring anything less than 20 grams. Life got A LOT easier after that! On top of that, all the bakers percentage listings started making sense. Because everything is measured in grams, we work with a standard decimal standard! So scaling a recipe up or down is SO much easier than Imperial volume measurements!

It literally changed my life. I now use spreadsheets to do measurement calculations. In fact, I have three Google Sheets spreadsheets for my different calculations. So convenient.

A Note on Bakers Percentages

If you’re not familiar with bakers percentages, don’t sweat it. It’s not rocket science, though if you’re new to it, it can be a bit intimidating. But it makes putting together recipes very easy. Here’s how it works:

Every ingredient’s percentage in a recipe is always relative to the amount of flour, which is 100%

That’s it. So if you hear someone talking about an 82% hydration dough, no matter what amount of flour is used, you’ll know that the water’s weight is 82% of the flour’s weight. So if the flour’s listed out at 1000 grams for an 82% hydration, you automatically know that there are 820 grams of water in the dough.

What is so powerful about this is that no matter what the amount of flour is used, all you need to do is multiply the flour’s weight by the ingredient ratio and divide by 100 to get the weight of the ingredient. So technically, a recipe can be listed only as percentages!

But given that, this is where having a large scale and a precision scale (or a scale that can do fractional grams) come in handy as some yeast measurements might come in at 0.4 gram. But no matter, scale up or scale down, and as long as you have the percentages, you can easily work out the weights!

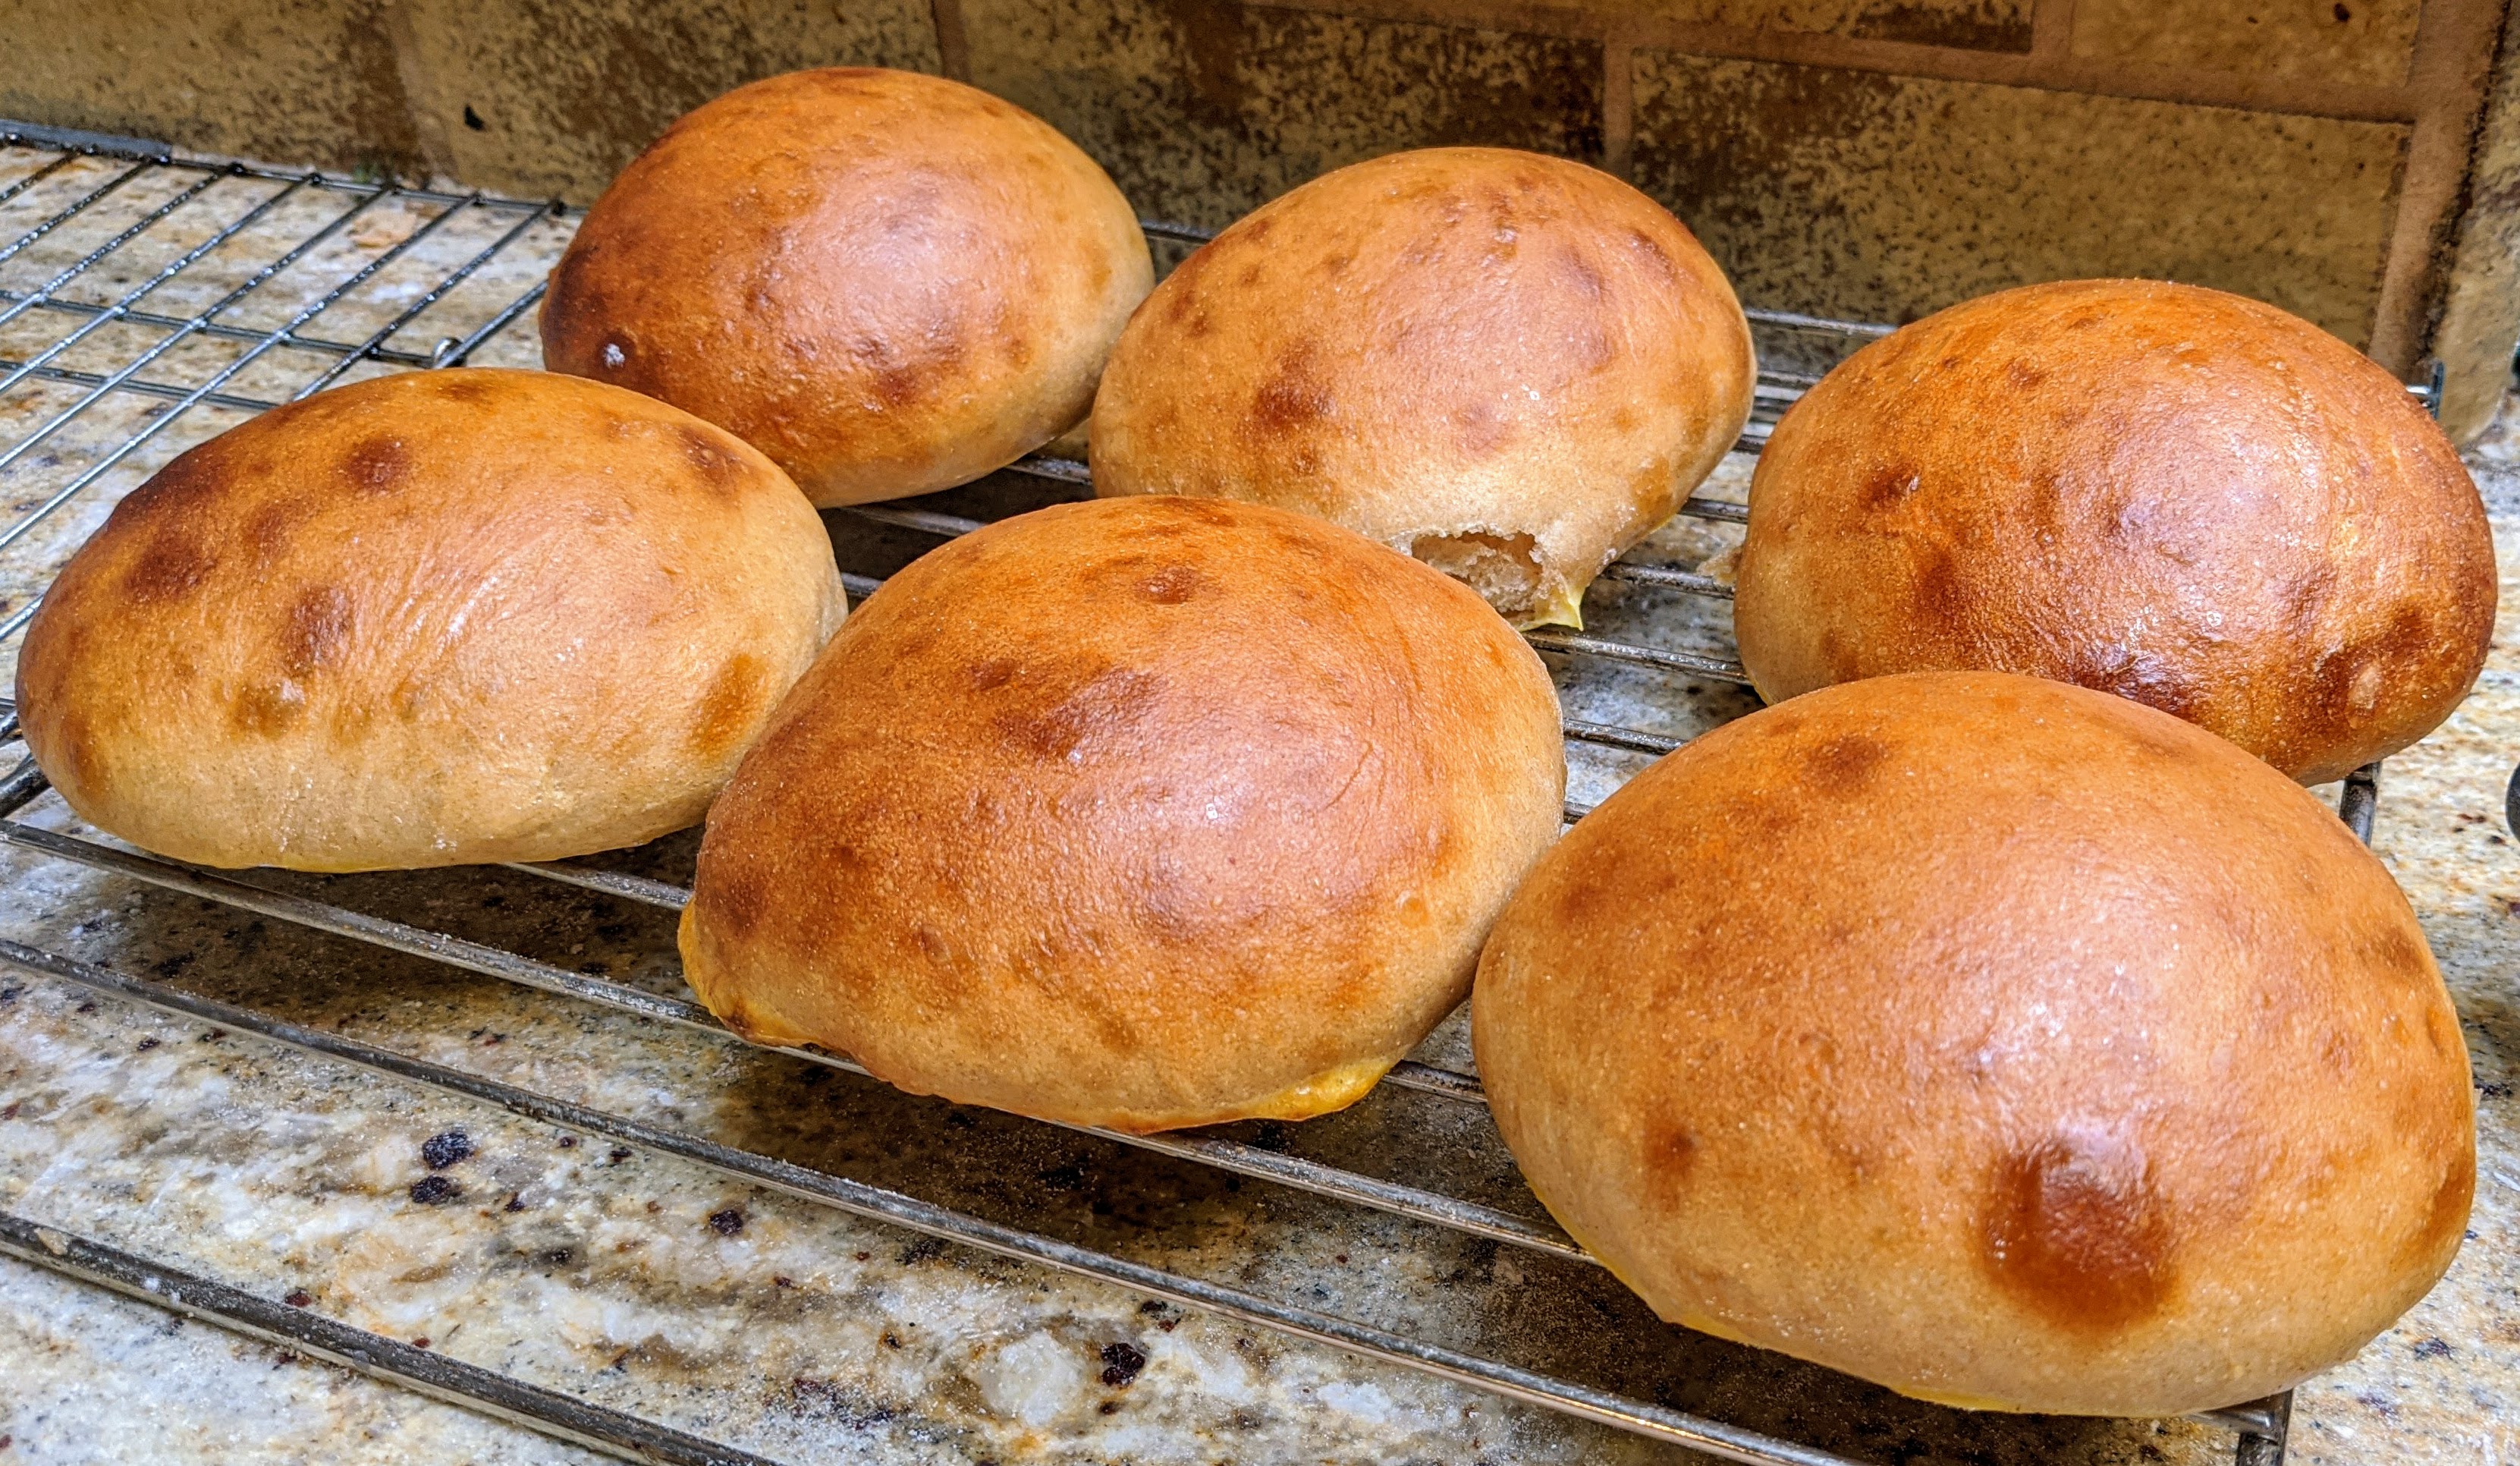
No-Knead 100% Whole Wheat Hamburger Buns

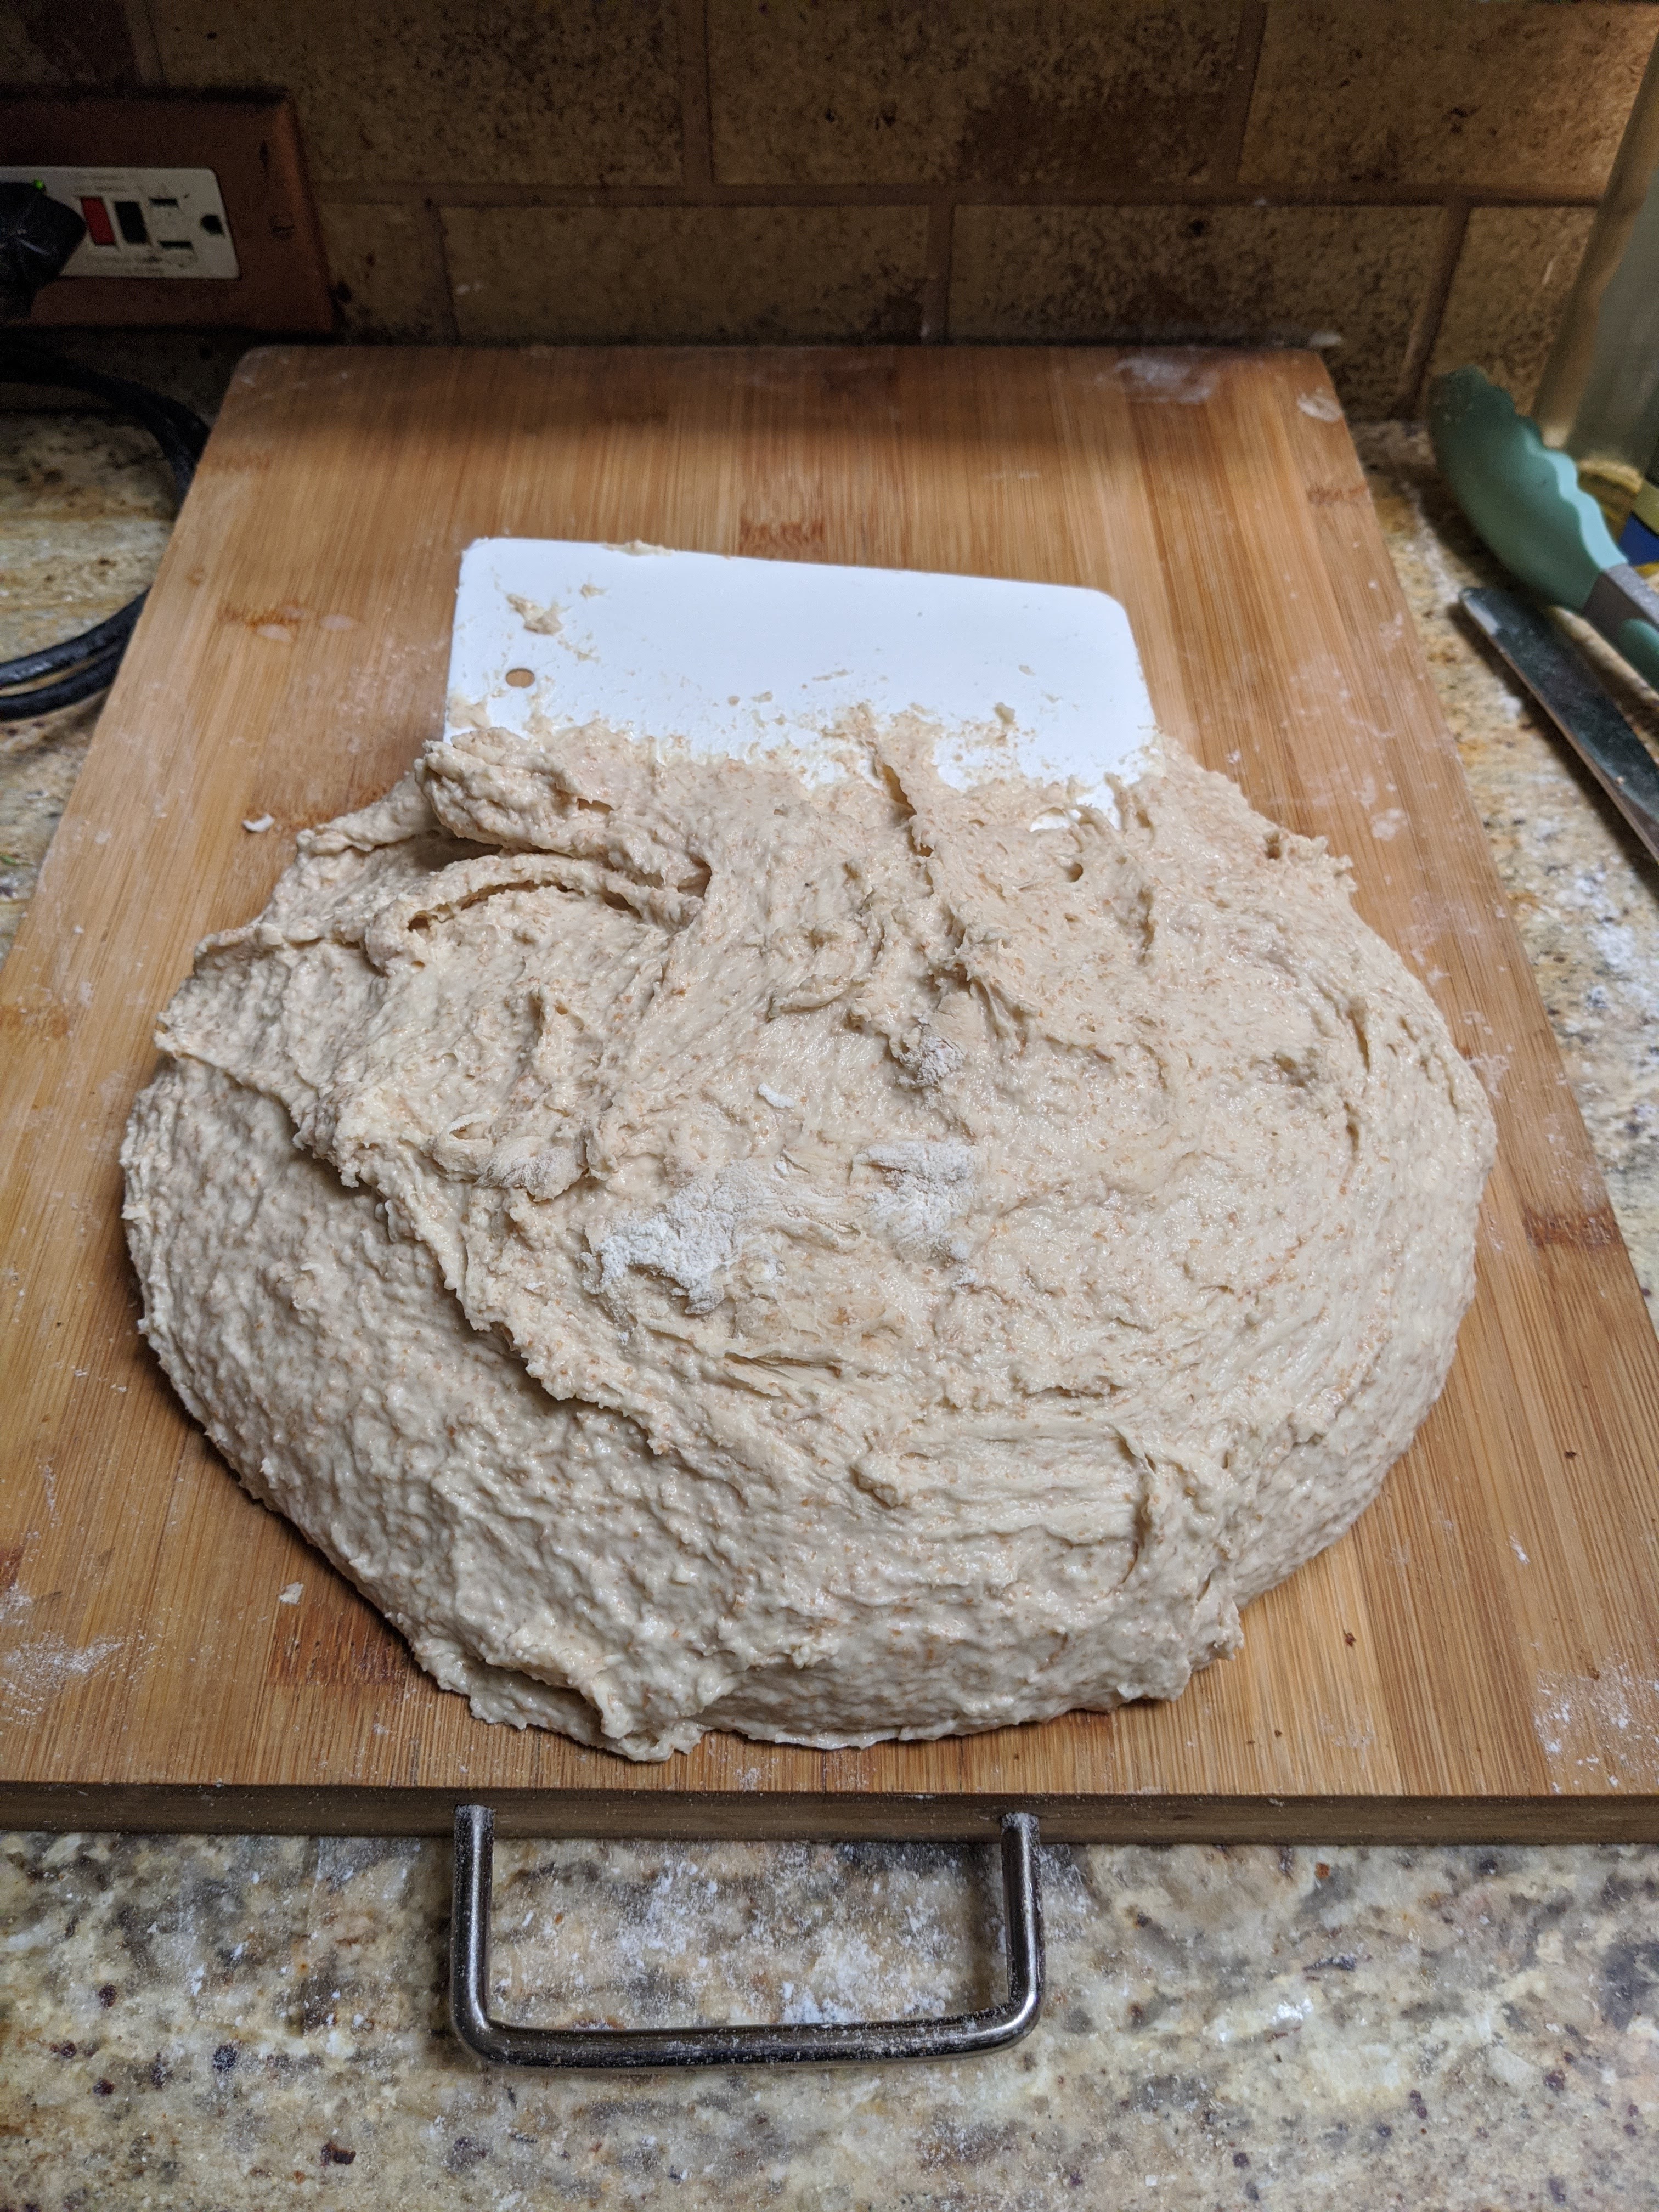
These burger buns are light, airy and fluffy, and guess what? They’re nutritious because of the whole wheat or high-extraction flour retaining the wheat’s nutrients! The dough is no-knead, but you’re still going to have to do stretch and folds for the first hour or so to help develop the gluten network and because we’re using flour with more of the bran and germ than regular flour, this dough is wet. Kneading really isn’t an option.

Tip: Though you can do the initial mix completely by hand, I’d recommend using a stand mixer if you have one.

A Note About the Flour You Use

It is critical that you use fine or extra-fine flour if you’re going to use 100% Whole Wheat. Course-ground flour has too many sharp particles in it that will literally cut the gluten strands. Myself, I use high-extraction bread flour that has about 90% of the bran and germ. It works like regular bread flour, but bakes like whole wheat flour which means it needs a really high hydration rate.

Without further ado, here’s the recipe!

Burger BunsFlourWater*ButterHoneySaltYeast**Malt
Weight (grams)900720 (@ 105º)60 7211163
Baker’s %100.00%80.00%6.69%8.00%1.27%1.80%0.35%
*Butter should be room temp, not melted
** Diastatic Malt Powder (I use diastatic malt powder from Modernist Kitchen) It’s optional, but it really helps with the oven spring.
  1. Mix the flour, butter, salt, yeast, and diastatic malt powder until fully incorporated.
  2. Measure out the 105º water into a container, then add the honey to it and stir until the honey is completely dissolved.
  3. Slowly add the water/honey mixture to the dry ingredients, then mix until smooth with no lumps (this is why I suggest using a stand mixer as it makes it a lot easier).
  4. Check the dough. It will be too wet, so with your mixer running at Speed 2, add a couple of extra tablespoons of flour until the dough pulls away from the sides of the bowl, but is still pooled at the bottom. You don’t want to make a dense ball with this dough!
  5. Transfer the dough to a large mixing bowl and cover it with a towel to rest for 10 minutes.
  6. Stretch and fold the dough, turn the dough over onto the folds, then let it rest for another 10 minutes.
  7. Repeat the stretch and folds every 10 minutes for the next hour for a total of 6 stretch and folds. By the last stretch and fold, you should see plenty of large bubbles forming.
  8. Cover the bowl again and let the dough rest for an hour or until the ball doubles in size (don’t worry, with this amount of yeast and with the diastatic malt powder, the yeast will go crazy).
  9. Once doubled, gently pour the dough out onto an unfloured bench being careful no to tear the dough and ruin all the hard work the yeast has just done.
  10. Divide the dough into 125-gram pieces. This recipe will make about 14 buns. Only 6 will fit on a standard cookie sheet, so you can do as I did and make a baguette or mini-batard with the excess dough.
  11. Sprinkle flour over the tops of the divided pieces. These will be the tops of your buns.
  12. Now, lightly flour your work area.
  13. Take a piece of dough, flip it over, gently, press it out into a circle, then shape it just like you would shape a boule, pulling an edge and bringing it to the center. If the dough sticks, add a bit of flour underneath the piece. We’re building tension on the top, so this is important!
  14. Now, flip the ball over onto its seams, then round the ball out using a claw-like shape with your hand and rotating.
  15. Once you’ve got a reasonably nice spherical shape, gently flatten the ball until it’s about 3-3 1/2″ in diameter, being careful not to degas it.
  16. Place the shaped disc on a parchment-covered cookie sheet.
  17. Repeat steps 12 – 16. But only re-flour your bench if it needs it.
  18. Once you’ve created your discs, sprinkle flour on the top of them, then cover the cookie sheets (you’ll need 2) with a paper towel and let them proof for an hour.
  19. At this point, pre-heat your oven to 425º. If you have double oven, then heat both so you can bake the sheets at the same tie.
  20. After an hour, the buns will be ready to bake. If you only have a single oven, pop the other sheet into the fridge to retard the proof (don’t worry, you can bake them right out of the fridge).
  21. Bake for 25 minutes. Hint: To help them pop up, I put some hot water (1/2 cup) in a metal pan on the bottom rack of my oven. This develops steam and helps with the oven spring in the first 15 minutes of the bake.
  22. Once finished, immediately transfer for cooling racks! Do not let them cool on the cookie sheet as the bottoms will get all gooey!

Working with Flour That Has a Lot of Bran And Germ

I’m going to just be up front: The one thing you have to expect when you introduce 100% whole wheat flour into your dough, or like me, where you use a combination of high-extraction flour and whole wheat is that you will not get a big vertical oven spring; at least compared to a pure white flour loaf. The more bran and germ there are in the flour, the less vertical rise you’ll get and that’s a fact of life and there’s nothing you can do about it.

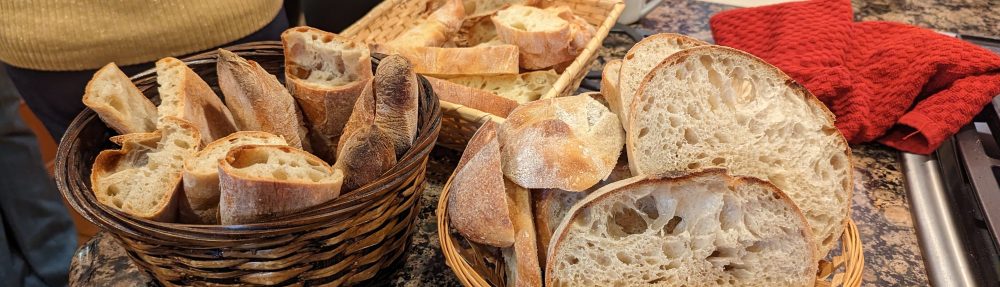
This is something I’ve had to expect once I made the move to more nutritious flour. Especially when I moved to high-extraction flour in lieu of white bread flour, I noticed a distinct lessening of the vertical rise. The fact that my bread was making nice ears meant that I was getting great oven spring (as evidenced above) and open crumb. It just hasn’t been as vertical and you know what? I’m now okay with that! But admittedly, it has taken several adjustments to achieve the crumb that I achieved with those loaves above.

Before I go on to explain what I did, I just can’t believe the flavor and texture of the final bread that this combination of flours produces. It’s chewy but with a velvety-smooth texture. I just can’t say enough about how great these Azure Standard Unifine flours are!

Adjustment Time

Lots of changes to my process… I used to pride myself on being able to make bread in a day, but with the switch to these flours, that’s no longer possible if I want to get results like I got above.

  • The first thing I had to do was up my hydration to 82%. I started out with 75%, 78% and 80% hydration, and while the loaves turned out pretty good, they were still a little dense. Just that extra 2% between 80 and 82 made a HUGE difference. Now you might think that at 82% the dough would be difficult to work with. I won’t lie. It’s a challenge, but it’s not nearly as bad as one might think. You just have to get used to working with a wet dough.
  • The next adjustment that I made was using a poolish. But instead of doing an overnight poolish, I started it at 7 AM in the morning, let it bubble up for 12 hours. then made my final dough at 7pm.
  • After mixing the final dough, I kneaded it until smooth, let it rest for 10 minutes, then did a stretch and fold. I then did five more stretch and folds every 10 minutes over the next hour or so.
  • After I did the last stretch and fold, I moved my container to the fridge where I let it bulk ferment for 14 hours. After the bulk ferment, I divided and shaped the loaves, then proofed them for 45 minutes at room temperature, then popped my bannetons in the fridge for an hour.
  • I then baked the loaves at 500 degrees for 30 minutes on my baking stone.

Here’s the recipe:

FlourWaterSaltYeast
Poolish2502500.40
Final Dough750570193.00
Totals1000820193.40
Bakers %100.00%82.00%1.90%0.34%
  1. In a separate container, make the poolish and mix everything together until smooth. This wet, you don’t want any lumps. You can make this in the early morning then let it sit out all day (at least 12 hours) at room temperature, then make the final dough in the early evening – you’re going to refrigerate it for awhile. At the end of the 12 hours, it should be pretty bubbly.
  2. Just before the poolish is finished fermenting, in large bowl, add the remaining flour.
  3. Add the water to the remaining flour, but reserve a little bit (like 50-100 grams) to rinse out the poolish container after you’ve added the poolish.
  4. Mix the flour and water until you get a shaggy dough, then let it rest and autolyse for 30 minutes. We just want to get it started because bulk fermentation will take place in the fridge.
  5. After the final dough has rested, evenly sprinkle the salt and yeast over the dough, then add the poolish to it.
  6. Rinse out the poolish container with the water you reserved and make sure you get everything in the poolish container. Add that to the final dough.
  7. Mix well until all the ingredients are fully incorporated.
  8. At this point, you either dump it out on your board and knead it until it’s smooth, or if you’re using a stand mixer, mix at Speed 2 until the dough is smooth.
  9. Let the dough rest for 10 minutes, then do a stretch and fold.
  10. Over the next hour or so, do a stretch and fold every ten minutes until you’ve done 5 or 6 folds. You’ll know you’ve done enough when you pick up a corner of the dough and the whole ball comes will try to come with it without tearing.
  11. Cover the container with a lid or plastic wrap and let it ferment in your fridge for at least 14 hours or until the dough about doubles in size. It really depends on the temperature of your fridge. I have my mini fridge set to 49-degrees and 14 hours is the sweet spot. You should see some nice bubbles in the dough. If not, let it ferment some more. It could take up to 30 hours.
  12. Once the dough has doubled, remove it from the fridge and divide and shape it as you normally would, but be EXTREMELY gentle with the dough. You do not want to degas it!
  13. Once shaped, proof for 45-minutes to an hour at room temperature, then move the loaves into your fridge once again to chill for an hour.
  14. Once chilled, remove the loaves from their proofing containers, score the loaves, then bake for 30 minutes at 500 degrees.

Yes, this is at least a 2-day process. But believe me, the results are totally worth it!