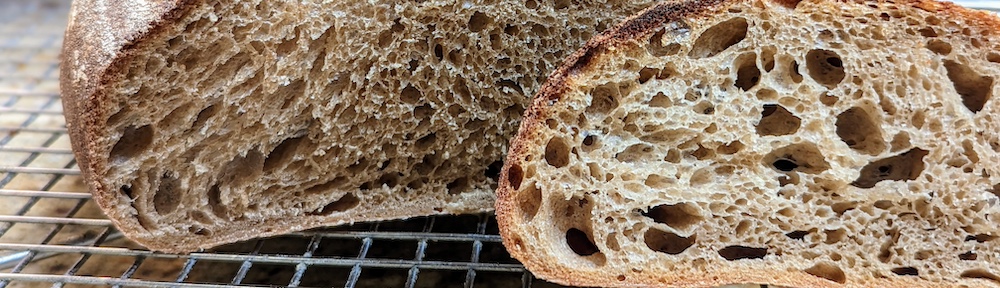
These burger buns are light, airy and fluffy, and guess what? They’re nutritious because of the whole wheat or high-extraction flour retaining the wheat’s nutrients! The dough is no-knead, but you’re still going to have to do stretch and folds for the first hour or so to help develop the gluten network and because we’re using flour with more of the bran and germ than regular flour, this dough is wet. Kneading really isn’t an option.
Tip: Though you can do the initial mix completely by hand, I’d recommend using a stand mixer if you have one.
A Note About the Flour You Use
It is critical that you use fine or extra-fine flour if you’re going to use 100% Whole Wheat. Course-ground flour has too many sharp particles in it that will literally cut the gluten strands. Myself, I use high-extraction bread flour that has about 90% of the bran and germ. It works like regular bread flour, but bakes like whole wheat flour which means it needs a really high hydration rate.
Without further ado, here’s the recipe!
| Burger Buns | Flour | Water | *Butter | Honey | Salt | Yeast | **Malt |
| Weight (grams) | 900 | 720 (@ 105º) | 60 | 72 | 11 | 16 | 3 |
| Baker’s % | 100.00% | 80.00% | 6.69% | 8.00% | 1.27% | 1.80% | 0.35% |
** Diastatic Malt Powder (I use diastatic malt powder from Modernist Kitchen) It’s optional, but it really helps with the oven spring.
- Mix the flour, butter, salt, yeast, and diastatic malt powder until fully incorporated.
- Measure out the 105º water into a container, then add the honey to it and stir until the honey is completely dissolved.
- Slowly add the water/honey mixture to the dry ingredients, then mix until smooth with no lumps (this is why I suggest using a stand mixer as it makes it a lot easier).
- Check the dough. It will be too wet, so with your mixer running at Speed 2, add a couple of extra tablespoons of flour until the dough pulls away from the sides of the bowl, but is still pooled at the bottom. You don’t want to make a dense ball with this dough!
- Transfer the dough to a large mixing bowl and cover it with a towel to rest for 10 minutes.
- Stretch and fold the dough, turn the dough over onto the folds, then let it rest for another 10 minutes.
- Repeat the stretch and folds every 10 minutes for the next hour for a total of 6 stretch and folds. By the last stretch and fold, you should see plenty of large bubbles forming.
- Cover the bowl again and let the dough rest for an hour or until the ball doubles in size (don’t worry, with this amount of yeast and with the diastatic malt powder, the yeast will go crazy).
- Once doubled, gently pour the dough out onto an unfloured bench being careful no to tear the dough and ruin all the hard work the yeast has just done.
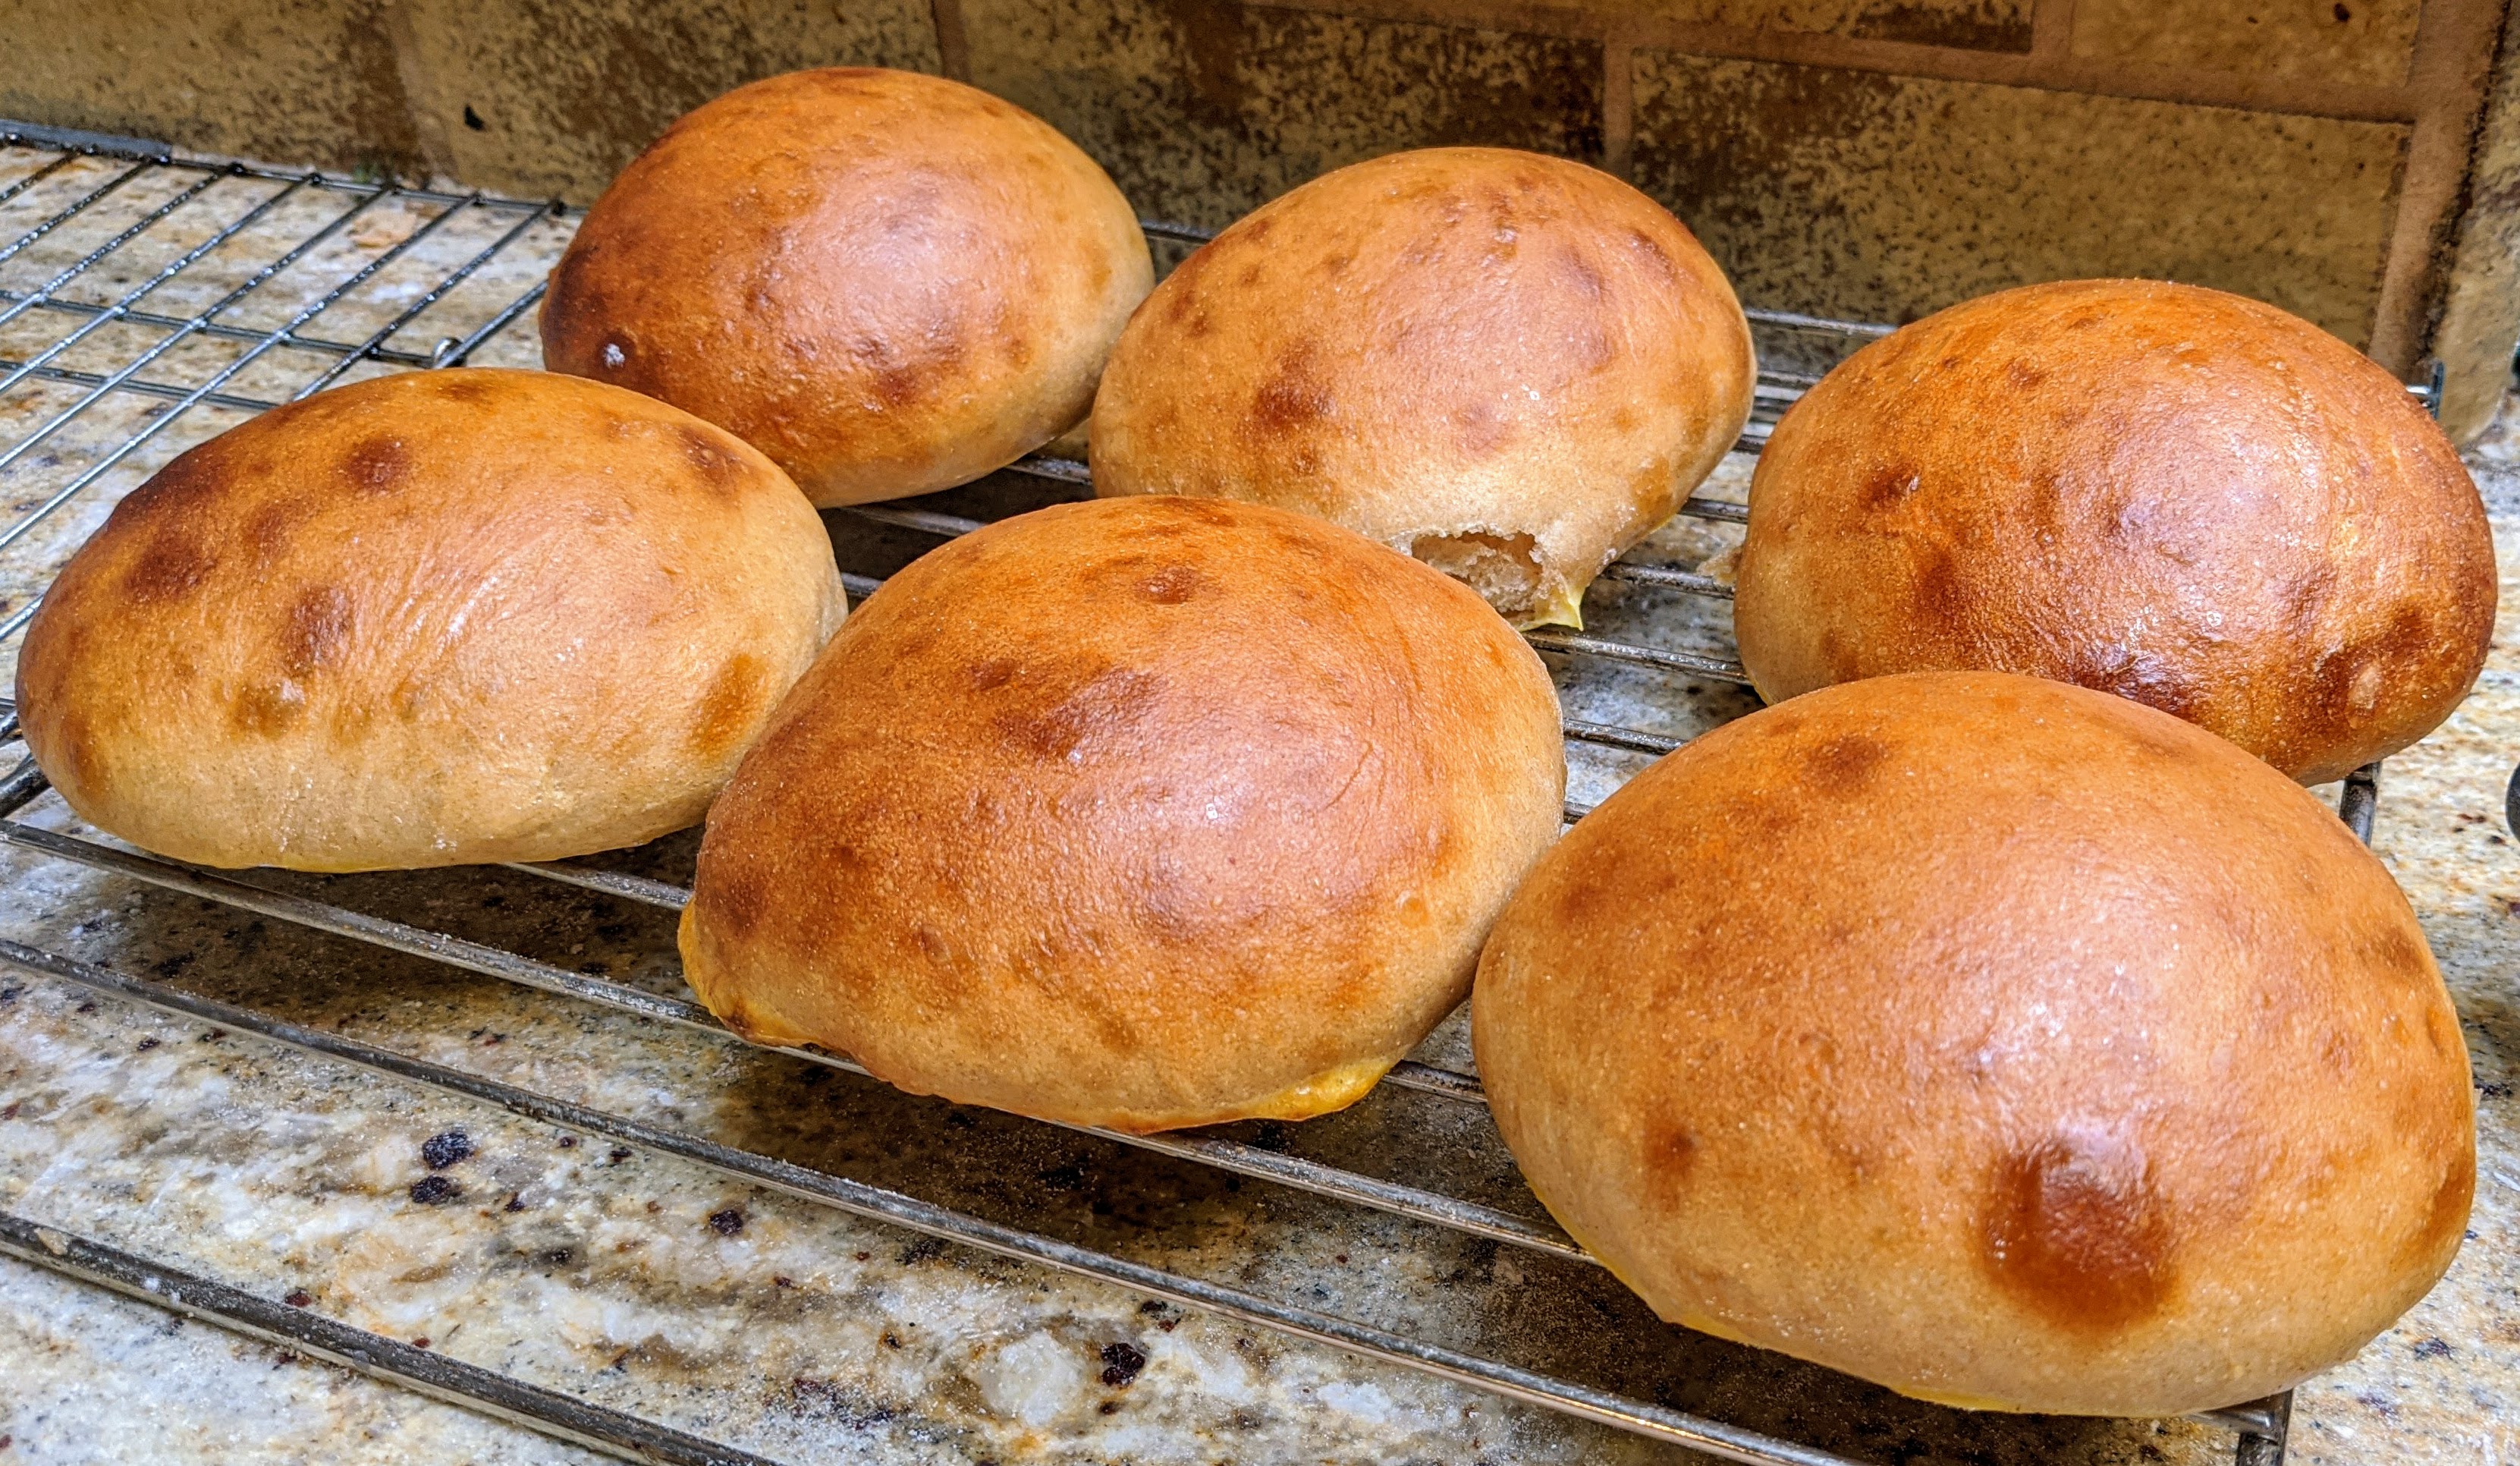
- Divide the dough into 125-gram pieces. This recipe will make about 14 buns. Only 6 will fit on a standard cookie sheet, so you can do as I did and make a baguette or mini-batard with the excess dough.
- Sprinkle flour over the tops of the divided pieces. These will be the tops of your buns.
- Now, lightly flour your work area.
- Take a piece of dough, flip it over, gently, press it out into a circle, then shape it just like you would shape a boule, pulling an edge and bringing it to the center. If the dough sticks, add a bit of flour underneath the piece. We’re building tension on the top, so this is important!
- Now, flip the ball over onto its seams, then round the ball out using a claw-like shape with your hand and rotating.
- Once you’ve got a reasonably nice spherical shape, gently flatten the ball until it’s about 3-3 1/2″ in diameter, being careful not to degas it.
- Place the shaped disc on a parchment-covered cookie sheet.
- Repeat steps 12 – 16. But only re-flour your bench if it needs it.
- Once you’ve created your discs, sprinkle flour on the top of them, then cover the cookie sheets (you’ll need 2) with a paper towel and let them proof for an hour.
- At this point, pre-heat your oven to 425º. If you have double oven, then heat both so you can bake the sheets at the same tie.
- After an hour, the buns will be ready to bake. If you only have a single oven, pop the other sheet into the fridge to retard the proof (don’t worry, you can bake them right out of the fridge).
- Bake for 25 minutes. Hint: To help them pop up, I put some hot water (1/2 cup) in a metal pan on the bottom rack of my oven. This develops steam and helps with the oven spring in the first 15 minutes of the bake.
- Once finished, immediately transfer for cooling racks! Do not let them cool on the cookie sheet as the bottoms will get all gooey!
