
Yesterday I posted an article discussing that salt does not kill yeast. It’s a myth that has somehow propagated across the baking world. There’s a lot of misunderstanding about the relationship between salt and yeast. I’ve even read articles where even well-known bread chefs really didn’t have an understanding of how salt truly affects yeast. Pretty amazing.
In my research on the subject, I came across a number of articles from academics and laypeople discussing and experimenting with salt-stressing yeast prior to mixing and how it affected the rise and texture of the dough.
What is salt-stressing the yeast?
Basically, it’s a process of exposing the yeast to a slightly saline environment to make it go into osmotic shock. When it gets shocked like this, its reaction is to produce chemicals that protect it from leaching. Once it gets over the shock, it becomes resistant to further osmotic shock events. What this means with respect to baking bread is that salt-stressed yeast can then be added to high-salt or high-sugar dough and still function.
For standard, straight dough, using salt-stressed yeast shortens fermentation time. With the typical straight dough, when you dump everything together and mix it, the yeast initially goes through osmotic shock. There is a lag period where the yeast needs to recover from the shock, then it becomes active again and starts producing gas. With salt-stressed yeast, there’s no lag as the yeast has already gone through osmotic shock and it starts fermentation immediately.
Another effect of using salt-stressed yeast is that the chemicals that get released apparently act as a natural dough conditioner, increasing the gas-retention ability of the dough and producing a softer crumb.
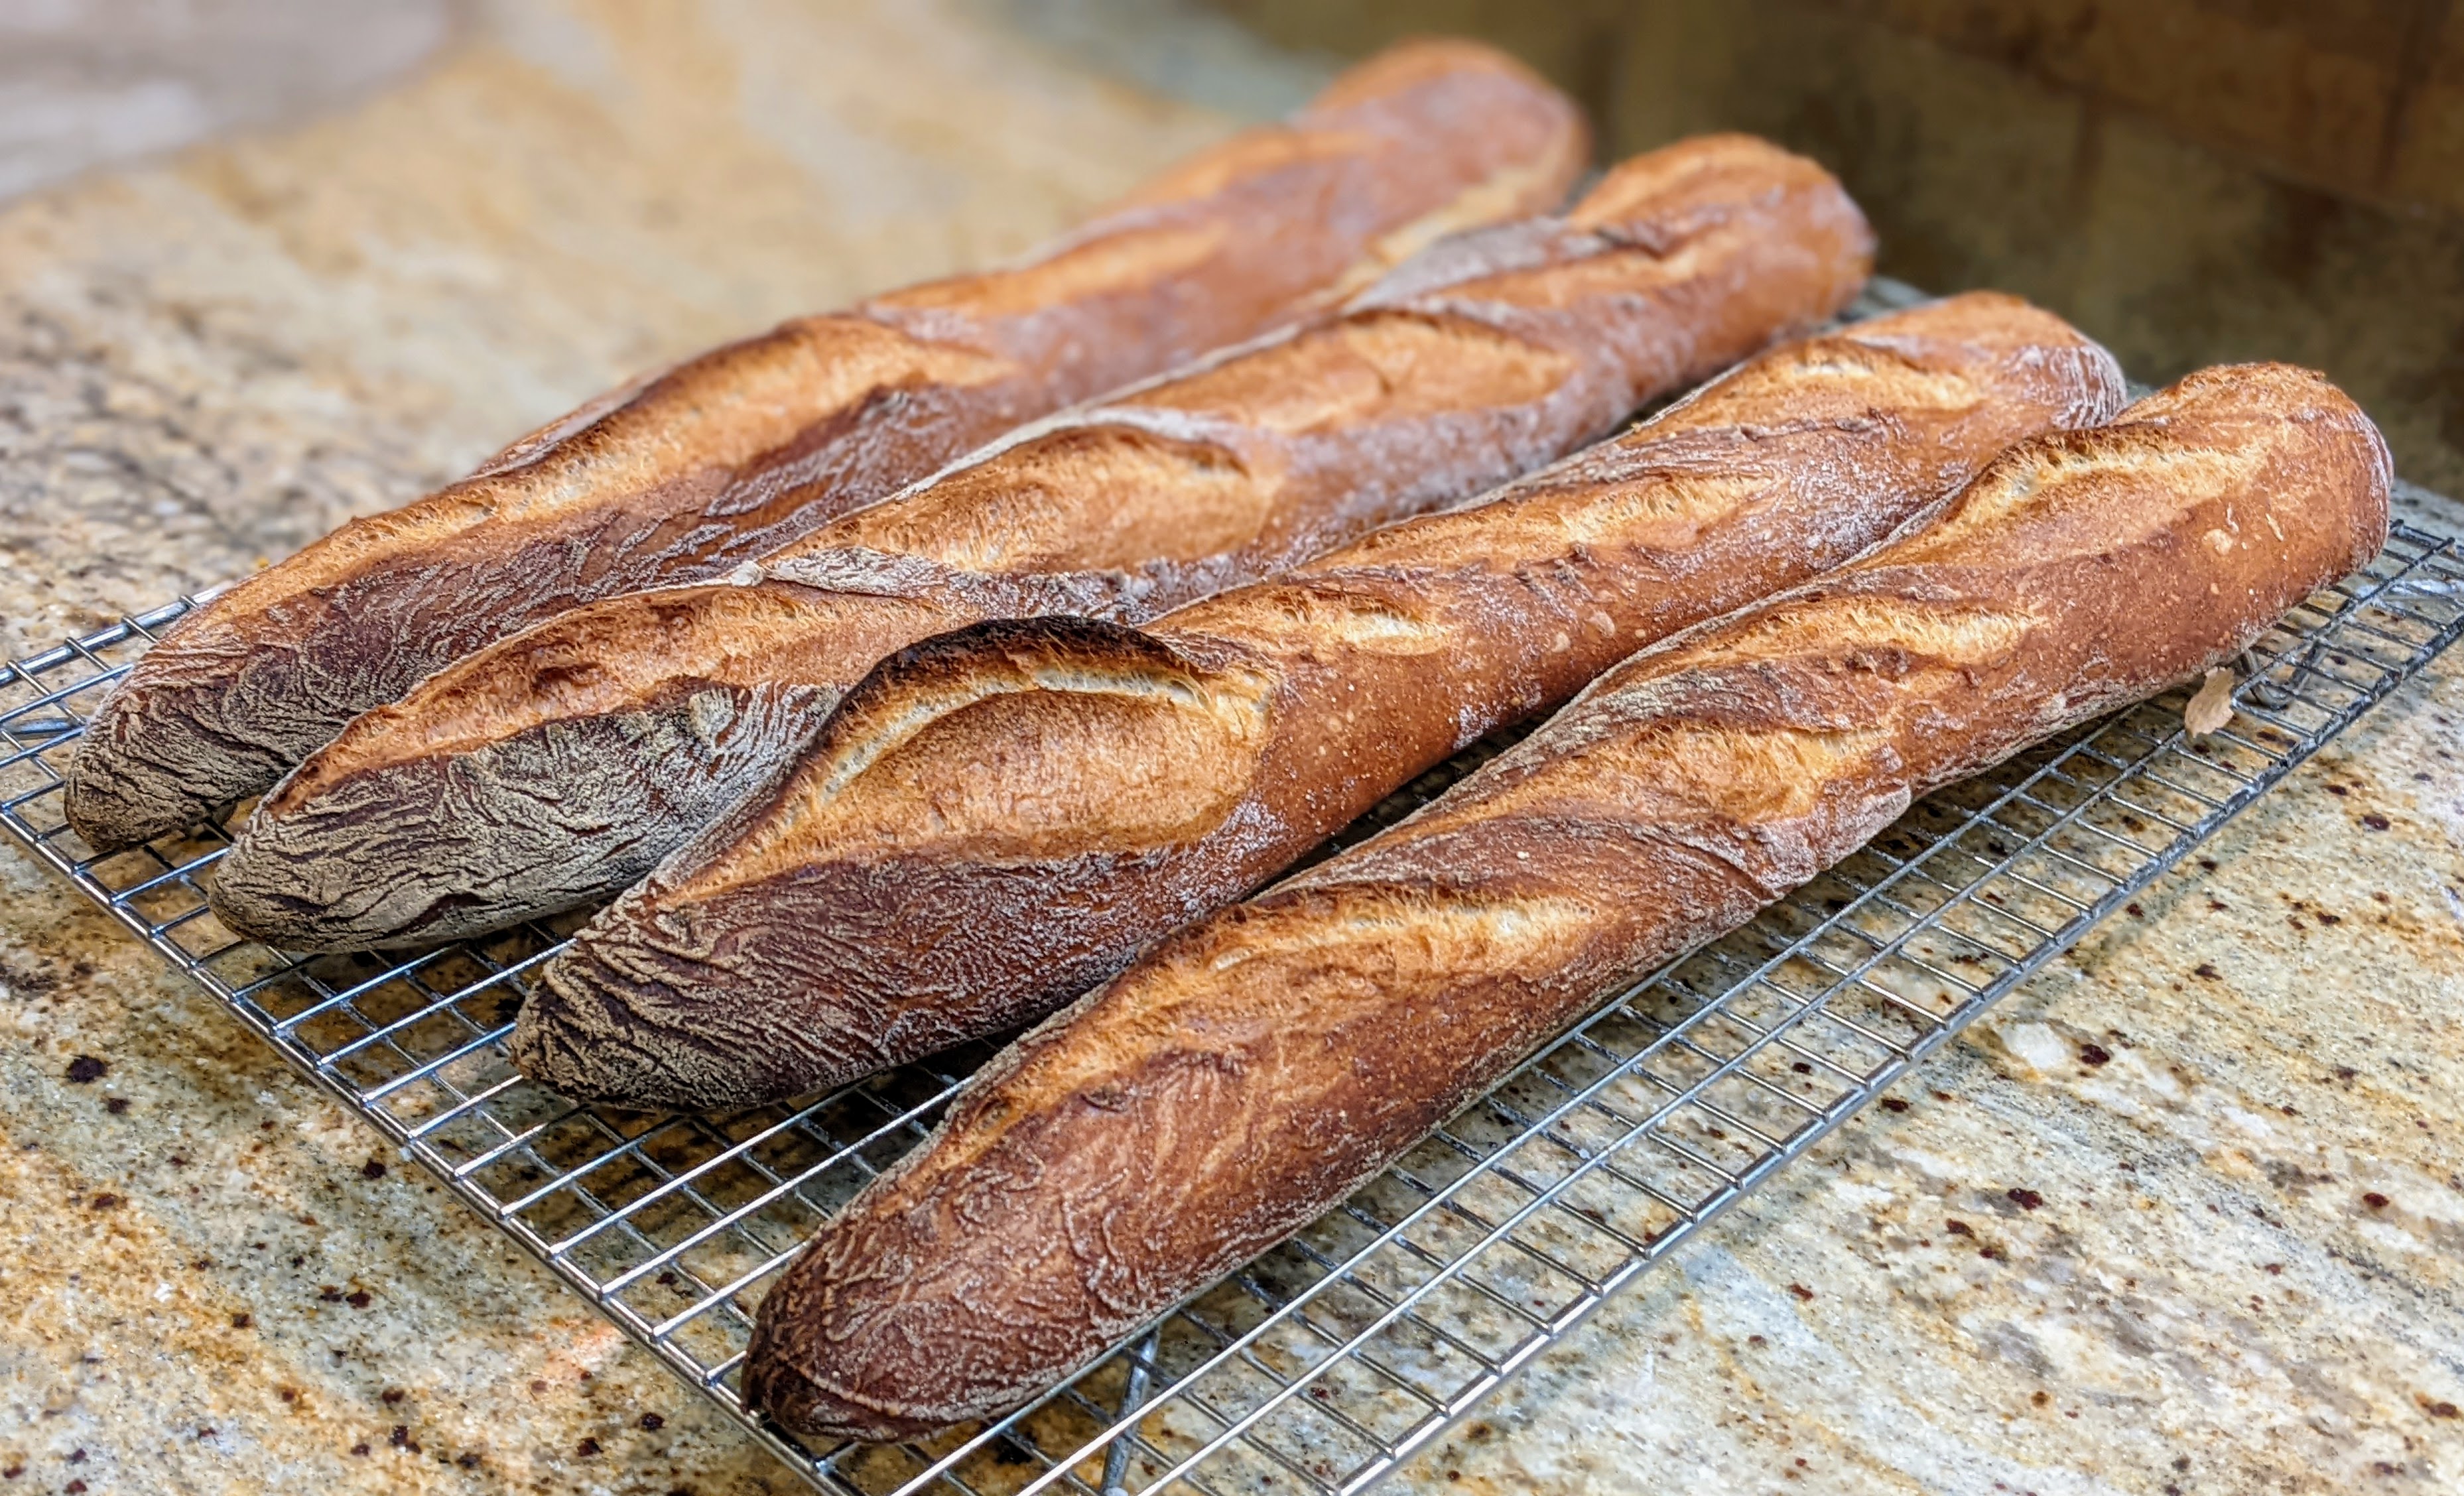
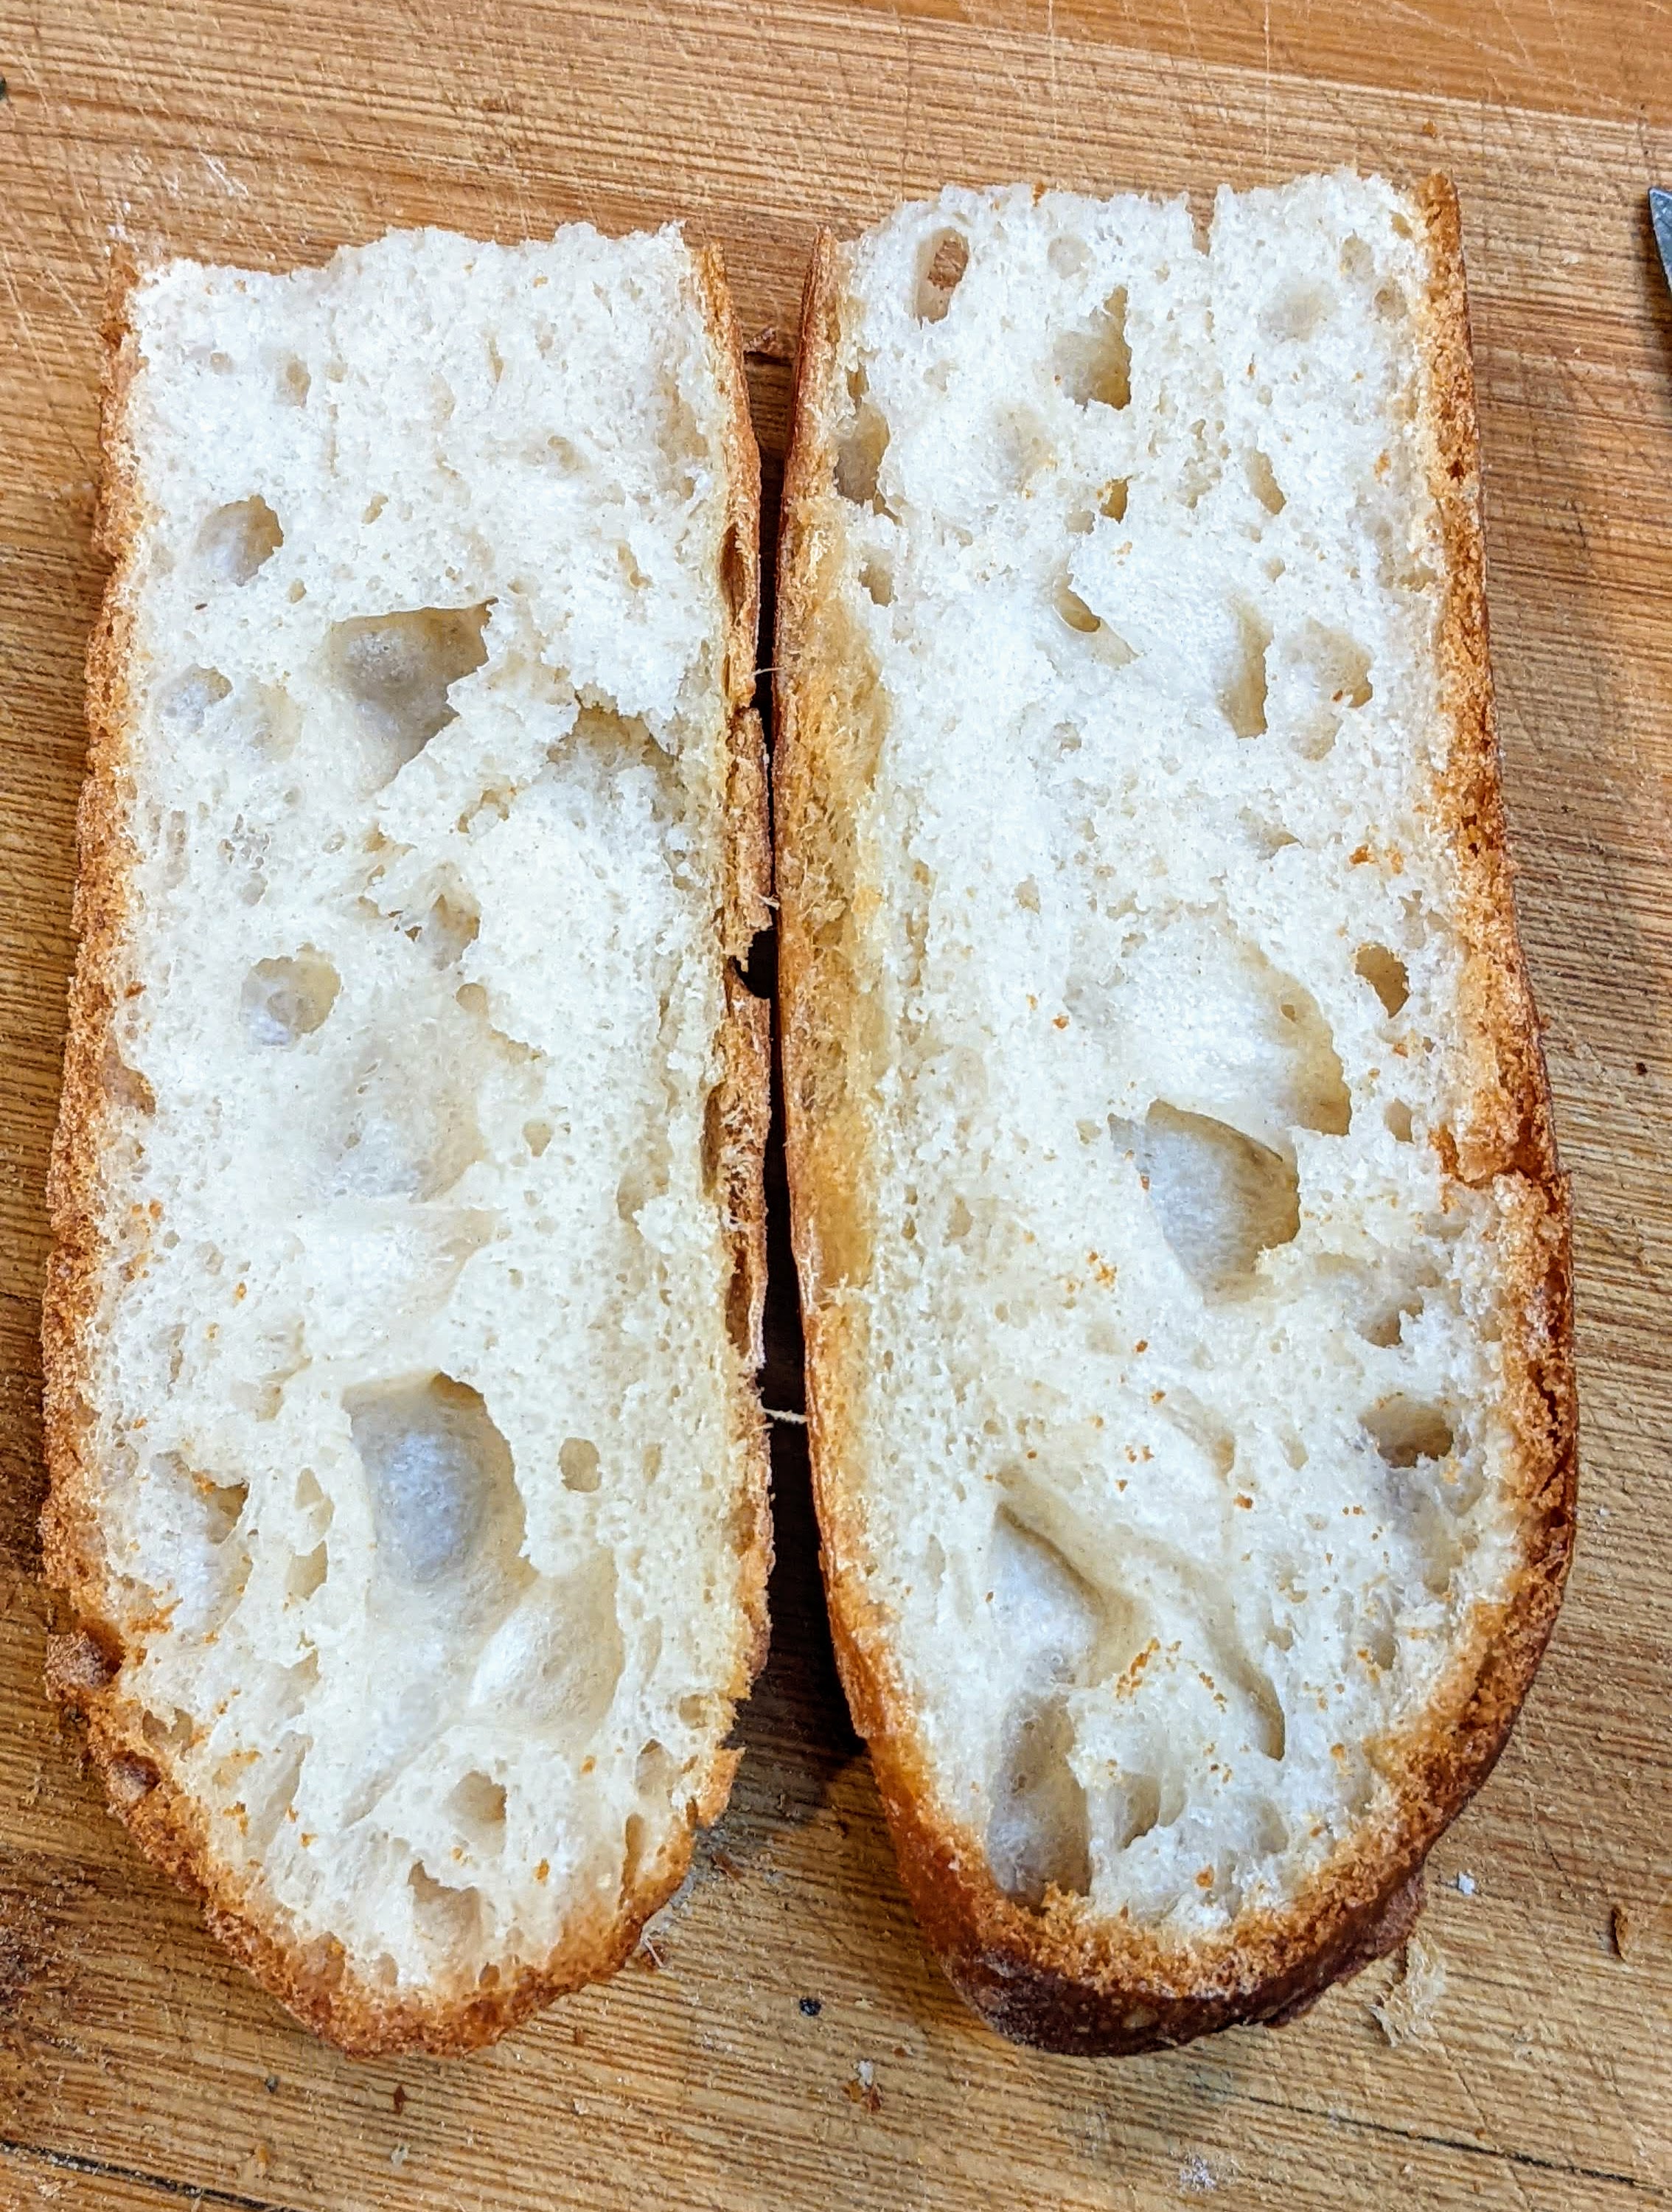
Of course, after going down the rabbit hole of salt-stressed yeast, I had to try baking bread with it. So I took my traditional poolish baguette recipe and baked the loaves above. I bake a lot baguettes and I have to say that the crumb was indeed softer with the salt-stressed yeast. What about the fermentation time? It was shorter, especially bulk fermentation. Normally my dough finishes bulk fermentation in about 3 hours at 78ºF. This dough took less than 2 hours to finish bulk fermentation, so the yeast activity was definitely higher.
The reason I used a poolish method was that since I was expecting a faster bulk fermentation, I wanted make sure there was some taste in the dough which the poolish would provide. Luckily I did that because the bread would have probably turned out insipid. Given that this technique really picks up the yeast activity, in the future, I will use less yeast to ensure flavor development.
But with regards to texture, wow! This technique is really awesome!
How to Salt-Stress Your Yeast
The scientific experiments that were run used a 7% saline solution, so I wanted to duplicate that in my own bake. So here goes:
- First let’s assume you want to use more salt than the recipe calls for. Most salt is about 2%. But let’s use 3% for this.
- Take the weight of the salt that represents the 3% and divide it by 7% (0.07). This will give you the amount of water you’ll need to create a 7% solution.
- Now measure out that amount of water calculated above (I recommend that it is at least 95ºF so the salt dissolves), then dissolve all the salt called for in your recipe into the warm water.
- Once all the salt is dissolved, add all your yeast to the solution, mix it well, then let it stand in a warm environment for at least 30 minutes, up to a few hours.
- When you’re ready to mix, add the rest of the water called for in your recipe to the solution. Mix this well.
- Add the liquid to your flour and mix. That’s it!
