The Three-Day Sourdough Process

It has been a long time since I’ve written in this blog, at least about bread. The truth is that I’ve been so busy with my career these past few years that I gave up baking for a while. I know, right? Baking was an obsession with me for a long time, but life got in the way.

I did try to get back into it after I got new ovens and a baking steel last Christmas. But my initial results were horrible. Discouraged, I relegated my baking to simple things I could make in a pan, like focaccia and Hawaiian rolls.

Then, a few weeks ago, my daughter mentioned that she missed my sourdough. I admit that I was hesitant because of those earlier failures with the baking steel. Still, I created a new starter and made a couple of loaves.

I failed again.

They were delicious and had great oven spring, but they weren’t aesthetically pleasing. I chalked that up to being rusty with my shaping. At least I was finally beginning to understand how to bake on the steel.

Then my wife came home with a starter she had inherited from a friend who was moving back to Germany and couldn’t take it with her. She had maintained it for the three years she lived here in the US, so it was a mature, healthy starter. I threw mine out in favor of hers.

That starter would eventually lead me to the loaves in this article—and to one of the most aggressive fermentation schedules I’ve attempted in a long time. I figured I might as well go big or go home if I’m making a comeback.

And I’m back…
Three-Day Sourdough

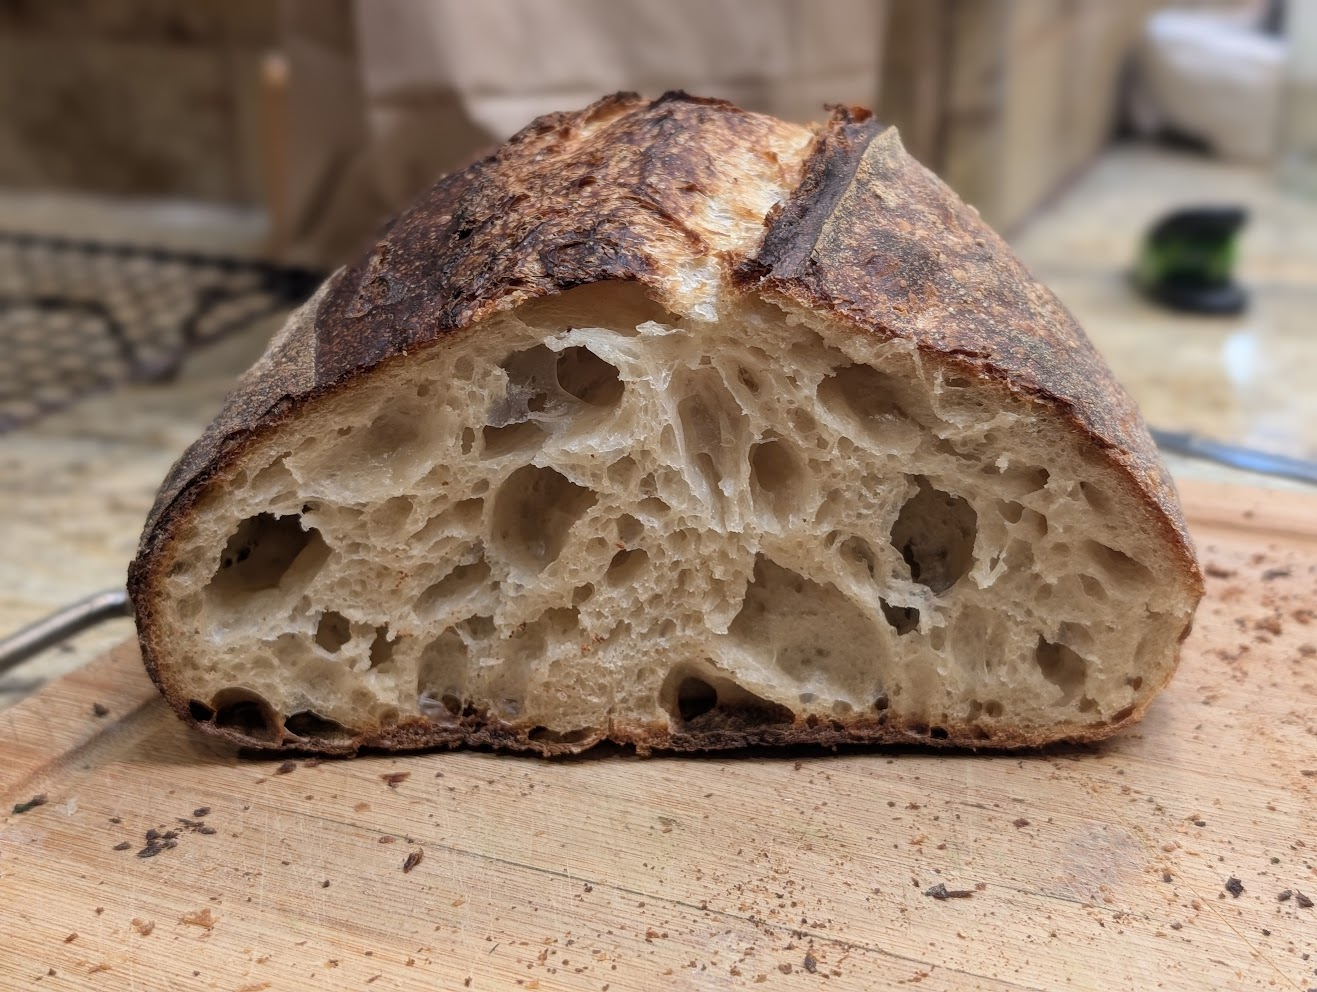
This bread is all about the slow development of flavor. The end result has a gentle sour tang, with a nutty character and a creamy texture. The aggressive bake brings out gorgeous caramel and vanilla notes in the crust.

And by slow flavor development, I mean that the dough undergoes two periods of cold retardation before baking. It’s not particularly difficult to make. But it does take patience and a watchful eye.

Let’s jump into the formula, then we’ll discuss the process below.

Baker’s Formula

Flour100.00%
Water75%
Salt2.00%
Total %177.00%

Final Dough – Creates 2 X 800g loaves

Bread858g
Water630g
Salt18g
Mature Starter110g
Total Yield1616g

Process

Prepare Your Starter. You can use your starter at its peak or just after. I prefer using it slightly past peak because of the additional acidity.

Initial Mix. Reserve about 50g of the water and dissolve the salt in it. Set that aside for later.

In a large bowl, combine the starter with the remaining water and mix until the starter is completely dissolved. Add the flour in batches, mixing as you go, until everything is thoroughly combined and you have formed a shaggy mass.

Cover the bowl and allow the dough to rest for one hour. This is essentially a fermentolyse, giving the flour time to fully hydrate while fermentation begins.

Final Mix/Bassinage. Pour the saltwater mixture over the dough and work it in thoroughly. Press and squeeze the dough with your fingers to ensure the saltwater is evenly incorporated, then perform a few stretch-and-folds to improve the distribution.

Cover the bowl and allow the dough to rest for 30 minutes.

Bulk Fermentation/Folding. Fold the dough at least four times over the next two hours, or until it has developed sufficient strength and extensibility. When stretched for a windowpane test, the dough should form a thin, translucent lamina.

After the folds are complete, allow the dough to increase in volume by about 25%. Cover the bowl and place it in the refrigerator for up to 18 hours, or until the dough has doubled in volume. I personally follow a 12-hour schedule.

Make sure your refrigerator is between 39°F and 42°F. Below that range, yeast activity will slow considerably.

Important Tip. Do not place the dough in a warm environment between folds. That will favor yeast activity too early in the process. At this stage, we want to limit yeast development and allow the cold fermentation to proceed slowly.

And do not worry if the dough seems slow to rise. That is exactly what we want.

Finish Bulk Fermentation, If Necessary. If the dough has not doubled after 12 hours in the refrigerator, do not freak out. It simply means bulk fermentation has not finished.

Place the dough in an oven with the light on, leaving the door slightly cracked to allow excess heat to escape. Keep the environment at or below 82°F, and allow the dough to continue fermenting until it has doubled in volume.

Divide and Pre-Shape. Turn the dough out onto an unfloured work surface. Divide it into 800g pieces, then pre-shape each piece into a tight round.

Cover the rounds with a tea towel and allow them to bench rest for 15 to 20 minutes, or until they have relaxed enough to shape without resisting.

Shape. Shape the rounds into boules or bâtards, then place them in bannetons. Cover and refrigerate for at least 12 hours.

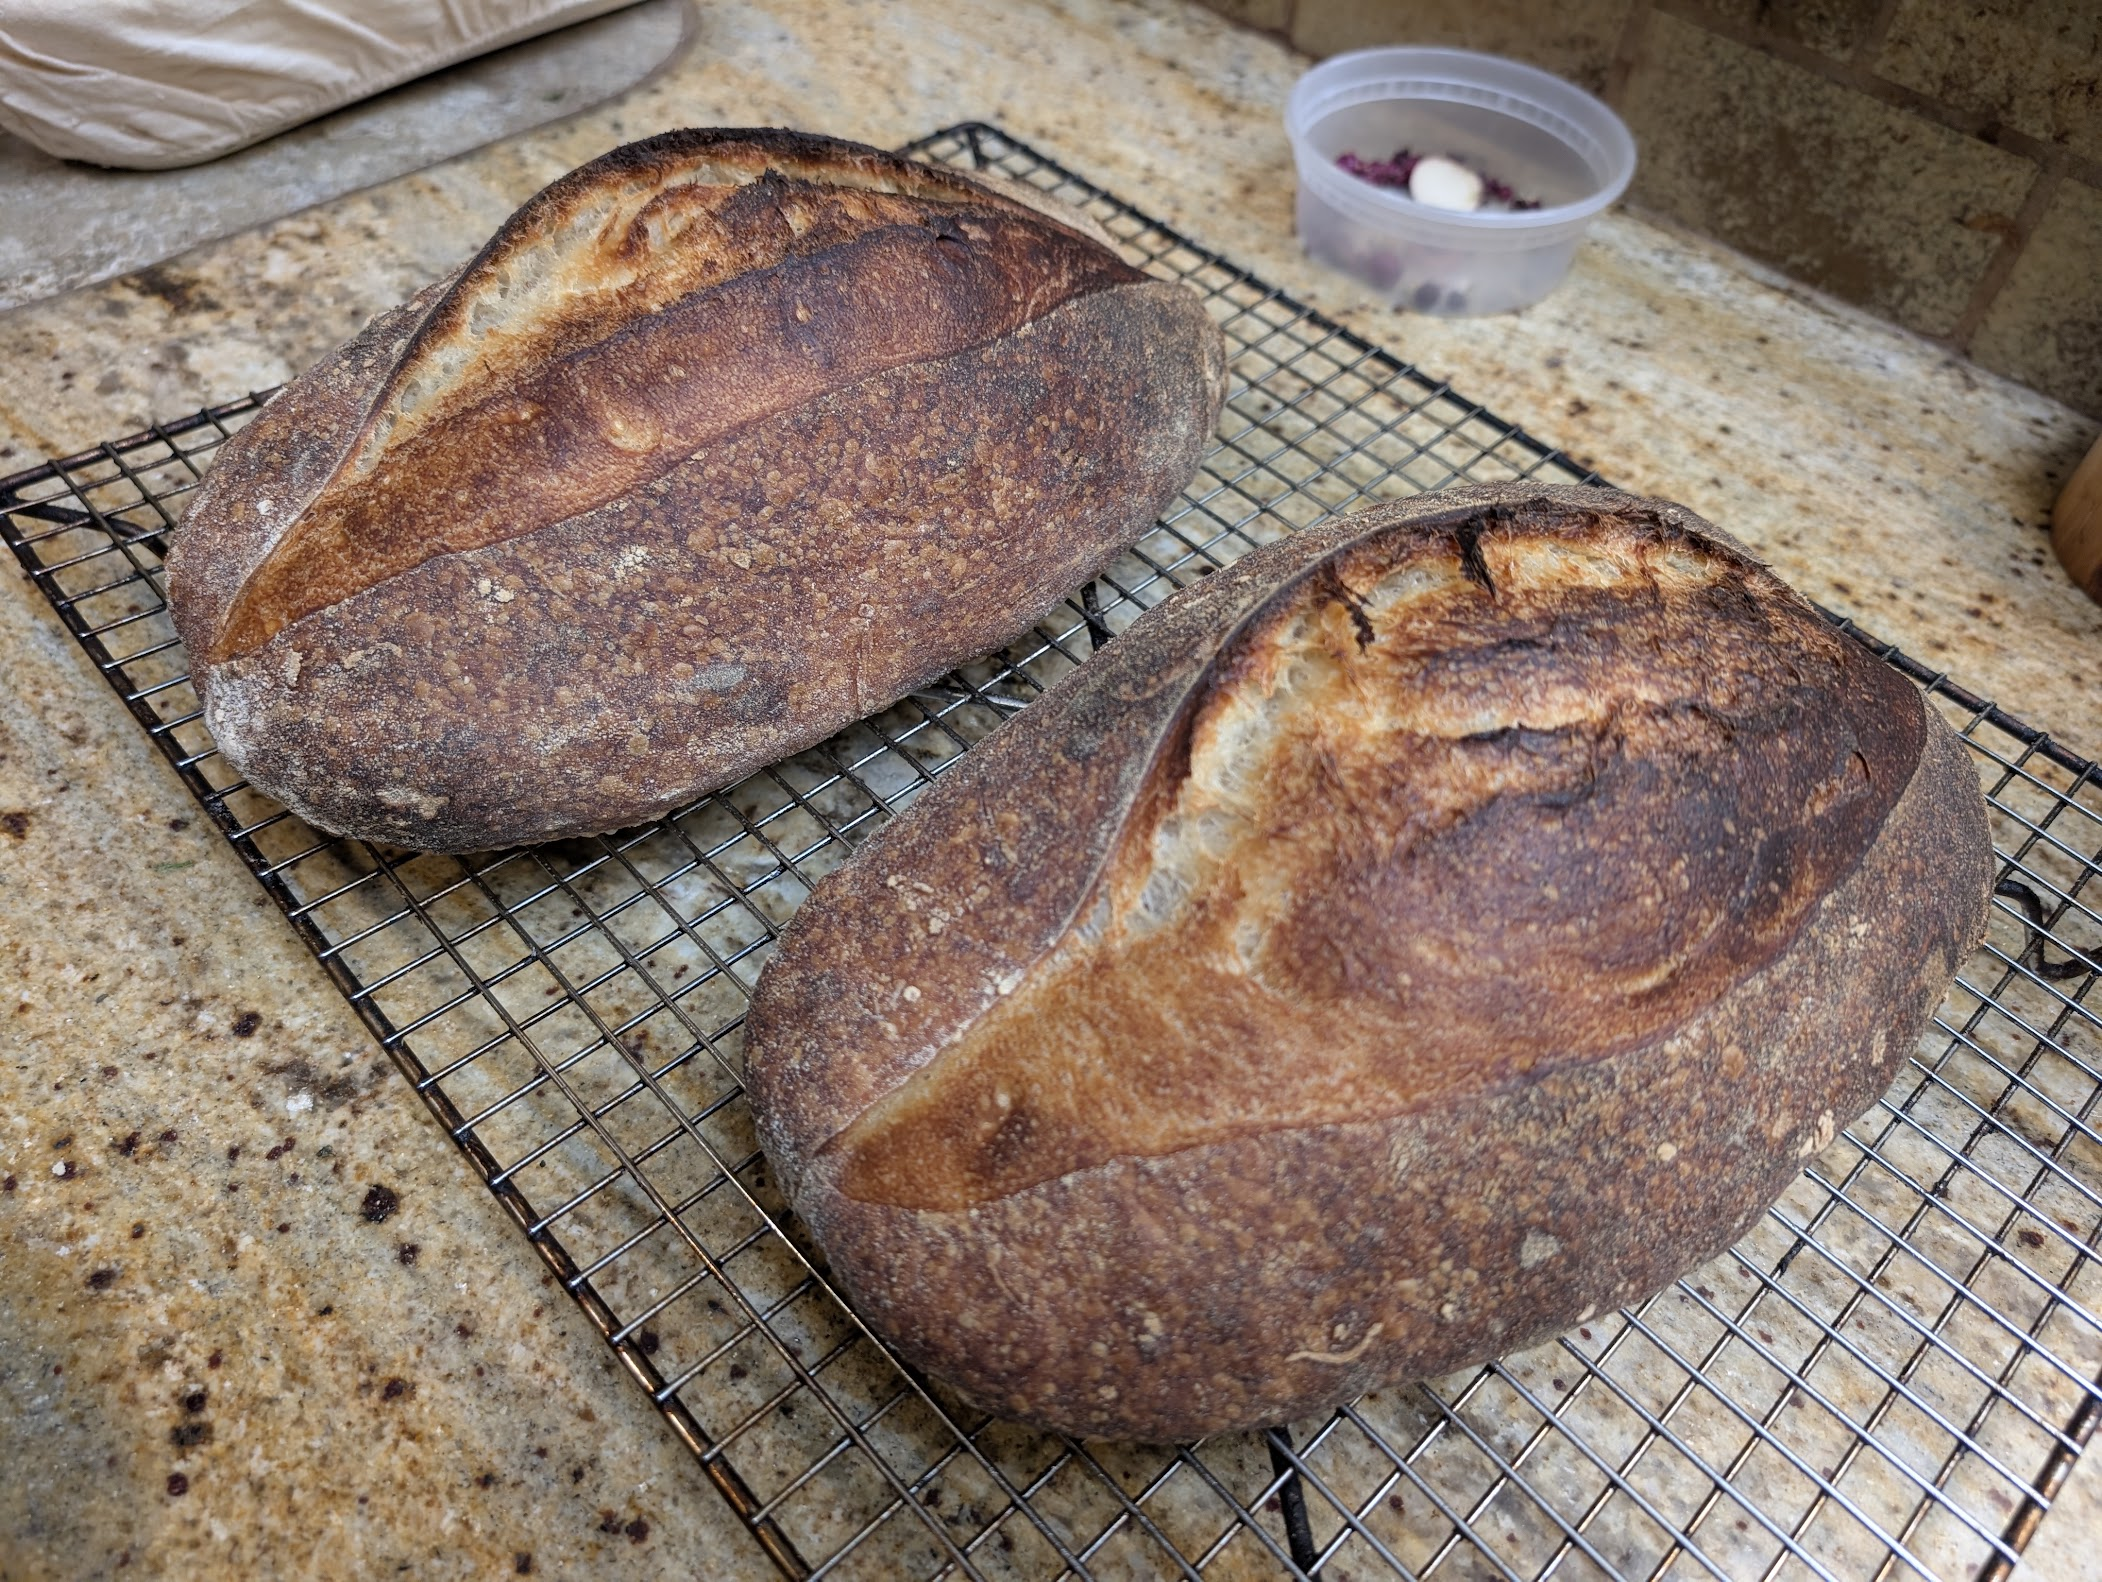
Bake. When you’re ready to bake and you remove your loaves from their bannetons, don’t freak out if they seem slack. All that means is that the gluten has relaxed. Just be careful in handling them because you will degas them. With the right-side loaf in the picture at the top, the banneton slipped and pushed the dough against the end. I still got decent oven spring, but it didn’t rise enough to break through my cut. Just make sure you’re gentle with how you handle them.

Bake the loaves as you normally would, using a Dutch oven, baking stone, baking steel, or sheet pan. For a lighter crust, remove the loaves when the internal temperature reaches about 195°F. For a darker crust like the loaves shown here, continue baking until the internal temperature reaches 203°F to 205°F.
Chili: The Cold Weather Comforter

Yeah, yeah, before any Texas chili purists chime in, I like my chili with beans, but with this recipe, beans are optional.

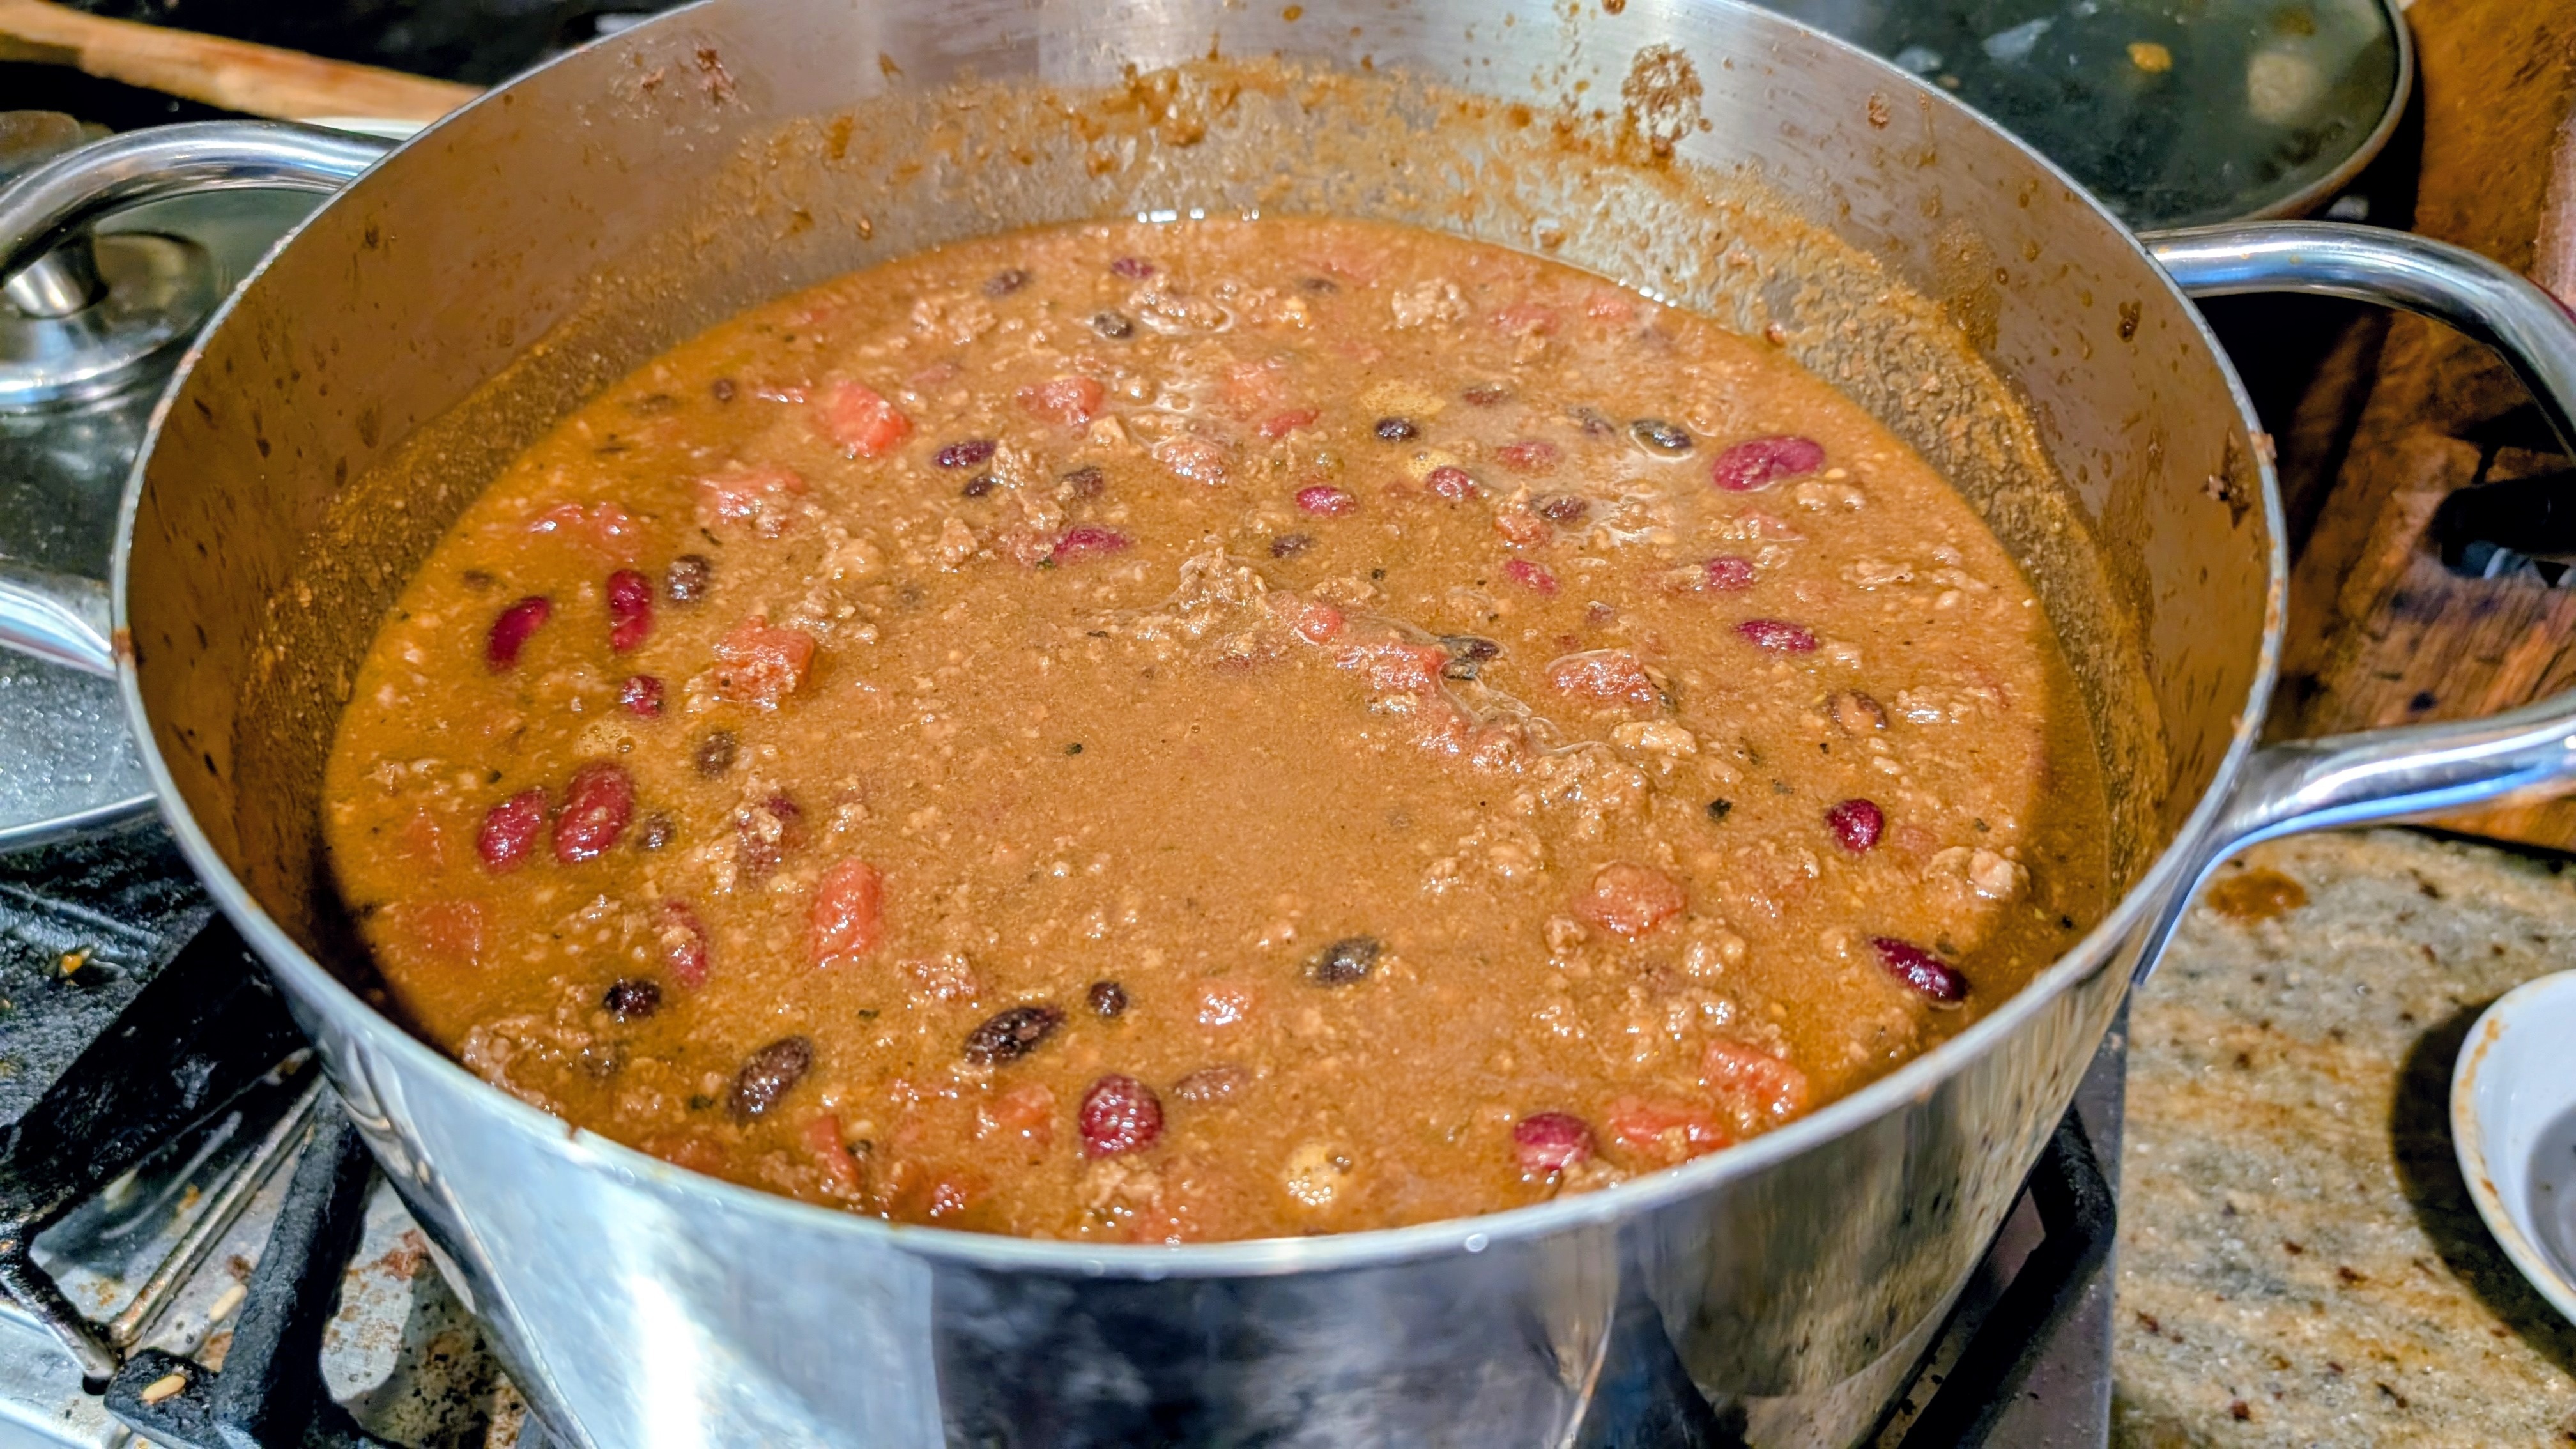
This is a recipe that took me years to develop. I don’t know – or care – if it’s competition-worthy, but it’s hearty and delicious. The batch above was made with venison hamburger and venison sausage. But pork or beef or any meat will do – even ground turkey and chicken!

This is a low-and-slow chili that takes about 3 hours to finish, but it’s simple to make, even though it may take some time to cook.

Ingredients

4 large, dried Guajillo chilis
1 yellow onion
6 cloves of garlic
1 1/2 lb lean ground meat (85-15 to 90-10)
1/2 lb sausage (preferably something with low sage like Texas breakfast sausage)
1 1/2 tbsp cumin
1 tbsp chili powder
1 tbsp cocoa powder
1 tsp black pepper
1 tsp MSG (optional)
1 tbsp paprika
1/2 tsp ground coriander
1/2 tsp black pepper
2 bay leaves
2 cans diced tomatoes (I like fire-roasted)
2 cans of beans, drained (optional – I like kidney and black beans)
2 tbsp corn starch slurry
Salt to taste – about 1 tbsp for me, usually
8 oz. beer (I prefer Pilsner or a Lager. IPA are too bold)

  1. Rehydrate the dried chilis in 2 cups of warm water
  2. Cut the onion into quarters and place in a blender with the garlic
  3. Once the chilis are rehydrated (about 1/2 hour to an hour), remove the stems and place in the blender with the onion and garlic.
  4. Pour about a cup of the chili water into the blender and blend. You want the consistency to be thick, but not a paste. If it’s too thick, add a bit more chili water.
  5. Add all the dry spices to the blender and mix thoroughly.
  6. In a medium pot, add some olive oil, then fry up the onion blend over medium heat until aromatic.
  7. Add the tomatoes and slurry and mix thoroughly.
  8. Add the meat and break it up till there are no large chunks. Stir often.
  9. Add the bay leaves.
  10. At this point, you can add the beans.
  11. Pour in the beer and fold it in thoroughly.
  12. Allow the chili to come to a boil, cover, then reduce heat to simmer.
  13. Let simmer for an hour and a half, stirring every 15-20 minutes.
  14. Uncover, then let simmer without a cover to help thicken. Stir once halfway through.
  15. Turn the heat off, cover, and let the chili rest for an hour.
  16. Before serving, remove the bay leaves.
  17. Serves 6.

Notes

  1. This is just a basic recipe, but you can tweak it any way you want. I sometimes add a small can of chopped green chilis to give it an extra kick.
  2. It’s even better the next day! I often make it the day before I serve it, let cool down, then pop it in the fridge overnight. All the flavors marry.
  3. You can top with chopped onions, sour cream, and cheddar cheese.
  4. This sounds crazy, but this is great on spaghetti!
  5. If you don’t add beans, you might let this simmer partially covered so more water evaporates from the chili.

Traeger Smoked/Pulled Leg of Lamb

Ever since I was a little boy, I have loved lamb. When my mom made lamb chops or roasted a leg of lamb, those were some of my favorite meals growing up. Nowadays I don’t eat it much and normally it’s at a restaurant. My wife doesn’t like lamb and since there aren’t many people in the house, I don’t get to cook it. But I know I can make it at least once a year and that’s on my birthday.

For all the years I’ve made it, I’ve roasted it in the oven, then served it as slices. But this time, I wanted to do something different and barbecue it to make pulled lamb. I got some further inspiration from Matt Pittman of Meat Church who makes pulled lamb for gyros! So that’s what we’ll be having for dinner tonight. My daughter is making her awesome homemade tzatziki sauce and dicing up Persian cucumbers and tomatoes. We’ll be serving all that on fresh-made pita bread from our local falafel shop. But enough of that, let’s get to making the lamb.

Preparation

There’s really not much to do to prepare a leg of lamb. But a little effort will go a long way to creating a great product in the end. First off, I remove the hard fat from the leg. All hard fat does is block heat from penetrating the meat, so I remove it. But I keep the soft fat on because it’ll melt away and make the meat much more succulent. I also don’t remove the silver skin. You can, but it’s just a lot of work and it’s usually so thin that it just cooks away.

Some legs of lamb have a big flap of meat at the end of the bone. Whether I’m smoking or roasting the leg, I always fold it over the joint and truss it with some butcher twine. That’ll ensure a nice, even cook.

As far as seasoning is concerned, you can go from basic to sophisticated. Some folks like to make an oil and fresh herb and garlic rub with fresh dill, rosemary, garlic, and olive oil. I prefer using dry rubs. For this cook, I used my new favorite rub from Meat Church called the Hail Mary Rub. This is Matt Pittman’s tailgating rub that he uses for Dallas Cowboys tailgating before games (he’s the Cowboys’ official tailgate pitmaster, BTW). This is a great blend of several different spices and it goes great with lamb. I also use a light sprinkling of Meat Church Honey Hog Hot to give it just a tiny bit of a bite. Finally, I finely chop fresh rosemary from my garden and sprinkle that all over the leg.

What about garlic? That’ll come later.

When I do a leg of lamb, I always crosshatch the fat cap through the fat to expose some meat. I then season it liberally with whatever rub I’m using. I’ve gotten the best results prepping the lamb the day before and putting it into the fridge to dry brine. Once I’m ready to cook it, I apply a bit more seasoning to the top of the leg (fat side for me), then into the smoker or oven it goes.

Smoking the Lamb

For this cook, I cooked the lamb at 225°F. It was cold and windy to I set my Traeger to 250°F. It fluctuated between 220° and 230° the entire cook. When the lamb reached 160°F (about 6 hours), I placed it in a half sheet foil pan and dropped in about dozen cloves of whole garlic and a sprig of fresh rosemary. I covered the pan with a sheet of heavy duty foil, then finished the cook in a 250°F oven until the internal temp reached 201°F (about an hour and a half) and the meat was probe tender. If it took a little effort to probe the meat, I would’ve let it go to 203°F to 205°F.

Pulling the Lamb

Meats like pork and lamb don’t need a rest like beef, so I pulled it by hand using insulated gloves. That meat practically dropped off the bone in a few places! I also have large pulling forks that normally use for pulled pork, but for the lamb, I chose to do it by hand to get a chunkier end product.

As for the garlic, the beautiful thing about adding the whole garlic cloves to the pan was that they roasted in the au jus. The rosemary sprig added tons of aroma and flavor.

At that point, the lamb was ready to serve, but dinner was still a couple of hours away, so I re-covered the pan and put it back in the oven at the “keep warm” setting after I let most of the heat out. This’ll allow the au jus and juices really penetrate the pulled meat.

Here’s Something a Little Different: Brisket-Style Smoked Tri Tip

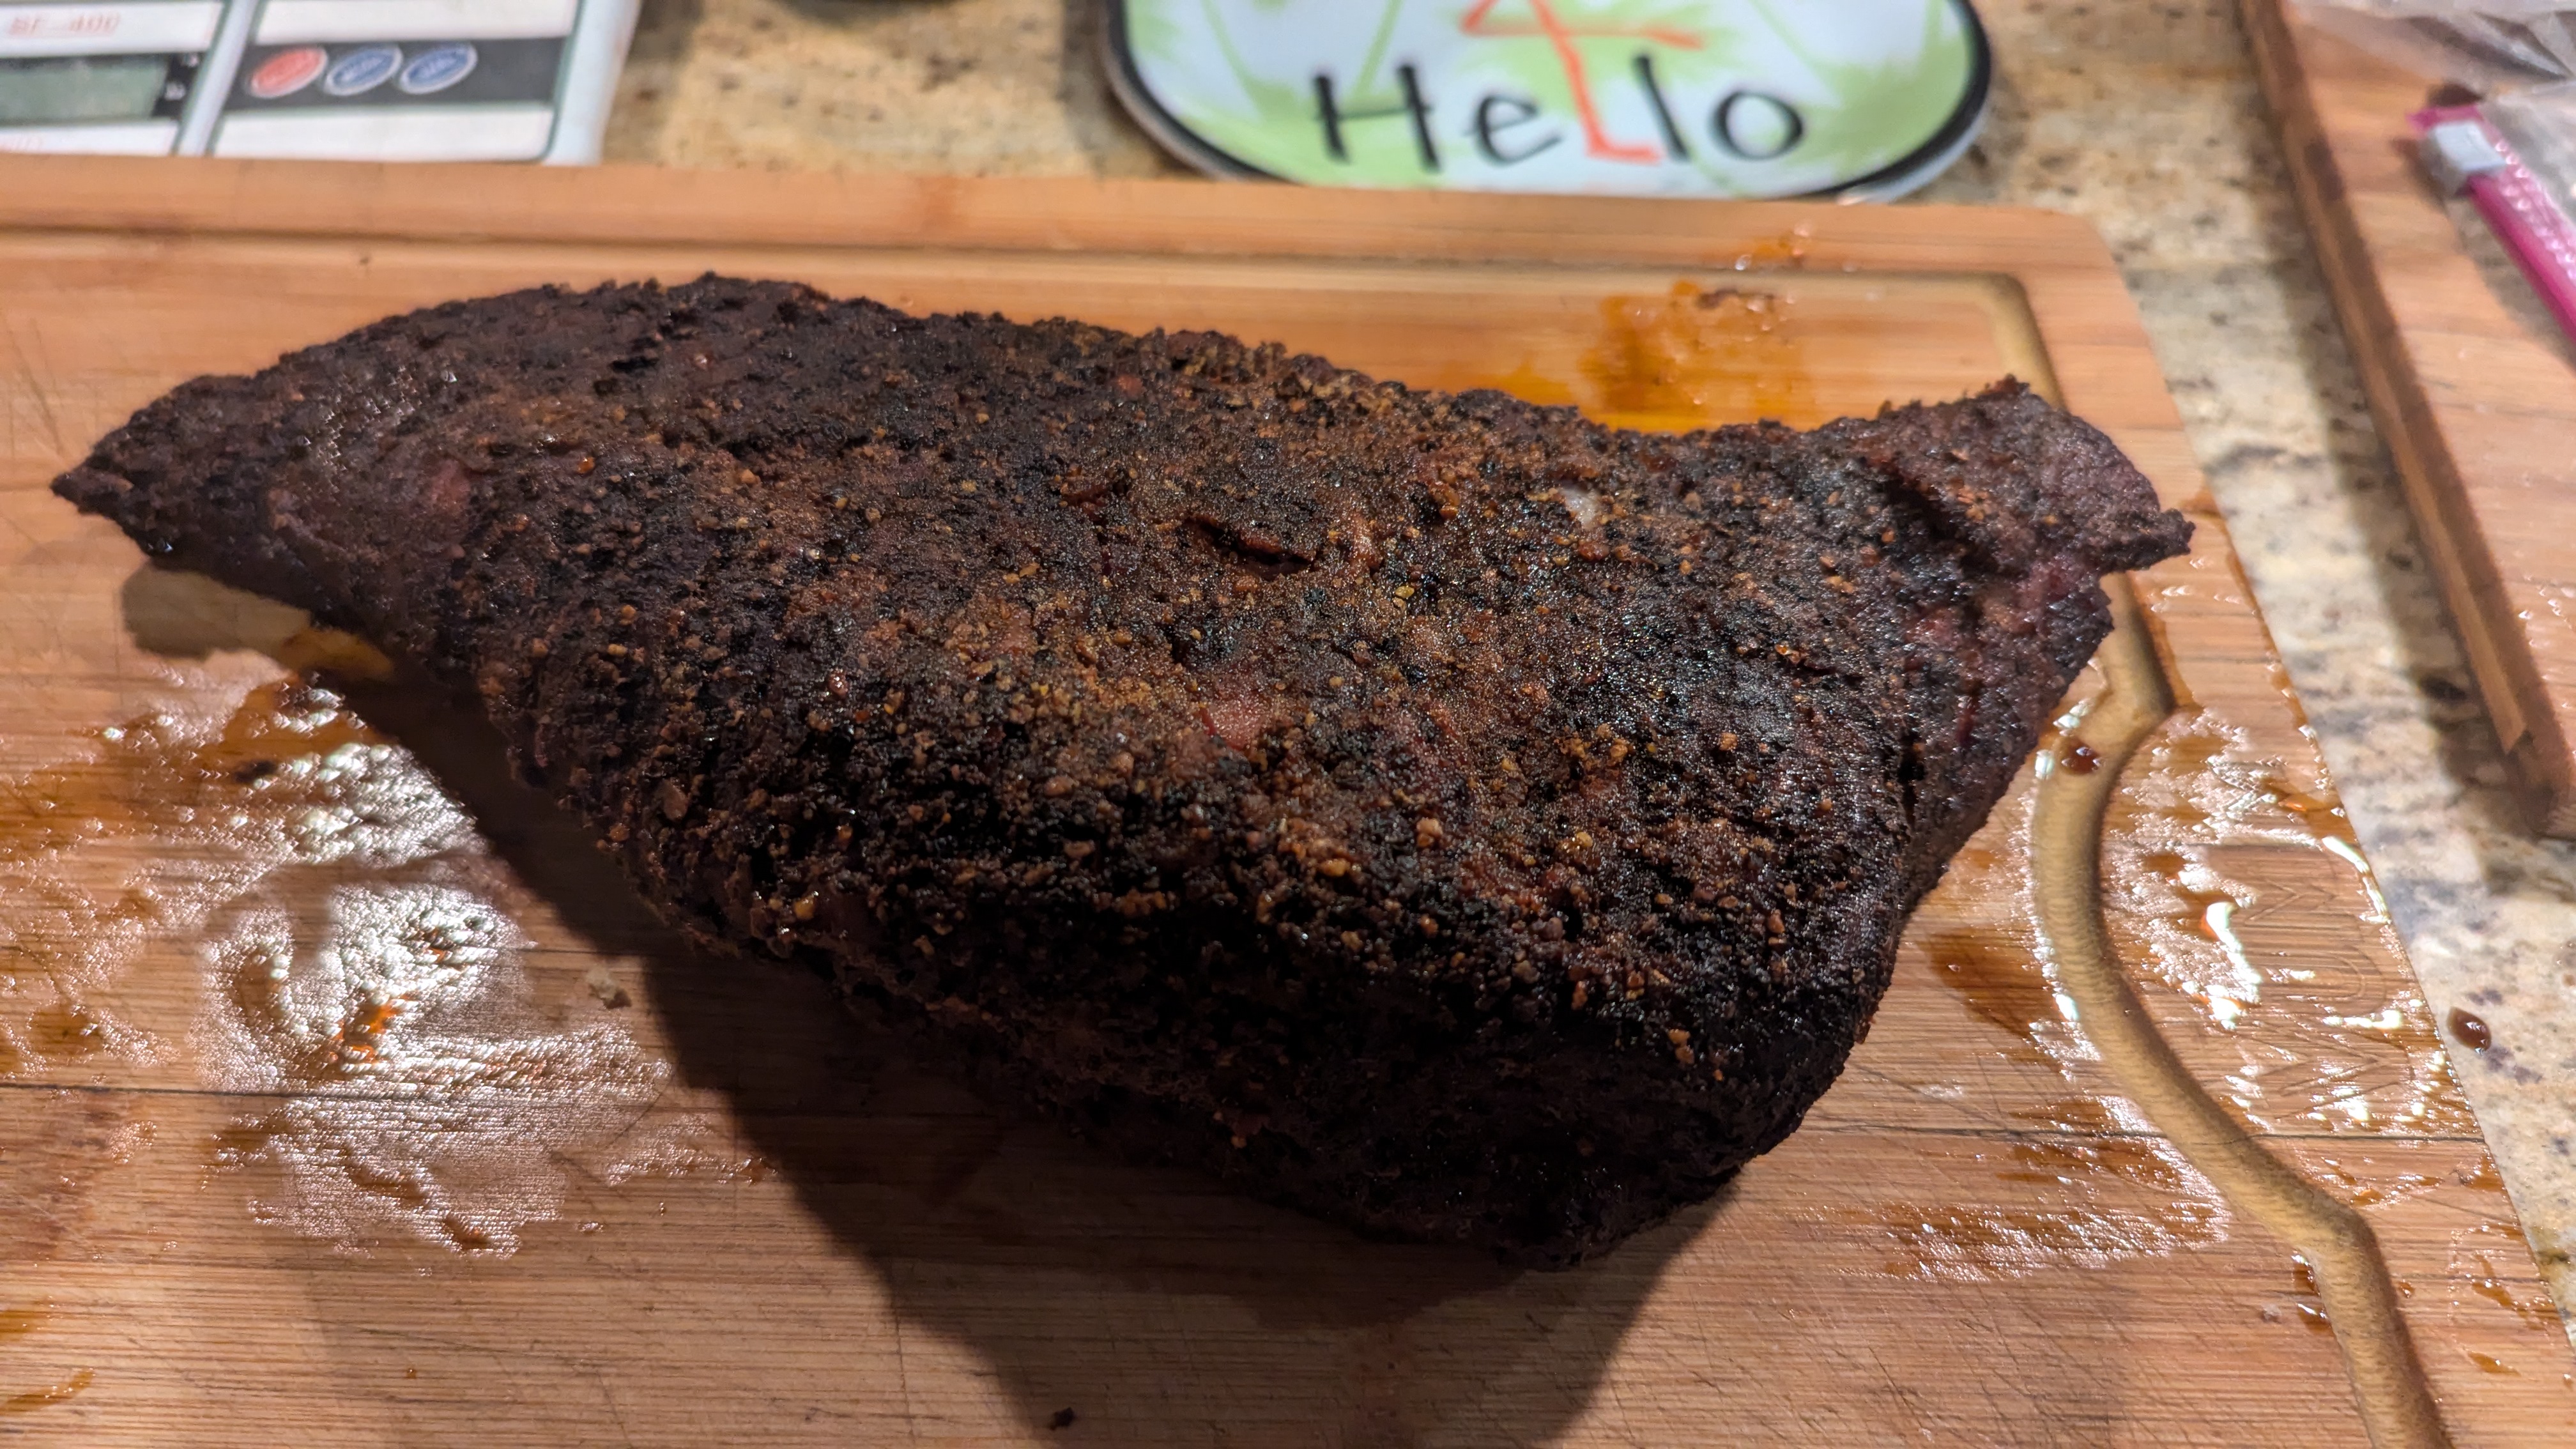
Now and then I like to share things I’ve cooked other than bread. But they’re also great to go with bread! This time it’s brisket-style barbecue Tri Tip steak. Tri Tip is predominantly a US West Coast cut, and more specifically, it tends to be a California cut. But if you can find it outside of California, it’s a great cut that can be cooked in a variety of ways.

The traditional way of cooking Tri Tip is over a hardwood pit using indirect heat for the first part of the cook then searing the outside in a sort reverse sear method. This is a method I’ve used for years. But since I got such a great deal on the last two Tri Tips I purchased, I decided to smoke one like I would a brisket to see how it would turn out. As you can see from the picture above, it turned out fantastic!

Here are the steps:

Preparation

Tri Tip is a rather lean cut of meat, but invariably, it will be encasd on one side with a thick layer of fat. So before you do anything, trim the cut, removing the hard fat and silver skin. If you do leave some fat, make sure you don’t leave more than 1/8″.

Next, you should brine the steak for 12-24 hours. With the steak above, I dry brined it with my homemade rub. In the future, I think I will wet brine in a marinade. The reason is that Tri Tip has a loose muscular structure, and even though good cuts have marbling, because of that loose structure, the fat leeches out during a long cook. Wet brining should help bolster the moisture in the meat.

Barbecue!

Like any barbecued red meat, it takes time to cook. For this cut, I used my Traeger pellet smoker:

  1. 2 hours on the “Smoke” setting (it’s about 160)
  2. Turned up the smoker to 180℉ and cooked until the internal temperature of the meat read 160℉. By this time, the meat formed a beautiful bark! (~3 hours)
  3. I removed the meat from the grill and wrapped it tightly in butcher paper and turned the temperature up to 225℉.
  4. Returned the meat to the grill then barbecued it until the meat had an internal temperature of 200℉. (~6 hours)
  5. I immediately transferred the meat (still wrapped) to a jumbo ziploc bag, then let it rest for 30 minutes in a cooler. Normally I’d rest it for a couple to a few hours, but it was dinner time and I was hungry! 🙂

As you can see, it was a pretty straightforward process. That’s the beauty of barbecue! In the future, I will definitely dry brine the meat overnight and even inject it to bolster the moisture. The only issue I had with this cook was that even though the meat came out super-tender and moist, I would’ve liked it to be a lot more juicy. Tri Tip has less fat than brisket, so I believe you have to make up for the lack of fat with some other liquid.

That first night after cooking, I just ate it straight with some BBQ sauce and some veggie on the side. But since I still had a bunch of meat left over, it made some great sandwiches the next day!

Baking on Vacation. No, I Don’t Bring My Starter.

I’ve gone to my house in Hawaii and so far, I’ve already baked a couple of times and will bake bread yet again for a Labor Day party in couple of days. I got a special request for Labor Day by the host of the party, and my wife’s friend invited us to dinner tonight and asked if I could bake some bread to bring to the dinner. Then my daughter asked me to bake some bread for her because she hadn’t had any of my bread for a year.

It is never a problem for me to bake. I love it and enjoy baking when I have the time; yes, even on vacation. But one thing I haven’t done is bring my starter with me. I suppose could bring a little starter and grow a levain if someone specifically wanted sourdough, but my thinking is that I can make so many diverse types of bread that it seems almost pointless to bring a starter.

Plus, I refuse to let my starter rule my life. Holy crap! I’ve seen people proudly post pictures of themselves in their hotel rooms proudly holding up their jars of sourdough starter that they took on vacation with them so they can feed it. To each their own, but if I’m on vacation, I don’t want my activities limited by my freakin’ starter feeding schedule! I feed my starters (yes, I have anywhere from two to four) before I leave then put them in the fridge. They’ll keep for weeks.

So what did I bake? I made two batches of ciabatta, one for us and one for the dinner party with our friends. For the Labor Day party, I baked two dozen Hawaiian rolls that went perfect with the BBQ short ribs we had. Both of those types of bread just required regular old yeast. For the ciabatta, I made an overnight biga preferment. Wow! Were they delicious.

And the Hawaiian rolls were the hit of the party! They didn’t last at all! They were rich with butter and soft and pillowy. I’m going to have to make more!

Anyway, the point to this is that if you want to bake on vacation and have the means to, go for it. But just remember this: It doesn’t have to be sourdough.