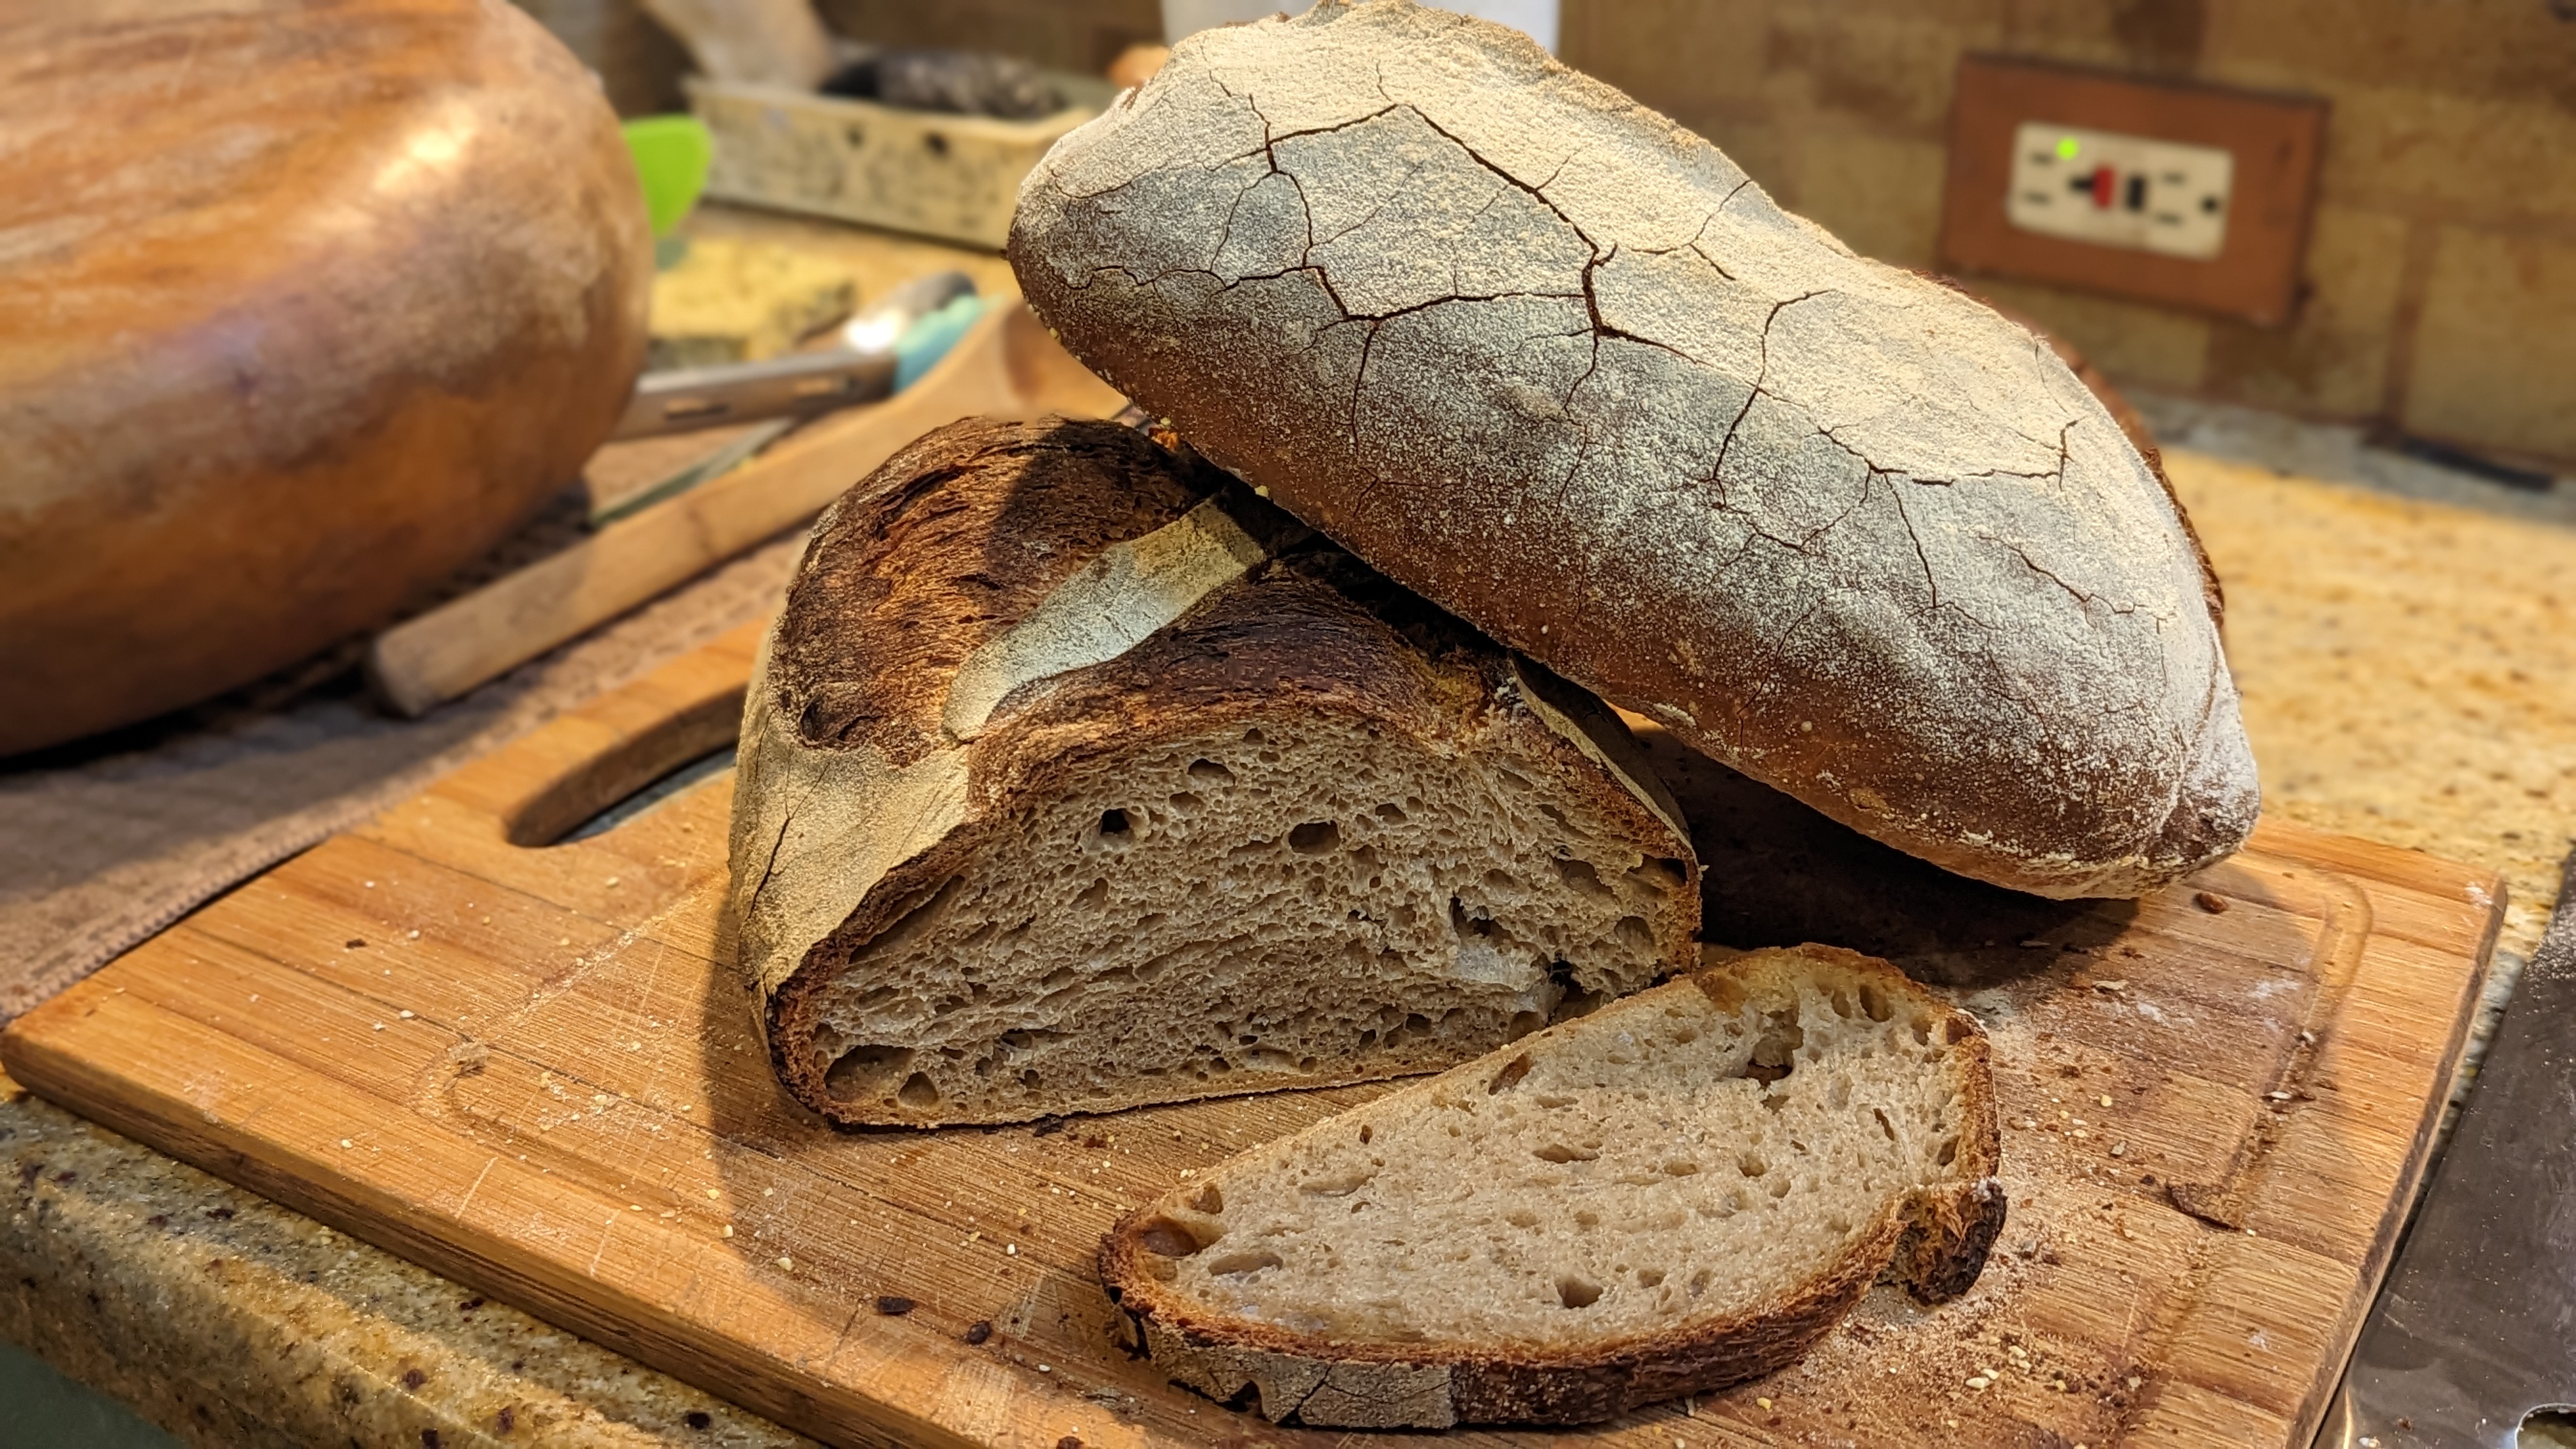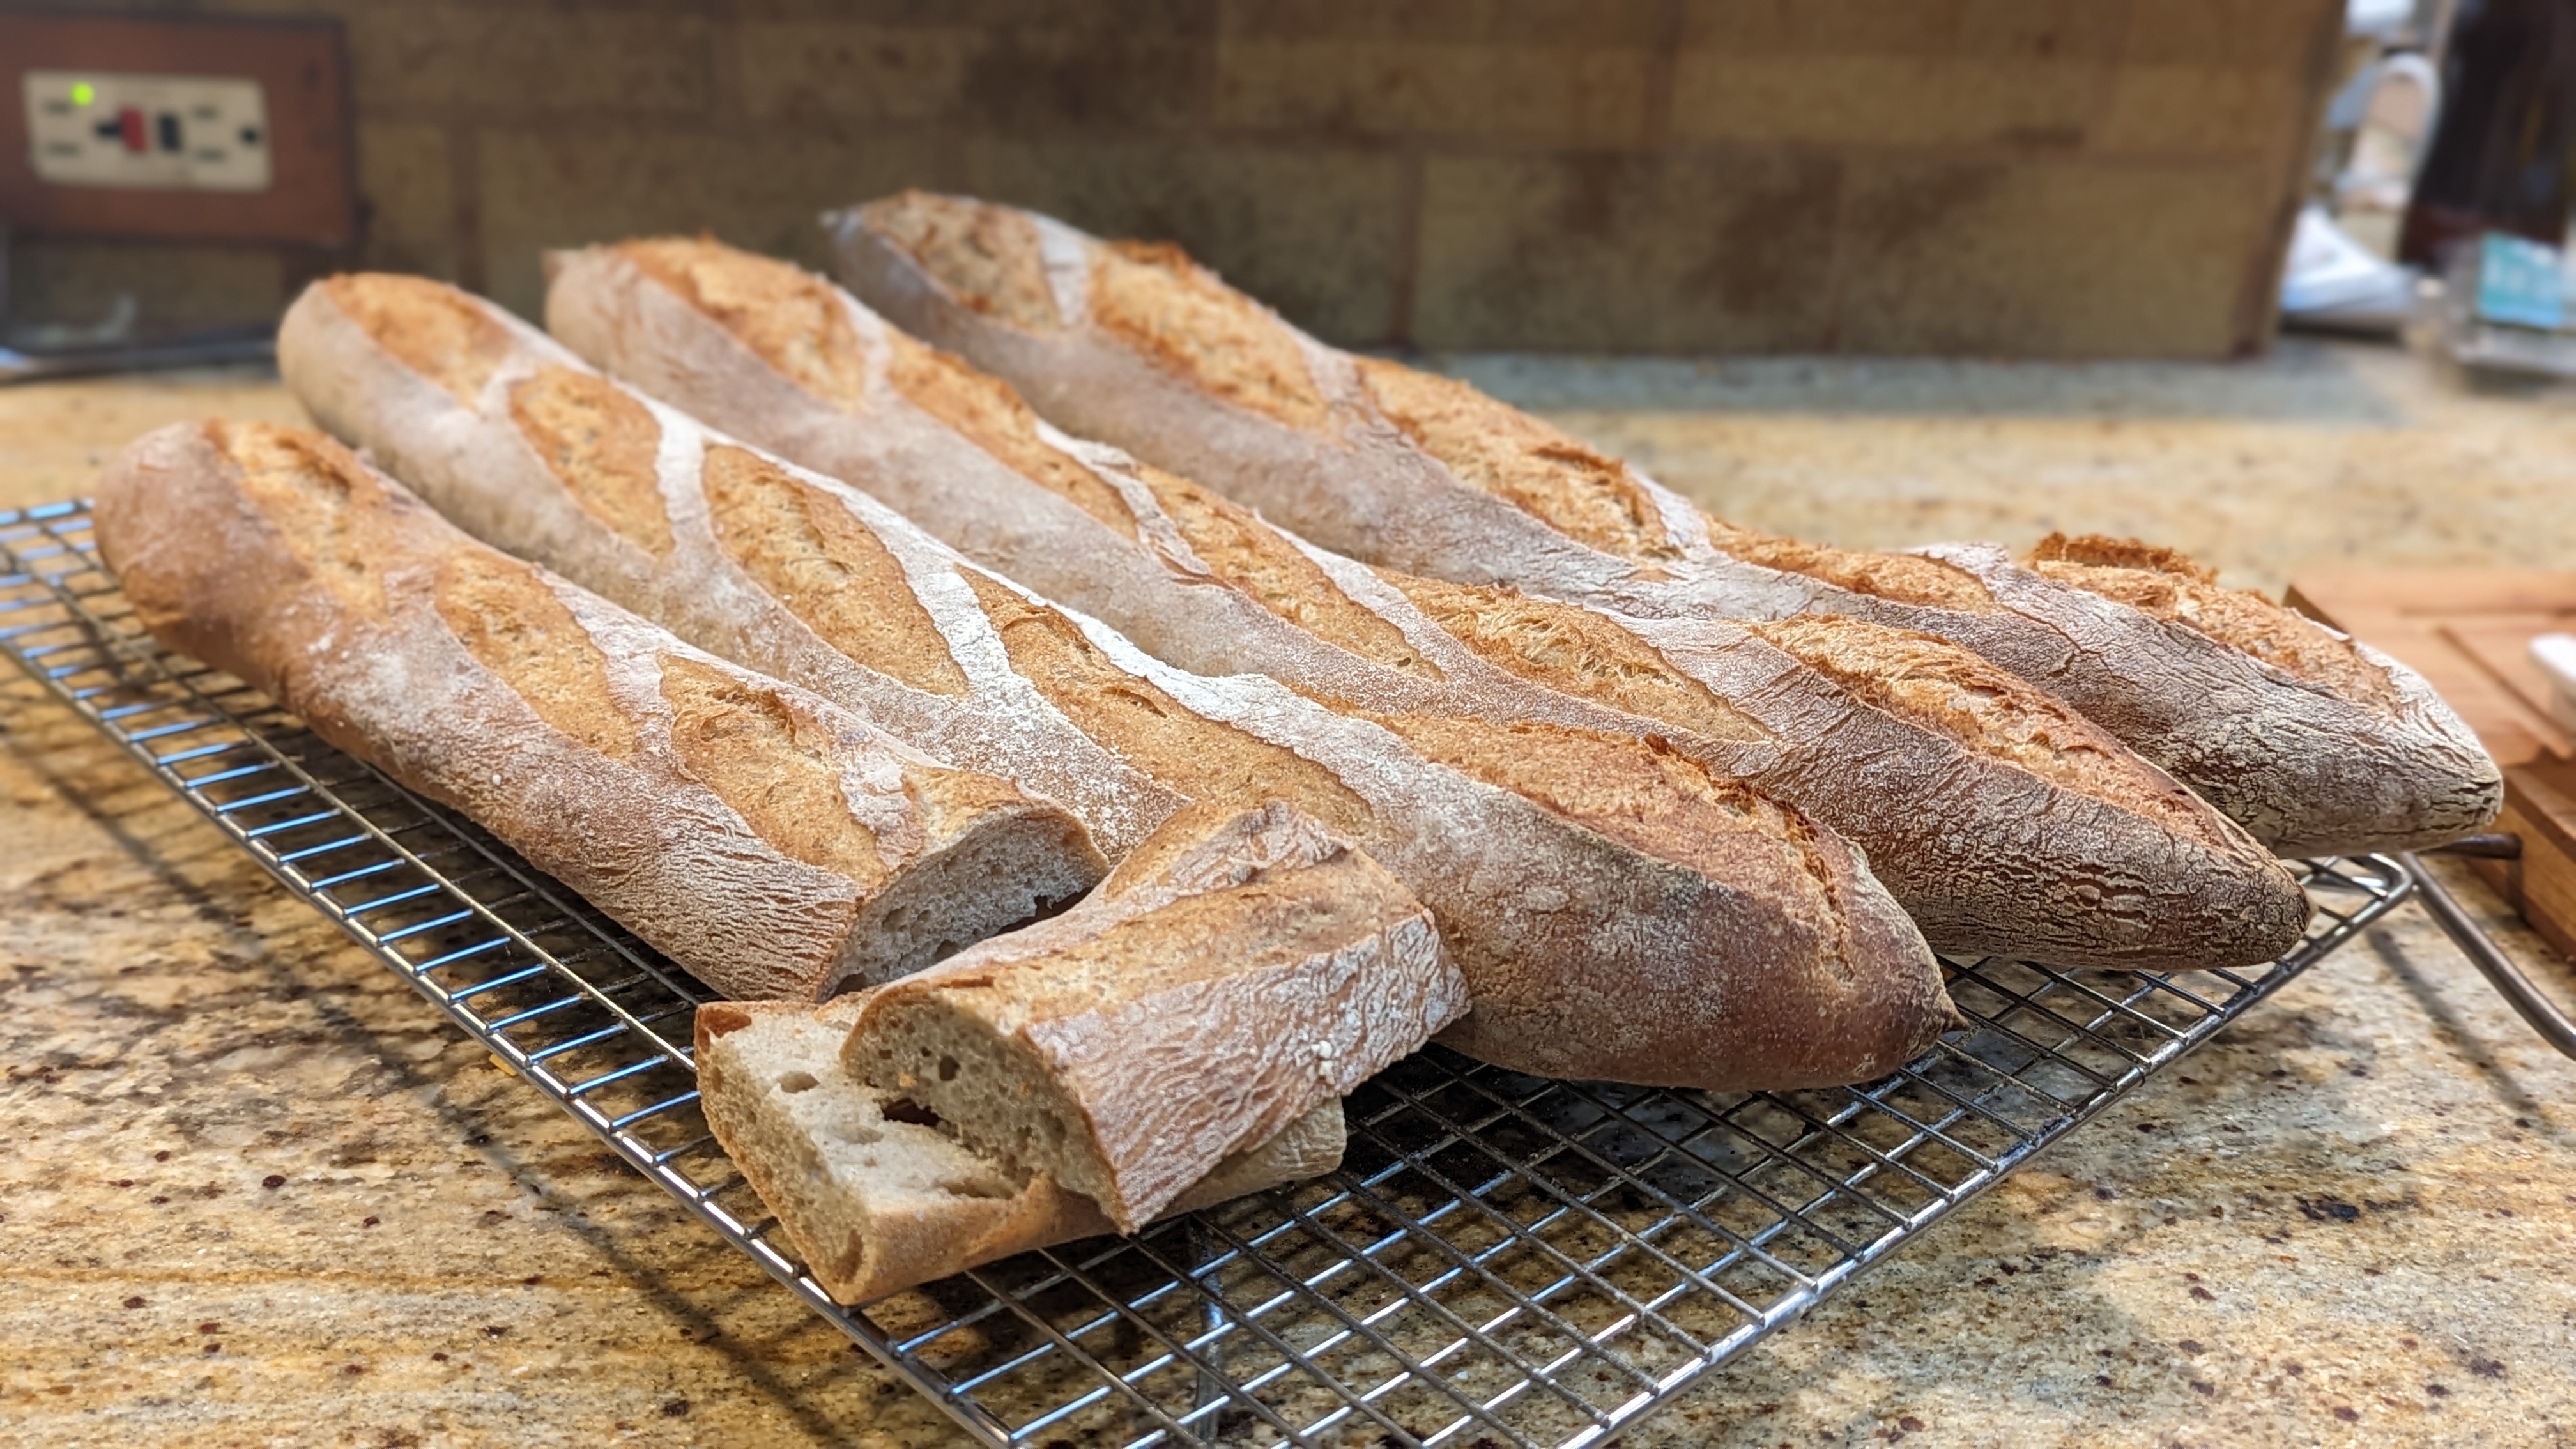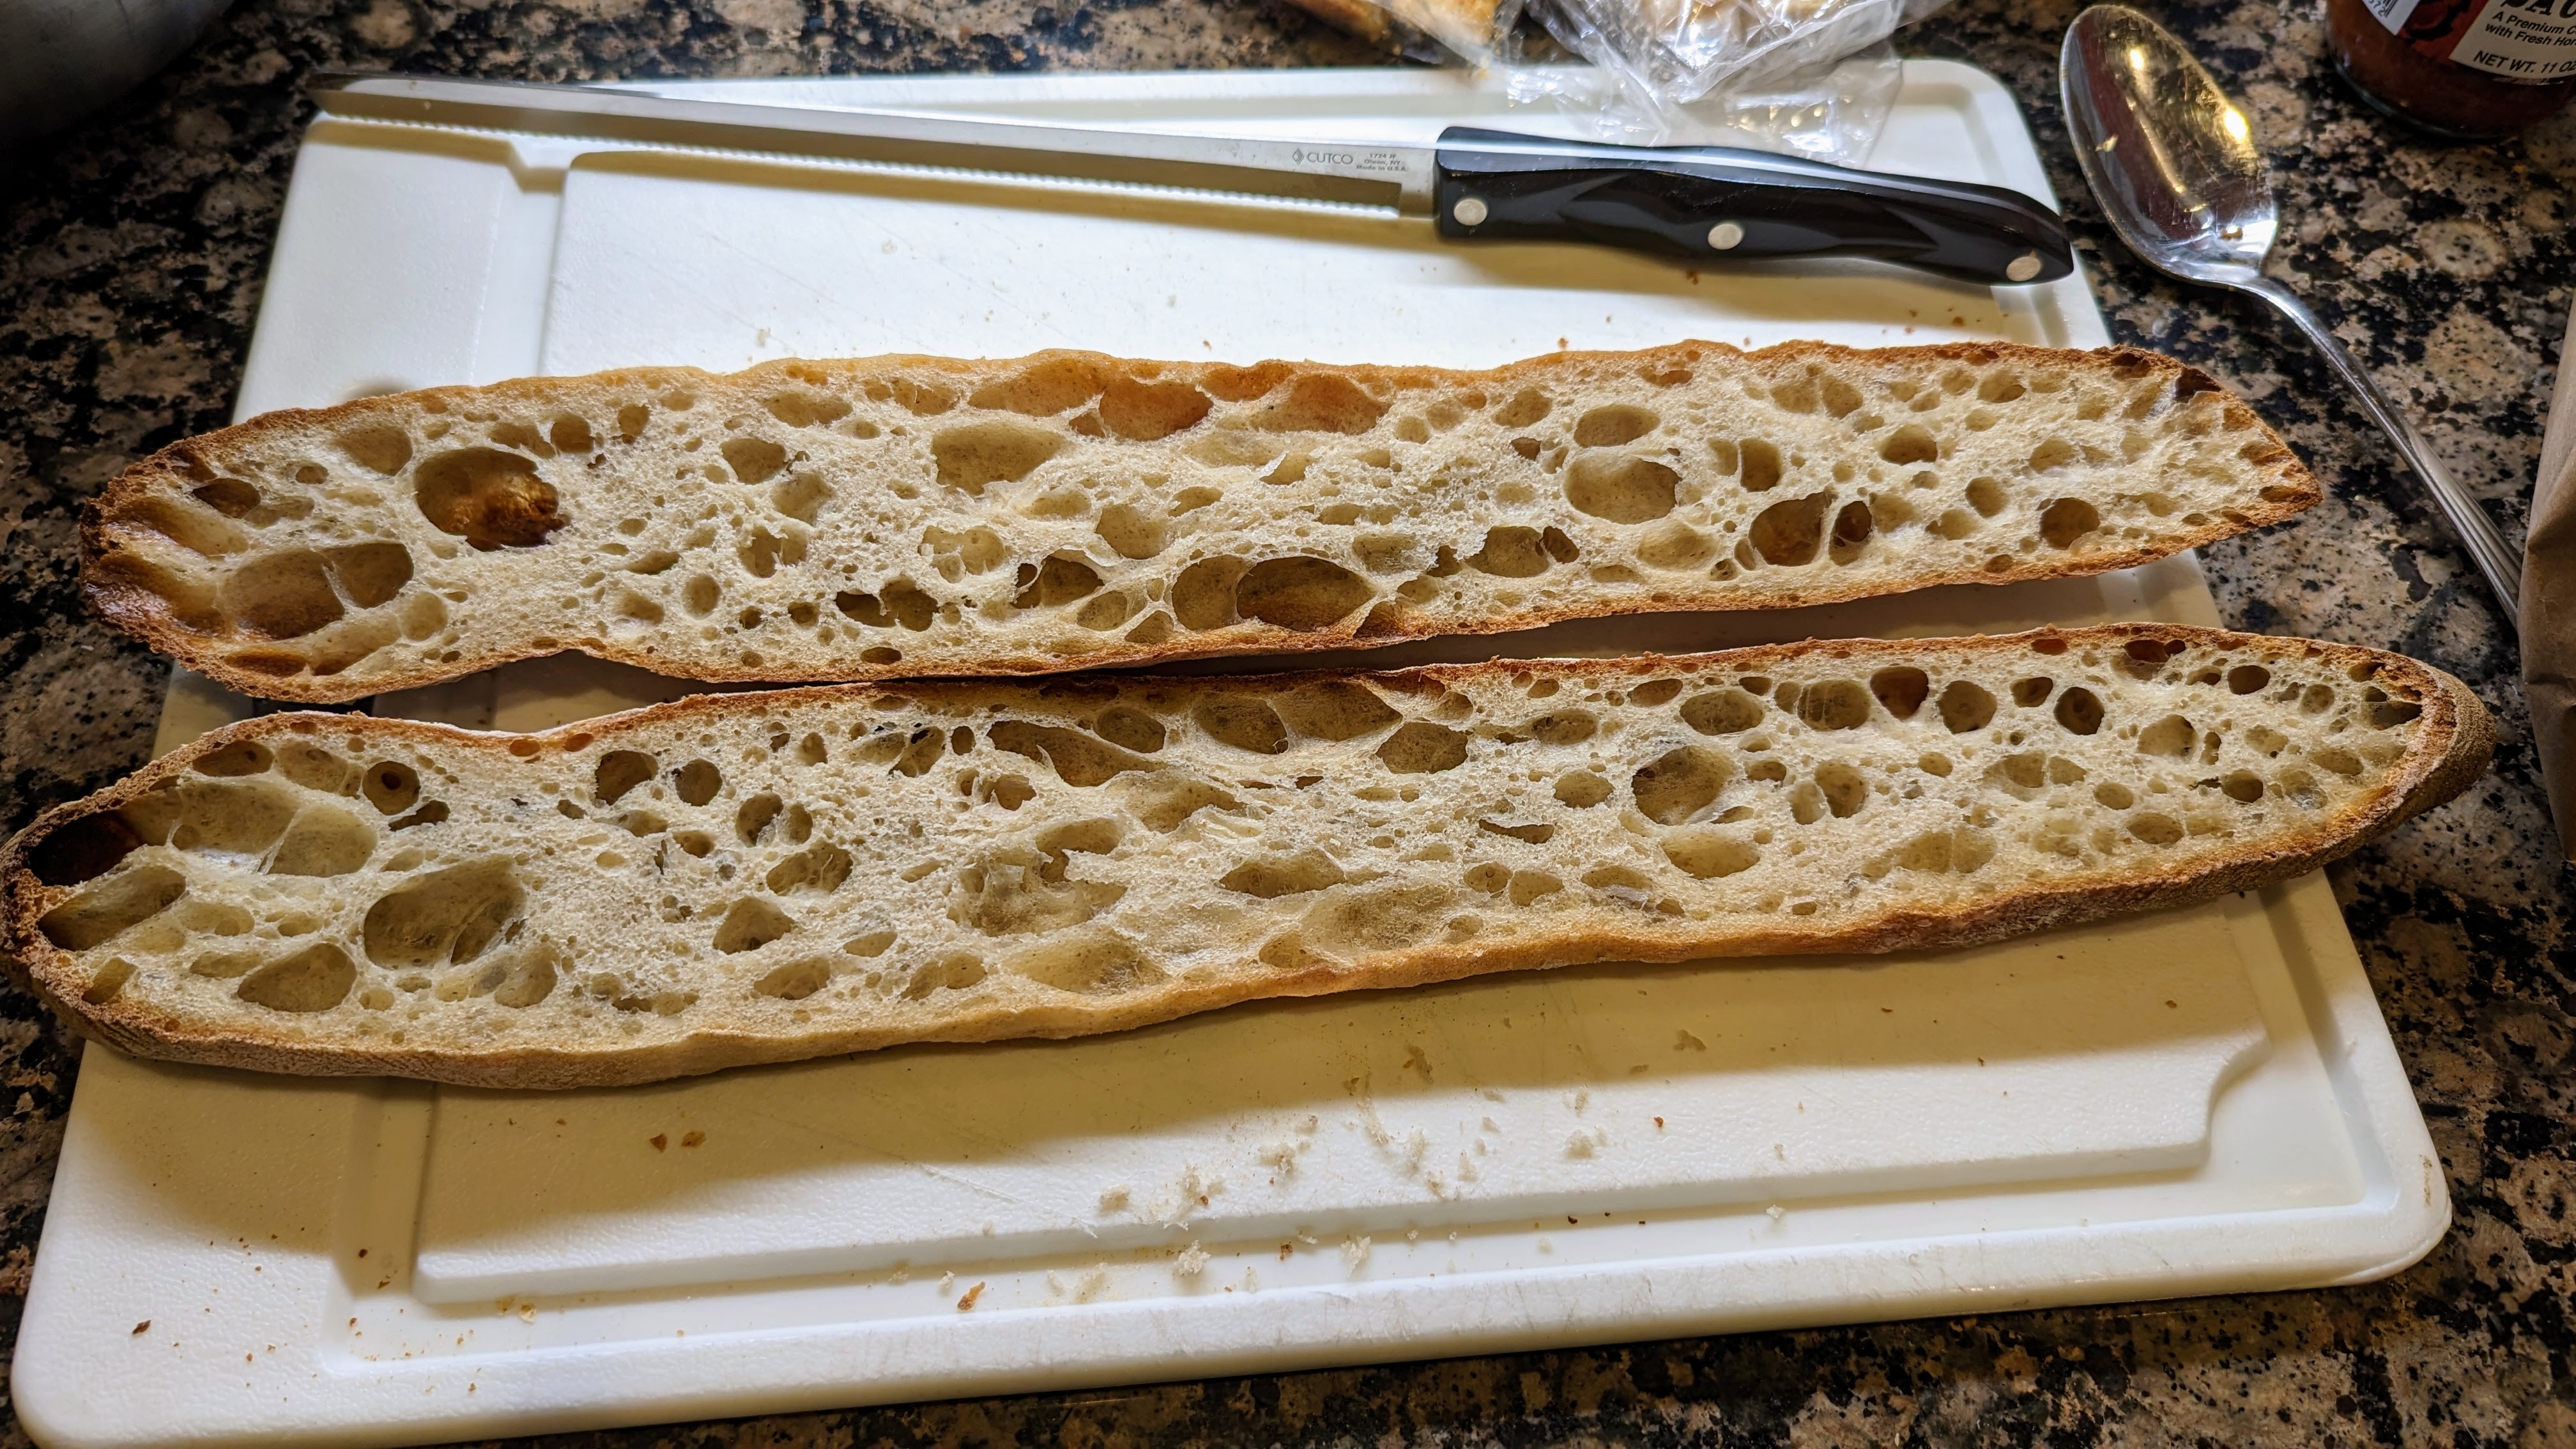
Recipe: All-Purpose Dough for Rolls, Sandwich Bread, and Pizza Crust!

For years, I’ve occasionally experimented with creating a dough that I could use for both pizza crust and bread, and I finally produced a formula that works wonderfully for both! As you’ll see in the formula below, there’s not much to it. But the kicker for me was using a much lower hydration than I’ve been experimenting with in the past.

My earlier experiments employed hydration 75% and above. I was also using a combination of high-gluten bread flour and AP flour, and sometimes mixed with some Kamut™️ flour. But yesterday afternoon, I thought about an episode of Diners, Drive-ins, and Dives where Guy Fieri visited this pizza place and the chef used AP flour only. That got me thinking that if I used just AP flour and lowered the hydration, I could still achieve decent gluten formation, and the small amount of olive oil would help to create a soft crumb if I used it for bread.

As far as bread is concerned, this dough produces a closed but airy crumb that is perfect for rolls, but placed in loaf pans, is perfect for sandwich loaves! For pizza, the lower hydration creates a nice, strong dough that can easily be spread out into a pizza crust. And here’s the kicker: The long, cold fermentation takes place during bulk fermentation. This means you can create the dough the day before, and let it sit in the fridge for 12-24 hours. If you’re making pizza, you can divide the dough immediately after kneading, then let it rise in the fridge. More details below. For now, here’s formula and the final dough to make 6 buns.

Formula

AP Flour100.00%
Water65.00%
Salt2.00%
Yeast0.60%
Olive Oil1.30%

Final Dough

AP Flour825g
Water (lukewarm)536g
Salt17g
Yeast5g*
Olive Oil11g
Total Yield1394g
6 X 230g buns
12 X 115g rolls
*Use half the yeast for a 24-hour bulk ferment

I must come clean. I experimented with making longer buns as you can see in the pictures above. They turned out great, but they’re a little too heavy to be used for sandwich rolls. Based on those results, I’d lengthen them to make bread sticks for dipping. And if I’m going to use it for sandwiches, I’d definitely make loaves for loaf pans.

Process

Mix. Combine all the dry ingredients together. Then add the oil and water and mix thoroughly. Knead the dough until smooth (you can use a mixer or do it by hand).

Bulk Fermentation. If you’re making bread or rolls, place the dough into a container (I use a 6-liter Cambro container). If you’re making pizza dough, divide the dough into two or three equal pieces, depending on the crust size you want, form into balls, then place on a sheet and cover with plastic wrap. In either case, place the dough in your fridge with a temperature in the range of 39℉-42℉. Ferment for 12-16 hours. The dough may triple or quadruple in volume during this time. But it’ll be okay if it’s domed in the middle.

If you want to go for a long bulk fermentation, use half the yeast. With that amount, the dough should expand to its fullest in about 24 hours.

Divide and Shape. If you made pizza crusts, there’s no need to divide. Simply gently press out the balls to about 1cm-thick discs, then cover and set aside. For rolls, divide into twelve pieces, then form balls and place on a baking sheet covered with parchment paper. For sandwich bread, divide into two equal portions, then form each into logs and place them into loaf pans. For breadsticks, form into long logs then set on a well-floured couche.

Final Fermentation. Let the dough proof for an hour at room temperature or until it doubles in volume.

Bake. For bread, lightly brush the tops of the loaves or rolls with a little water, then score if you want. Bake at 425℉ for 30 minutes. Use steam for the first 10-15 minutes of the bake to help rise. For pizza, shape, top, and bake as you normally would.

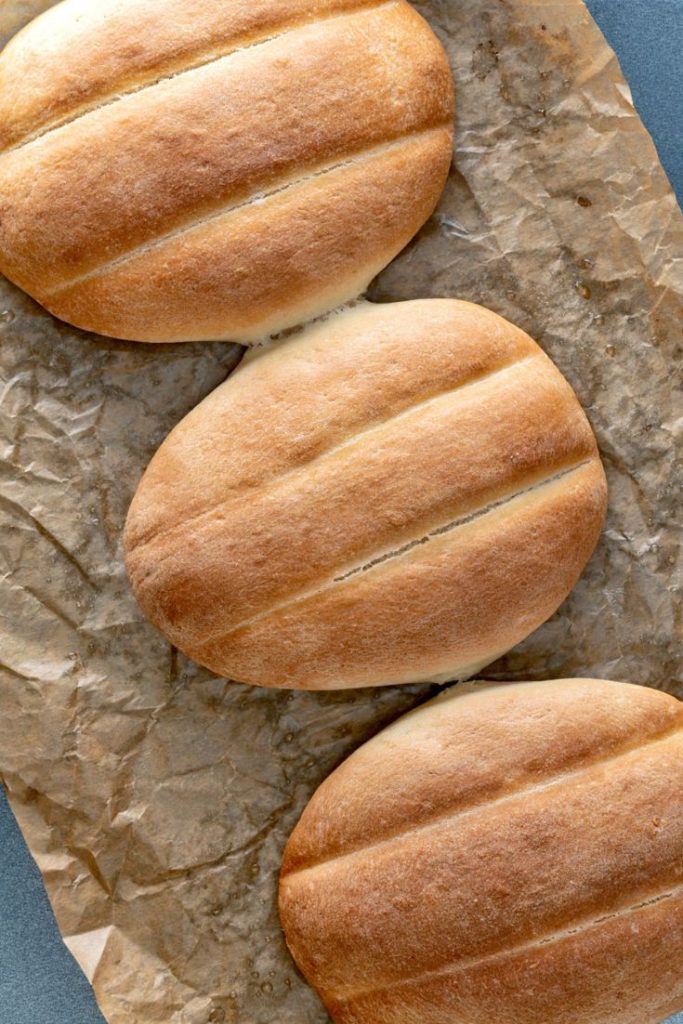
Mexican Telera Bread: The Soul of the Torta

Having been to Mexico several times over the years and being born and bred in California, I have a deep appreciation for Mexican food. But I have a special place in my heart for the Torta, the Mexican version of a sandwich. In the US, when we think of a “sandwich,” what typically comes to mind is a flat piece of meat with some condiments like mayo or mustard, and maybe some lettuce, onion, and tomato.

But the Torta… Ah, the torta. Like a sandwich, it’s meat between some bread, but that’s where the commonalities end, especially with the meat. The meat can be carne or pollo asada (grilled steak or chicken), or puerco (pork), camaron (shrimp), polpo (octopus), and my favorite: arrachera (marinated, grilled skirt steak). Heck! You can use any type of meat – yes, cold cuts as well. But instead of mayo, there will invariably be avocado. As for vegetables, you might get some grilled onion or diced tomato. In the states, shredded lettuce or lighly pickled cabbage are often added as well.

What I love so much about the Torta – and I suppose sandwiches in general – is that there are no rules. It’s a wide-open playing field! But that said, there is a type of bread that is commonly used for Tortas, and that is the Telera roll.

The Telera is an oval or rounded rectangle roll that is neither too wide nor long. The crumb is soft and fluffy with a firm but slightly chewy crust, making it perfect to soak up the juices of the various meats that are used. Visually, it is marked by two indentation lines across the top (we’ll get into that later). As for taste, technically, the Telera is a savory roll, but there is a slight sweetness as the dough contains a small amount of sugar.

As you can see in the picture to the left, it’s much like a hamburger bun that is ever-so-slightly longer on one side. This makes it a perfect platform for the grilled meats or seafood that are usually put on it.

Being a baker, after having a few Tortas on my last trip to Mexico just recently, I wanted to learn how to make them. And after a bit of research, and a bit of trial and error, I finally got a formula and recipe that’s both easy and delicious!

Overall Formula

Flour100.00%
Water60.00%
Butter (Softened)5.00%
Yeast1.40%
Salt2.00%
Sugar4.00%
Total Percentage172.40%

Final Dough

Flour516g
Water309g
Butter (Softened)26g
Yeast7g
Salt10g
Sugar21g
Total Weight889g*
8 X 110g rolls
78ºF/26ºC
*The extra 9g is factored in to allow for process loss.

Mix. Combine all the dry ingredients together in a large mixing bowl and mix to evenly distribute. If you use a mixer, use the paddle at lowest speed. Cut butter into the dry ingredients much like you’d do with biscuits (butter should be soft). Add the water in 3-4 batches, making sure it’s well-incorporated. If using a mixer, switch to the dough hook and slowly add the water until everything has been incorporated together.

Knead. Even though I use a mixer to mix, I enjoy kneading simply because I don’t do it that often as most of my bread is “no-knead” bread. Turn out the dough onto a clean work surface and knead it for 5 minutes or until the dough is smooth. Richard Bertinet’s slap and fold works great too! Work the dough into a ball, then place it in a greased bowl (I use olive oil), seam side up. Flip the dough over onto the seams so the whole ball is covered. Cover the bowl with a cloth.

Bulk Fermentation. Place the bowl in a warm place and let the dough rise and expand to almost double in volume. 45 minutes – 1.5 hours. Remember, watch the dough and not the clock!

Divide and Shape. Punch down the dough to release the gas (no, you don’t want an open crumb), then divide the dough into 110g pieces. Roll each piece into a tight ball, then set aside to relax for about 15 minutes.

On a lightly floured surface, press each ball out into an oval of about 1 -1.5 cm thick. Sprinkle a little flour on top of the oval, then about a 1/3 of the way from the long side of the oval, press a straw or chopstick down to the board, being careful not to tear the dough, but really work it down into the dough. Repeat on the other side, then place on a baking sheet covered with parchment paper. BTW, you’ll want to move the sections together when you place them on your baking sheet. This is a method of scoring without a blade. And if you find that your dough sticks to your work surface, just use a bench scraper to lift it up.

Final Fermentation. Once all the rolls have been shaped, cover the baking sheet with a damp cloth (you don’t want to form a skin), and allow the rolls to double in volume. This could take 30 minutes to an hour depending on your ambient temperature. Preheat oven to 400ºF/200ºC.

Bake. Before baking, lightly brush the tops of the rolls with water, then bake for 15 minutes at 400ºF/200ºC or until golden-brown on top. Don’t let these overcook as the sugar – even though there’s just a little – will caramelize easily so be watchful!

Making a Torta

There are no hard and fast rules when making a torta. Even in Mexico, tortas vary from region to region. And while it’s generally accepted that the Telera roll is the common roll to use, even in Mexico, depending on the region, different bread may be used. For instance, in Guadalajara, there is the Torta Ahogada or “drowned” torta that uses a sourdough bread called “Bilote Saldado.” But for our purposes, we’ll just stick with the basic torta.

If you want something really basic, just put some grilled meat between the halved bread, top it with avocado, then close the bun. This is the way it is normally served in Cozumel. But if you want to get fancier (and I like to get fancier), coat the halves with smashed avocado, spread some shredded lettuce or cabbage (I prefer cabbage), add some sliced tomato, then top that with the grilled meat. Add lime juice for a little zest.

As for meats, you can use pretty much any meat or even seafood. Cold cuts are fine as well. My favorites are:

  • Carne or Pollo Asada
  • Arrachera (skirt steak)
  • Grilled Octopus
  • Shrimp (Grilled, Sauteed)
  • Grilled Fish

My two big favorites are Arrachera and Octopus. But truth be told, I’ve only had octopus in Mexico. Not sure how it’s prepared, but it ROCKS!

Here’s my Carne Asada recipe, if you want to give it a try!

What’s So Special about Kamut Flour and Why I Love to Bake with It So Much

Last week, I finally was able to procure a 25 lb. bag of KamutTM flour. For months, so many producers were out of it, and those that did have it, like Whole Foods, sold it in much smaller quantities than I needed and for a premium price. So, as soon as I saw that Azure Standard had it back in stock, I immediately put in an order!

Since I discovered it, KamutTM flour has been an integral component in most of my flour blends. I’ve mentioned using it several times since I started this blog, but when I baked my first loaves of it after many months of not having it, I sat down and asked myself, “Why do I love this flour so much?” I realized that there are lots of reasons, so I thought I’d share them here.

Before I go on, let me answer the obvious question for those who don’t know what it is: What is KamutTM? KamutTM isn’t a type of wheat but a trademark name for the Khorasan strain of wheat. It is an ancient grain that was discovered in an ancient Egyptian burial chamber after World War II and the grains ended up in the hands of a Montana wheat farmer who cultivated them. The trademark name is important because:

  1. It ensures that the grain comes from the original seed stock and is both unmodified and unhybridized and completely non-GMO.
  2. It is also 100% certified organic.

These are important distinctions as they provide a guarantee of origin, purity, and quality.

Nutritionally, unlike regular wheat, Kamut has a high intrinsic energy as it has a higher lipid content than regular wheat. But it is also high in both protein and fiber and contains several essential minerals and vitamins such as niacin and manganese that contribute to its overall high nutritional value.

But the science-y stuff aside, another thing I love about this flour is the romance behind its history. As I mentioned above, the grain was found in an ancient burial chamber in Egypt after World War II, and though classified as Khorasan wheat, it has also been called “King Tut’s Wheat” or Pharoah’s Wheat” based on its origin.

And baking with flour that comes from wheat that has a provenance dating back thousands of years makes me think of what it was like baking back then. Sourdough was discovered in ancient Egypt around 3000 BC, and it’s cool to me to bake with grain whose origins date back that far. I admit it. I’m a hopeless romantic, dreaming of the “old days” and what it was like baking with those ancient hearth ovens with that original grain.

Plus, historians believe the discovery of sourdough was purely accidental. Accidental or not, it changed the world! Up to that point, bread was flat and dense. But the addition of yeast literally gave rise to a completely new form of bread that was then adopted by the Greeks and Romans, then spread to the rest of the world. Did it start with Khorasan wheat? Maybe. I have no idea. But who cares? It was used back then and that was all I needed to know to want bake with that ancient grain.

But other than the romantic history, I love KamutTM flour for what it brings to the loaves that I make with it. When combined with a high-extraction or whole-grain flour, it helps soften the crumb. This is because even though it forms gluten when mixed with water, its gluten is much more delicate than regular wheat.

And that delicateness was a challenge to work with at first as it introduced a trade-off with the soft crumb: The dough also became prone to tearing. It forced me to learn how to handle the dough more gently. Until then, I hadn’t realized how ham-handed I was with my dough. My stretch and fold sessions were relatively rough affairs compared to how I stretch and fold now; not that I’d completely rip the dough apart, but it certainly wasn’t with the deliberate care I take now. And that skill has carried over to other dough made with different flour blends.

Of course, as KamutTM is flour, and flour is food, what about its taste and texture? As I mentioned above, its gluten provides a smooth, almost velvety feel to the crumb. It also has a nutty flavor that contributes to the overall complexity of the flavor profile.

Working with KamutTM Flour

If you want to work with KamutTM, I recommend starting with a smaller quantity first to try it out. Whole Foods usually carries 1-pound bags from Bob’s Red Mill. That’s enough to make two 1-kg 60% Bread Flour/40% Kamut loaves @ about 85% hydration.

Other than that, here are a few things to keep in mind when working with Kamut:

  1. I’ve found that Kamut’s starches break down pretty easily. So, if you use a rye-based starter, be extremely watchful of your bulk fermentation. The loaves I made above used a 25% rye starter inoculation and bulk fermentation happened a lot faster than with normal bread flour. That amount of starter is going to speed things up anyway, but it was about twice as fast as normal with the Kamut present. I had to turn down the temperature on the fridge I use for cold final fermentation to about 39℉, where I normally have it set around 42-44℉ to favor lacto-fermentation. Of course, an alternative is to use less starter, but I really wanted a more pronounced tang.
  2. And since Kamut’s starches break down pretty easily, I do not recommend using a real high temperature for baking. The loaves I baked above were baked at 460℉ for 20 minutes with steam, then 425℉ for another 22 minutes dry. Because of all the released sugars, that bread finished with a dark crust!
  3. As I mentioned above, the type of gluten that is formed with Kamut is a lot more delicate than with the hard red wheat that’s normally used in baking. When you’re folding your dough, be very mindful of the extent to which you pull the dough. My advice is to only pull to the point where you feel some resistance, then fold the dough over. You may have to fold more times than you normally would during a session to ensure you’re building structure, but you’ll also ensure that you’re not tearing your dough.
  4. Kamut is a “thirsty” flour, so I recommend a healthy autolyse or fermento-lyse of at least 45 minutes. This will ensure that your flour is well-hydrated.
  5. As far as hydration percentage is concerned, you’ll have to experiment. The bread flour I use is particularly high in protein at around 15%, and though the Kamut from Azure Standard is about 11.7% protein, I can still push my hydration way past 80%, though I typically don’t exceed 85%. Even then, it still handles like a 72% hydration dough with regular bread flour.
  6. If you make bread with 100% Kamut, best treat it like rye and bake it in a pan or a Dutch oven to prevent it from spreading out. It won’t spread out nearly as much as rye, but its gluten is not very strong.
  7. And speaking of strength, bear in mind that most Kamut flour is whole-grain flour, so don’t expect to get big holes. You’ll get plenty of spring, but just not a lot of voids in your crumb.
  8. You might consider sifting the flour through a fine mesh to capture the germ and husk. These are like little knives that will cut the gluten strands. And with Kamut’s weaker protein bonds, removing that stuff will help with your rise. I usually sprinkle the germ on top of the loaves before I place them in the oven.

Stiff vs. Liquid Starter? Which One Creates a Sourer Taste – It Depends

If you follow baking blogs or participate in online baking forums, you’ve probably heard this: The stiffer – lower hydration – the starter the sourer the taste. The thinking is that a stiffer starter promotes aerobic metabolism, thus creating more acetic acid, while a more liquid starter promotes anerobic metabolism which favors the creation of lactic acid. The difference is that acetic acid tastes more sour than lactic acid.

That’s all well and good. But as with so many things in making sourdough, there are several variables that can affect the sourness of your bread. For instance, with the loaf at the top, I used a 100% hydration starter to ferment the bread. It was 20% inoculation relative to the flour (BTW, I hate using that word with respect to bread because it has a specific scientific meaning). But at that hydration level, the yeast density was low, and it took 24 hours for final fermentation in my fridge. That loaf was nice and tart!

On the other hand, with the loaves immediately above, I used a 60% hydration starter, with the same inoculation level of 20%. But the yeast density was so much greater than the liquid starter, that final fermentation was barely 10 hours and I was pushing it, which accounts for the less open crumb. It hardly has any sour taste.

Myself, I’ve never bought into that rule of thumb that a stiffer starter will make a more a sour tasting loaf of bread. I’m quite familiar with the food science behind that and agree that aerobic metabolism promotes the production of acetic acid which will be perceived as more sour. But baking as long and as much I have, the best way I know that making a sour loaf involves a lot more than just the starter. The stiff starter gives you a head start as it favors the production of acetic acid. But other factors such as the environment, fermentation time, type of flour, and amount of starter also affect sourness.

As far as a long, cold fermentation is concerned, while yeast metabolizes, it creates inhibitors that block bacterial activity, effectively mitigating or eliminating competition. So, using a lower inoculation level will ensure a lower relative yeast density and will help mitigate fungal activity, and in turn, allow the bacteria to flourish during bulk fermentation. Then when bulk fermentation is complete, doing a cold fermentation of around 38℉ (and no higher than 40℉) will slow down yeast activity even further and let the bacteria continue do their thing. These principles apply to using all sorts of starters, from pure liquid fruit-based starters to high hydration starters, to super-stiff starters. So, at least for me, the type of starter isn’t as relevant as the dough fermentation techniques I employ.

That said, I could be completely full of it, and there are folks who will disagree with me vehemently. I get that. But for me, it’s time and technique that will dictate how sour my bread is, not my starter.

Loving My Flour!

The other day, I got a shipment of my favorite flour, Azure Market Organics Unbleached Bread Flour. I’ve written about it several times, so I won’t go into detail about it. But if you’ve read this blog, you know I love this flour! It’s so flavorful and wonderful to work with, but until recently, it was out of stock at Azure. They finally got it back in stock and I immediately ordered it. I feel like a kid in a candy store!

I’m excited because this flour has been integral to my flour blends, and with it unavailable, I’ve had to use alternatives. That hasn’t been too much of an issue, but any time you change things up, you need to adjust to the change, and sometimes it takes a few times to get comparable results to what you’re used to, as you tweak hydration, preferment amount, fermentation times, etc. But baking with this flour? It’s like putting on a pair of broken-in shoes. It’s just comfortable, which in turn makes my dough development process comfortable and familiar.

And I’ve realized that a very large part of my progression as a baker has been getting familiar with my ingredients. When you’re used to working with different ingredients, you just know how they’ll react and you can execute your process without having to apply too much conscious thought. Things just become automatic.

I once got in a great conversation with a professional chef. He said that the fundamental difference between him and a home chef is that he knows his ingredients so well that he doesn’t have to think about what he’s cooking. He can just focus entirely on creating his dishes. But more importantly, he said he gets the reps in that build that familiarity. It’s the same way with baking. When you’ve put in the reps, you just know, and as they say, when you know, you know.

As soon as I got my flour, I made the dough for the loaf above. With that loaf, I used a 500% hydration starter (yes you read that right) to ferment a 75-25 Bread/AP flour blend. Final hydration was around 75%. That’s just a basic loaf. But this was a bit of a challenge because I couldn’t do as long a bulk fermentation as I normally do because of time constraints. But knowing this blend and recipe so well, I knew that I could make up for it by doing an extra-long final fermentation. So, this loaf spent about 18 hours in my fridge.

When I checked it baking through my oven’s window, I just smiled and gave a sigh of pure satisfaction. I just nodded and said, “Mm-mm-mm, how sweet it is!” Then when I removed it from the oven, I was giddy. I saw how much the loaf had expanded, and I knew it was going to turn out great. Yes, it has a nice, open crumb, but more importantly, the dough was fully fermented and in no place was dense. So satisfying…

Like many other bloggers, I often talk about experimenting with different ingredients. I think that’s part of the process of developing skill. And while experimentation is great, getting reps in and learning what ingredients work best for you is just as important.

There’s Nothing More Satisfying…

…than pulling baguettes out of the oven, picking one up, and immediately noticing that it weighs far less than how it looks. That goes for any bread, but for baguettes, it’s a crucial quality because it’s an indicator that the loaves had great oven spring which, in turn, means that the crumb will be light and airy.

I baked the loaves in the picture above yesterday. For those, I used a rye poolish, with the flour of the rye accounting for 25% of the total flour. I knew that even with 25%, the bran in the dark rye flour that I use can cut up gluten strands. But I handled the dough much more gently, making sure I didn’t tear it, and only folded it once as the bread flour I use has over 14% protein – gluten forms up fast.

I still took a hit on the overall openness of the crumb, but the crumb still came out light despite the lack of numerous large holes. I knew when I pulled them out just by looking at them, that they had sprung up quite a bit. And though I didn’t expect a super-open crumb due to the whole-grain rye, with that kind of volume expansion, I didn’t have to worry about the crumb being dense and chewy.

Then picking that first one up… I just smiled in satisfaction. It was a good bake.

Recipe: Roasted Garlic-Parmesan-Rosemary Bread with Rye Poolish

My daughter asked me if I could make her a garlic-parmesan-rosemary loaf for her birthday, as that is her favorite bread of mine. I normally make this as a sourdough, but because of time constraints, building a levain wasn’t an option. But I didn’t want to make just a straight dough. Not that it would be bland, but for me at least, it would just be a bit boring. Plus, a straight dough just doesn’t keep fresh for long.

But then it occurred to me that I could still use a preferment and make a poolish. While it wouldn’t have the sourness of a levain, it would contain at least some organic acids that would not only add to the flavor profile, but also add some natural preservative. Then it further occurred to me that if I made the poolish from rye flour, I’d add yet another dimension to both the flavor and textural profiles! The result was magnificent, as you can see in the picture above. Here are numbers…

Overall Formula

Flour100.00%
Water76.00%
Salt1.50%
Yeast1.00%
Roasted Garlic6.00%

Poolish

Preferment % of total flour50%
Preferment Hydration100%
Flour301g
Water301g
Yeast @ 0.33%1g

Final Dough

Bread Flour821g
Water (90-100°F)558g
Salt16g
Yeast11g
Roasted Garlic66g
Preferment547g
Total Yield2020g
2 X 1000 loaves

Extra Ingredients

Normally, I’d include the whole garlic cloves, cheese, and rosemary in the overall formula and the final dough. But I’ve found that developing the dough first, then including the cheese and garlic when I’m shaping gives me much better results.

Raw, Whole Garlic Cloves200-250g
Parmesan Grana Padano Cheese400g
Fresh Rosemary (finely chopped)10-15g

Make the poolish. The night before you bake, make the poolish. Since it’s going to ferment overnight, there’s no need to use warm water. Just use regular tap water or room temp water. Because you’re using rye flour, you won’t get many surface bubbles, if any at all. But you will get lots of expansion by morning. And don’t worry if the poolish has peaked and subsided a bit.

Roast the garlic. Place the garlic in either an oven-safe container or some foil. Drizzle with a little olive oil to coat the cloves, then wrap them so all cloves are covered. Roast for 30-45 minutes at 375℉/250℃ until the cloves are mashable with a fork. Mash the cloves well, then set aside and allow to cool.

Mix.

  1. In a separate bowl, combine all the wet ingredients together, along with the yeast and poolish. Mix well to break up and dissolve the poolish and set aside.
  2. Thoroughly combine the flour and salt in your main mixing bowl.
  3. Pour the liquid mixture into the dry mix, then start to slowly combine. As the dough starts forming, add the mashed garlic.
  4. Mix the dough until smooth and no dry ingredients remain.

While you can certainly hand-mix the ingredients, I like to use a mixer for this dough. It’s more efficient.

Bulk Fermentation. You want this dough to double in volume. This could take anywhere from 1 1/2 – 2 hours.

Folding. Fold the dough once within the first 45 minutes. But make sure you fold it to the point where the dough no longer wants to be folded. Once you’ve finished folding, turn the dough over onto the seams.

Divide and preshape. Once the dough has fully fermented, turn it out onto a clean work surface. Divide into two 1000g pieces (yes, I scale out the portions), then form the pieces into nice rounds. Bench rest the rounds for at least 15 minutes to allow the dough to relax.

Shape.

Work a round into a rough rectangle as shown below.

Next, spread half the garlic cloves, parmesan cheese, and rosemary evenly over the surface of the dough.

Next, fold over the ends of the rectangle.

Starting at the “top” of the rectangle, start rolling the dough into a cylinder. Try to make the rolls as tight as possible without tearing the dough.

Once you’ve finished rolling up the cylinder, pinch the cylinder closed, then roll cylinder onto the seam.

Now, with a sharp knife, cut the cylinder in half length-wise, and form a “V” with the two halves.

Carefully, twist the two halves together.

Pick up the twisted mass from the ends, then place it into a well-oiled 9″ X 5″ X 3″ pan.

Bake. Drizzle olive oil over the top of each loaf, and bake at 375℉/250℃ for 45-50 minutes. It may seem that this is a low temp to bake at, but you want to roast the garlic slowly, plus you don’t want to completely liquify the cheese, which will happen at a higher temp. Bake the loaves until the internal temperature reaches 205-210℉.

Remove from the oven, turn the oven off, then separate the loaves from the pans. Put the loaves onto a baking sheet, then return them to the oven and let them cure for 15-20 minutes to help solidify the crust.

Recipe: 25% Rye Sourdough

As much as I love baking with KamutTM, my normal supplier has been out of it for some months now. But what they have had in stock is dark rye flour. So for the past few months I’ve been experimenting with it and trying to find a good ratio. Like KamutTM, rye flour doesn’t form gluten. They’re both high in protein, but their proteins are more gelatinous in the presence of water as opposed to forming chains. Needless to say, they don’t add to the structure of the dough.

While you certainly could do a 100% rye or KamutTM loaf, you’d have to keep the hydration pretty low or bake your bread in a pan. As for myself, while I’ve made bread using 100% rye or KamutTM, I have to admit I’m not a fan. But I love what they contribute to the bread when used in a flour blend.

For this recipe, the final blend is a 75% bread flour / 25% rye flour blend. 15% of the flour comes from the rye-based starter. The other 10% blended with the bread flour for the final dough.

Here’s the recipe:

Overall Formula

Flour100.00%
Water76.00%
Salt1.50%
Total %177.50%

Flour Blend

Rye Flour from Preferment15.00%
Bread Flour75.00%
Rye Flour10.00%
Total %100.00%

Final Dough

Bread Flour854g
Rye Flour114g
Warm Water694g
Salt17g
Levain341g
Total Yield2020g
2 X 1000g loaves
Total Flour1138g
Total Water865g
Optimal Dough Temp78°-82°F / 25° -27°C

Prepare the Levain. Make a levain that will yield about 350g or a bit more from a mature starter and equal parts of rye flour and water. The mother culture I use for this is 100% rye flour, but if yours isn’t, don’t sweat it. Once the levain passes the float test, it’s ready.

Initial Mix. In a separate bowl, mix the levain with all the water and make sure to break up the levain. The water should be very warm to increase the yeast activity. Blend the bread and rye flour together well, then add the liquid to it. You can mix by hand, but I use a mixer on the lowest setting. Mix until you achieve a shaggy mass and there are no dry ingredients. You don’t want much gluten development at this point. Cover and let the dough rest in a warm place for 30 minutes to ensure the flour is well-hydrated.

Final Mix. Sprinkle the salt over the top of the dough, then fold it into the dough. I do this with a wet hand, scrunching the dough together, then folding it. I do this until I can’t feel salt granules. This also serves as a bit of a stretch and fold session.

Bulk Fermentation. I’m not going to give a time for this as it varies wildly. But the telltale you’ll look for is 75-100% volume expansion – almost double. With the amount and type of starter I use (it’s from an ancient Italian culture that I got from Sourdoughs International), my bulk fermentation is about 2 1/4 hours! It’s fast. Make sure your dough temp is within the optimal range I listed above!

Folding. Fold once after the first hour of bulk fermentation. I realize this seems counterintuitive, especially if you’ve followed the dogma of 6 folds over a 3-hour period. But we’re baking with rye flour and even though it represents only 25% of the total flour, it’s still delicate. So don’t want to keep punching it down. When you fold, make sure you’re getting a really good stretch from the dough and fold it until the mass no longer wants to be folded and the whole mass comes up when you stretch. When you’re done, turn the mass onto the folds and LET IT SIT!

Divide and Shape. Gently transfer the dough to an unfloured work surface. Divide it into two equal piece weighing a kilo each. Shape into rounds and bench rest for 15-20 minutes, or until the dough has relaxed. Finally, shape them into rounds or ovals, then place them in bannetons.

Final Fermentation. Pop your bannetons into your fridge and let the dough ferment for 12 – 18 hours. I went up to 24 hours with my previous batch as an experiment, and though flavorful, there wasn’t much energy left in the yeast for oven spring.

Bake. Bake at 460°F/240°C for 15 minutes with steam. After this, remove your steaming container, then turn your oven down to 425°F/220°C and bake for 25 minutes. You can go longer if you want a darker crust.

So… You Want an Ear… There’s More To It Than Just Shaping and Fermentation

Of course, if you don’t get those right then you’ll never be able to achieve an ear. But I don’t want to get ahead of myself…

The pictures of the loaves above and the one below were made using the exact same formula (85%/15% Bread/Rye flour, 75% hydration, 2% salt), processed and fermented in the same way, and shaped using the exact same technique. They are all 1-kilo loaves. The crumb of the loaves in all three pictures looks similar to the picture below. They are all moderately open with a complete rise throughout the interior. They were also scored using the same lame and same scoring technique.

But as you can see in the top-right picture above, my loaves didn’t form ears. Most people would immediately say that I needed to create more skin tension. Sorry, that’s not it. Others would say I didn’t let the loaves ferment long enough. Sorry, that’s not it either. Still, others would say that I didn’t have enough steam, and the crust hardened before it could form an ear. Nope. So what’s the answer?

The loaves in the top picture were made from the same batch of dough, but the loaf on the left was part of a batch that was baked after the two on the right. What happened was that my stone had not come to temp, thus the ambient temperature was higher than that of my stone. As a result, the bottoms of the loaves did not expand as fast as the rest, and the exposed surfaces literally ballooned during baking, destroying any chance of forming an ear.

What also led me to this conclusion was that since the bottoms of the loaves were not as hot as the rest of the loaves, the yeast activity took longer to come to a close on the bottoms of the loaves. As a result, the exposed crusts set before the bottoms were done and one of the loaves literally sprung a leak as dough burst through a crack in the crust! Now THAT was funny!

When I removed the loaves from the oven, I laughed out loud because the loaves were HUGE and as I mentioned above, one of the loaves had leaked and a rather large protrusion was sticking out the back! On the other hand, the loaf at the top-left and the other in its batch came out as expected because my stone had come up to temp by then. Ugh! So I’ve learned my lesson and have an infrared thermometer on its way to me so I can ensure that my stone has come to temp.

The point of this is that as with other things I’ve written about in the past, there are several variables that will affect the outcome of a bake. Even in a commercial bakery, though conditions tend to be much more consistent than in a home kitchen, there’s variability in the environment. So you have to take the time to know your environment so you can achieve consistent results from bake to bake.

This is why I get a little irritated at some YouTubers who entitle their videos, “The Last _________ Recipe You’ll Ever Need,” or some nonsense like that. Though there are helpful tips in those videos, the vloggers invariably fail to mention their kitchen conditions and talk about how to deal with variances. For instance, baking bread on a hot day versus a cold day in a home kitchen, or failing to mention what their optimal dough temperature is!

Look, I realize that processing and shaping dough is challenging, and mastering just those things are probably the first things you need to accomplish to become proficient in bread baking. But as you get deeper and deeper into it, you realize things like temperature, or in my case, the stone equalizing with the oven affects the dough and the outcome of the bake.

As for developing an ear, I hate to break it to you, but that is NOT a sign of mastery. It is a sign that your loaf expanded, but don’t think that just because your loaf didn’t form an ear, you somehow failed. There are lots of gatekeepers in the home-baking world, especially in sourdough circles who believe that these things are important. They’re not.

But here are some rules of thumb that you can follow:

  • You don’t have to make a super-deep cut into your loaf when scoring. It’s more important that you maintain a shallow angle with your lame. For the loaves above, my cuts were about 1/2″ deep.
  • Also, understand that the purpose of scoring is NOT to make an ear. The purpose of scoring is to control where the loaf expands. Otherwise, your loaf will expand unevenly.
  • Make sure your dough is fully fermented. And no, it’s not just bulk fermentation. Yes, you want a thorough bulk fermentation, but you have to make sure there’s food left for the yeast for final fermentation. This is why Chad Robertson only takes his loaves out to about 30%-50% volume expansion in bulk fermentation. With his long, cold, final fermentation, he needs to make sure there’s food left for the little beasties.
  • Of course, shaping is absolutely critical. But you don’t have to get super-tight skin to get an ear. And though others may stress the importance of tight skin, the purpose of shaping is to orient the gluten strands.
  • Speaking of orienting the gluten strands, in order to orient them in the first place, you need to build strength in the dough but make no mistake, depending on the flour, the amount you stretch and fold will vary wildly. I use bread flour that is very high in gluten content (>13.5). Though I usually cut it with some other kind of flour, if I bake with it as the only flour, my dough only takes two stretches and folds before it has built up strength. On the other hand, if I use pastry flour that is made from soft red wheat, I have to do 4-6 stretch and fold sessions before it has built up strength. The point of this is that you should never overdo your folding. Fold until the dough can hold its shape for a while before it relaxes. Then leave it alone!
  • Finally, especially if you’re using a baking stone or steel, make sure your surface is equalized with the ambient temp of your oven. This is much less of an issue if you’re using a Dutch oven, but even when using a Dutch oven, you need to preheat it. That said, I saw a video where Chad Robertson was giving a master class and was using several Dutch ovens. He was popping them in the oven cold! But he was using a commercial convection oven to bake, so it’s likely the Dutch ovens came up to temp pretty fast.

100% Sourdough Baguettes Using a Rye Starter

As I’ve mentioned many times in previous posts, the bread I love to bake the most is the baguette. The reason is that what makes a great baguette boils down to technique. Whether you use yeast or a starter to raise the dough, the dough itself is simple and straightforward. But the dough development and shaping techniques – for lack of a better word – are unforgiving. And on top of that, I’ve found that making baguettes requires using quite a bit of intuition and feel, much more than other types of bread I bake.

With more standard loaves like rounds and ovals, I tend to focus on building dough strength during fermentation. As long as I do that, shaping is pretty easy. Baguettes, on the other hand, are a different animal altogether. Dough strength is important, but timing and observing certain telltales with the dough are critical to getting a good result. And when using a sourdough starter, the process is a little slower than with commercial yeast, so the telltales are important. I’ll discuss those below.

As for these particular baguettes, the rye flour adds incredible flavors that really enhance the taste of the bread. You get the rye grain flavor as about 12-15% of the total flour comes from the rye. But I’ve also found that a rye starter creates a nice sour tang. It’s not really strong, but it’s noticeable.

And at least in the case of my mother starter, the yeast absolutely loves rye flour. In fact, if I add my mother starter cold from fridge into the rye flour and water mix, it will peak in less than 3 hours! I don’t know what that may be due to, but there must be something in the rye that makes my yeast go wild!

Overall Formula

Flour100.00%
Water76.00%
Salt2.00%
Levain30%

Levain

Rye Flour125g
Water @ about 100℉125g
Mature Starter50g

Final Dough

Bread Flour418g
AP Flour228g
Water @ about 95-100℉ to get a 78-82℉ dough temp464g
Salt15g
Levain (30% of total flour)228g
Total Yield4 X 40cm-335g loaves

Initial Mix. Reserve 50g of the water. We’re going to do a Tartine-style autolyse by combining the flour, levain and water. Mix well and make sure all dry ingredients are incorporated with no large lumps. Personally, I do the initial mix with a mixer with the dough hook. Let rest in a warm place for 20 to 30 minutes. We don’t want fermentation to really get going.

Incorporate the salt. Dissolve the salt into the reserved water, then mix it into the dough. You can use a mixer for this, but salt will tighten up the dough and it will quickly climb up the hook. So I just mix the salt in by hand. If you do it this way, wet your hand often. Transfer dough to another container to do your bulk fermentation (I use a 6L Cambro).

Bulk Fermentation. No time on this. You’re looking for a 30%-50% rise from the original dough mass. Using my active starter, this usually takes about 2 – 2 1/2 hours total with a dough temp of 80℉.

Folding. This only needs two folds within the first hour and a half. In each session, stretch and fold until you can pick up the entire mass. After the second fold, just let the dough ferment until you achieve 30-50% rise from the dough.

Telltale: Before you start folding, check the dough. You want to get good extensibility out of the dough. It should stretch very well but not tear. By the time bulk fermentation is complete. your dough should feel velvety smooth and luxurious.

Divide and Pre-Shape. Divide the dough into 335g pieces. You can refer to my baguette dough development process. Let rest for 20 minutes or until the dough as relaxed.

Shape. Roll pieces into logs, then transfer each to a well-floured couche.

Final Fermentation. Especially with sourdough baguettes, it is critical to leave them alone once you start final fermentation. You want the shaped dough to expand to almost double in volume or until the indentation of the poke test comes back very slowly. You’re taking the dough out to almost full fermentation.

Bake. Bake a 475℉ for 12 minutes with steam, then 425℉ for 12-15 minute or until the crust is the desired color. I prefer a slightly darker crust without getting too crunchy.