Do You Really Need All That Fancy New Equipment?

As I returned to baking bread in earnest after a long hiatus, and “in earnest” that meant baking every single day, not just the same kind of bread, but many diverse kinds from French to Italian bread. For instance, I learned to make ten distinct kinds of baguette. I learned to make several traditional Italian loaves. I had four active starters that were optimized for different outcomes (sourness, fast rise, etc.). But here’s the thing: Other than buying simple implements such as a Danish dough whisk or some good scrapers or getting a baking stone. I didn’t get a new mixer or other high-end equipment. I baked everything in my standard electric oven.

I mostly mixed by hand but also used a mixer for specific kinds of dough. For that I used my trusty KitchenAid Artisan 5-quart mixer; yes, even for large batches when I had to make bread for a shelter. In those cases, I had to make several small batches of dough. And since I only had two ovens to work with, I had to work out timing. And though I was tempted to get a spiral mixer (I still dream about it) and a dedicated bread oven (I will get that in the next year or so), I still got by with what I had. And I made some incredible bread. My thought was that if I learned how to use what I had on hand, there wouldn’t be much I couldn’t do.

But I think a major reason keeping me from getting higher end equipment was that I had worked out a process and got so proficient and efficient with it that I didn’t feel a pressing need to buy new gear. Honestly, I’d forget the new stuff and would only remember when I deliberately thought about how nice it would be to have a spiral mixer or dedicated bread oven. And that leads me to the reason I wrote this post in the first place.

There’s an urban legend about the famous violinist Izthak Perlman who broke a string during a concert, then proceeded to finish the concerto playing only on three strings. At the end of the piece, he spoke to the audience and said, “You know, sometimes it is the artist’s task to find out how much music you can still make with what you have left.”

No one knows whether the story is true, but the quote is inspirational, nonetheless. And I think of it when I’m evaluating buying new equipment. Granted, there are times when there is an absolute necessity to get some new gear, especially if you’re replacing broken equipment. But for other, more aspirational items, can you still perform with what you have? I will be honest with you that that quote has saved me thousands of dollars, not just in bakery equipment, but also in guitar and golf and even home appliances.

Look, I’m not saying that you must be cheap. If you have the means to get the top-of-the-line stuff, go for it. But will those aspirational things improve your process to a significant degree? At least for me, as I had my process down, I didn’t think they’d help to a large degree. Even with my micro-bakery where I was baking more bread than most home-based bakers, the higher end gear became more “nice-to-haves” rather than “must-haves.”

And to be honest, in the end it’s all about the dough. A great mixer will help in mixing the dough, but after that, there’s no other equipment you need to develop you bread dough. A dedicated bread oven will certainly provide much more consistency than a normal home oven, but if you know your oven and you’re only baking limited quantities, the benefit of a dedicated oven will be minimal at best. Besides, if you screw up your dough, no amount of high-end gear is going to help you.

An early batch of baguette from the holidays. Whew! I was little rusty!

Over holidays, I baked quite a bit of bread; mostly baguettes, but I made other types of loaves as well. But here’s the thing: All the mileage I put on my ovens completely messed them up and one oven no longer holds temperature consistently and the hinge on my other oven broke so I couldn’t use it. I tried to make baguettes on my stone, but they turned out horrible. So I had to turn to my old metal baguette pans. Those never produce great results, but they’re what I had on hand. And I trudged forward thinking about the Izthak Perlman quote.

And I was okay with the results, even though I knew they wouldn’t be as optimal as I would normally get with a stone. I was making music with what I had left!

Leave It the F#$k Alone!

In addition to baking, I barbecue a lot. And one thing I’ve learned in making great bread and great barbecue is to have the patience – and trust – to leave your dough or meat alone. Especially with baking, sometimes it’s SO tempting to check how your baking is going, but temperature fluctuations can have a deleterious effect on your bread. So, as in the words of Nancy Reagan, “Just say no!”

In the first 10-15 minutes of baking, when you’re applying steam to certain bread, opening your oven will release the steam and your bread will not get oven spring because it’s the steam that keeps the crust moist and allows the bread to expand. Talk about killing a bake!

Several people have asked me why their bread doesn’t spring much, and many times I find out it’s because they open their oven door to see how their bread’s doing. I know, it can be tortuous to have to wait, but if you have a little trust in the process, you’ll be rewarded. Remember the saying, curiosity killed the cat.

I had to learn lots and lots of patience when I started barbecuing in earnest. For instance, a pork butt requires at least 12 hours. A brisket can take up to 16 hours! Of course, there will be times when basting or spritzing the meat is necessary, but in between those times, I’ve had to learn to just let the meat cook, lest it come out tough and chewy, and no one want that.

So, have some patience, trust in the process, and let your dough do its thing!

Happy Baking!

Here’s Something a Little Different: Brisket-Style Smoked Tri Tip

Now and then I like to share things I’ve cooked other than bread. But they’re also great to go with bread! This time it’s brisket-style barbecue Tri Tip steak. Tri Tip is predominantly a US West Coast cut, and more specifically, it tends to be a California cut. But if you can find it outside of California, it’s a great cut that can be cooked in a variety of ways.

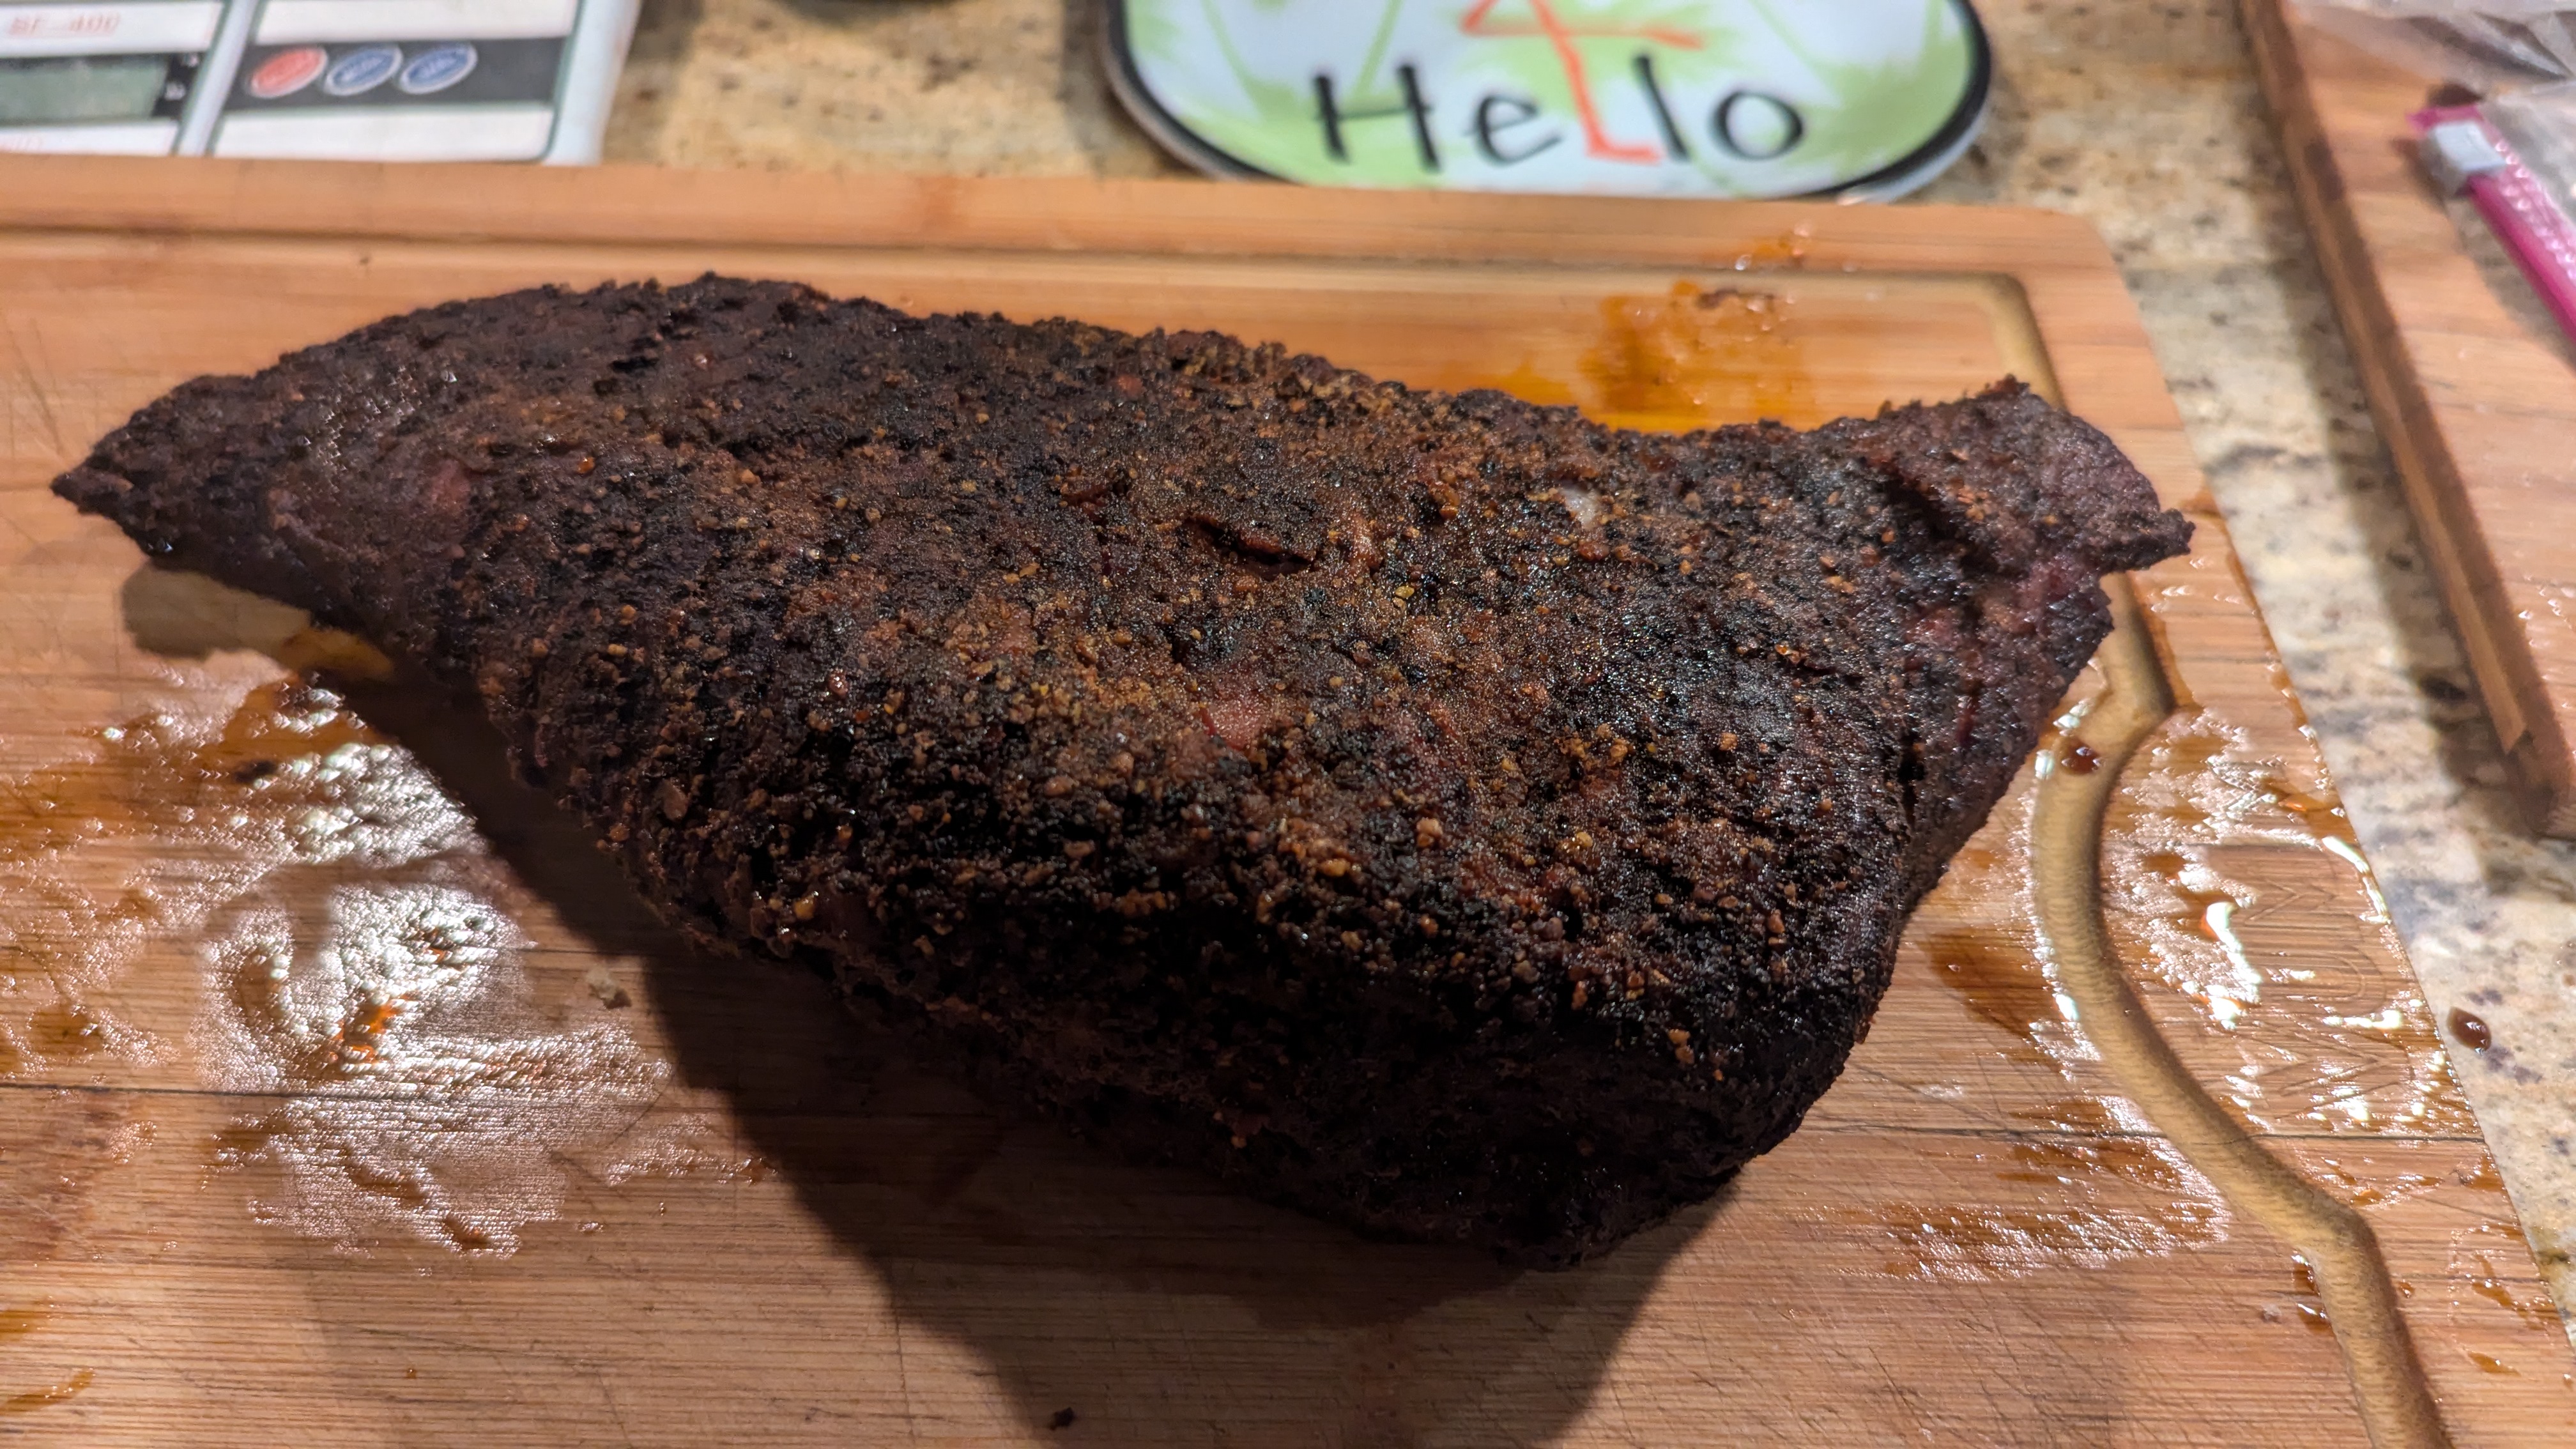
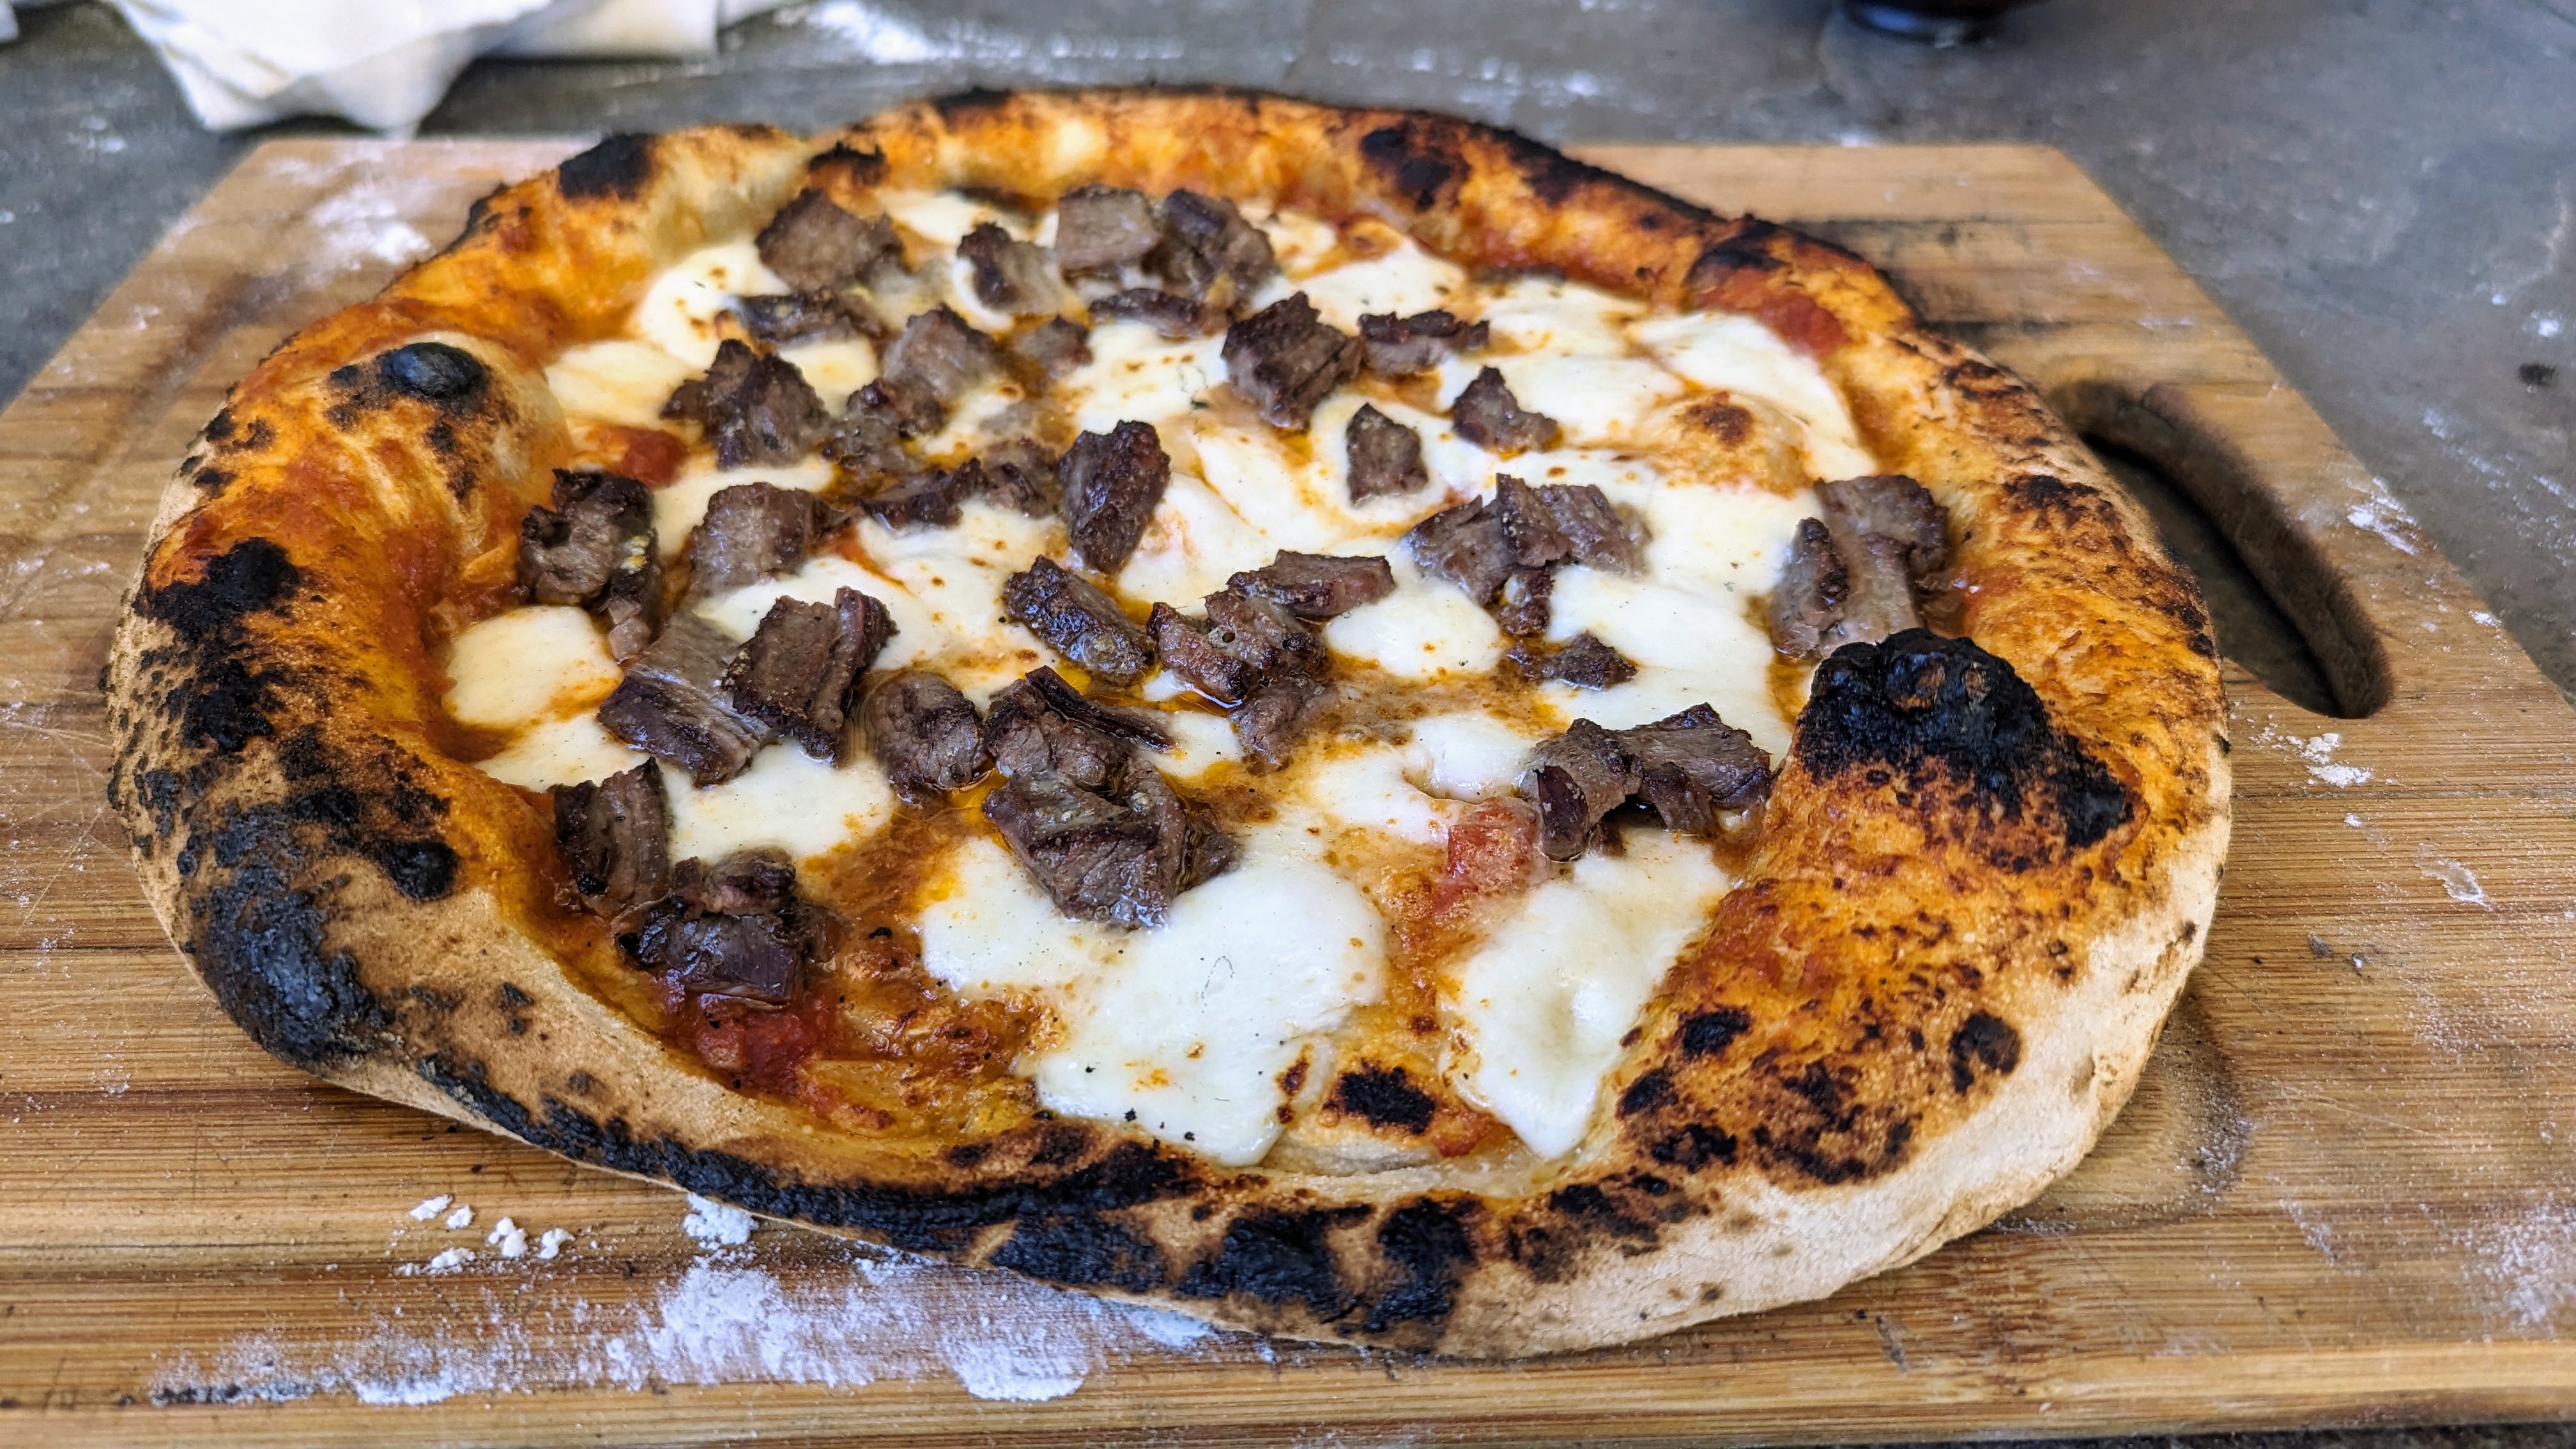
The traditional way of cooking Tri Tip is over a hardwood pit using indirect heat for the first part of the cook then searing the outside in a sort reverse sear method. This is a method I’ve used for years. But since I got such a great deal on the last two Tri Tips I purchased, I decided to smoke one like I would a brisket to see how it would turn out. As you can see from the picture above, it turned out fantastic!

Here are the steps:

Preparation

Tri Tip is a rather lean cut of meat, but invariably, it will be encasd on one side with a thick layer of fat. So before you do anything, trim the cut, removing the hard fat and silver skin. If you do leave some fat, make sure you don’t leave more than 1/8″.

Next, you should brine the steak for 12-24 hours. With the steak above, I dry brined it with my homemade rub. In the future, I think I will wet brine in a marinade. The reason is that Tri Tip has a loose muscular structure, and even though good cuts have marbling, because of that loose structure, the fat leeches out during a long cook. Wet brining should help bolster the moisture in the meat.

Barbecue!

Like any barbecued red meat, it takes time to cook. For this cut, I used my Traeger pellet smoker:

  1. 2 hours on the “Smoke” setting (it’s about 160)
  2. Turned up the smoker to 180℉ and cooked until the internal temperature of the meat read 160℉. By this time, the meat formed a beautiful bark! (~3 hours)
  3. I removed the meat from the grill and wrapped it tightly in butcher paper and turned the temperature up to 225℉.
  4. Returned the meat to the grill then barbecued it until the meat had an internal temperature of 200℉. (~6 hours)
  5. I immediately transferred the meat (still wrapped) to a jumbo ziploc bag, then let it rest for 30 minutes in a cooler. Normally I’d rest it for a couple to a few hours, but it was dinner time and I was hungry! 🙂

As you can see, it was a pretty straightforward process. That’s the beauty of barbecue! In the future, I will definitely dry brine the meat overnight and even inject it to bolster the moisture. The only issue I had with this cook was that even though the meat came out super-tender and moist, I would’ve liked it to be a lot more juicy. Tri Tip has less fat than brisket, so I believe you have to make up for the lack of fat with some other liquid.

That first night after cooking, I just ate it straight with some BBQ sauce and some veggie on the side. But since I still had a bunch of meat left over, it made some great sandwiches the next day!

Baking on Vacation. No, I Don’t Bring My Starter.

I’ve gone to my house in Hawaii and so far, I’ve already baked a couple of times and will bake bread yet again for a Labor Day party in couple of days. I got a special request for Labor Day by the host of the party, and my wife’s friend invited us to dinner tonight and asked if I could bake some bread to bring to the dinner. Then my daughter asked me to bake some bread for her because she hadn’t had any of my bread for a year.

It is never a problem for me to bake. I love it and enjoy baking when I have the time; yes, even on vacation. But one thing I haven’t done is bring my starter with me. I suppose could bring a little starter and grow a levain if someone specifically wanted sourdough, but my thinking is that I can make so many diverse types of bread that it seems almost pointless to bring a starter.

Plus, I refuse to let my starter rule my life. Holy crap! I’ve seen people proudly post pictures of themselves in their hotel rooms proudly holding up their jars of sourdough starter that they took on vacation with them so they can feed it. To each their own, but if I’m on vacation, I don’t want my activities limited by my freakin’ starter feeding schedule! I feed my starters (yes, I have anywhere from two to four) before I leave then put them in the fridge. They’ll keep for weeks.

So what did I bake? I made two batches of ciabatta, one for us and one for the dinner party with our friends. For the Labor Day party, I baked two dozen Hawaiian rolls that went perfect with the BBQ short ribs we had. Both of those types of bread just required regular old yeast. For the ciabatta, I made an overnight biga preferment. Wow! Were they delicious.

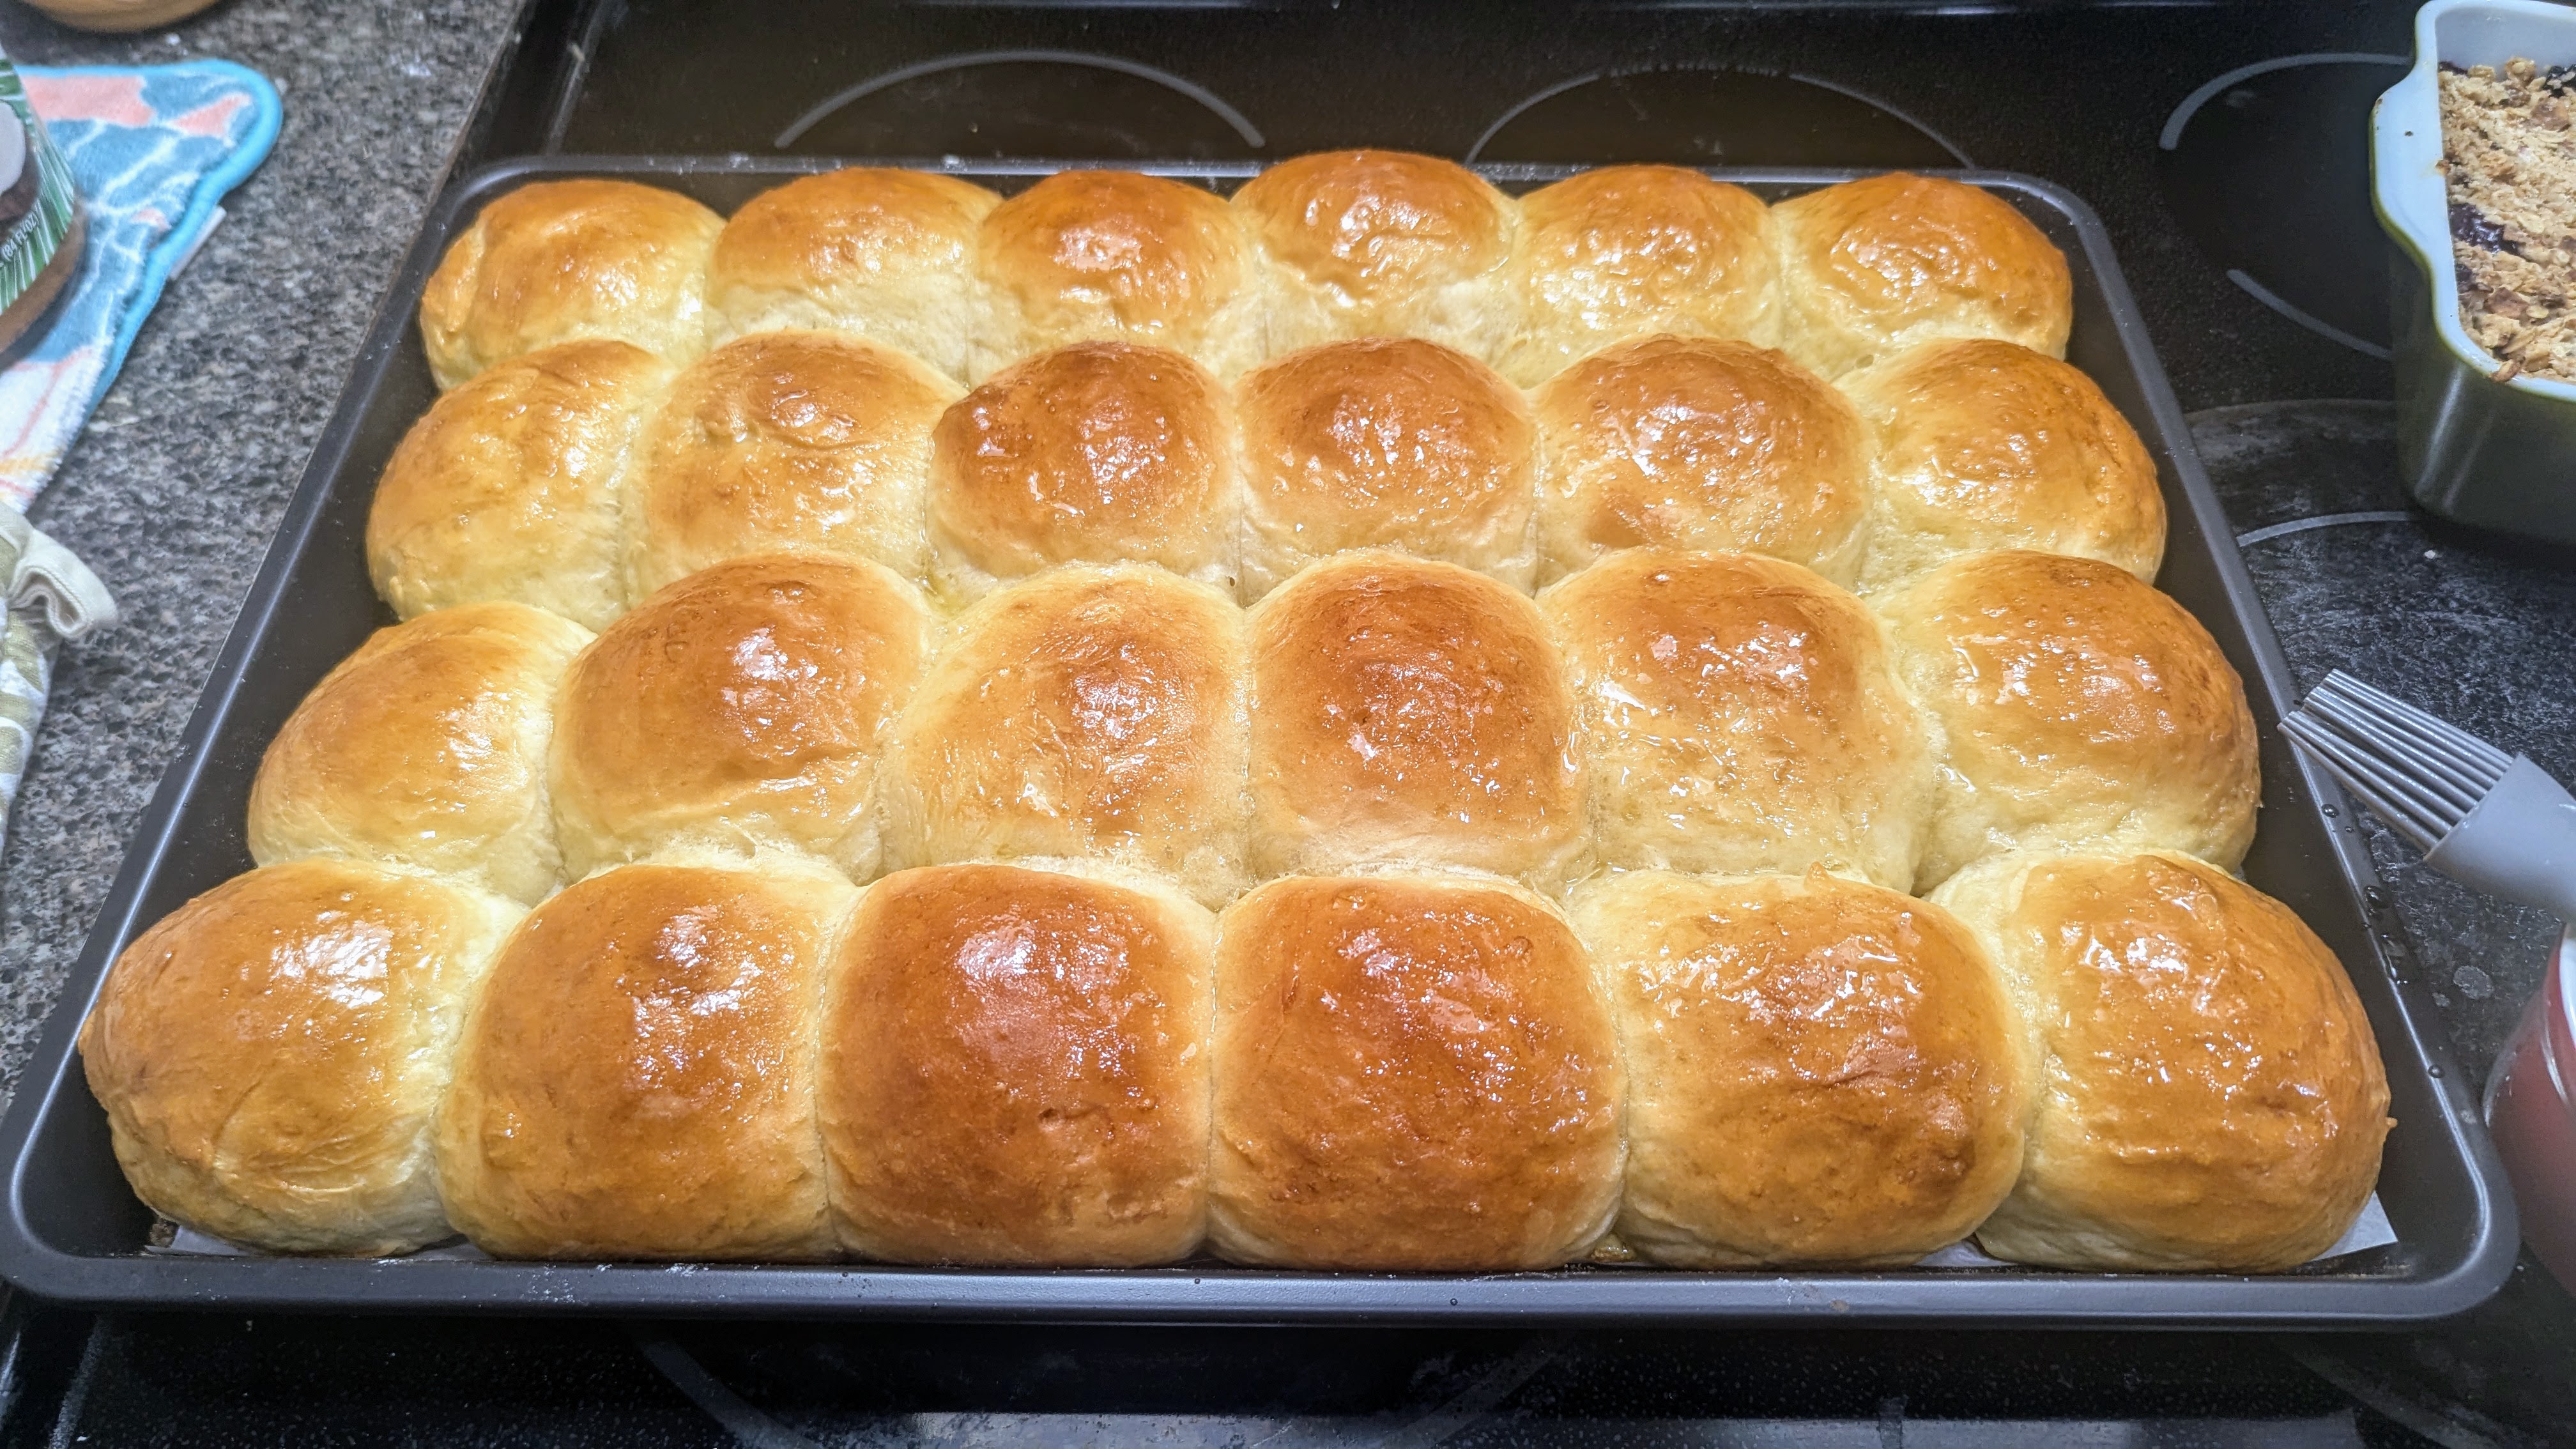
And the Hawaiian rolls were the hit of the party! They didn’t last at all! They were rich with butter and soft and pillowy. I’m going to have to make more!

Anyway, the point to this is that if you want to bake on vacation and have the means to, go for it. But just remember this: It doesn’t have to be sourdough.

Hawaiian Butter Rolls

I’ve spent lots of time perfecting this recipe. Though I’ve been making these for several years, I’ve also been tweaking it to get the right results. My main goal with this bread has been to make it much like brioche with the butter and eggs, while retaining the island vibe; hence, the 50% pineapple juice.

Like brioche, this is a very wet dough even though the total liquid represents only 65%. But the eggs and butter up the hydration, and make it feel like an 85%+ hydration dough. It’s a little tricky to work with, but with good gluten development and handling technique, it’s not too difficult. We’ll discuss this more below.

Overall Formula

Flour100.00%
Pineapple Juice – (canned, not from concentrate)50.00%
Milk15.00%
Egg10.00%
Butter20.00%
Yeast1.00%
Salt1.50%
Sugar7.50%
Total Percentage205.00%

Final Dough

Flour709g
Pineapple Juice355g
Milk106g
Egg (1 large egg + 1 yolk, reserving the egg white)71g
Softened Butter142g
Yeast (Instant or Active Dry – 1 pack)7g
Salt11g
Sugar53g
Total Yield1454g
24 X 60g rolls

Preparation. There’s a bit of preparation that has to be done before you get into mixing.

  1. First, measure out the pineapple juice into a microwave-safe container and nuke it for about 1 minute or heat on the stove to at least 180°F. This will eliminate the enzymes that would break down your gluten. Let it cool to 105°F. It’s ultra-important to use canned pineapple juice and not from concentrate that often has added sugar!
  2. Warm the milk to around 95°-100°F, then mix the yeast into it to bloom the yeast. I do this with instant yeast as well to get it going as exposure to the high amount of sugar from the juice and granulated sugar will send it into osmotic shock. This won’t kill the yeast, but it will slow it down. So, I want the yeast to wake up first rather than slowing it from the get-go.
  3. Finally, separate a yolk and from 1 egg, retaining the white to brush the rolls before baking. Beat the egg and extra yolk. You may exceed the required weight, so be mindful of using only the amount called for in the recipe.

Though you can certainly mix this by hand, I recommend using a stand mixer because of how sticky the dough will be.

Mix. Combine the flour, salt, and sugar in the mixing bowl. Mix these on low speed for at least 30 seconds. Add all the wet ingredients to the bowl, then mix with the paddle at low speed until all the ingredients are thoroughly combined. Scrape down the bowl, then continue to mix for at least another minute. Remove the paddle, scrape it down, and scrape down the bowl. Switch to the dough hook and start kneading at medium-low speed for 2 minutes. Increase the speed to medium and knead for 4-5 more minutes or until the dough begins looking smooth. Your dough temperature should be around 78°-85°F from the warm pineapple juice and milk (this is important).

Bulk fermentation – Part 1. Allow the dough to rise for 45 minutes (don’t worry, there won’t be much expansion), then turn it out onto a lightly floured surface. Using your bench knife, fold the dough twice in a North-South-East-West pattern, patting the dough down in between stretches. Finally, turn the dough over then shape into a round ball and return it to the bowl seam side down, covered. Wait another 45 minutes then fold the dough again.

Bulk fermentation – Part 2. Place the dough in your fridge until it has doubled in volume. This can be an hour or even more. But because the dough temperature is high, the yeast activity will keep on going, even though the dough is getting chilled.

Divide and shape. Turn the dough out onto your work surface, then measure out 60g pieces. With well-floured hands, roll the dough pieces into balls. Place the balls onto a full-size baking sheet lined with parchment paper, arranging them into six rows of four balls.

Final Fermentation. Cover the balls with damp paper towels (they won’t stick because of the butter) and let them proof and puff up for about 45 minutes or until they nearly double in size. It’s fine if they touch each other since they will all come together during baking anyway.

Bake. Before you pop the sheet into the oven, make a mixture with water and the reserved egg white, and brush the tops of the rolls. Bake at 350°F for 20-25 minutes or until the internal temperature of the bread is at least 195°F. Mine took 22 minutes.

Once they’re done, remove the sheet from the oven, brush the tops with melted butter, then cool them in the sheet for an hour before transferring them to wire rack. This will allow the butter to soak in and crumb to set up.

Same-Day Yeasted Bread

There are times when I want some bread and don’t have the patience nor time to make a loaf of sourdough. Today was one of those days. I had meetings solid in the morning, had a major architectural problem to solve, and though I knew that I wanted some bread for dinner this evening, I didn’t have the time to get a levain started; truth be told, I just didn’t want to fuss over a starter. It was a bit of a dilemma

So, to solve my dilemma, I turned to a yeasted same-day recipe that I’ve developed over the years. I got the inspiration for this loaf when I attended a retreat, and the chef had a huge mixing bowl filled with proofing dough. I asked her about her process and decided to develop my own same-day bread.

The challenge with making a loaf like this is that it can turn out to be insipid and with a crumb that dries out easily. But this bread has plenty of flavor due to the addition of a bit of honey and the use of T90 bread flour for a bit of whole grain and diastatic malt powder. The diastatic malt powder is optional. It provides a bit of flavor but more importantly, it will produce a soft crust and a moist but not gummy crumb. This is a perfect loaf for making sandwiches!

Formula

Flour100.00%
Water72.00%
Salt2.00%
Yeast1.00%
Diastatic Malt Powder0.50%
Honey3.00%

Final Dough

High-Gluten Bread Flour (I recommend using 12%+ protein content flour)577g
T85/90 or Whole Wheat Flour102g
Water (~95-100℉)489g
Salt14g
Yeast7g
Diastatic Malt Powder3g
Honey20g
Total Yield 1 loaf X 1212g

Mix. Thoroughly combine all the dry ingredients together in one large bowl. Dissolve the honey in the water then add the water in batches to the dry ingredients until there are no dry ingredients in the bowl. Mix to a shaggy mass.

Bulk Fermentation. (about 1 1/2 to 2 hours) Do two sets of stretches and folds every half-hour in the first hour, then resting the ball on the seams. Make sure you stretch the dough to its extents during folding. You really want to develop the gluten network! After the final stretch and fold, allow the dough to expand in volume to almost double. With this amount of yeast, plus the addition of honey and malt, on a warm day like today (it’s 75º in my kitchen), a half-hour after the last fold was all I needed to complete bulk fermentation.

Pre-Shape/Bench Rest. Pour the dough out onto your work surface, then shape it into a boule, making sure the skin is nice and taut. Pop any large bubbles that form – there may be a lot! Cover it with a tea cloth then let it bench rest for twenty minutes.

Now would be a good time to preheat your oven and Dutch oven to 475℉

Shaping/Final Fermentation. ~45 min to an hour. Turn the dough over, then gently punch it down. Don’t be too rough! Shape it into a boule or a batard, then place it seam-side-up in a well-floured banneton, then place the banneton in the fridge for final fermentation. Do the poke test to make sure it’s ready. As with any bread, you want to make sure that final fermentation completes, less you get a fool’s crumb.

Bake. Bake at 475℉ for 20 minutes covered I also thrown in a couple of small chips of ice to add to the steam. Remove the lid and finish baking at 425℉ for 20 minutes.

Cool for at least an hour before slicing! Happy Baking!

Update 9/18/2024: I just made patty melts for my kids’ dinner this evening and they both said the bread was FIRE! My son made a huge sandwich with it earlier in the day. Looks like I will be making yet another loaf. 🙂

Notes

  • There’s an obsession in the home baking world with creating an ear. Having baked this loaf many times, this will not create an ear or make a small ear at best, even if you make a deep cut. There are a few reasons for this: 1) The crust is thin on this type of loaf; 2) The diastatic malt moistens the dough, making a soft crust; 3) Finally, the yeast action is so dramatic during baking that the loaf expands too fast for an ear to form.
    • You may be concerned about the loaf not having much flavor since both bulk and final fermentation add up to just over two hours. That’s the reason for using a bit of whole grain flour, honey, and diastatic malt. The addition of these ingredients provides subtle but important flavor enhancement.
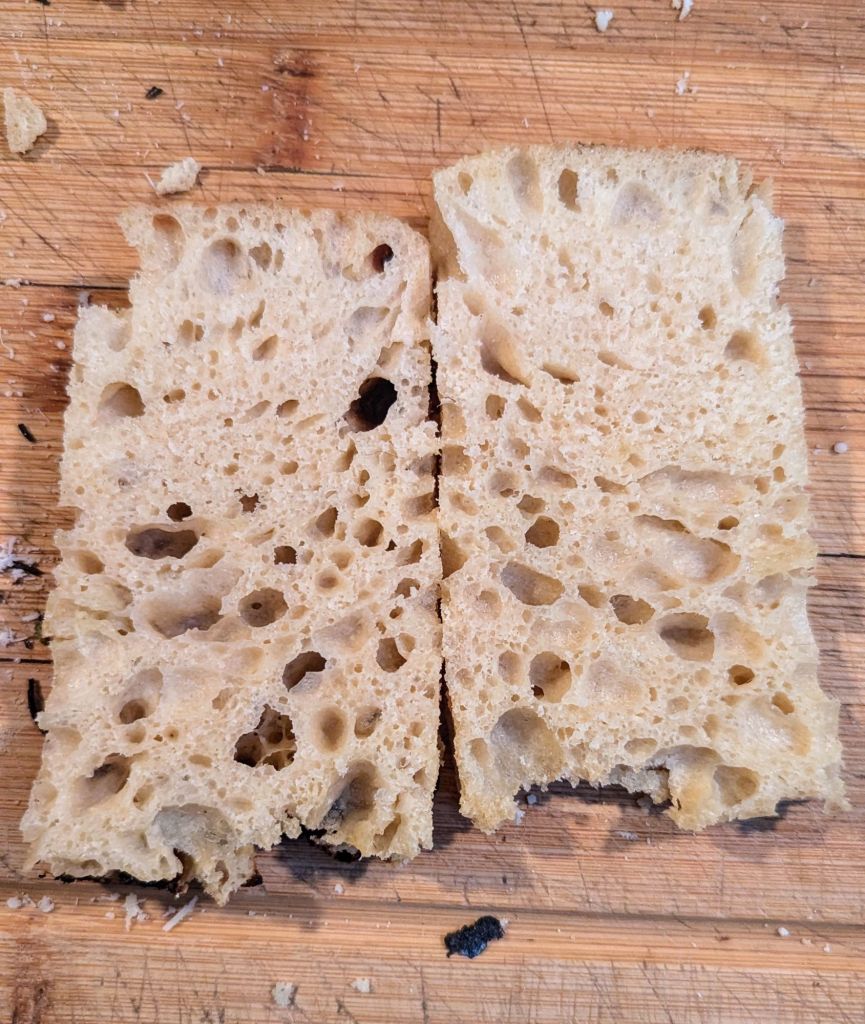
    • As I mentioned above, this makes a perfect sandwich loaf! Looking at the picture, you’ll notice there aren’t any large holes. But there are many, many small holes. Squeezing the loaf after it cools feels like you’re squeezing a sponge; the crumb is exceptionally light and airy! And using high-gluten flour helps the loaf keep its structure during baking.

Sourdough Focaccia with 30% Semolina Flour

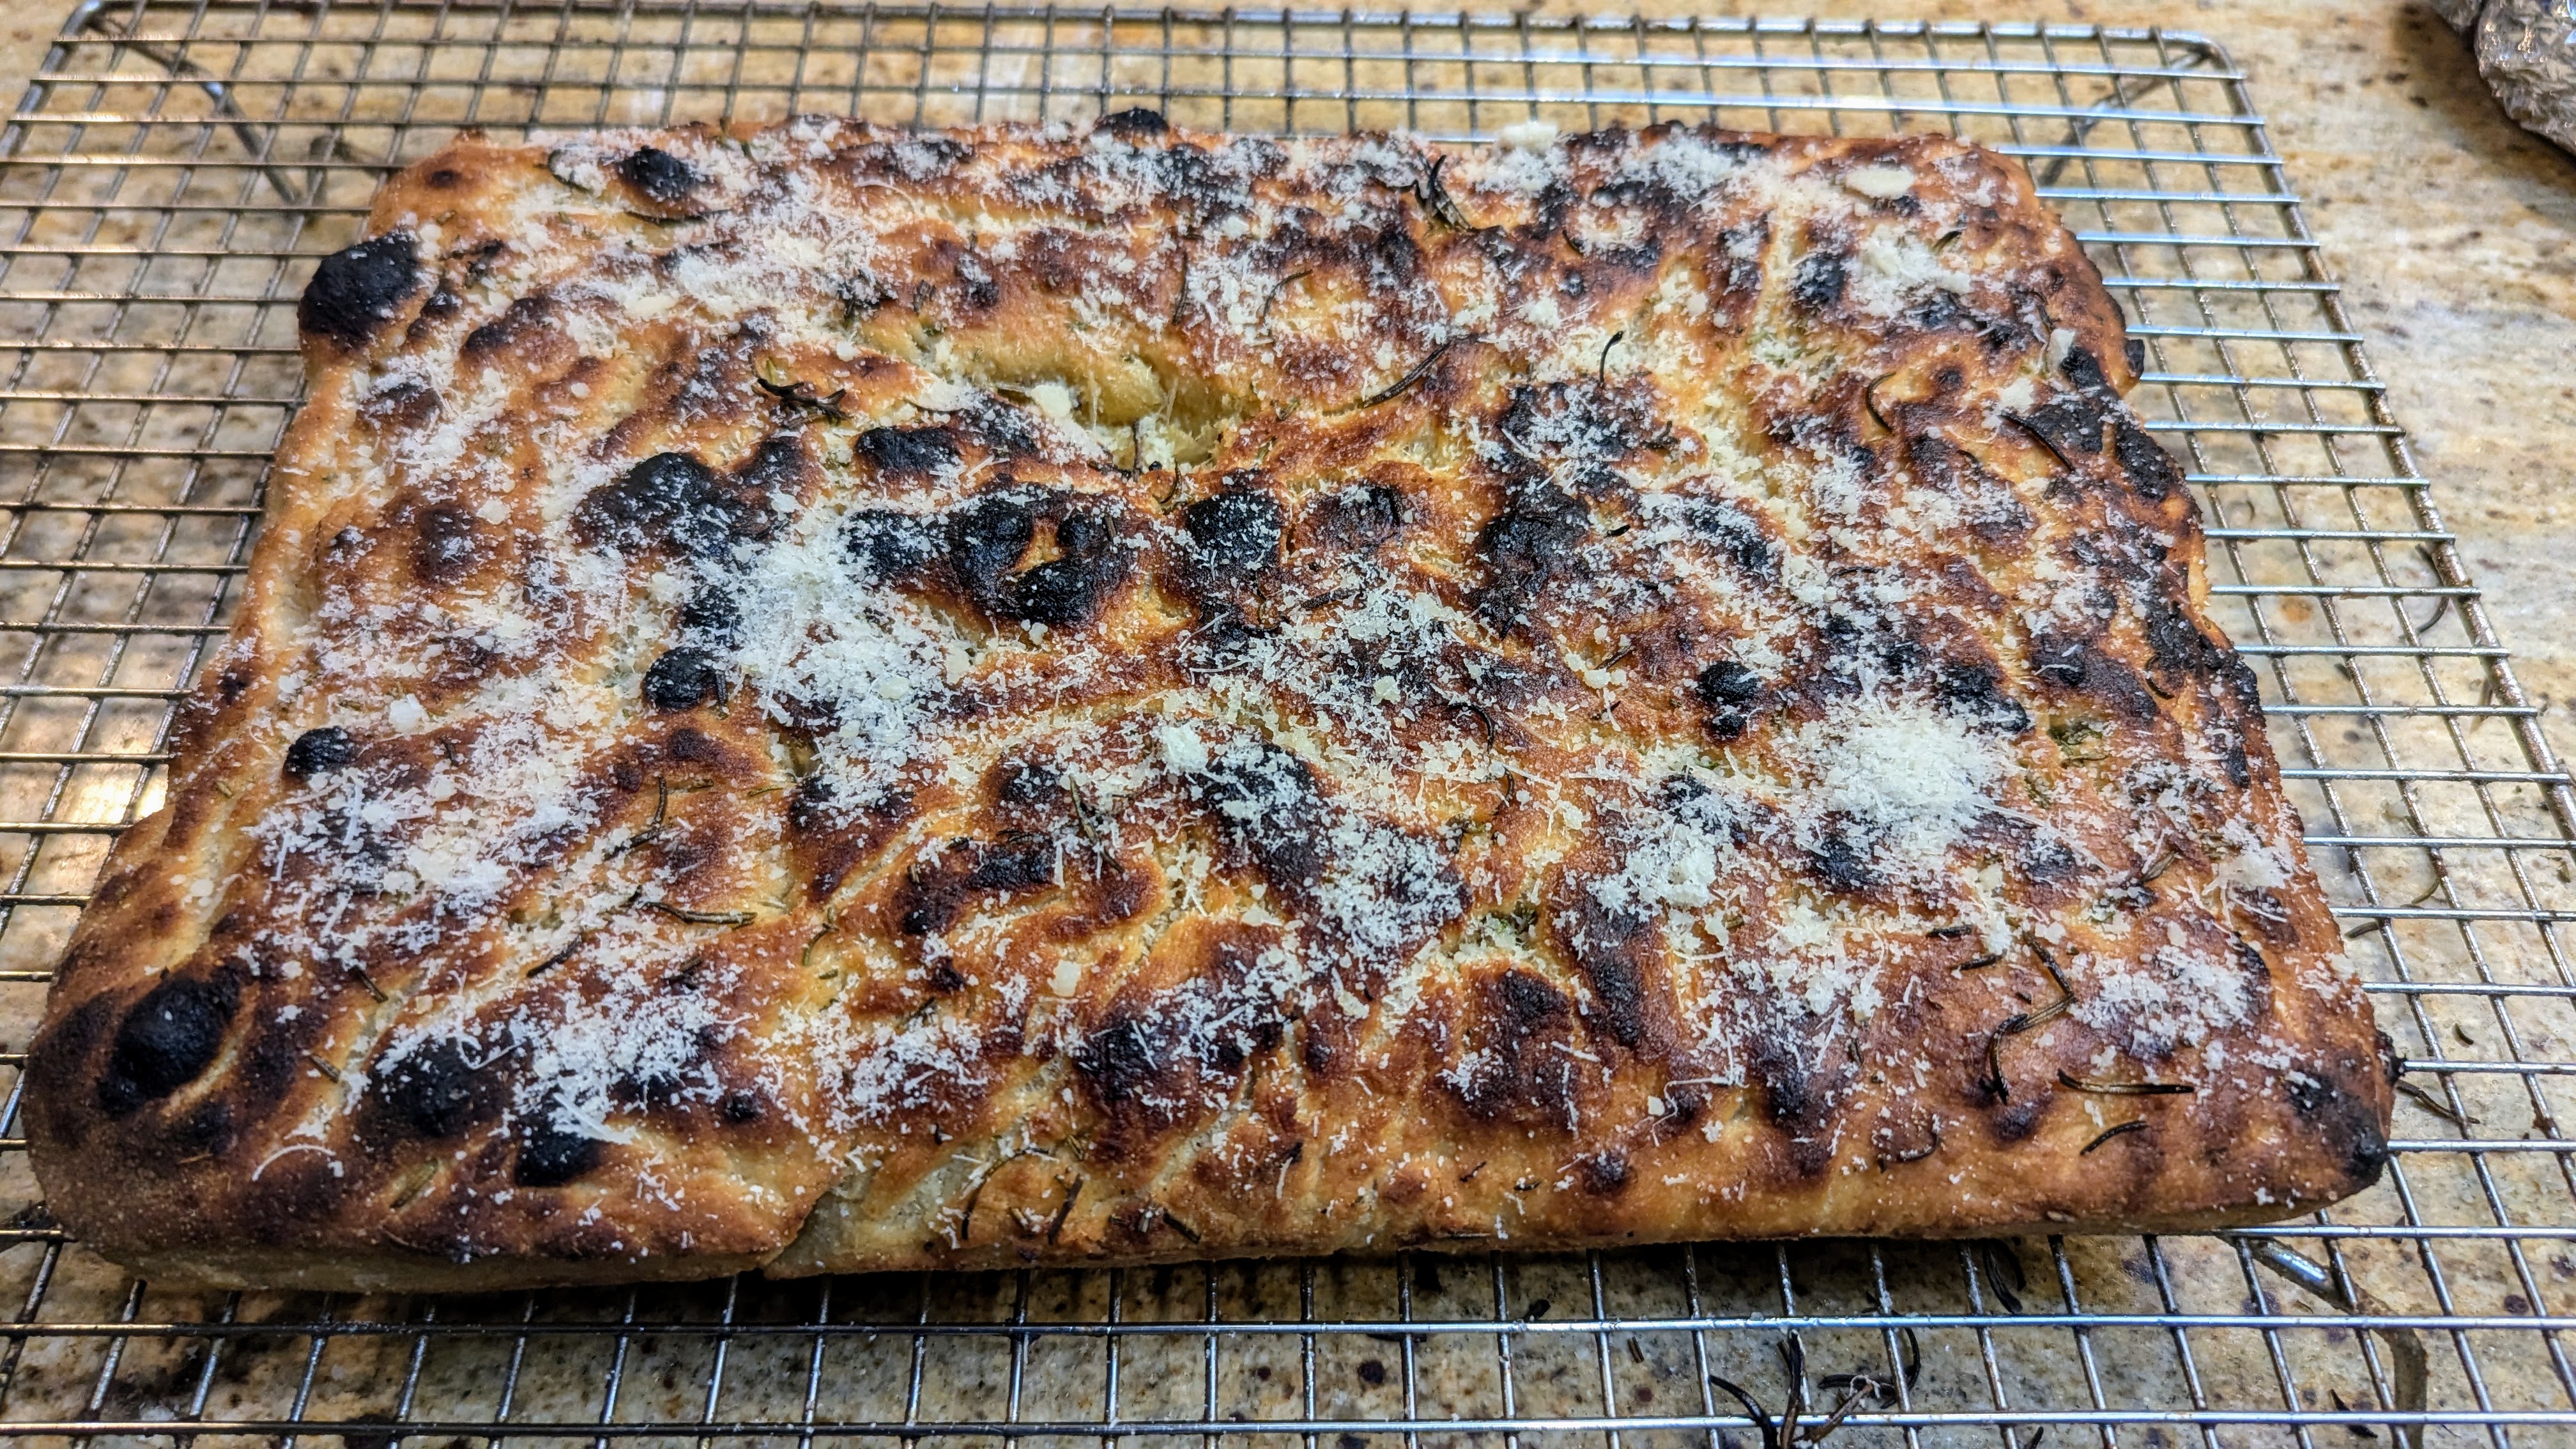
The very last piece of focaccia. It didn’t last an hour after I baked it!

Now that I’ve gotten into making wood-fired pizza, I’m back to making dough on a regular basis. And more importantly for me, I’ve revived my mother culture to create levain which I use for all my dough now. Yeah, I know… Yeast is typically used for Italian breads, but there is nothing like the texture and flavor of a dough risen with a sourdough culture.

In doing my research on focaccia, like other Italian breads, there are various kinds depending on the region. This recipe is a sourdough riff on Ligurian focaccia which tends to be a thicker, puffier kind as compared to a Genovese focaccia which is thin like flatbread. Also, even though I list honey as part of the formula, I didn’t include it in my final dough because I baked it in my wood-fired pizza oven. And even though it is baked in a pan, I didn’t want to risk the sugar burning. However, if you’re baking in a regular oven, by all means, include the honey! Either way, it’s still delicious.

And finally, I wanted to add a little complexity to the flavor profile by using whole grain, fine ground semolina flour. The results were spectacular!

Formula

AP Flour70.00%
Finely Ground Semolina Flour30.00%
Water75.00%
Salt1.50%
Yeast1.10%
Olive Oil6.25%
Honey1.80%
Total %185.65%

Final Dough

The final dough will fit in a standard 9″ X 13″ baking pan.

AP248g
Semolina129g
Water ~100℉-105℉269g
Salt6.46g
Olive Oil27g
Honey8g
Levain108g
Total Yield800g

Make the Levain. Make a 1:5:5 levain; that is, one part starter to five parts flour and water each. If you make the levain the night before, you can let it ferment overnight on the counter, then mix the dough in the morning. If you want to do a same-day bake, once you’ve mixed the levain, place it in the oven with the light on and maintain a temperature of 78℉-82℉. This will favor yeast activity over bacterial activity.

Mix. In a small bowl, measure out the levain you’ll need, then add all the water to it and dissolve the levain. Add the honey and whisk to dissolve. Add the olive oil to this mixture (don’t worry, it won’t mix). In a separate, large bowl, combine all the dry ingredients and mix thoroughly to ensure even distribution. Add the liquid mixture to the dry ingredients and mix to a shaggy mass, making sure there are no lumps or dry ingredients. Scrape down the sides, cover, then rest for 10 minutes.

Bulk Fermentation, Folding. 2 1/2 to 3 hours. Fold the dough every 30 minutes in the first hour and half of bulk fermentation. By the third fold, you should have achieved a nice windowpane. If you haven’t, then do one more fold. Allow the dough to rest until it has almost doubled in volume.

Final Fermentation. Punch down the dough, shape it into a rough rectangle in the shape of a 9″ X 13″ pan. Place into the pan, then use your fingers to spread out the dough and distribute it evenly in the pan. Let the dough rest for 20-30 minutes. After resting, sprinkle flaky salt on top and fresh rosemary all over the top. Sprinkle good extra virgin olive oil over the entire surface, then dimple the dough to let the oil pool in the dimples.

Bake. In a conventional oven, bake at 450℉ for 25 minutes or until the top becomes a nice chestnut brown. If baking in a wood-fired pizza oven, the focaccia will only take about 10 minutes. Don’t let it get too close to the flame to avoid burning and turn the pan every 30 seconds to achieve and even bake. Like a Neapolitan pizza crust, you should get charred spots.

Remove from the oven. Spray or sprinkle more olive oil on top, then lightly powder with freshly grated Parmesano Reggiano. Let it cool for at least 15 minutes. It’s best when it’s warm!

Sourdough Pizza Crust

My son who lives in San Francisco was telling me the other day that a trend with pizza in the city – at least with the places he and his fiancé frequent – is crust made from sourdough. I took it as a tacit challenge. Plus, I hadn’t used my starter in months, so it gave me an excuse to wake it up. And now that I’ve done it, I’m going to go Mandalorian and say, “This is the way!”

I got an absolutely incredible oven spring from this dough. And the trick to that was building up a super-active levain, one that doubled in less than two hours. With the pie above, though I laid my toppings almost to the edge, it popped up so much that it pushed everything in! The result for both pies was crispy skin and chewy crumbs.

Baker’s Formula

Bread Flour100.00%
Water67.00%
Salt2.00%
Total %169.00%

Final Dough

Bread Flour457g
Water (~100°F – 105°F)280g
Salt11g
Levain161g
Total Yield909g
2 X 450g 16″ dough balls

Make the levain. As I mentioned above, I built up lots of activity in my starter to where it peaked in less than two hours. This was a basic 1:1:1 levain using AP flour. Since I had to wake up my starter, it took me three days and a few feedings to get to this point. Technically, you don’t have to do this, but your levain should pass the float test, and not just pass it. It should float on the water like it’s Styrofoam.

Mix. When the levain is ready, dissolve it in the warm water until fully broken down. Add the flour and mix to a shaggy mass, making sure no dry bits or large lumps are left.

Fermento-lyse. Allow the mixture to rest for at least 30 minutes to hydrate the flour. Once that’s done, add the salt, and work it into the dough until you don’t feel any salt crystals.

Knead. You can knead by hand, but I just knead in my KitchenAid at speed 2 for 5-7 minutes to really develop the gluten.

Scale and Cold Ferment. Once you’re done kneading, scale out two 450g dough balls, then form them into tight balls. I shape them like I’m shaping mini boules. Place the balls in a well-oiled container. Then pop them in the fridge for at least 48 hours.

Final Fermentation. On baking day, remove the balls. They will probably have collapsed in the container. That’s fine. Reshape them into tight balls, then place them covered in a warm place to come to room temperature. This may take 2-3 hours depending on your ambient temperature.

Make pizza. There are so many different techniques out there, so I’ll leave it to you to find out how to shape and top your pies.

NOTE: If those dough balls are too large, you can easily half the recipe ingredients and make 225g balls that will make 10-12″ pizzas.

Foolproof Pizza Dough Using Bread Flour

I finally got a pizza oven for my backyard kitchen, so of course I had to make some dough. I have been using a super-simple formula that works as a quick dough and for cold fermenting. It’s more along the veins of a Neopolitan-style dough, but I use King Arthur or Bob’s Red Mill bread flour as opposed to 00 flour since it’s more accessible.

Overall Formula

Flour100.00%
Water67.00%
Salt2.00%
Yeast1.50%
Total %170.5%

Final Dough

For the final dough, I make two 450g balls.

Bread Flour (King Arthur or Bob’s Red Mill)533g
Water357g
Salt11g
Yeast8g
Total Yield909g
Note that in my calculations, I add 1% extra for process loss

The process for this is simple.

Mix. In a large bowl, combine the flour, salt, and yeast until well-incorporated. Add the water, and mix thoroughly until no dry ingredients are apparent.

Knead. Knead the dough for 10 minutes by hand, or if you’re using a mixer like I do, run the mixer at medium-low (position 2 on a KitchenAid) for 5 minutes.

Alternatively, once you mix the dough, you can just put some plastic wrap over it and let it sit for 8-12 hours. But note that if you take the no-knead approach, if the weather is warm, I’d use half the yeast to keep the dough from over-proofing.

Bulk Fermentation (Quick Dough). Once the dough is kneaded, form it into a nice, tight ball and place it in a well-oiled bowl, seam side down. Cover with plastic wrap and allow the dough to double in volume. On a warm day, this can take less than an hour. Once it has doubled, divide it into two equal balls, and shape each like you would a boule.

Final Fermenation (Quick Dough).Transfer the balls to a parchement-lined sheet pan, cover with a tea cloth and let them rise for at least an hour. They should expand about 75%.

Bulk Fermentation (Cold Ferment). This is my preferred way. Once the dough is kneaded, immediately divide the dough into two equal pieces. Shape each into a tight boule and transfer them to a container that will give them room to expand. I use a couple of plastic ramen bowls. Cover the container(s) with plastic (I put my ramen bowls in a jumbo ziploc), then place them in the fridge for up to 72 hours.

The advantage of a long, cold ferment is that yeast activity is retarded, but bacterial activity isn’t. Organic acids are allowed to develop in the dough that will help with its extensibility but more importantly, add all sorts of flavor. The texture of the final cooked pizza crust also becomes airy and creamy.

The dough for this pizza sat in my fridge for 3 1/2 days! The flavor and texture were amazing!

Final Fermentation (Cold Ferment). Remove the balls from the fridge and place on a parchment-lined sheet. Cover with a damp tea cloth and allow them to come to room temperature. This can take a couple of hours. Technically, you can work with the dough right out of the fridge, but cold dough is incredibly difficult to work with and can easily tear.

Shape. Shape into pizza crust. The 450g balls will make 12″-14″ crusts. Here’s a great video on how to shape pizza dough:

Focaccia al Rosmarino (Rosemary Focaccia)

While the word “focaccia” dates to the 14th century, the Romans baked panis focacius which was a flat bread baked in a hearth. In other words, this type of bread has been around quite a long time. It’s one of the simplest, most straightforward breads to make, and this version of it is super simple, only requiring mixing. No kneading, no folding.

Yesterday, I realized that I hadn’t baked any kind of bread for weeks because of my increasingly busy schedule of work. So, I resolved to remedy that and decided that I’d make some focaccia. I also realized that even though I’ve made it many times, I never posted a recipe here.

Don’t let the title of this bread make you think it’s something special or complicated to make. Focaccia al Rosmarino is simply focaccia topped with rosemary. Here’s the recipe:

Overall Formula

Flour100.00%
Warm Water88.00%
Salt2.00%
Yeast1.00%
Total %191.00%

Final Dough

1/2 Bread / 1/2 AP Flour529g
Water465g
Salt11g
Yeast5.29g
Total Yield1010g

Other Ingredients

Rosemary (fresh or dried, whole or chopped)1 tbs
Butter1 tbs
Olive Oil~1/4 cup

Mix Dough. Mix all the dry ingredients together until fully combined. Gradually add water and mix dough until smooth. This is wet dough. If mixing by hand, I highly recommend using a Danish dough whisk if you have one. Otherwise, a stand mixer works great!

Bulk Fermentation. If you used a mixer to mix the dough, transfer the dough to a large glass bowl. At this point, you have two options: 1) Let the dough rise at room temperature until the dough ball doubles in volume or 2) Cover the bowl with plastic wrap and pop it into the fridge for 8-12 hours. Option 2) is better as that allows some organic acids to form to give the bread a slight twang.

Final Fermentation. Liberally grease a 9″ X 13″ glass baking pan with butter, then spray or spread olive oil on the bottom of the pan. Transfer the dough to the pan, placed roughly in the center. Transferring will degas the dough, but don’t worry, it will re-gas. Spray olive oil on the top of the dough. Cover with plastic or a tea towel and allow the dough to expand out to the edges of the pan, again doubling in volume. Once doubled, using your fingertips, dimple the dough to spread it out to the extents of the pan and to create little pockets on the top of the dough. Sprinkle rosemary all over the top, then liberally spray olive oil on the top as well. Allow the dough to relax for another hour.

Bake. Bake at 425℉ for 25 minutes (the top should be golden brown). Once baked, transfer the loaf to a cooling rack. Brush butter or olive oil on top then lightly sprinkle salt on the dough.