…eat grocery store bread any longer, unless there isn’t an alternative. And if there isn’t one, I will be extremely picky of what I buy. Luckily for me though, I bake practically every day, so the likelihood of me having to buy a loaf of bread is pretty low.
I realize that this might seem obvious considering this blog is now almost entirely about my bread-making journey and I think it’s clear that I bake – a lot! But if baking bread was merely an occasional affair, I’d certainly be buying bread from the grocery and wouldn’t feel compelled to write an article like this. But yeah… I’m kind of done with store-bought bread.
What prompted me to write this was last night’s dinner which was graciously prepared by a good friend to help my family out while I recover from surgery. She made an absolutely wonderful vegetable frittata, a fresh green salad, watermelon, and brownies for dessert. And she included a small loaf of heat and serve sourdough. My family really enjoyed the meal. But not one of us could eat the bread beyond a single bite!
I took a bite of it and put my piece down. But I didn’t say anything to the rest of the family because I didn’t want to seem ungrateful. But then my wife asked my son, “Do you want my bread? I can’t eat it. I like Dad’s bread more.”
Then she turned to me and asked, “What do you think of it?” I replied, “I can’t eat it.” My wife laughed and said, “We’ve gotten really spoiled with Daddy’s bread.” We all had a bit of a laugh at that remark, but it’s true. To all of us, store-bought bread’s taste and texture simply pale in comparison to what I can produce at home. But that’s not the only thing…
It’s well-known that commercial bread and bread products have additives. But did you ever consider what the nature of these are? Honestly, I was blissfully ignorant of these for years. But once I started successfully making my own bread and doing a lot of research on home versus commercial baking, I was shocked at some of the things I discovered.
Did you know that lots of bread labeled “sourdough” isn’t made from an actual sourdough starter? They inject acetic acid in the dough to give it its sour taste! Furthermore, manufacturers enrich bread with all sorts of chemicals to help the dough be fluffier or give it longer shelf life or give it a better color. And especially in the US, commercial bread makers add chemicals that have been linked to cancer and even banned in other countries. Click the link I provided above. It’s eye-opening.
The FDA argues that the parts-per-million amount of these chemicals is so small as to be negligible. But what does that mean? Is that negligible against an average response? What about those people whose systems will react at just the slightest amount?
That said, I’m not going to eschew commercial bread entirely. If it’s the only thing available, I’ll eat a bit of it, though I will limit my intake going forward. But if I have access to artisan bread, either made by me or someone else, I’ll choose the artisan alternative.
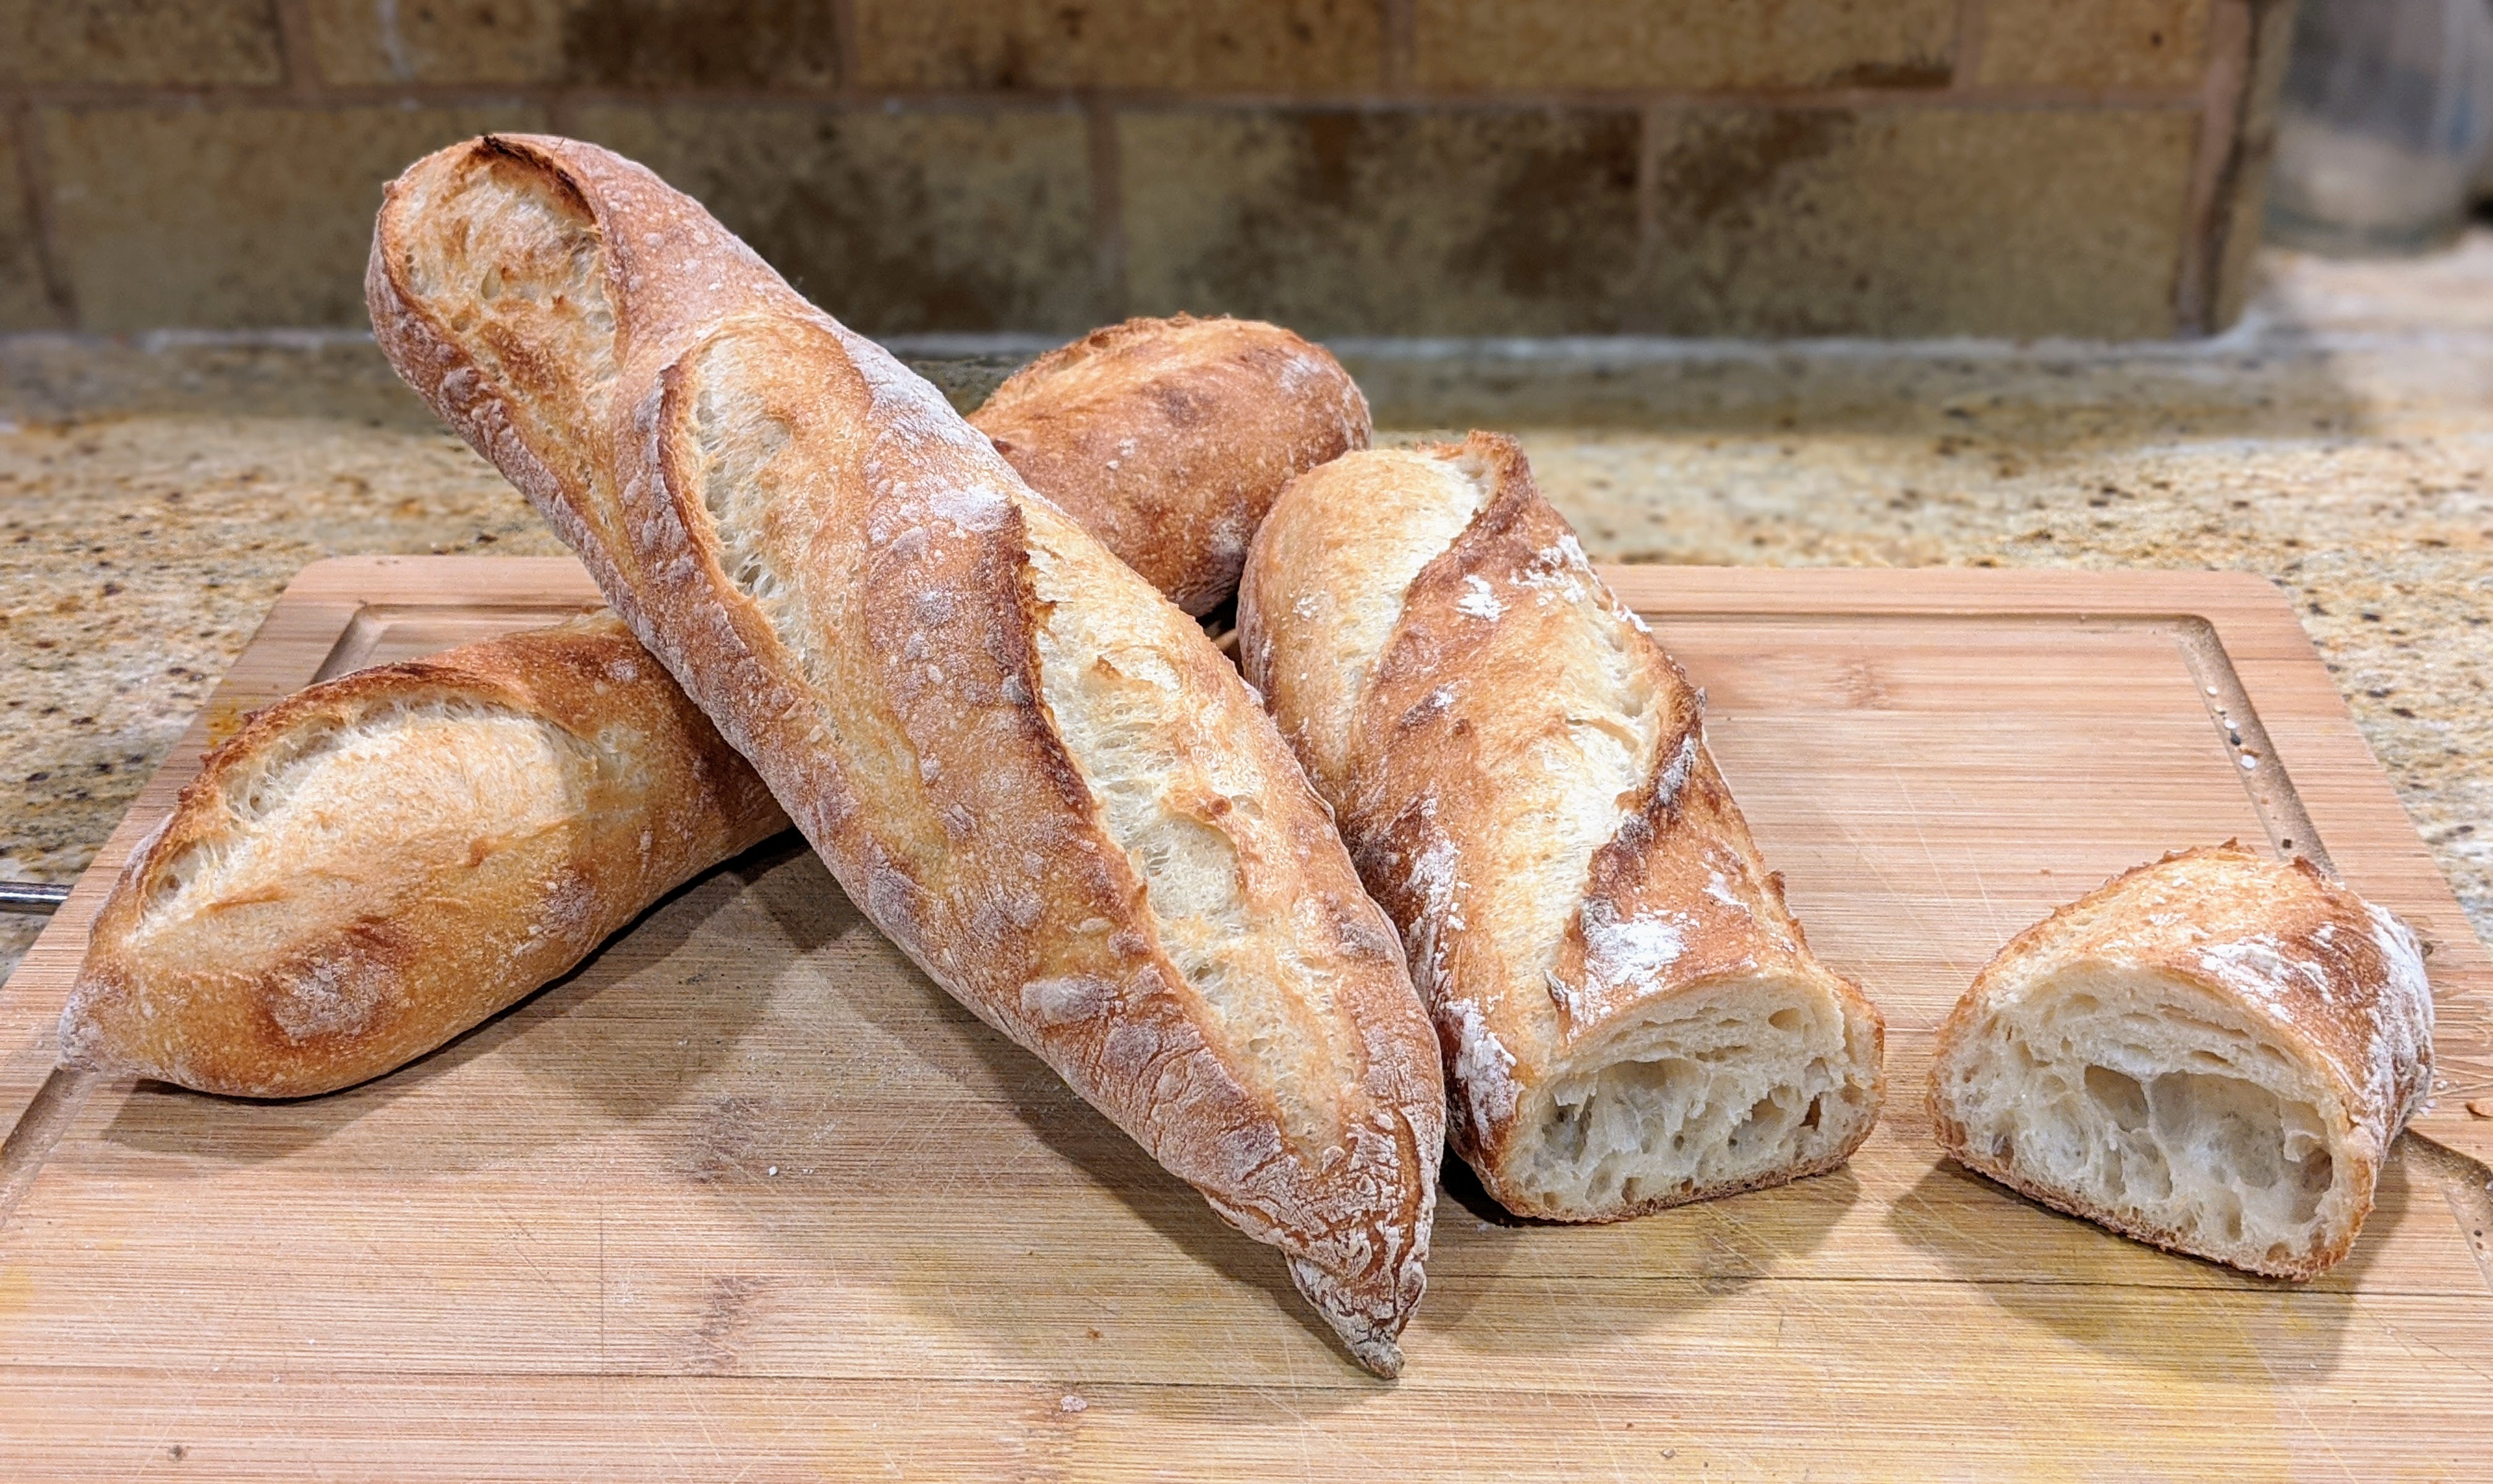
I’m actually pretty amazed at how mobile I am just three days after full hip replacement surgery. And I have to admit that my relative comfort level has quite a bit to do with the pain meds I’m on. But irrespective, since I’m capable of moving around and to avoid getting bored, I decided to bake baguettes!
I just pulled those baguettes out of the oven a few minutes ago! You’ll notice the ears on one loaf and just nice openings on the others. I was experimenting with my scoring and wanted to see what a shallow score would produce. I’ll stick with the deeper score. 🙂
Now normally when I bake baguettes, I make a poolish the night before I bake. But I was pretty exhausted last night, so I decided to make a straight dough this morning. Here’s my recipe:
Flour
Water
Salt
Yeast
500 grams
365 grams (85º-90º F)
12 grams
7 grams
This will produce a 73% hydration dough
Measure out your flour into a large mixing bowl.
Add the water and mix until no dry ingredients are present and you form a shaggy dough.
Let the dough rest for 30 minutes (autolyse)
Sprinkle the salt and yeast evenly over the surface of the dough.
Thoroughly mix the salt and yeast into the dough.
Dump the dough onto an unfloured surface
Knead the dough until it just starts getting smooth (about 5-8 minutes). Do NOT overwork it! The moment you start feeling tension in the dough (it feels like you’re fighting it), stop kneading.
Transfer the dough back to your mixing bowl and let it rest for 30 minutes.
Now do a stretch a fold and form the dough into a ball, then turn it over onto the folds.
Allow the dough to rise from 1-2 hours. Check after an hour – you want the dough to have expanded at least 50%. You should see some bubbles formed on top and the surface should be nicely domed. At about 50% rise, you have room for proofing/final rise which I found is critical with baguettes.
If you don’t see much activity, which typically happens on cooler days, do one more gentle stretch and fold and let the dough rise for an hour. But check it at a half hour because sometimes all the little beasties needed was a nudge. 🙂 Again, you want to see some bubbles, but not a preponderance of them.
Gently remove the risen dough from the bowl onto an unfloured surface.
Portion out the dough into four equal pieces. By weight, the pieces should weigh about 213-215 grams apiece. Alternatively, you can portion out into three for a little beefier baguettes (I do this when I’m making baguettes for sandwiches).
Lightly sprinkle the tops of the portioned dough with flour, then pre-shape each into a nice, tight ball.
Flip the balls over on their folds, sprinkle a little more flour on top, then cover with a cloth and bench rest for 15 minutes.
Shape the balls into baguettes. Here’s a simple, yet effective shaping technique from Markus Farbinger. But just take note: When you fold the dough, you want to make sure you’re creating good tension on the skin without tearing it! You don’t want to be lackadaisical with the folding because you won’t get any spring.
If you have a couche, transfer the shaped loaves to the couch (or you can use a well-floured towel) and let them proof for an hour. This is why you don’t want to over-ferment in the bulk fermentation stage.
Preheat your oven to 480 degrees.
Once proofed, transfer the loaves to your peel, score with nice longitudinal cuts, then bake for 15 minutes. Provide steam for the first 15 minutes, then remove the steaming container. Then turn your oven down to 450 for 10 minutes.
You might be wondering why I’m using 7 grams of yeast. You can definitely use less, but it lengthens the timeline. I came up with this recipe specifically because I wanted to produce the bread relatively quickly with limited manipulation because I was literally three days out of total hip replacement surgery. But you know what? I like this process because it produces great results!
What About Using a Poolish?
You can absolutely use a poolish, and that’s my normal method of making baguettes. Typically I use 25% of my total flour for the flour I use for a poolish, and I make the poolish at 100% hydration. I do this the night before I bake and give it about 12-16 hours to ferment. At 12 hours, it will not be sour, but at 14-16 hours, it will get nicely sour, so if you vary the times of the poolish, you can make different flavored baguettes.
If you do use a poolish, you have the option of bumping up the fermentation activity with some yeast, or just let the poolish be the only leavening agent. If you do decide to use a bit of yeast, use no more than 2 grams of yeast because you have a lot of active microbes already in your dough, and you just want to give it a little kick.
Yet Another Word on Flour
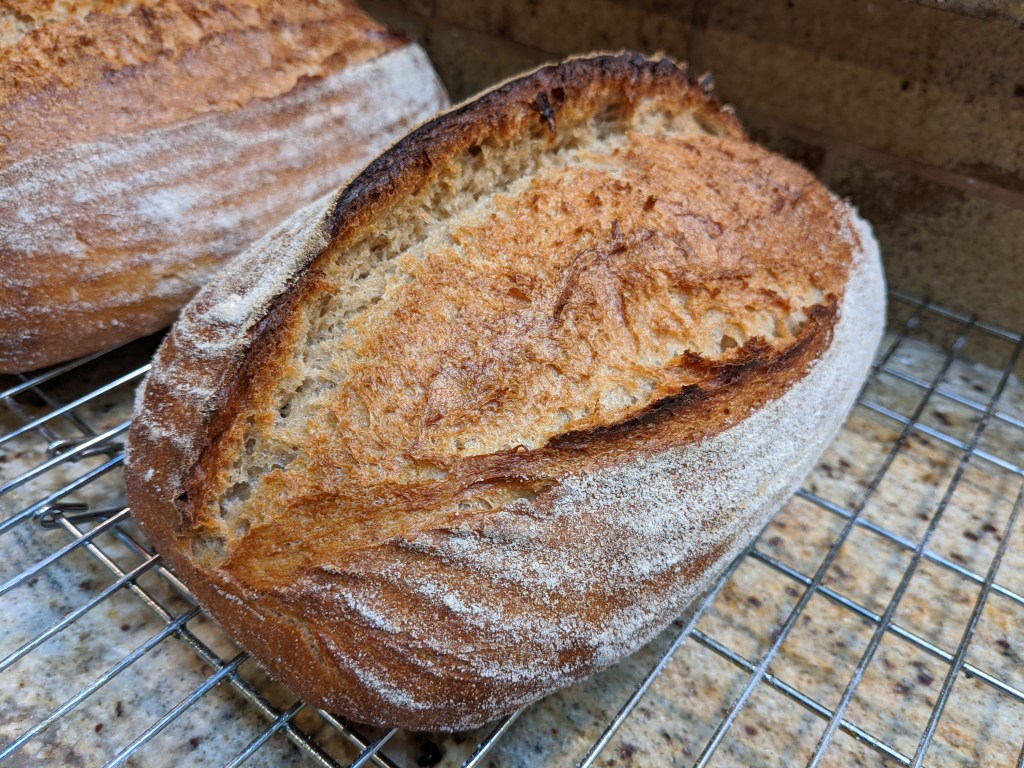
If you read this blog with any regularity, I’m pretty obsessed with flour. Now even though I occasionally make my baguettes with white flour, you all know that my flour of choice is a 75-25 blend of high-extraction flour and white whole wheat flour (the second picture); and specifically, flours produced with the Unifine milling process. I prefer the darker crust it produces (the picture at the top) but more importantly, the nutrition those flours provide.
If you venture into high-extraction flour (Type 85 and above), do not expect to get the kind of open crumb you get with white flour. It just ain’t gonna happen. The particulates in high-extraction and whole wheat flour cut the gluten strands. And if you think working the dough to build more structure will help, it won’t. The strands you do create will be so tight, you won’t get any holes!
This is why I advocate for doing a shorter bulk and a bit longer final proof. This allows the dough to really relax so when you place the loaves in the oven, the final activity before the microbes die will allow for better gas pocket formation.
Celiac disease is thought to affect roughly one percent of the population. The good news: it can be treated by quitting gluten. The bad news: many celiac patients haven’t been diagnosed. The weird news: millions of people without celiac disease have quit gluten – which may be a big mistake.
For years, a very good friend of mine has claimed to have celiac disease. He went to a doctor but wasn’t actually diagnosed to have it, though the doctor did say that he could be one of those folks that has a non-celiac sensitivity to gluten. But he has so thoroughly convinced himself that he has this sensitivity that he has foregone many gluten products like pasta. Frankly, I think his sensitivity is more psychosomatic than anything else. I know that sounds a little insensitive of me, But here’s the rub: He can eat as much of the bread I bake as he wants with no side effects.
What’s actually funny is that even though he gobbles up my bread, he catches himself and says, I really should go easy on this stuff as if he’s telling himself he has this allergy or sensitivity; a belief that is bolstered by all the marketing around “gluten-free” products. It has gotten so bad that some bottled water companies advertise that their water is gluten-free. WTF? The gluten-free craze has really gotten out of hand.
Though I’m no scientist, maybe people’s recent sensitivity to bread has more to do with all the shit that’s put into mass-produced bread, like sugar and vitamins and preservatives. Maybe people’s bodies have absorbed the limit of what they can take and their systems are reacting.
I shared this thinking with my friend and also added that the bread I bake as well as that of other artisan bread makers has just four ingredients: flour, water, salt, and a leavening agent. There are no enrichment materials, no preservatives. The bread we make is made the way bread was originally made for literally thousands of years.
In the excellent documentary series on Netflix called “Cooked,” author of the book on which the documentary is based and star of the show Michael Pollan delves into this subject of how mass-produced bread has taken us away from the traditional healthy aspects of bread. The specific episode is called, “Air.” He too posits that perhaps most people who claim to have a gluten sensitivity may not be sensitive to gluten at all, but all the other stuff that’s present in mass-produced bread, suggesting that perhaps people with a gluten sensitivity try out traditional bread and see how they react.
Having said all that, I don’t want to discount the fact that there are people who have a real intolerance to gluten. But the only way to really know is if you are diagnosed by a doctor with having celiac disease. With respect to my friend, I pointedly asked him, “Did your doctor specifically diagnose you with celiac disease?” He said no, to which I replied that I while I didn’t want to discount his possible sensitivity to bread that it’s telling that he doesn’t react to bread made in the traditional way.
Gluten has really gotten a bad rap. Even I was kind of falling for this gluten-is-bad craze. But that kind of went out the window once I started baking. And I also started becoming a lot more aware and sensitive to the marketing behind the anti-gluten movement. Beware of companies using the term “gluen-free” with products that could never have it in the first place, like… water. Bear in mind that they’re using that phrase to convey that their products are somehow superior because they’re gluten free.
Unfortunately, this kind of marketing has created a paranoia around gluten. Obviously, you’ll have to decide for yourself what direction you take with respect to gluten. For me, after having done a bit of research, I’m not falling for it any longer. And no… I ain’t no conspiracy theorist…
Coming to you live from my hospital bed… I just had a full hip replacement surgery yesterday and the reality is that I will probably be out of commission for the next week to ten days recuperating from the surgery. So I most likely will be in bed. But despite that, I really just want to bake bread.It’s my Zen-thing. It puts me in an emotional and psychological place where everything is in balance and in perfect harmony.
For me, the act of baking bread is almost cathartic. Pent-up stress, anxiety, work-related issues – they’re suddenly released when I start working a dough. From the time I start weighing out ingredients to producing the finished product, I’m in the zone.
And in a very large way, baking is healing for me. I could be in the crappiest of moods when I start making bread, but by the time I’m finished my “baditude” is gone.
There are so many other things I could point out, but irrespective of them, I just want to heal up and get back to baking as soon as I can!
Now that I’m more experienced at bread baking, you could say that being a bit of a Captain Obvious. But when I first started baking it wasn’t at all. I thought I’d just merrily use any old AP or bread flour and that would be that. And it was fine for the first few times. The loaves I made were tasty, if not necessarily aesthetically pleasing to look at; a little misshapen, or risen so much in the Dutch oven that it was a perfect imprint of the inside of the pot, or a replica of a flying saucer.
But as my initial interest starting transforming into the obsession it is now, I started looking into different techniques and ingredients that would improve the quality of the bread I baked, and one of those things was flour.
Like many, I jumped on the King Arthur bread flour bandwagon. It seemed that most home bakers used it and quite frankly, it’s great flour. And for the first couple of months I was baking, I used either that or the KA Special Patent flour which creates a real smooth, fluffy texture as it is geared towards buns and pastries.
But as I’ve shared a few times in previous posts, because of health reasons, I had to seriously reconsider not just the visual and taste quality of my bread but also its nutritional value and quality. So I started to make 100% whole wheat loaves. They looked pretty good, but ugh! They felt a little grainy and also tended to be a little dense as whole grain bread can be.
This led me on a quest for flour that I could work like regular bread flour but had the nutritional value of whole wheat. And that brought me to the flour that I use now and that I’m absolutely crazy about: The Unifine White Whole Wheat and Ultra-Unifine Bread Flour. Used in a 25-75 ratio, I get the feel of working with a bread flour but the nutritional benefits of a whole wheat flour as the bread flour is a high-extraction flour.
But more importantly, the taste of the bread that this combination produces is unlike any bread I’ve ever had. No matter if I create a sourdough or straight dough, I’m always rewarded with a slightly sweet aftertaste and an absolutely wonderful, chewy texture. The Unifine milling process smooths out the particulates in the flour so you don’t get that graininess that you normally feel with whole grain bread. But from a taste perspective, you know you’re eating whole wheat – or at least close to it.
So this is now my master flour despite having claimed that in another post for a completely different combination. And for me, having discovered this combination completely changes the game for me because I can focus all my baking efforts and skill development around working mainly with this flour. It just removes some of the guesswork and I can create a more consistent process.
As some might know, I technically don’t make traditional sourdough in that I don’t maintain a starter culture to inoculate my dough. There are a number of reasons for this which I won’t go into here, but in lieu of a starter culture, I do use a poolish I create the day before I bake, which means I make practically every evening.
I know what you’re thinking. I could just maintain a starter and use the discard every day. But I have to be honest. I don’t want to invest the minimum five days in creating the culture – at least not right now. I’d rather be baking. Plus, as I greatly admire Nancy Silverton who started La Brea Bakery in LA, when I’m ready to do a sourdough starter, really want to try her grape sourdough. It’s pretty amazing. But I digress…
So as I mentioned, I use a poolish as a starter for my breads. A poolish is made from a 50-50 mixture of flour and water, and literally a pinch of yeast (I measure out 0.4 gram). I make mine at about 6-7 PM in the evening, then let it sit in my fermentation bucket on my counter overnight. Then at about 9-10 AM the next day, I prepare the final dough.
Now here’s where I scratch my head. Technically, a poolish is not a levain. A levain has no commercial yeast. And conventionally, a levain equates to a sour taste. This is because the airborne yeasts and lactic acid bacteria work in concert to consume the sugars in the flour and create that sour flavor. But my poolish is sour.
I let my poolish develop around 14 hours. And in that time, the natural yeasts and bacteria have time to activate and make a contribution to the flavor and gluten development in the starter. And it seems that at that point, the predominant microorganisms that act on the dough are the natural ones, not the commercial yeast. But of course, unless I actually do a chemical test, I can’t be absolutely certain.
But if my assertion is true, is my pre-ferment starter a levain at that point? Frankly, it’s not really important at all, but I just like to understand things so it remains a bit of a head-scratcher for me.
And as Nancy Silverton, founder of La Brea Bakery in LA said, “For me when I think of any food product, the most important test is the result, right? And how you got there is sort of incidental…”
When I first heard her say that, it gave me a lot of encouragement because I’ve lately had this feeling that even though I’ve been absolutely methodical and meticulous with my technique, I’ve been a bit unconventional. But the results have been great for the most part and it’s great to hear one of the greats in bread making provide some validation. So I guess I can keep scratching my head about this, but at least I know that the results are what matter.
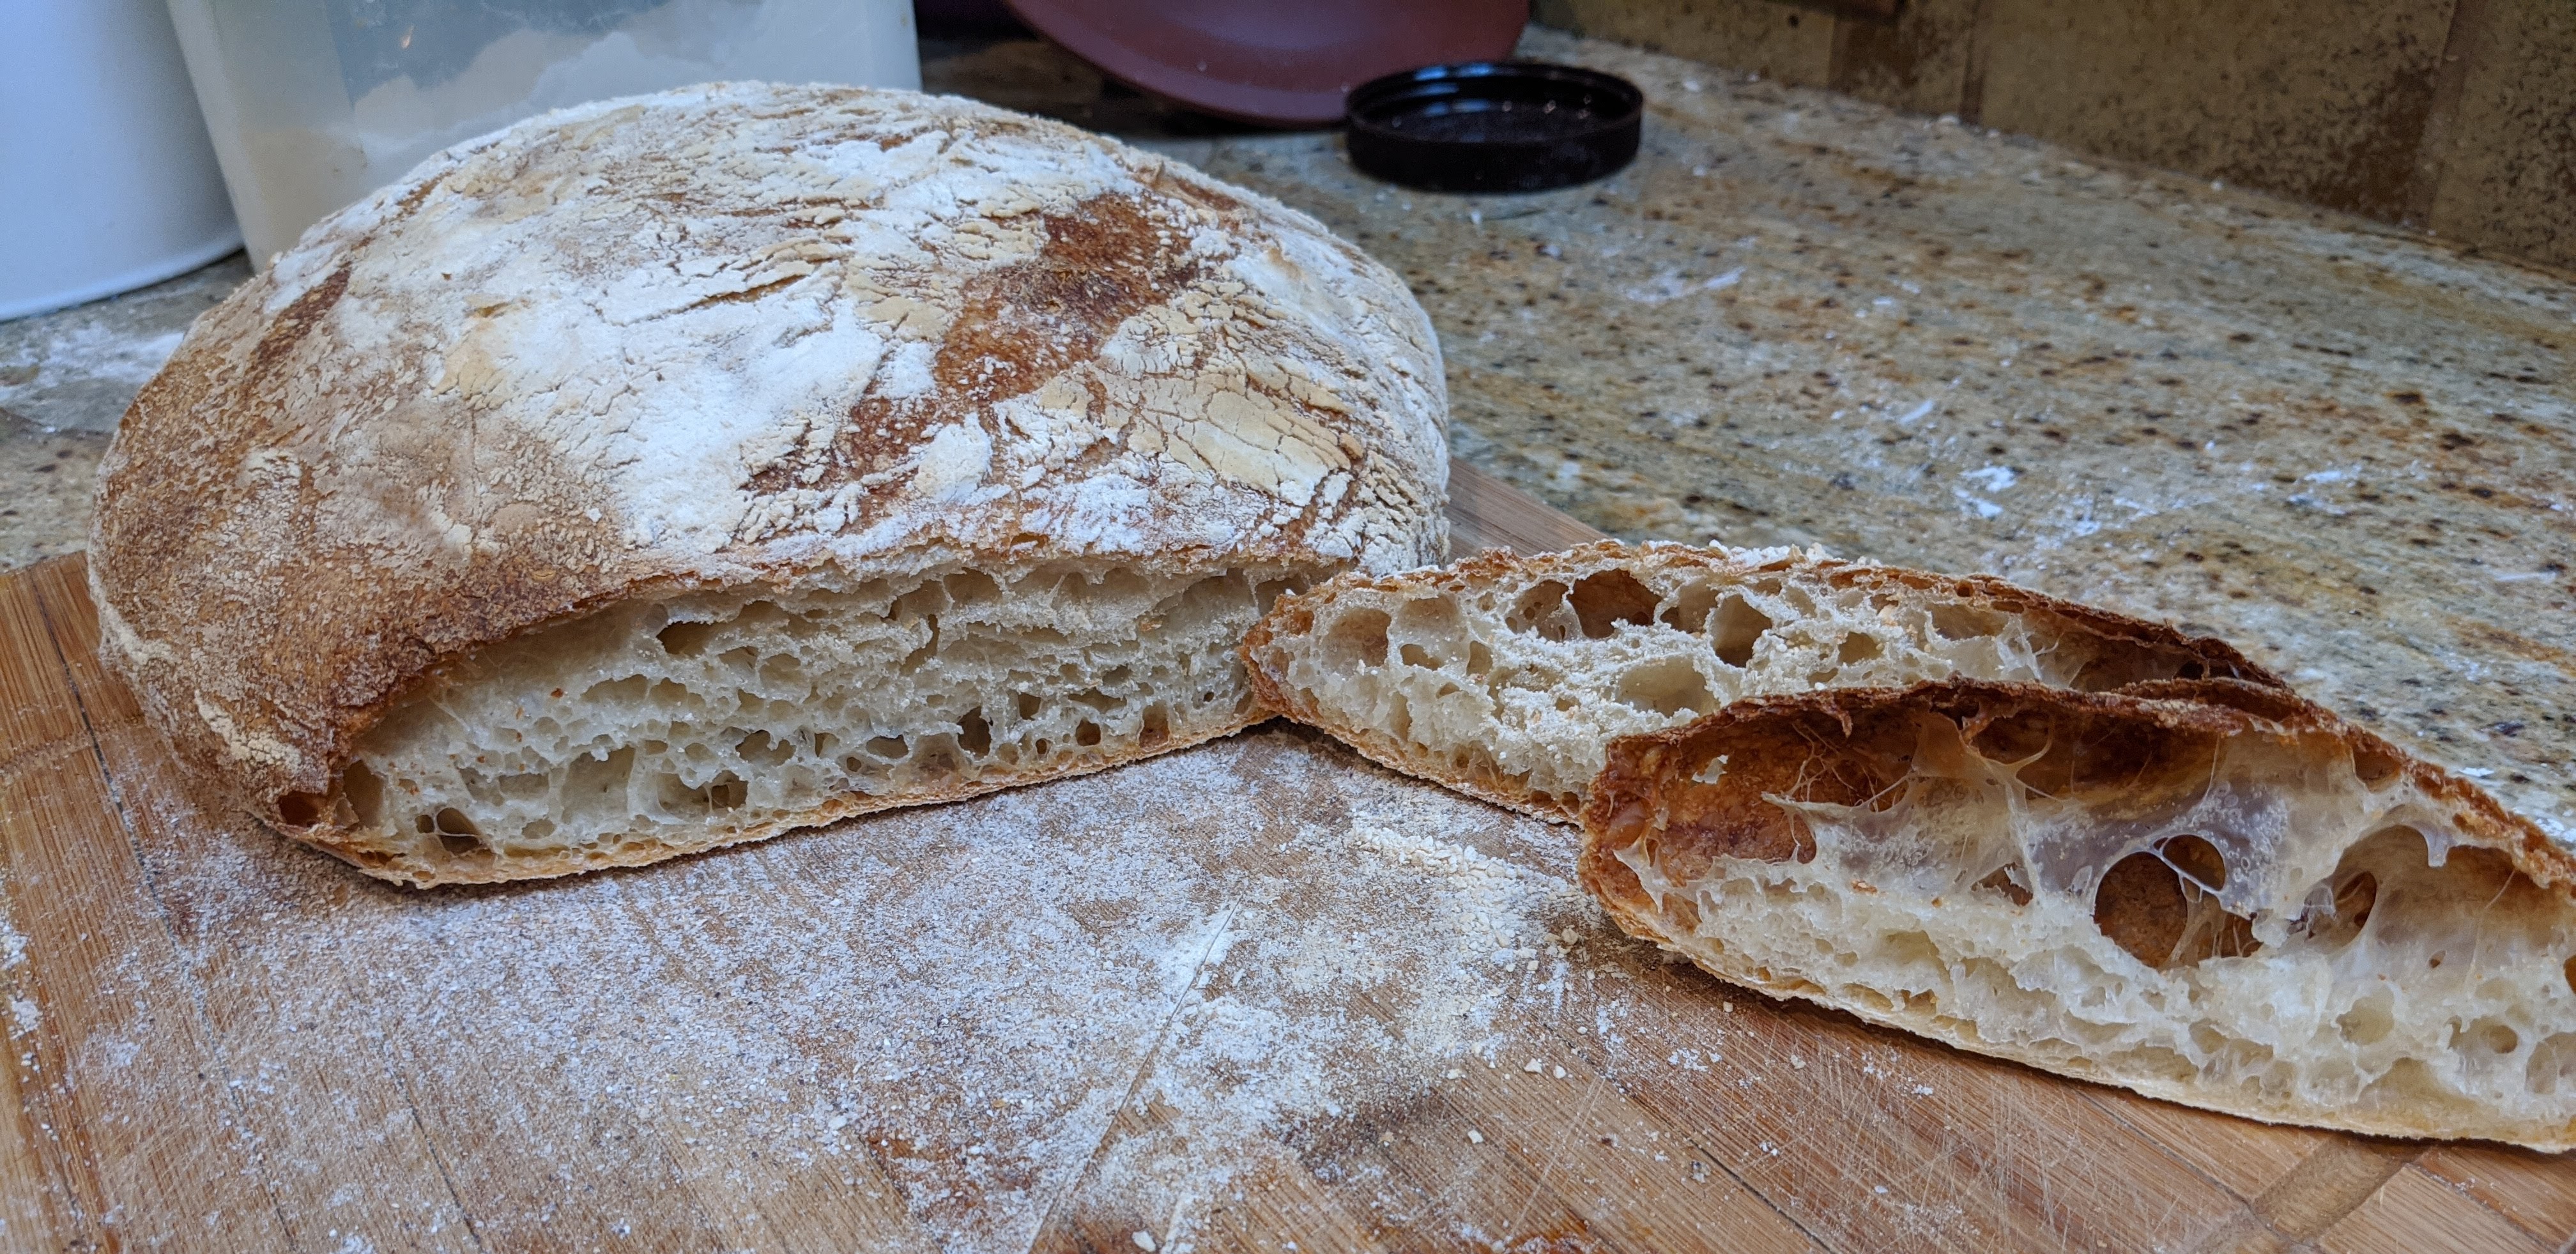
Flat bread… Ugh! You’d think that I’d have learned my lesson about baking in a hot kitchen. Times are MUCH shorter! But NOOOOOOOOOO! I let my dough rise for too long. The hell of it is that it tastes wonderful, but it’s UGLY. It’s like in high school when your friend is setting you up on a blind date and tells you, “She has a GREAT personality!”
My wife cut a slice and told me that it tasted incredible. I was expecting that because I really let my poolish develop for almost 30 hours. I just wanted to have that great taste with a great look! The picture above doesn’t really show just how flat those loaves are. But they’re pretty flat. And mind you, I’m not really pissed off; I’m more amused than anything else, mixed in with a bit of disappointment.
Pre-shaping, the dough was great. But it was hot, and frankly, I probably should’ve only proofed for about 15-20 minutes tops. But I let it go for a full hour and didn’t bother to check. By the time I got to the loaves, they had collapsed. Ugh! Pissed me off, but in a humorous way.
Failure is part of learning. They all can’t be perfect every time. I just have to be more vigilant next time!
I have to admit that I was originally compelled to make bread when I saw a recipe entitled, “Easy Dutch Oven No Knead Bread.” And with that recipe, all you did was mix the ingredients together and let the dough sit overnight. Other than forming the dough into a ball the next day, you don’t touch it. I made it and it’s easy and no fuss. But then after making it a couple of times, I started looking at other no-knead bread recipes and each one of them had some sort of manipulation involved; specifically, stretching and folding. So I set out to understand why these recipes involved folding and not just leaving the dough alone.
And in my research, which also involved making bread from the recipes I encountered, I came to realize that even though the mix-together-and-let-sit-for-24-hours method works because it gives the yeast time to convert the proteins into gluten, it can have inconsistent results. The reason why is that if the dough wasn’t sufficiently mixed with all the yeast distributed evenly through the dough, the rise will be uneven. On the other hand, folding the dough ensures that not only is the dough mixed well just in case I missed some, it also ensures that the yeast gets distributed consistently through the dough.
Now technically, stretch and fold, coil fold, slap and fold and other dough folding techniques aren’t kneading. But they are methods to physically work the dough, albeit a gentler approach than kneading or using a machine which is the most intense way of developing gluten. And no matter how you work it, it’s going to help the yeast evenly distribute throughout the dough and help build up the gluten network.
So given all that, while no-knead can mean fire and forget, to develop a good loaf, you need to work it somehow.
I lurk a lot in online bread baking forums in search of tidbits of information and insights that will help me improve my skills. And though I’ve finally reached a point where I can consistently make a pretty good loaf of bread, I’ve refrained from contributing to public forums. But that doesn’t mean I don’t want to share, which is one of the reasons I devoted this blog to bread baking. A large part of this blog is a diary of the things I discover, the other part of it is sharing the lessons I learned. And a HUGE lesson I’ve learned is this:
With no-knead bread, if you want good oven spring, you have to have achieve sufficient dough strength so the gluten network retains the gases to promote forming gas pockets and be strong enough to hold the dough’s general shape in the first 10-15 minutes of baking.
Just baked yesterday. I did 7 folds over 3 1/2 hours!
Okay, for the experienced baker, this is a given. But for many folks like myself up until recently, it wasn’t an intuitive thing. I now know how to feel that my dough has strength and the telltales, but when I first started making bread, I was just following the recommendations in the recipes I’d follow.
Specifically, I’m talking about the recipes in Flour Water Salt Yeast (“FWSY”) by Ken Forkish, which seems to be the “reference” book for many home bakers. It surely was mine when I first started out. I still follow many of the principles Ken lays out in the book, but after having created dozens upon dozens of loaves over the last few months (I bake atleast two loaves a day), I realized that there was one discussion that was missing in the book, or more implied rather than specifically called out and that is developing dough strength and why it’s important.
On page 35 of FWSY, he has a page devoted to folding. The salient point of the section is in the first paragraph:
Doing this [folding] several times during the bulk fermentation of the dough helps organize the dough’s gluten network, which allows it to holod on to gases produced as the dough ferments… The more complexly knit this network of gluten becomes, the more strength the dough has.
That nails it. And for a more experienced baker, the implication is clear: Developing dough strength gives you a better rise and oven spring.
But for the beginning baker following recipes, they don’t have the experience and, more importantly, haven’t developed the feel for dough strength. So like me, they’ll just follow the recommendations as in the Saturday White Bread which specifies just two folds. But that’s assuming you’re using AP flour or white bread flour. But even with those flours, if you haven’t sufficiently folded the dough and developed the gluten network, even those will collapse or spread out in the oven like the loaf shown below:
As you can see, the crumb on that loaf actually wasn’t all that bad. At first, I thought it was a proofing issue, but if it was, I would’ve gotten a really weird, uneven rise. So after doing a bit of research, I learned that I hadn’t developed enough strength in my dough.
I have to admit that I kind of scratched my head at that discovery because I followed the Saturday White Bread recipe in FWSY absolutely closely. But two folds was just not enough. As a dough expands in the oven, you should get both horizontal AND vertical rise. If you don’t get much vertical rise, it means the gluten network isn’t strong enough to support the vertical height. Also, if you look at the loaf, it’s also not scored on the top. That also could be a contributing factor as there may have not been enough give in the top skin, which forced the bread to expand outward instead of up, but that’s another discussion altogether. For now, we’ll just focus on developing dough strength.
How Do You Know Your Dough Has Strength?
I’m just going to start off by saying that there is no magic number to the amount of folding you need to do. Even Ken Forkish says in the last paragraph of “What Is Folding?” on page 35:
The recipes in this book each give guidance on the time and number of folds recommended, usually specifying a range, such as three to four folds. However, I don’t want to be overly hard and fast with rules about this. When working with your douh, you’ll be able to see the physical change after you’ve folded it. If, based on what you observe, you want to give it one more fold, go ahead and do it.
I remember reading that last line and saying out loud, “What the f$#k am I supposed to observe?” But despite that, I went on reading because I thought he might delve a littler deeper into the observation. Unfortunately, that’s about as far as he went with it.
So I had to do a bit of research and did a lot of baking and have a couple of telltales that I use to make sure I’ve developed enough strength in my dough.
The first test is a common one that you’ll probably see online – a lot. It’s known as the windowpane test. Basically, you take a hunk of your fermenting dough and stretch it. If you can stretch it into a thin membrane (window) without it tearing, then you have good dough strength.
But there’s also a way to feel the strength developing when you’re doing your stretch and folds that I use to gauge how far along my dough is. When it’s time to do a stretch and fold, if, when you do the first stretch, the dough stretches really easy and you can stretch it to two times the width of the dough ball, it’s likely not strong enough. And when you finish the last fold, if the whole dough ball doesn’t want to come along when you pull, you don’t have enough strength in your dough.
Furthermore, when you stretch and fold, you’re supposed to turn the dough over onto the folds after you’ve formed a ball. You should be able to do this easily if your dough is strong. But if you finish and the rest of the dough settles back, then you don’t have enough strength and you’ll need to do more rounds of folds.
That said, if you’re working with a super high-hydration dough (like above 80%), your dough will have a tendency to collapse, no matter what you do. But when you stretch high-hydration dough, the dough mass should come along with your stretch. If it shows signs of tearing, you’ll need more folds.
For this very reason, as opposed to following the guidelines in FWSY, I’ve taken the Tartine Bakery approach where they do 6 folds over the course of 3 hours, doing one every half-hour. I know, that’s very involved. By the time you do the last stretch and fold, you can really feel the resistance!
Folding Forms the Foundation
A lot of emphasis is put on shaping and creating a taut skin to get a good oven spring. No doubt, it is critical. But if you don’t have the good foundation of a well-developed gluten network with which to start, you won’t get as good an oven spring. It’s really the combination of a well-developed gluten network AND a nice, tight skin that will give you great oven spring, at least as far as structure is concerned. There are other factors as well, but those are beyond this particular discussion.
For me, I started getting great oven spring when I started to trust what I was feeling in the dough as I folded it. Was it too easy to stretch? Did it feel like tearing? Or did it put up some resistance and want me to take the whole dough ball in one pull? These questions led me to fold the dough more than the prescribed or suggested amount of folds in FWSY, and since then, I haven’t had to worry that my loaves will collapse, even with really wet dough. And especially now that I’m using a whole wheat and high-extraction flour combination, those extra folds have worked wonders with my oven spring.
I thought that maybe it was my folding technique that was flawed. But as I mentioned in a previous article, this is exactly what they do at Tartine Bakery!
Now all that said, I’m only sharing what works for me. You may do fewer folds and still get great results. The great thing about making bread is that though there is a certain exactitude to the process, there’s also a lot of variability. So what may work for some, may not work for others and vice-versa.
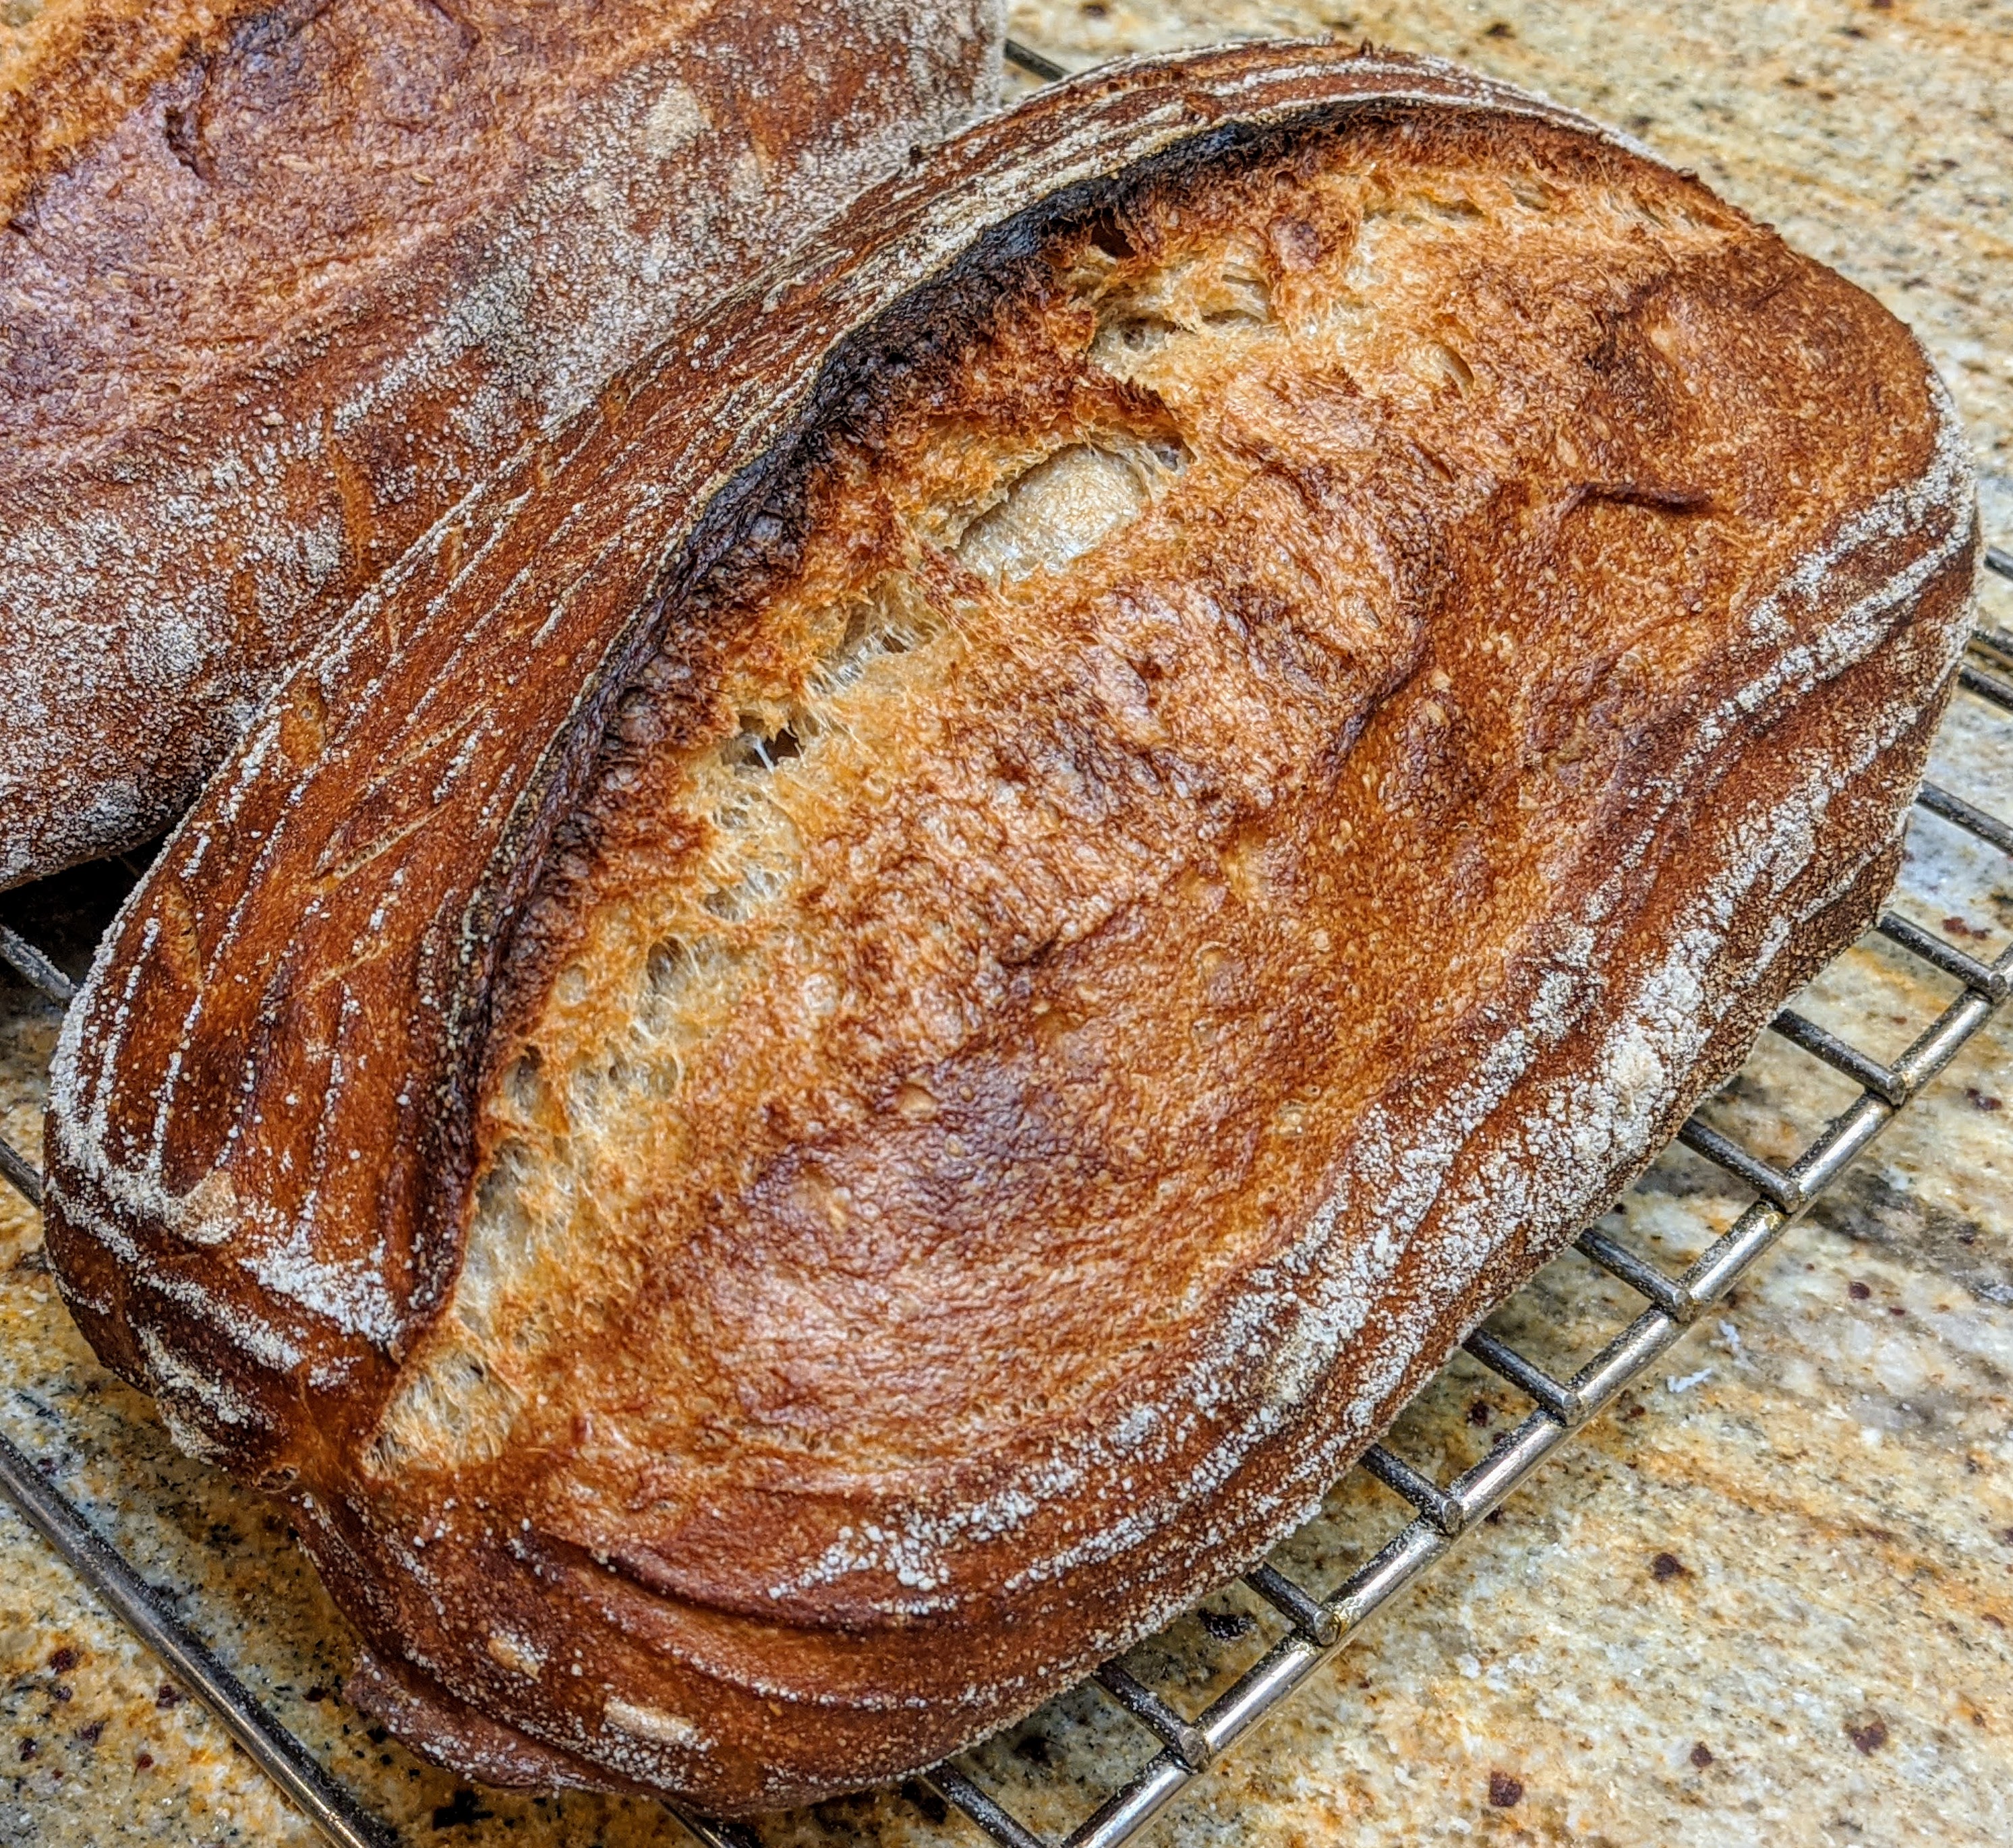
I purposely put quotes around “Sourdough” because even though the bread has a slightly sour taste, it is not made from a levain, but from a pre-ferment; specifically a poolish. What? Sourdough bread from a poolish? Well, give it a bit of time and it’ll turn sour, then when added to the final dough, that will give the microbes plenty more to feed on, and it’ll produce a very pleasing, sour taste throughout the loaf.
One might argue that a bread like this will not be as complex in taste as a traditional sourdough bread. But I disagree. Just as with cooking, complexity can come from several sources. I’ve joined the school of thought that doesn’t depend solely on the microbes to provide the flavor complexity. The combination of the flours I use plays an immense role in influencing the flavor and texture of the bread.
If you read this blog, you know I’ve written another batard with poolish recipe. That one works great, and even though the proportions are exact, the fundamental difference with that recipe and this are the number of stretch and folds that are done with this recipe. The original had just four folds, this has six. The extra two folds make a HUGE difference in the structure of the dough!
Here’s the recipe:
Flour
Water
Salt
Yeast
Poolish
250*
250
0.40
Final Dough
750**
500†
19
2.6***
Totals
1000
750
19
3.00
Bakers %
100.00%
75.00%
1.90%
0.3%
* Whole Wheat Flour (fine or extra-fine ground) ** You can use regular, high-protein bread flour here, but I recommend using a high-extraction flour such as Type 85. *** Add a bit more yeast (up to a gram) if your kitchen is around 70-degrees. The amount listed here is for 75+-degree kitchen, like mine is in the summer.
†You really want to have your dough be in the 75-80 degree range. So take the temperature of your flour with a food-grade thermometer, then use the table in this article to determine what your water temp should be.
In a separate container, make the poolish mixing everything together until smooth. This is wet, and you don’t want any lumps.
Allow the poolish to rest for at least 12 hours, but probably not more than 16 hours. With this long of a resting time, make the poolish at about 8-9 PM at night, and it’ll be ready in the morning.
When you’re ready to make the final dough, transfer the poolish to a large mixing bowl or a stand mixer bowl. Add most of the water and whisk until the poolish is dissolved. Then use the rest of the water to rinse out your poolish container so you get everything.
Add the flour to the poolish mixture, and combine until there are no dry spots. It’ll be shaggy. Cover the bowl with a damp cloth or plastic wrap and let it autolyse for 30 – 45 minutes. It’s important not to mix to a smooth state because all we’re trying to do here is help the flour with water absorption and not start to develop the gluten structure. Note that with the poolish in there, fermentation will start, but that’s okay.
Once autolyse is complete, sprinkle the salt and yeast evenly over the top of the dough and start mixing until smooth. Admittedly, I do this with a stand mixer because it does it better than I can with my hands. I used to do this step with my hands but using a stand mixer saves me a little time; especially when the bulk fermentation takes over three hours.
One the mixture is smooth, transfer the dough to the container you’ll be using for fermentation. Once transferred, immediately do a stretch and fold of the dough to form it into a ball. Then turn the ball over onto its folds. I use Ken Forkish’s stretch and fold technique and stretch and fold in my fermentation container. There are lots of others but I started out with Ken’s technique and it’s what I’m used to. In any case, once you’ve done the stretch and fold, cover your container and put it a place where you can reasonably maintain the temperature of your dough.
Repeat step 6 every half hour for the next 3 hours. Yup… you read that right. This one takes time, but it is SO worth it! Also, note that you want to treat the dough gently and not degas it. When you stretch and fold in the bulk fermentation stage, you want to be gentle and not tear or press down on the dough.
After the last fold, let the dough rest for 45-60 minutes. You should see nice bubbles in the dough, but it shouldn’t be going crazy. Your dough should be a bit jiggly from the air pockets that have formed.
Now, carefully pour the dough onto an unfloured work area. You don’t want to degas it and ruin all the work the microbes have done. Divide the dough into two reasonably equal portions, then lightly flour the tops of the pieces. These will be the tops of your dough.
Take a portioned piece and flip it over onto the floured side (with a little flour on your board). Try to gently move the dough. If it sticks, just lift it up and sprinkle some flour underneath the sticky area. Pre-shape the piece into a nice, tight ball then flip it over onto the seams. Repeat this with the other piece.
Lightly flour the tops then cover with a floured cloth and let them rest for 15 minutes.
Once the balls have rested, shape them into the type of loaf you want and place them into an appropriate proofing container, seam side up.
Place the containers in separate plastic bags, then put them in a cool, dark place place to proof for up to 2 hours. Check after an hour though and if your dough passes the finger dent test, then it’s ready to bake.
While the dough is proofing, preheat your oven to 475-degrees. If you’re using a Dutch oven, place it in the oven now. I use a baking stone and it needs a minimum of an hour to come to temp. If using a baking stone, also place a metal baking pan (I use a 9″ cake round) on the bottom rack of the oven.
Baking
Dutch Oven
Remove your preheated Dutch oven from your oven, then place a loaf directly into it. Carefully score the top of the bread, cover the pot, then put it back into the oven. Bake covered at 475-degrees for 20 minutes, then uncovered for 10 minutes to harden the crust.
If you only have one Dutch oven, then pop the other container in the fridge while the first loaf is baking. Once it’s done, you can transfer the chilled dough directly to the Dutch oven.
Baking Stone
Before you transfer your loaves to your peel, put about a cup of hot water into the metal baking pan to start generating steam. If your oven doesn’t have heating coils at the bottom, you can help with the steam by pouring a little on the bottom of the oven. Immediately close the door, so your loaves will enter a humid environment.
Now, transfer your loaves to your peel, then score the loaves. Now, as quickly – and safely – as you can, place your loaves onto your baking stone and get the door shut as quickly as you can. You can do the water at the bottom of the oven to get the steaming process going again.
Bake at 475-degrees for 35 minutes.
After 20 minutes, remove the water pan from the oven to allow the crust to set and harden for the last 15 minutes.
Final Thoughts
The cool thing about this is that with the stretch and folds, I recently started doing this because my previous loaves kept on collapsing on my peel. You have to expect a little collapse, but these were laying out too much. It was perplexing because I knew I nailed the proofing times and I’d get a big ear and an open crumb – just not much vertical rise. So I thought I needed to work the dough a bit more to get some more structure.
It turns out that this is exactly what the famous Tartine bakery in San Francisco does! I just read several Tartine recipes by various people (yes, even the famed NY Times recipe) and each had six stretch and folds over the course of three hours! Pretty awesome!