My Dirty Little Secret

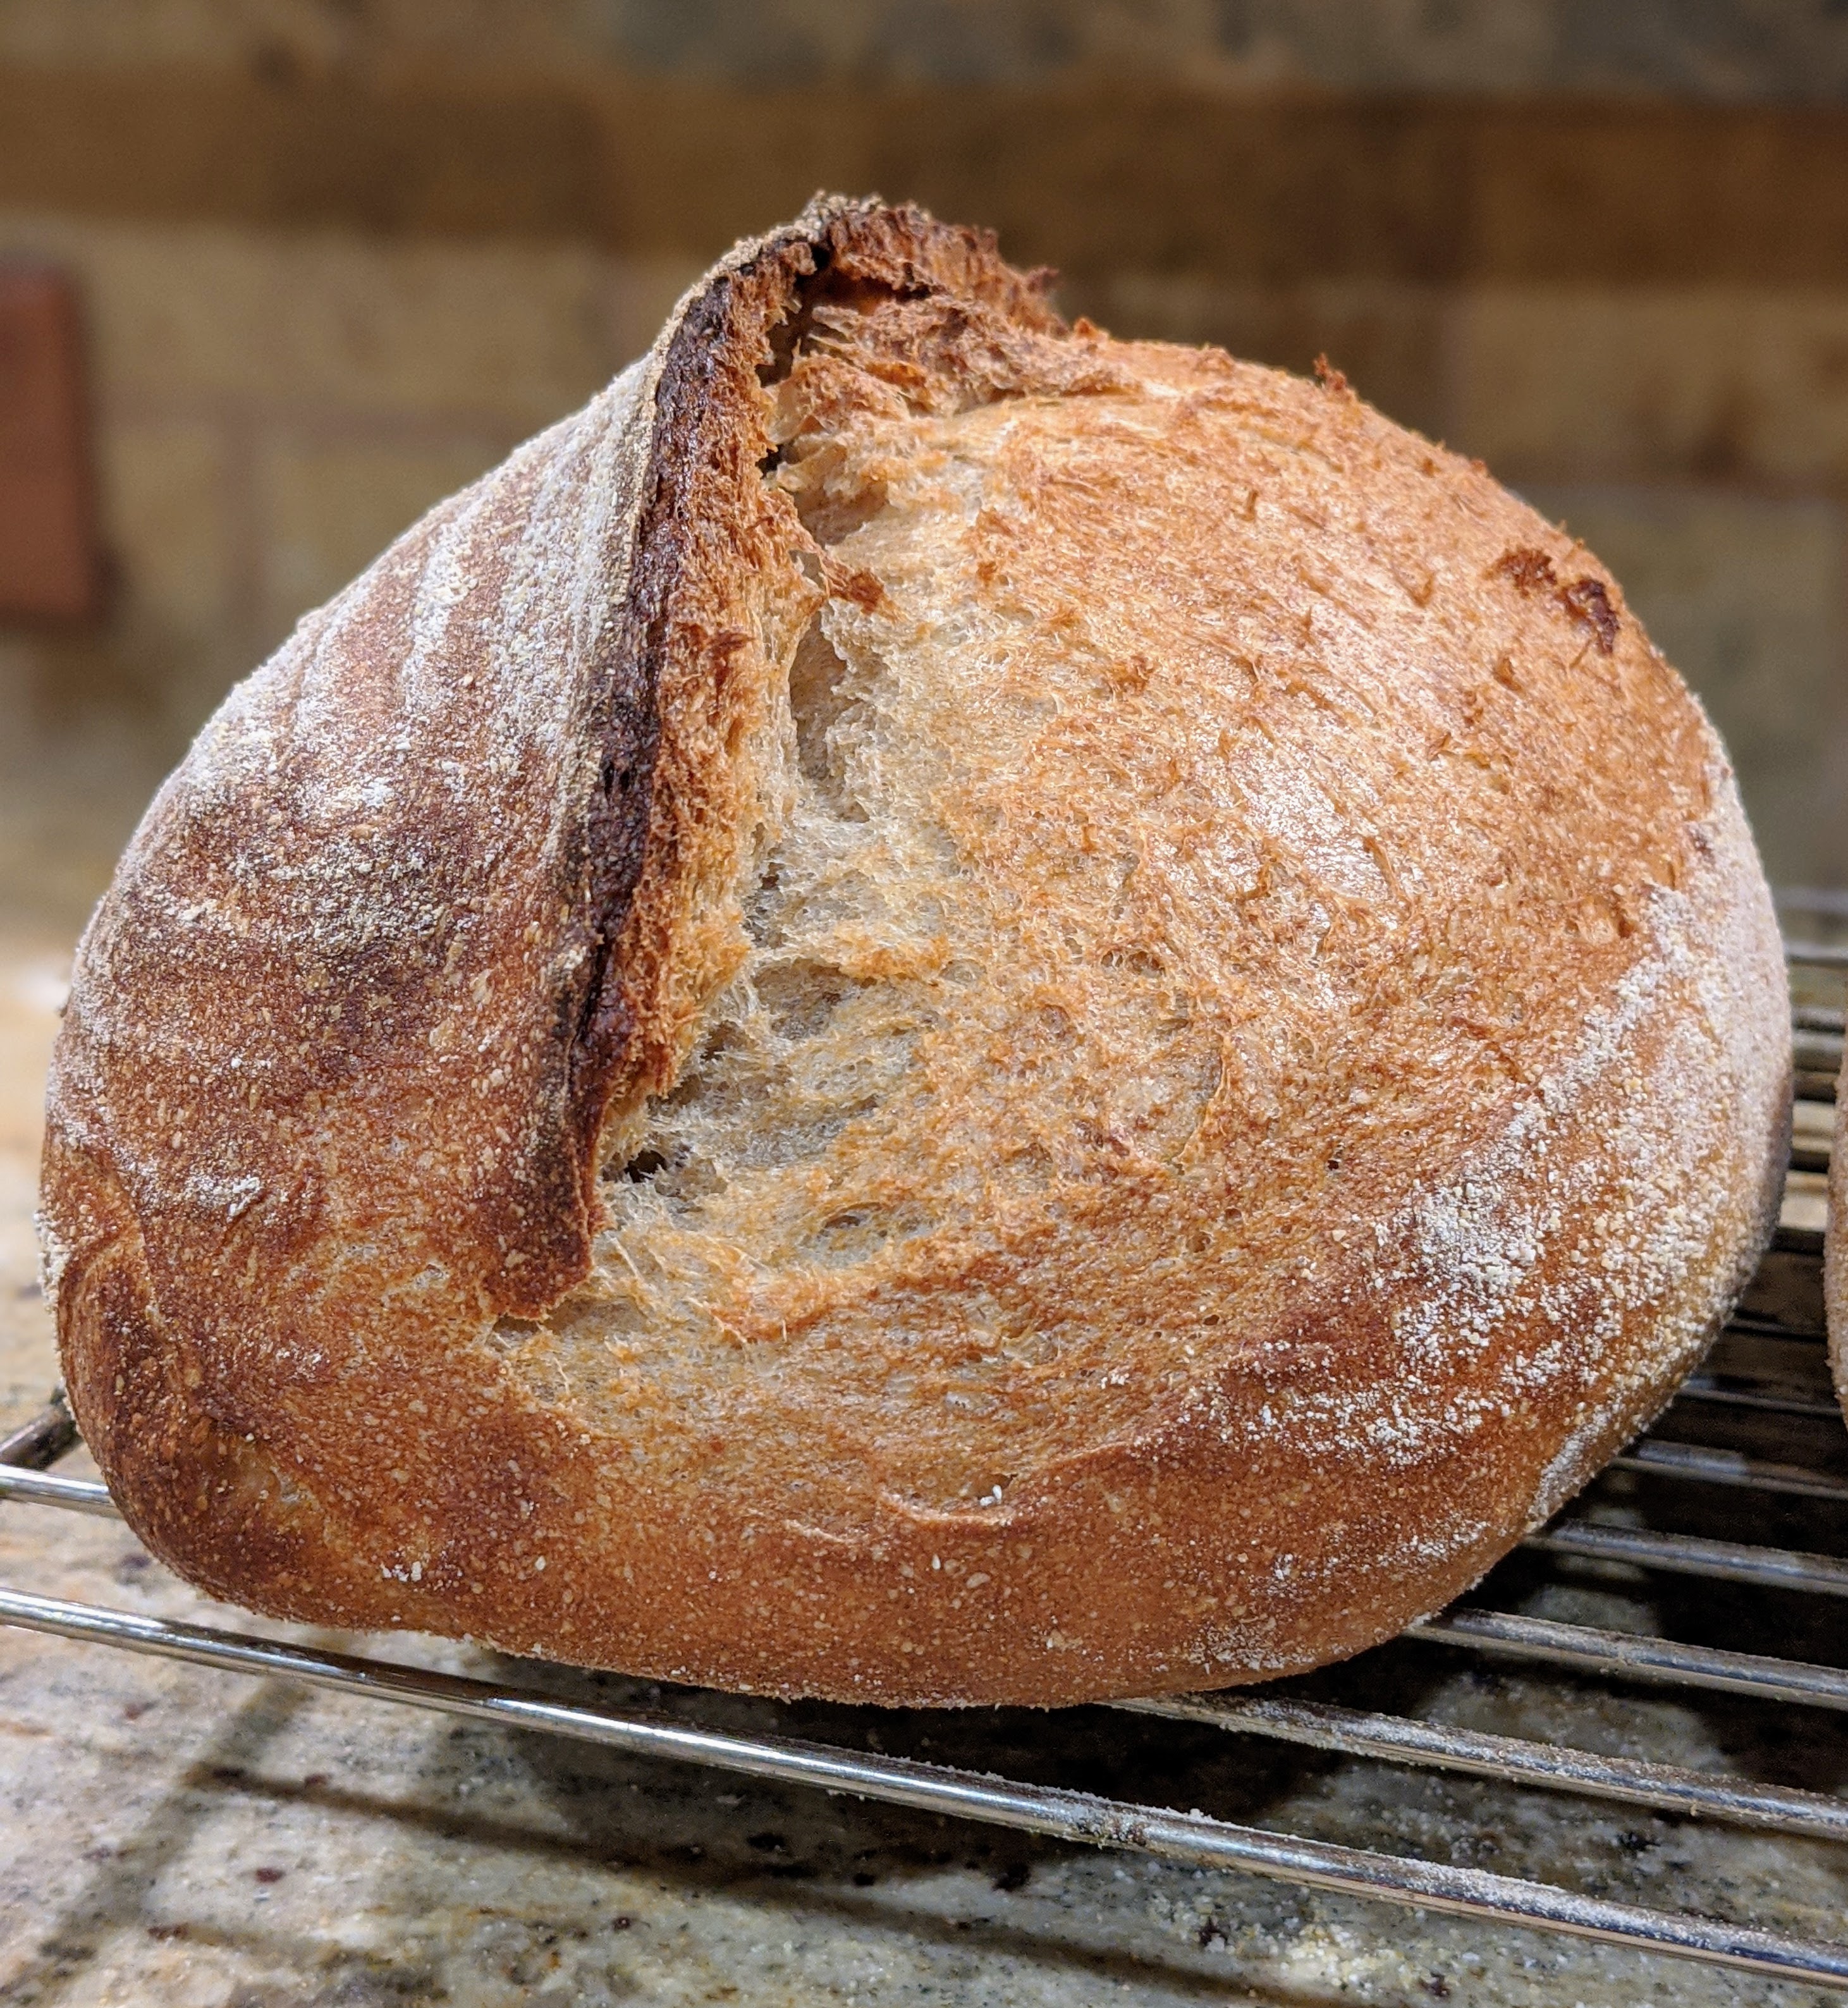
If I could point to one positive thing about this pandemic lockdown it has to be that it has given me time to master a few different styles of bread. I’ve reached heights of quality and consistency in my baking that I didn’t think possible just six months ago. Though I no longer use a Dutch oven and bake on a stone, all my loaves basically come out the same in appearance and taste and texture. And I’ve also gotten to the point where I know exactly what to tweak to get a particular result.

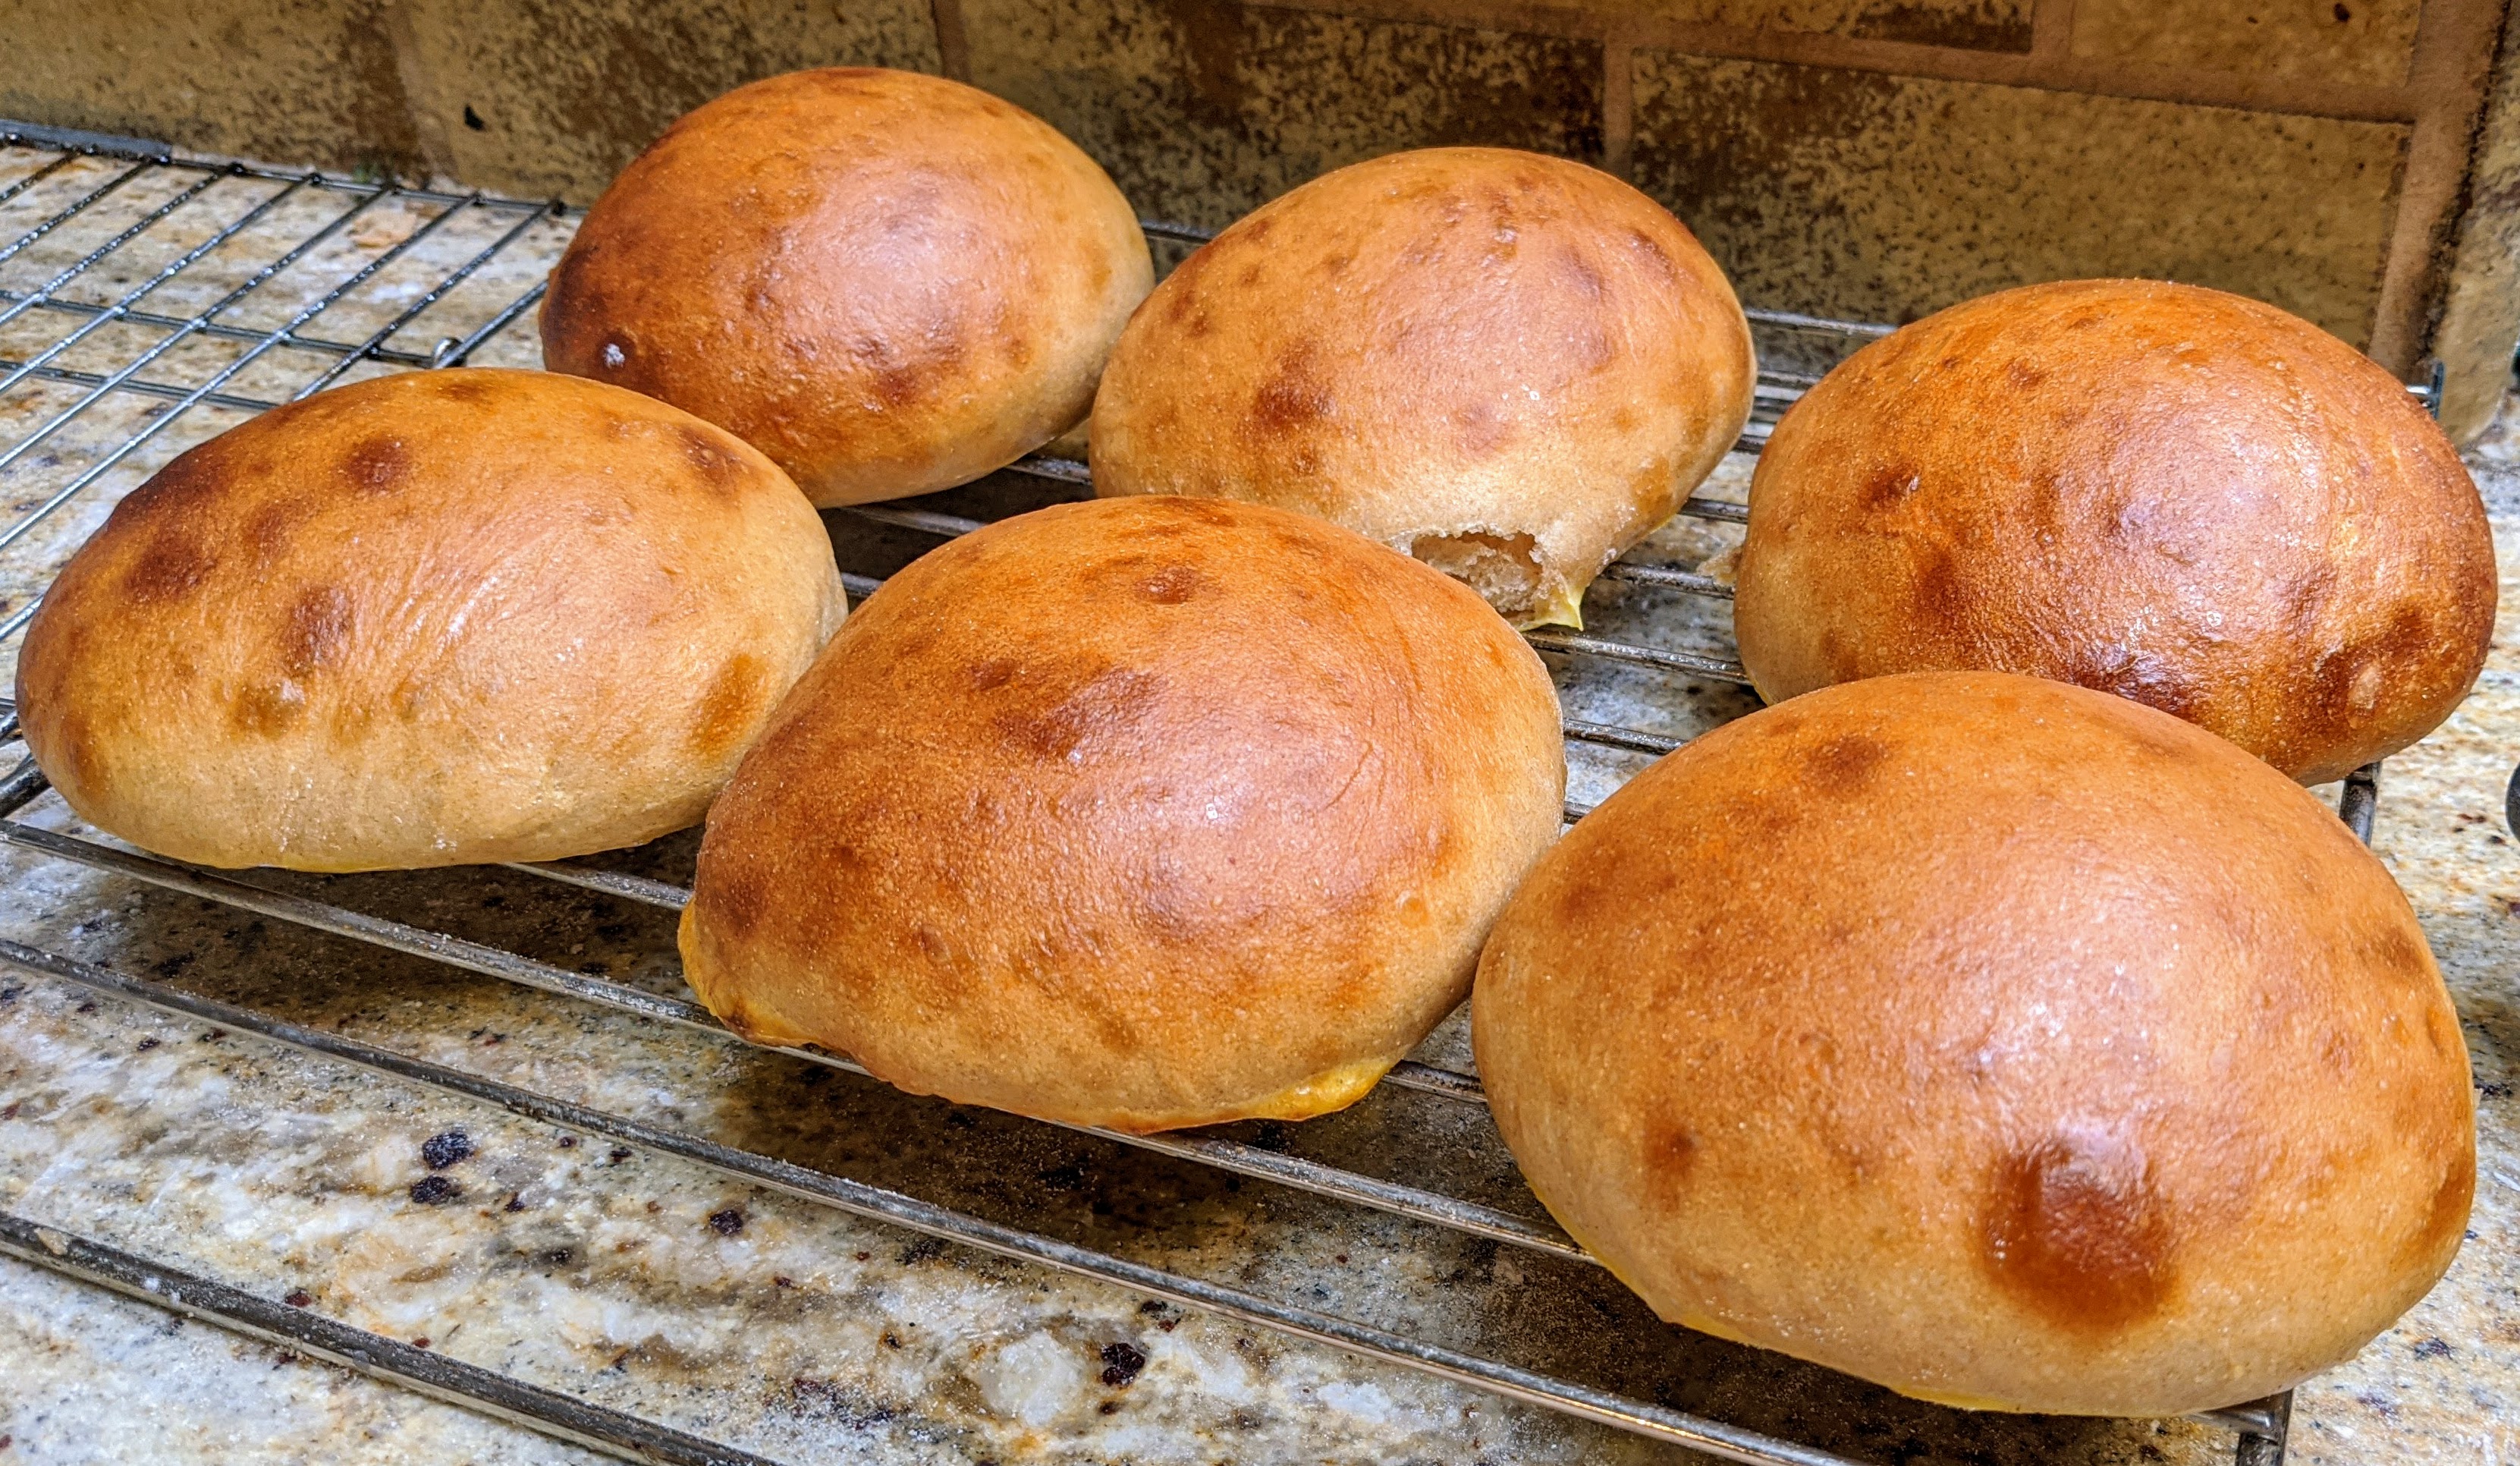
Don’t get me wrong. I’m not trying to brag on myself. But the plain fact of the matter is that I bake bread at least 6 days a week, ranging in quantity from 2 to 12 loaves. So naturally I get a lot of practice; not nearly as much as I would in an actual commercial artisan bread bakery, but enough practice to where I’ve developed a comparatively high degree of skill.

So one would assume that with all the bread that I bake that I have this super starter that I keep alive and have grown from scratch to give me my signature taste. But I don’t have one, and as I admitted to a close friend of mine last night, I really don’t have any intention of getting one started very soon. I know that I have mentioned in the past that I will eventually get around to making a levain, but the truth is, I’m having too much fun and too much success with my bread to even consider it.

So here’s my dirty little secret: None of my bread is made with a sourdough starter, nor do I in the immediate future intend to start and grow one. So there! 🙂

I used to think that not going down the whole sourdough starter route made my bread less “artisanal,” so I didn’t openly admit that I didn’t use one. I’d say that I have a culture in my fridge that I was intending to use. But truth be told, it has been sitting in my fridge for months now, and though it’s not dead (yeast and microbes go dormant, not dead), it’ll take at least a week to revive it. That’s a week I don’t want waste.

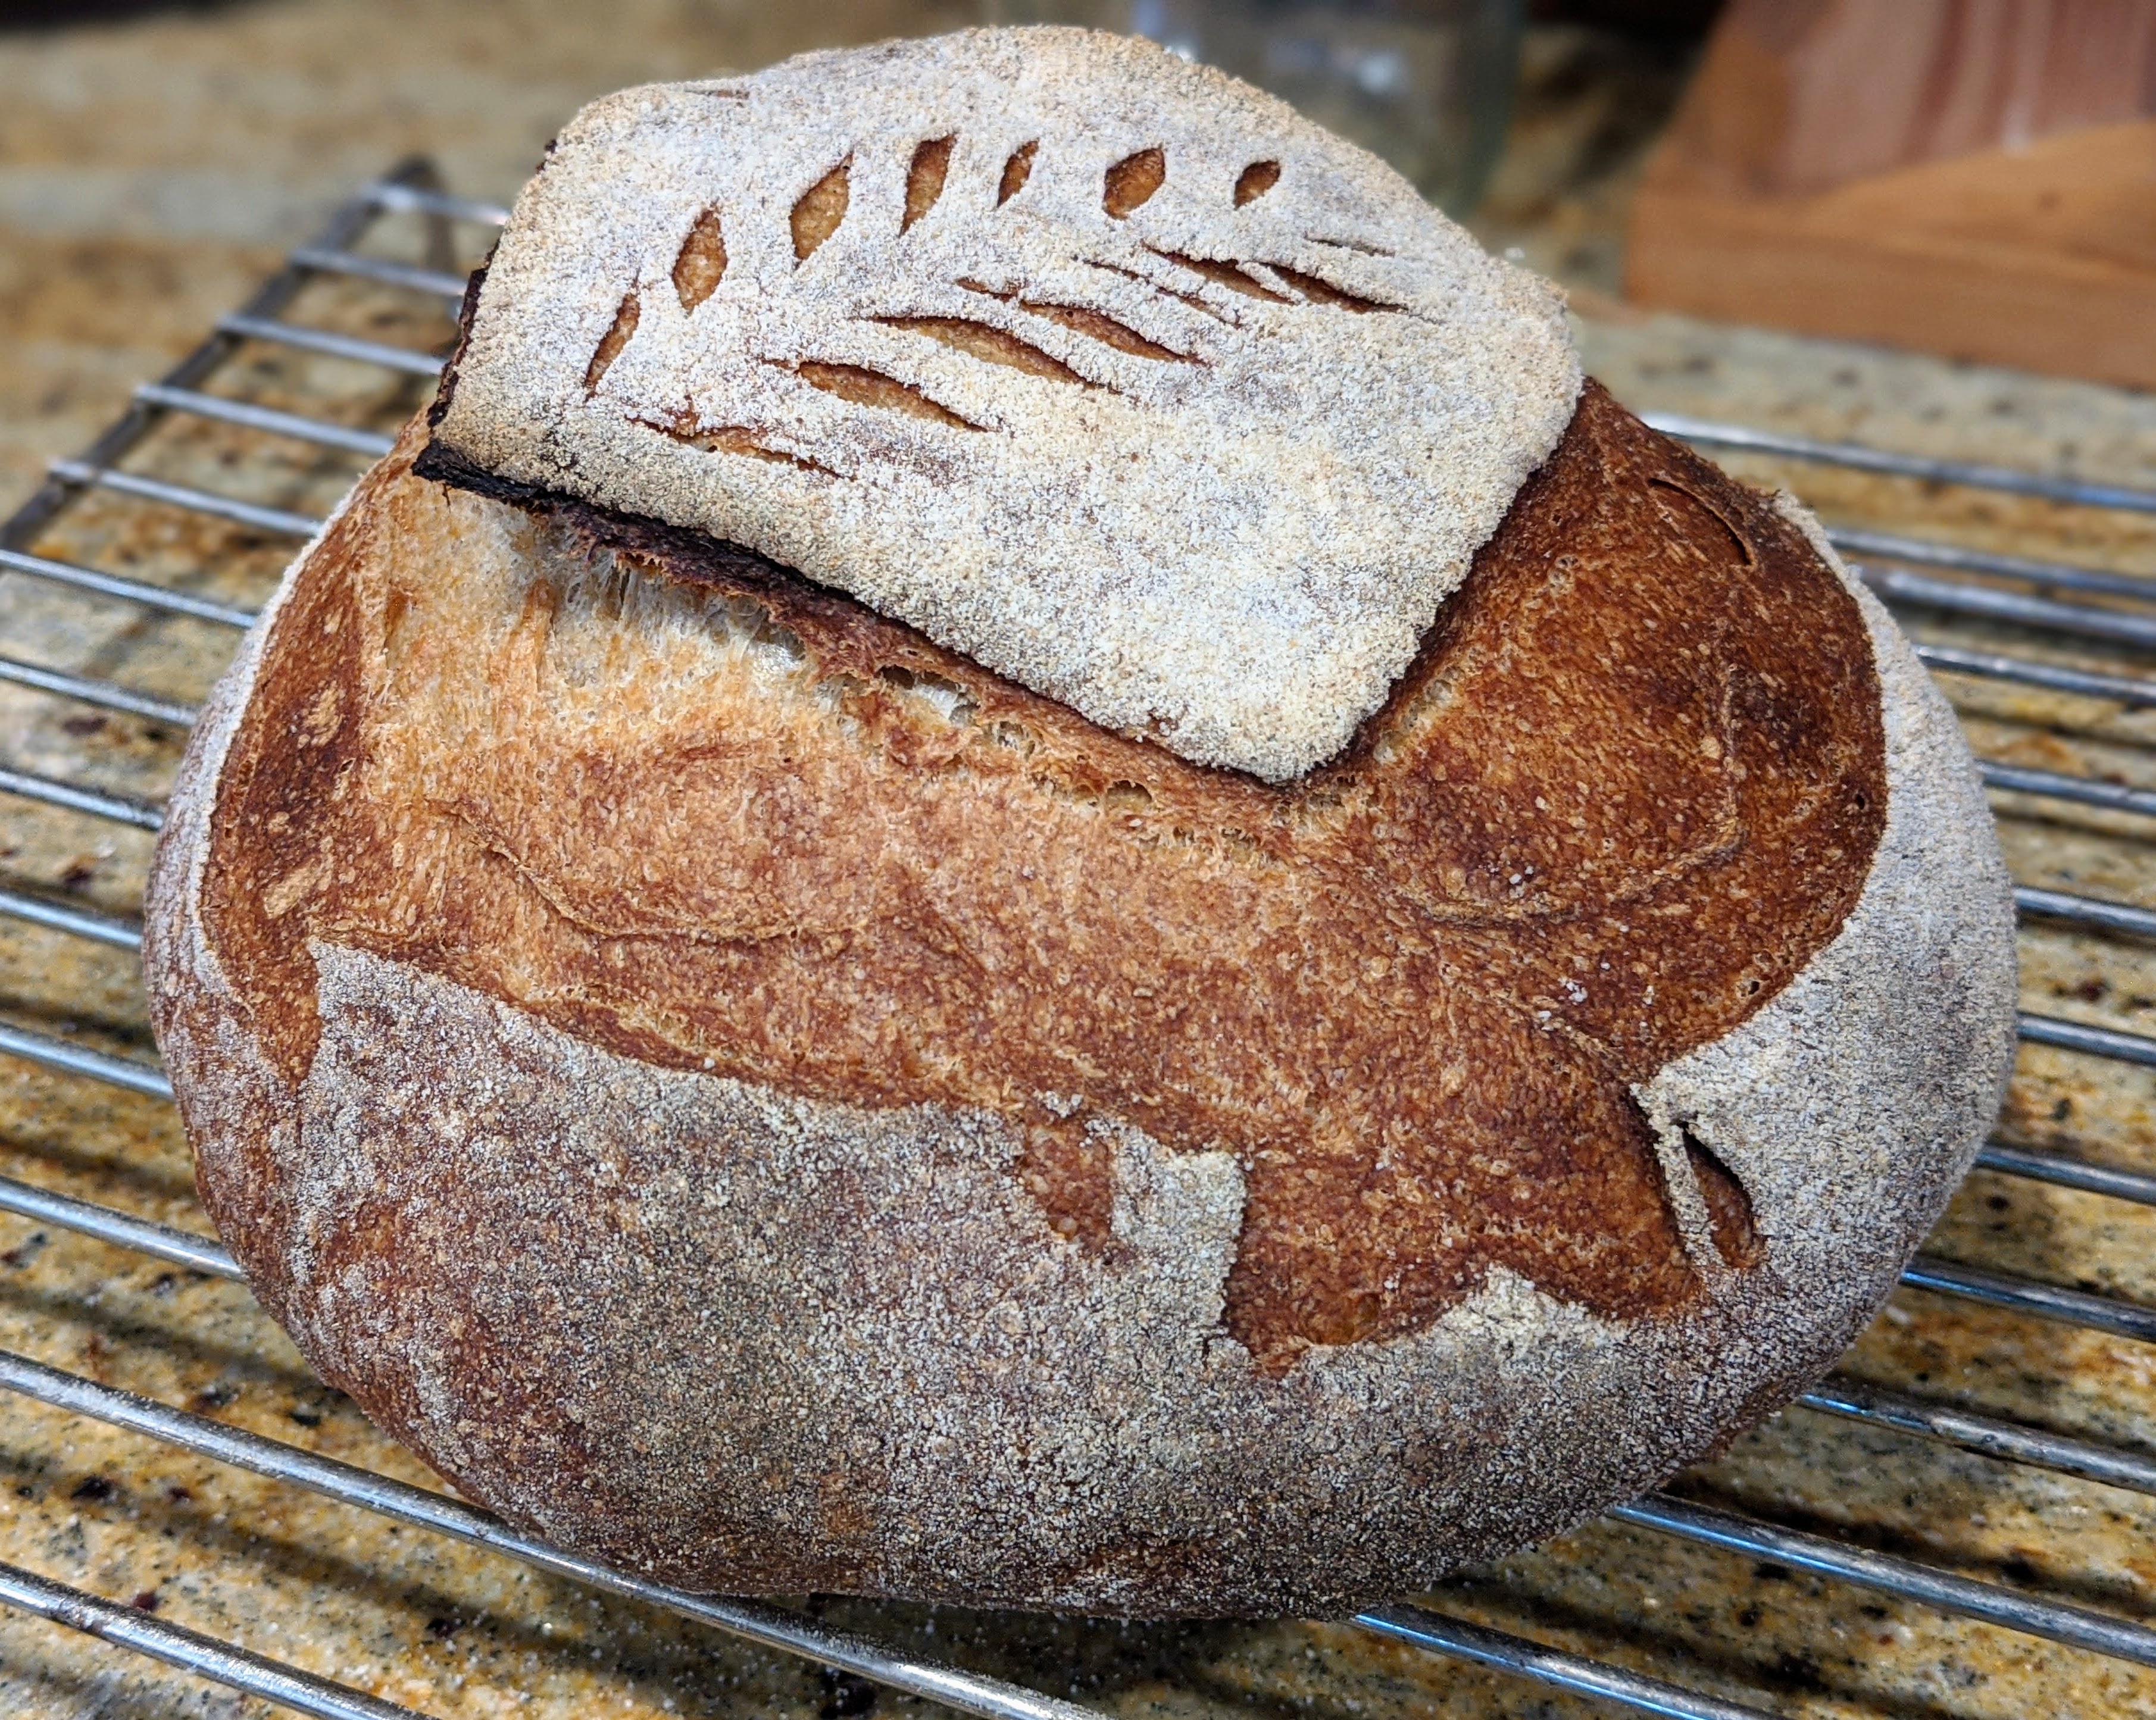
Furthermore, as I’ve dived deeper and deeper into the artisan bread making rabbit hole, I’ve realized that there’s really no formal definition for “artisan bread.” The only common factors are that it is made up of only flour, water, salt, and a leavening agent (with no chemical additives) and that it is handmade; well, at least the shaping part. Hell! Even commercial artisan bakeries use mixers for at least part of their process. 🙂 So I figured that if I’m meeting those informal criteria, my sourdough starter-less bread is no less artisanal than one made with a levain.

People have debated with me that a sourdough starter makes their bread more complex and nutritious. But as I’ve mentioned previously, I have spent a lot of time introducing complexity and nutrition through other factors such as flour mixtures and varying my pre-ferment fermentation times, among other things.

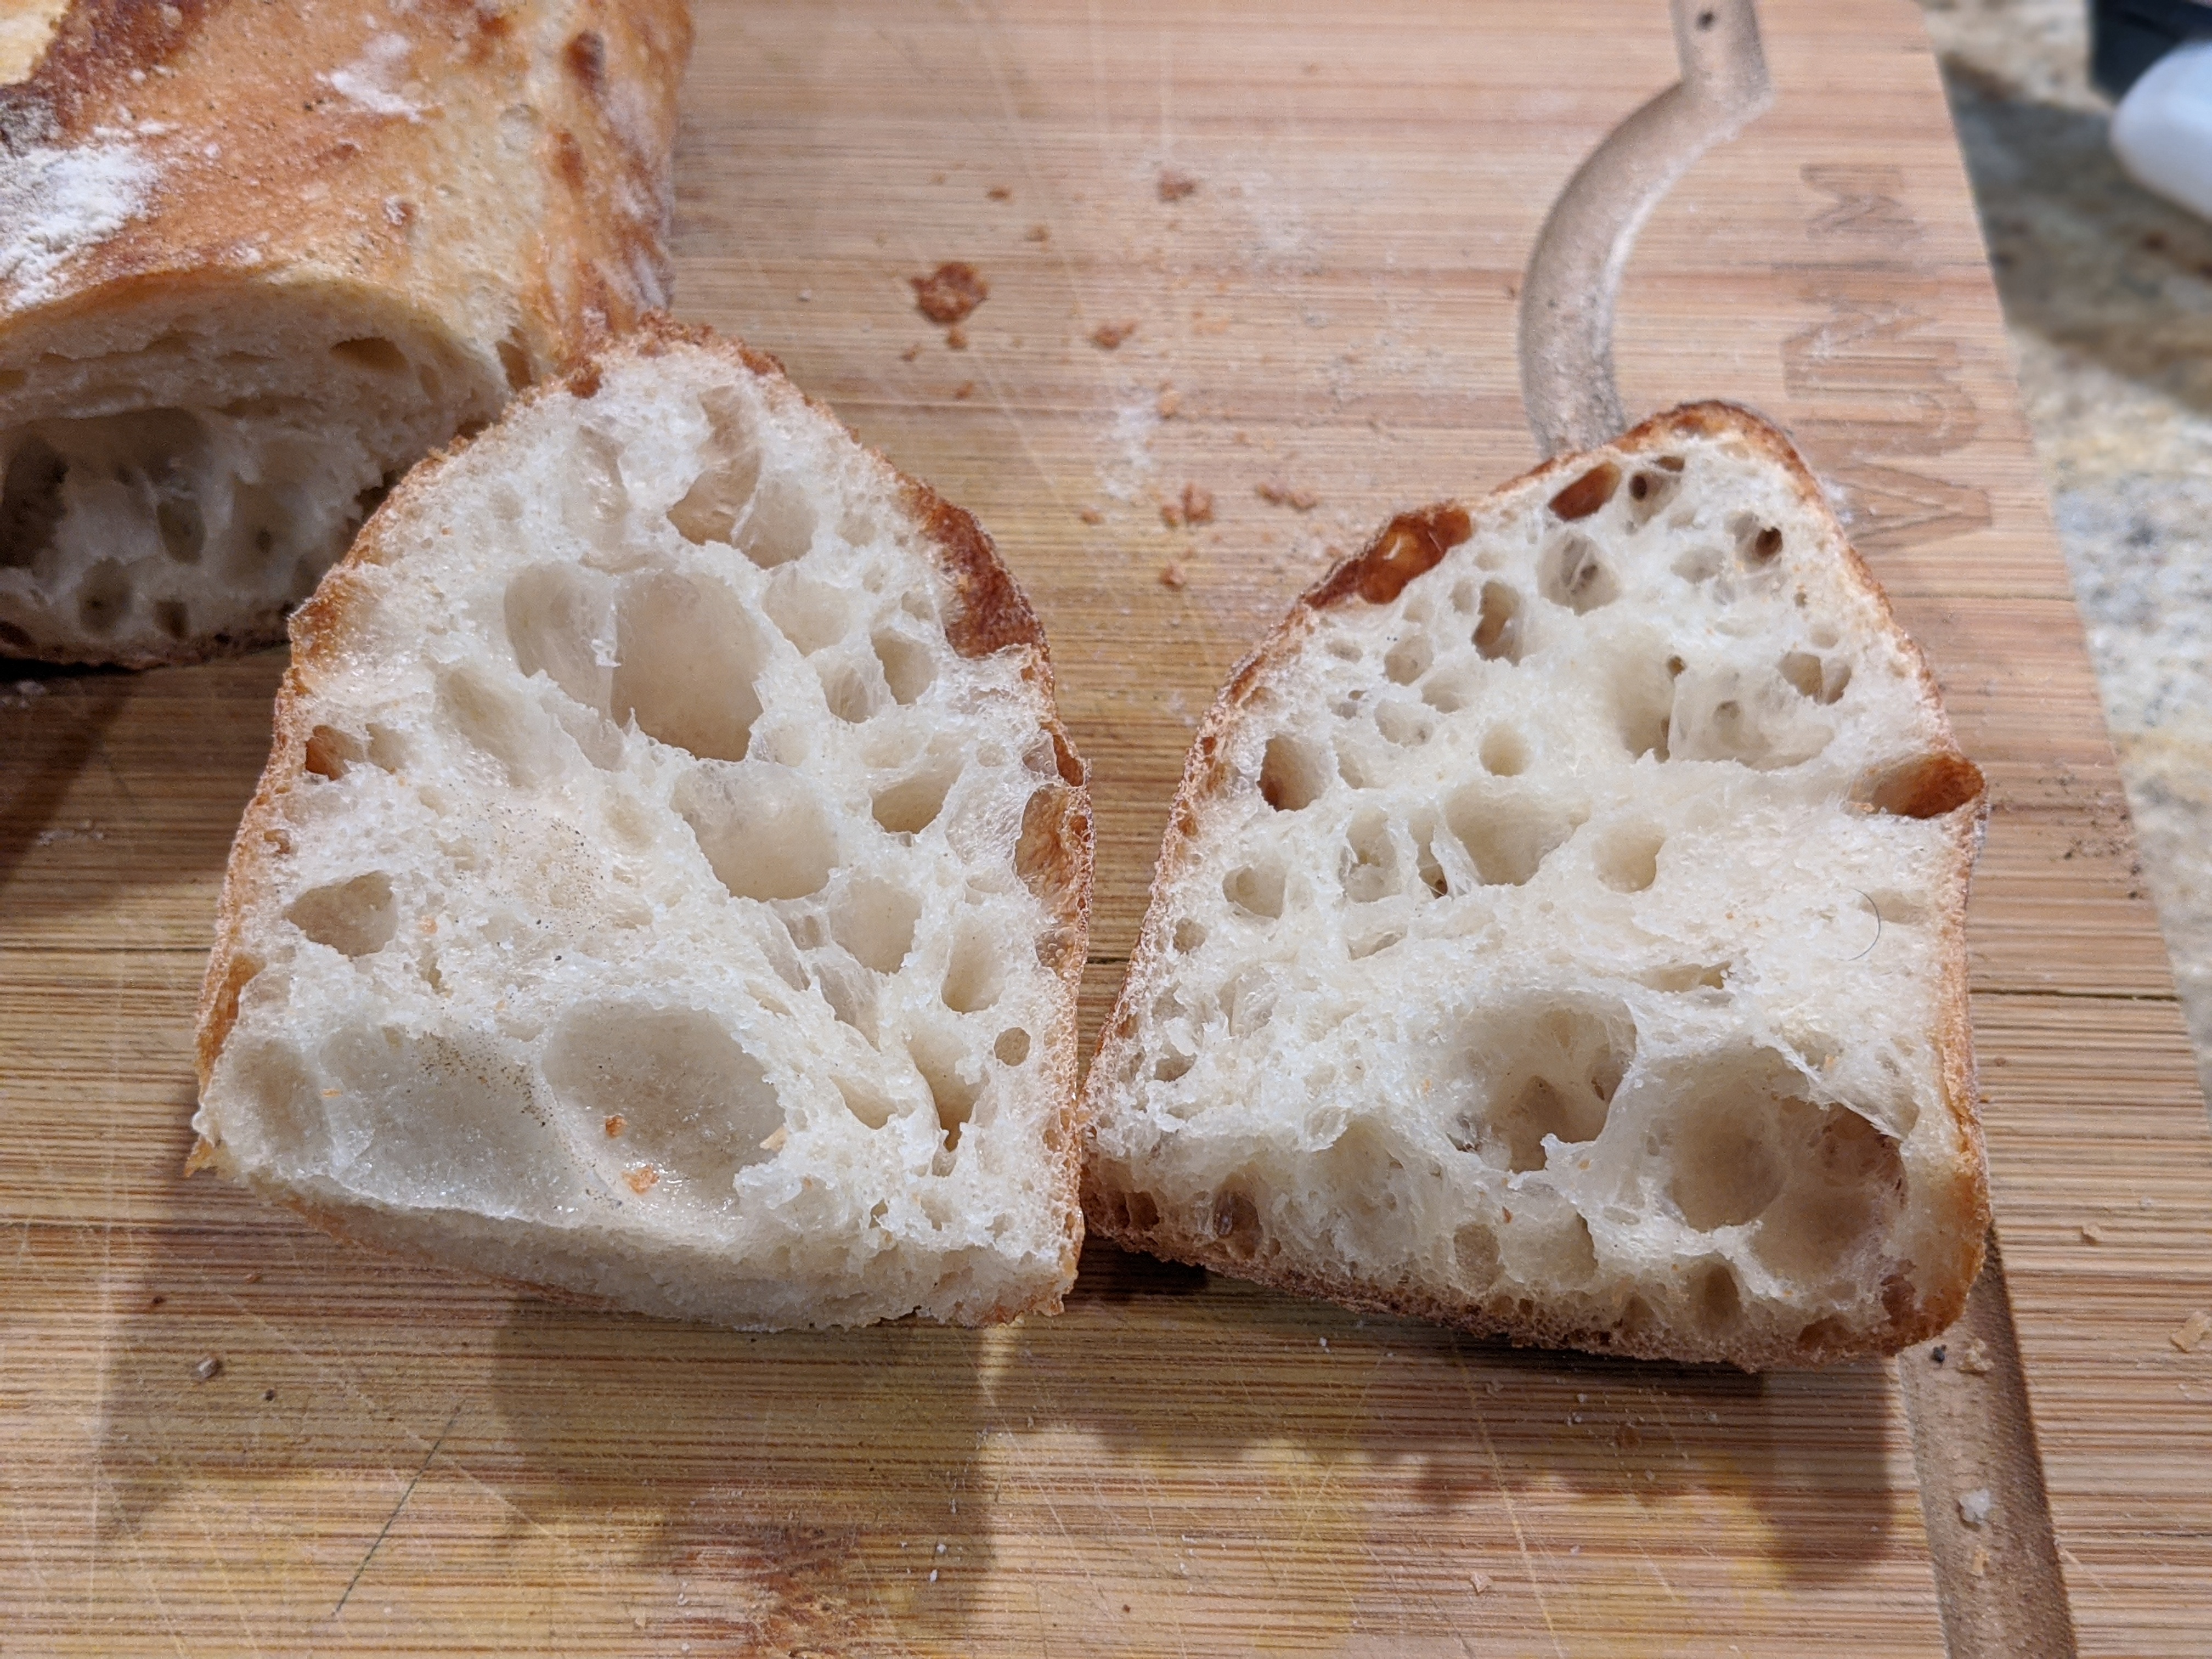
I think what “ruined” it for me using a sourdough starter was my focus on developing my poolish technique. Once I figured out that if I vary the fermentation times of the poolish, I could affect different flavor profiles in my bread and also introduce other by-products like amino acids and enzymes that make the bread more digestible, on top of adding flavor, so the whole sourdough being more nutritious argument kind of went out the window.

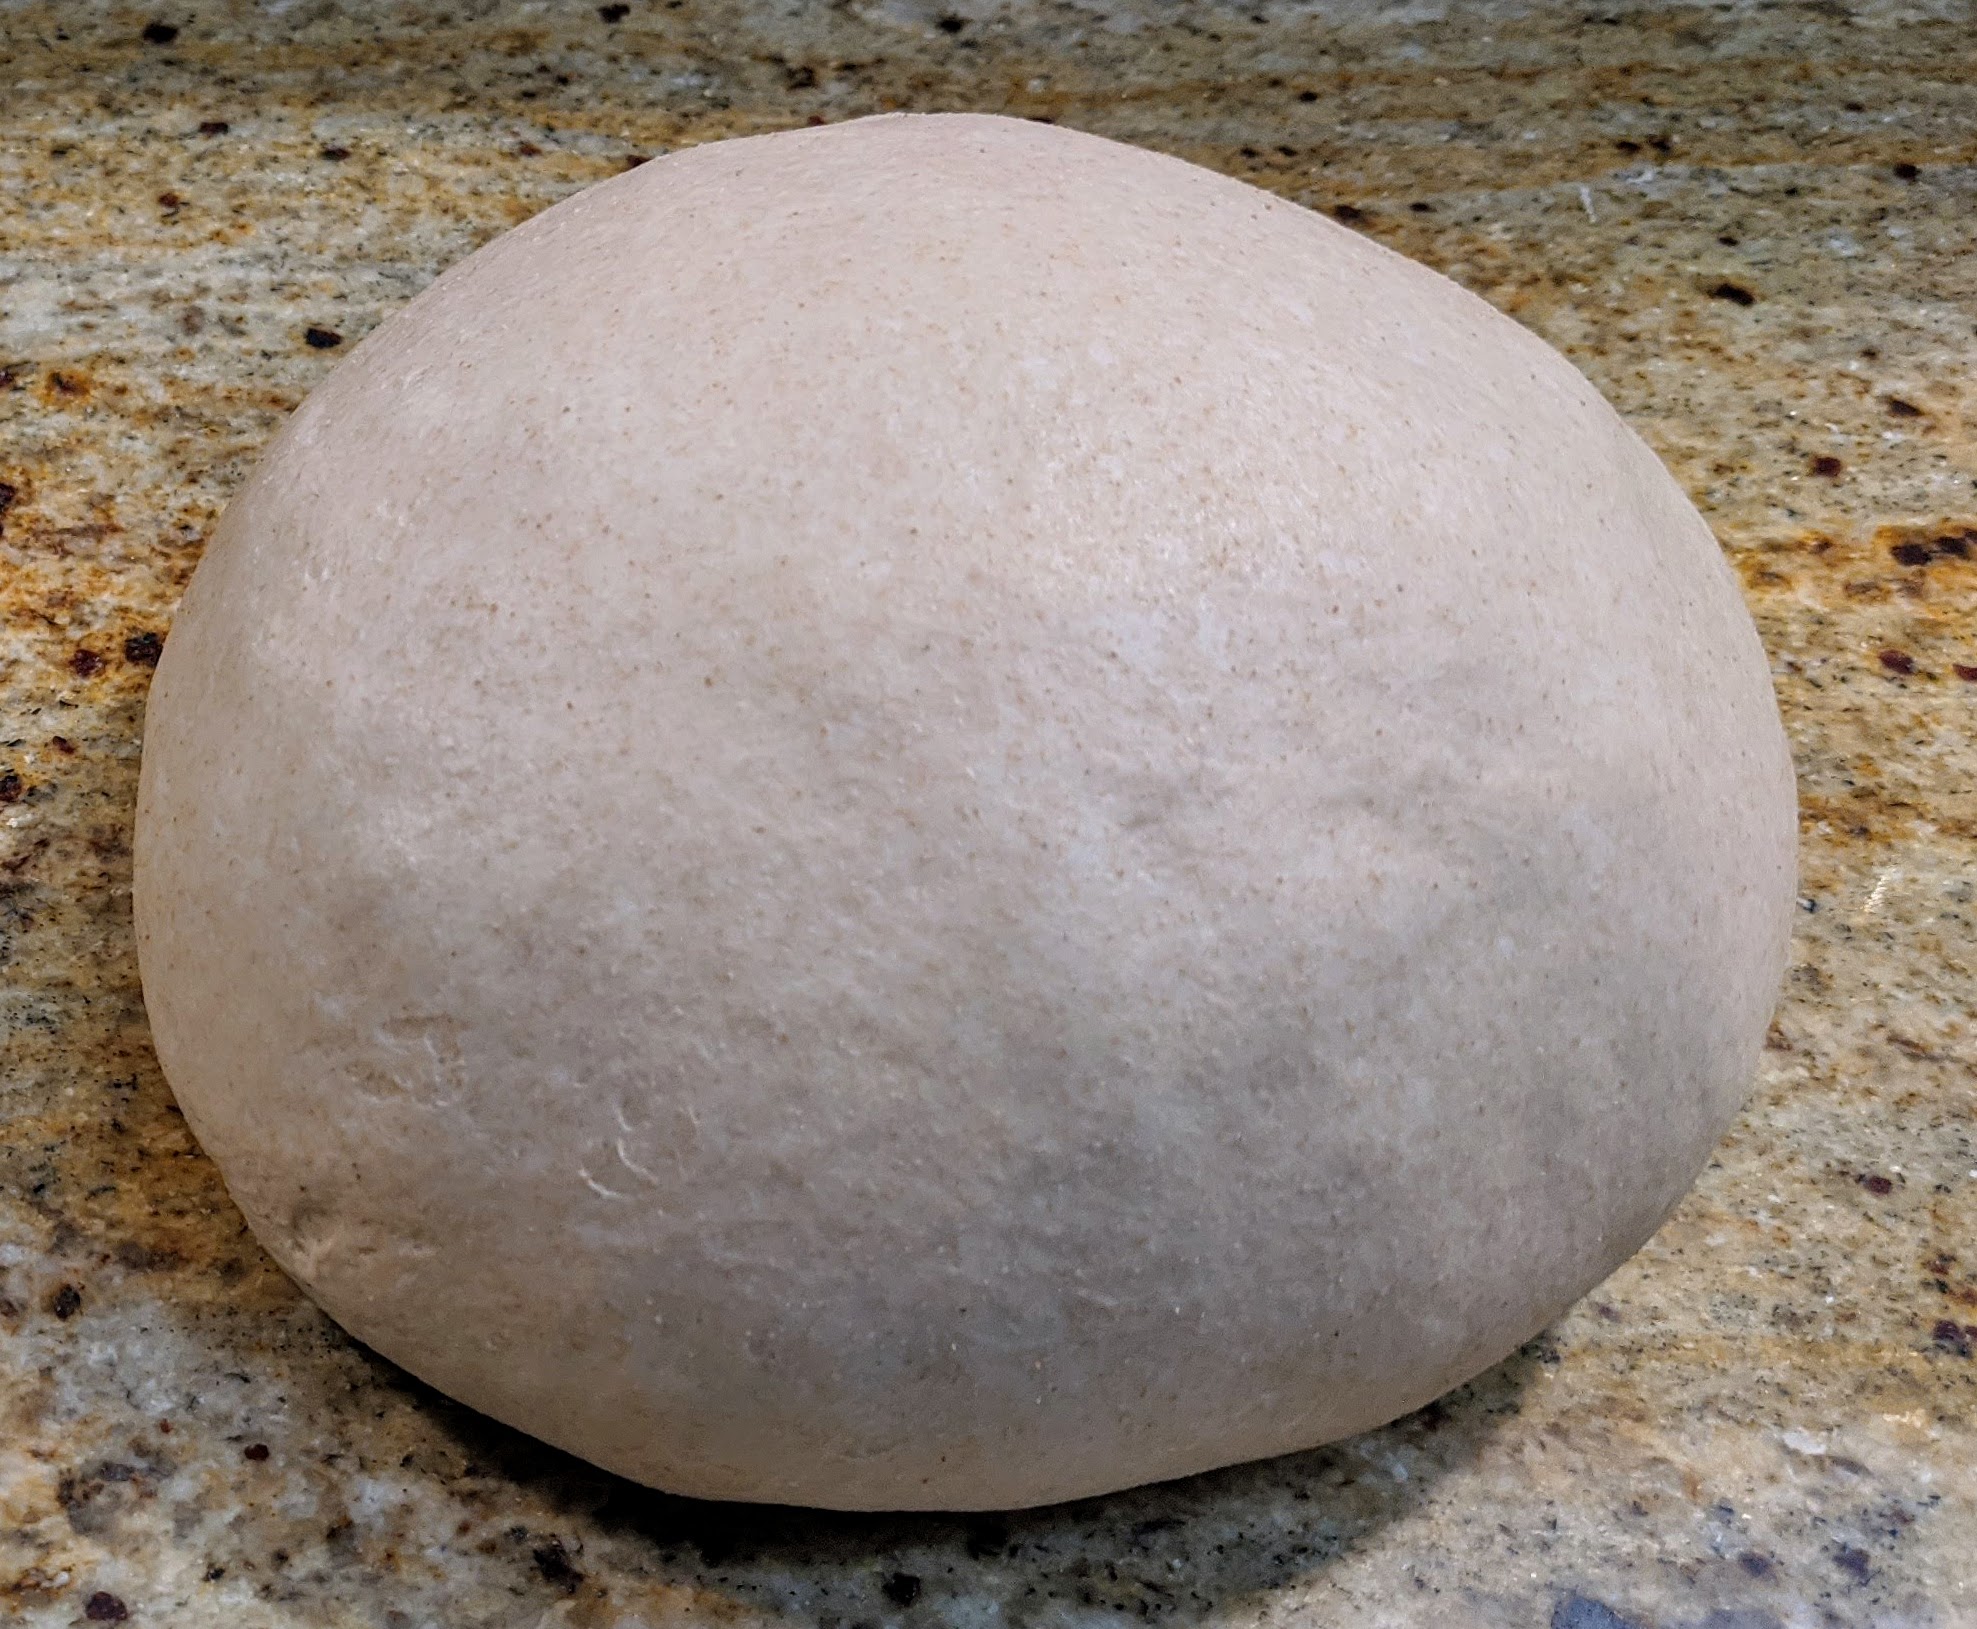
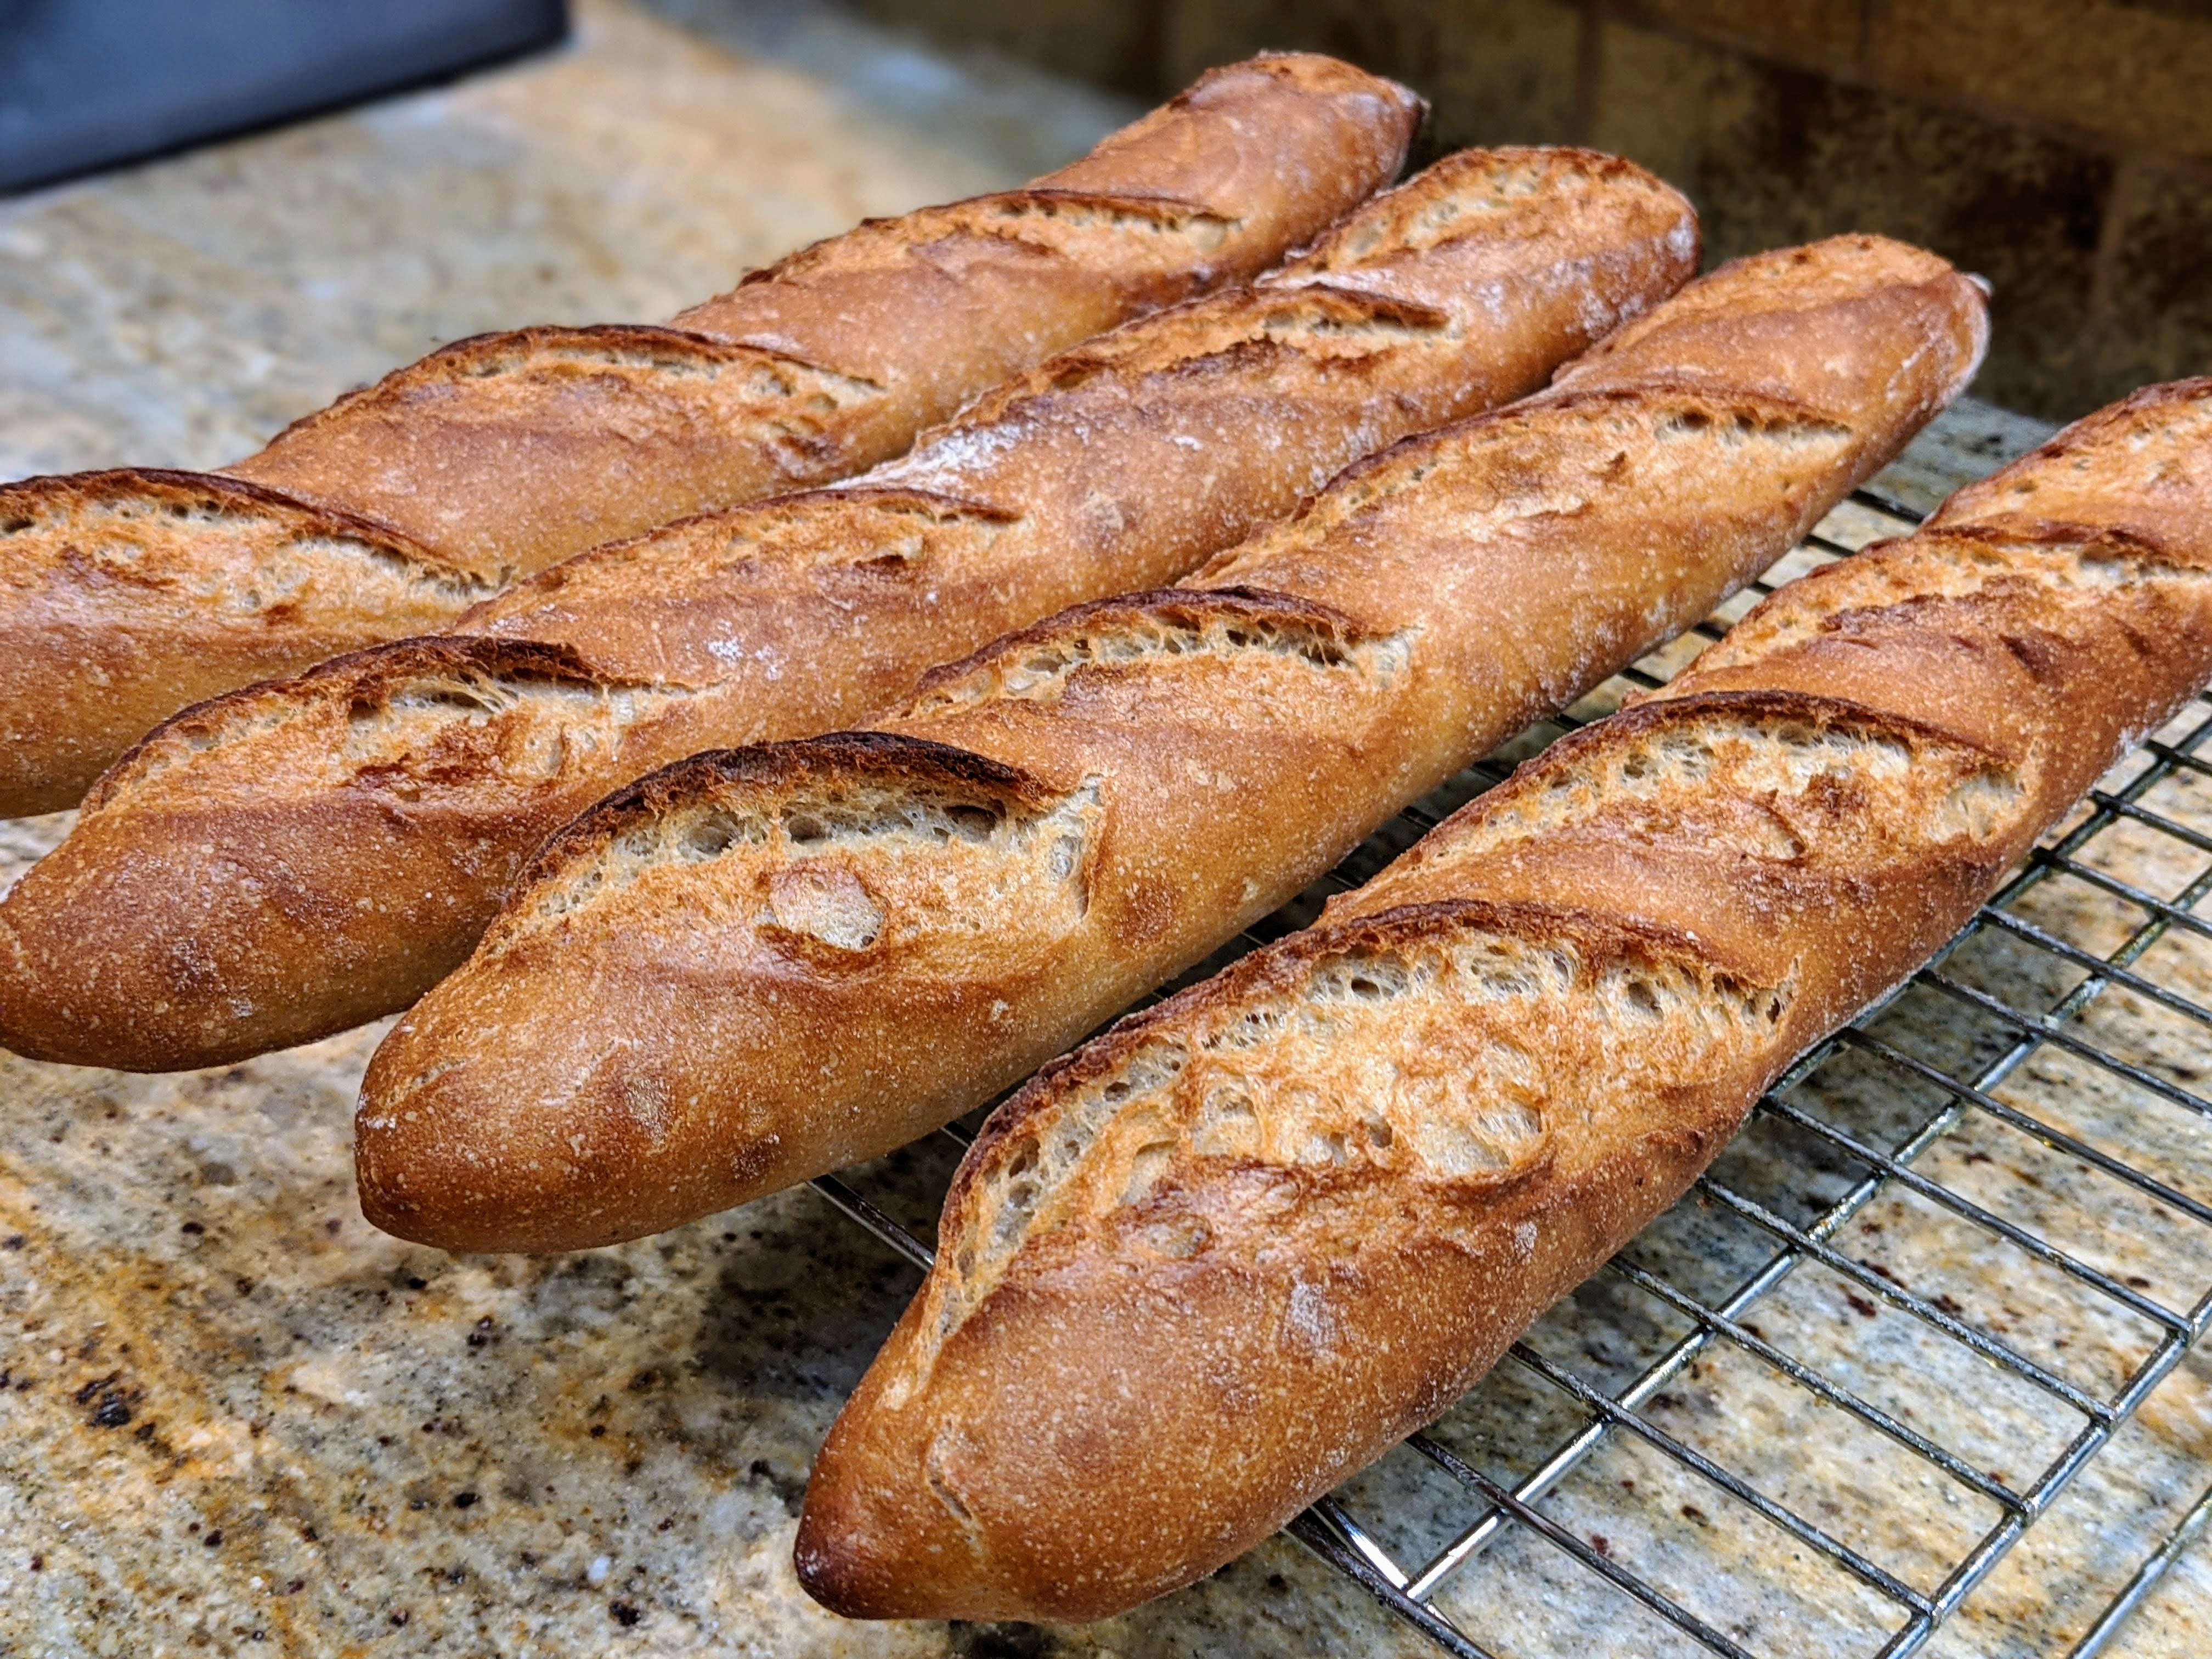
After that, I kind of lost my aspiration to make a sourdough starter. BUT, I’m excited to say that I also recently started using a Pâte Fermentée, or old dough technique with my baguettes where I reserve some of the dough from the previous day’s bake to kickstart the current day’s dough. I have to do write-up on it once I’ve worked out the process, but so far, it works marvelously!

So… Sourdough starter? We don’t need no stickin’ sourdough starter. And there’s my dirty little secret! Nee-nee nee-nee neeeee-neeeeee!

Next Stop… Ciabatta Town!

So in my imaginary bakery – well, at least it’ll be imaginary until I make it a reality after I retire – I’m only going to offer a finite set of loaves. I’ve decided on three loaves so far, but I probably won’t offer more than five. It’ll be a small-volume shop where I can sell all my stuff in the morning, so I can go and play in the afternoon.

One type of loaf that I will for sure be making is ciabatta. Now THAT is a loaf I’ve been wanting to make since I started baking, but up until recently, didn’t want to learn until I had baguettes down cold. And now that I finally have my master baguette recipe, it’s time to move on to ciabattas!

I’m SO excited to get this loaf down. To me, learning to bake ciabatta is like baguettes: So easy to learn, but very difficult to get right. But I’ve been doing my research, and now I’m ready to go for it.

What turns me on about a ciabatta is that like a baguette, it’s the perfect medium for a sandwich. Surprise! If you want to know just one thing about me, I love to make sandwiches! Even when I first started out making my early Dutch oven boules, I always had sandwiches in mind.

My first attempts at ciabatta have been well… just okay. They’ve certainly tasted absolutely delicious, but I need to get them a bit more puffy. It’s tough because the hydration rate of the recipe I’ve learned is 85%. It’s almost like a batter! And to create structure, you have to do letter folds. I’m okay at it, but I certainly need more practice doing those folds with a super-high hydration dough.

But as with anything, all it takes is practice! I can’t wait until I’ve fully arrived in Ciabatta Town!

One Size Does NOT Fit All

Though all bread is basically made with just four ingredients, what makes them different lies in the ratios of the ingredients and especially the processing techniques. For instance, with boules and batards where the ingredient ratios and fermentation times tend to be exactly the same, just a little thing like shaping completely changes the texture of the bread. Crusts bake completely different.

The reason I’m bringing this up is because early on, I learned that lesson. Reading Ken Forkish’s Flour Water Salt Yeast (FWSY) was a revelation in artisan bread baking, but it also had the effect of metastasizing my thinking that I could use the same principles I learned in the book to every single type of bread that I wanted to bake. That, even though Ken often said that his recipes were general guidelines and that depending on my kitchen and equipment, I’d have to work out what worked best.

I thought I could use the basic Saturday white bread recipe to make baguettes. After all, I thought to myself, it was just dough, and I was just shaping it differently. But to my frustration and consternation, my baguettes kept on coming out too heavy. Yet in my stubbornness, I pulled an Einstein, “Insanity is doing the same thing over and over again and expecting different results…” I finally had to get over the fact that FWSY was not the be-all/end-all to baking artisan bread, and I had to change things up.

I now make baguettes that are airy on the inside and crispy on the outside and if you looked at my process, it’s WAY different than any recipe in FWSY. And mind you, I’m not cutting down anything in the book. But I had to break free and diverge from the book, which is what I believe Ken intended all along.

To be honest, everything changed for me when I decided to make long loaves like baguettes. You can’t make them in a Dutch oven, and I didn’t want to purchase a bunch of special pans to bake the different kinds of breads I had in mind. So when I purchased a baking stone, it was game over as far as FWSY recipes were concerned. I still made my boules according to the recipes in the book for the most part, but for other loaves, I took different routes.

And this is where I realized that one size doesn’t fit all with respect to making bread. Even the slightest tweak can yield significantly different – and admittedly, sometimes unexpected – results. For example, in FWSY, Ken promotes this idea of letting the dough bulk ferment to double or even triple the original size. I never do that because it runs the risk of over-proofing the dough. And since I use a baking stone, I don’t have an enclosed container that will limit the spread of my dough should it be over-proofed.

For me, I want to have plenty of energy left over for intermediate and final proofing. So I cut bulk fermentation short at about 50% rise, so I have plenty of fuel for the final two fermentations after pre-shaping and shaping, respectively. Furthermore, I will err on the side of slightly under-proofing my dough (not too much). My final product may be a little tighter than a fully-open crumb, but I also avoid making flat loaves.

So for those just starting out, I have to say that just don’t take my word for it. You’ll have to learn these lessons by baking over and over. But the important thing is to keep an open mind to different techniques and processes. One size does not fit all!

Baguette Day Is My Favorite Day!

While I love baking all sorts of loaves, baguettes are definitely my favorite loaves to make. To me, there’s no more satisfying a feeling than seeing baguettes come out of the oven, all crunchy and steamy, and knowing the technique that goes into making them. Out of all the different loaves I make, baguettes require so much technique to get right.

When I made my first set of baguettes, they looked great, but they were extremely dense – and I was even using 100% white bread flour! I figured at the time that I could use my normal technique of several stretch and folds over a few hours – boy was I wrong!

Then thinking that the denseness was due to hydration, I upped my hydration to 80%. I got a marginally better result, but still, the baguettes were a little dense.

But then after watching several videos and reading a bunch of different recipes, I saw that most people just kneaded the dough once, then did maybe one extra stretch and fold within the first hour. Then they let it sit! I then got a much better crumb, with great oven spring, but the loaves were a bit lopsided.

Then it dawned on me that perhaps the last pieces of the puzzle were pre-shaping and final shaping. As I recently wrote in “Gimme Some Skin” the other day, it’s absolutely critical to form that outer skin of the dough. And especially with baguettes, because I don’t want to create a tight, internal gluten network which will affect the crumb, I have to rely on my shaping for structure. And once I figured that out, I started getting consistent results time after time.

Honestly though, I’m still honing my technique, but I’ve got the all-important fundamentals down to the point where I’m very confident of my ability to create great baguettes consistently. And like Chef Markus Farbinger says, “I still get excited when my baguettes come out of the oven!”

Gimme Some Skin!

A friend recently asked me what drew me into my bread making obsession. I shared that when I first started, I had no idea I’d totally fixate on this. All I was doing was jumping on the bandwagon and my only goal was to be able to make a decent-tasting loaf of bread. But once I made my first few loaves, inevitably, my sense of aesthetics kicked in and I didn’t want to just create decent-tasting bread, I wanted it to look good as well as taste good.

Then I wanted it to be much more nutritious than other bread. In essence, I went on, what drew me in was the nuance; those little niggling details that all come together to create a beautiful loaf of bread. As I discovered, all those little things affect how the bread turns out. And one of those little things I have found to be absolutely critical is, of all things, pre-shaping.

I have to admit that when I first started out, I kind of took the pre-shaping step for granted. After all, it seems like such a minor step: Shape the dough into a ball, let it rest for 15-20 minutes, then shape. And mind you, I was learning alot of technique from YouTube videos, and none of the chefs I watched ever explained the importance of this step. But I found that the more care I put into pre-shaping, the better my loaves turned out. Let me explain why…

First, pre-shaping establishes the “skin” of the bread; essentially creating the canvas that will be presented to the world. But that skin isn’t just for looks. It plays a vital role in the overall structure of the loaf. Arguably, this is the most important item of pre-shaping’s importance. In pre-shaping, you don’t want to just create a smooth outer skin, it has to be taut, stretching the gluten strands to begin to establish the outer structure of the loaf.

Secondly, pre-shaping begins orienting the gluten strands to make it easier for the ultimate shape. It doesn’t seem that apparent when making boules or batards, but that orientation is really apparent when making baguettes. It gives the dough a little bit of a head start before shaping.

Finally, pre-shaping re-arranges the yeast and other microbes in the dough, so that the little beasties that have exhausted their food supply during bulk fermentation can be moved to a new spot to get new food. This may explain why oftentimes during pre-shaping, you’ll see bubbles spontaneously form. Pre-shaping wakes up the microbes and that’s a great thing. You want them to be active during final proof!

When I first started out and didn’t put any emphasis on establishing the skin, I believe it negatively affected my ultimate shaping in that my loaves would often collapse. But once I started making sure I’d create a nice, smooth, taut skin during pre-shaping, I had fewer and fewer collapses to the point where my loaves – which are generally 75-80% hydration – just don’t collapse unless I over-proof them.

But as I always say, this is just one aspect of the whole process; though on the surface it seems like a minor item, it really isn’t.

Happy Baking!

Okay… I Admit It. I’m Obsessed.

I took this weekend off from baking because I went on an annual trip to Lake Tahoe to spend a few days with some of my oldest friends from college (yes, I brought up a bunch of bread that got completely gobbled up – it was very pleasing to witness that). Throughout the weekend I was having what amounted to mental withdrawal symptoms because I wasn’t baking.

My best friend who came with me asked me on Saturday what I felt like not baking. I replied, “I have to admit that I don’t quite know what to do with myself. For the past six months, my hands have been covered in either flour or dough, so to have completely flour-free hands the entire day is a little unsettling.”

But now that the weekend is over, I still can’t bake this week at all as my house is being tented for termite fumigation. I have to admit that even though I know that I’ll be just fine, baking bread has been part of my daily life these past six months that I’m feeling a little… weird…

So yeah, I’m a little obsessed.

Open Crumb? Sure… But Not All the Time

Generally, the bread I bake has a fairly open crumb, considering the high-extraction flour I use. With the loaves pictured above, the only pure white flour bread is in the top-left corner. I can get that kind of open crumb every time with any kind of loaf I bake when I use white bread flour. But the other ones? They use my 75-25 combination of high-extraction and white whole wheat flour.

Their crumbs may appear to be pretty open. But if you pick up a slice, there’s a certain heft to it. In fact, your first reaction will be that it’s dense. But when you bite into it, it doesn’t feel dense at all. The reason is that instead a really big holes, what I get with this flour are lots of small gas pockets, which makes the bread a lot more airy than how it might appear. And that’s exactly the end product that I’m after.

I want to strike a balance between open crumb and density to make my bread versatile. A loaf with big, open pockets isn’t really good for making sandwiches. But then a super tight crumb is just too dense and filling. But striking a balance between the two is perfect. I get to make my sandwiches, and my wife and kids love making avocado toast! And the bread is great with pasta and sopping up sauce!

This really isn’t a rant. But there is this preponderance of thought that an open crumb is the ultimate aim of artisan bread. For me, getting an open crumb was certainly a goal when I first started. But now that I’ve gained a lot more experience these past six months, what crumb I get is based on what I want to achieve with the bread.

For my baguettes and boules, I definitely want to get a nice open crumb. But for my batards and hand-shaped long loaves, I want a slightly less-open crumb (not tight, but less than open than a boule or baguette). For my loaf pan breads, I definitely don’t want big bubbles at all, though I do want to make sure the dough is airy.

The reason I’m writing this is because once you get to the point of consistently being able to create bread with an open crumb, you may also start asking yourself what you want to do with the bread; in other words, practicality may make you think about the different loaves that you make and what their ultimate purpose might be.

Mind you, I’m not arguing against an open crumb. But what I am saying is that an open crumb doesn’t necessarily define what makes a good loaf of bread. To me, what does define success is if the loaves I create fulfill the purpose I have in mind for them. And, of course, they have to taste good…

Best Videos Yet on Shaping and Baking Baguettes

I’m always trying to learn different techniques of shaping bread, and just when I thought I had baguette shaping down, I ran across the following videos with Chef Markus Farbinger. He has this quiet, soothing teaching style that I just love and great technique! But best of all, these videos are for making baguettes in a domestic oven! To me, this is the best of both worlds: A professional chef instructing for home baking. It doesn’t get better than this!

Shaping Baguettes

Scoring and Baking Baguettes

I love his passion and I really connect with his excitement. Even with all the loaves I’ve baked these past six months, I still get totally jazzed when my bread comes out of the oven! I addicted to the warm and fuzzy feel-good!

And following his techniques, here’s what I produced today!

Okay… I’m following his shaping technique from here on out. These came out perfect!

Baguettes Are Easy. NOT!

My favorite bread to make is baguettes. I love sandwiches and I especially love to make sandwiches with baguettes. And ever since I started making bread, my goal was to make my own baguettes so I could use them for sandwiches. And of all the different kinds of bread that I make, baguettes are the simplest with respect to the process. But they are also the easiest to completely screw up.

With my earliest attempts, the baguettes had a great shape. They appeared to get great oven spring and from appearance alone, they just looked right. But most of the time, they were pretty dense inside and super-chewy. I’d pick up a loaf and my heart would sink because I could feel the heft. They tasted okay, but damn if I couldn’t make a 6″ sub and not be completely weighed down by the dough.

But now my baguettes are light and airy. They have a great chew, but the dough gives very easily. And with the flour that I use, while the crust is crunchy and crispy, it’s not overly so. This bread is perfect for making sandwiches!

What changed to get me to making much better baguettes? In actuality, not much. I just did less; specifically, I worked the dough far less than I would with a larger loaf like a boule or batard. What I realized is that while forming a good, strong gluten network is important with any bread, with baguettes, there’s an inflection point that defines whether I get a light, airy crumb or I get a dense one. And that point comes a helluva lot sooner than when I’m making larger loaves.

With my larger-format loaves, I’m pretty aggressive with mixing the dough upfront until the dough is completely smooth. Then I do about six stretches and folds over the course of three hours from the initial mix. But with baguettes, I mix to a much courser consistency, rest the dough for a half-hour, then do at most two stretches and folds within the first hour then let it rest from 1 1/2 to 2 hours.

It reminds me of making biscuits. With biscuits you never want to overwork your dough. You mix only until all the ingredients are just incorporated and the butter or shortening is reasonably distributed throughout the dough. Then you roll it out and cut the biscuits. It’s a similar thing with making baguettes. Less is definitely more!

I wish I could explain where that inflection point is, but it’s something I feel. What I can share is that once I finish the second stretch and fold, if I can pull on the dough mass and the whole thing wants to come up, I know I’ve hit that point where the dough’s strong enough. And then I leave it alone!

Leaving the dough alone was a very difficult thing for me to learn. In fact, even with my larger-format loaves, I’ve learned that resting is just as important as manipulating the dough. And it’s been especially tough for a naturally impatient person as myself. As I used to say, “If patience was a virtue, then I’d be a slut.”

Sorry, I Just Won’t…

…eat grocery store bread any longer, unless there isn’t an alternative. And if there isn’t one, I will be extremely picky of what I buy. Luckily for me though, I bake practically every day, so the likelihood of me having to buy a loaf of bread is pretty low.

I realize that this might seem obvious considering this blog is now almost entirely about my bread-making journey and I think it’s clear that I bake – a lot! But if baking bread was merely an occasional affair, I’d certainly be buying bread from the grocery and wouldn’t feel compelled to write an article like this. But yeah… I’m kind of done with store-bought bread.

What prompted me to write this was last night’s dinner which was graciously prepared by a good friend to help my family out while I recover from surgery. She made an absolutely wonderful vegetable frittata, a fresh green salad, watermelon, and brownies for dessert. And she included a small loaf of heat and serve sourdough. My family really enjoyed the meal. But not one of us could eat the bread beyond a single bite!

I took a bite of it and put my piece down. But I didn’t say anything to the rest of the family because I didn’t want to seem ungrateful. But then my wife asked my son, “Do you want my bread? I can’t eat it. I like Dad’s bread more.”

Then she turned to me and asked, “What do you think of it?” I replied, “I can’t eat it.” My wife laughed and said, “We’ve gotten really spoiled with Daddy’s bread.” We all had a bit of a laugh at that remark, but it’s true. To all of us, store-bought bread’s taste and texture simply pale in comparison to what I can produce at home. But that’s not the only thing…

It’s well-known that commercial bread and bread products have additives. But did you ever consider what the nature of these are? Honestly, I was blissfully ignorant of these for years. But once I started successfully making my own bread and doing a lot of research on home versus commercial baking, I was shocked at some of the things I discovered.

Did you know that lots of bread labeled “sourdough” isn’t made from an actual sourdough starter? They inject acetic acid in the dough to give it its sour taste! Furthermore, manufacturers enrich bread with all sorts of chemicals to help the dough be fluffier or give it longer shelf life or give it a better color. And especially in the US, commercial bread makers add chemicals that have been linked to cancer and even banned in other countries. Click the link I provided above. It’s eye-opening.

The FDA argues that the parts-per-million amount of these chemicals is so small as to be negligible. But what does that mean? Is that negligible against an average response? What about those people whose systems will react at just the slightest amount?

That said, I’m not going to eschew commercial bread entirely. If it’s the only thing available, I’ll eat a bit of it, though I will limit my intake going forward. But if I have access to artisan bread, either made by me or someone else, I’ll choose the artisan alternative.