Tartine-Style 50% Whole Grain Sourdough: Experimenting with Extreme Hydration, First Stop 85%

After re-reading Tartine No. 3 recently, I got inspired to start experimenting again with super-high hydration sourdough production. My typical hydration for sourdough is 75%, but Tartine goes even past 90% hydration! My earlier forays into 90%+ hydration were a little discouraging. I produced pretty flat loaves that, though possessed of a really open crumb, didn’t have much vertical rise. Then I saw some pictures of full loaves of Tartine and realized they had similar results!

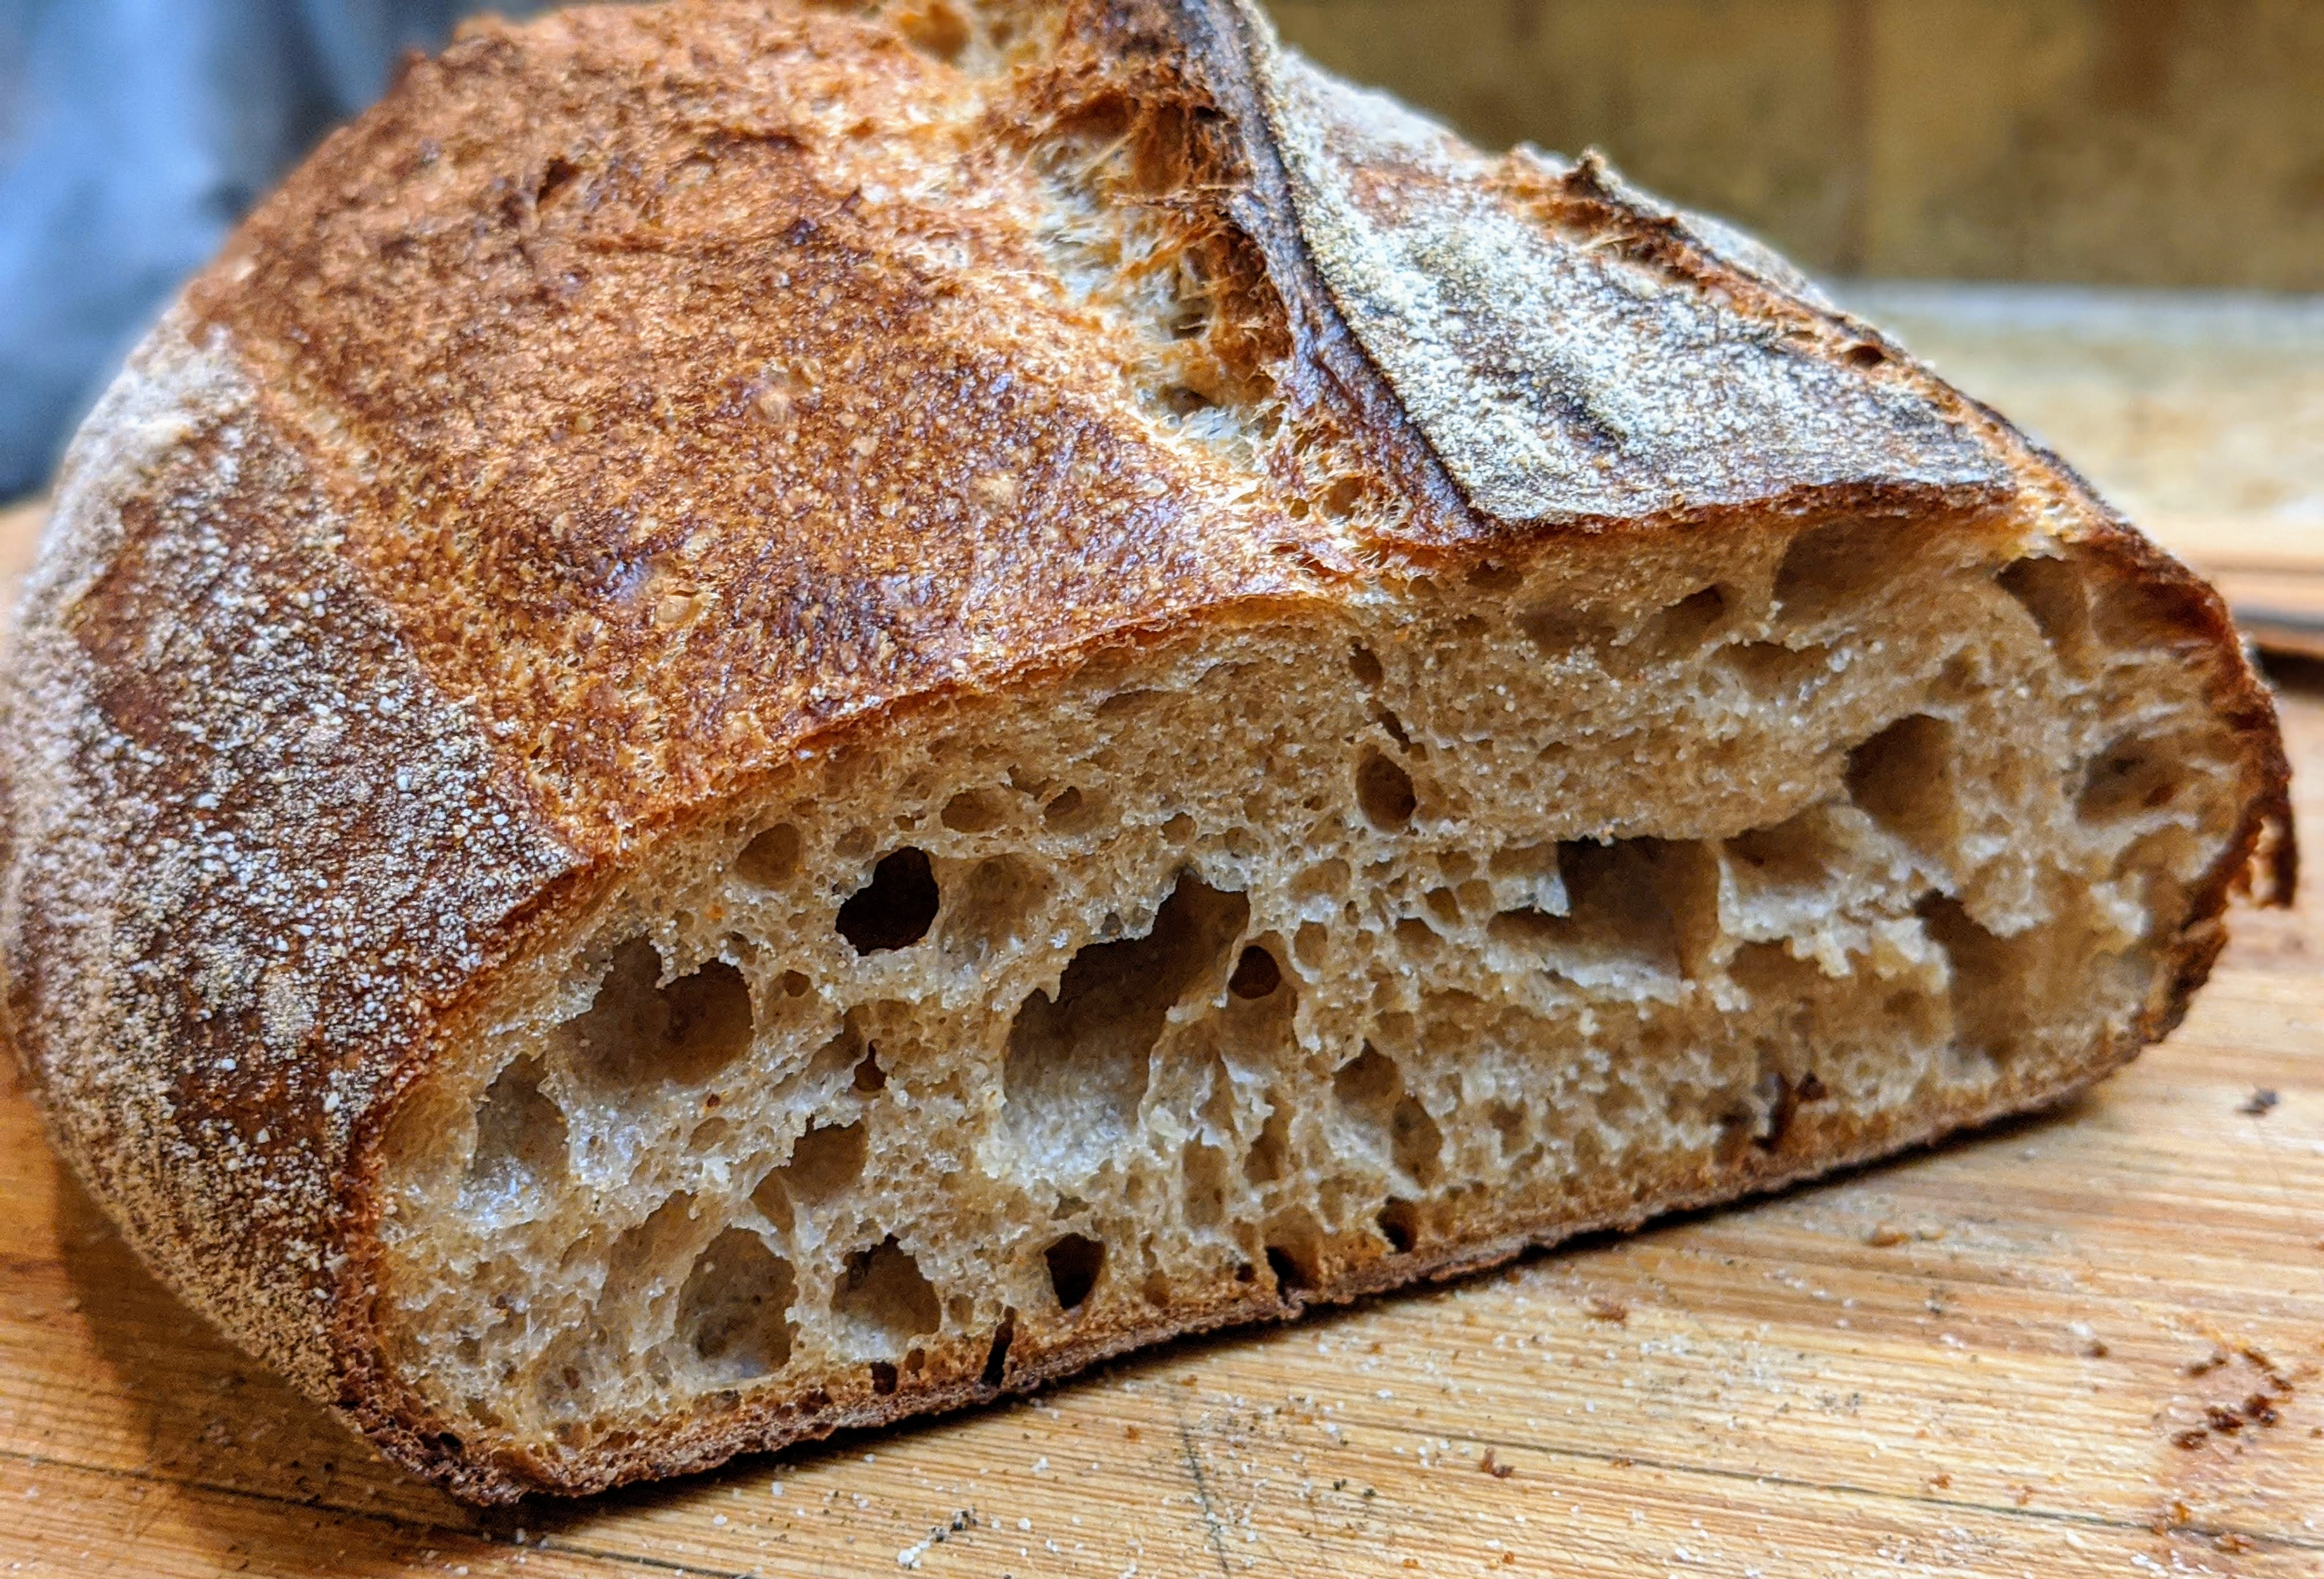
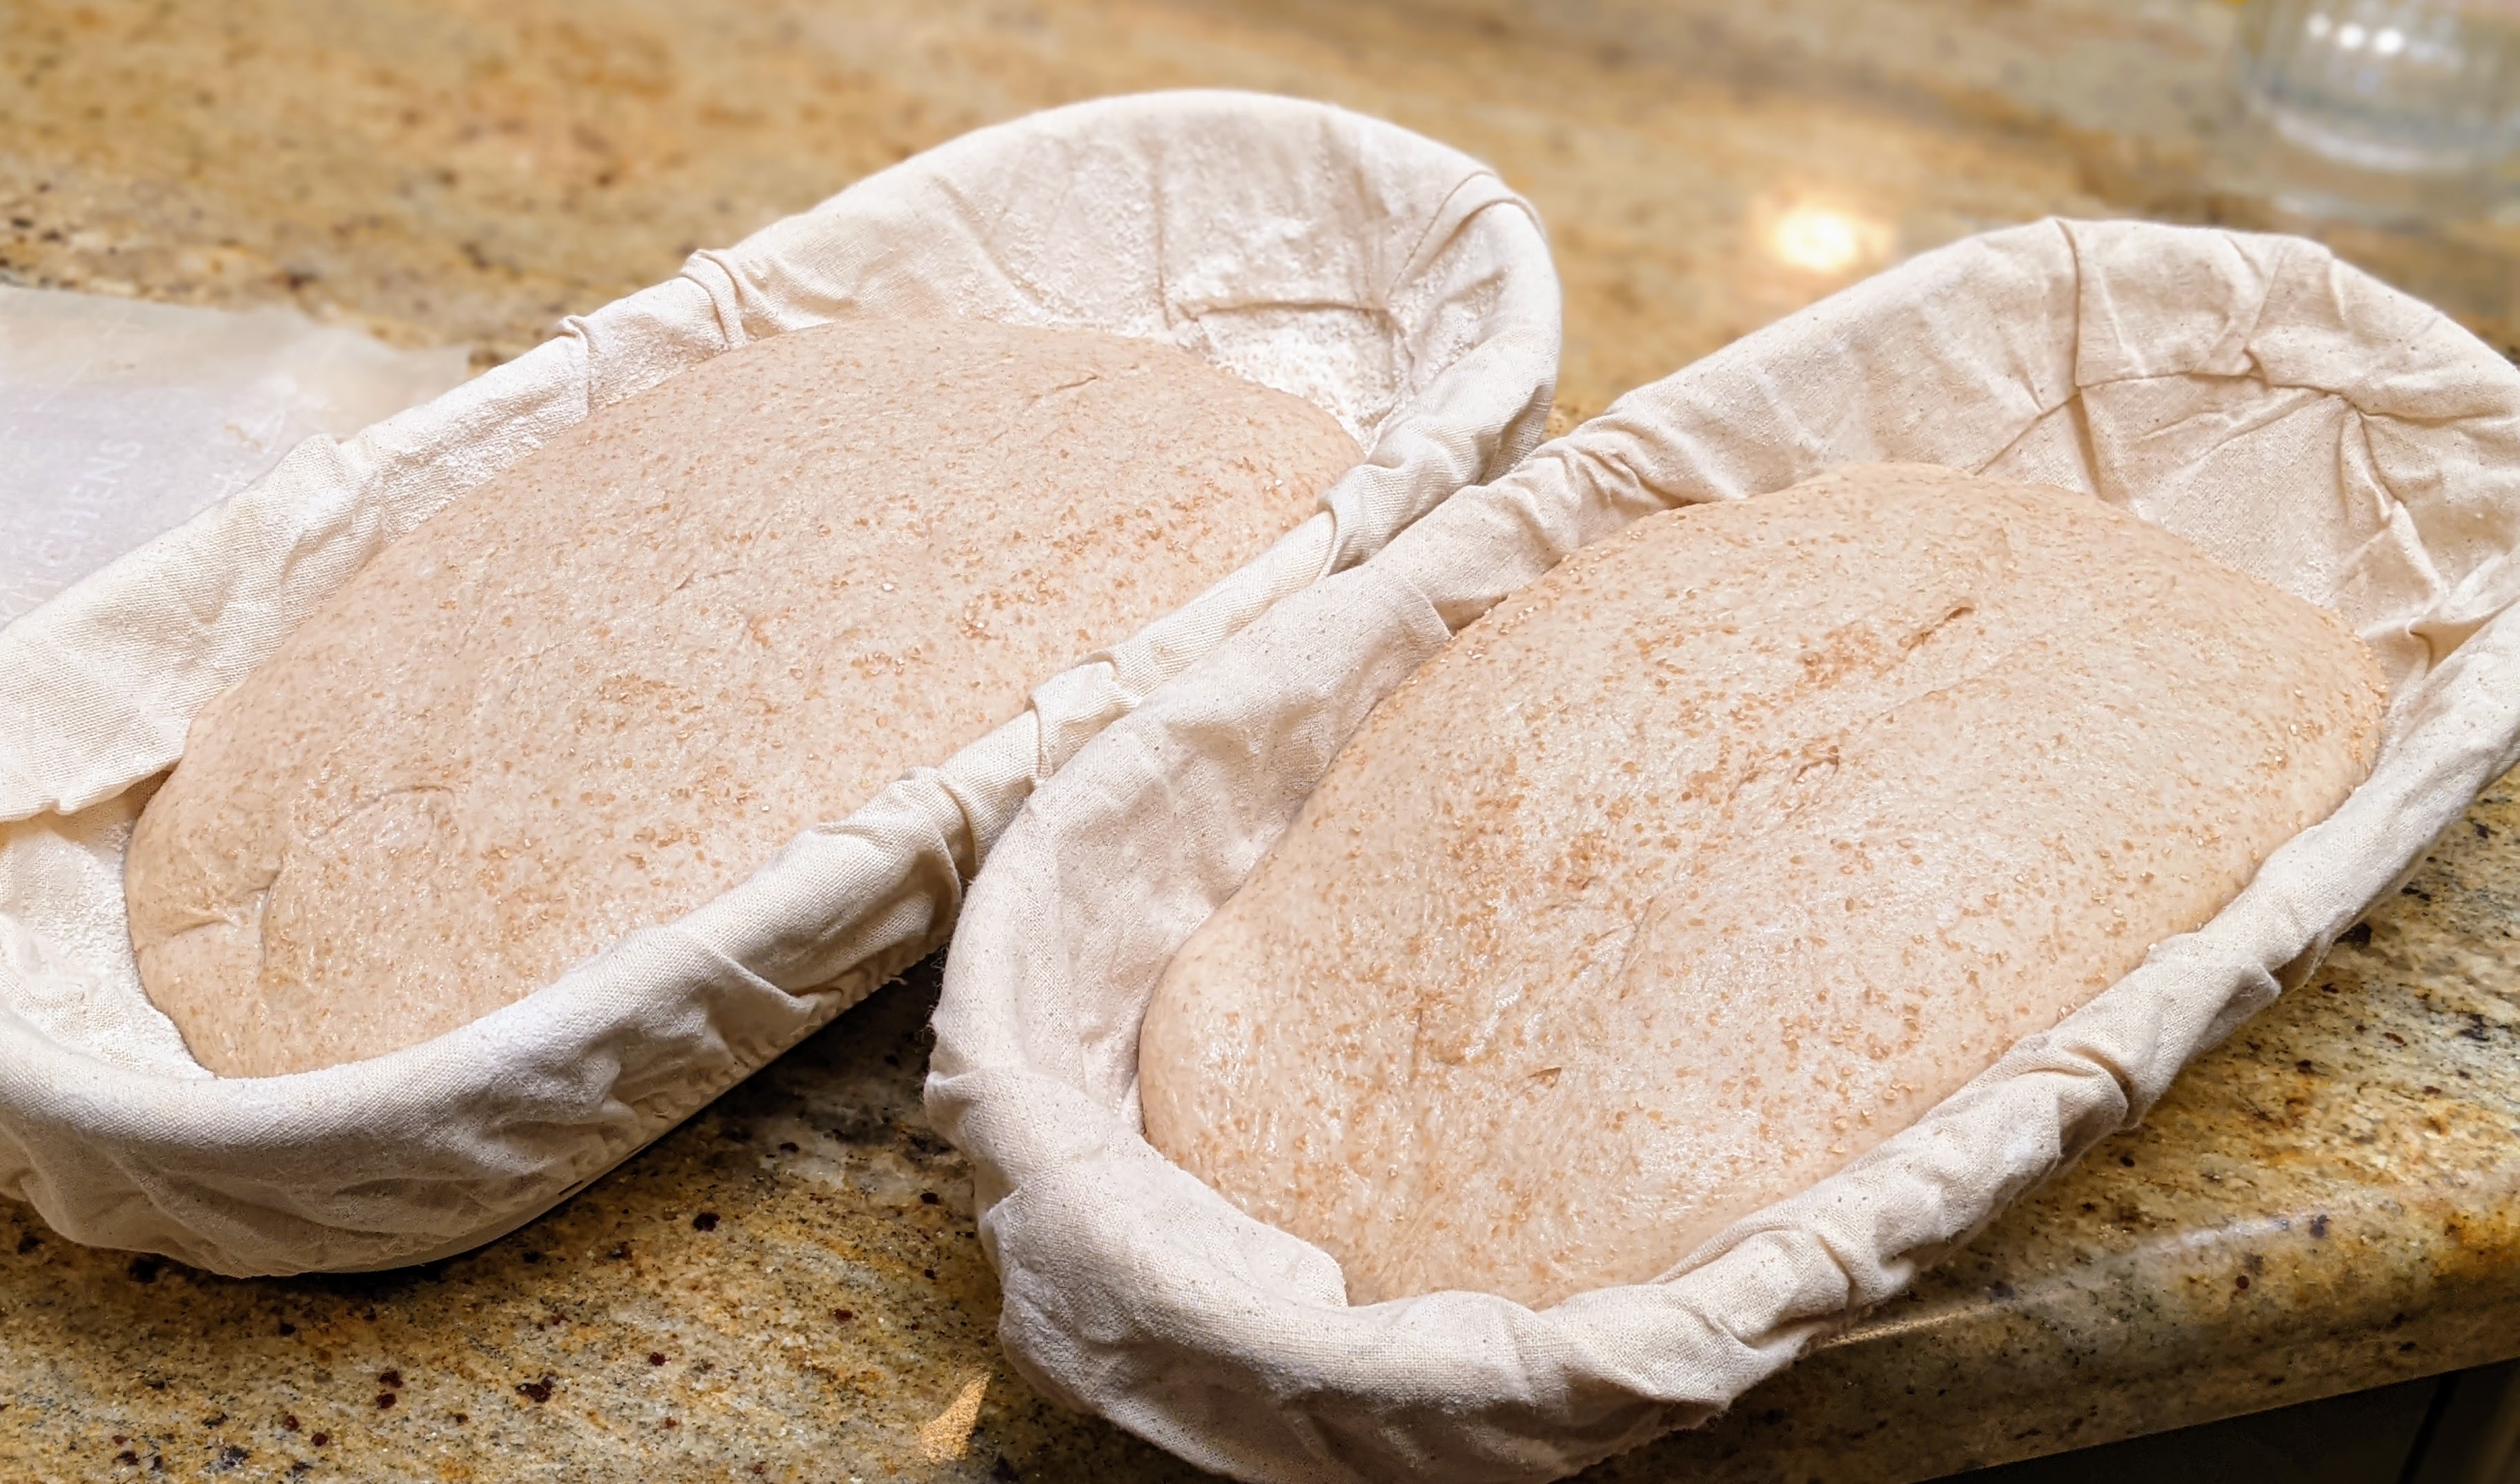
But for me, I wanted to find a balance between extreme hydration and maintaining some oven rise. So I decided to do some tests, of which this is the first. The loaves in the pictures above were made with 85% hydration dough. I have a feeling that that is probably the limit of the type of flour I’m using, but the next bake, I’m going to push it to 90%.

These turned out a lot better than my previous forays. And part of that – I think – is due to the baskets I used. I watched some videos of both Tartine and several other bakers that were making high-hydration oval loaves and they all used what appeared to be 14″ baskets. So I got a couple. I think it makes a difference as it allows the dough to expand. But I won’t be absolutely sure until I make loaves using a standard oval basket and a long basket at the same time.

Baker’s Formula

Flour100.00%
Water85.00%
Salt2.00%
Diastatic Malt Powder (optional)**2.00%
Total Percentage189%
*Levain percentage factors the flour from the levain into the total flour
**Depending on the flour bread flour I use, I’ll add malt if there’s none added by the miller.

Final Dough

Flour
50% Bread Flour (13.8% protein), 30% Whole Wheat, 20% Kamut
935g
Water775g
Salt21g
Levain*267g
Diastatic Malt Powder21g
Total Dough Yield2020g
2 X 1000g loaves + 20g wiggle room
*Levain is calculated as 25% of the total flour which can be arrived at by taking the target dough weight and dividing it by the total percentage, so 2020 / 189%.

The Process

Make the Levain. Like Tartine, I prefer to use a young levain because I like the nutty flavor characteristics of a young levain and prefer to develop sourness during final fermenation. Even if I end up fermenting the dough enough to make it sour, it won’t be overpowering. For this particular recipe, I take about 50g of mature starter (I maintain a separate mother) and combine it with 150g flour and 150g water (warm enough to get my dough to about 80°F). Levain is ready when it passes the float test (anywhere from 2 – 5 hours depending on weather).

Initial Mix/Autolyse. Reserve about 50g of water, then mix the rest with all of the flour (if you’re using diastatic malt powder, add it now so the enzymes have a chance to break down the starches in the flour). When I use whole grain flour, I will typically autolyse for 2-4 hours, in parallel with my levain maturing.

Final Mix. Add all the levain, salt, and reserved water to the dough. Mix thoroughly until all ingredients are fully incorporated.

Bulk Fermentation. 4-6 hours depending on ambient temp or rate of fermentation or until the dough has expanded about 30-35% of its original size. There are a lot of variances in the timing. With the loaves shown above, they took a long time to bulk ferment, even at 80°F.

Divide and Pre-Shape. Divide the loaves into 1-kilo pieces, then work into rounds, developing a little surface tension. Bench rest uncovered for 20-30 minutes until the balls have relaxed.

Shape. Shape into rounds or ovals, then place into baskets.

Final Fermentation. 12-24 hours at 39°-42°F. The longer you go, the sourer the bread. I’ve taken loaves out to 36 hours but by that time, the acids started breaking down the gluten and I didn’t get much oven spring.

Bake. Bake at 475°F for 20 minutes with steam (if using a Dutch oven, then 20 minutes with the lid on). Remove the steaming container, then bake for 25-35 minutes dry at 425°F or until the crust has baked to a deep, golden brown.

Baking Is Like Playing Music

I was watching an excellent video on making poolish baguettes by King Arthur Baking Ambassador, Martin Philip. Though I feel I’ve really gotten the hang of baguettes, there’s always something to learn, plus I wanted to get affirmation on the techniques I’ve learned and employed to this point. While not much was new to me, it was great to get some insights into when the dough was ready for final shaping and also learn a new way to shape!

But about three and a half minutes into the video, he said something so compelling that I had to write about it. Basically, he drew an analogy between music and baking. It was one of the aptest insights about bread making I’ve ever heard. Here’s the video (I’ve queued it to where he makes it):

I love the analogy he drew between a recipe and a sheet of music, especially when he said that “a recipe is like musical notation in that it’s notes on the page and the notes on the page will get you close to the song, but they’re not the song. It takes time. It takes practice before you can interpret things before you can become a good musician… or a good baker.”

Dammit! I’m going to be using this for all sorts of lessons, not just baking bread!

I just love the analogy! The recipe’s ingredients are the notes and the directions are the notation of the notes on the page. With a piece of music, you have to learn it and play it several times before it sounds like a song. At first, because you’re unfamiliar with it, you’ll flail and stop and start, or play sections over. But as you get used to the flow of the music, it starts sounding like a song.

Such is the case with a recipe; especially if it’s brand-new. I remember the first time I tried making baguettes. I was proficient with dough development and knew what to look for and I wasn’t at all intimidated by the 75% hydration. And I’ve since learned that dough development is the easy part! But when it came to shaping the dough into loaves – eek!

I had prepared by reading and watching videos about the technique. But having no experience with shaping baguettes, let’s just say it was a helluva lot harder than all the books, articles, and videos may have indicated. Oh, I was able to elongate the loaves all right, but they were a little… misshapen to say the least. It took me about 10 bakes to start getting comfortable with shaping and probably another 40 to 50 bakes and breaking my oven before I gained a level of proficiency and consistency.

And taken holistically, it took me all that time to understand the dough development and processing as well. Though I mentioned above that dough development is the easy part, dough behaves differently in different environmental conditions. For instance, in warmer weather, I tend to stick to the base hydration of 75%. But in colder weather where the dough can be a little stiffer, I’ll add a couple to a few percentage points of water so that the dough feels like I think it should.

Repetition breeds familiarity.

Baking Bread: It’s a Perpetual Balancing Act

Last night, I watched a video of Paul Hollywood touring bakeries in San Francisco on a quest for San Francisco sourdough. He got bread from different bakeries all over the city apparently to see if he could find the epitome of sourdough and once he identified it, he’d go visit that bakery. Of course, it was going to be Tartine. That he saved the Tartine loaf for last in his evaluation was a total giveaway, which made that particular segment seem a little contrived.

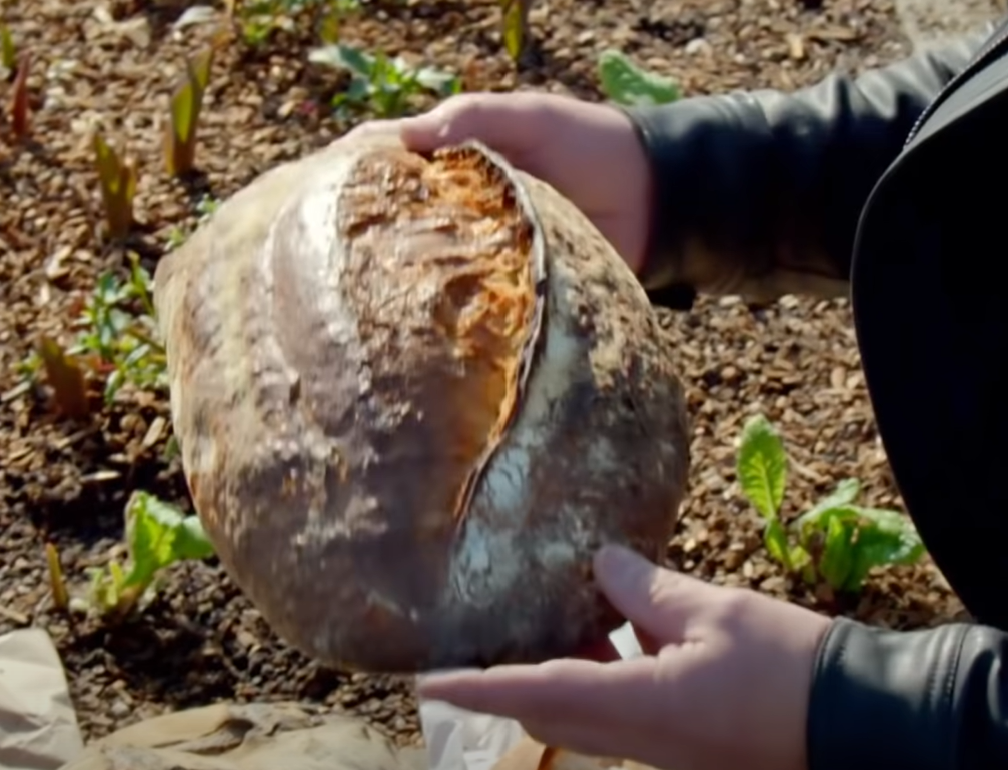
The inevitability of Paul going to Tartine aside, one thing caught my eye when Paul showed the entire loaf. I was able to capture a screenshot from the video. Look at how flat that loaf is! Though the crumb is a classic, open Tartine crumb, the vertical rise in the bread is actually minimal. And if you look at the lower end of the loaf in the picture, it’s clear that the dough spread out – a lot – in the oven.

Then looking at a top-down view of the loaf (right), there wasn’t much opening from the scoring mark, which is another indicator that the loaf sprung more outward than up.

The reason for this is likely because Tartine dough is incredibly high-hydration. In some cases, and especially with their whole-grain loaves, the hydration levels exceed 90% (their flatbreads are over 100% hydration). At that level of hydration, no matter how well the gluten structure is developed to trap gas, the water in the dough will not allow the gluten strands to coalesce nearly as much as a lower-hydration dough. So as the dough bakes, it tends to spread out rather than rising up.

Mind you, I don’t consider this to be bad in any way, shape, or form. In fact, based on what I’ve gathered from studying the Tartine method, I’d expect a loaf like this to have little vertical rise and tend to spread out. But it’s a great illustration of the balancing act of baking. In this case, in Tartine’s quest to produce a highly-open crumb, they increase hydration and sacrifice vertical rise. Other bakers may not want this.

For me, I prefer a tighter, softer crumb and more vertical rise similar to the picture below:

It’s by no means a dense structure as evidenced by the sheer number of small holes in the crumb. And I prefer this because this kind of crumb structure will hold spreads like mayonnaise and mustard and have far less leakage when used with a sandwich as compared to a crumb that has lots of big holes. In my case, I sacrificed that open crumb structure that so many people seem to obsess over in favor of vertical rise and the ability of the crumb to hold spreads more effectively.

The point of all this is that I’ve found that it’s necessary to weigh the different factors that go into producing a loaf of bread. If I’m after a particular outcome, I have to constantly balance that with what I might have to sacrifice in another area.

For instance, like many, when I first saw pictures of Tartine bread, I wondered what it would take to produce bread similar to that. And after lots of study and experimentation, I finally got the method down to produce loaves with a super-open crumb such as the ones shown below:

I must have baked at least 50 loaves before I could achieve this consistently. A friend of mine whom I had given a loaf messaged me and remarked how it was like Tartine bread. What a compliment!

But despite my success in achieving that, personally, I didn’t like the bread. It tasted great and the long, final proof really brought out its sour characteristics. But from a practical standpoint, it frustrated me. Though it looked and tasted great, I felt that bread like this wasn’t very versatile. So I had to do quite a bit of rethinking and balance the desire for an open crumb with its practical use. So after weighing all the different factors, I decided to drop the hydration rates of my boules and batards to around 78%-82% depending on the flour blend I use.

I realize that for beginning bakers I’m probably sounding like the teacher in Charlie Brown: “Mwa-ma-wah-wah-mwa…” But if once you start baking with regularity and gaining knowledge and skill, you’ll see what I mean about the balancing act of baking bread.