


When I first started getting into artisan bread baking, like many, I sought out lots of help online in forums and from various blog posts. I’m so thankful for all the information that’s readily available, but I found that especially with final proofing (aka final fermentation), there’s a lot of misunderstanding or lack of clarity as to when your loaves are ready to bake.
Before I go on, obviously there are several factors that contribute to great oven spring including kneading or folding, shaping, and hydration. But I feel one area that’s oven overlooked is final proofing. If you get this wrong, the other factors won’t matter.
Admittedly, there’s a bit of instinct that you have to develop over time with knowing the right time to bake. And there are useful tests you can do like the finger dent test. But I thought I’d offer up a bit of a cerebral, perhaps intellectual discussion to provide a background.
Let me just start out by saying that you never want to fully proof your dough when you’re doing your final proof; that is, you never want to take your dough to the point at which the yeast has nothing to feed. The reason for this is that once you pop your loaf into the oven, there’s a huge increase in yeast and enzyme activity up to about 140° F. During this period of accelerated activity, the starches swell and gas production from that fermentation is super-accelerated, contributing to oven spring.
Now of course, hydration plays a huge role in this as well as a highly hydrated dough allows for better extensibility. But it’s that initial kick of the yeast and bacteria at the outset of baking that gets you your spring.
But that’s assuming there’s food for the yeast and bacteria…
If you take your dough out to 100% fermentation, there’s no more food left on which the microbes can feed. This is why over-proofed loaves barely spring up at all because it’s only the steam that’s working to extend the dough – not to mention that the gluten also breaks down and you lose all dough strength.
As Master Baker Jeffery Hamelman puts it in his wonderful book, “Bread: A Baker’s Book of Techniques and Recipes,” ϯ
As a rule, bread should not be 100 percent risen at the time of the bake. Just as we will fall onto our noses if we lean over 100 percent, so too will the loaves tend to collapse if they receive a full 100 percent proofing before the bake. It is difficult to quantify with unvarying certainty the perfect degree of rise, since there are so many variables involved; however, 85 to 90 percent rising is a fair approximation to begin with. With careful and consistent observation of each bread, the baker’s eyes and hands will soon learn the parameters that work best.
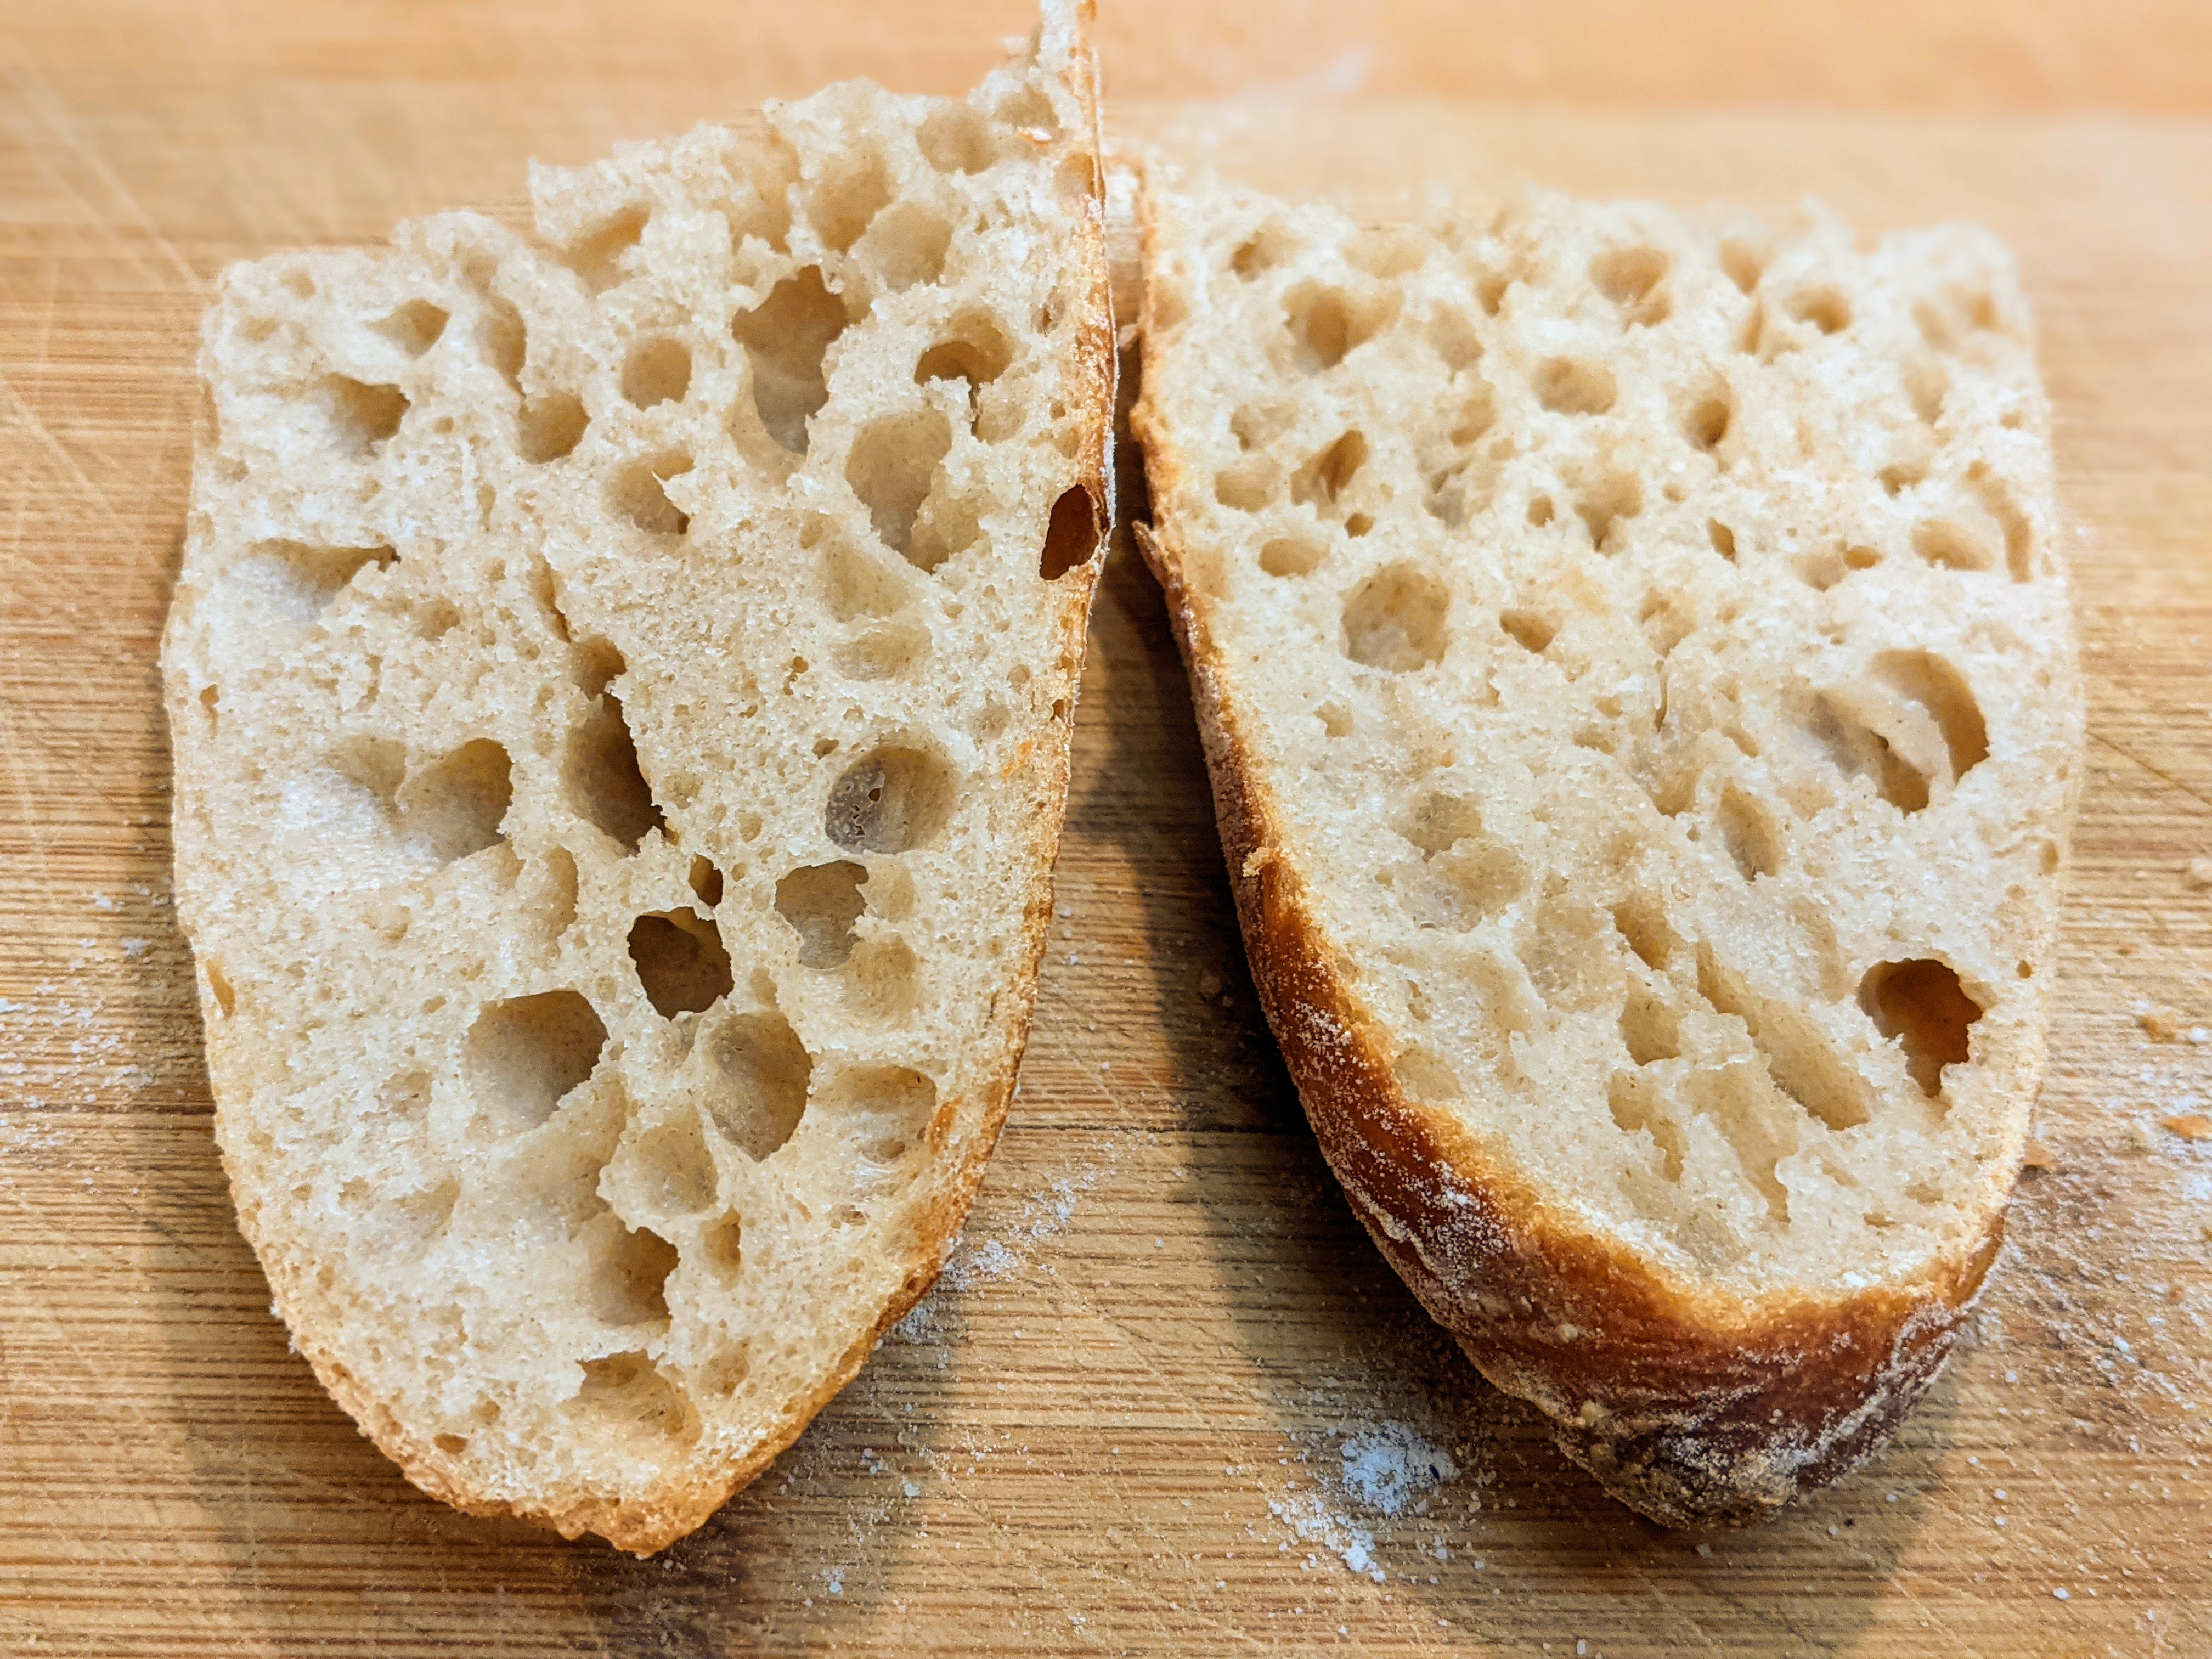
So now that we have a background on why we shouldn’t go to full fermentation, let’s put this within the context of the finger dent test. With the finger dent test, the conventional wisdom is that it is one of the most effective way of determining how ready – or not – your dough is to bake. I use it all the time. Essentially the way it works is this: You push the tip of your finger about a centimeter into the dough. If the dent pops back immediately and goes away within several seconds, your dough isn’t ready. If it springs back partially ϯϯ and the dent slowly goes away but not entirely, then it’s likely ready. If the dent stays put, you’ve over-fermented your dough.
Do you sense the “but” in this?
This is a great test and I use it for practically every loaf of bread I make. But because it’s inexact, it takes practice to get right, and is also highly dependent on the flour you use. Different flour and flour blends make the springiness factor a challenge. A strong flour will almost invariably be more bouncy than a weaker flour – at almost all stages of fermentation. A weaker flour, like AP will have a lot of give naturally and may fool you into thinking your proofing is done.
Unfortunately, the only way I know – and according to a few professional bakers I’ve both read about and spoken with – of determining a dough’s doneness is learning through trial and error. As Chef Markus Farbinger puts it, it takes time and practice to develop an instinct about your dough.
Essentially, there’s just no empirical way to teach this. Eventually, you’ll come to know the ultimate endpoint of the dough you make. But frankly, that’s half the fun! And who doesn’t need an excuse to bake?
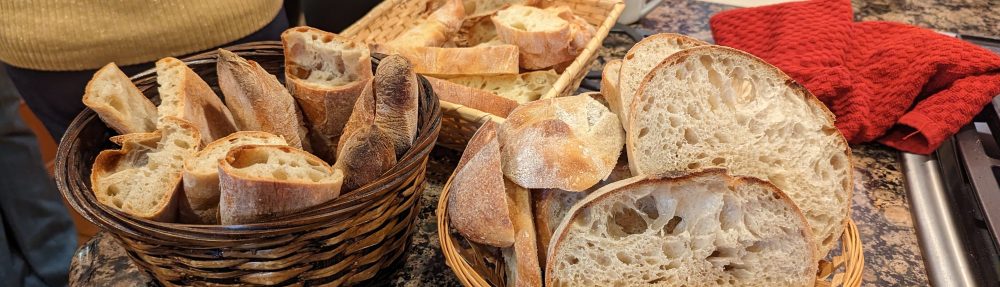
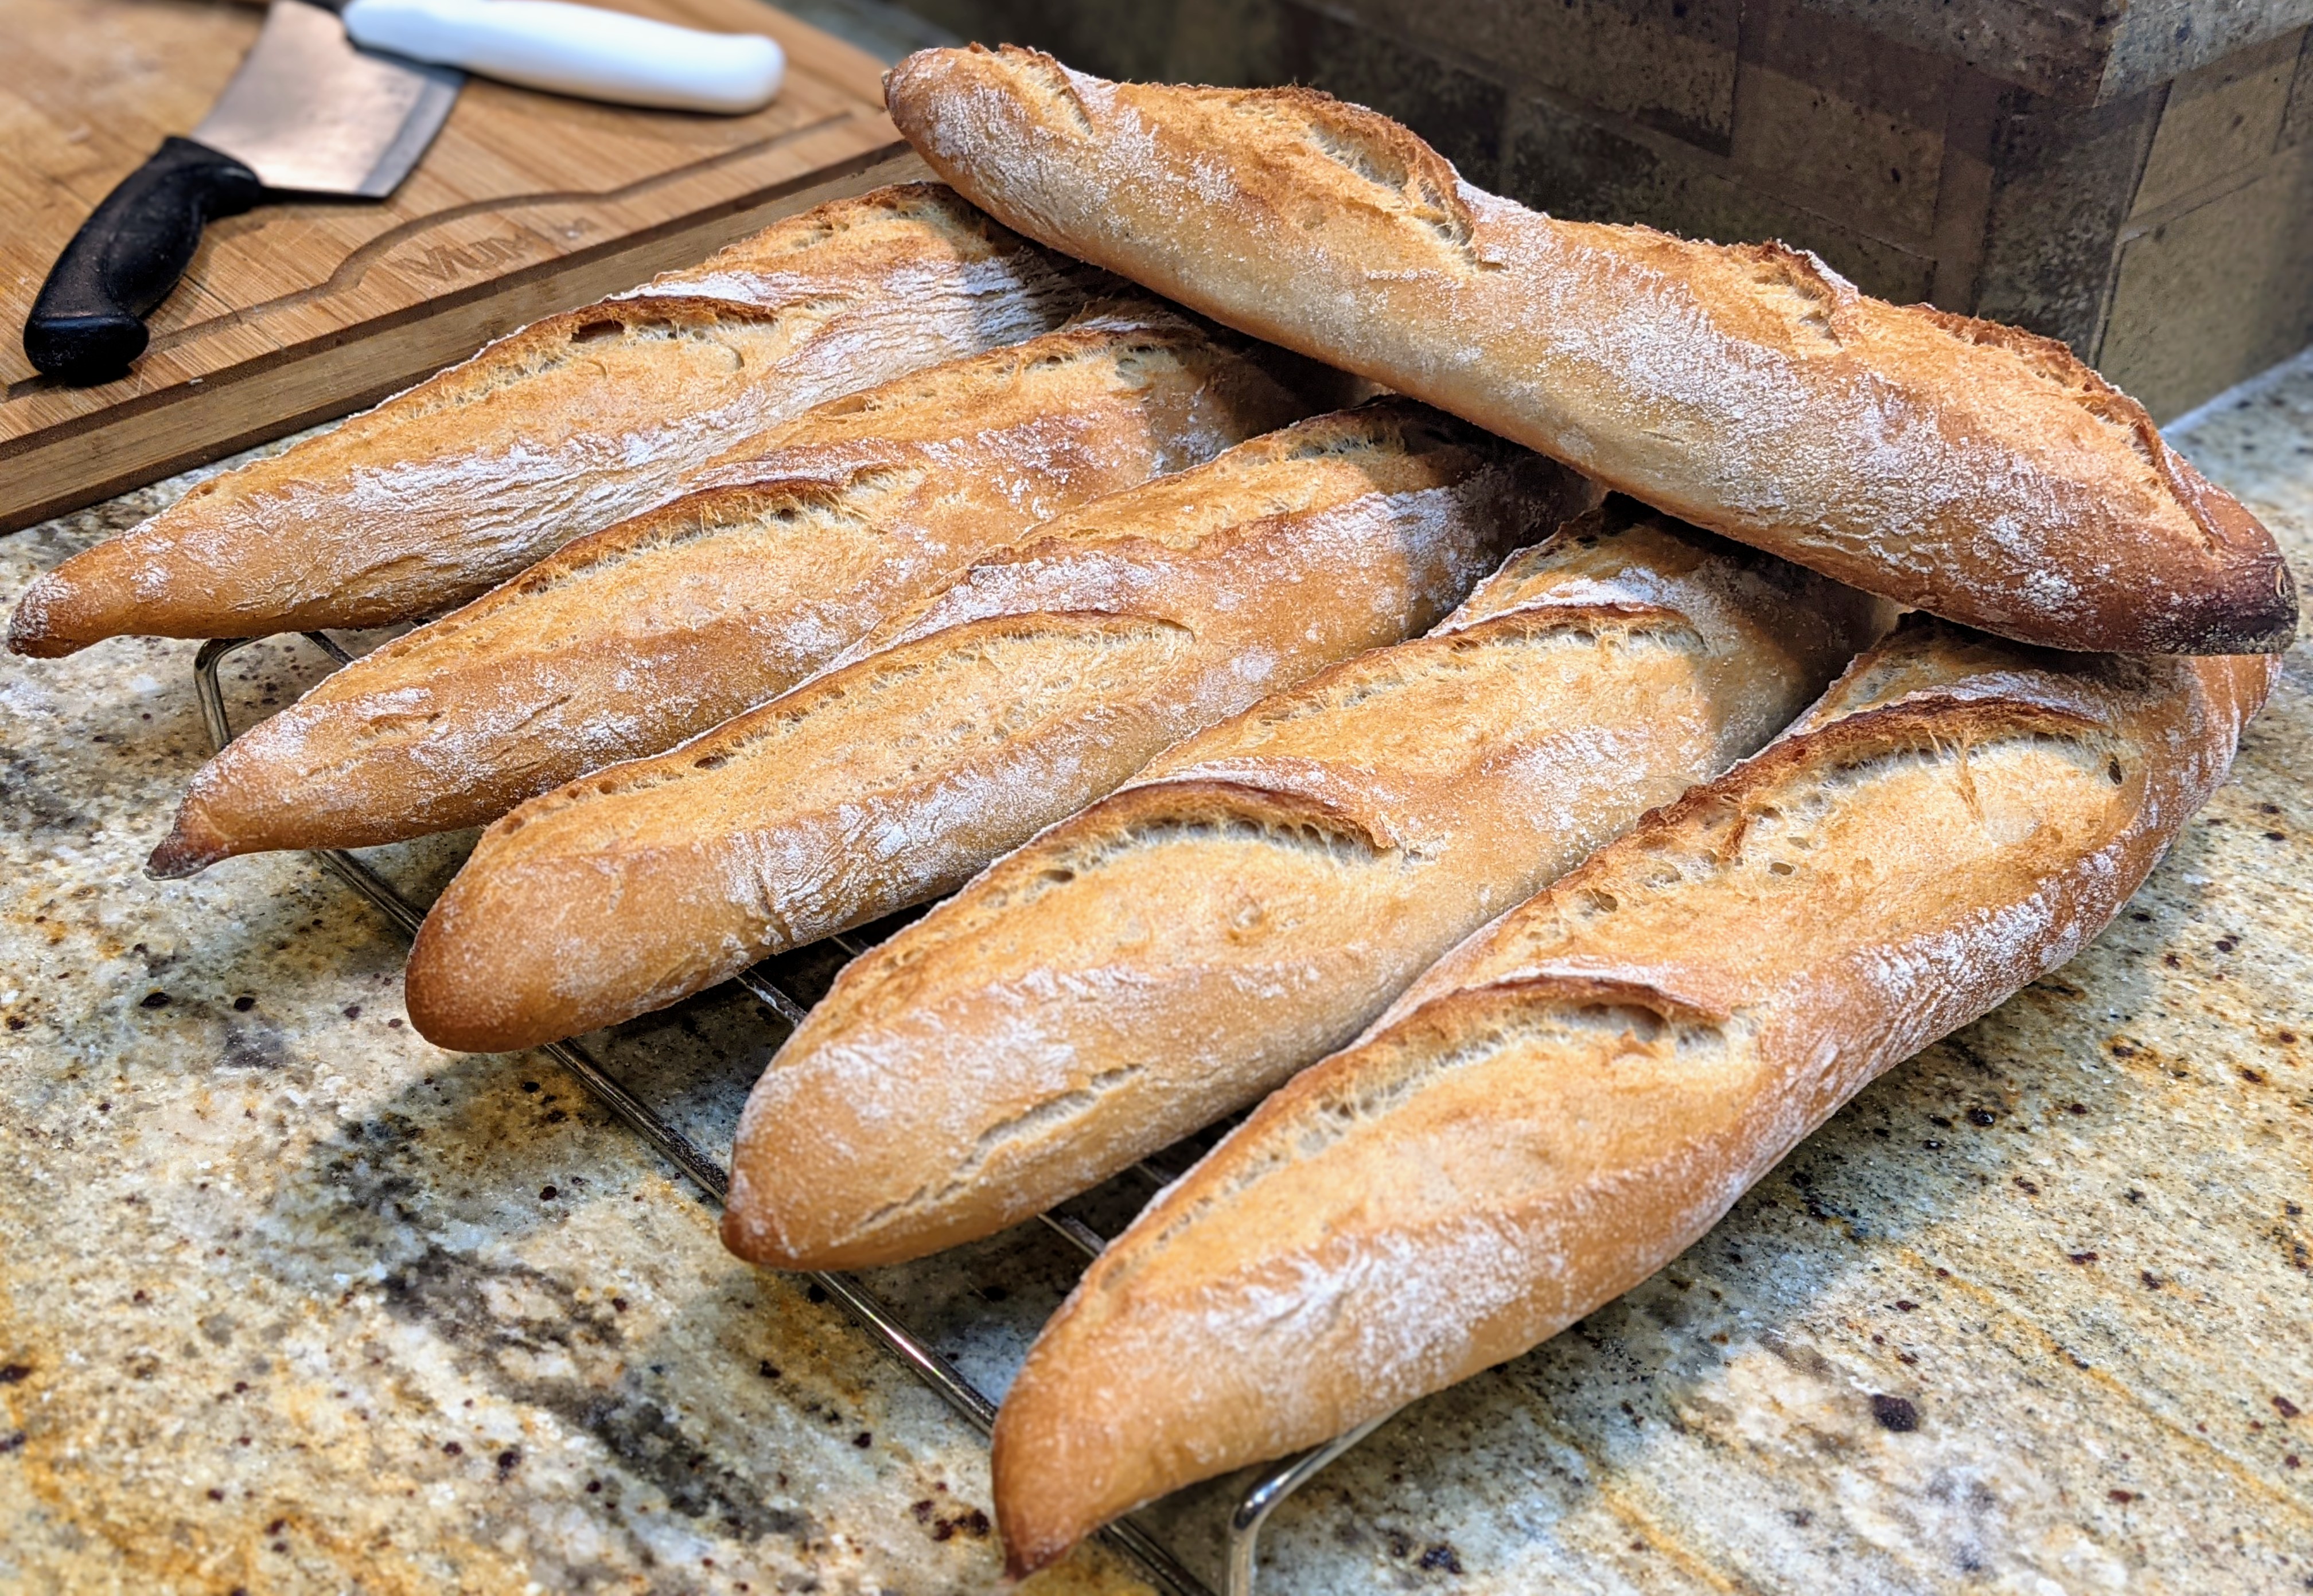
Another thing to consider is that different loaves respond differently to the amount of proofing. Even though Chef Hamelman recommends 85 to 90 percent as a guide, that’s really only a rough approximation. With baguettes, I’ve learned to only take them to the lower end of that range, perhaps even short of 85%. There have been too many times I’ve ended up with flat baguettes because I’ve taken them too far in proofing. And it’s easy to do because baguettes don’t have that much internal structure built into their dough.
On the other hand, with boules and batards, I tend to take them a bit further. I’m personally not after numerous huge holes, but an even distribution of moderately-sized holes, so I’ll tend to take them to about 90% proofing. I realize that I’m playing with fire because that requires some careful monitoring before it’s too late. But because I use fairly high-protein flour I can afford to do this because their structures are strong.
As I mentioned above, this is one contributing factor to great oven spring. But because it is the last step before a loaf gets put in the oven, it is critical to get this right.
ϯ Hamelman, Jeffrey, Bread: A Baker’s Book of Techniques and Recipes (2nd Edition), John Wiley & Sons, Inc., 2013.
ϯϯ The important thing to note here is that the dent should spring back a bit but not totally go away. If the dent stays in place and doesn’t move at all, then your dough’s overfermented.
