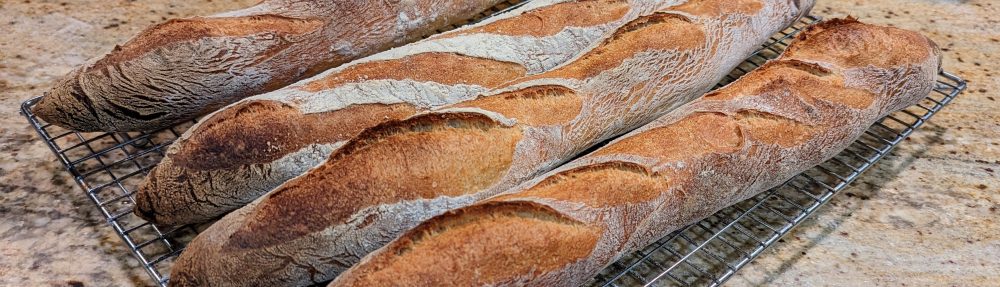
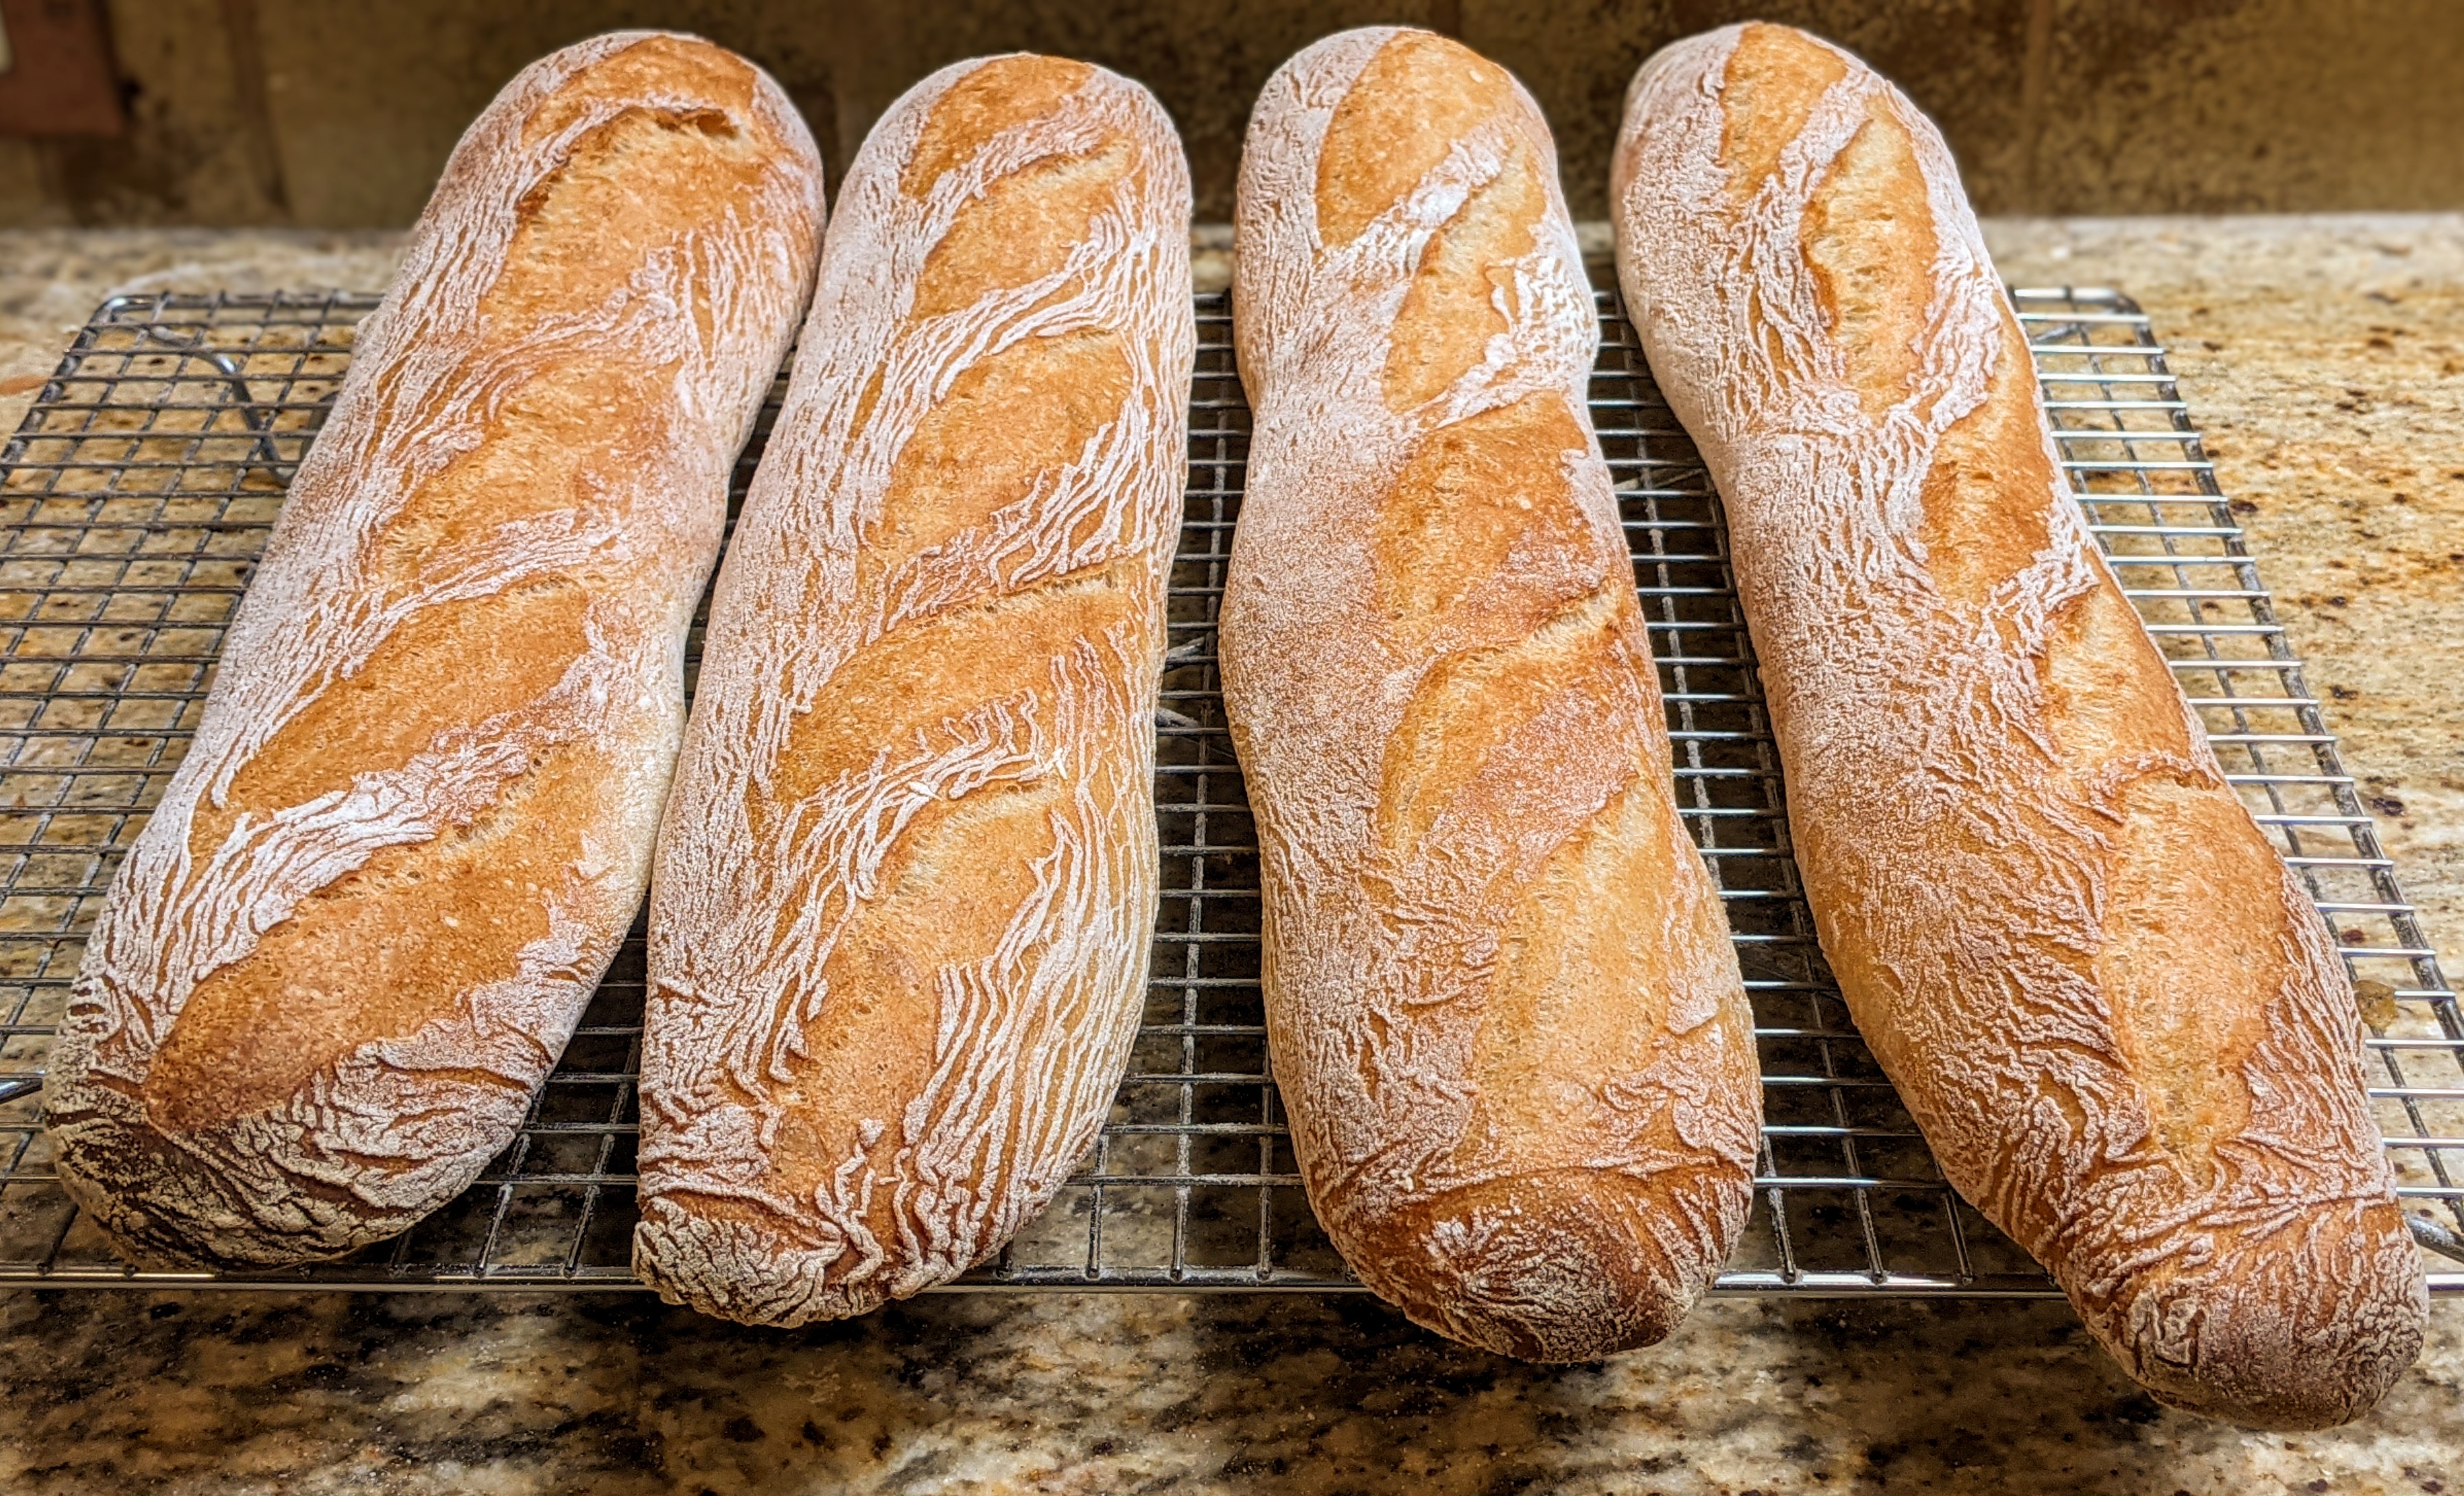
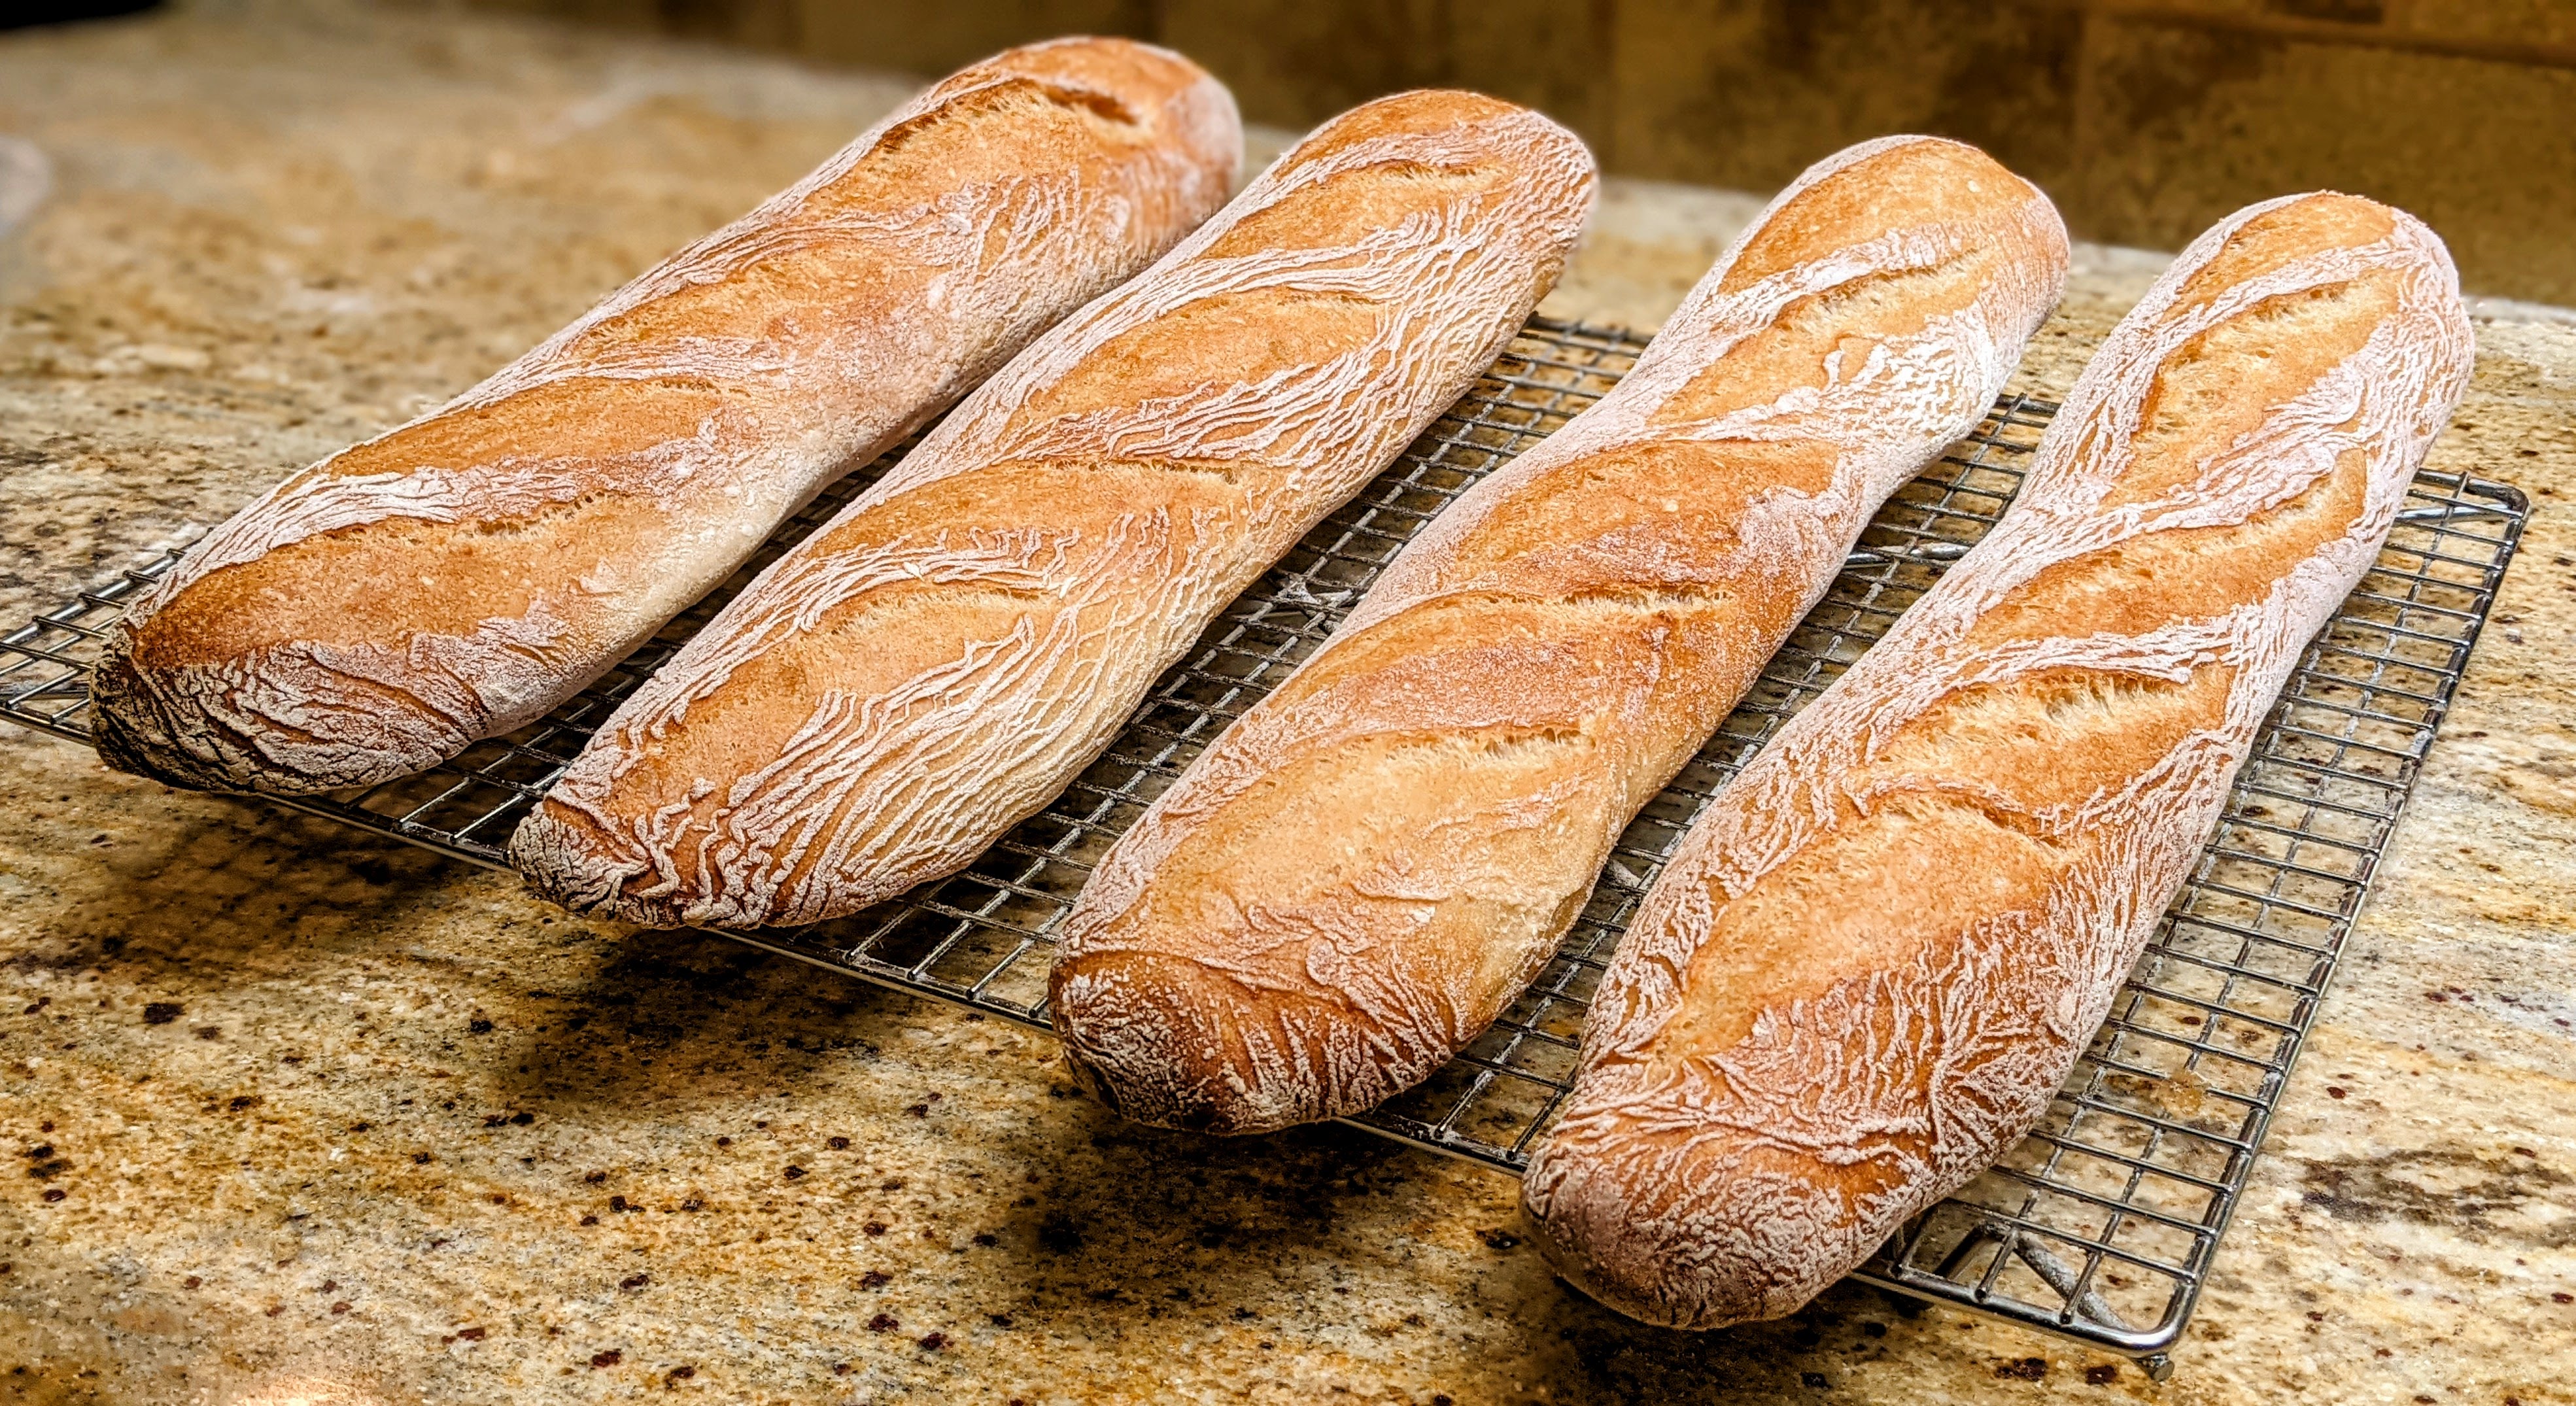
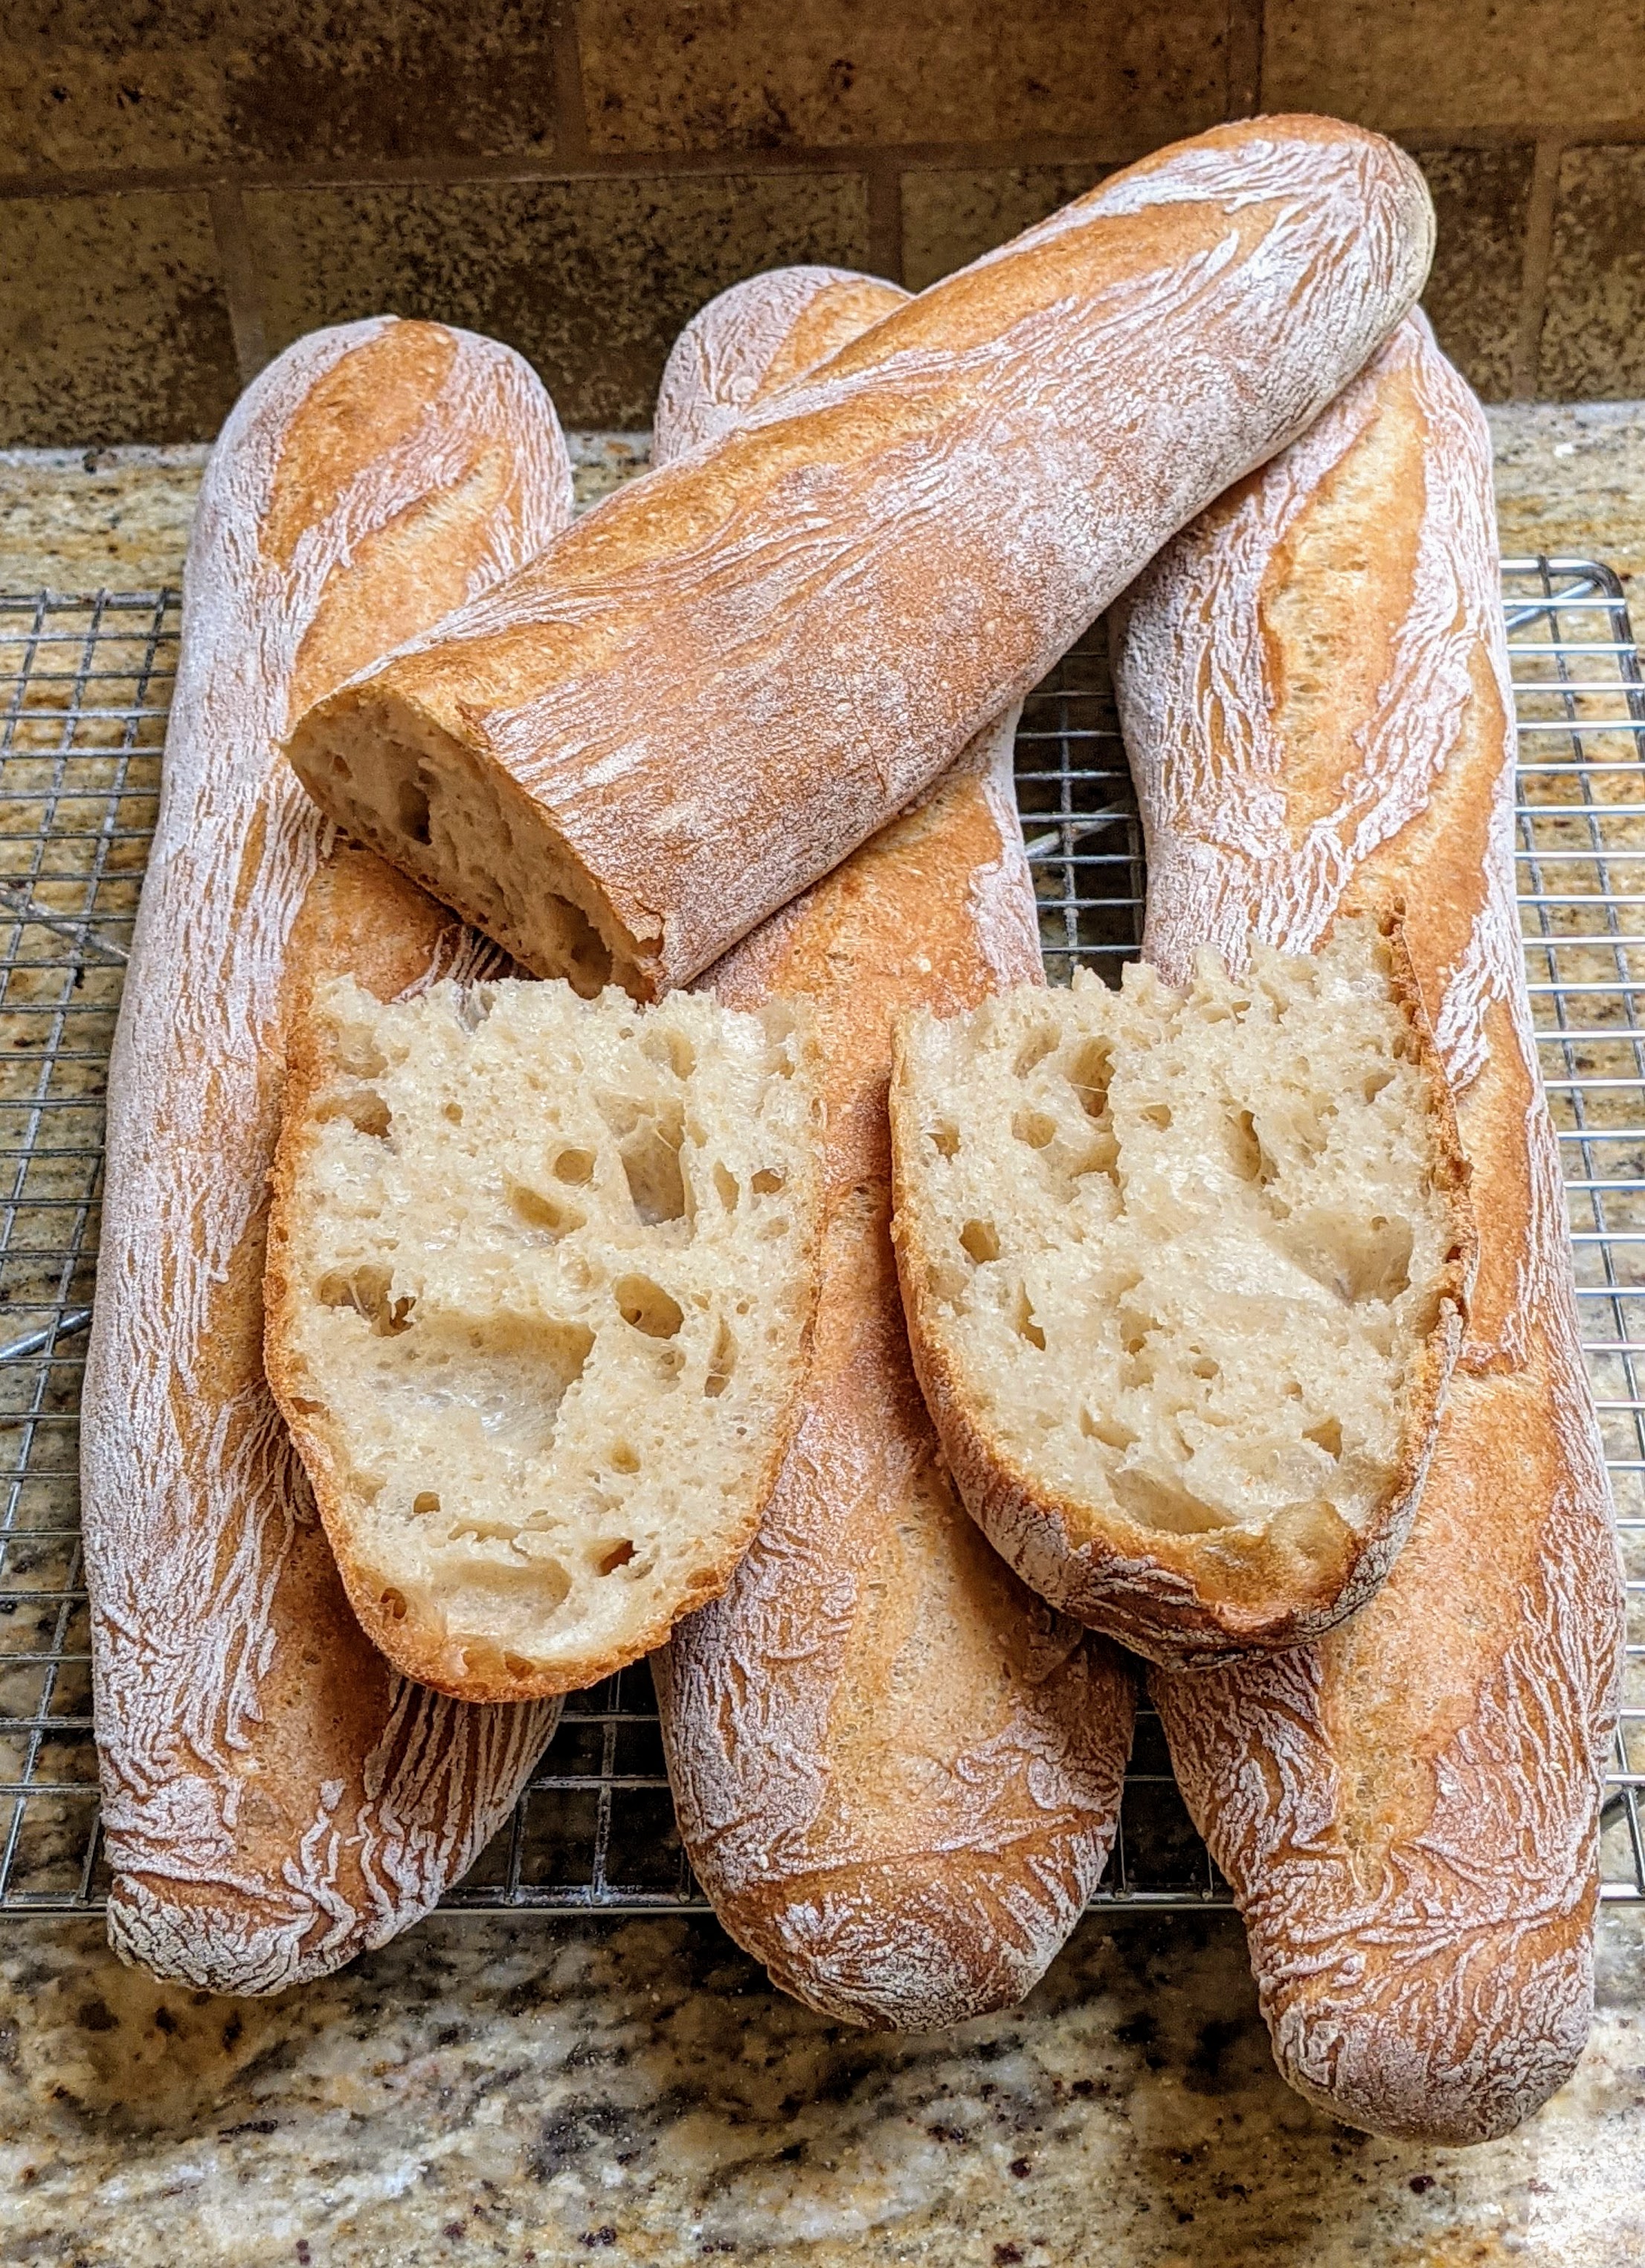
This is yet another versatile dough that can be used for different kinds of bread. I’ve made baguettes from this dough, mini cheese-filled boules, dinner rolls – and it’s also one of my favorite formulas for making hand-shaped batards! But it really shines for making French bread, producing a thin, crispy crust and a light, airy, pillowy crumb riddled with holes that is the perfect platform for sandwiches, or eaten warm, to hold little pools of butter. Gluten development with this dough is relatively light as compared other loaves; a little more than baguettes and a whole lot less than boules and batards. So somewhere in the middle.
As the title says, this bread uses a poolish which, truth be told, is my favorite ferment with which to work. Done right, a poolish imparts a distinct nuttiness and just a bit of tang upon the flavor profile of the bread. But it also adds extensibility to the dough. When I work with a poolish-based dough, it feels so luxurious. I jokingly call it a “sexy dough.”
But sexy as this dough may be, to be fair, I should offer up a bit of a caveat. This is NOT a dough you want to work with if you haven’t worked with high-hydration dough yet. At 76% hydration and using predominantly bread flour, it’s slack and sticky. Any manipulation of the dough needs be done precisely and with quick movements, lest you find your hands covered in muck. This is further exacerbated by the moderate – and perhaps by others’ standards minimal – gluten development. But though I issued that warning, don’t let that intimidate you. As with anything, practice makes perfect. Let’s get to the formula:
Overall Formula
| Bread Flour (unbleached) | 100% | 907g |
| Water | 76% | 689g |
| Salt | 1.8% | 16g |
| Yeast (Instant) | 0.4% | 3.6g |
| Total Yield | 1616g | |
| Optimal Dough Temp | 76°F |
Poolish
| Bread Flour* (unbleached) | 100% | 302g |
| Water | 100% | 302g |
| Yeast (instant and relative to the poolish flour) | 0.2% | 0.6g |
Final Dough
| Bread Flour* (unbleached) | 605g |
| Water | 387g |
| Salt | 16g |
| Yeast | 3.4g |
| Poolish | 604g |
Make the Poolish
You’ll make the poolish 12 to 16 hours before you mix the final dough. Since I’m an early riser, I usually make it between 4pm and 6pm, so I can start mixing the dough at aroun 6am the next morning. I will make it later as the weather warms up. You’ll know the poolish is ripe and ready when its surface is riddled with bubbles – and you can actually see bubbles actively forming plus, when you uncover it, you get a nice whiff of alcohol.
To make the poolish, simply combine the flour, water, and yeast into an appropriate size bowl and mix until smooth. It’s better to use a larger container rather than a small one as the poolish will expand. I’ve woken up to a container whose lid literally exploded and spewed dough all over my counter. In any case, let the poolish sit at room temperature on your counter.
Dough Development
Mixing. You can mix by hand or with a mixer. First, pour your water into the poolish container, then with a spatula loosen the poolish from the sides of the container. Then dump the water and poolish in your mixing bowl. It will slide right out! Add the flour, salt and yeast then mix until all dry ingredients have been incorporated and you form a shaggy mass with no large lumps. If you use a mixer, mix for no more than 3 minutes on low speed. You want little to no gluten development.
Bulk Fermentation: 2 1/2 to 3 hours.
Folding. Let the dough rest for the first hour, then fold it until you start feeling tension building in the dough. Rest for another hour and then fold again. You should start feeling plenty of tension by this time. Let the dough rest another half hour, then you’ll be ready to scale. However, if, after several folds, the dough still feels a little too slack, rest it for 45 minutes, do another set of folds, then take the fermentation out to the full 3 hours.
Technically, you could do the folding in half-hour intervals right after mixing and reduce the bulk fermentation to 1 1/2 hours. But there’s a lot to be said about the flavor development that takes place in the full 2 1/2 hours.
Divide and Shape. Pour the dough out onto a well-floured surface. With this wet dough, you want to be generous with the flour. I normally don’t recommend this, but this is a slack dough! Divide the dough into 400g pieces, then preshape into blunt, compact logs, rolling them up like jelly rolls. Rest the rolls for 20 minutes on a well-floured couche, seam-side-up. Once the rolls have sufficiently relaxed, shape them as you would baguettes, but be as gentle as possilbe when rolling them out – you want to shape and not degas. Place each shaped loaf seam-side-up onto a couche, providing a generous fold between each loaf to allow plenty of room for proofing.
Final Fermentation. 1 – 1 1/2 hour. Note: On warmer days, check the loaves after 30 minutes. This is a bread that I will take out to about 90% full-fermentation. It’s cutting it close, but the flavor development and bubble development in this last phase makes it worth the risk. Admittedly, the first few times I made this bread, I over-fermented the loaves and they came out pretty flat, but once I found the sweet spot – yowza! They were incredible!
Bake. Transfer the loaves to a loading peel and score as you would a baguette though perhaps not quite as deep. I personally don’t like pronounced ears on these fatties. 🙂 Bake at 500°F with steam for 12 minutes. Remove steaming container, then reduce oven temp to 425°F and bake for another 12-15 minutes or until the crust is a deep golden brown. You don’t want to take this bread out to chocolate as it will create too thick of a crust.
Notes:
- When shaping, even though you’re rolling the dough out with your hands to form a cylinder, do your best to not press too hard. Be firm, yet gentle in your motions and coax the dough into shape. Because it’s so wet and also due to the moderate gluten development, the dough will tear if you try to muscle it into shape.
- When scoring, be absolutely quick and assertive with your blade. It’s not necessary to create an ear and besides, even with a super sharp blade, with this slack of a dough, you won’t be able to dig in. After you score, don’t worry if the loaves appear to deflate. As long as you didn’t beat the shit out of them during shaping, they’ll pop right back up in the oven. 🙂
