
Okay, I admit it. I’m a baguette freak. I make baguettes at least once or twice a week. And up until this past week, I’ve been experimenting with different methods from baguettes made with a poolish to paté fermenté to levain. But to tell you the truth, my favorite baguette to make is based on the slow rise or pointage en bac method; a method similar to the one Master Baker Markus Farbinger teaches in his baguette and ciabatta video series.
So what is the pointage en bac method? Simply put, it’s a straight dough that slowly rises in the fridge. Traditionally, it was retarding the shaped dough. The technique has its roots in busy French bakeries where bakers wanted to provide baguettes throughout the day. After all, baguettes are best eaten within the first hour or two of baking – and they’re MUCH better warm! However, that had an issue of the shaped loaves collapsing, so to prevent that, the bakers would add dough conditioners to help the shaped loaves maintain their structure. Not a fan.
However, as Jeffrey Hamelman put it in “Bread,” the close cousin to this technique is to create a huge batch of dough then separate it into several batch buckets and allow the individual batches to bulk ferment in a cold environment. From a production standpoint, this has huge advantages because all the baker has to do is pull a bucket from the retarder, then shape and bake as opposed to whipping up another batch of dough. This is the method that Chef Markus Farbinger teaches in his baguette video series, though he only makes a single batch.
I prefer this technique simply because it keeps things simple: Throw all the ingredients into a mixing bowl, let it ferment for an hour, fold the dough, cover it, then pop it into the fridge for 6-18 hours. I’ve even used a third of the amount of yeast called for and let it ferment for over 24 hours to develop flavor. It’s a very flexible technique that can easily be adjusted to accommdate different schedules.
AND if you’re going to be baking in separate batches, it’s an ideal method. For instance, in the next couple of days, I’m going to have to make a few batches for an upcoming graduation party. I’m going to make a huge batch of dough, then separate it into separate batches. When the dough’s ready, I’ll take a batch from the fridge, shape it, then bake it. While those loaves are in the oven, I’ll remove the next batch from my fridge, shape them, then let them go into their final fermentation. By the time the previous batch is finished and the oven comes back to temp, the next batch should be ready to bake.
What makes it possible is retarding the dough. Yes, the later batches will be slightly more fermented, but there shouldn’t be too much of a flavor difference between the batches. Let’s get to the formula/recipe, shall we?
Note that the final dough will produce 4 loaves at 335g apiece. With the baking method, the finished loaves will have be approximately 250 grams, which is the official French weight for a baguette (those French are very exacting about their bread standards).
Formula
| Ingredient | Baker’s % | Final Dough |
| AP Flour (11-12% protein) | 100% | 763g |
| Water | 75% | 573g |
| Salt | 2% | 15g |
| Yeast | 0.3% | 2g |
| Total Yield (Accounts for about 1% weight loss during processing) | 1353g | |
| Optimal Dough Temp | 76°F |
The yeast amount can be varied. Go up to 5g if you intend to just bake them that day, but 2g and an overnight cold rest yield the best flavor!
Process
This is one of the few doughs that I make where I mix entirely by hand mainly because I only make enough dough to make 4 X 330g pieces for a single batch. I use a mixer if I’m doing multiple batches.
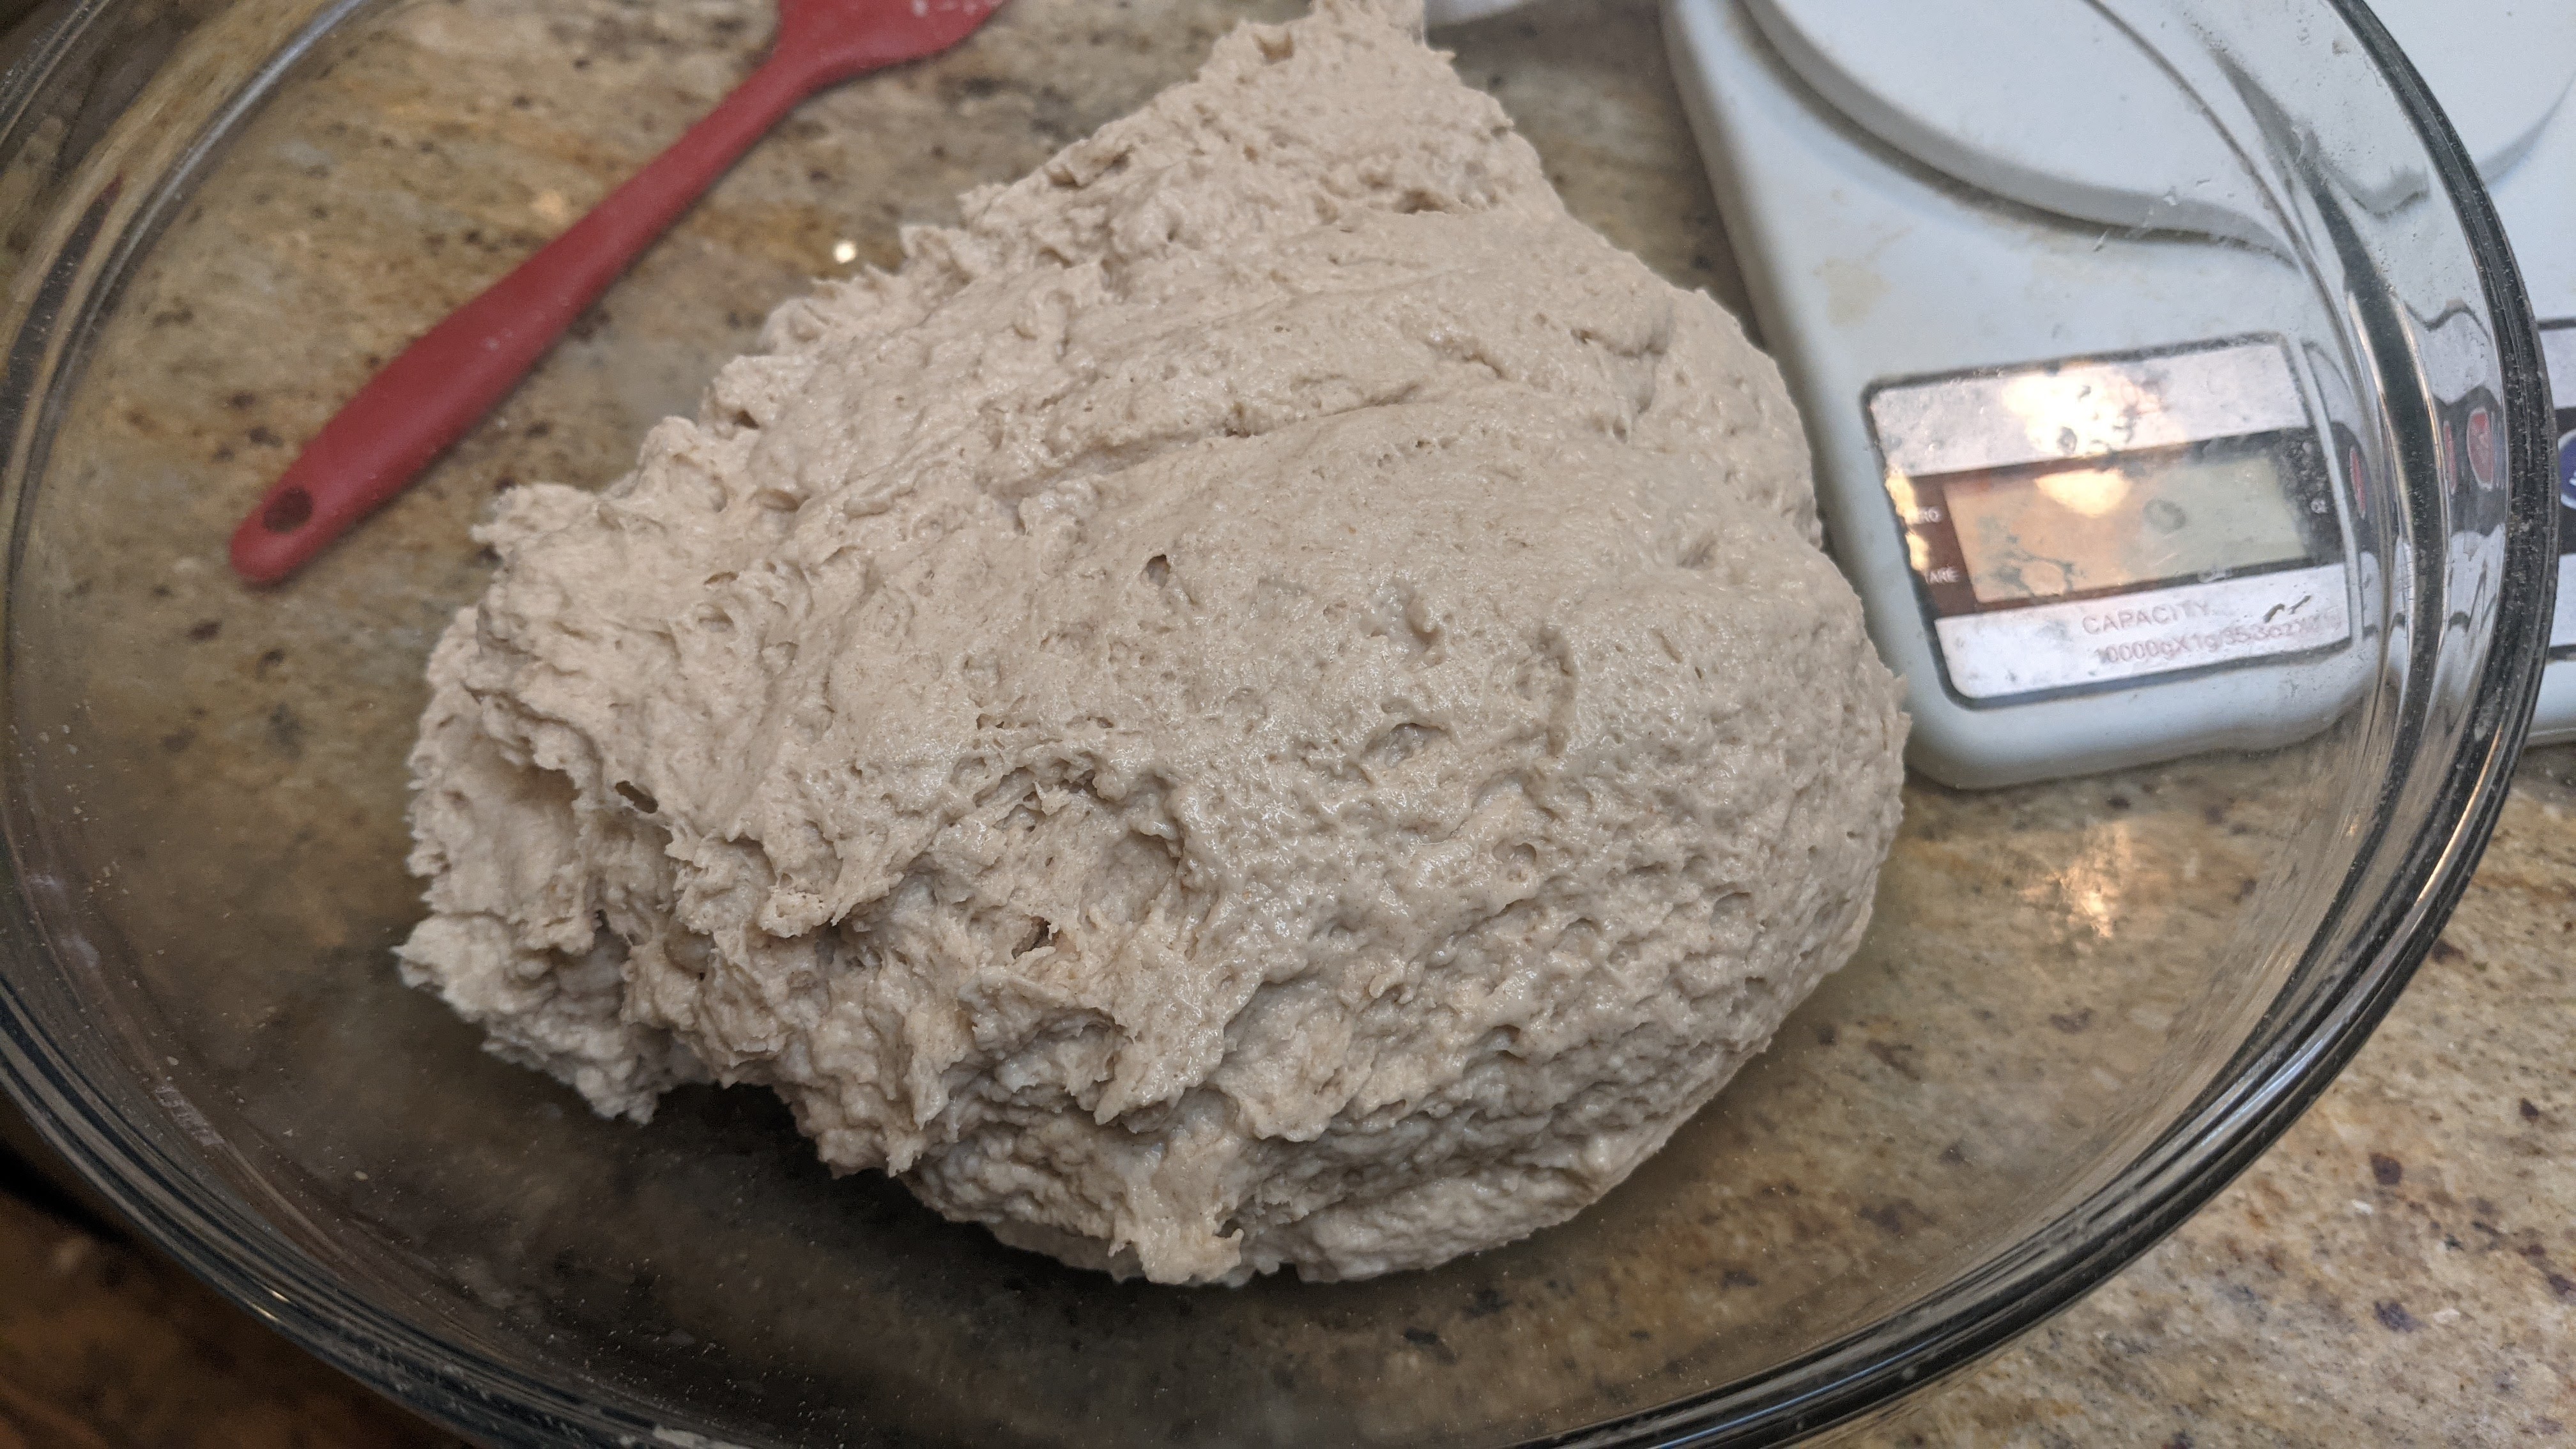
Mixing. Use a mixer or mix by hand and mix to a shaggy mass with no large lumps. As I mentioned above, I almost always mix by hand for a single batch, though I use a Danish dough whisk – that’s a must-have tool. Make sure though to sift the flour if you mix by hand.
Bulk Fermentation: 6-18 hours. 1 hour @ room temp; the rest of the time in the fridge.
Folding. Fold 3 times at 20-minute intervals for the first hour to develop the gas-retention properties of the dough. This is gentle folding. Though I do stretch and folds I do my best to not press down on the dough too much when folding a flap over. After the third fold, pop the dough into the fridge for a long, cold rest, or until the dough has expanded around 50%. It’s best not to let it go too much further than this.
You may notice that this folding schedule is different from my original instructions of letting the shaggy mass sit for an hour, then doing a single fold and popping it into the fridge. But once I started making Baguettes de Tradition, I’ve preferred this folding schedule because it ensures equal distribution of the yeast and salt AND the dough develops lots of strength, especially if I mix by hand so I now use this folding schedule for all the baguettes I make.
Divide and Shape. Dump your dough out onto a lightly floured surface, tug the dough into a rough rectangle with even thickness throughout, then scale out 335g pieces. Preshape each piece by letter folding it, then rolling it like a jelly roll into a log. Seal the seams, then set aside on a well-floured couche – seam-side-up – for 20-30 minutes to relax the dough (this could be longer if you rolled the log tight, but don’t go over 45 minutes). After resting, shape the dough into baguettes, returning each piece to the couche, giving ample room for the loaves to expand.
There’s technically no official weight and length, though in general, the accepted final weight and length of a finished loaf is around 250g and 60cm in length. After a lot of tweaking with different weights, I found that a 335g dough weight is optimal to achieve the 250g finished weight.
Final Fermentation. 30-minutes – 1 1/2 hour depending on ambient temp. This is where feel is extremely important. While traditionally “doubling” is a decent visual cue, that will take the loaf close to full fermentation and leave very little room for expansion in the oven. And with a dough like this, which is wet and narrowly shaped, the finger dent test isn’t revealing because when you poke into it, most of the time, the dent will remain – even in the early stages of the final fermentation. So it’s best to check the loaves every 30 minutes. The loaf will be ready when it feels like poking a marshmallow.

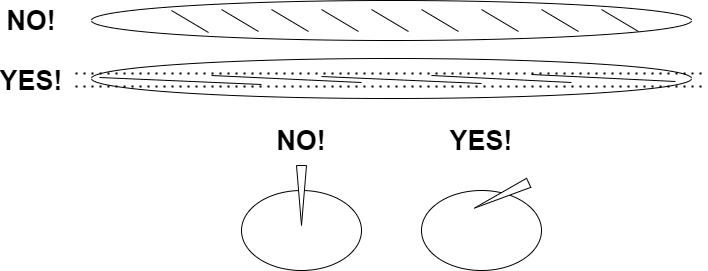
Score. Score the loaves according to the diagram below. Do not score on the bias! Even though the scoring may appear to be on the bias, the slashes are actually fairly parallel, with just a few degrees of deflection down the middle third of the loaf. Though there’s no rule governing how many slashes you make, aesthetically, an odd number looks better.
Bake. Bake at 475°F/250°C for 12 minutes with steam. Remove steam container, then bake for 12-15 minutes at 435°F/225°C, or if you have a convection setting, 425°F/220°C. These baguettes really benefit from a full bake.
Happy Baking!

Pingback: Welcome! | The Dawg House!
Pingback: Delayed-Fermentation Baguettes | The Dawg House!
Pingback: Making Bread More Flavorful | The Dawg House!
I’d like to try this cold fermentation with the poolish formula that you created for baguettes. Will it work? Do you have any advice for me if there’s anything I should do differently if I want to include the poolish and then do the bulk fermentation in the fridge? Thank you so much!
I wanted to pop back in letting you know this was a great formula! I followed the instructions and although I still need to work on the shaping, the crumbs structure was beautiful, like I had always wanted! I need to figure out how to not let the bottom crust gets darker too quickly. My oven doesn’t have adjustment for top and bottom heat so I’ll have to figure out a way…
Thank you so much for your instructions and formula! Once I get a hang of this, I’m thinking of trying to incorporate some yudane and/ or poolish (10%) to this slow cold fermentation schedule and formula.
That’s so awesome, Amber! There are a couple of ways to prevent the bottoms from getting overdone:
The point of either of these methods is to create a layer between your burner and your bread.
As for using a poolish, you certainly can do that. Make the poolish the night before, you can use my poolish baguettes recipe that is essentially the same formula as the Pointage en Bac formula, but uses a poolish as part of the dough.
Happy Baking!
Thank you so much for your feedback!
I failed a few times but today’s bake was a success. They aren’t as beautifully done and good looking at yours, but for me, it’s the right direction. I’m just overjoyed I came across your blog and hope you can keep it up for others like myself who truly want to bake great baguettes at home! Your knowledge really helps here!
Not sure if I said this before but I prefer to bake with instant yeast for several personal reasons and prior to stumble upon your blog, I thought all the wonderful and tasty baguettes needed to start with a good starter/ levain, so I really did give up trying to bake baguettes with instant yeast for several years.
You highlighted the important of “feel” for the final fermentation and this is absolutely true. I got “lucky” today and my batches came out really nice, because I didn’t rely on the “poking” test…. I got a lot still to learn, but today’s batch is definitely making me proud and thank you!
Happy New Year to you and yours! Hoping to see more of your bake here if you have time, and please keep your blog up so I can refer others to!
Hey Amber! Sorry I’m so late with my reply. I use nothing but instant yeast because it’s so accessible. And anyone who tells you to use fresh yeast is just plain bonkers. 🙂 They’re the same strain. Instant yeast just has a higher concentration of yeast than fresh.
Pingback: A Sourdough Riff on Baguettes de Tradition | The Dawg House!